Haunted Laia | Part I
Hello everyone and welcome to Part 1 of our walkthrough for “Haunted Laia” an escape room game created by the Dark Dome. Haunted Laia is the fifth game in the series, and like the other games, the story is set in Hidden Town, which is filled with all kinds of mysteries. In this walkthrough, we will show you how to solve all the puzzles and finish the game.
NOTE: Some puzzles will CHANGE with each playthrough, but the logic behind solving the puzzles will always remain the SAME. For example, in one playthrough a code to open a safe could be 1234, and in another playthrough, the code could be 4321. However, you will always discover the numbers for the code at the same location and by using the same hints.
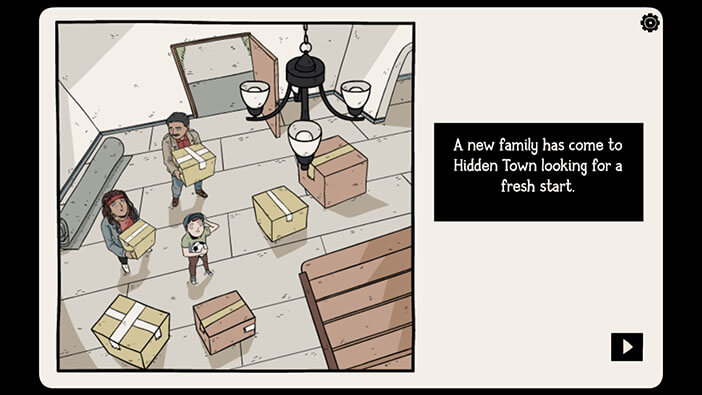
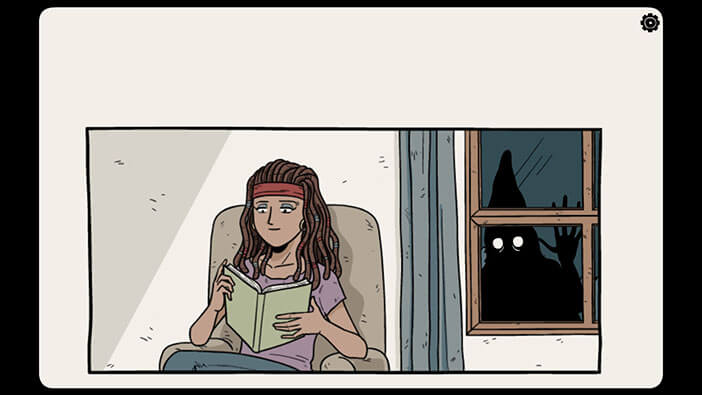
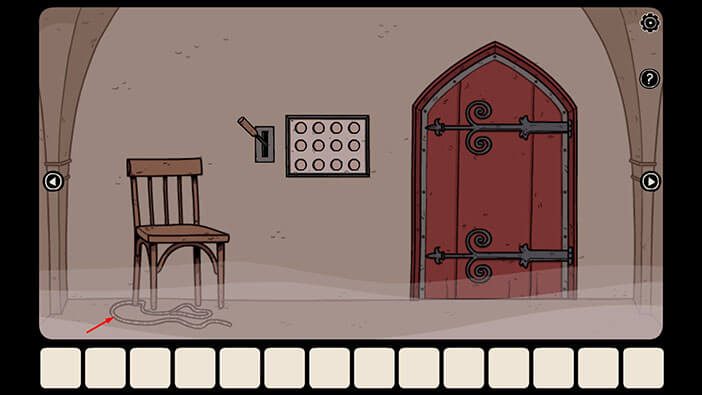
The story begins with Laia and her family moving into Hidden Town. However, as soon as they settled in their new home, they started experiencing some very, very strange events. For example, some force will suddenly strip down the blanket from Laia, while she’s sleeping (I guess this would be very annoying). Also, chairs and other items in the house would start floating in mid-air, as if they were lifted up by some invisible, unnatural force. Most terrifying of all, ghostly figures would occasionally show up and observe Laia and her family.
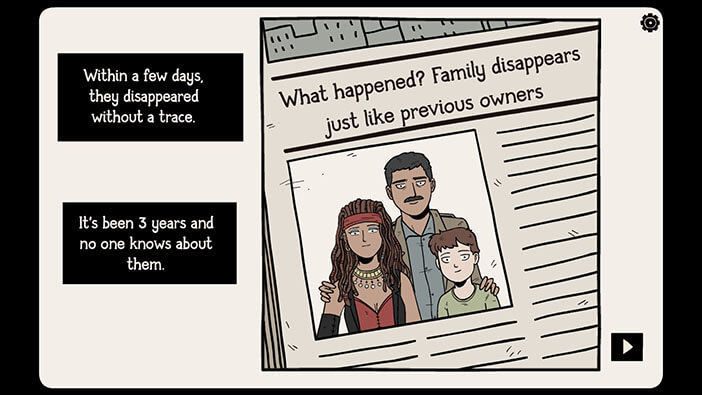
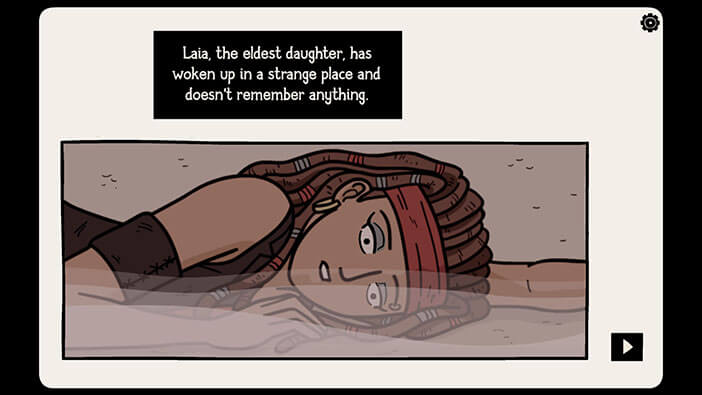
A few days later, Laia and her family, which consisted of her father and younger brother, would disappear without a trace. We will also learn that the same fate befell the previous owners of the house (I guess that the property value of this house dropped significantly after these events). The story continues three years after the disappearance of Laia and her family, with Laia (protagonist of this story) waking up on the cold, stone floor. She doesn’t remember anything and has no idea where she is. Laia tried calling for her brother and father, but there was no answer…
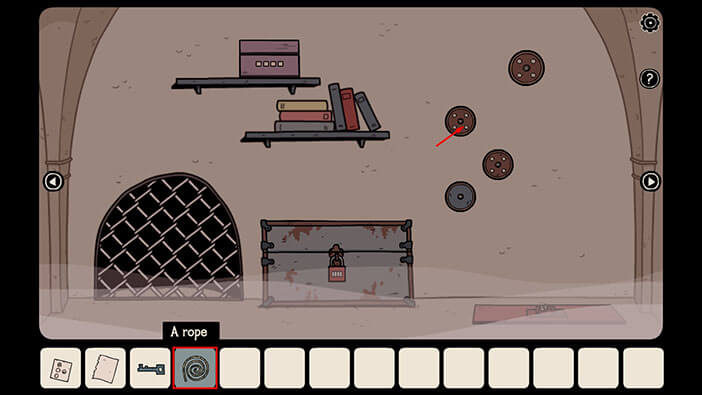
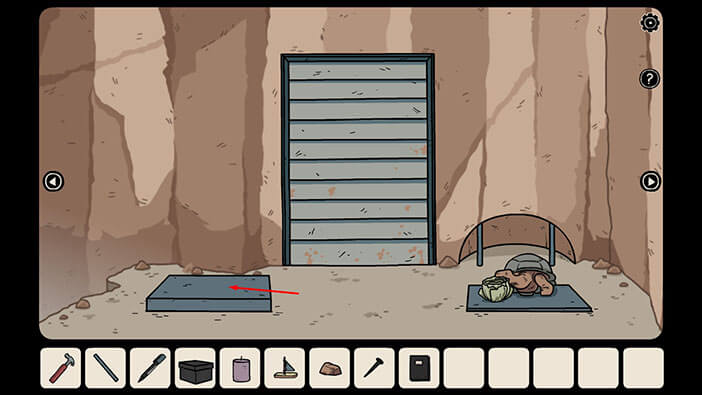
Ok, we should search for the exit from this strange place. First, tap on the “Rope” located below the chair on the left to pick it up.
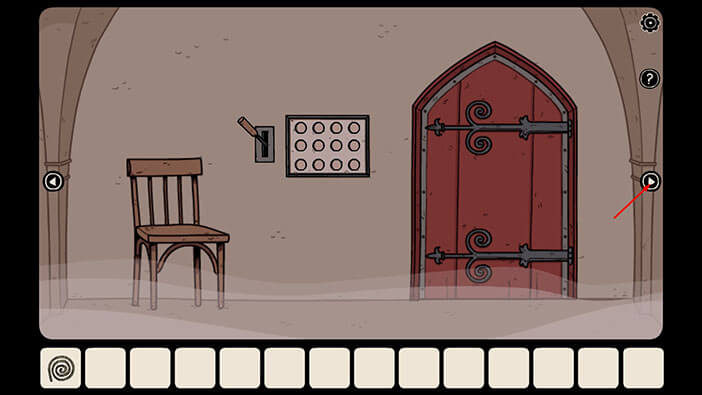
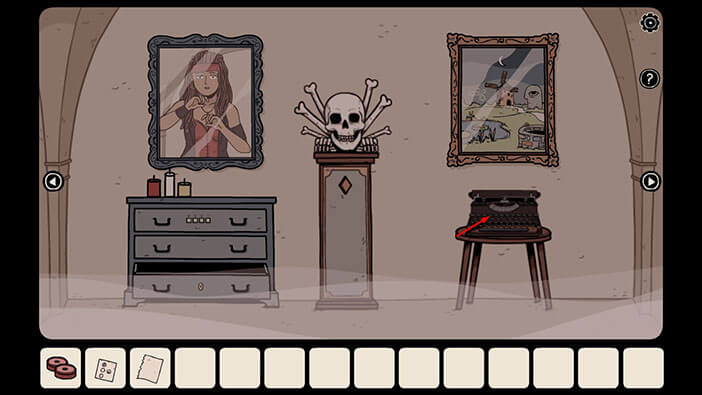
Let’s explore this place. Tap on the arrow on the right to proceed into the next room.
On the wall on the left, we can see Laia’s portrait. Let’s take a closer look at it.
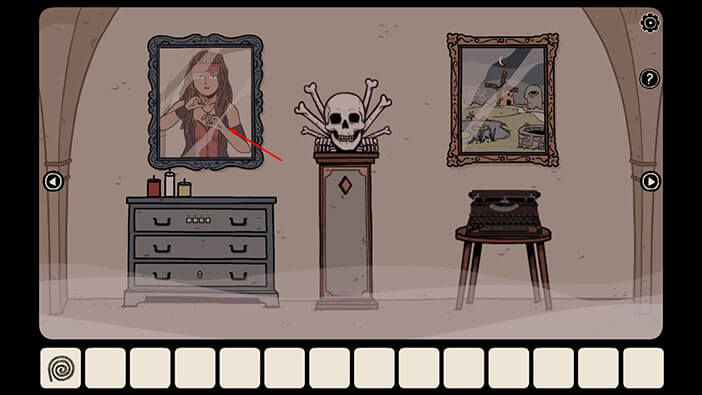
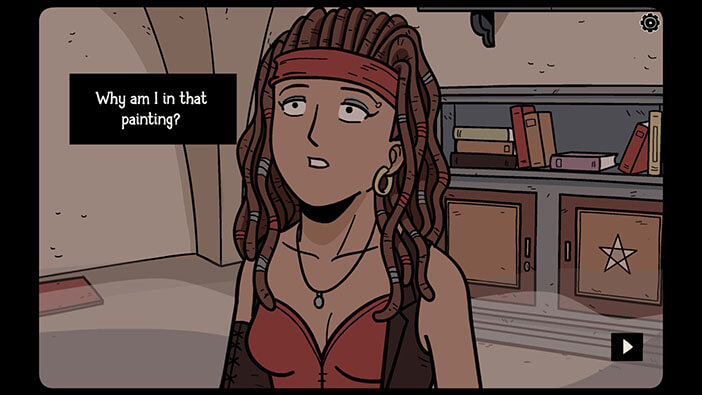
Laia in the portrait looks scared of something. Our character has no idea how her portrait ended up in this place. Heck, she doesn’t even know where she is.
We will get back to the portrait a bit later down the line, for now, let’s continue the exploration.
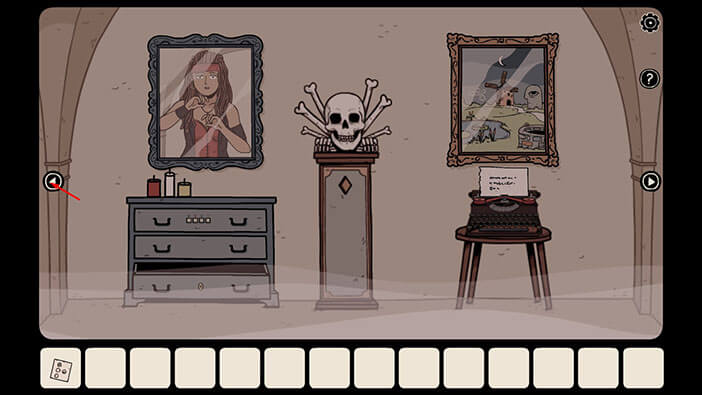
Next, let’s take a look at the other picture, on the wall on the right.
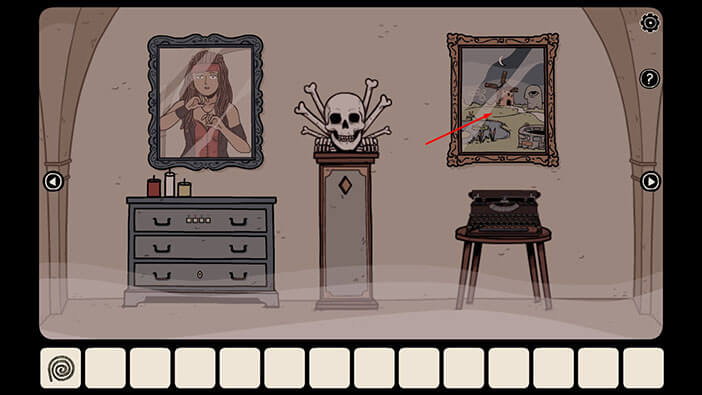
If you take a closer look at the picture, you will notice five distinct symbols.
The “Crescent Moon” is at the top of the picture.
The “Wind” is on the left side.
The “Eye” is on the right side.
The “Frog” is in the lower-left corner.
The “Snail” is in the lower right corner.
Memorize/write down the position of these symbols, because we will need this information in order to solve the next puzzle. Once you’re done, tap on the arrow in the lower-left corner to go back.
NOTE: You might get different symbols and they might be arranged differently in your playthrough. This is one of the puzzles that changes every time you start a new game.

Ok, let’s go back to the previous room.
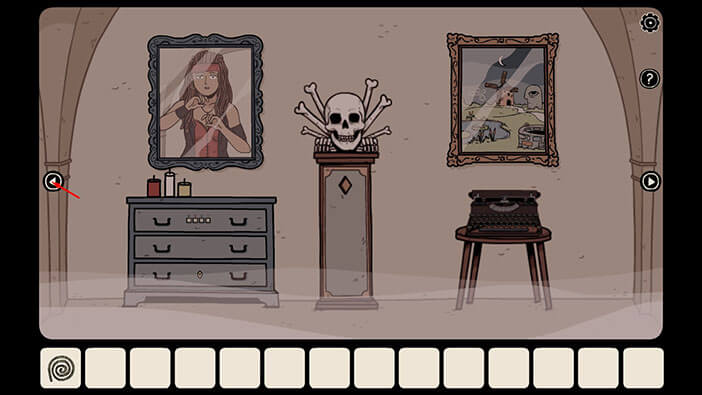
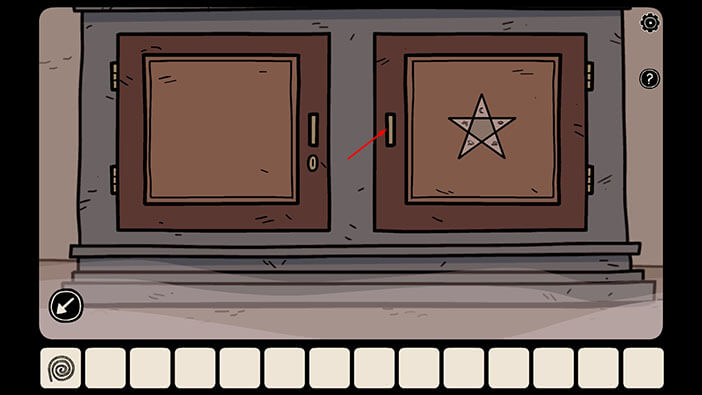
Let’s go to the room on the left.

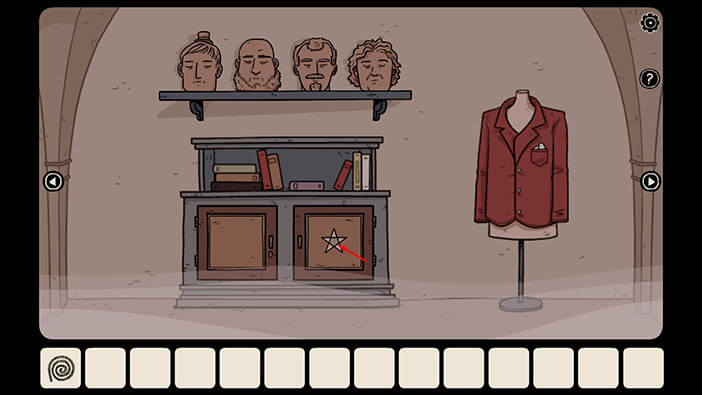
Tap twice on the star, located on the right cabinet door, to take a closer look at it.
The star has five slots for the symbols. So, let’s browse through the symbols and arrange them to match the picture that we saw earlier. So, we had,
Top = “Crescent Moon”
Left = “Wind”
Right = “Eye”
Lower-left = “Frog”
Lower-Right = “Snail”
NOTE: As I already mentioned, the type and the position of the symbols on the picture might be different in your game.
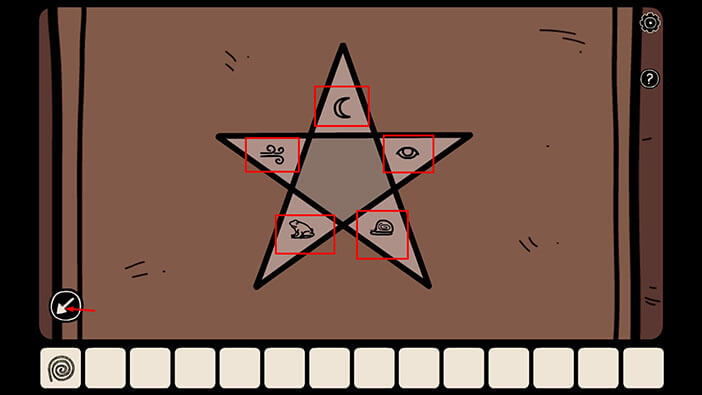
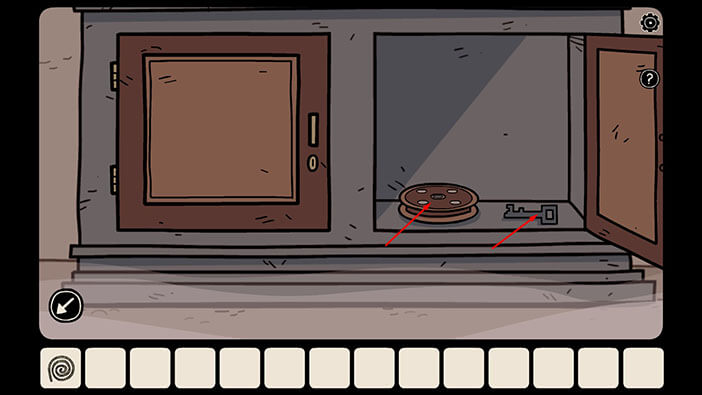
By entering the correct symbols, you will unlock the cabinet door. So, let’s tap on the door to open it.
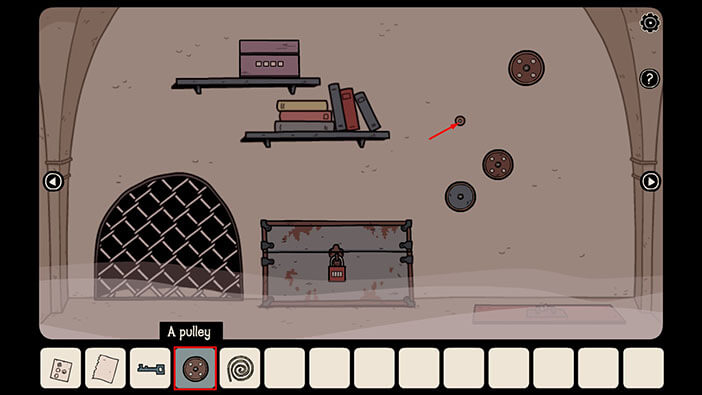
Inside, you will find two items. Tap on them to pick them up and a “Pulley” and a “Blue Key” will be added to your inventory.
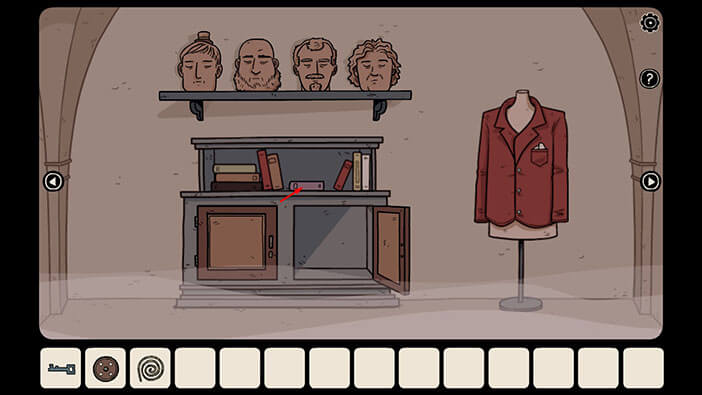
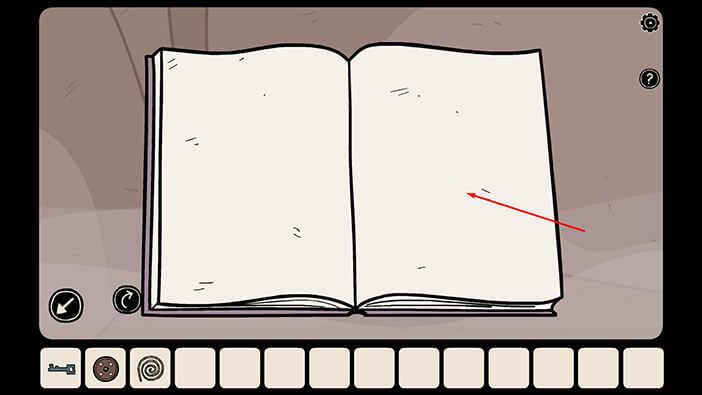
Next, let’s take a closer look at the pink on the bookshelf.
Tap on the arrow in the lower right corner to open the book.
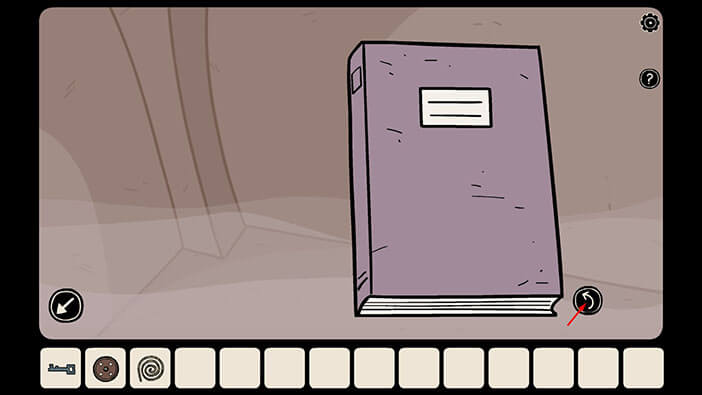
Tap on the page on the right, and Laia will tear it out. A “Blank Piece of Paper” will be added to your inventory.
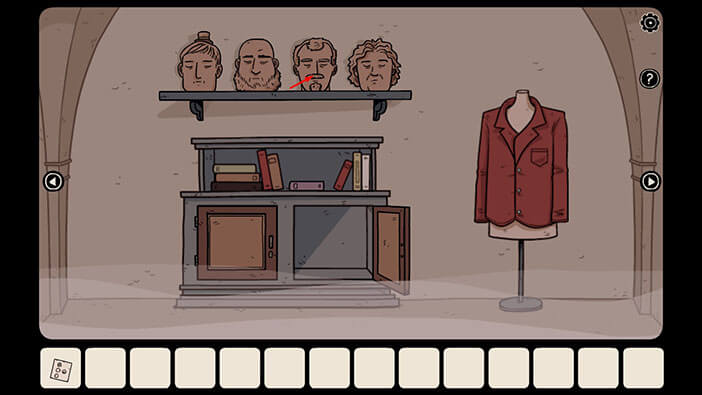
Next, let’s take a closer look at the jacket on the right.
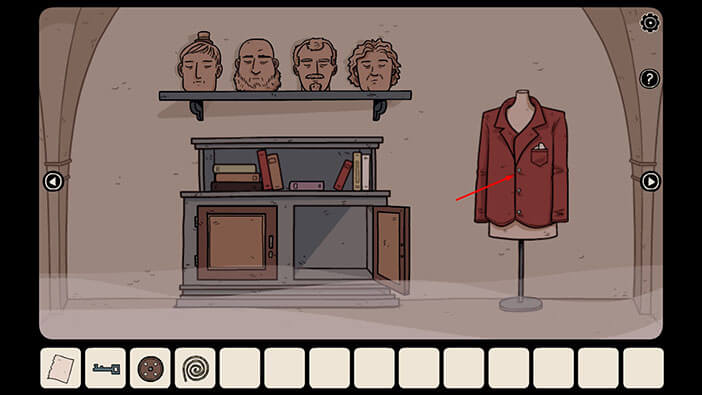
Tap on the piece of paper that is sticking out from the pocket to pick it up, and a “Note” with a hint will be added to your inventory.
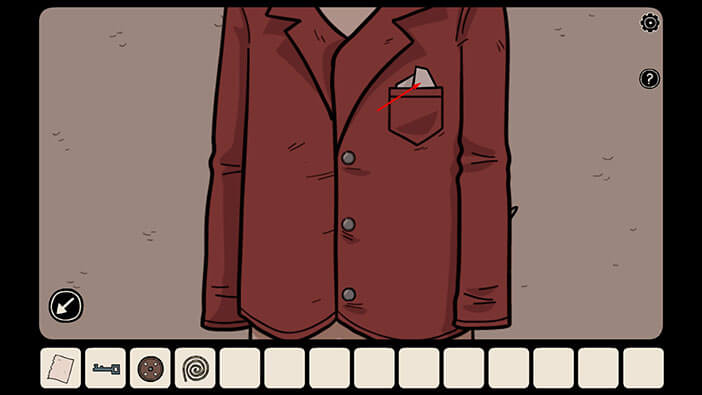
We will take a look at the note a bit later. For now, let’s pay attention to the right side of the jacket. We can see that there’s something sticking out from the back of the jacket. Tap on it to take a closer look, and you will discover the first Iguana.
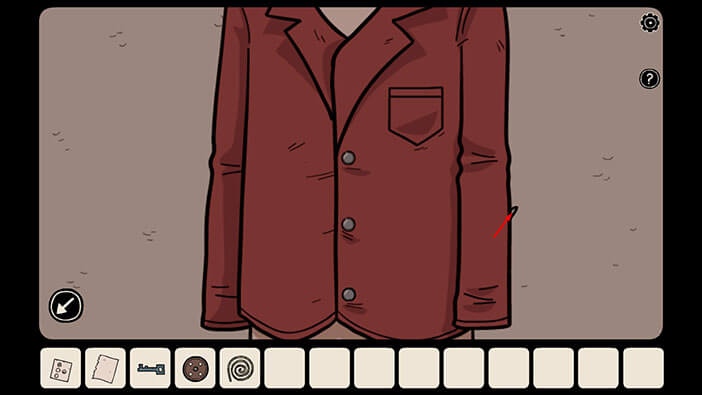
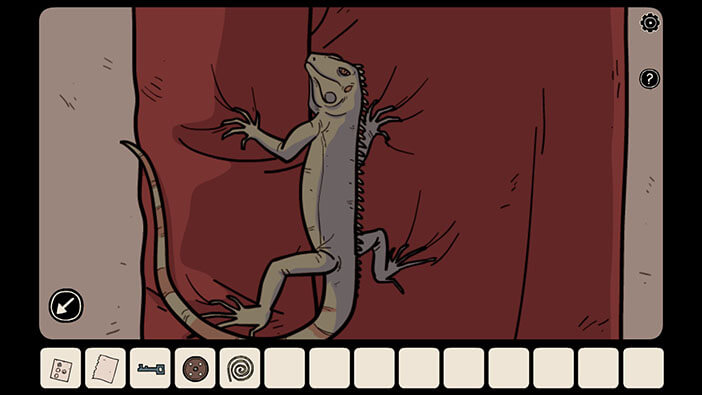
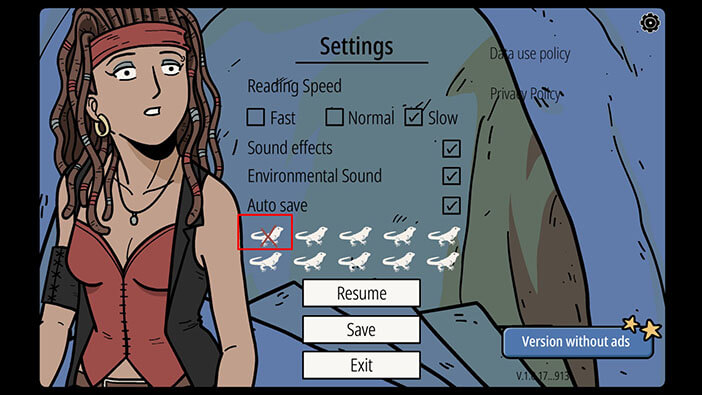
If you tap on the “Settings” button in the upper left corner, you will see that there are 10 iguanas in total, hidden somewhere in the game, and finding them all is a side quest. We have just found the first Iguana, so there are 9 more of them, hidden somewhere in the rooms.
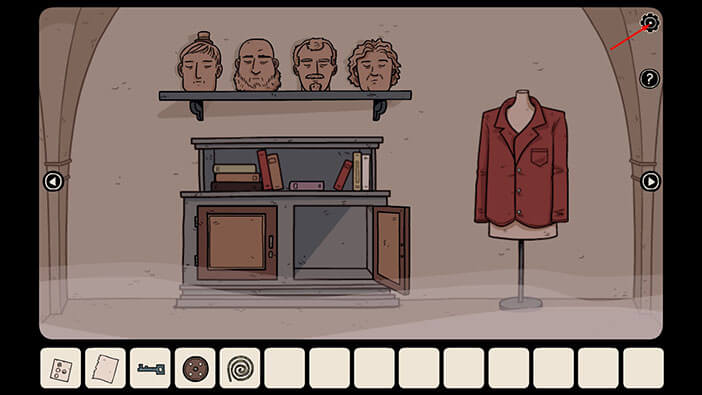
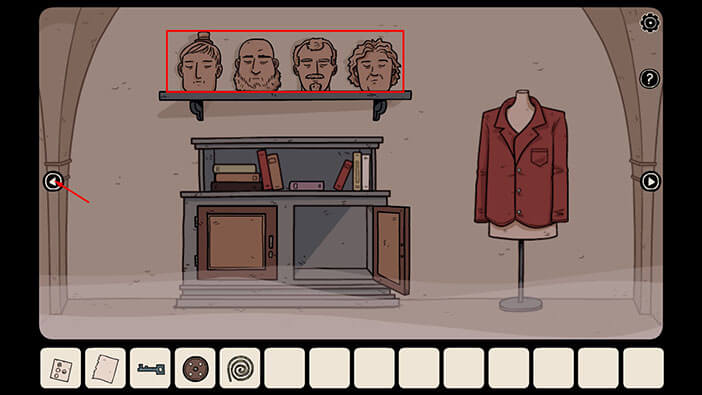
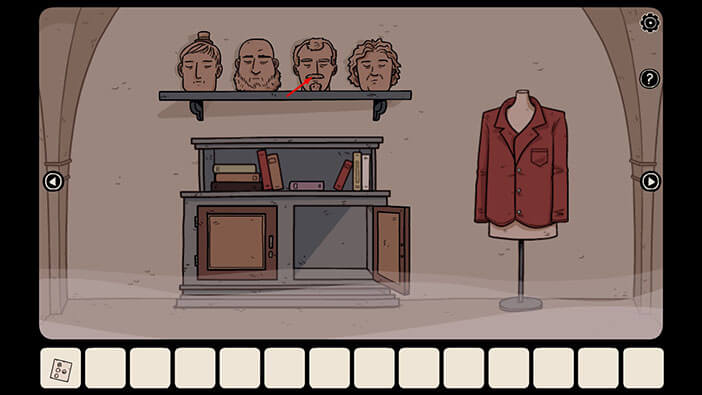
Before we leave, just take note of the five heads on the top shelf, because we will come back to them, a bit later.
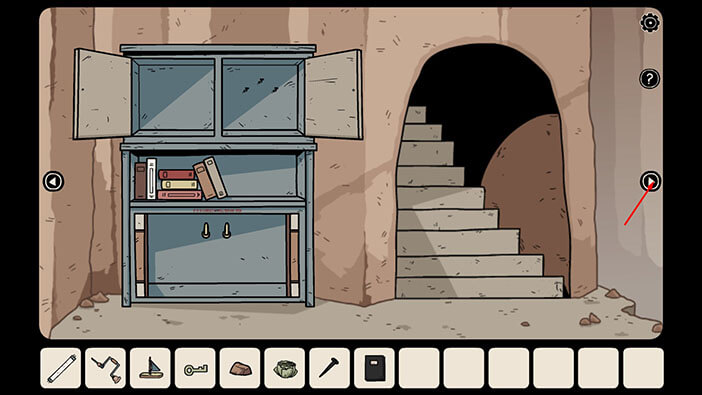
For now, let’s proceed into the next room on the left.
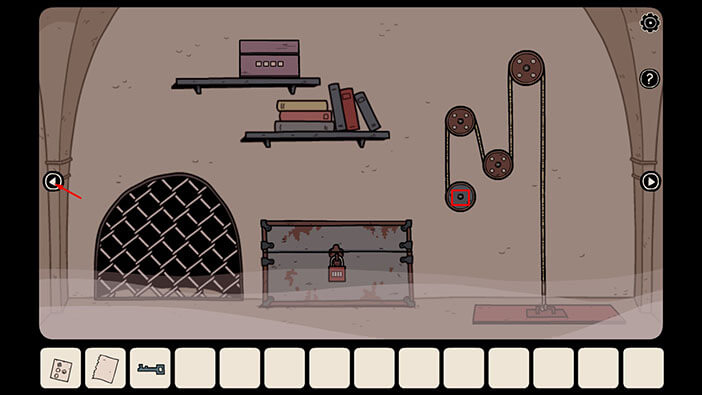
On the right side of a wall, we can see an empty slot. So, select the “Pulley” from the inventory and insert it into the empty slot.
Next, select the “Rope” from the inventory, then tap on the pulley to install it.
Later, we will use this mechanism to lift the hatch in the lower right corner. However, one part of the mechanism is still missing, and that is the handle. So, we have to find a handle before we can use this mechanism.
With that said, let’s proceed into the next room on the left.
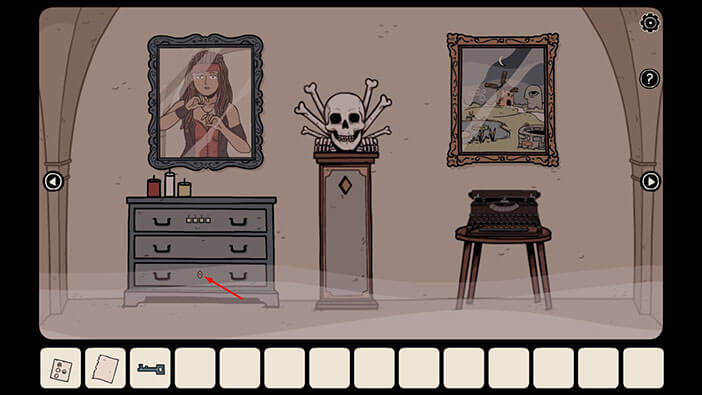
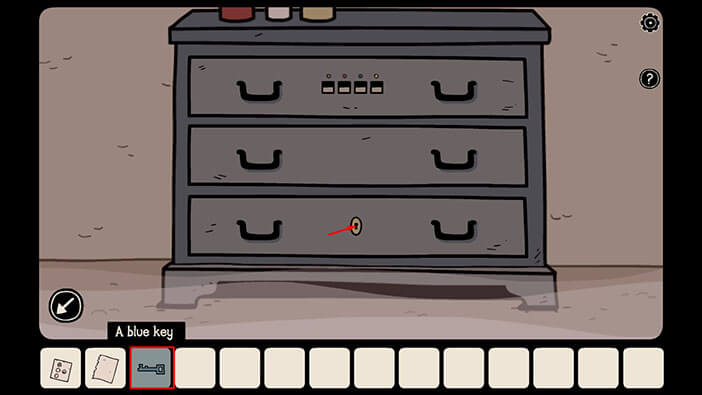
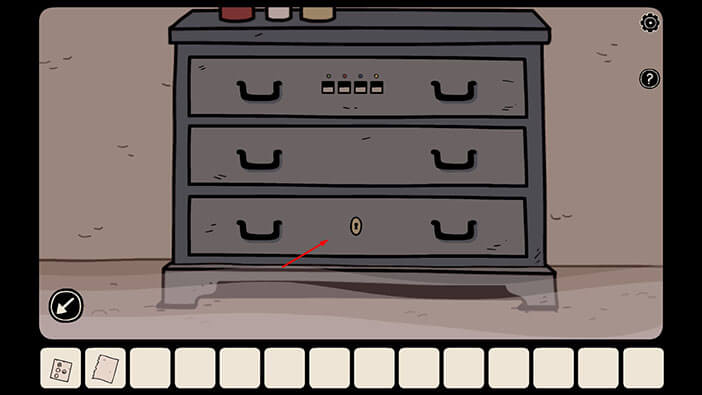
Tap on the bottom drawer to take a closer look at it.
After that, select the “Blue Key” from the inventory and tap on the keyhole to unlock the drawer.
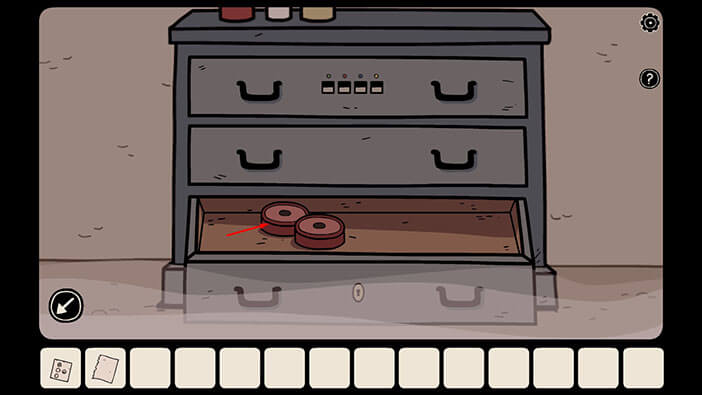
Tap on the drawer to open it, and inside you will find another item. Tap on it to pick it up, and “Tint for a Typewriter” will be added to your inventory.
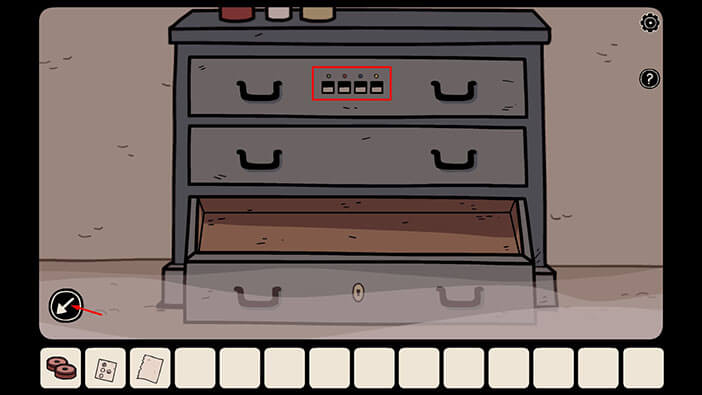
Also, just take note of the colored dots and squares on the top drawer, because we will come back to this puzzle, a bit later.
After that, tap on the arrow in the lower-left corner to go back.
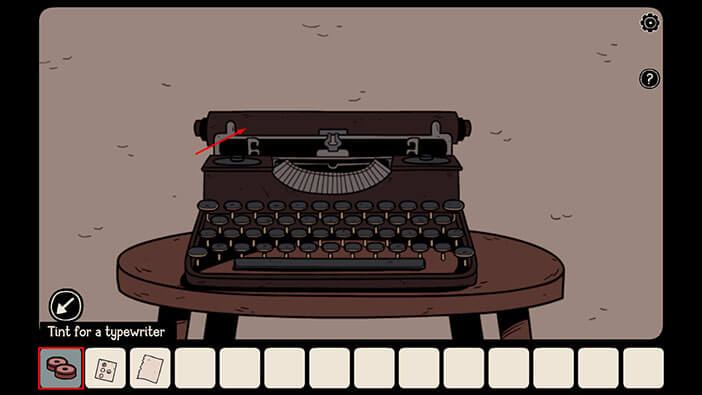
Ok, let’s take a closer look at the typewriter on the right.
Select the “Tint for a Typewriter” from the inventory, then tap on the typewriter to install it.
Next, select the “Blank Piece of Paper” from the inventory and add it to the typewriter.
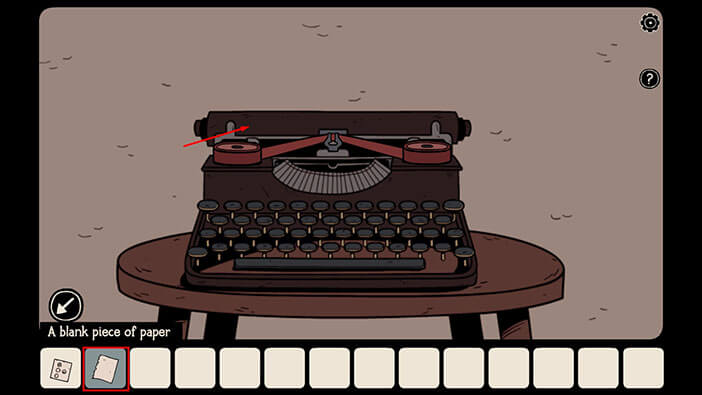
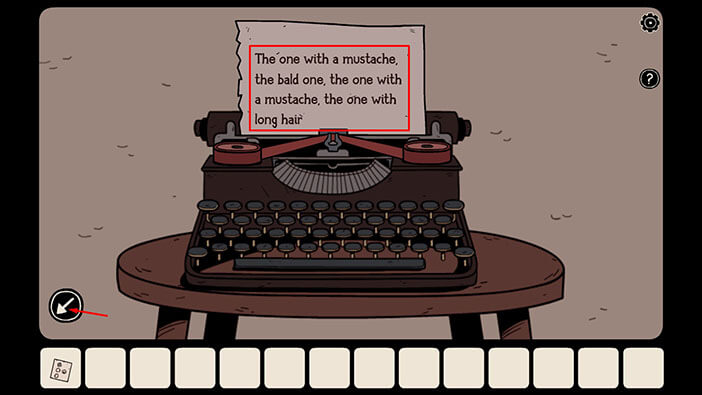
As soon as you do this, you will trigger a cutscene. Laia will wonder what to do next, but then, the typewriter will start working on its own, typing some text onto the blank paper.
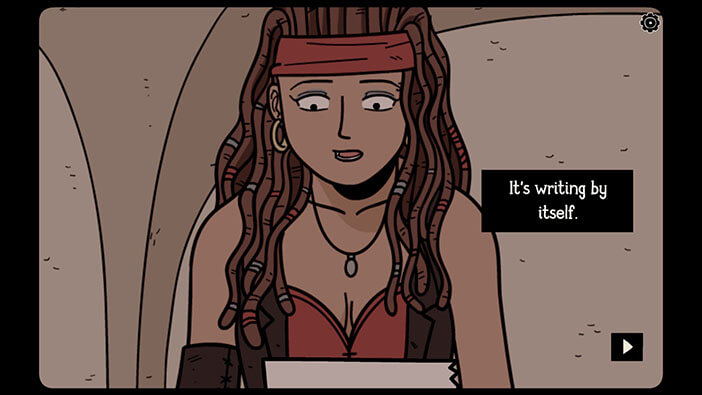
Ok, let’s take a look at the text. Here, we can see four descriptions, and it seems that the descriptions are referring to the heads that we saw earlier.
Let’s write down the descriptions.
First = The one with a mustache
Second = The bald one
Third = The one with a mustache (again)
Fourth = The one with long hair
Once you’re done, tap on the arrow in the lower-left corner to go back.
NOTE: You will get a different description every time you start a new game. So, the text in your game might be different.
Ok, let’s go back to the room with heads (it’s the second one on the left).
If you tap on one of the heads, it will make a weird sound several times. So, we should tap on the heads that the text was referring to, and count how many times they open their mouths.
Let’s start with the first head.
The first head was the one with a mustache, so tap on it and count how many times it opens its mouth.
The first head opened its mouth four times. So, memorize/write down
First Head = 4
NOTE: This is one of the randomized puzzles, and the number of times that the heads open their mouths might be different in your game. So, you will have to tap on the heads that were described in the text in your game and count how many times they open their mouths.
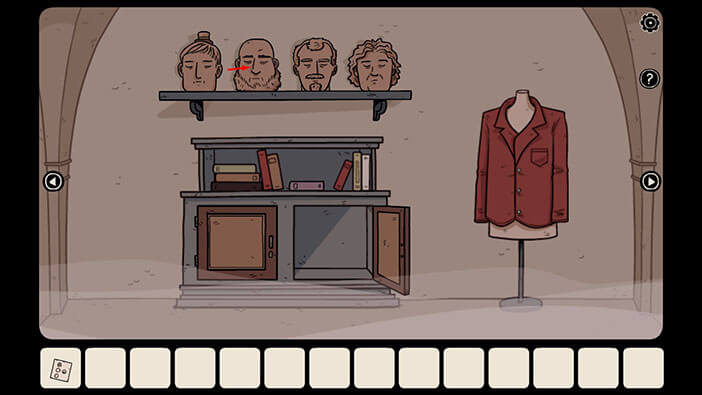
The second head was the bald one, so let’s tap on it and count.
Second Head = 6
The third head was the one with a mustache (again), so let’s tap on it and count.
Third head = 4
The fourth head was the one with long hair, so let’s tap on it and count.
Fourth head = 2
When we put it all together, we will get the number “4642”. Write down / memorize this number.

Next, let’s go to the room on the left.

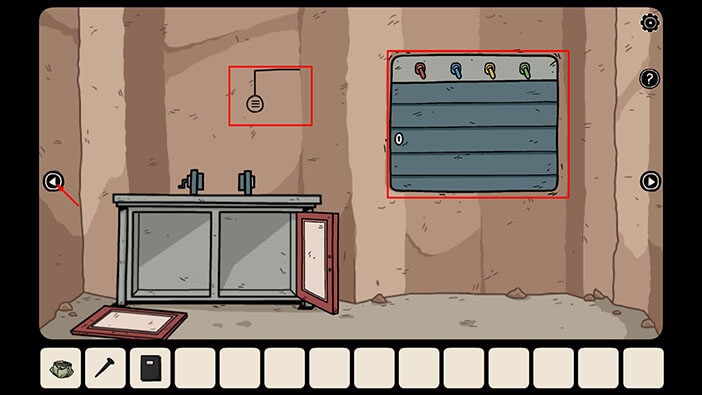
Tap on the purple box on the top shelf to take a closer look at it.
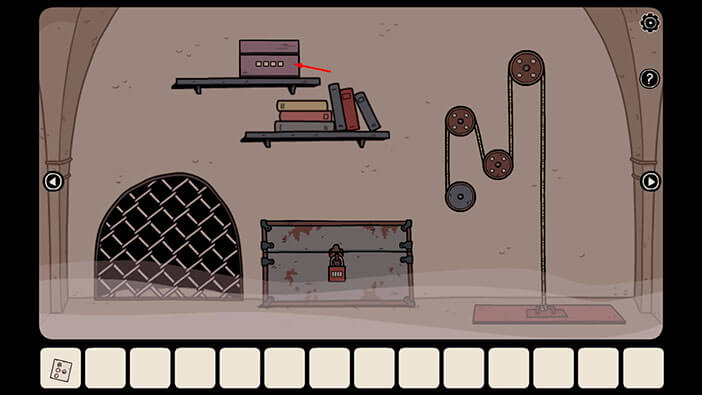
Here, you will see four slots, and we can change the number of dots in each slot by tapping on them. The number of dots represents how many times the head opened its mouth. So, let’s enter these values, starting from left to right
First slot = 4 dots
Second slot = 6 dots
Third slot = 4 dots
Fourth slot = 2 dots
NOTE: As previously mentioned, the text on the typewriter might describe different heads in your game, so this solution will also change from playthrough to playthrough. However, the logic will remain the same, so you will be able to solve this puzzle by following our guide.

As soon as you enter the correct values you will hear the clicking sound and the box will open. Inside, you will see an orange object and a note. Tap on the object to pick it up and the “Small Crank” will be added to your inventory (the last part for the mechanism that we need in order to lift the hatch).
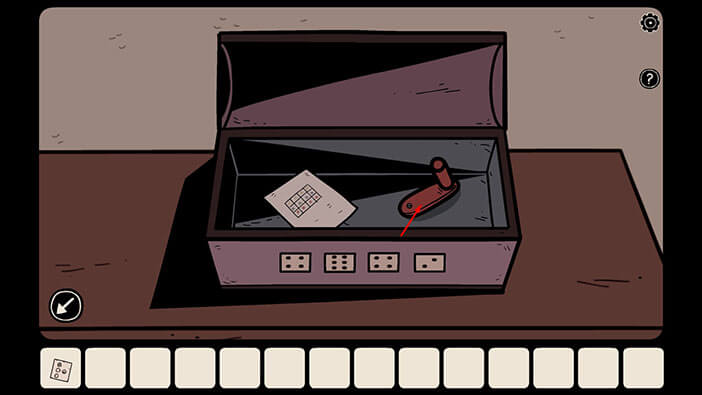
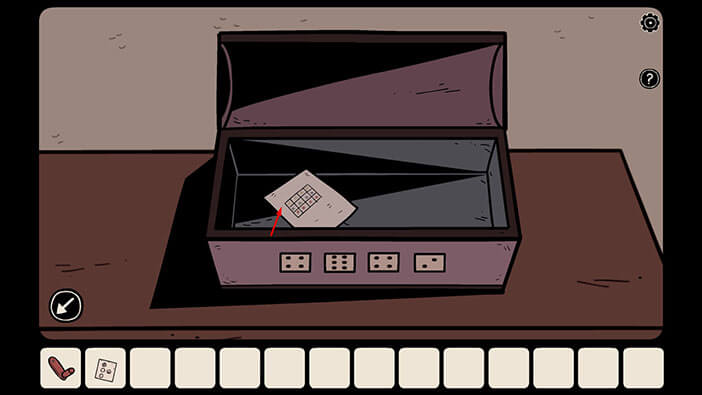
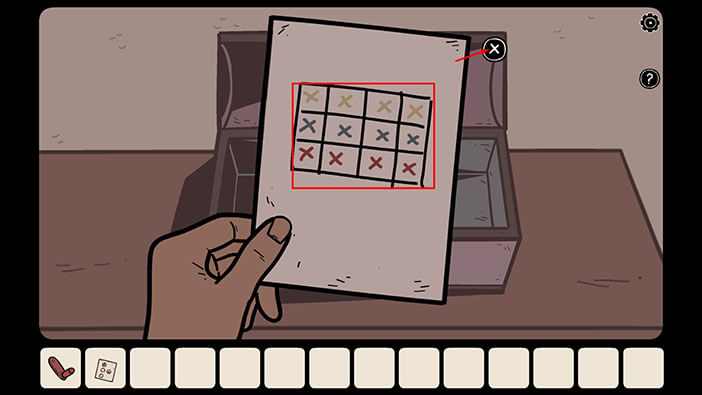
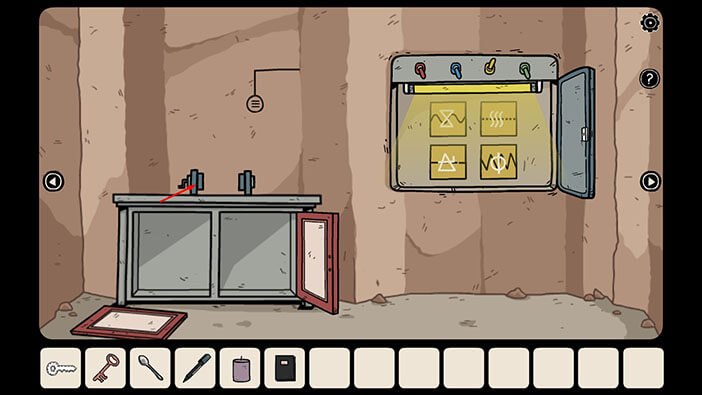
Before we leave, tap on the note to take a closer look at it.
Here we can see,
Yellow X signs in the top row.
Blue X signs in the middle row.
Red X signs in the bottom row.
Memorize/write down this information because it represents the hint for the next puzzle.
Once you’re done, tap on the “X” button in the upper right corner of the note to put it down.
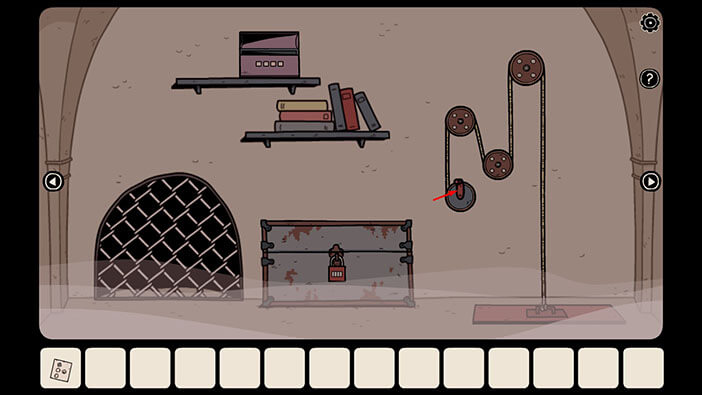
Select the “Small Crank” from the inventory and insert it into the empty slot (on the blue wheel).
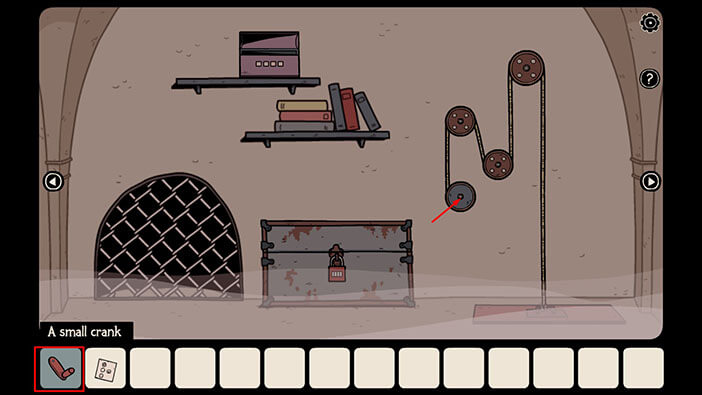
Tap on the crank to lift the hatch.
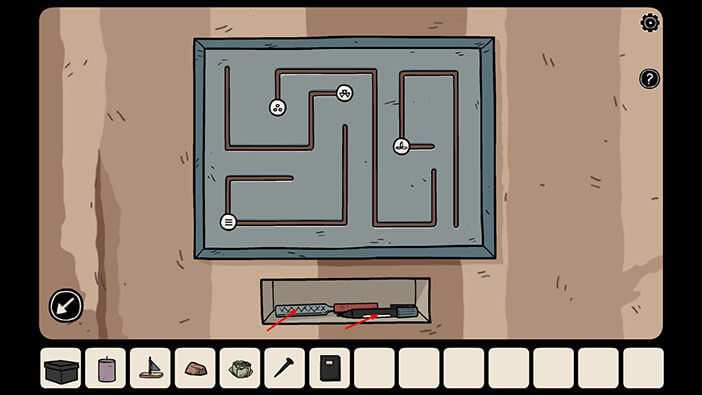
Well, it turns out that the hatch is actually a very large box. Let’s take a closer look at it.
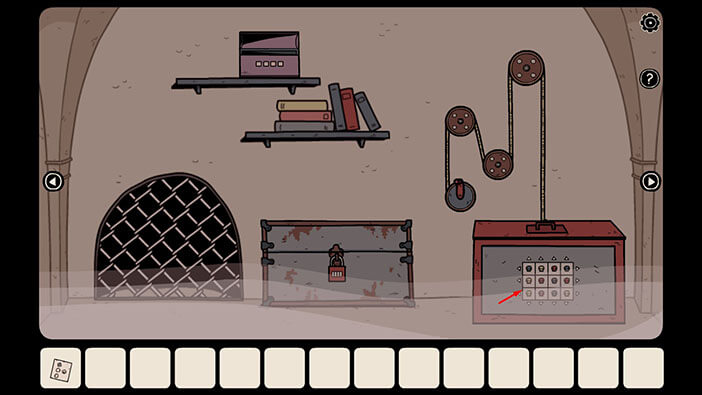
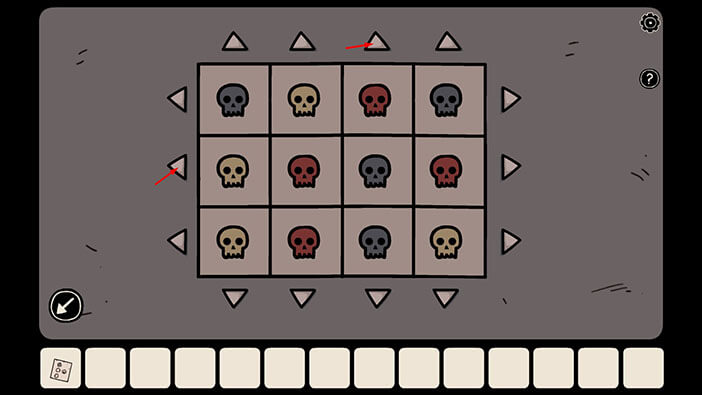
Ok, here we can see a 3×4 grid, filled with blue, yellow, and red skulls. Previously (inside the purple box) we found a note with the grid of the same dimension, and it suggests that we should place
Yellow Skulls in the top row.
Blue Skulls in the middle row.
Red Skulls in the bottom row.
We can shuffle the skulls by tapping on the arrows next to the grid. Let’s begin.
NOTE: The order of the skulls on the note might be different in your game because this hint changes with each playthrough. For example, in your game, blue skulls might be in the top row.
Step 1
Tap once on the third arrow at the top.
After that, tap on the middle arrow on the left.
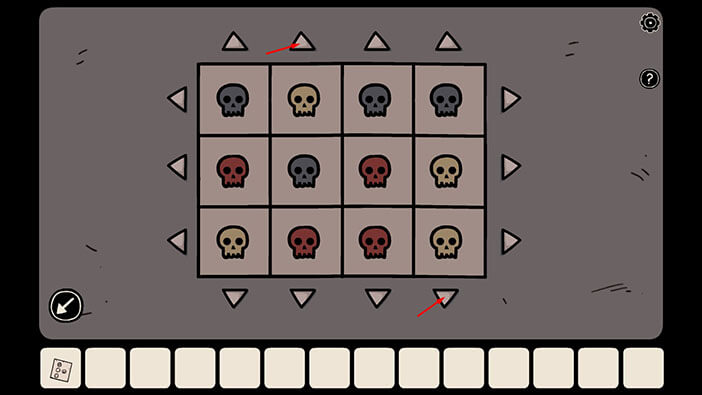
Step 2
Tap once on the second arrow at the top.
After that, tap on the fourth arrow at the bottom.
Step 3
Tap once on the third arrow at the bottom.
After that, tap on the fourth arrow at the top.

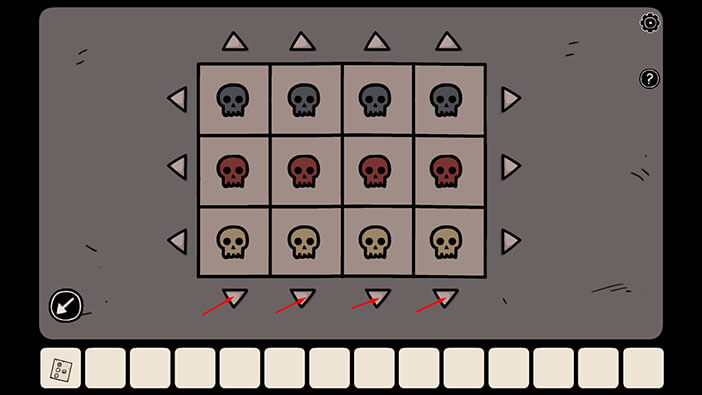
Step
Ok, now, we just have to change the order of the rows.
So, tap once on each of the four arrows at the bottom, and you will move the entire row with yellow skulls at the top.
The blue skulls will go down to the second row.
The red skulls will go down to the third row.
With this last step, we will also the puzzle.
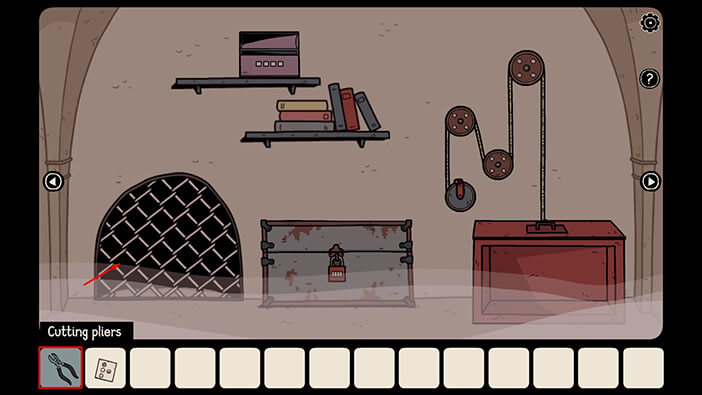
As soon as you solve the “skull” puzzle, the red box will open and in it, you will find a “Cutting Pliers”. Tap on them to pick them up.

On the left, we can see that a wire fence is blocking the entrance to a small passage. So, select the “Cutting Pliers” from the inventory and use them to cut the fence.
Before Laia could cut the fence, she got a severe headache, which caused her to drop the pliers. Suddenly, she began remembering the events that transpired 3 hours ago.
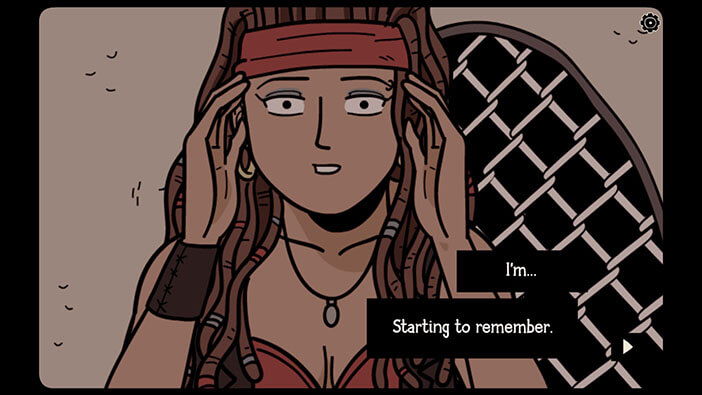
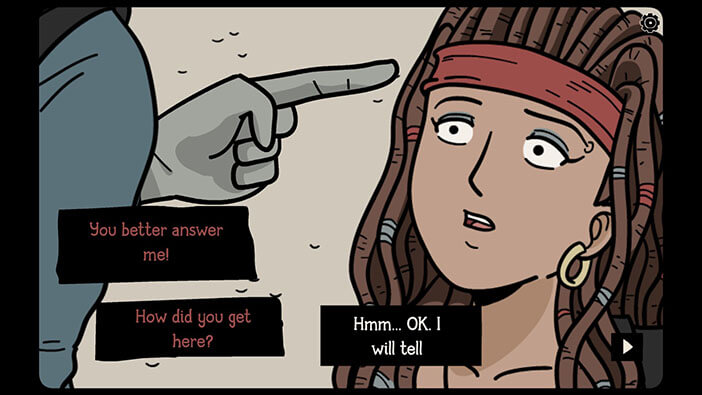
Three hours ago, Laia was tied to a chair and she was being interrogated by an angry witch (the witch should be familiar to you from the previous games in the series. Most notably, she was a big part in the “Nowhere House” game).
The witch wants to know how Laia managed to find her hiding place. Under a severe threat from this unnatural creature, Laia had no choice, and she had to explain how she found the witch.
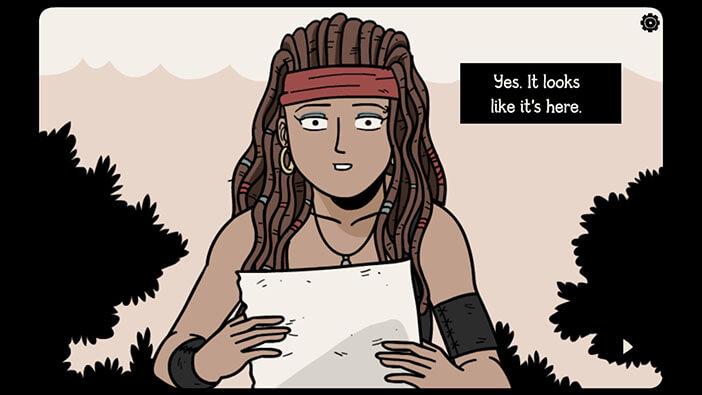
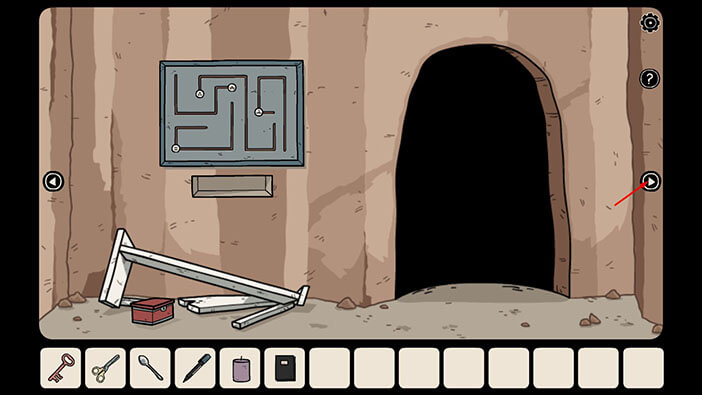
Now, Laia starts recalling the events that happened one day ago. She was following the map, which lead her to the cave entrance. Without any hesitation, she decided to go in.
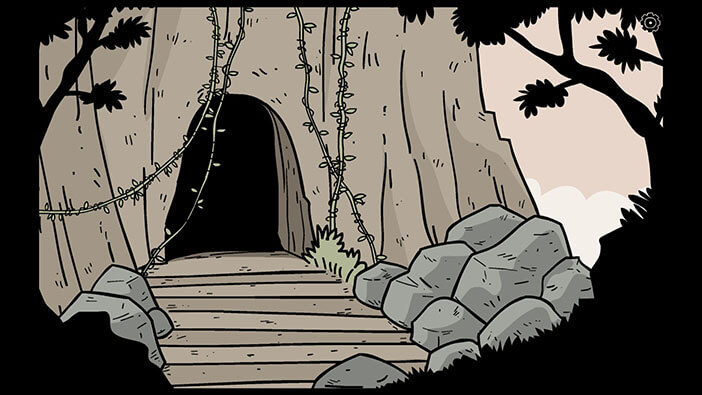
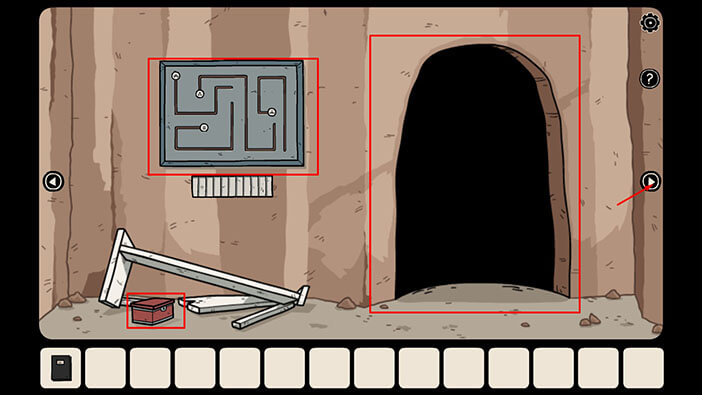
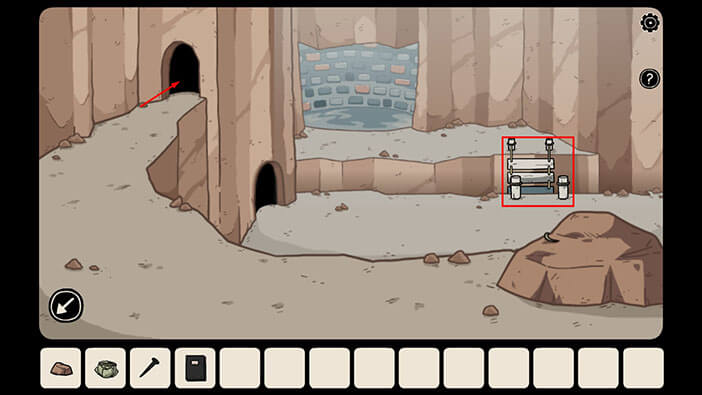
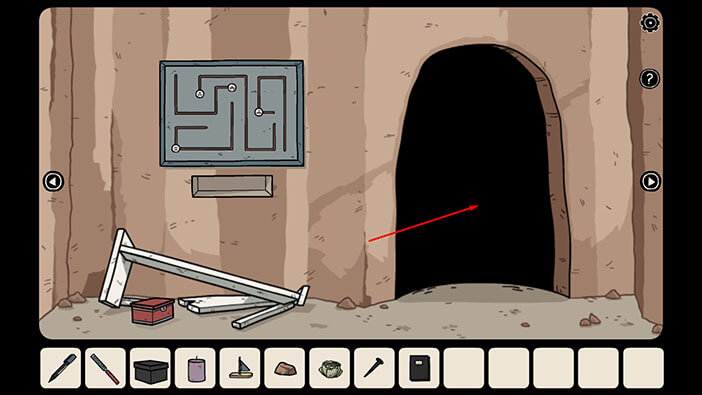
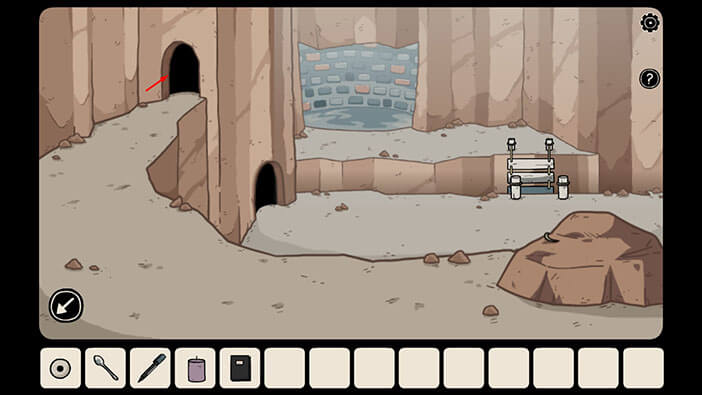
The story continues with Laia entering the cave. So, now we will witness the events that happened one day ago. Let’s explore the cave.
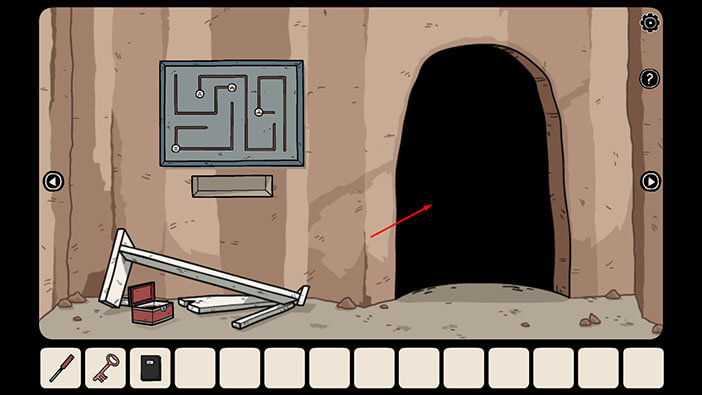
Tap on the hole in the stone wall on the right, and you will find the second iguana.
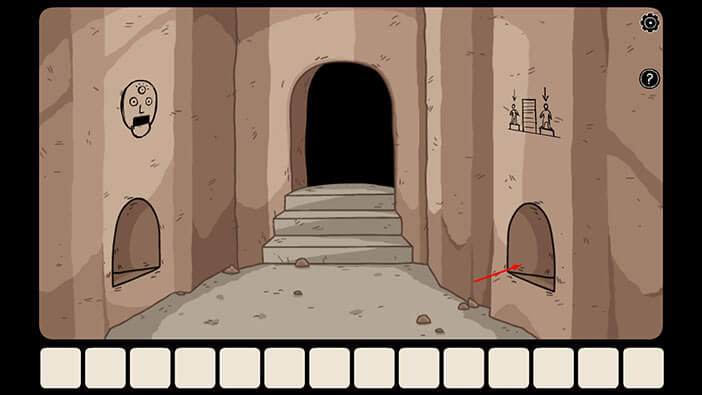
The first room isn’t very interesting, except for the iguana and the drawing of the head on the left wall. For now, just take note of this drawing, because we will come back to it a bit later.
Ok, let’s proceed to the next room.

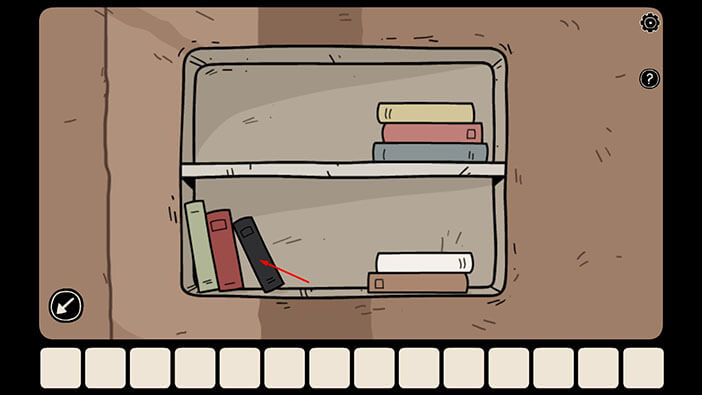
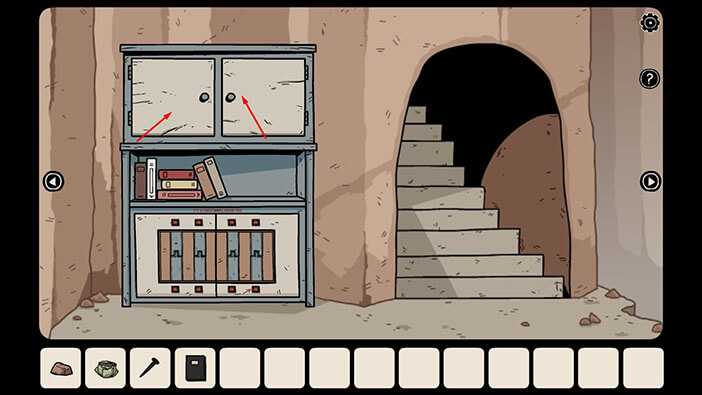
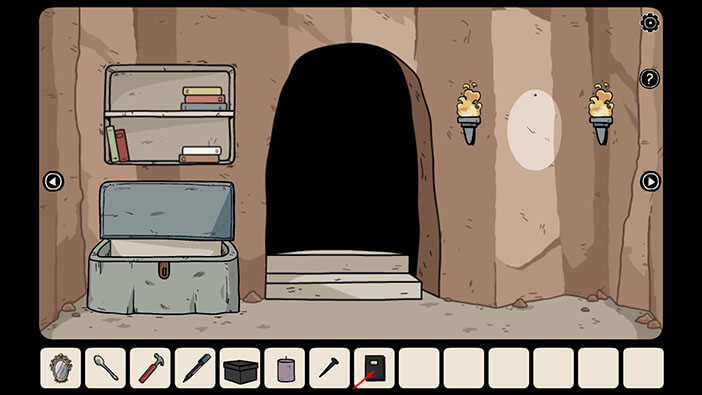
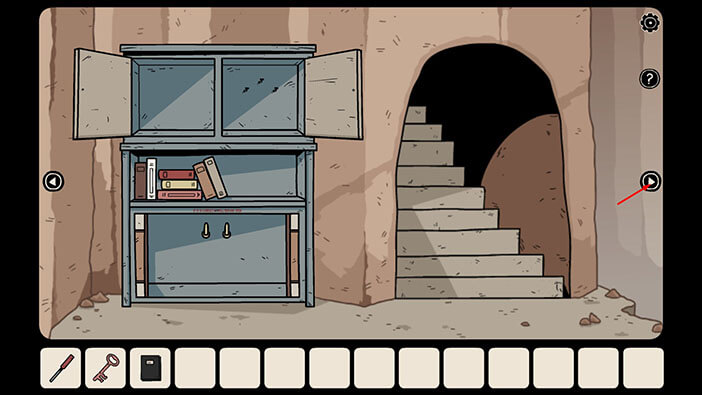
Tap on the bookshelf to take a closer look at it. After that, tap on the “Black Book” to pick it up.
If you open the “Black Book” you will find several hints for the puzzles that we will run into a bit further down the line.
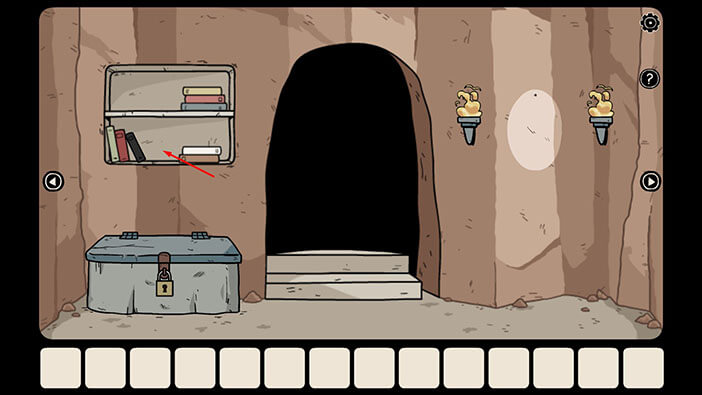
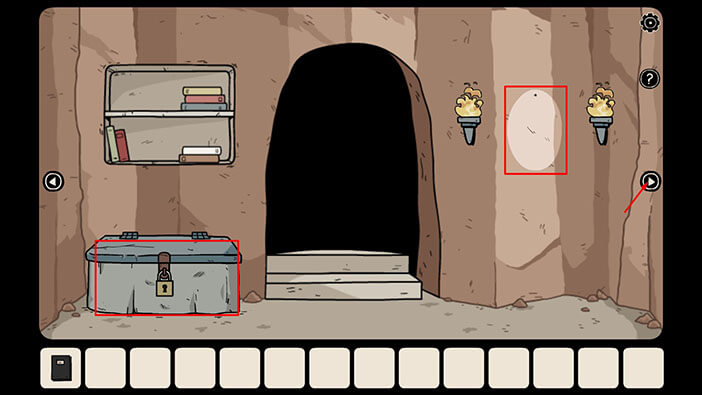
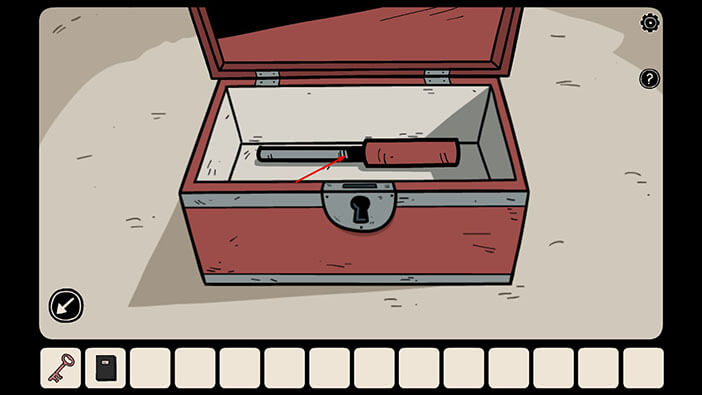
There’s also a locked chest in this room, but we still don’t have the key to open it.
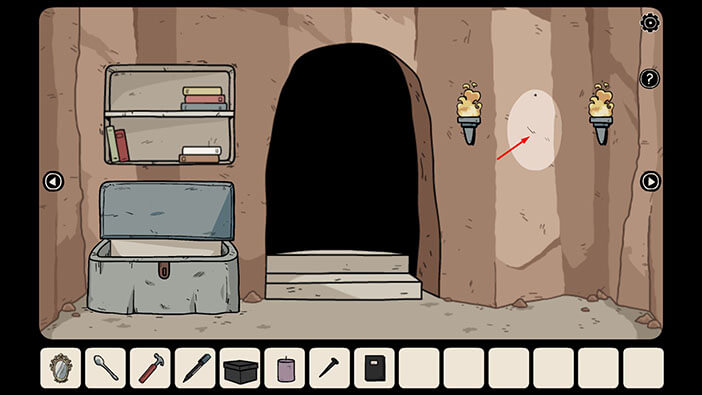
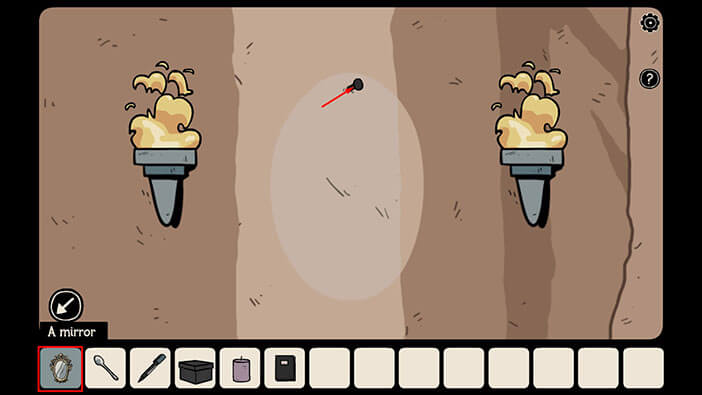
Also, on the wall, between the torches, you can see a bit lighter, oval shape, like something was hung on the wall. Also, just take note of it, we will come back to it later.
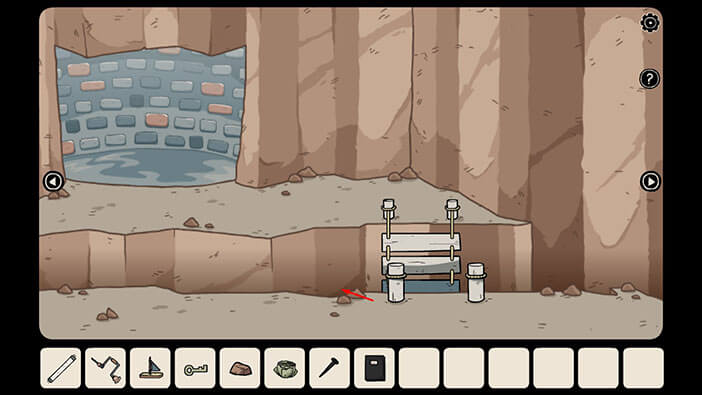
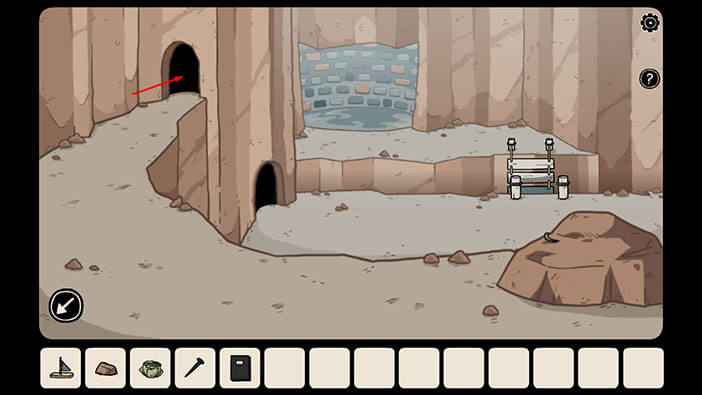
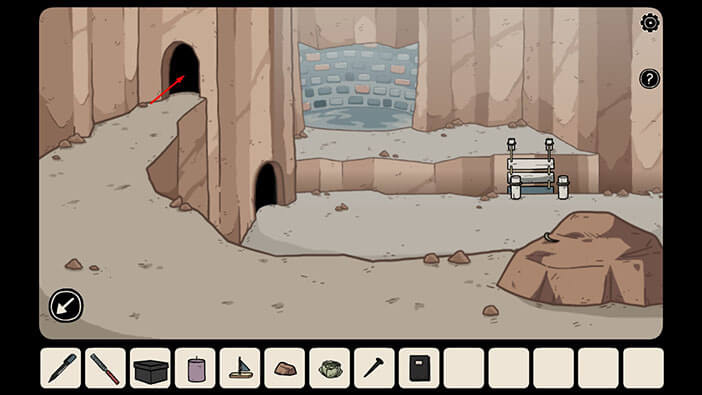
Let’s proceed to the next room on the right.
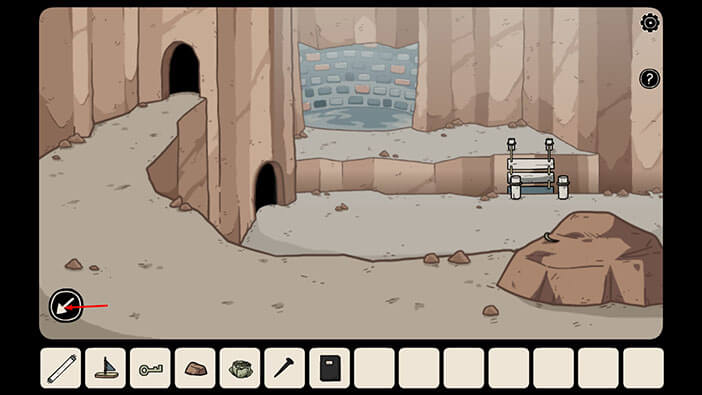
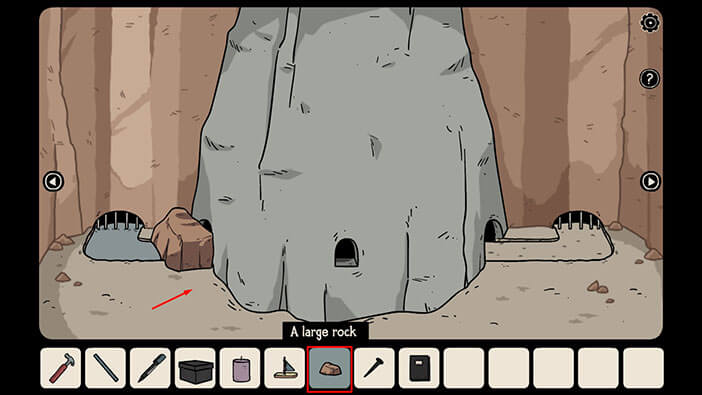
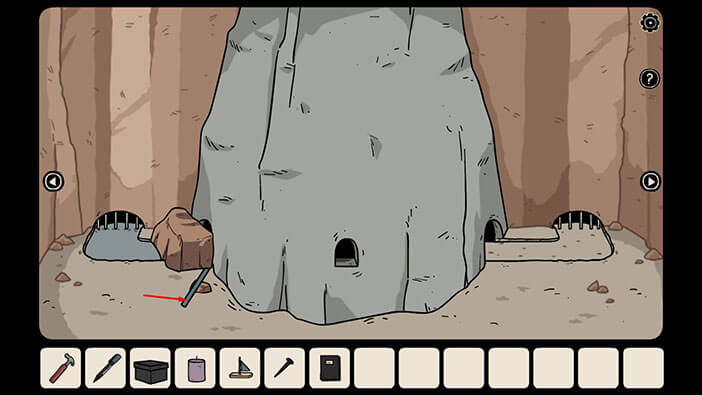
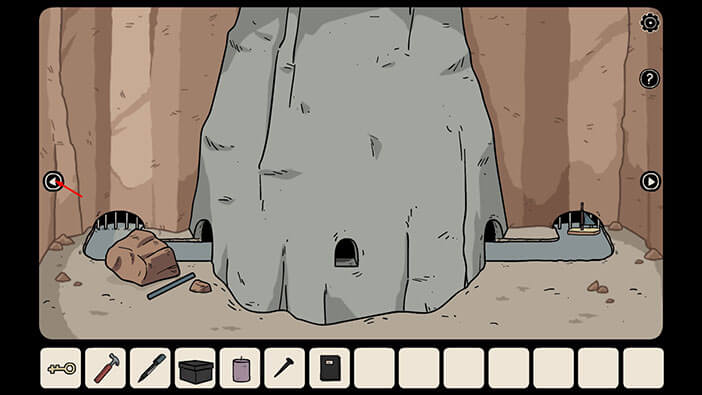
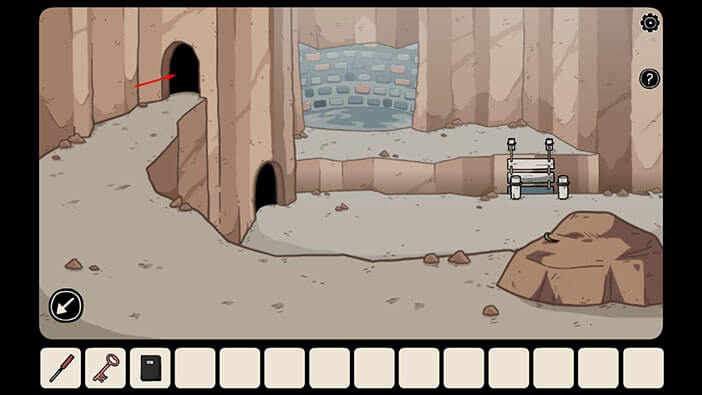
On the left side, we can see a small stream, but it’s currently blocked by a large rock, so the right side of the canal is dry.
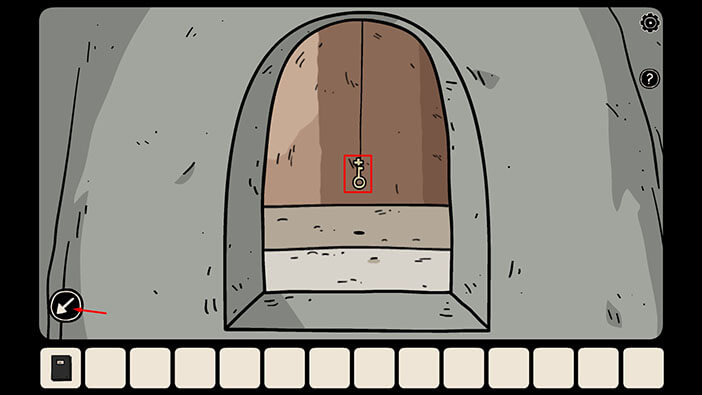
Tap on the middle hole to look inside this massive rock.
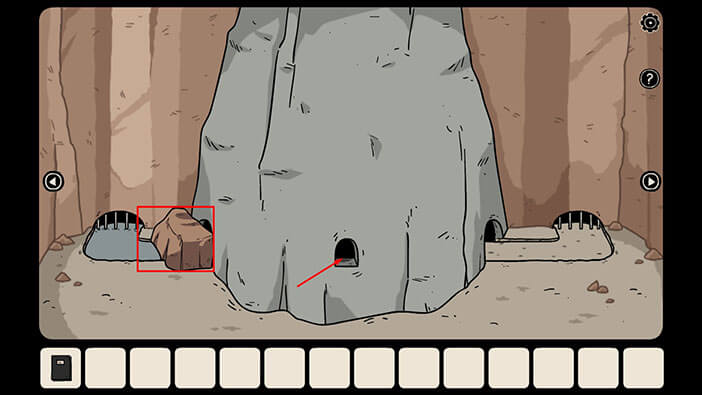
Well, inside we can see a key hanging from a thread. However, we can’t reach the key at this point in time, so let’s continue.
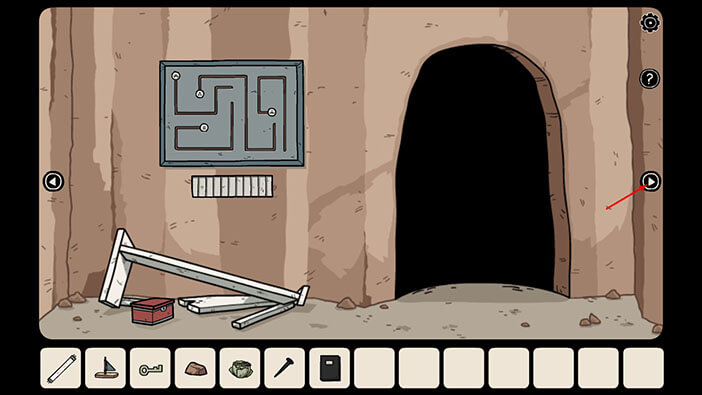
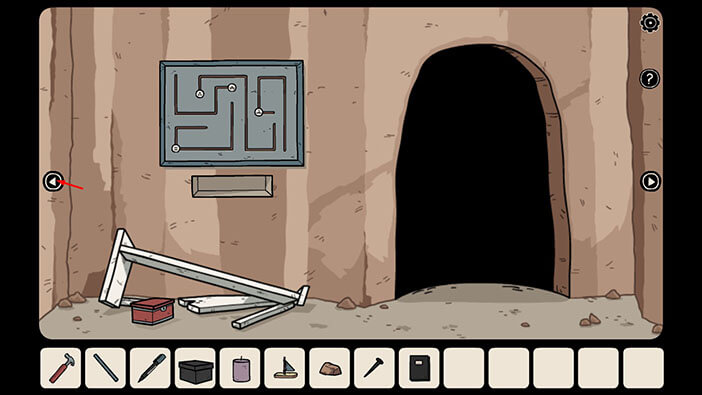
Let’s proceed to the next room on the right.
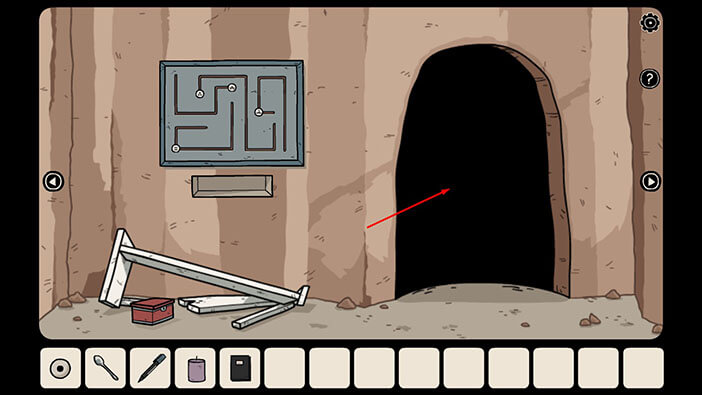
In this room, we have two points of interest. The board on the left wall, and the red box below it. For now, just take note of these objects, because we will come back to them a bit later.
Also, there’s a hole in the wall which leads to another area of the cave. Soon, we will explore this new area, but first, let’s finish the exploration of this part of the cave.
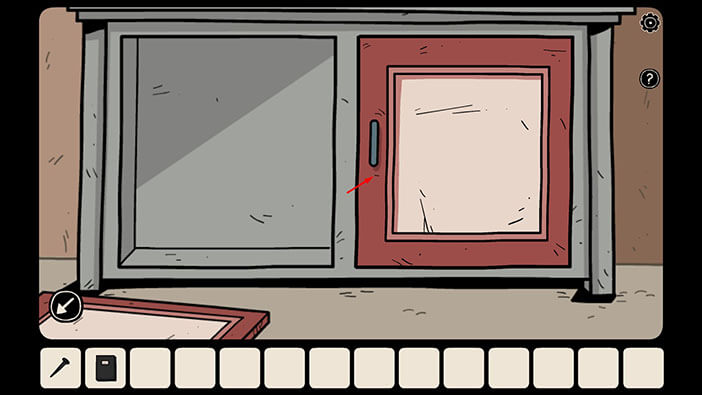
Let’s proceed to the next room on the right.
Tap on the item in the left cabinet compartment to pick it up and a “Nail” will be added to your inventory.
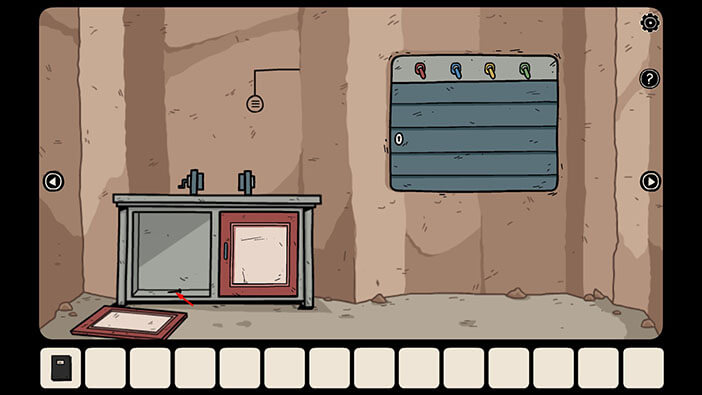
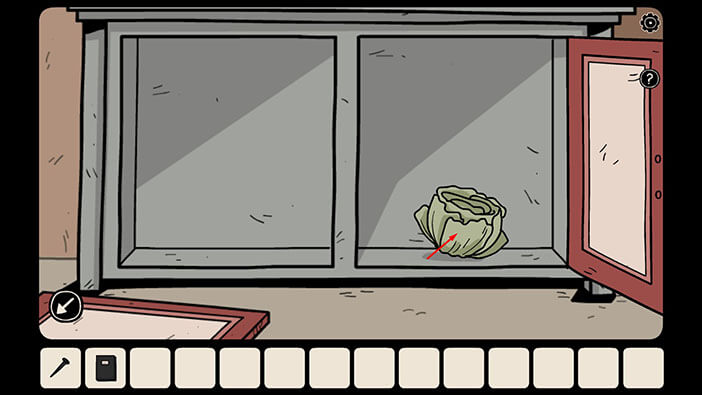
Next, tap on the cabinet door on the right to open it, then tap again to pick up the “Head of Lettuce”.
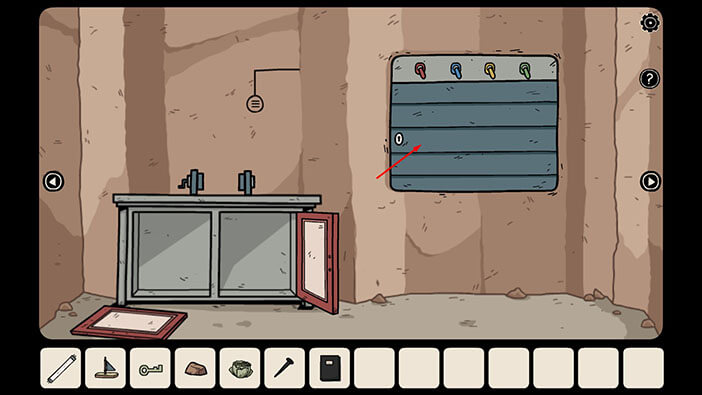
In this room, we have a small hint on the left side of the wall, and a locked panel with switches on the right. We will come back to it.
For now, let’s go back to the previous room.
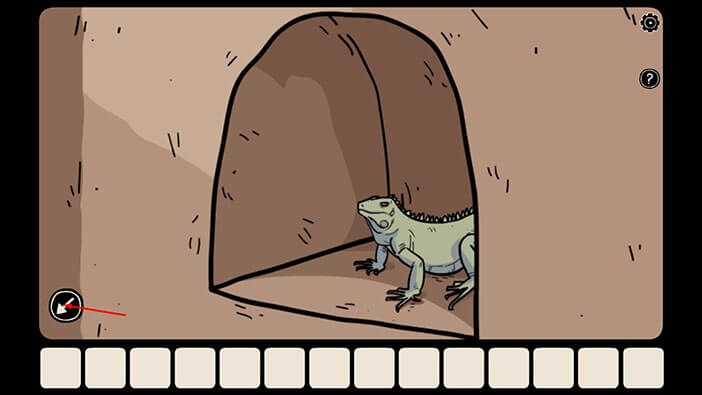
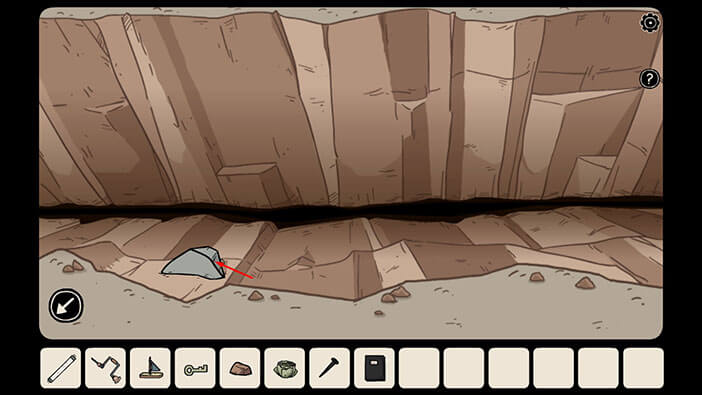
Tap on the hole in the wall to proceed to the next area.

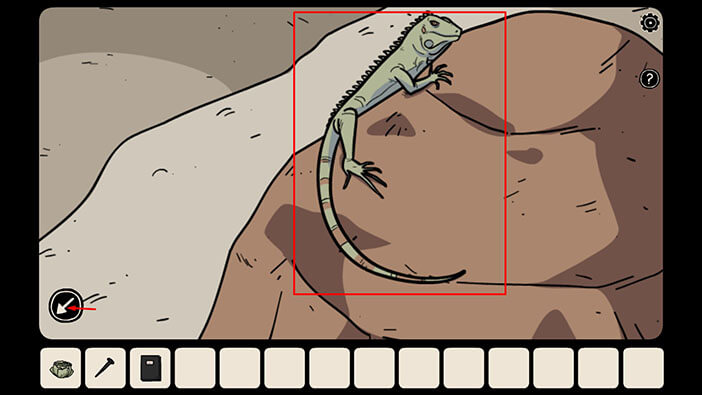
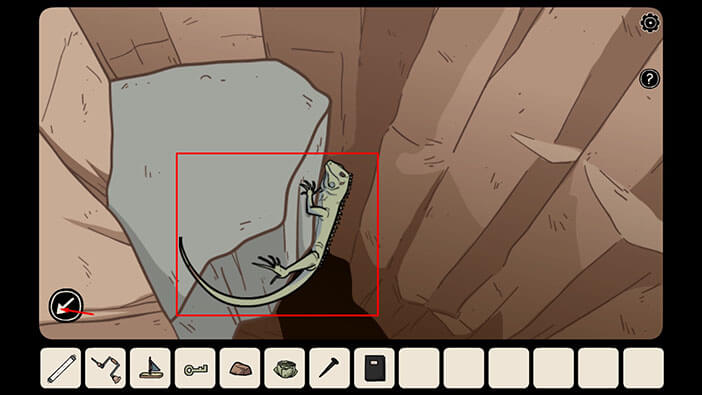
Here, we can see an iguana’s tail sticking out behind the rock on the right. Tap on it to look behind the rock, and you will find the third iguana.
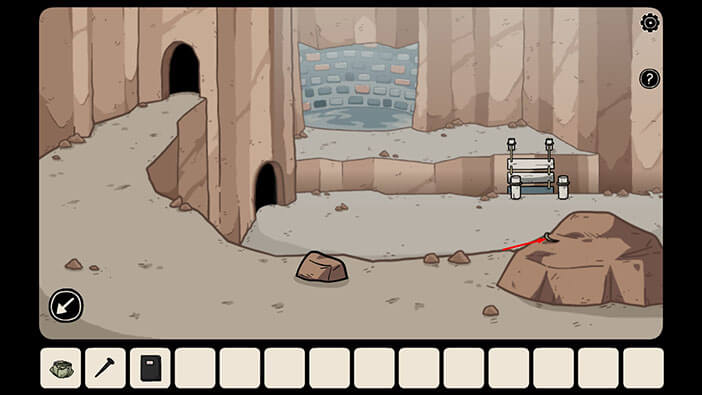
Next, tap on the “Large Rock” on the left to pick it up.
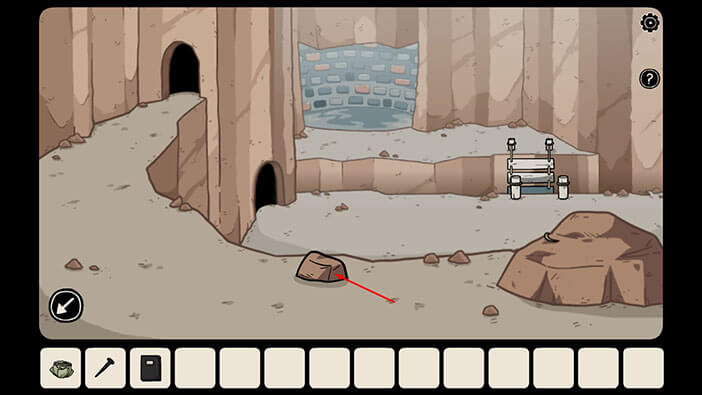
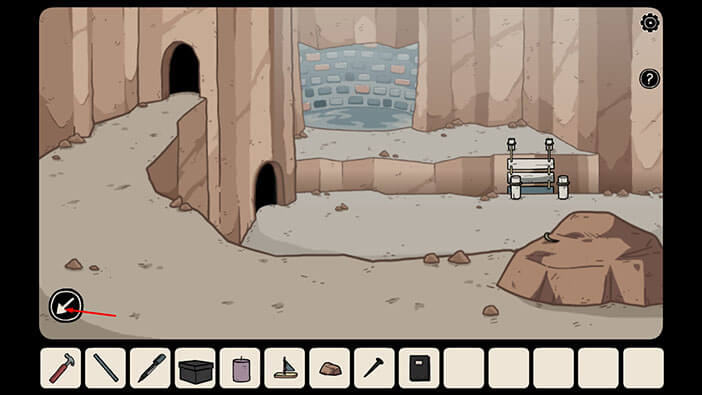
On the right side, we can see a small bridge, but it is lowered at the moment. So, later on, we will have to find a way to raise the bridge in order to cross the chasm and get to the other side.
For now, let’s go through the hole on the left.
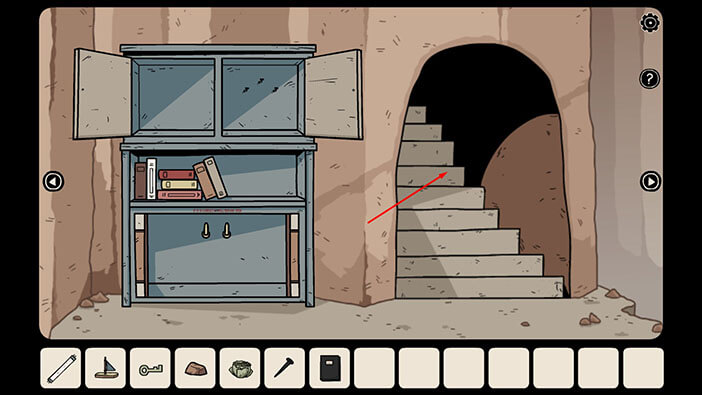
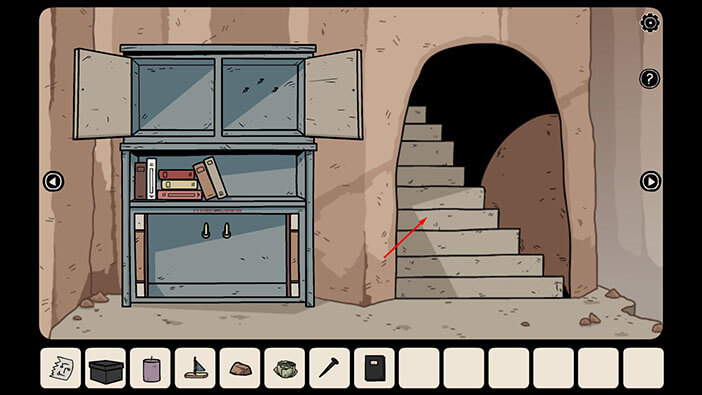
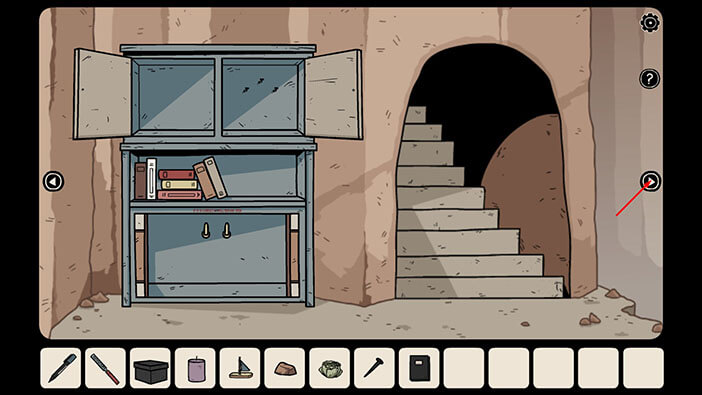
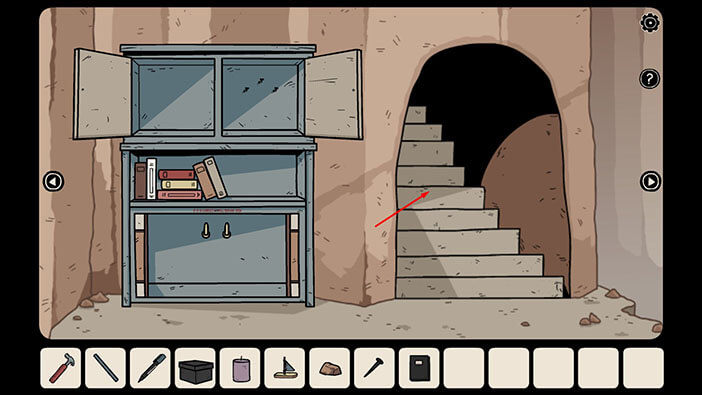
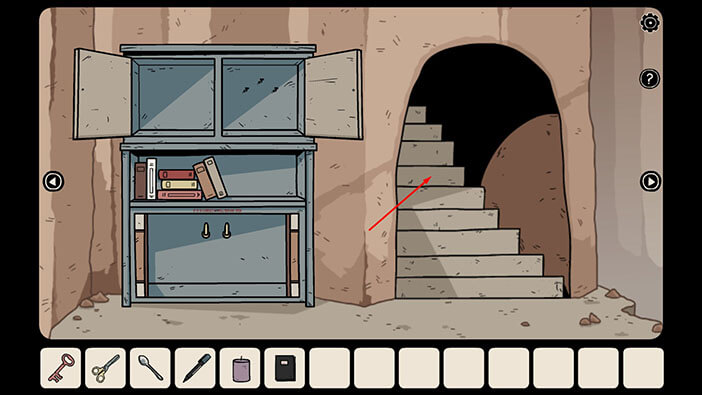
Well, here we found the stairs that lead deeper into the cave. Let’s go down and explore this new area.
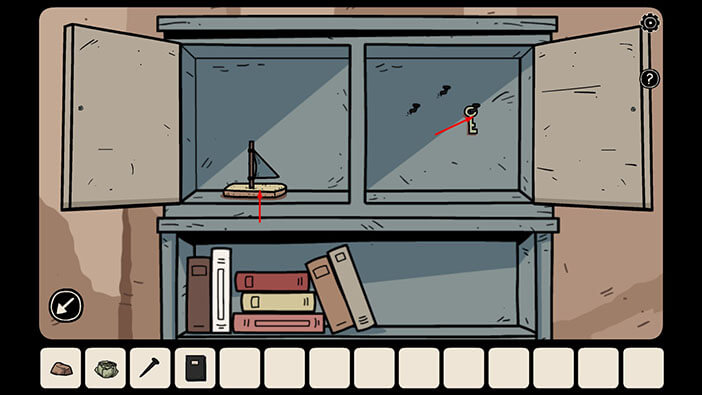
Tap on both cabinet doors to open them.
Tap on the key in the right compartment to pick it up and a “Green Key” will be added to your inventory.
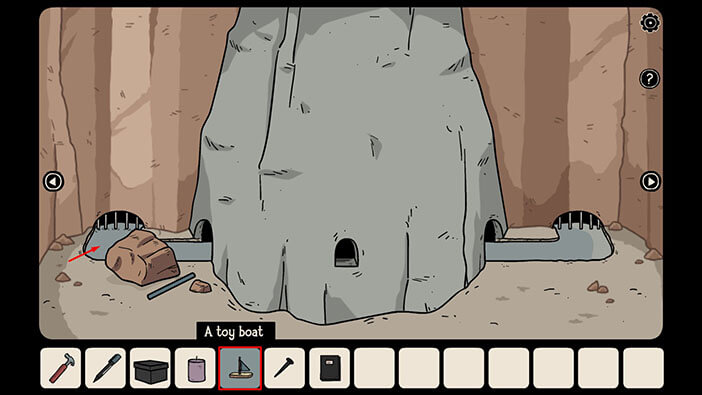
After that, tap on the boat in the left compartment and you will pick up a “Toy Boat”.
Next, tap on the lower half of the cabinet to take a closer look.
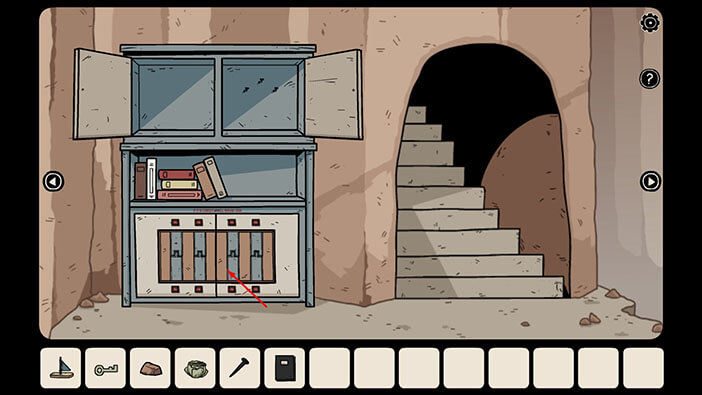
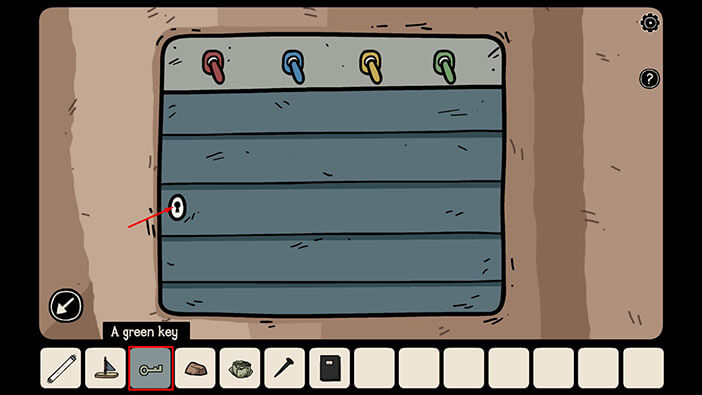
Here, we have another puzzle. The task is to press the button in the correct sequence in order to open the compartment. The starting point is the fourth button in the bottom row, as indicated by the red arrow.
So, let’s tap on the fourth button in the bottom row.
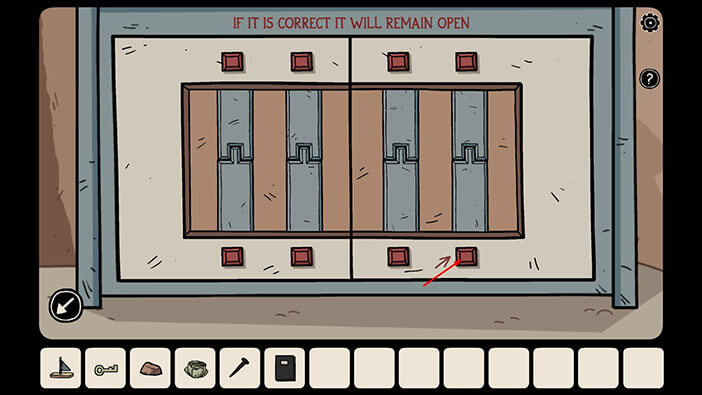
After we pressed the button, the metal pieces associated with it retracted. So, we should figure out the next button in the sequence.
The only way to figure out the correct sequence of buttons is by trial and error. If you press the correct button, you will retract another piece. If you press the wrong button, you will reset the puzzle.
Fortunately, this puzzle WILL NOT CHANGE with each playthrough, so you can find the correct sequence below.
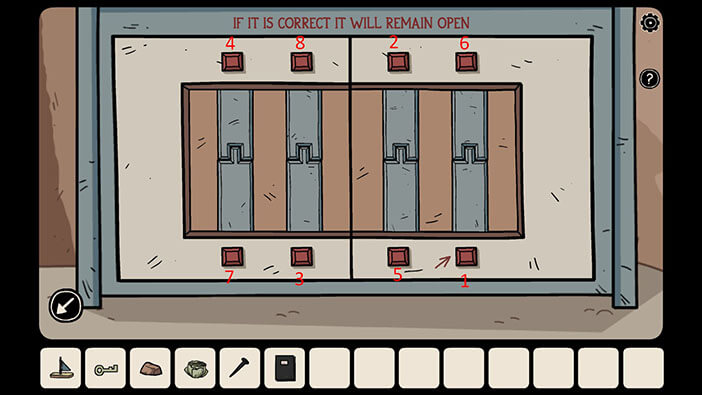
Second Step = Third (left to right) button in the top row
Third Step = Second button in the bottom row
Fourth Step = First button in the top row
Fifth Step = Third button in the bottom
Sixth Step = Fourth button in the top row
Seventh Step = First button in the bottom row
Eighth Step = Second button in the top row
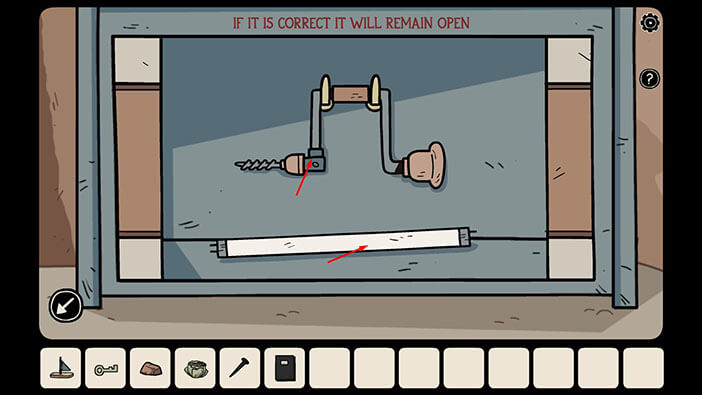
By solving the previous puzzle you will open the compartment behind the mechanism, and inside you will find two items. Tap on them to pick them up and a “Drill” and a “Fluorescent Tube” will be added to your inventory.
Let’s check out the next room on the right.
Well, we reached the bridge which we saw earlier. Tap just to the left of the bridge to look at the chasm.
When you look down, you will see another iguana’s tail sticking out behind the small rock. Tap on the tail to look behind the rock and you will find the fourth iguana.
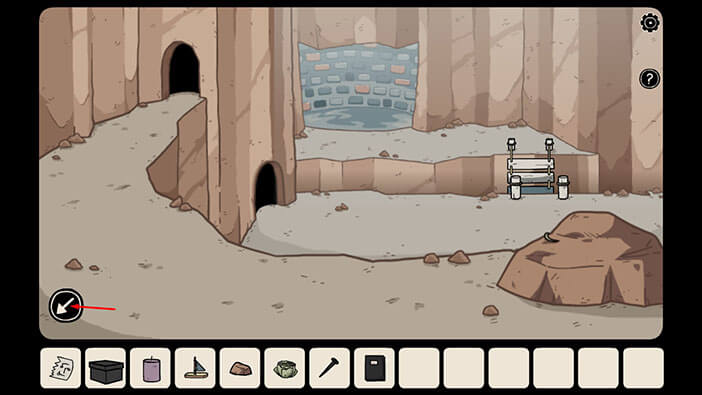
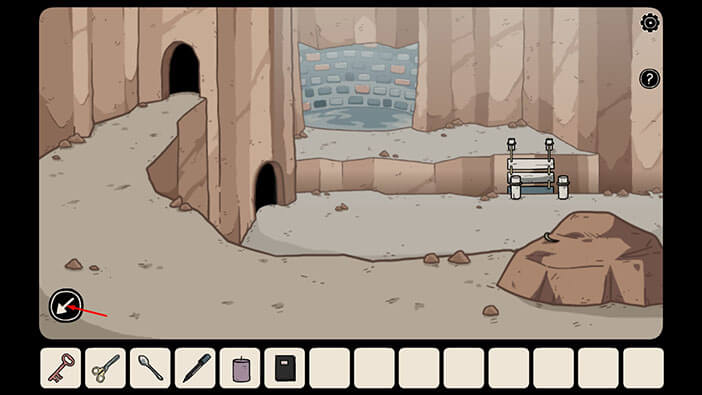
Let’s explore the entire lower level of the cave system by going to the next room on the right.

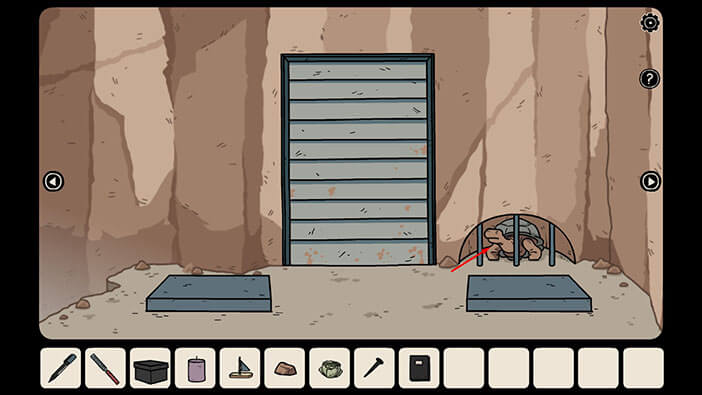
In this room, we can see a turtle trapped behind the metal bars. Behind the shutter door is the mechanism that lowers and raises the bridge, so we will have to find a way to access this mechanism in order to raise the bridge, and cross to the other side.
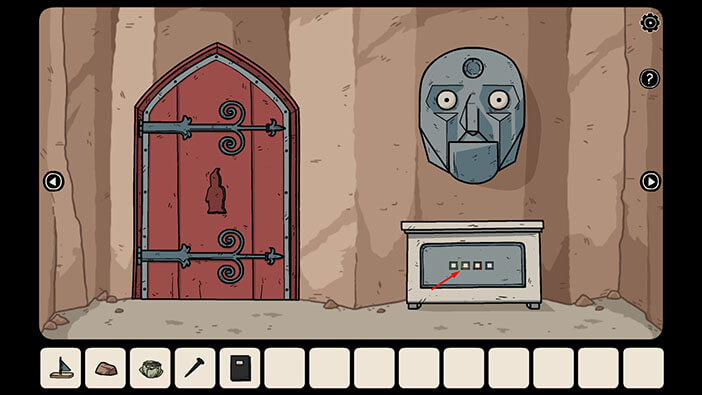
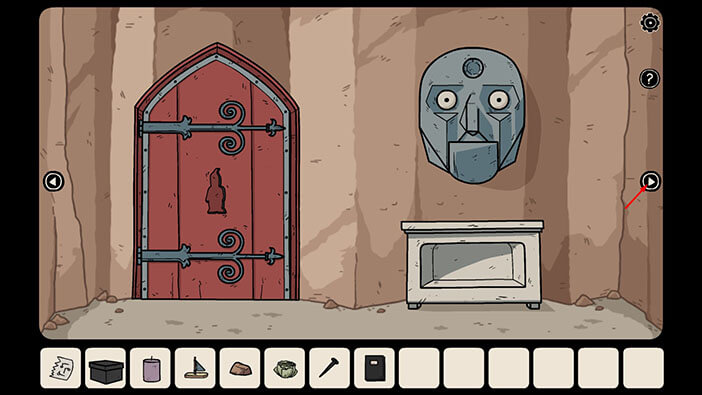
Let’s proceed to the next room on the right.
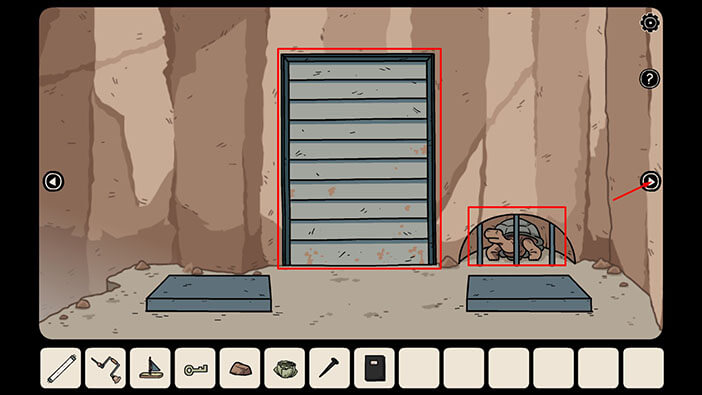
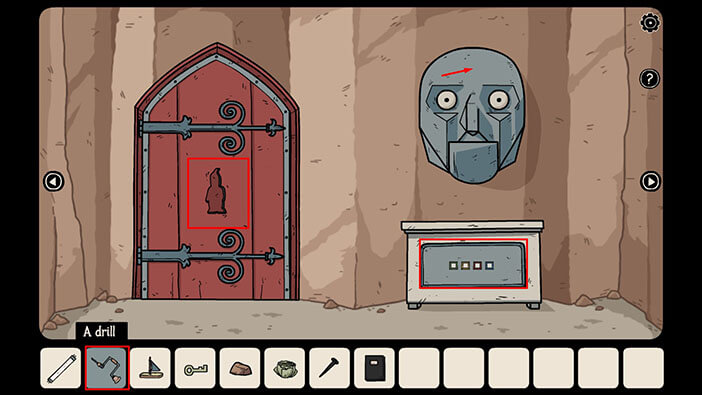
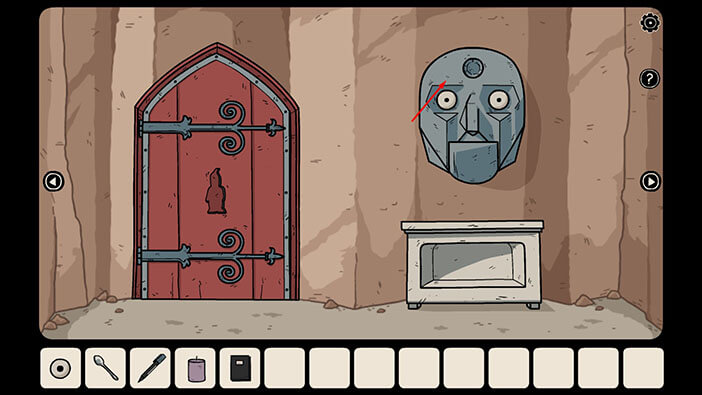
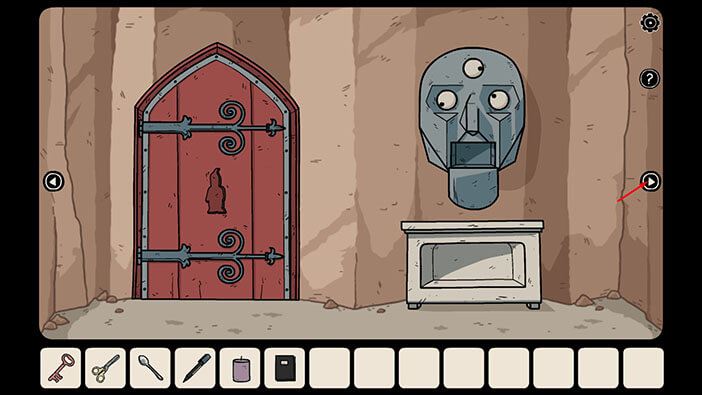
Here, we have a red door with an empty slot (this slot reminds me of a ghost figurine that we saw in the “Nowhere House”). On the cabinet on the right, we have another puzzle. We will come back to it a bit later.
In this room, we can also see a stone head, which looks like the drawing that we saw in the first room. However, the head on the drawing had a third eye on its forehead. So, select the “Drill” from the inventory and then tap on the forehead of the stone statue to drill a hole.
Well, there’s nothing else to do here, for now, so let’s proceed to the next room on the right.
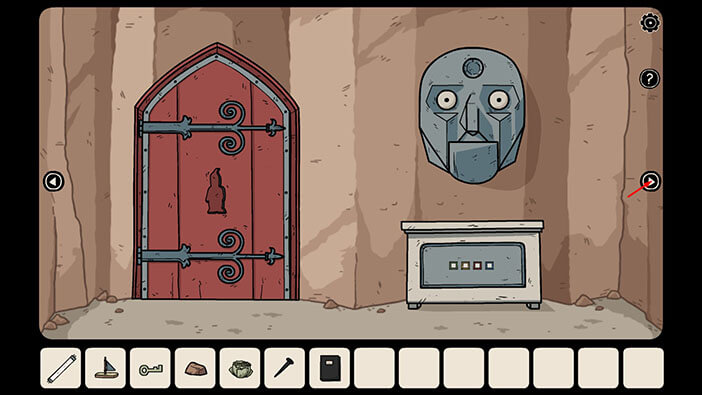
We are now back at the base of the stairs, which means that we explored the entire lower level. Let’s go back to the top floor.
Tap on the arrow in the lower-left corner to go back to the first area.
Let’s go to the first room on the right.
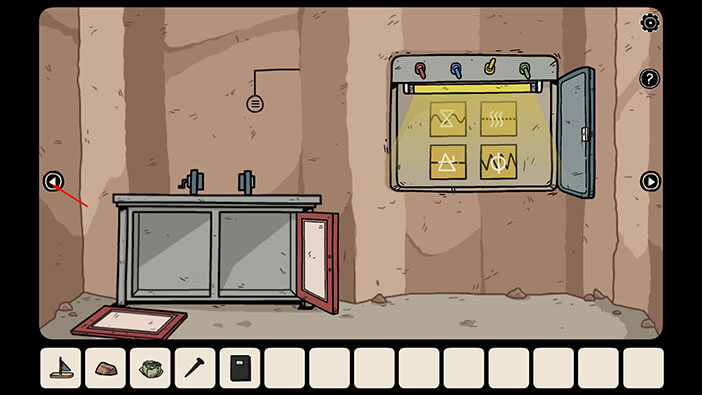
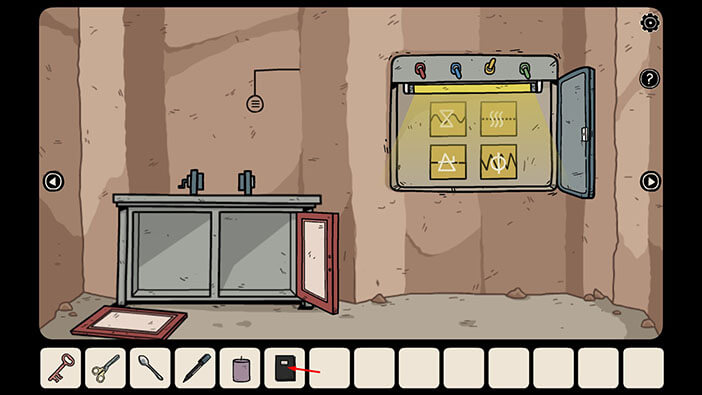
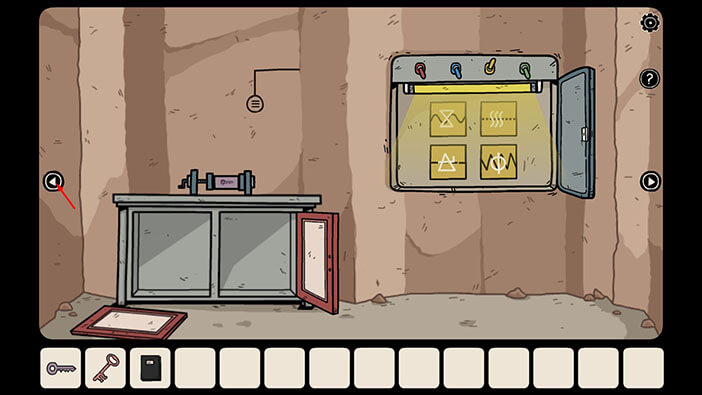
Tap on the shutter door to take a closer look.
Select the “Green Key” from the inventory and use it to unlock the panel.
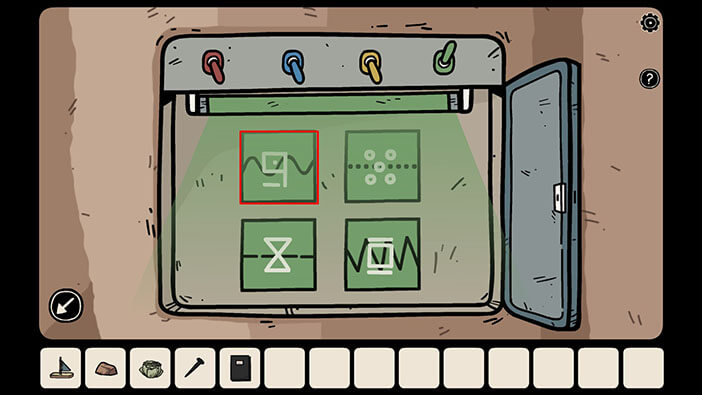
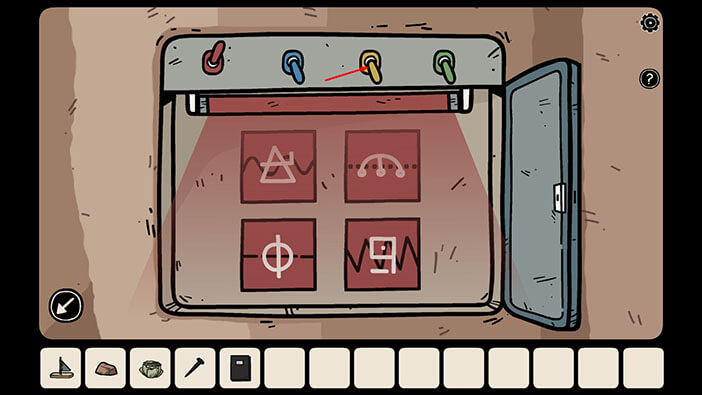
Next, select the “Fluorescent Tube” from the inventory and insert it into the empty slot above the white squares.

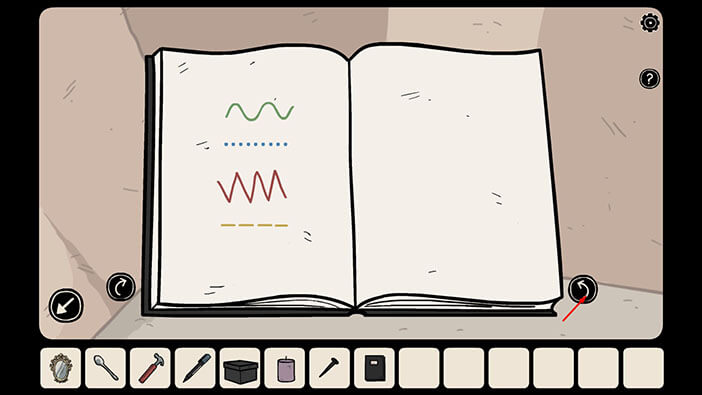
As soon as we installed the “Fluorescent Tube”, some shapes appeared on the four pieces of paper. Let’s check out the “Back Book” in our inventory.
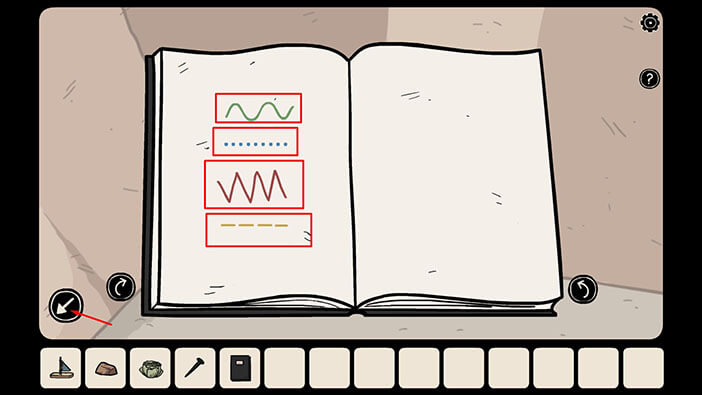
Tap on the arrow in the lower-left corner of the screen to open the book.
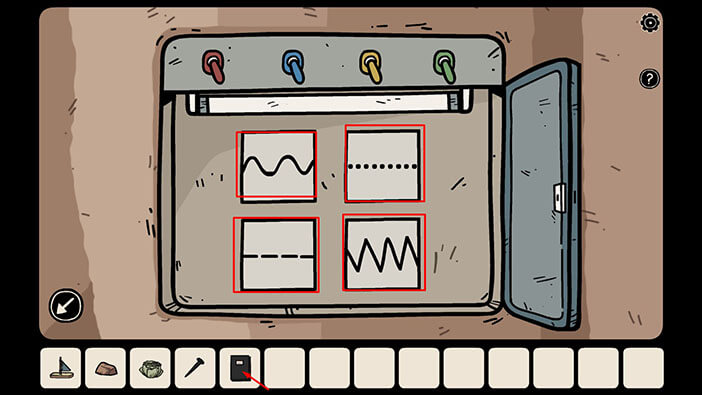
On the first page of the book, we can see the shapes that match the ones on the four pieces of paper.
Let’s memorize/write down this information. Starting from top to bottom we have,
First = Green wavy line
Second = Blue Dotted line
Third = Red zig-zag line
Fourth = Yellow Dashed Line
Once you’re done, tap on the arrow in the lower-left corner to go back.
NOTE: In your game, the color of the lines might be different because this is one of the dynamic puzzles that are randomized every time you start the new game. However, you can still solve this puzzle by using the same logic.
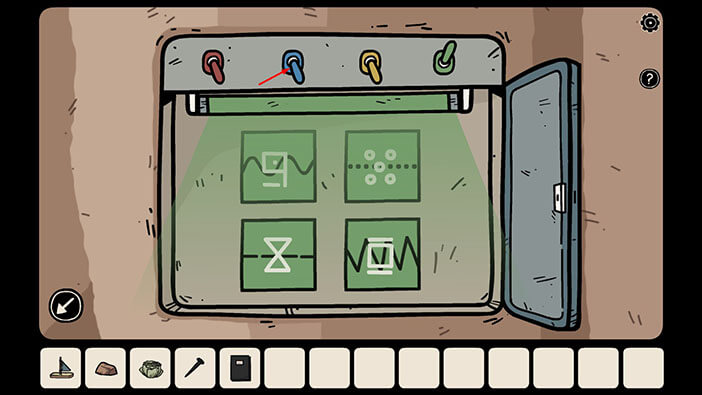
Ok, first we have the Green Wavy Line. Since the line is green, let’s tap on the green switch.
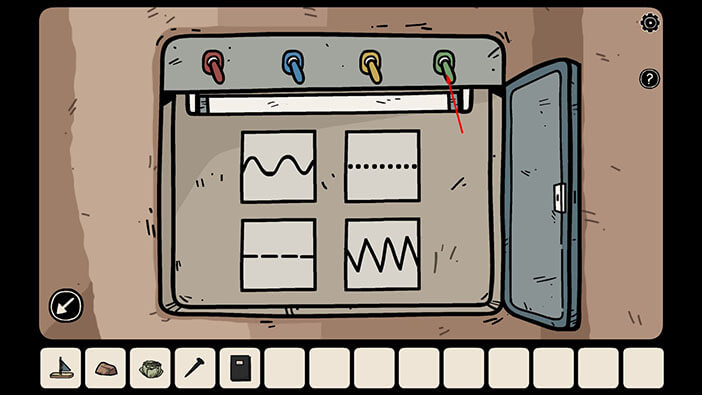
As soon as we turn on the green light, the symbol that looks like the number 9 will appear on the piece of paper with a wavy line. This shape is a part of the solution for the next puzzle. So, let’s write it down / memorize it.
Green Background = Symbol that looks like the number 9
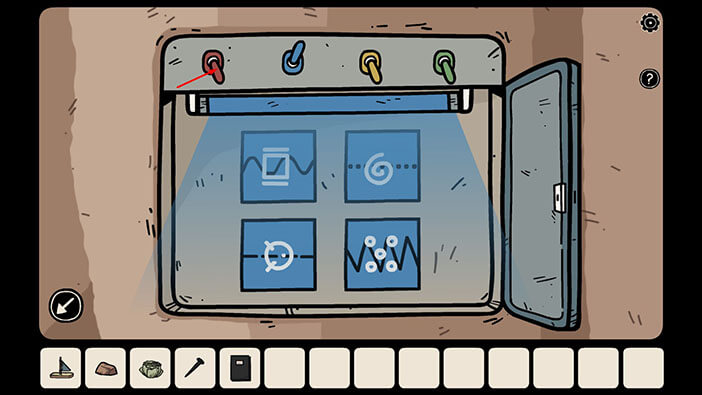
Second, we had a Blue Dotted line. As soon as we turn on the blue light, the shape that looks like Spiral Symbol will appear on the piece of paper with the dotted line. Let’s write it down / memorize it.
Blue Background = Spiral Symbol
Third, we had a Red zig-zag line. As soon as we turn on the red light, the shape that looks like the number 9 will appear on the piece of paper with a zig-zag line. Let’s write it down / memorize it.
Red Background = Symbol that looks like the number 9
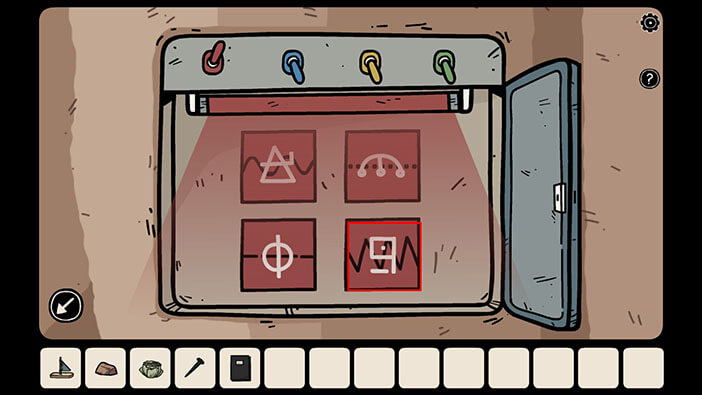

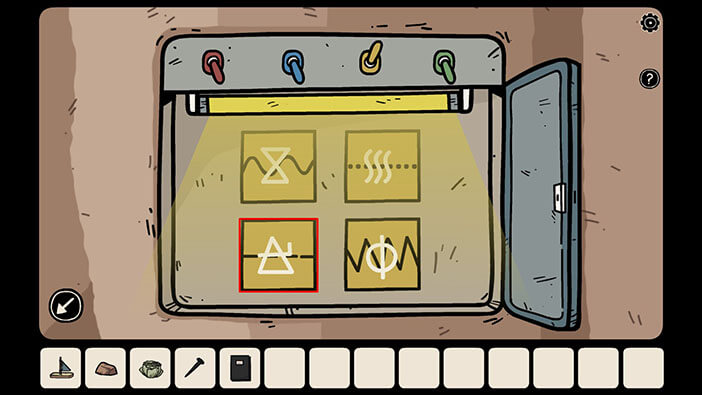
Lastly, we had a Yellow Dashed line. As soon as we turn on the yellow light, the shape that looks like a triangle with a hook will appear on the piece of paper with a dashed line. Let’s write it down / memorize it.
Yellow Background = Symbol that looks like a triangle with a hook
When we put it all together, we will get the following combination
Green Background = Symbol that looks like the number 9
Blue Background = Spiral Symbol
Red Background = Symbol that looks like the number 9
Yellow Background = Symbol that looks like a triangle with a hook
This combination of symbols and colors can be used to open the chest located in the same room as the stone head. To get to this room, we will have to go all the way down to the bottom of the cave. So, let’s go back. First, go to the first room on the left, then proceed through the hall in the wall.
NOTE: As already mentioned, you might get a different combination of colors and symbols in your game, because this is one of the randomized puzzles. However, you can find the correct solution by applying the logic that we showed in this walkthrough.

Next, go through the passage on the left.
When you get to the bottom level, the room with the stone head will be the first one on the left.

Tap on the chest below the stone head to take a closer look at it.
Let’s enter the combination that we discovered earlier. So,
Green Square = Symbol that looks like the number 9
Yellow Square = Symbol that looks like a triangle with a hook
Red Square = Symbol that looks like the number 9
Blue Square = Spiral Symbol
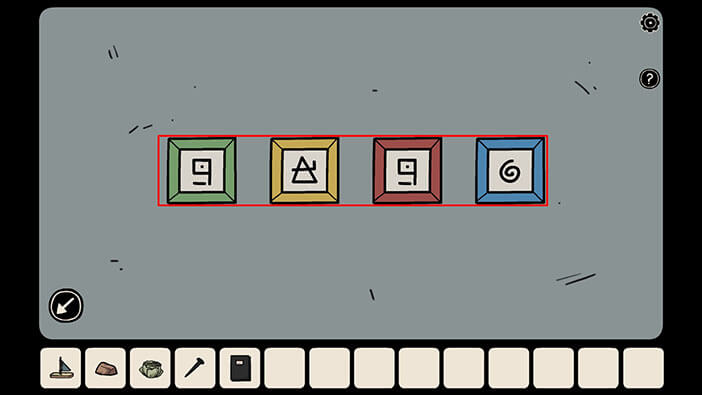
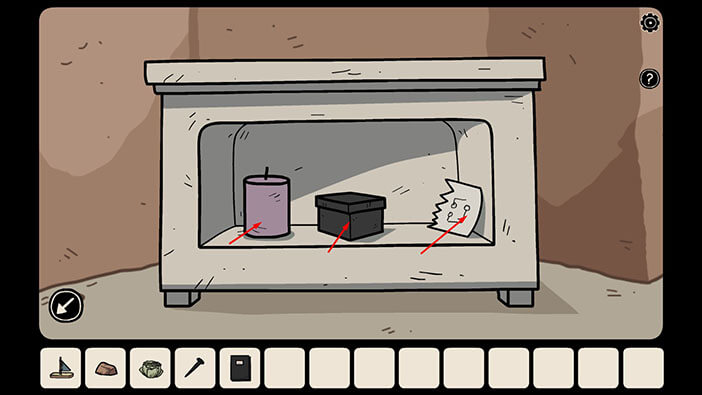
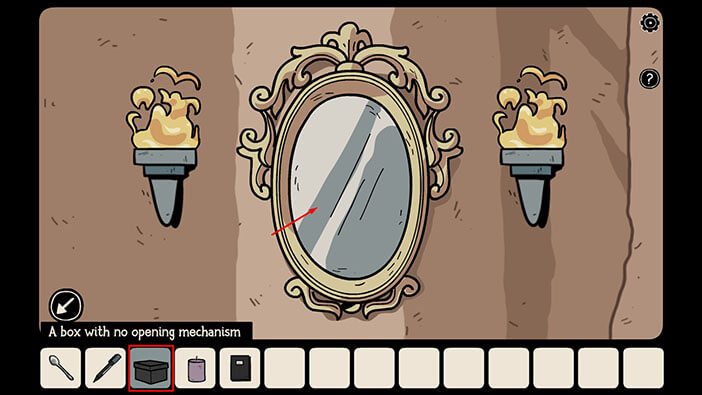
As soon as you enter the correct combination of symbols, the lid on the chest will open. Tap on the items inside to pick them up. The “Large Candle” the “Box with no opening mechanism” and the “Note with the hint” will be added to your inventory.
Ok, now, we can use the “Note with the hint” to solve the next puzzle. However, this puzzle is located in one of the rooms on the top floor, so we will have to go back…
Go to the first room on the right, then tap on the stairs to go to the upper level.
Tap on the arrow in the lower-left corner to go back to the first area of the cave.
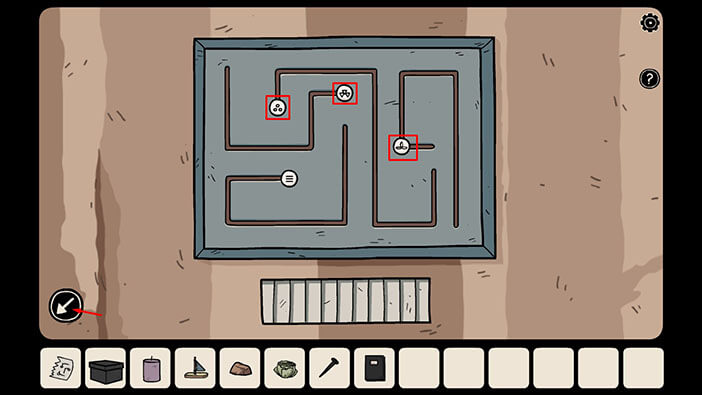
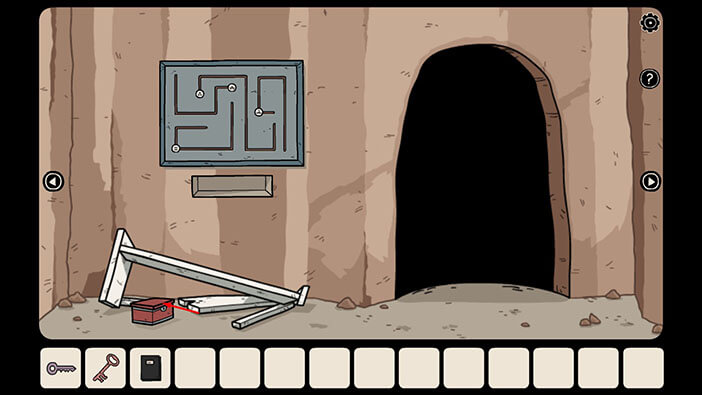
Let’s take a closer look at the puzzle on the left wall.
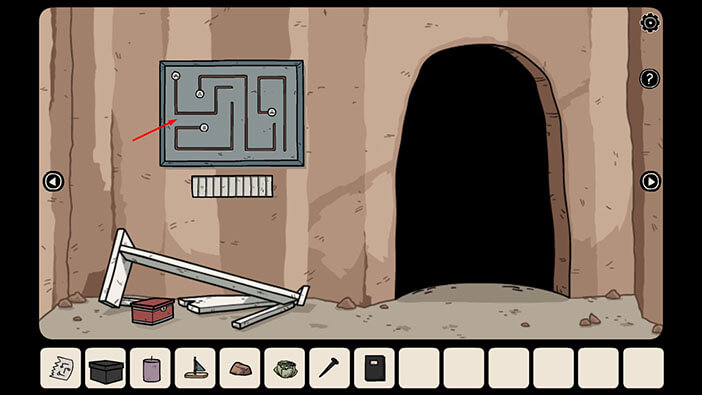
Here, we can see four white stones, and we can slide them forward/backward on the path carved into the stone.
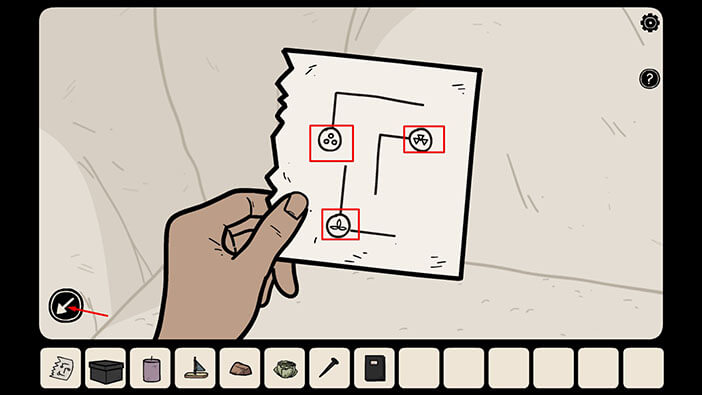
Let’s take another look at the “Note with the hint” in our inventory.
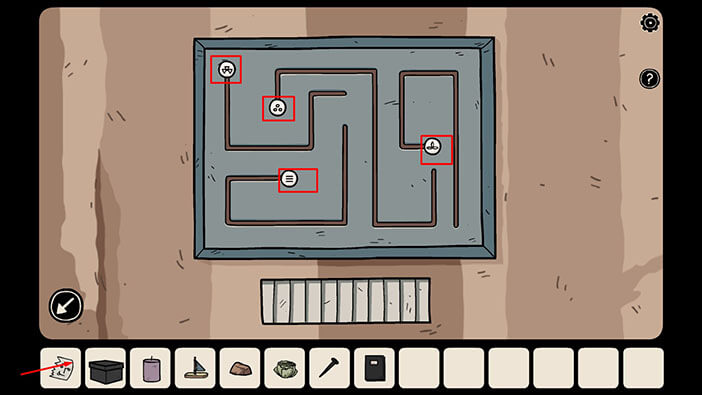
Here, we can see the stones with the matching symbols, and we can also see their position on the path.
Let’s memorize/write it down.
Stone with three circles = bottom position (the end of the line)
Stone with three leaves = Lower-left corner
Stone with three triangles = Right side
Once you’re done, tap on the arrow in the lower-left corner to go back.
NOTE: This puzzle is also randomized every time your start the new game. This means that arrangement of the stones on the board might be different in your game. But, just like with the other puzzles, you can find the correct solution by following the logic shown in this walkthrough.
Ok, let’s tap on the stones and slide them into the correct position (the position that matches the drawing on the “Note with the hint”).
First, the stone with three circles is already in the correct position.
Second, move the stone with three leaves into the lower-left corner.
Thirdly, move the stone with three triangles to the right side (the end of the path).
Once you’re done, tap on the arrow in the lower-left corner to go back.
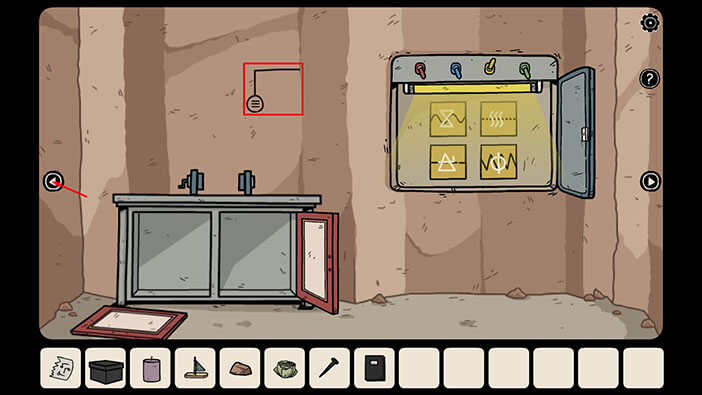
Well, we know the correct positions for three out of four stones. To find the hint for the position of the last stone, we will have to go to the next room on the right.

On the wall in this room, we can see a drawing with a hint. So, the last stone (with three horizontal lines) should be placed at the bottom position.
Let’s go back to the previous room.
Tap on the stone board to start the interaction, then slide the last stone into the correct position.
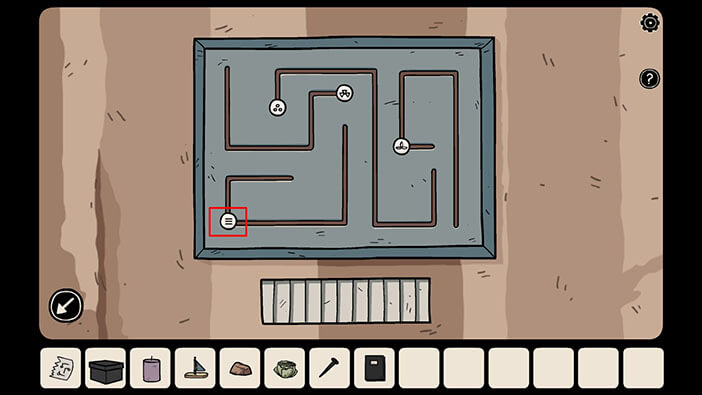
As soon as you slide the last stone into the correct position, the hidden compartment below the board will open. Tap on the items inside to pick them up.
The “Metal File” and the “Black Marker Pen” will be added to your inventory.
Ok, now, we should go back and use the “Metal File” to saw through the bars and release the turtle from this cage. Unfortunately, the room with the turtle is at the lower level, so we will have to go back, once more.
Tap on the hole in the wall.
Next, go through the passage on the left.
When you get to the bottom level, the room with the turtle will be the second one on the right.
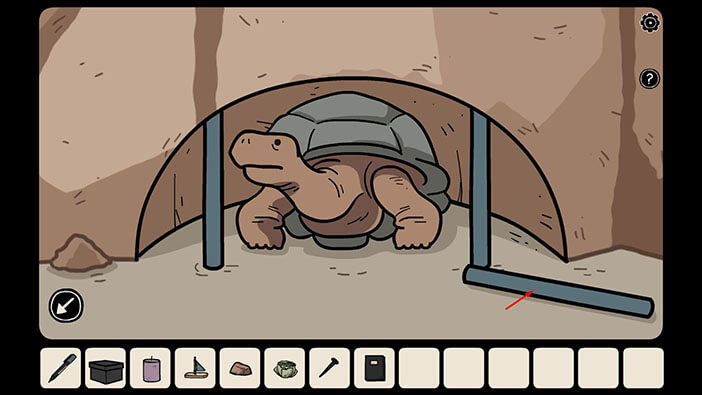
Tap on the bars to take a closer look.
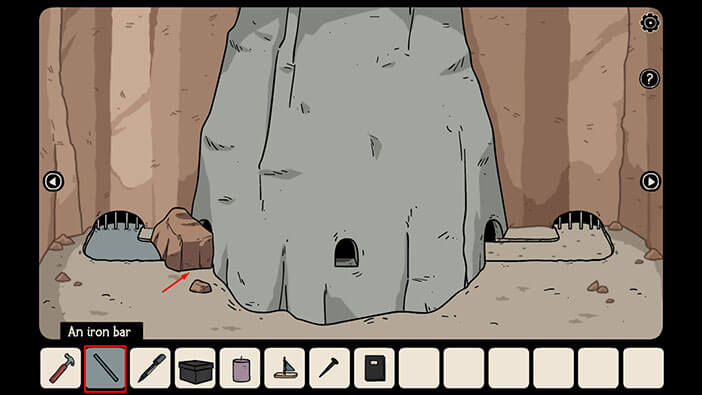
Select the “Metal File” from the inventory and use it to remove the bar.

Next, tap on the loose bar to pick it up, and the “Iron Bar” will be added to your inventory.
Next, select the “Head of Lettuce” from the inventory and place it on the pressure plate in front of the turtle.
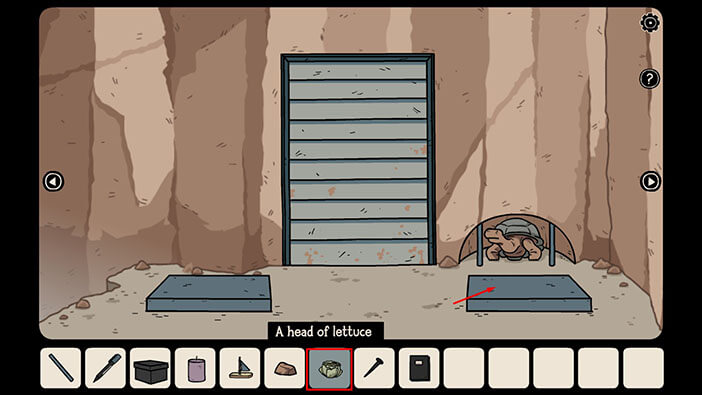
The turtle will slowly walk toward the head of the lettuce. The poor thing must be starving, so it will immediately start eating the lettuce. On the bright side, the weight of the turtle will lower the right pressure plate.
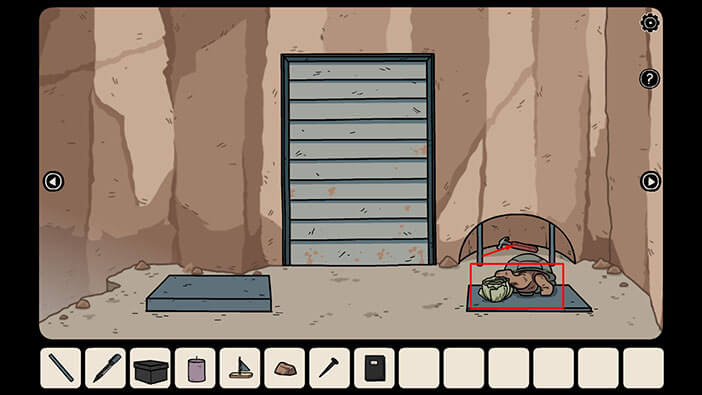
Also, after the turtle left the cage, we can see that a “Hammer” was hidden behind it, so let’s pick it up.
Tap on the left pressure plate, and Laia will step on it and lower it. With this, you will open the shutter door on the wall in front of you.
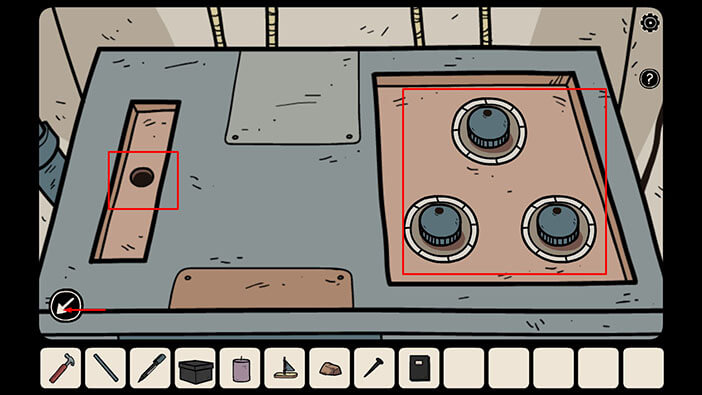
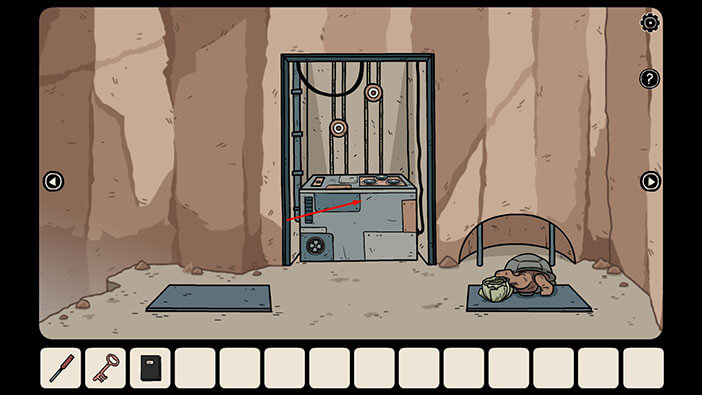
Let’s take a closer look at the mechanism behind the door.

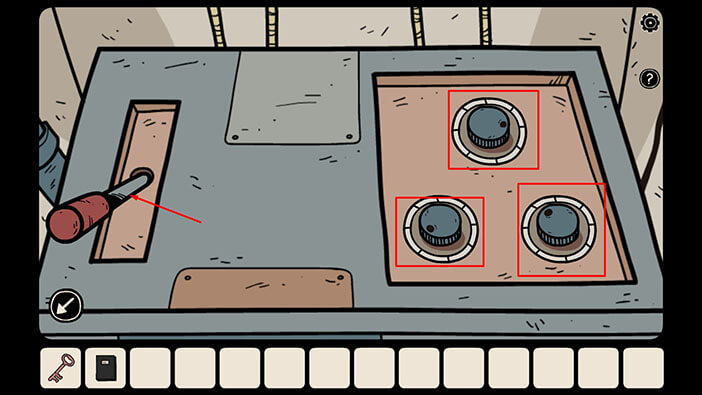
On the left, we can see an empty slot, and on the right, we can see the three dials. Obviously, we still haven’t found the missing item from the left side of the machine, and we have no idea how to operate the dials, so let’s go back.
Ok, we should now go back to the top floor, more specifically, to the room with the small stream blocked by a rock. To get there, go to the second room on the left. After that, tap on the stairs to go to the upper level.
Tap on the arrow in the lower-left corner to go back to the first area of the cave.
From here, the room of the stream is the first one on the left.
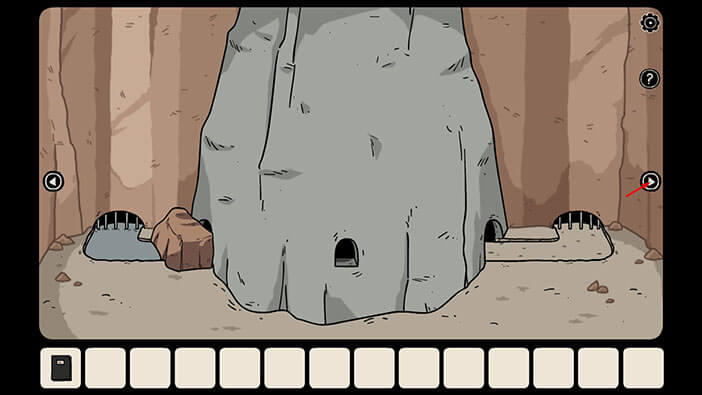
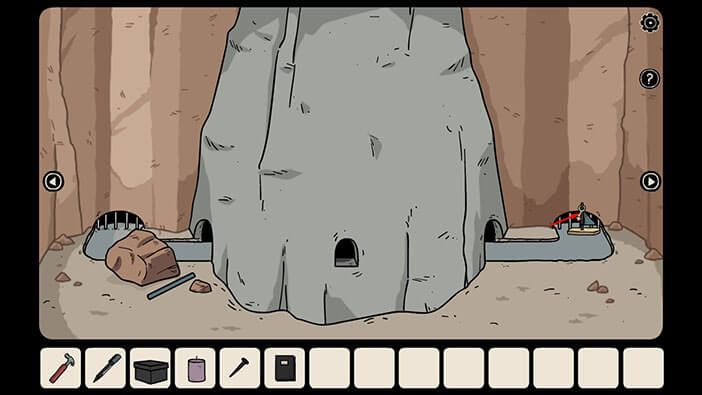
Select the “Large Rock” from the inventory and place it below the rock that is blocking the stream.
Next, select the “Iron Bar” from the inventory and place it between the two rocks. After that, use that, use the bar as a lever to move aside the rock that is blocking the stream.
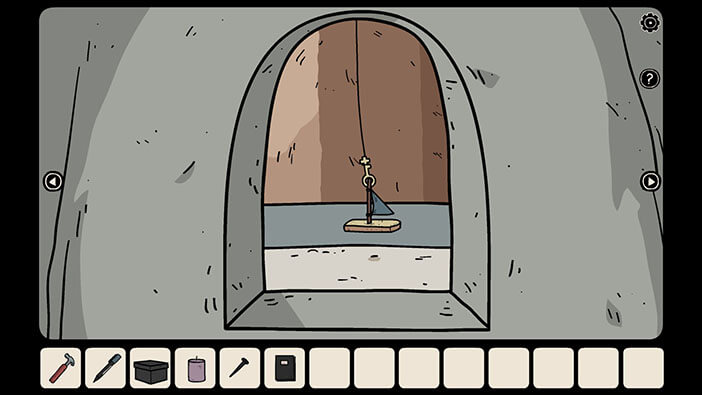
The water will start flowing through the large rock in the middle of the room, but we still weren’t able to reach the key inside it.
So, select the “Toy Boat” from the inventory and place it on the left side of the stream.
The toy boat will pick up the key, and it will float down the stream. Tap on the key to take it, and a “Yellow Key” will be added to your inventory.
Ok, now we should go to the room with the large, locked chest. Luckily, this room is on the first floor, so we don’t have to go down, again.
Go to the first room on the left.
Select the “Yellow Key” from the inventory and use it to unlock the padlock on the large chest.
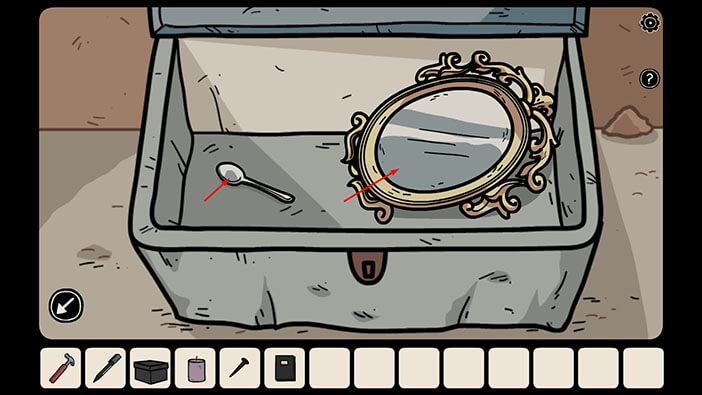
After that, tap on the chest to open it and look inside.
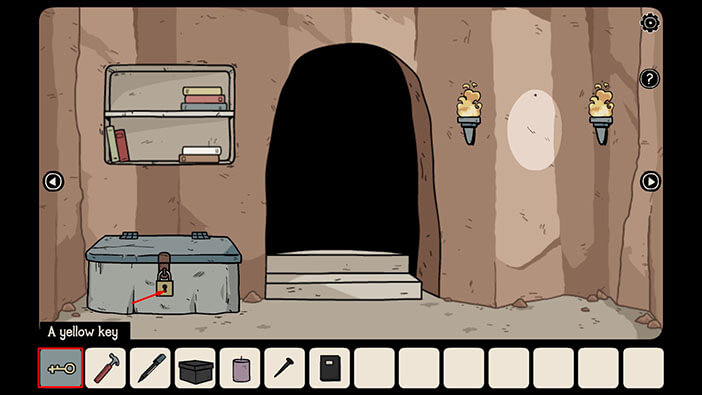
In the chest, you will find the “Spoon” and the “Mirror”. Tap on them to pick them up.
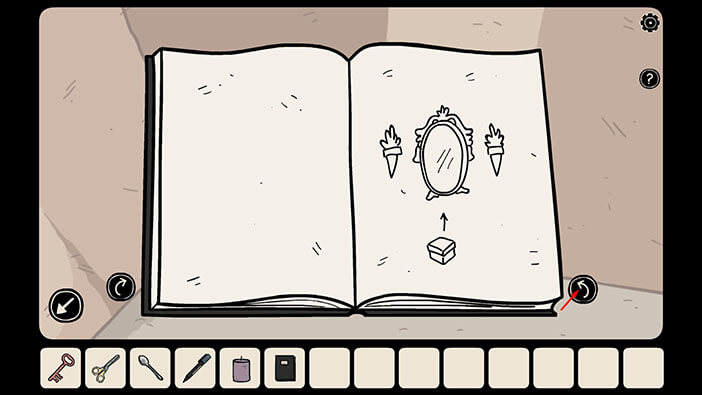
Ok, now, let’s take a look at the “Black Book” in our inventory since it contains several hints.
Tap on the arrow on the right to turn the pages, until you see a drawing of a mirror, two torches, and a small box.
If you pay attention to the drawing, you will notice two things.
First, the mirror is located between the two torches, and this position matches the spot on the wall in this room.
Second, we can see that the box can somehow interact with the mirror.
Ok, so our next task would be to hang the mirror between the torches on the wall.
Tap on the arrow in the lower-left corner of the screen to go back.

Tap on the “lighter” spot on the wall to take a closer look at it.
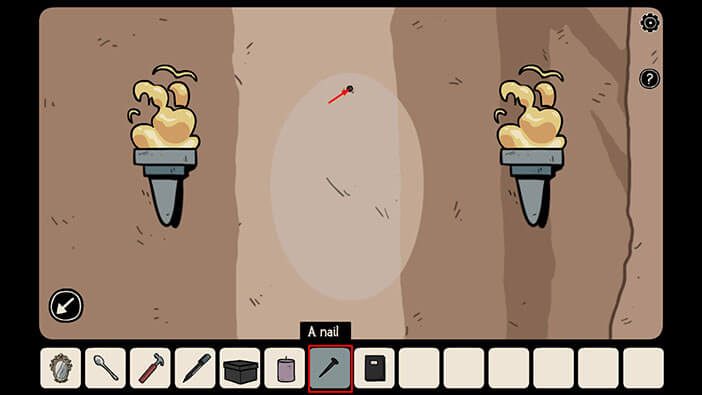
Next, select the “Nail” from the inventory and insert it into the small hole in the wall.
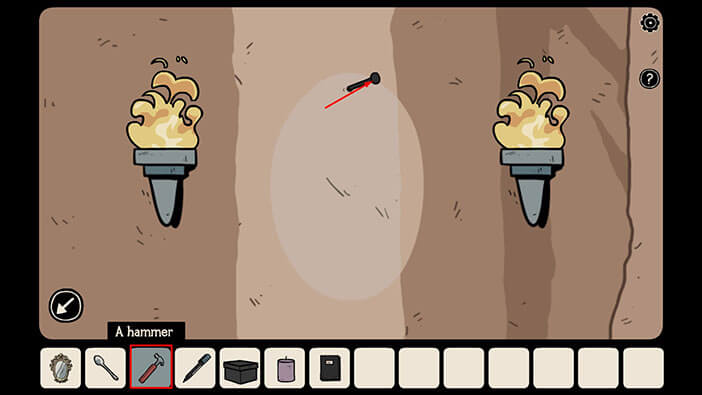
Next, select the “Hammer” from the inventory and use it to hammer the nail.
Lastly, select the “Mirror” from the inventory and hang it on the nail.
Well, the hint implies that the box can be used to somehow interact with the mirror, so let’s try that.
Select the “Box with no opening mechanism” from the inventory and tap on the mirror.
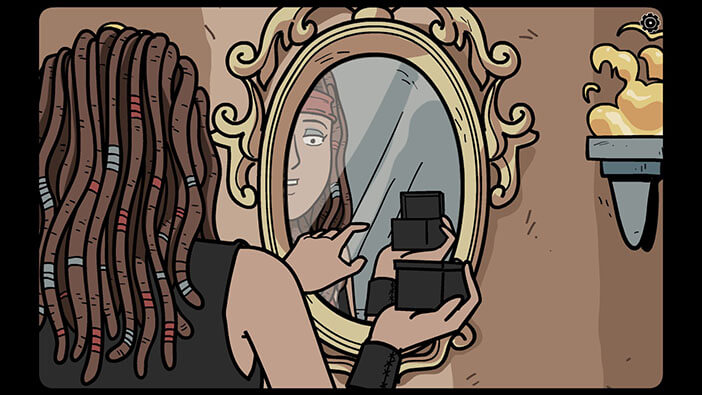
Strangely enough, when Laia looked at the mirror, she saw that the box in the reflection was open.
So, she decided to reach toward the box in the reflection and pulled out a small item.
The “Glass Eye” will be added to your inventory.
Well, previously, we drilled the slot for the third eye inside the stone head. Unfortunately, this stone head was located in the room at the lower level, so we will have to go down again.
As a side note, our character will get a very good cardio workout from going up and down the stairs, over and over again.
Let’s go. Go to the second room on the left, then tap on the hole in the wall to proceed to the next area.

Next, tap on the passage on the left to go downstairs.
When you reach the lower level, the room with the stone head will be the first one on the left.

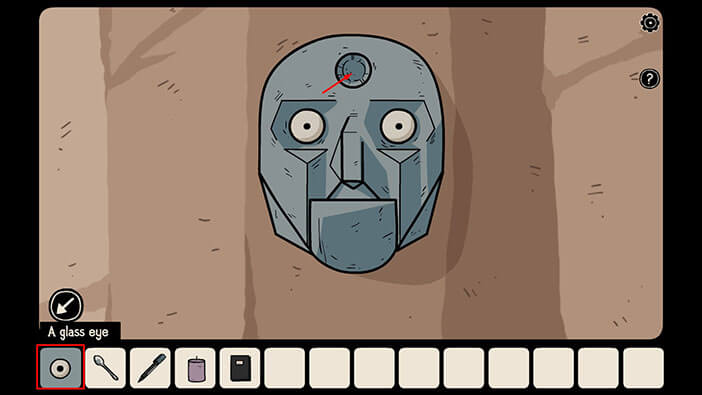
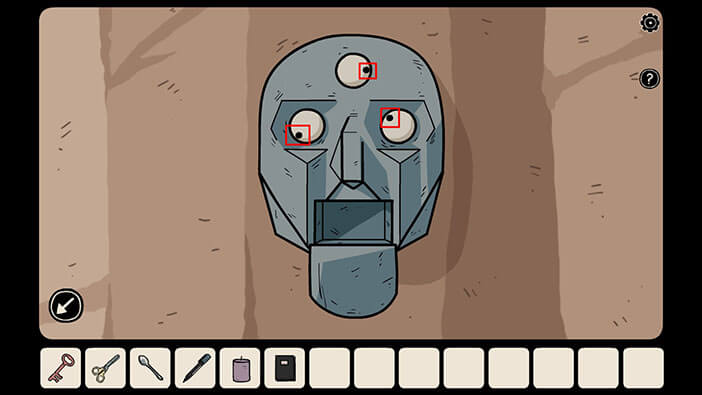
Tap on the head to take a closer look at it.
Select the “Glass Eye” from the inventory and insert it into the empty slot.
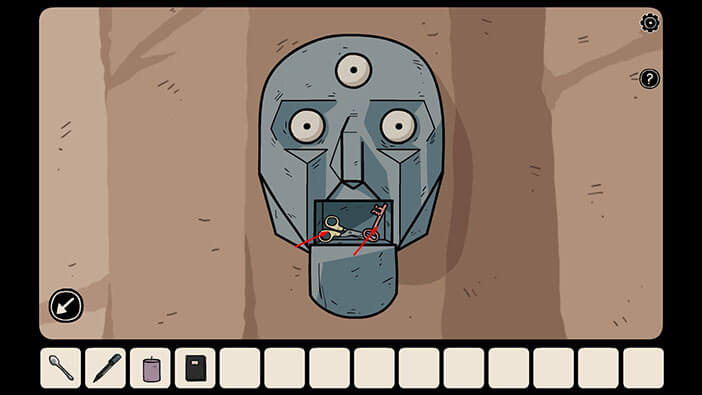
The mouth of the head will open and inside you will find the “Pink Key” and the “Pair of Scissors”. Tap on them to pick them up.
Also, the pupils of the eyes will move into very weird, and at the same time, very funny positions.
Let’s memorize/write down the position of the pupils because we will need this information in order to solve one of the following puzzles. So,
Top Eye = Pupil is pointing to the right (~3 O’clock)
Left Eye = Pupil is pointing down and left (~7 O’clock)
Right Eye = Pupil is pointing up and left (~10 O’clock)
NOTE: The pupils might be pointed in a different direction in your game because this is one of the randomized puzzles.
Ok, now we have to go back to the top floor, again.
Go to the first room on the right, then tap on the stairs to go to the top floor.
Next, tap on the arrow in the lower-left corner to go to the first area.
After that, go to the first room on the right.
Next, let’s take another look at the book with hints, the “Black Book” in our inventory.
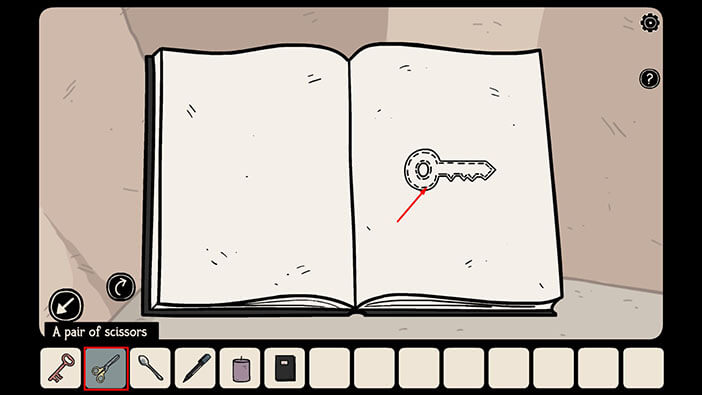
Tap on the arrow in the lower right corner of the book until you get to the last page.
On the last page, we can see the drawing of the key. We will use this drawing to make the real key, by carving it out of the candle. But I am getting a bit too far ahead.
First, select the scissors from the inventory and use them to cut out the “Key shaped piece of paper” (which will be added to your inventory).
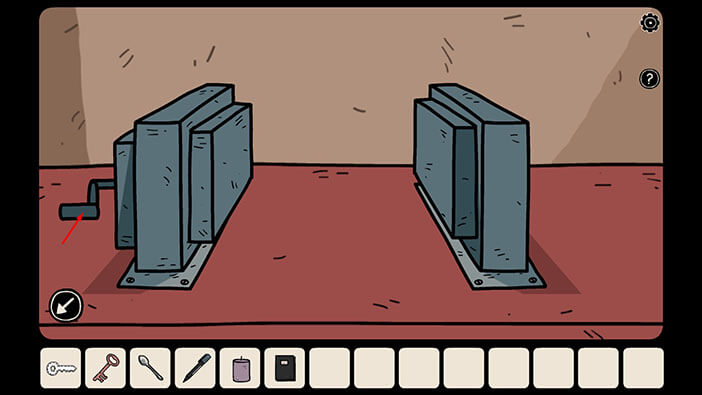
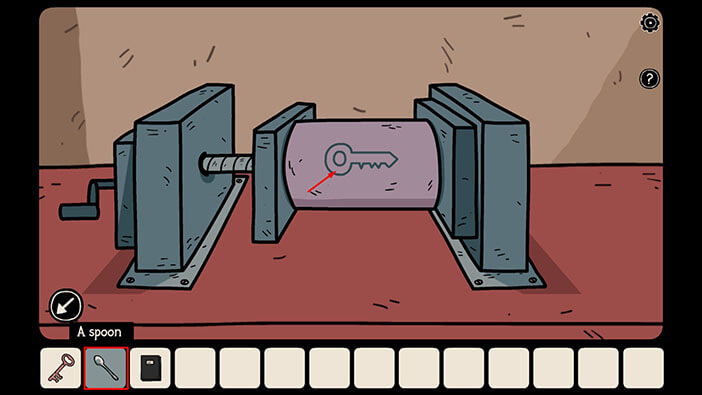
Tap on the holding tool, located on the cabinet in front of you, to take a closer look.
After that, tap on the handle on the left side of the tool to operate it.
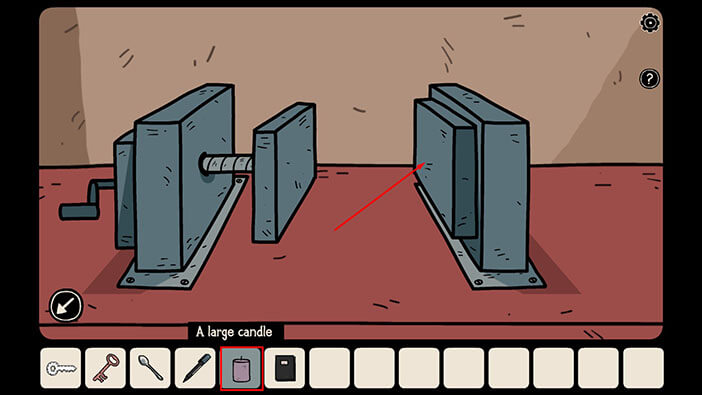
Next, select the “Candle” from the inventory and place it into the holding tool.
Next, select the “Key shaped piece of paper” from the inventory and place it on the candle.

Next, select the “Black Marker Pen” from the inventory and use it to draw the outlines of the key.
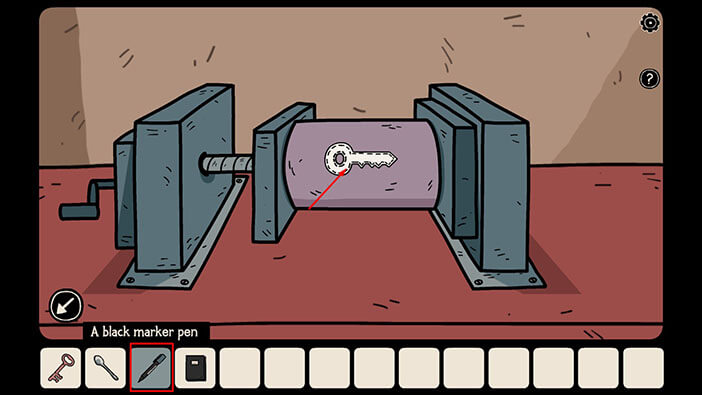
Finally, select the “Spoon” from the inventory and tap on the candle. Laia will use the spoon to carve out the key.
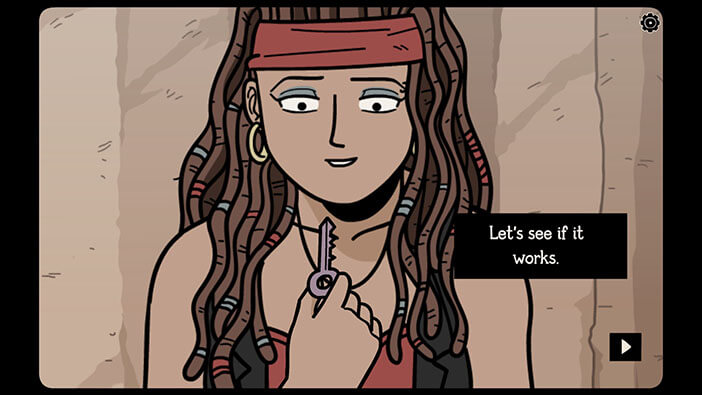
The “Key made from wax” will be added to your inventory.
Ok, we will use this key to unlock the small red box that we saw previously. The box is located in the first room on the left, so let’s head there.
Tap on the box to take a closer look at it.
After that, select the “Key made from wax” from the inventory and use it to unlock the box.

Tap on the box to open it, and inside you will find the “Lever”. Tap on it to pick it up.
The lever is the last part that we need in order to operate the mechanism that controls the lowering and raising of the bridge. Well, as you might remember, this mechanism is located in the room at the lower level, so we will have to do some walking, once more.
Tap on the hole in the wall to go to the next area.
After that, tap on the passage on the left to go to the lower level.
Once you reach the lower level, the room with the machine will be the second one on the right.
Tap on the mechanism to examine it.
Select the “Lever” from the inventory and place it into the empty slot on the left.

The black dot on the dials (on the right) should match the position of the pupils of the eyes we the stone head. We already wrote down the position of the pupils, but if you need a reminder, you can find the stone head in the first room on the right.
So, we had
Top Eye = Pupil is pointing to the right (~3 O’clock) – So, turn the black dot on the Top dial to the right position
Left Eye = Pupil is pointing down and left (~7 O’clock) – So, turn the black dot on the Left dial to the down and left position
Right Eye = Pupil is pointing up and left (~10 O’clock) – So, turn the black dot on the Right dial to the up and left position
Tap on the lever on the left, once you set up the dials.
NOTE: As already mentioned, the pupils might be pointing in a different direction in your game, because this is one of the randomized puzzles.
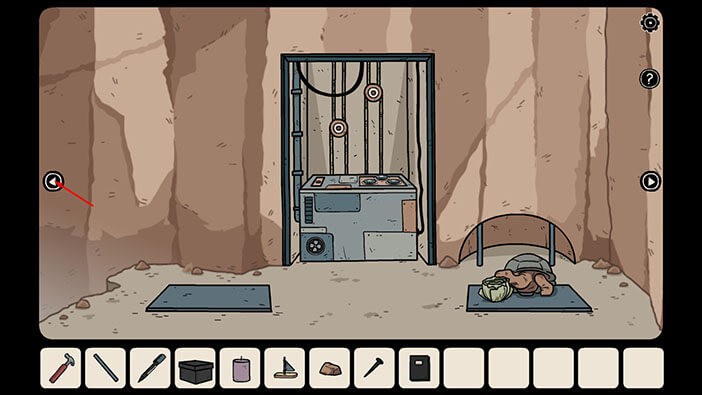
Well, we managed to raise the bridge.
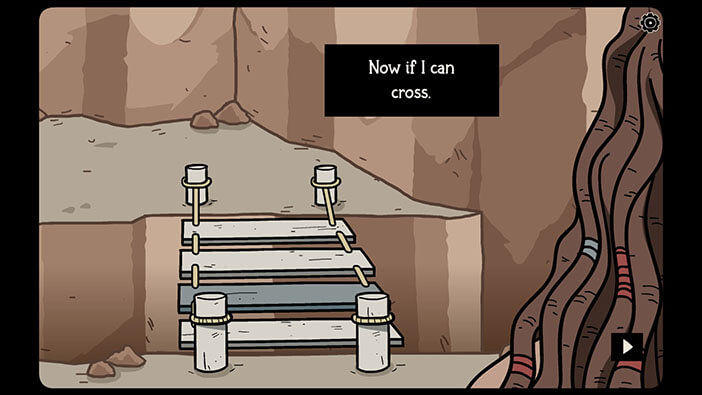
However, we will have to end the first part of our walkthrough here. Join us in the second part of the walkthrough, which will start by crossing the bridge, and exploring the new area of the cave.
Thank you for reading.