Escape Room The Mist Chapter IV Part 2
Hello everyone and welcome to the second part of our walkthrough for Chapter 4 of “Escape Room The Mist.” At the end of the previous part, we picked up the skull and were teleported back into the first room.
Tap on the second floor to explore it. After that, tap on the small table on the right to take a closer look at it.
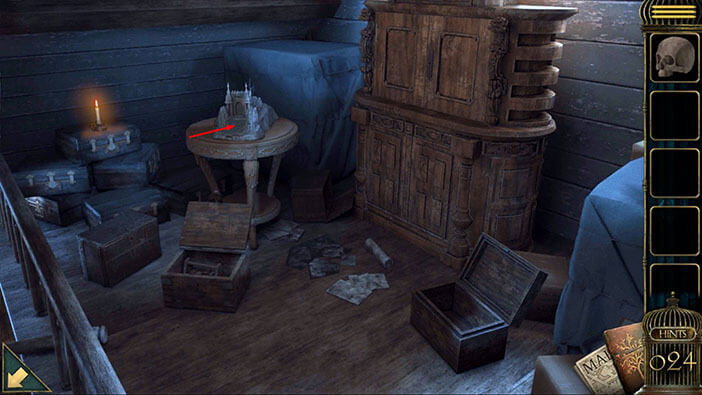
Select the “Skull” from the inventory and place it above the castle gate. Once you do that, the gate will open, so tap on the gate to proceed into the castle.
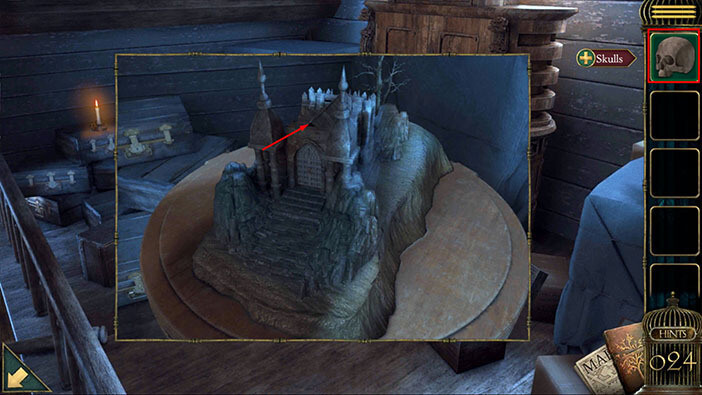
As you enter the castle, you will see a message “Daddy, is that you picking me up?”. So, looks like this truly is Alice’s skull.
Let’s explore the castle. Tap on the coffin on the left to take a closer look at it, then tap on the candle to reveal another part of the story.
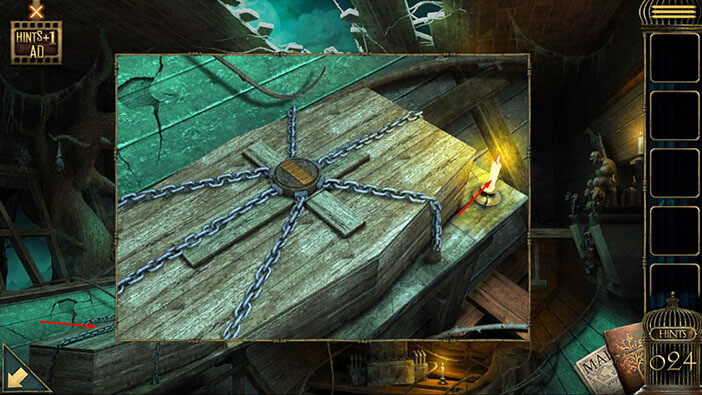
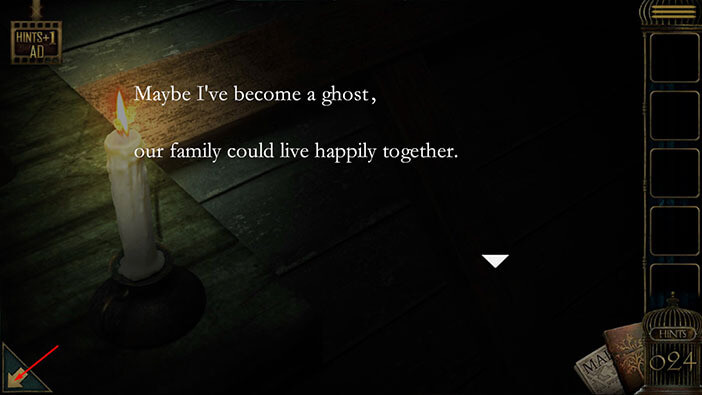
Alice thinks that she became a ghost and that her family could now live a happy life.
Tap on the arrow in the lower left corner to go back.
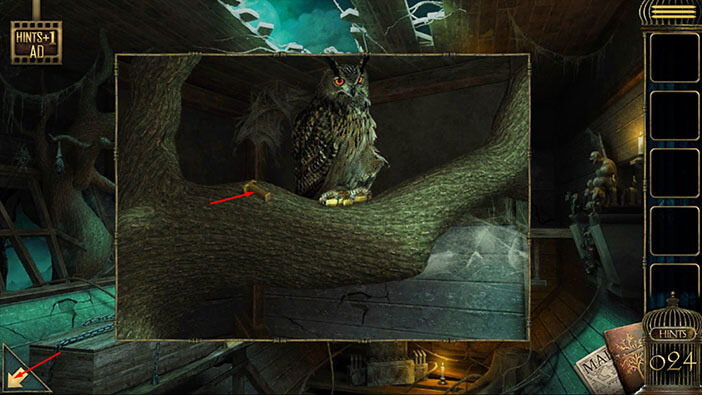
Next, tap on the owl on the tree on the left to take a closer look at it.
You will notice a letter “T” just to the left of the owl, so tap on it to pick it up. Also, you will notice that the owl is holding something in its claws, and we will have to find a way to take it away from the owl. We will come back to it a bit later.
For now, tap on the arrow in the lower left corner to go back.
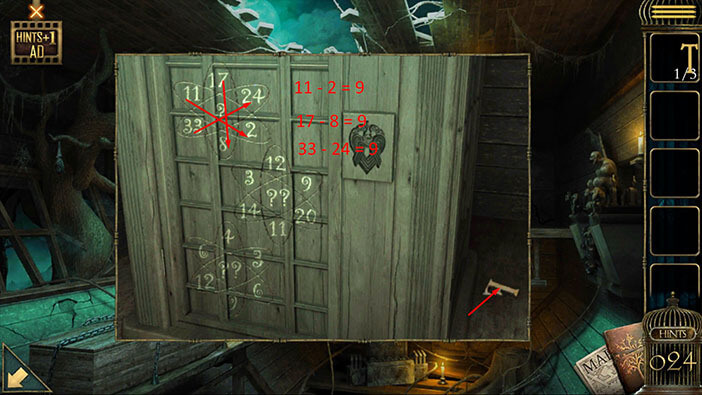
Next, tap on the door to take a closer look at it. On the right, you will see the “Letter F”. Tap on it to pick it up.
After that, we should take a look at the numbers on the left. At the top, we will see three pairs of numbers and the question mark in the middle. The question mark represents a hidden mathematical operation, and we have to figure out which one. Let’s look at the three pairs of numbers, and presume that the symbol ? = -. Here, we have,
11 – 2 = 9.
17 -8 = 9.
33-24 = 9.
The result of all three pairs would be 9. So, number 9 is our first number. Memorize/write down this number.
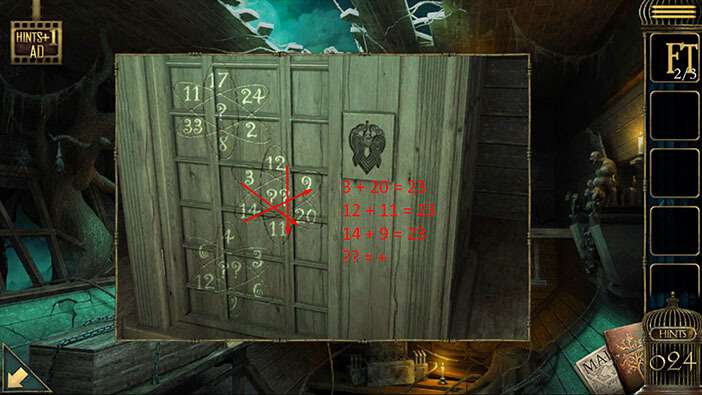
Next, let’s take a look at the three pairs of numbers in the middle. Let’s look at the three pairs of numbers, and presume that the symbols ?? = +. Here, we have,
3 + 2 = 23.
12 + 11 = 23.
14 + 9 = 23.
The result of all three pairs would be 23. So, number 23 is our second number. Memorize/write down this number.
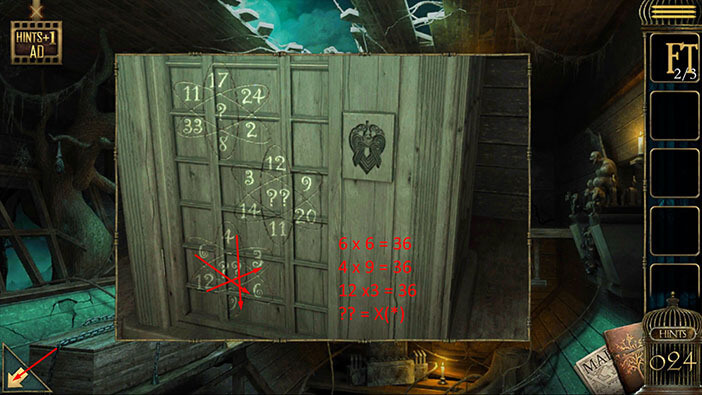
Lastly, let’s take a look at the three pairs of numbers at the bottom. Let’s look at the pair of numbers, and presume that the symbols ?? = X (*). Here, we have,
6 x 6 = 36.
4 x 9 = 36.
12 x 3 = 36.
The result of all three pairs would be 36. So, number 36 is our third number. When we put all the numbers together “92336”. Memorize/ write down this number because it represents the solution for the next puzzle.
Once you’re done, tap on the arrow in the lower left corner to go back.
Next, tap on the coffin to take a closer look at it. After that, tap on the lock to start the interaction.
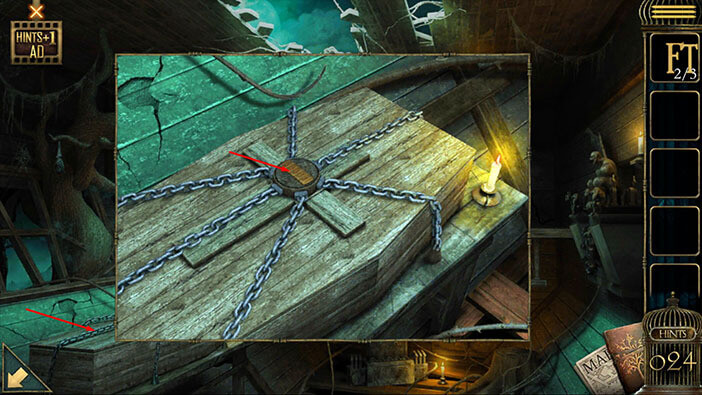
Enter the code “92336” that we discovered previously.
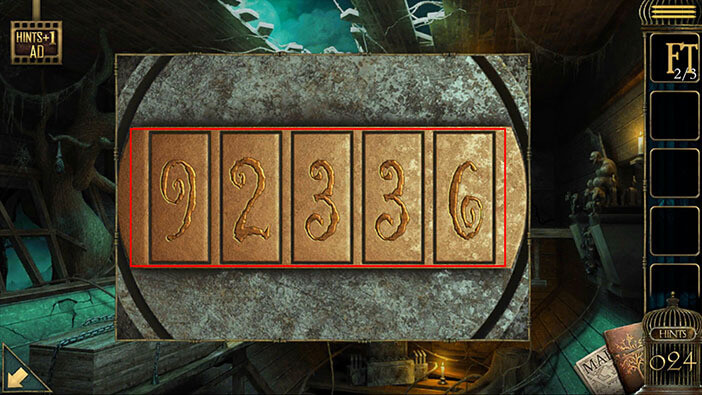
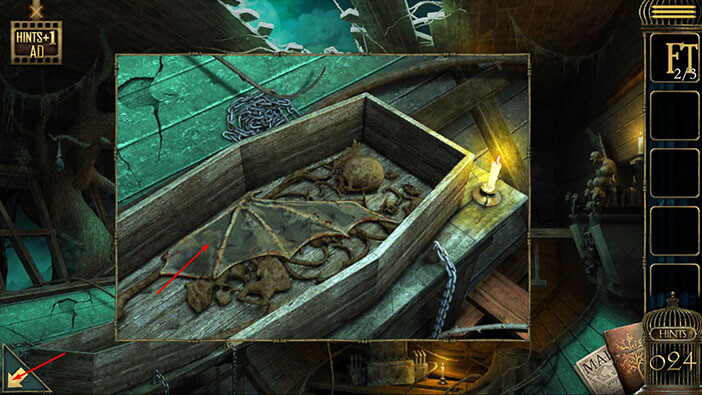
You will unlock the coffin as soon as you enter the correct code, and inside you will find “Devil’s Wings”. Tap on it to pick it up.
After that, tap on the arrow in the lower left corner to go back.
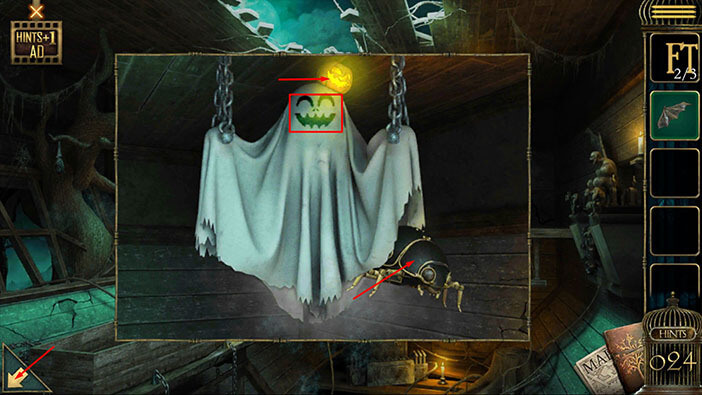
Next, tap on the ghost in the top right corner of the room to take a closer look at it.
Tap on the pumpkin, above the ghost’s head, to “activate” it. The ghost’s face will change and it will show you a mirror. Tap on the mirror to drop it down.

Tap again on the pumpkin, above the ghost’s head, to “activate” it. The ghost’s face will change and it will show you a stethoscope. Tap on the stethoscope to drop it down.

Tap again on the pumpkin, above the ghost’s head, to “activate” it. The ghost’s face will change to a smiley face and it will show you a “Mechanical Ladybird”. Tap on the “Mechanical Ladybird” and our character will pick it up.
After that, tap on the arrow in the lower left corner to go back.
Next, tap on the statue of the devil on the right to take a closer look at it.
You will notice that the statue only has one wing. So, select the “Devil’s wing” from the inventory and attach it to the statue.
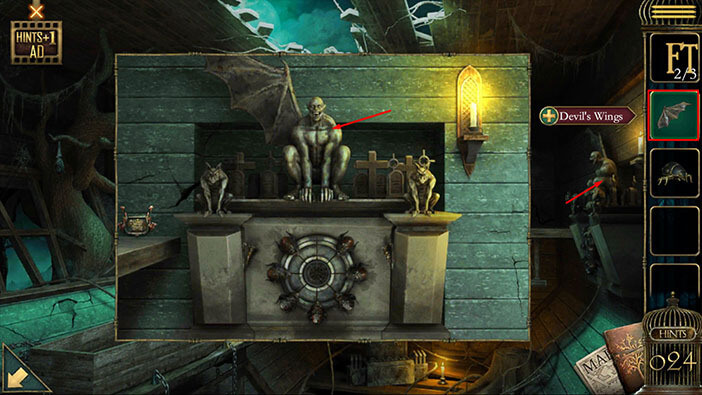
The statue’s mouth will open as soon as you attach the wing, and inside you will find a “Letter R”. Tap on it to pick it up.
After that, tap once on the arrow in the lower left corner to go back.
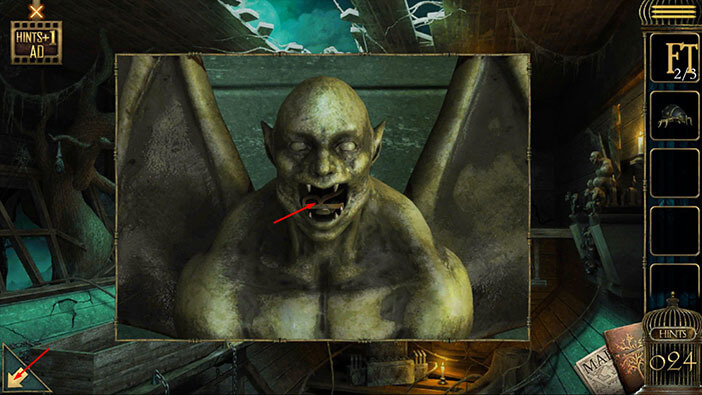
To the left of the statue, you will notice the fourth “Family badge piece (Alice)”. Tap on it to pick it up.
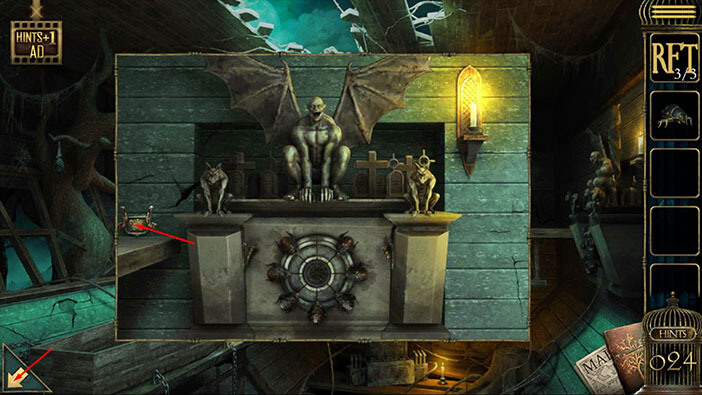
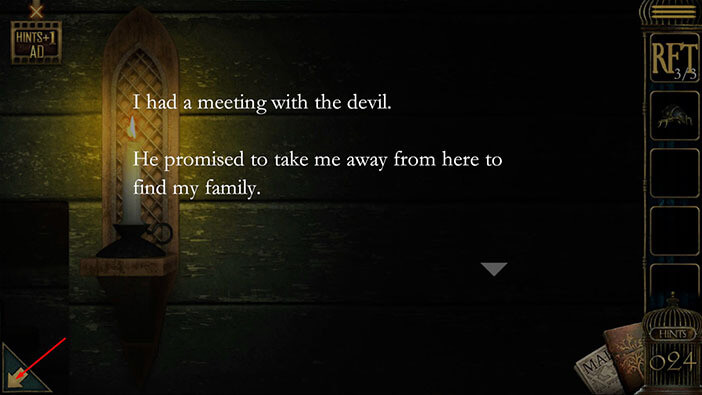
Next, tap on the candle located to the right of the statue to reveal another part of the story.
Here, we will find out that Alice made a deal with the devil who promised that he will take her to her family.
Tap on the arrow in the lower left corner to go back.
Next, tap on the gravestone on the lower floor to take a closer look at it.
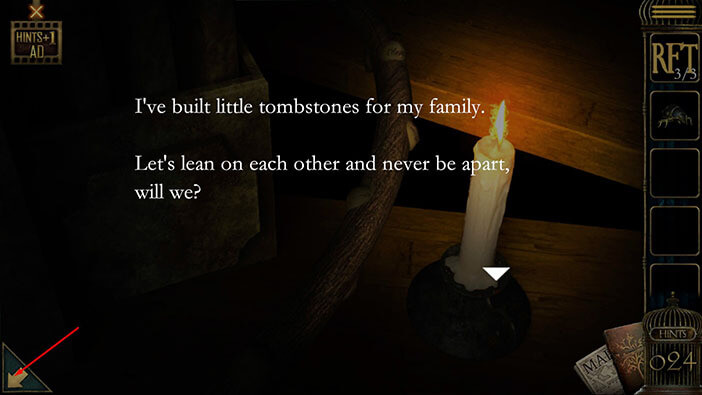
Before we proceed to the next puzzle, let’s tap on the candle on the right to reveal another part of the story.
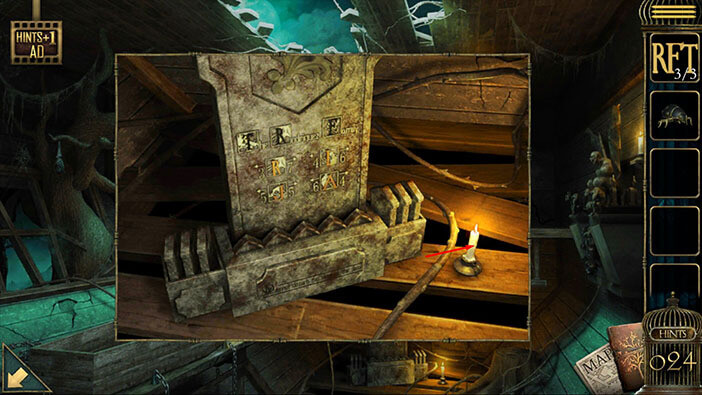
It seems Alice built these little tombstones for her family. Well, that’s just creepy.
Tap on the arrow in the lower left corner to go back.
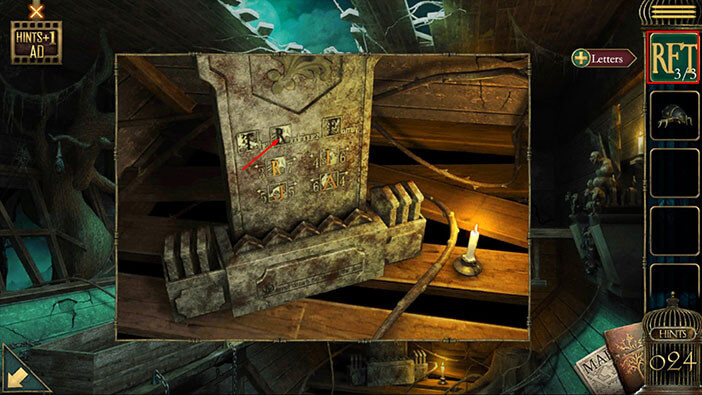
You will notice four letters on the tombstone, “R, I, J, and A”. However, three letters at the top are missing. So, select the three “Letters” from the inventory and insert them into the empty slot.
A new set of letters will appear at the bottom of the tombstone, as soon as you insert the missing letters. Tap on the tombstone to examine it.
Here, we can see that we will need to discover a five-letter password in order to solve this puzzle. If you look at the letters at the bottom, you will notice that they are inside the five small tombstones. Also, you will notice three different tombstones (without letters) on each side of these five tombstones.
Next, if we look at the four letters in the middle of the tombstone, we will notice the left and right arrows and two numbers next to each letter. Let’s examine the first letter, the letter “R”.
On the left side of the letter “R,” we can see the arrow pointing left and below it the number 3. On the right side of the letter “R,” we can see the arrow pointing right and below it the number 7.
If we count all the tombstones at the bottom (including the ones on the side), you will notice that there are eleven of them. The numbers next to the letter “R” actually describe the correct position.
So, there should be 3 tombstones left of the letter “R” and seven tombstones right of the letter “R”. Let’s place this letter in the correct position. Select the letter “R” then tap on the letter “A” to swap their positions.
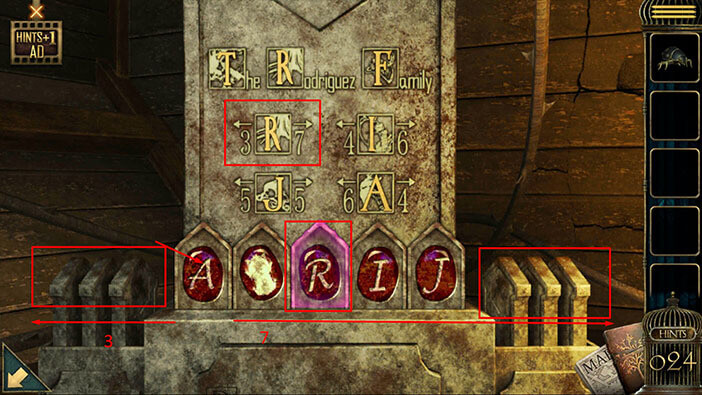
Next, let’s look at the letter “I”. On the left side of the letter “I” we can see the arrow pointing left and below it the number 4. On the right side of the letter “I” we can see the arrow pointing right and below it the number 6.
So, there should be 4 tombstones on the left side of the letter “I” and 6 tombstones on the right side of the letter “I”. Let’s place this letter in the correct position. Select the letter “I” then tap on the “Unknown” letter to swap their positions.
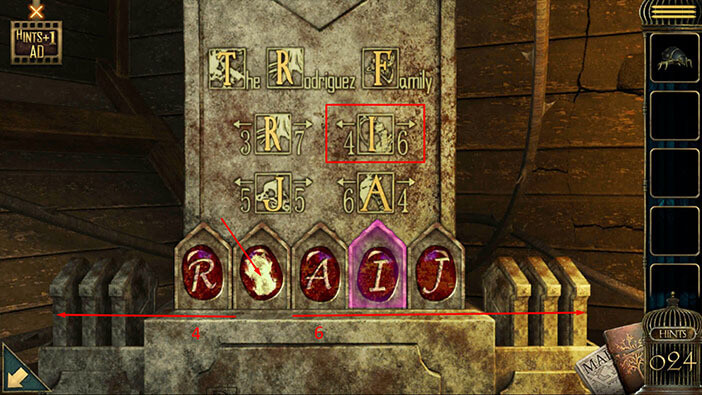
Next, let’s look at the letter “J”. On the left side of the letter “J,” we can see the arrow pointing left and below it the number 5. On the right side of the letter “J,” we can see the arrow pointing right and below it the number 5.
So, there should be 5 tombstones on the left side of the letter “J” and 5 tombstones on the right side of the letter “J”. Let’s place this letter in the correct position. Select the letter “J” then tap on the letter “A” to swap their positions.
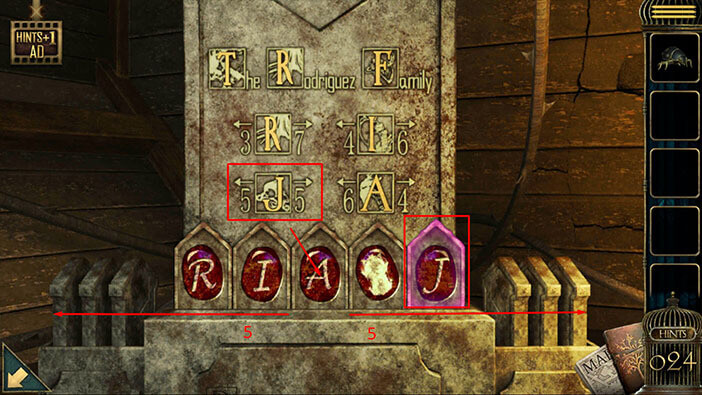
Lastly, let’s look at the letter “A”. On the left side of the letter “A,” we can see the arrow pointing left and below it the number 6. On the right side of the letter “A,” we can see the arrow pointing right and below it the number 4.
So, there should be 6 tombstones on the left side of the letter “A” and 4 tombstones on the right side of the letter “A”. Let’s place this letter in the correct position. Select the letter “A” then tap on the “Unknown” letter to swap their positions.
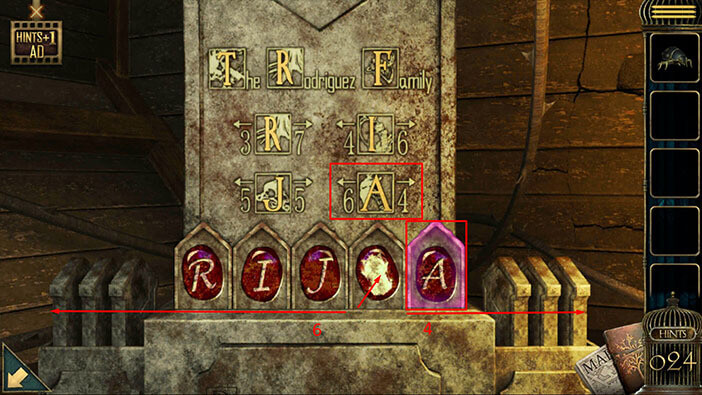
The hidden compartment at the bottom of the tombstone will open as soon as you place the letters in the correct order, and inside you will find “Devil’s Head”. Tap on it to pick it up.
After that, tap on the arrow in the lower left corner to go back.
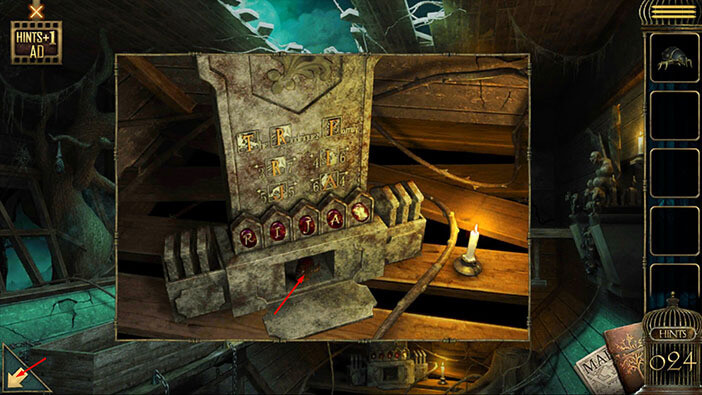
Let’s go back to the Devil’s statue on the right.
Below the statue, you will notice seven heads arranged around the circle, but the head number eight is missing. So, select the “Devil’s head” from the inventory and insert it into the empty slot.
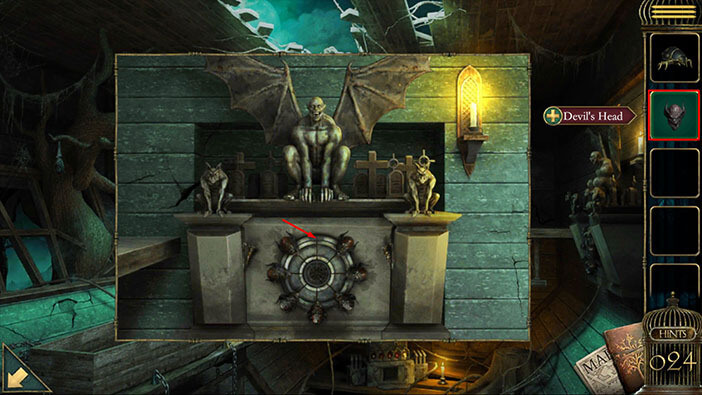
Here, we have another puzzle. On the outer circle, you will notice 8 “Devil’s Heads” and you will also notice that the eyes of the head at the 12 o’clock position are glowing red. On the inner circle, you will notice seven black triangles – the triangle below the head with the glowing eyes is missing.
Our task is to insert a triangle into the mouth of every devil’s head. However, whenever we insert a triangle, the inner circle will rotate one position to the left. We will do this puzzle in several steps. Let’s begin.
Step 1
Tap on the devil’s head located at the 3 o’clock position to slide the triangle into its mouth.

Step 2
Next, tap on the devil’s head located at the 7 o’clock position to slide the triangle into its mouth.

Step 3
Next, tap on the devil’s head located at the 11 o’clock position to slide the triangle into its mouth.

Step 4
Next, tap on the devil’s head located at the 1 o’clock position to slide the triangle into its mouth.
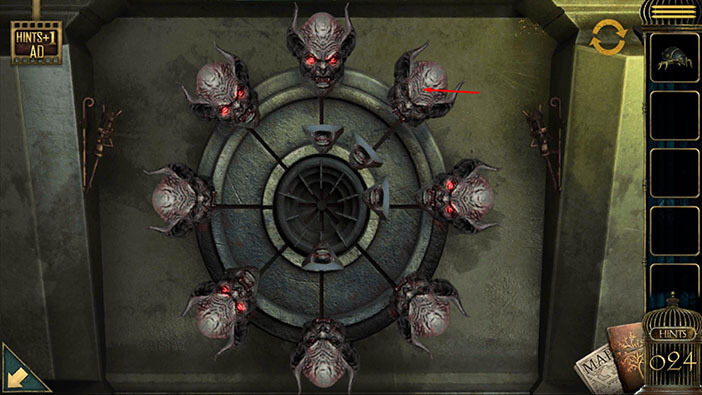
Step 5
Next, tap on the devil’s head located at the 5 o’clock position to slide the triangle into its mouth.

Step 6
Next, tap on the devil’s head located at the 9 o’clock position to slide the triangle into its mouth.

Step 7
Next, tap on the devil’s head located at the 7 o’clock position to spit out the triangle.
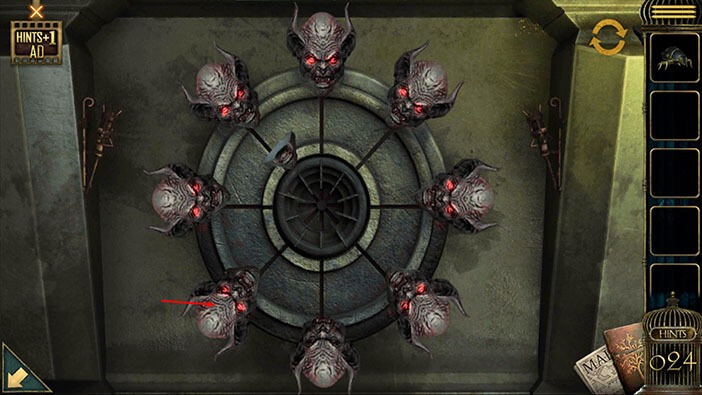
Step 8
Next, tap on the devil’s head located at the 6 o’clock position to slide the triangle into its mouth.
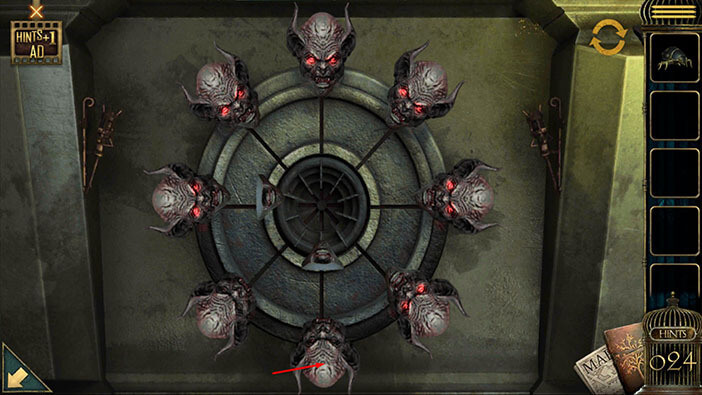
Step 9
Finally, tap on the devil’s head located at the 7 o’clock position to slide the triangle into its mouth, and you will solve this puzzle.

You will open the secret compartment below the statue as soon as you place all the triangles into the devil’s heads, and inside you will find a “Winder”. Tap on it to pick it up.
After that, tap on the arrow in the lower left corner to go back.
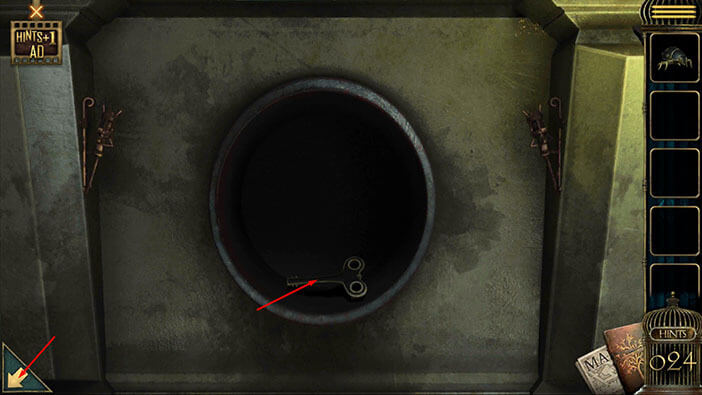
Ok, we can now activate the “Mechanical Ladybird” – to me, this looks like a bug, not a bird. Tap on the “Mechanical Ladybird” in your inventory to bring it up.
After that, select the “Winder” from the inventory and use it to wind up the “Mechanical Ladybird”.
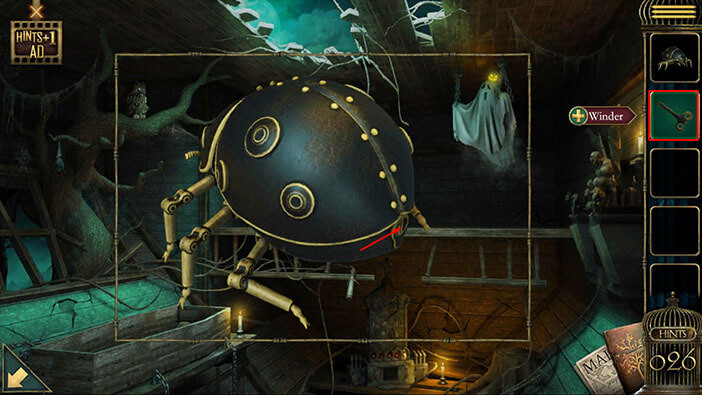
Next, tap on the owl on the branch on the left to take a closer look at it. Here, we can see that the owl is standing on something. So, select the “Mechanical Ladybird” from the inventory and place it just to the right of the owl.
The “Mechanical Ladybird” will fly out and the owl will chase after it.
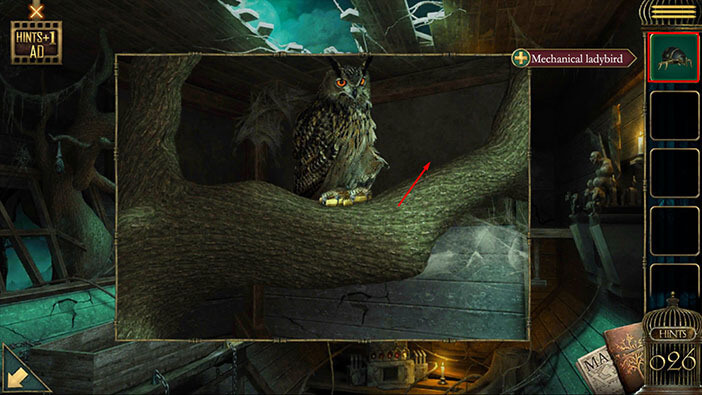
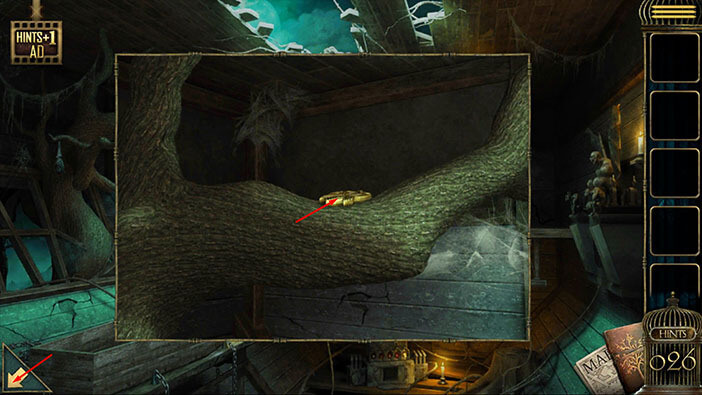
Ok, the owl was guarding something, let’s see what that is. Tap on the branch on the left again to take a closer look at it. Tap on the “Relief sculpture” on the branch to pick it up.
After that, tap on the arrow in the lower left corner to go back.
Next, let’s go back to the door. On the right side of the door, you will see an empty slot that has the same shape as the “Relief sculpture”.
So, select the “Relief sculpture” from the inventory and insert it into the empty slot.
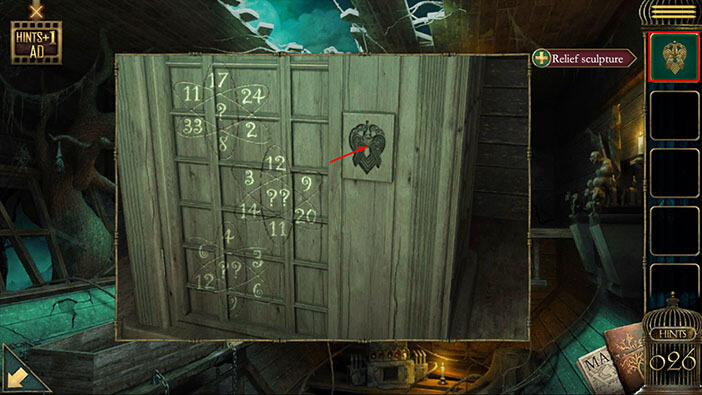
The door will open as soon as you insert the sculpture into the slot, and on the floor, you will see a “Book”. Tap on it to pick it up.
After that, tap on the arrow in the lower left corner to go back.
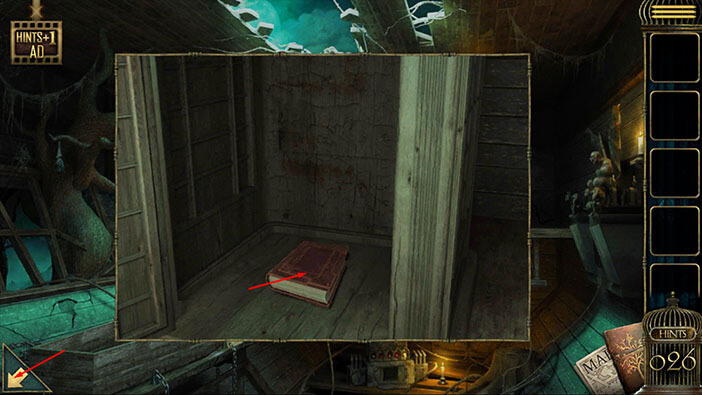
Select the “Book” from the inventory to bring it up. After that, tap a few times on the right page of the book to flip through the pages.
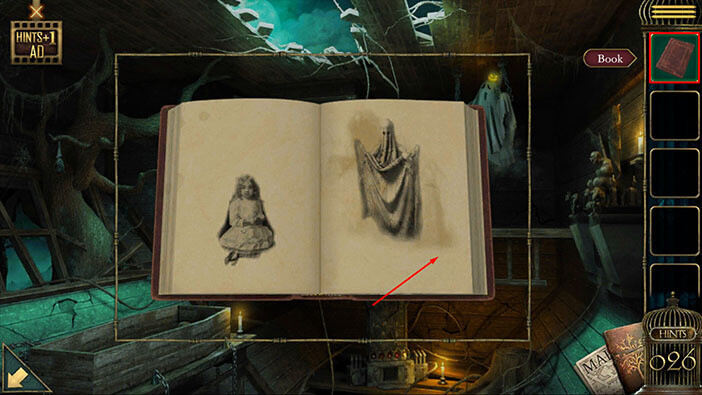
Several drawings of the girl and the ghost will appear, but on the last page, you will also see a wooden box.
Your character will automatically put down the book, and you will see a wooden box from the book on the floor in front of you. Tap on the wooden box to start the interaction.
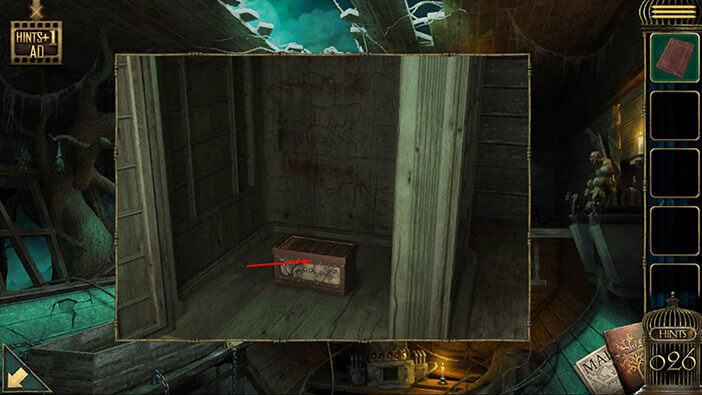
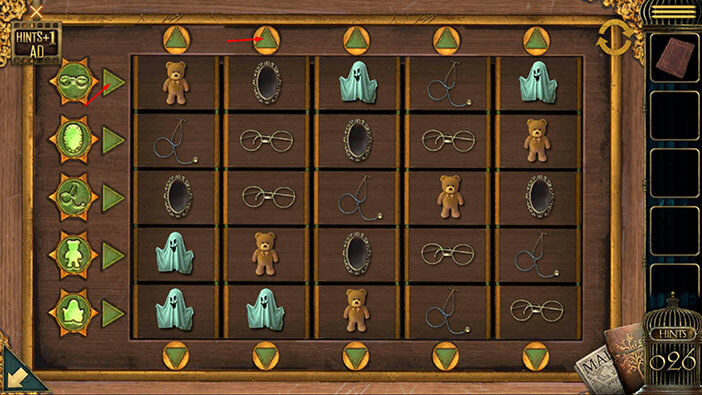
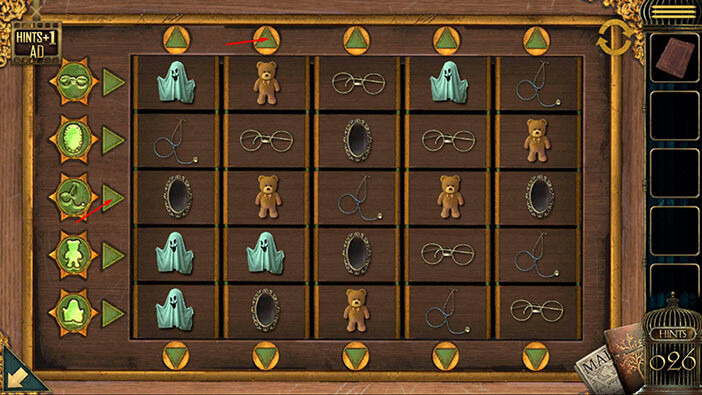
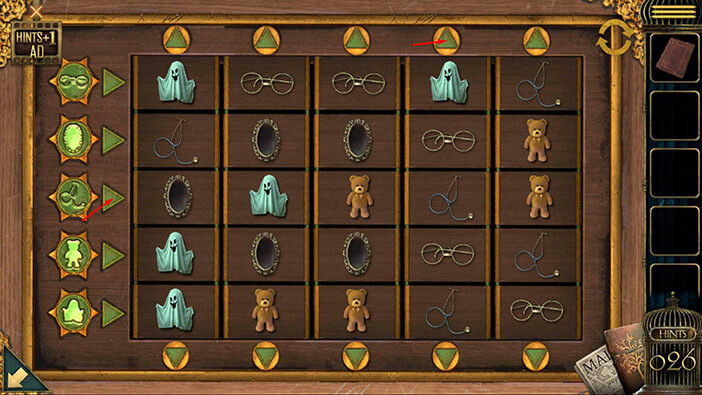
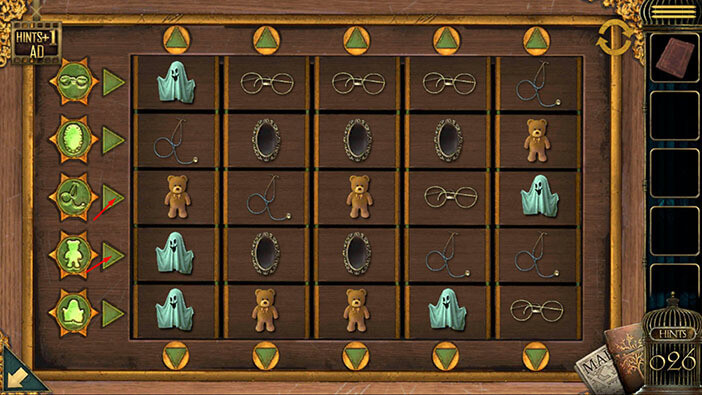
Here, we have another puzzle. In the column on the left, we can see five item types, and they determine which items should be placed in each row. We can shuffle the items by tapping on the up and down arrows above/below the grid, and the right arrow on the left.
We will do this puzzle in several steps. Let’s begin.
Step 1
Tap once on the “Up” arrow in the second column. After that, tap once on the “Right” arrow in the first row.
Step 2
Tap once on the “Right” arrow in the third row. After that, tap once on the “Up” arrow in the second column.
Step 3
Tap three times on the “Right” arrow in the third row. After that, tap once on the “Up” arrow in the fourth column.
Step 4
Tap once on the “Right” arrow in the third row. After that, tap twice on the “Right” arrow in the fourth row.
Step 5
Tap once on the “Up” arrow in the fifth column. After that, tap once on the “Right” arrow in the fourth row.
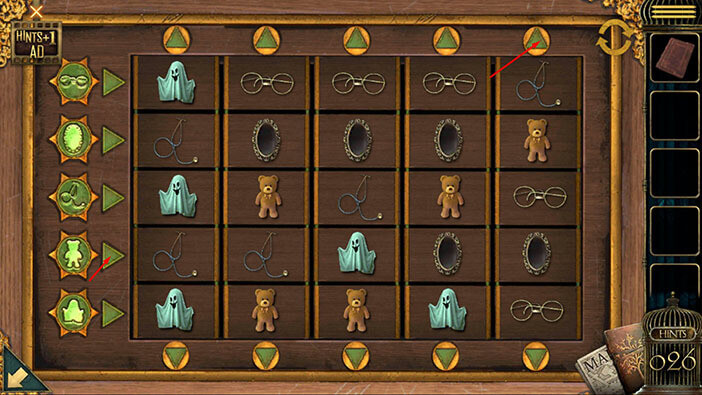
Step 6
Tap once on the “Up” arrow in the first column. After that, tap once on the “Right” arrow in the fourth row.
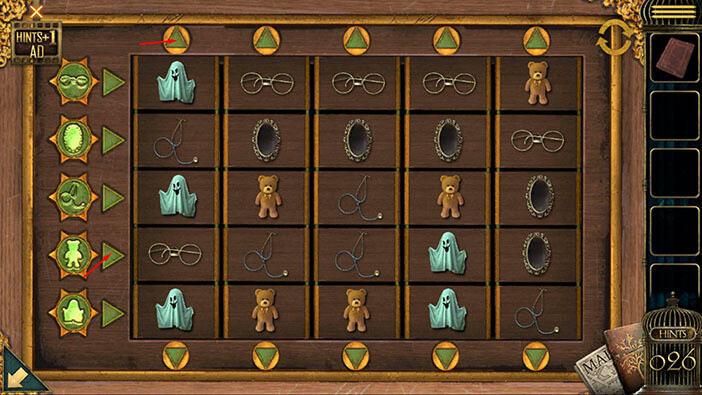
Step 7
Tap twice on the “Up” arrow in the first column. After that, tap once on the “Up” arrow in the fifth column. With this step, you will place the correct items into the first two rows.
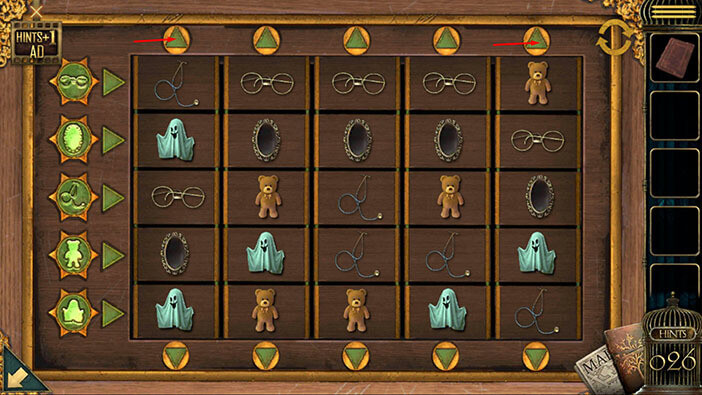
Step 8
Tap once on the “Down” arrow in the second column. After that, tap once on the “Right” arrow in the fourth row.
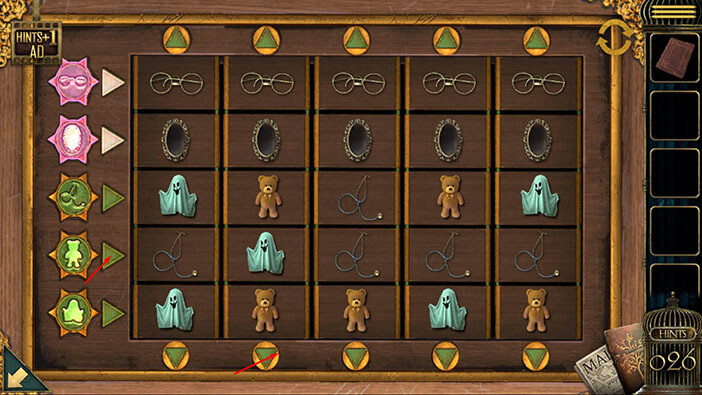
Step 9
Tap once on the “Up” arrow in the second column. After that, tap once on the “Down” arrow in the first column.
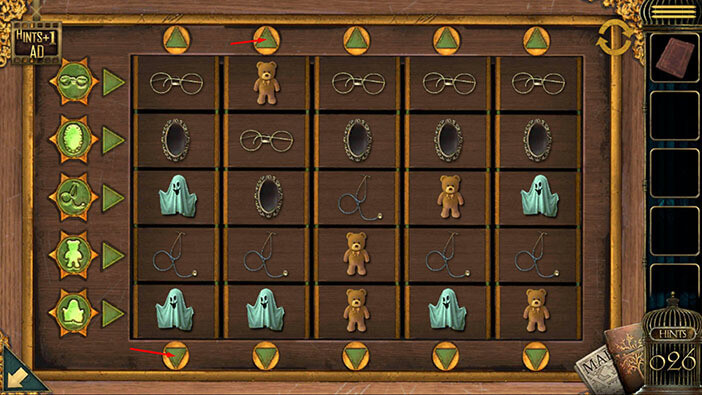
Step 10
Tap once on the “Right” arrow in the fourth row. After that, tap once on the “Up” arrow in the first column.
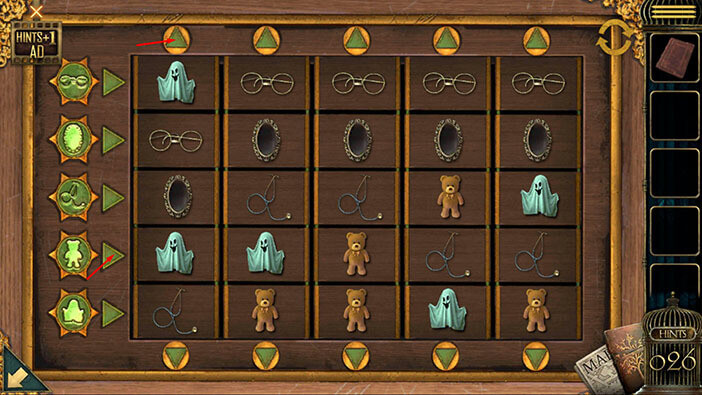
Step 11
Tap twice on the “Right” arrow in the fourth row. After that, tap once on the “Down” arrow in the fourth column.
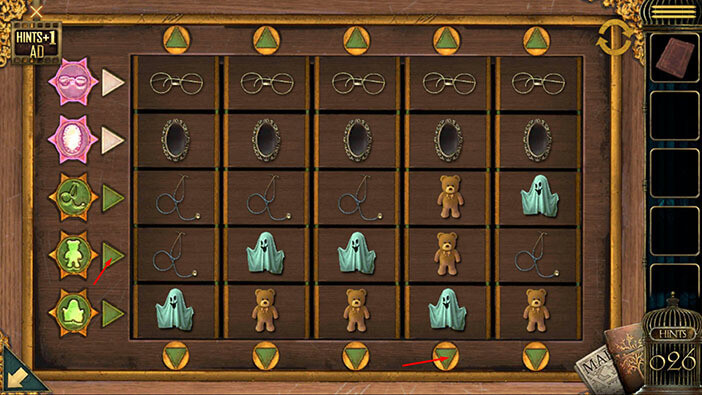
Step 12
Tap once on the “Right” arrow in the fourth row. After that, tap once on the “Up” arrow in the fourth column.
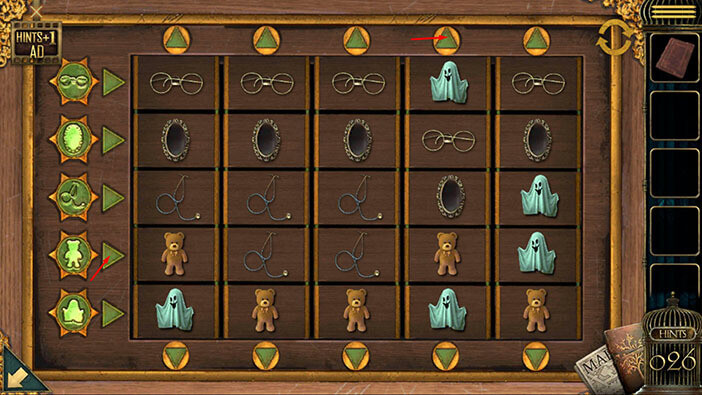
Step 13
Tap once on the “Right” arrow in the fourth row. After that, tap once on the “Down” arrow in the fifth column.
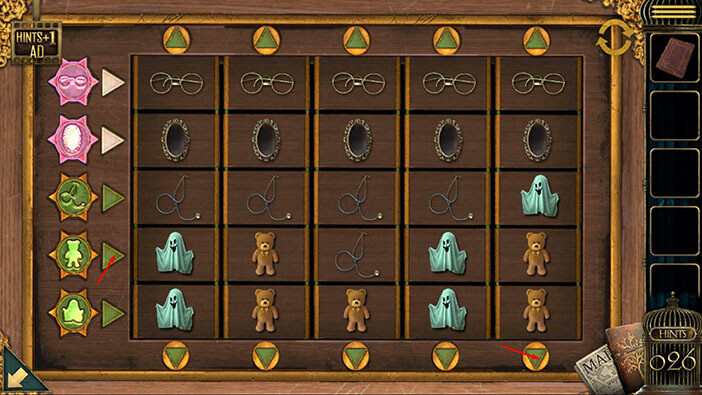
Step 14
Tap once on the “Right” arrow in the fourth row. After that, tap once on the “Up” arrow in the fifth column. With this step, you will place the correct items in the first three rows.
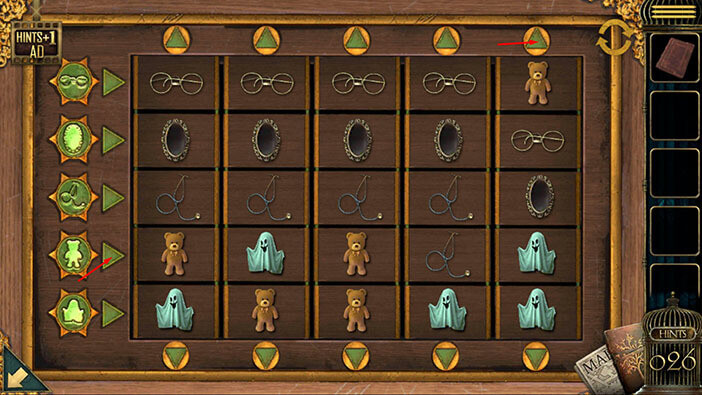
Step 15
Tap once on the “Down” arrow in the first column. After that, tap once on the “Right” arrow in the fifth row.
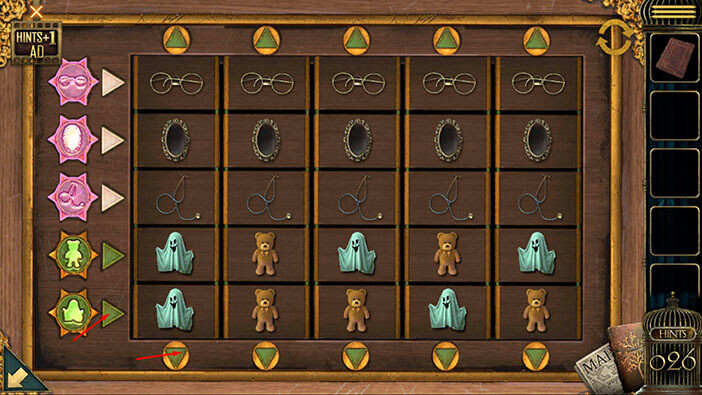
Step 16
Tap once on the “Up” arrow in the first column. After that, tap once on the “Down” arrow in the third column.
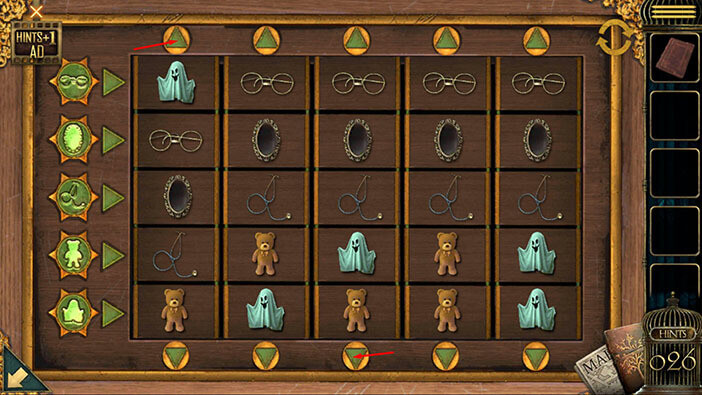
Step 17
Tap four times on the “Right” arrow in the fifth row. After that, tap once on the “Up” arrow in the third column.
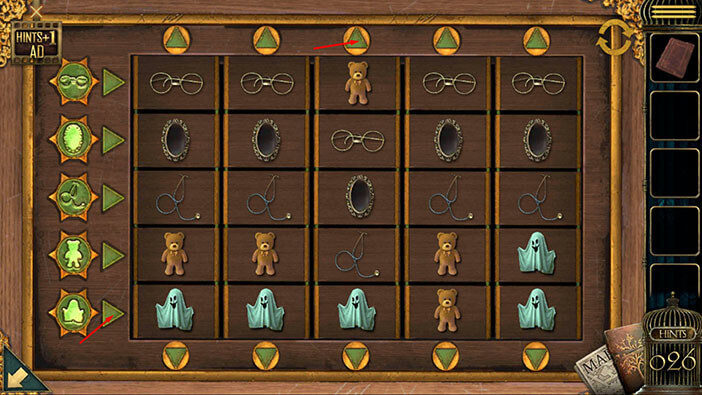
Step 18
Tap once on the “Right” arrow in the fifth row. After that, tap once on the “down” arrow in the fifth column.
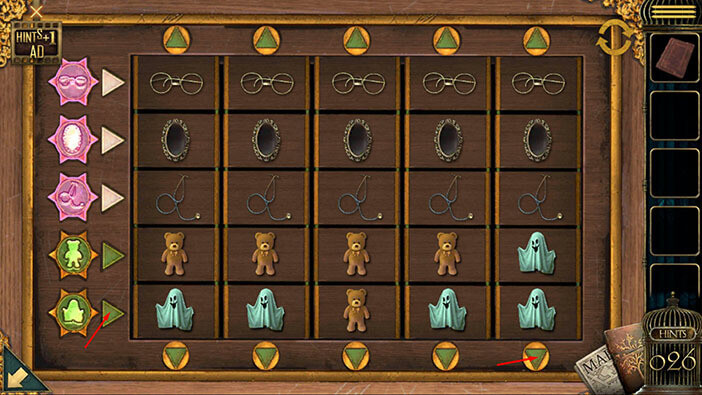
Step 19
Finally, tap once on the “Right” arrow in the fifth row. After that, tap once on the “Up” arrow in the fifth column. With this last step, you will solve the puzzle.
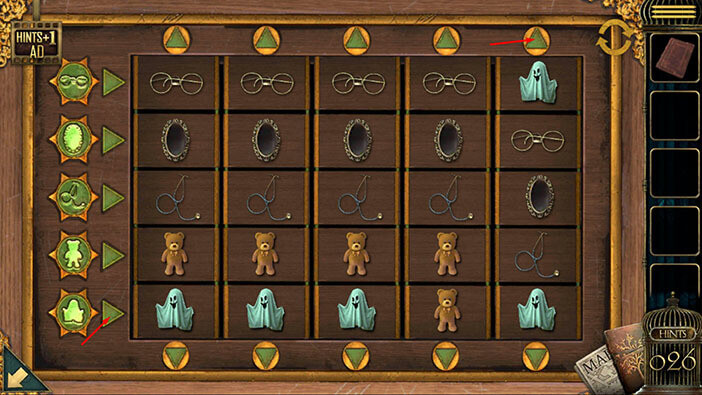
The secret compartment under the puzzle will open as soon as you place the items in the correct rows, and inside you will find a “Key”. Tap on it to pick it up.
You will be automatically teleported back to the room in which we found a small castle.
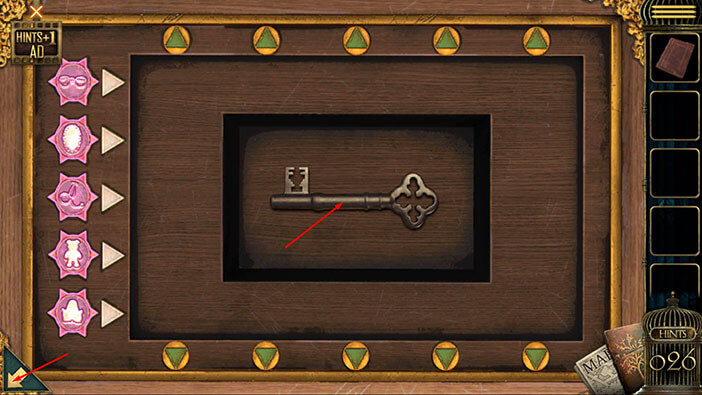
Let’s go to the second floor. Tap on the top part of the cabinet on the right to take a closer look at it.
Select the “Key” from the inventory and use it to unlock the cabinet.
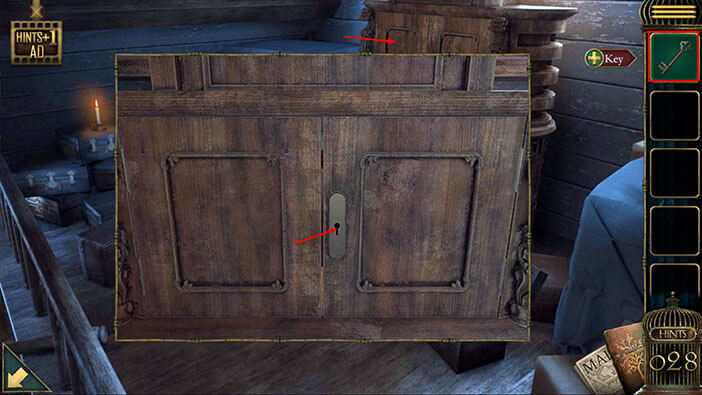
Inside the cabinet, you will see a stage and red curtains. Tap on the red curtains to proceed to the next puzzle.
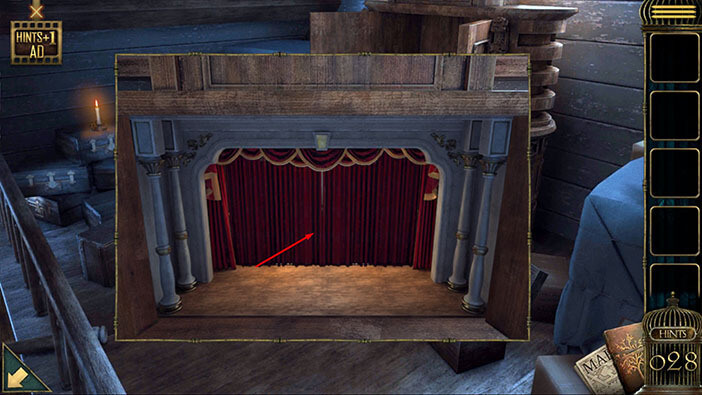
Here, we have another puzzle. The light from the candles on the left and right in combination with three other elements, will create shadows in the background. Our task is to create a shadow that matches a light grey drawing in the background.
We can adjust the shadow by moving several sliders. First and foremost, we can slide the two candles to the left and right, and adjust the direction of the light. Next, we can adjust the position of the items that are casting the shadow by using the left and right arrows above them.
In the image below, you can see the correct position for the candles, and the items that cast the shadow.
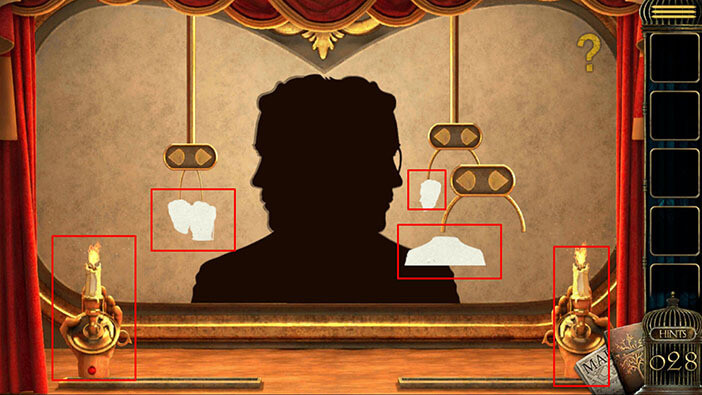
Raen suffered but, in his suffering, he also hurt his family. Let’s proceed to the next puzzle.
Here, we have the same situation as in the previous puzzle. Our task is to create a shadow that matches the light grey drawing in the background.
In the image below, you can see the correct position for the candles, and the items that cast the shadow.
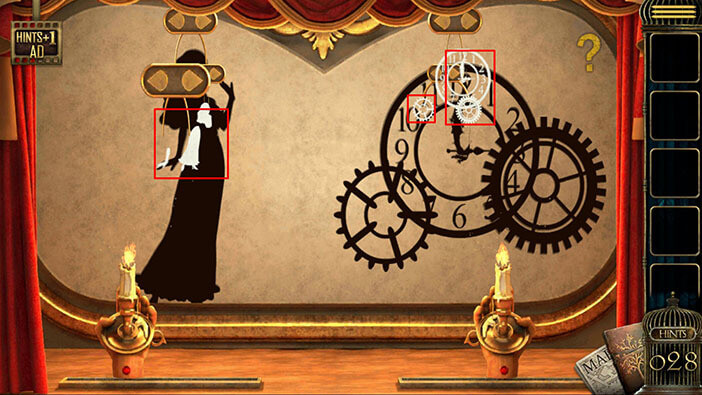
Let’s proceed to the next puzzle. Here, we have the same situation as in the previous puzzle. Our task is to create a shadow that matches the light grey drawing in the background.
In the image below, you can see the correct position for the candles, and the items that cast the shadow.
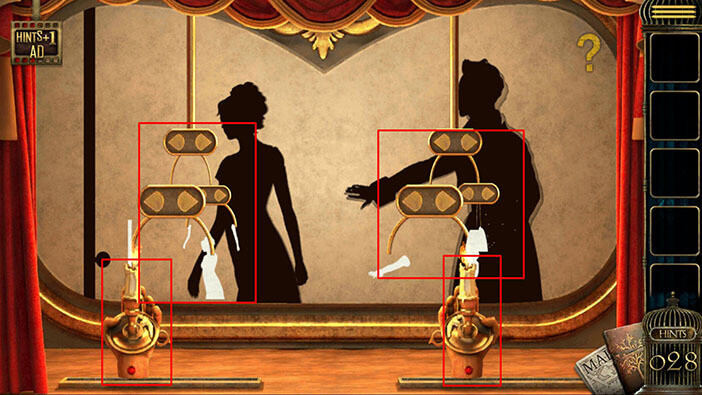
Looks like Jason lost his mind when his wife left him and murdered the rest of his family. Let’s proceed to the next puzzle.
Here, we have the same situation as in the previous puzzle. Our task is to create a shadow that matches the light grey drawing in the background.
In the image below, you can see the correct position for the candles, and the items that cast the shadow.
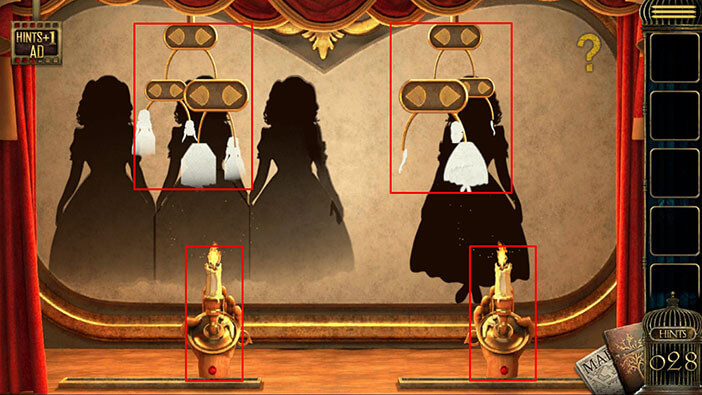
Jason hopes that his daughter, Alice, finally found happiness, in the afterlife. Let’s proceed to the next puzzle.
Here, we have the same situation as in the previous puzzle. Our task is to create a shadow that matches the light grey drawing in the background.
In the image below, you can see the correct position for the candles, and the items that cast the shadow.
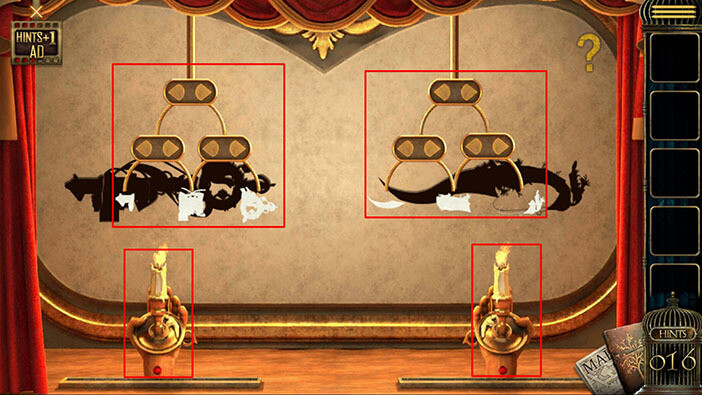
Tap on the key on the left to open the door.
A hand with a knife will appear from the dark, and it will stab your character in the belly.
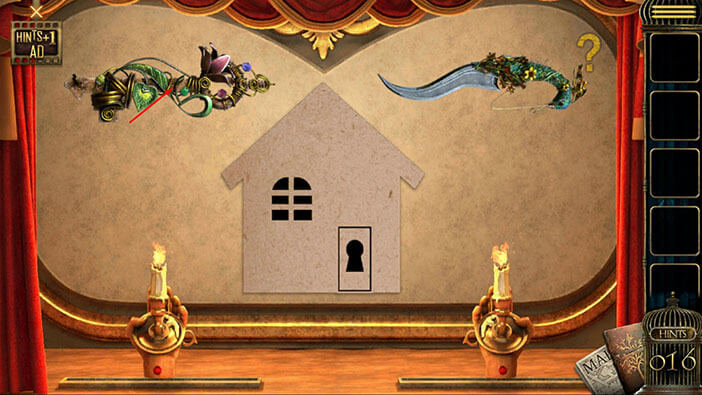
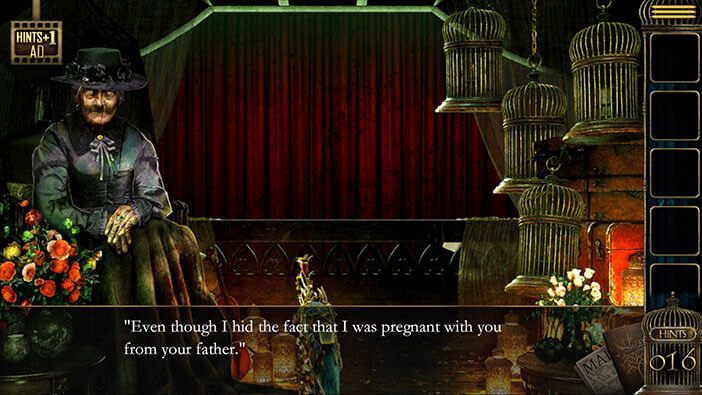
In the next scene, we will be back in the horse-drawn carriage. The old lady is the mother of our character, and she hid the fact that she was pregnant from his father. So, our character is probably Jason Junior and his father is Jason from the story.
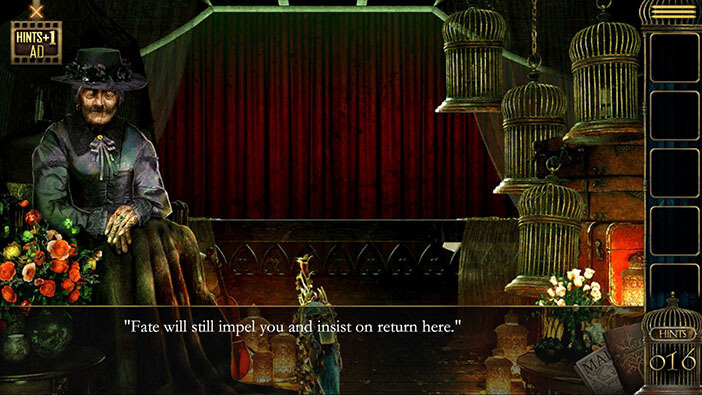
You will also notice that the knife is still sticking out from the belly of our character. The old lady will explain that she tried to protect him from the family curse by hiding his existence, and keeping him away from the family mansion. However, fate eventually lead him here, and he became a part of the curse.
Well, we have now reached the end of the story. If you’re interested in Escape Room games, check out our guides for the other games of this genre.
Thank you for reading.