Edge of Reality: Lost Secrets of The Forest | Bonus Chapter Part 2
Intro
Welcome to our walkthrough for Part 2 of the Bonus Chapter for the “Edge of Reality: Lost Secrets of the Forest” from “Friendly Fox Games”. Help biologist Dr. Amanda evacuate tourists and save them from the incoming storm.
Walkthrough

In the first area of the forest, the left path where you need to go and where the owl went is blocked by bushes. Choose the path on the right.
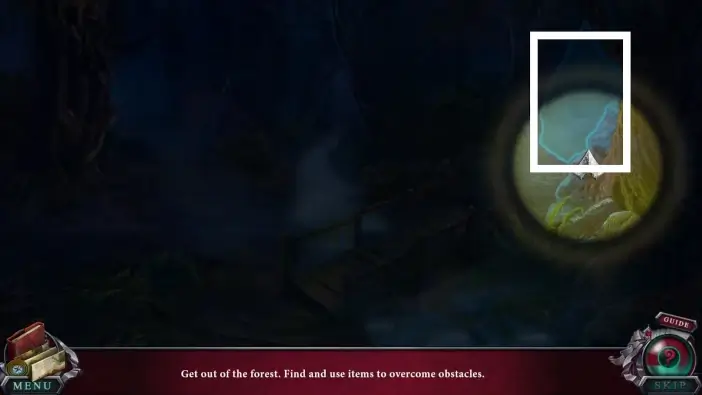
At the bridge area choose the right path.
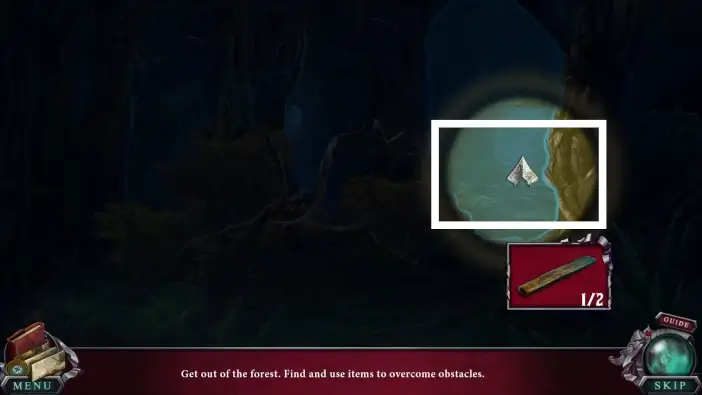
In this area, take the first plank.
Return to the bridge area and choose the path on the left.
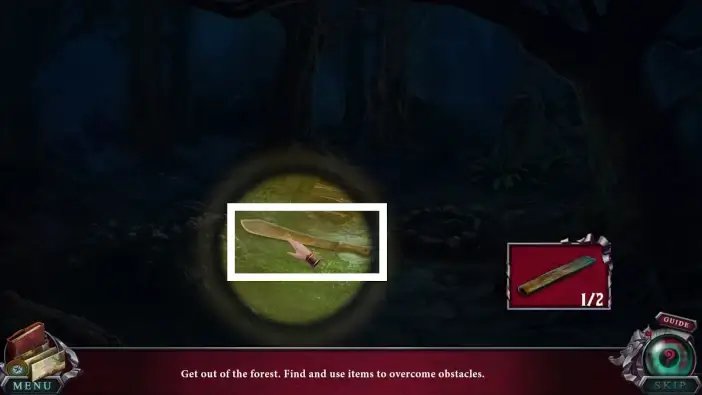
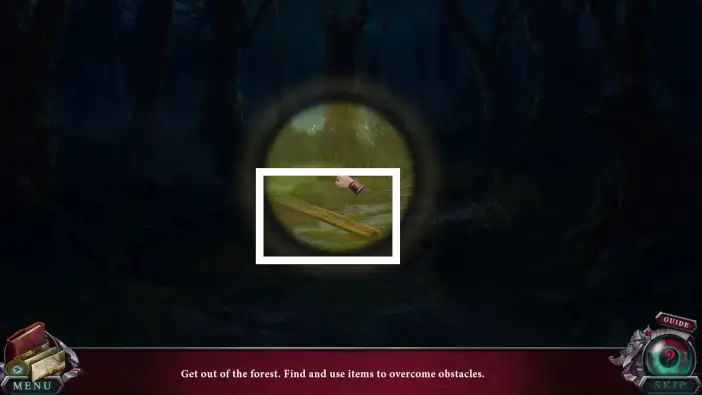
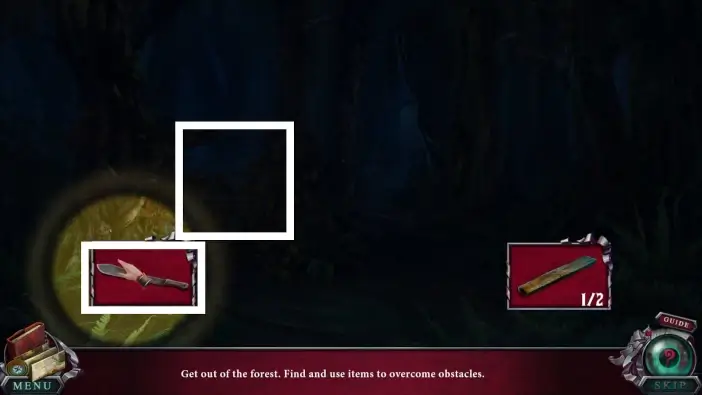
In this area, pick up the knife from the ground.
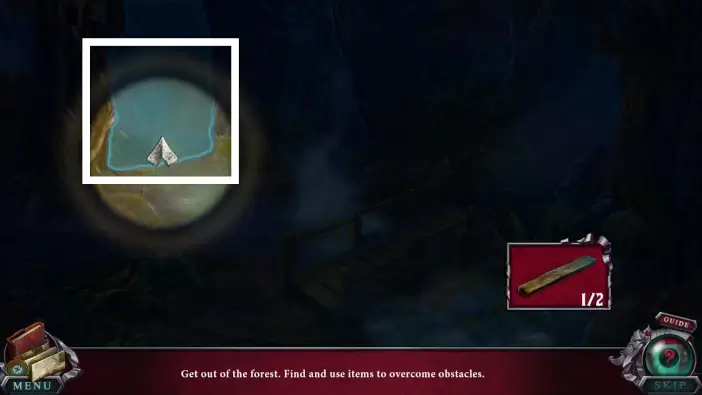
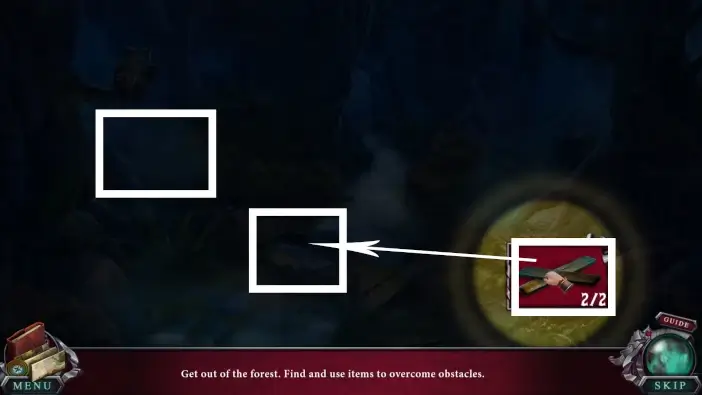
Return to the first area, the one where you were before the bridge, and use the knife to cut the bushes on the left path, then go there.
In the next area, choose the path on the right.
In the broken bridge area, you can only go right, since you won’t be able to cross the bridge.
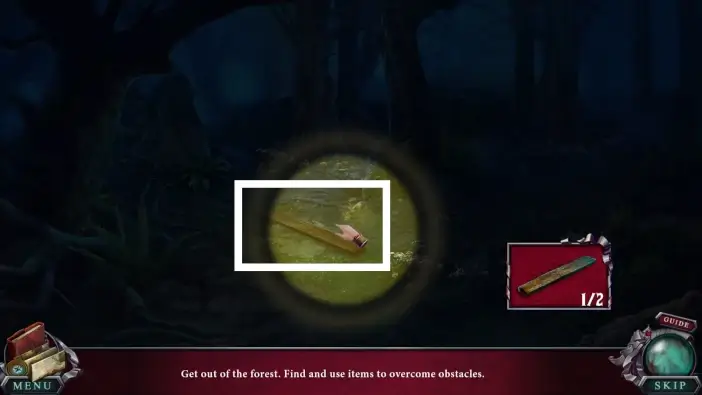
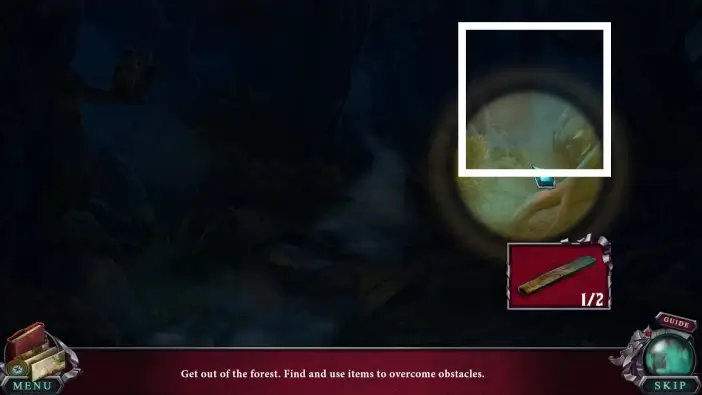
Take the second plank from the ground.
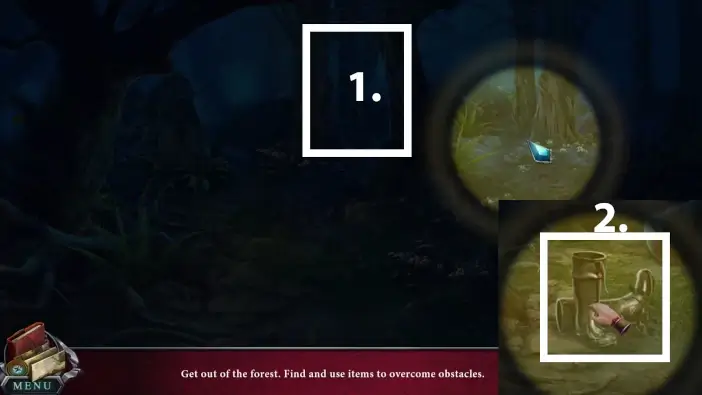
- In the same area, go on the straight path.
- You will arrive at the abandoned camp area. Take the boots from the ground.
Return to the broken bridge area and fix the bridge using the two planks you’ve found. Once you fix the bridge, go to the left.
Use the boots that you’ve found in the abandoned camp to cross the lake. After this, Amanda will reach the village where the Keeper and Tina live.
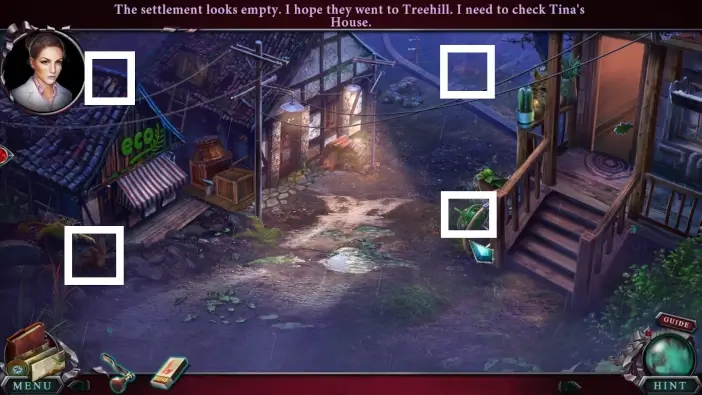
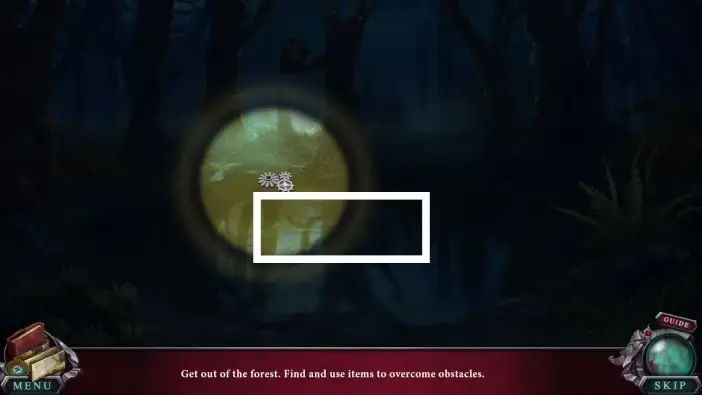
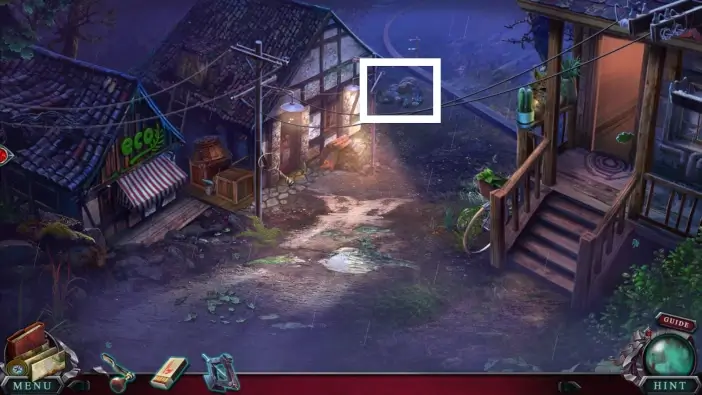
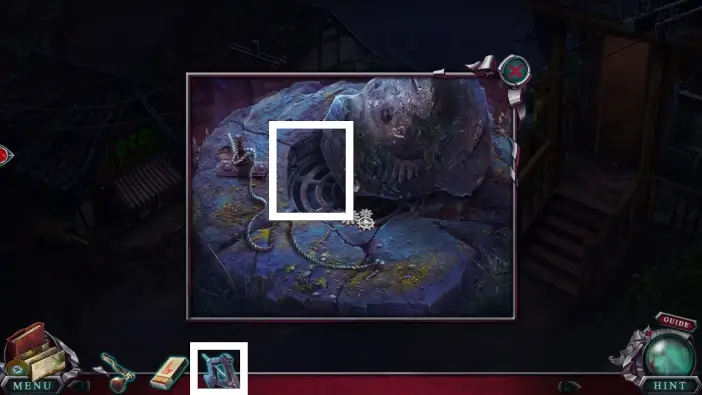
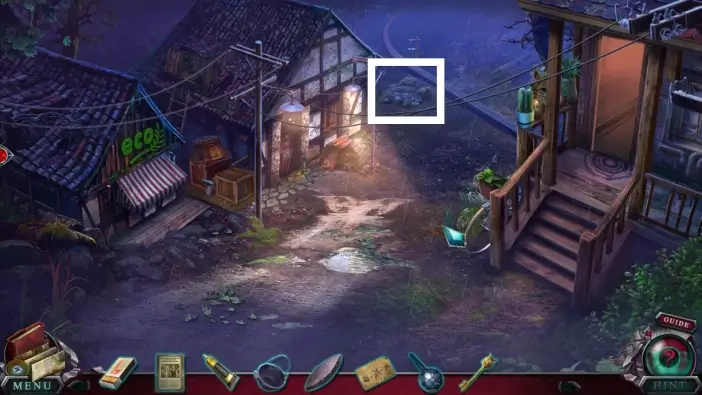
Find all morphing objects and animals in the village center.
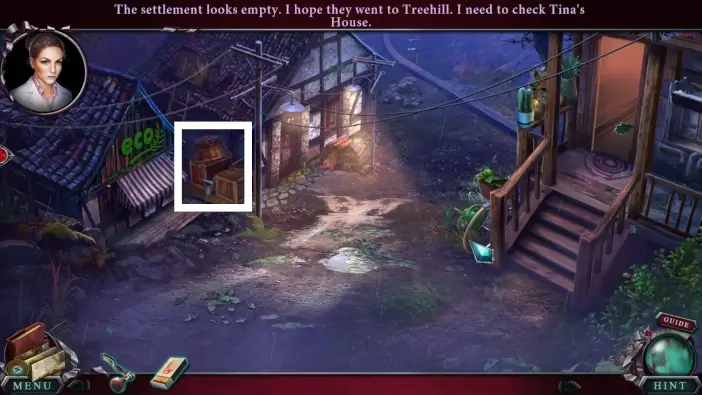
Approach the boxes that are between the eco shop and the Keeper’s house.
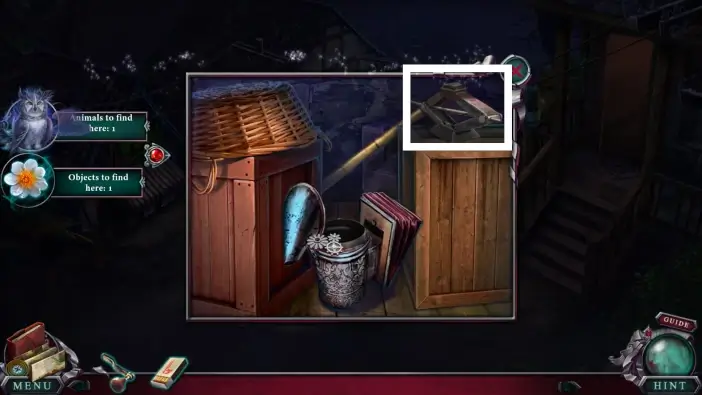
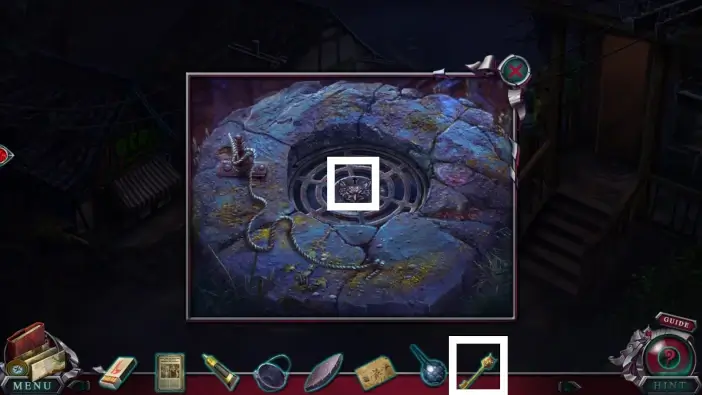
Take the jack from the box on the right. You will use it, together with the handle from your inventory, to remove one rock from the well.
Approach the well.
Place the jack below the rock.
Place the handle below the jack, and Amanda will move the rock. The well will be locked, so you’ll need to find the key first.
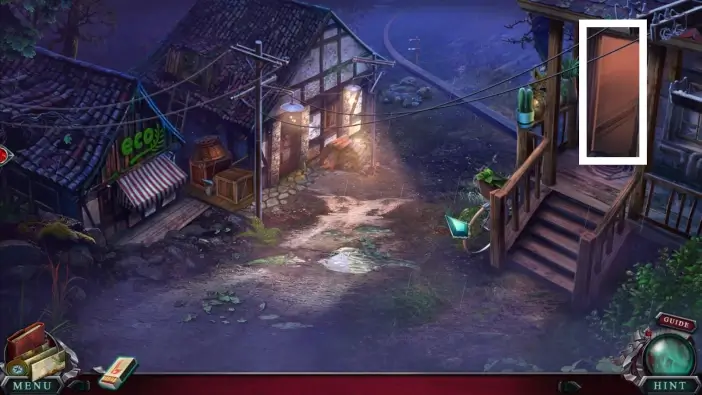
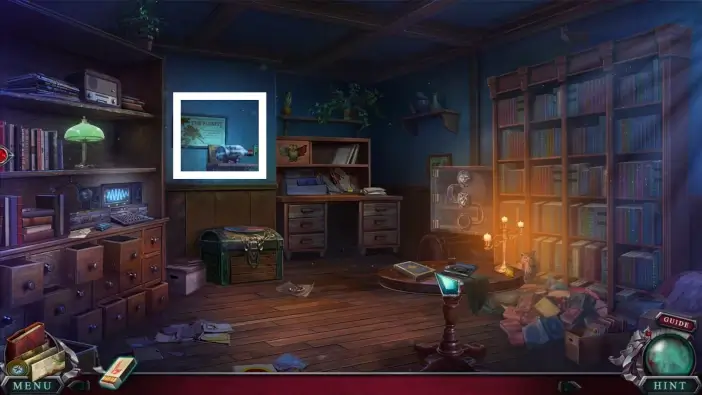
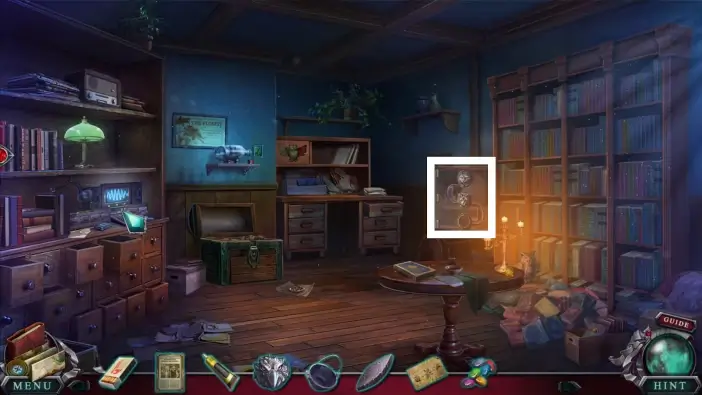
Enter Tina’s house.
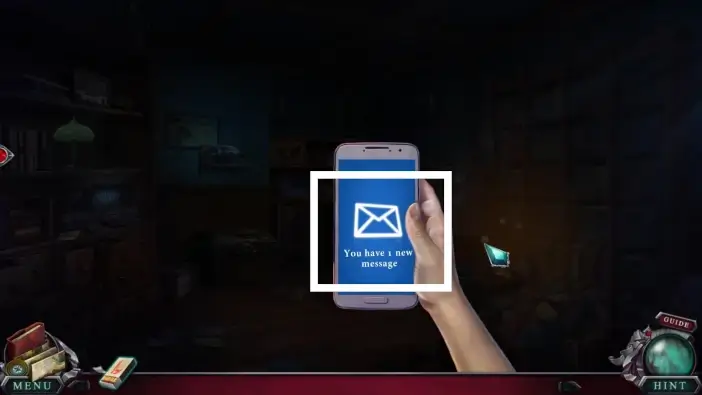
Once you enter Tina’s house, Amanda will receive a message. Click on the phone’s screen to watch the video message from Dr. Finch.
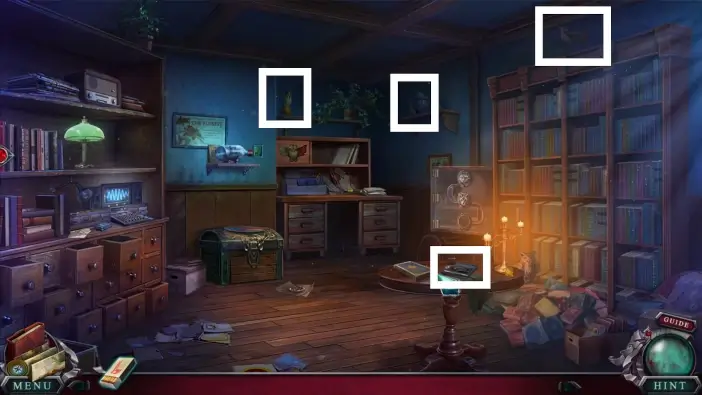
Once the video message is over, find all the morphing objects and animals in Tina’s house. Their locations are marked in the picture above.
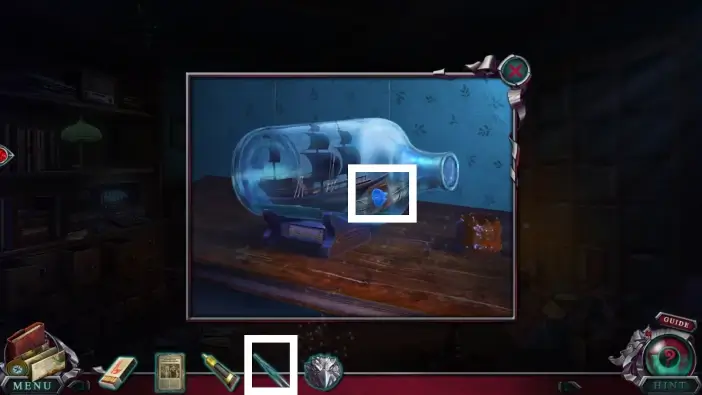
Approach the bottle on the shelf.
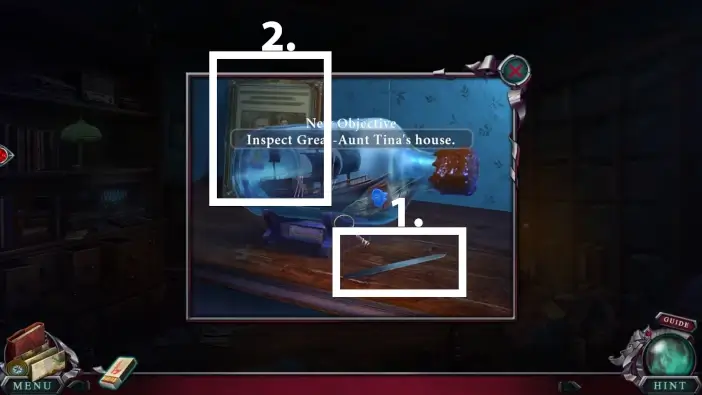
- Click on the knife, and Amanda will cut the bottle.
- Take the newspaper. You’ll need it later to give it to the owls so they can find the lost sheriff in the forest.
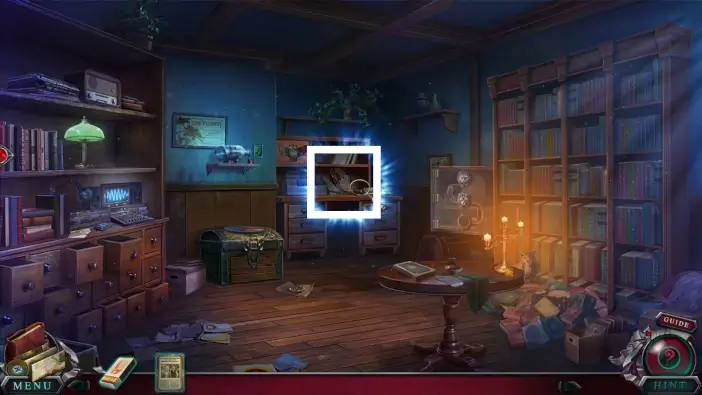
Approach the desk on the far side of the room.
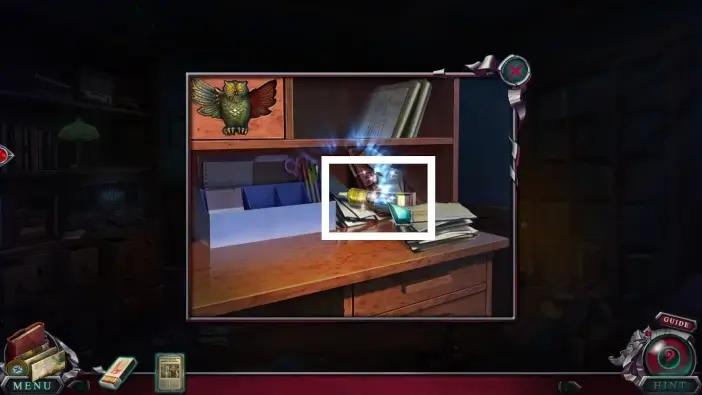
Take the glue from the desk. You’ll need it for the pottery later.
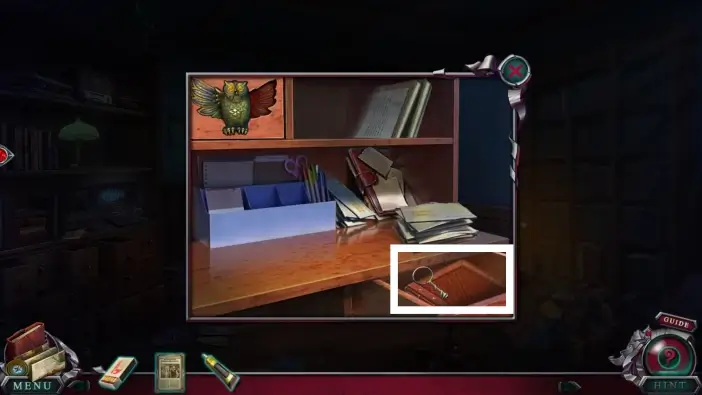
Open the drawer of the same desk and read Tina’s notebook.
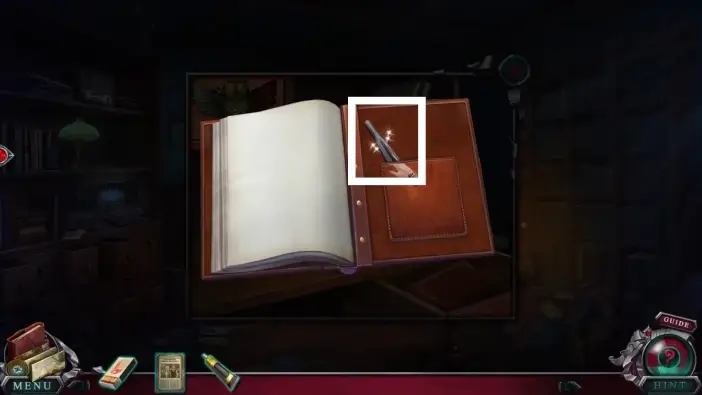
Turn the pages of the notebook to reach the end and take the tweezers. You will use it to take the chest token from the bottle you cut previously.
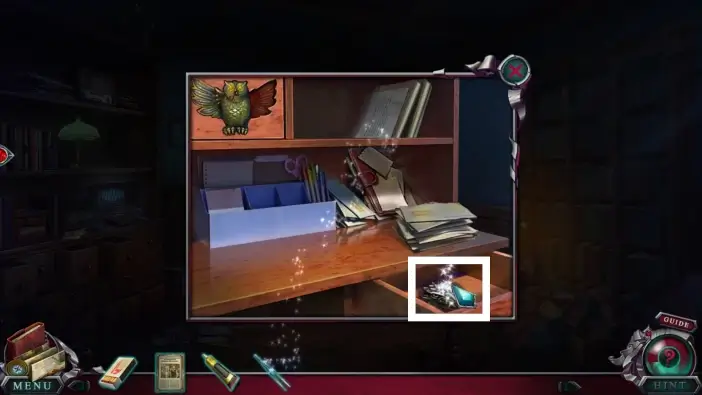
Take the eagle badge. You’ll use it to unlock a display case.
Return to the bottle and use tweezers to take the chest token.
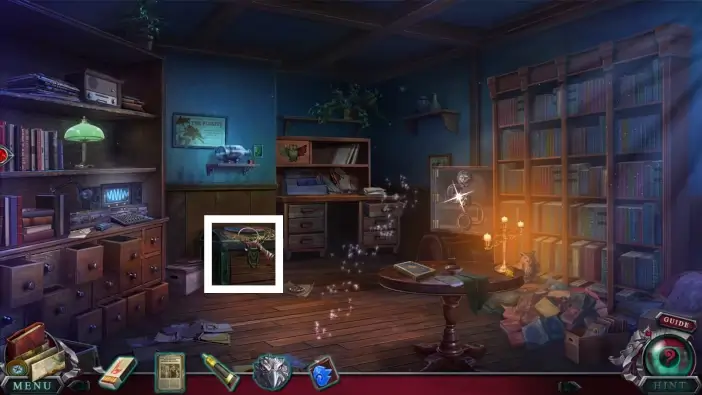
Approach the chest below the bottle.
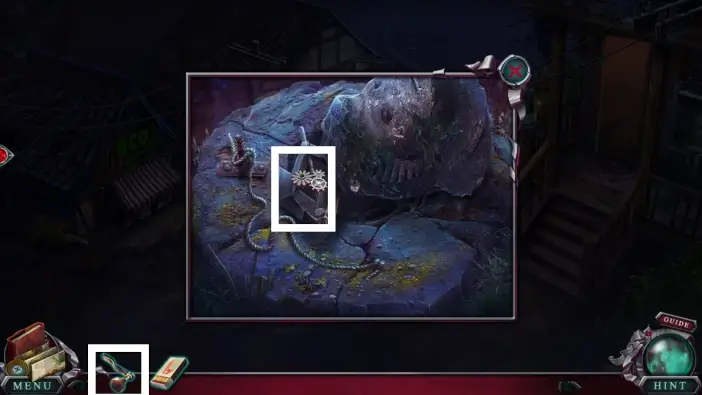
Place the chest token on the box, and a new puzzle challenge will begin.
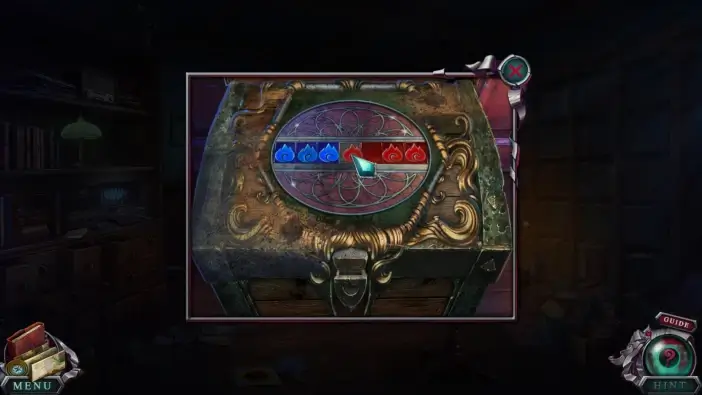
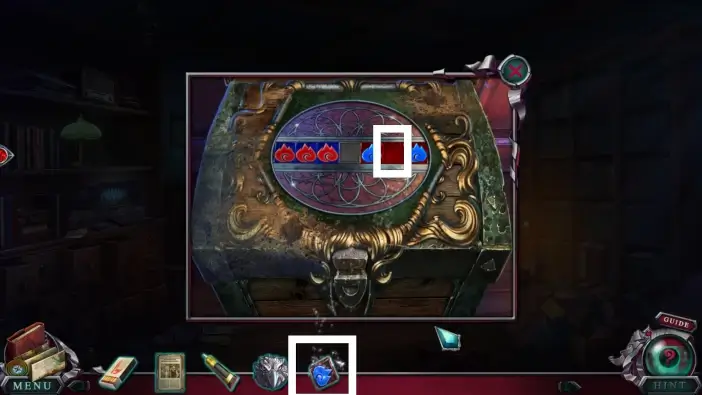
Rearrange the red and blue tokens so that the blue tokens are on the left side and the red tokens on the right side, like in the picture above.
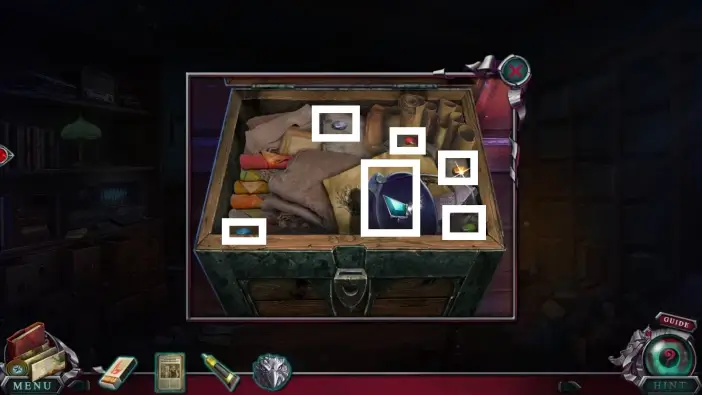
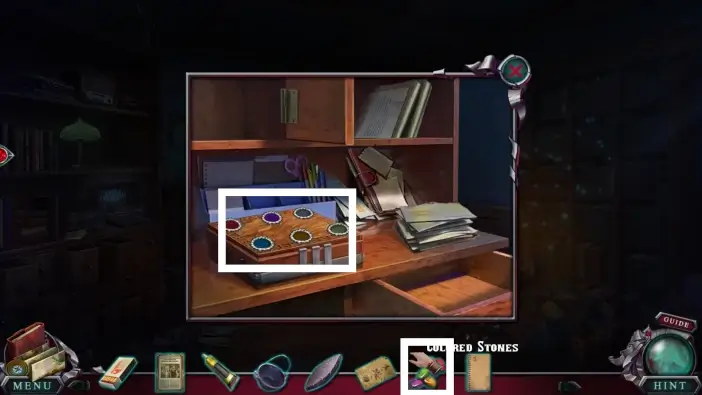
Once you open the chest, take the cauldron. You’ll use it to get some water from the well. Click on all colored stones that are marked in the picture above to gather them into one pile.
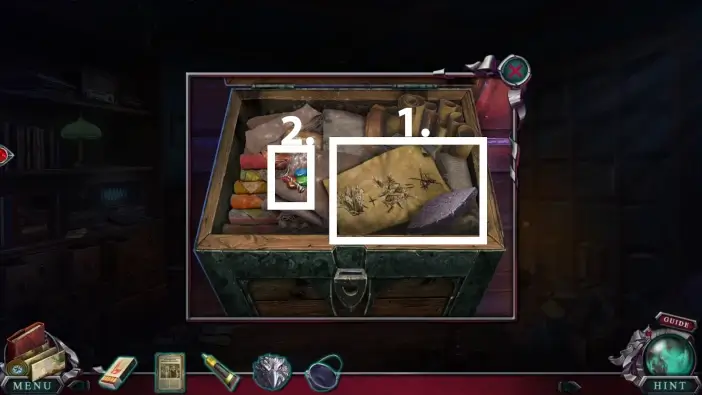
- Take the whetstone and the smoke recipe. You’ll use a whetstone much later in the forest to fix one bear trap. You will need the smoke recipe to know which plants you’ll need to burn to get rid of bees in the attic of the Keeper’s house.
- Click the pile of colored stones. You’ll use them to unlock one box.
Approach the display case on the right.
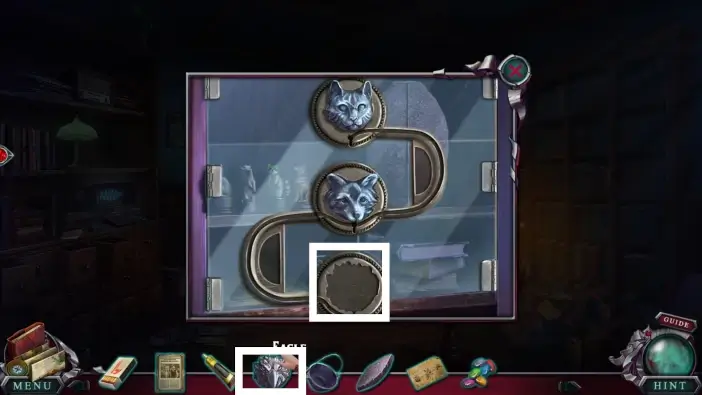
Use the eagle badge to unlock the display case.
- Take the owl’s wing.
- Open the mold. You will place pottery there later.
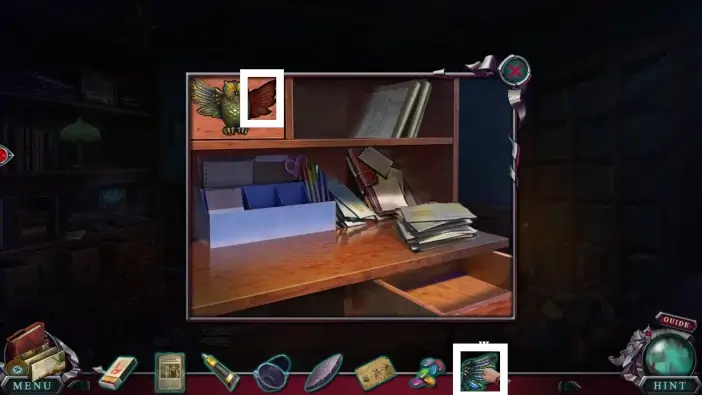
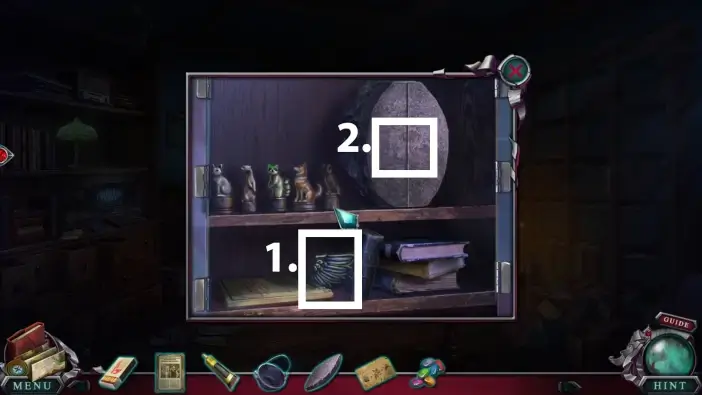
Return to the central desk and place the wing on the cabinet that has the owl symbol.
- Take Tina’s notes. You’ll need it for the search mini-game for the pile of books.
- Take out the box.
Place the colored stones on the box to open it. Take the clapper from the box. You’ll need it to create an improvised bell in the Keeper’s attic.
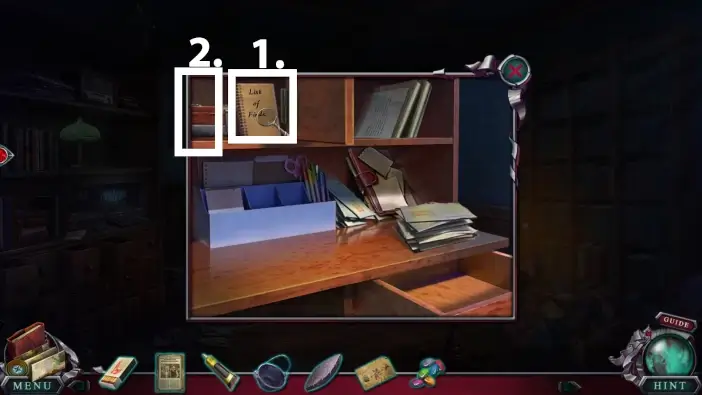
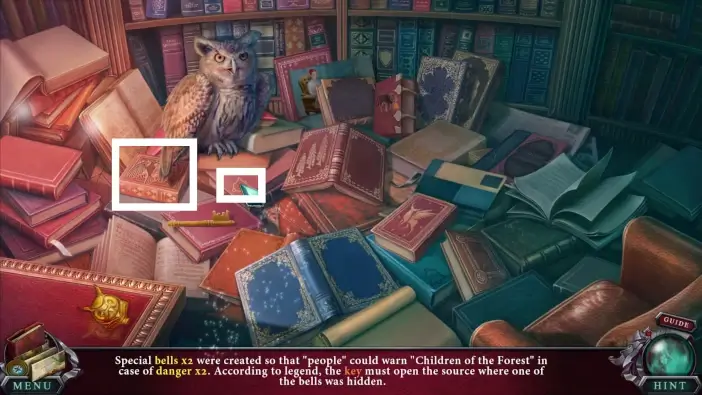
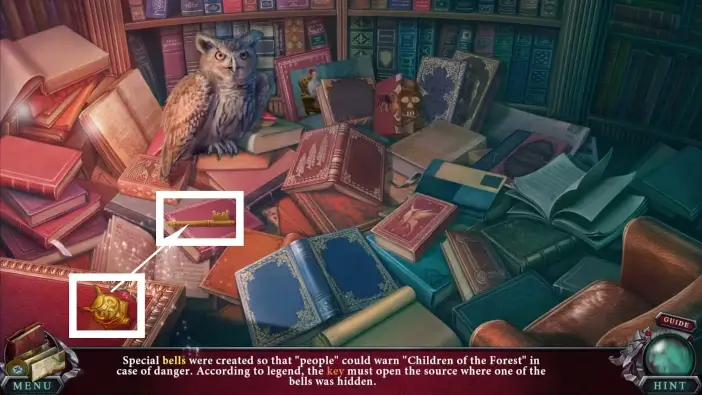
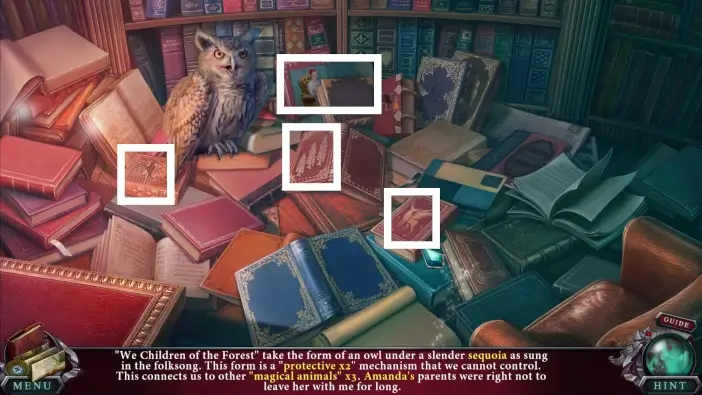
Approach the pile of books on the right.
Place Tina’s notes on the pile of books.
Click on Tina’s notes to start the mini-game.
Click on the items that are marked in the pictures in this guide. When you click on certain books, you will open them.
When you open a book, there will be more items to find.
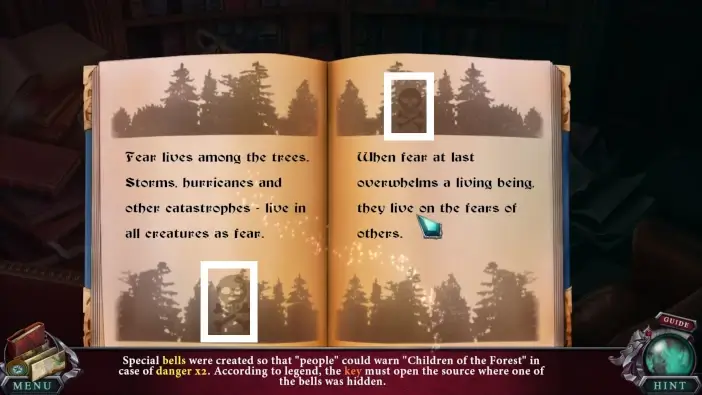
In the picture above, you’ll need to merge two parts of the key and then click the whole key.
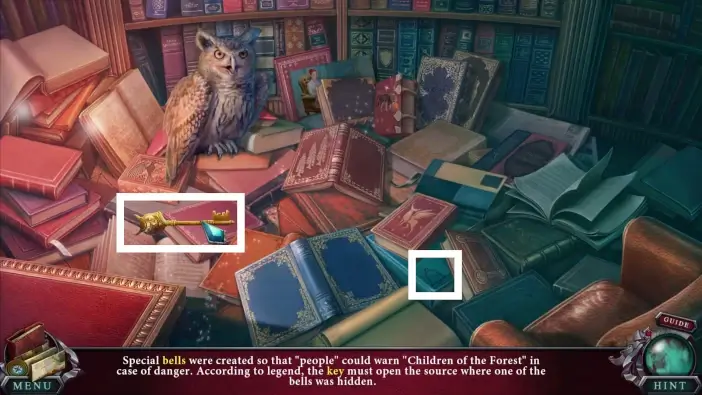
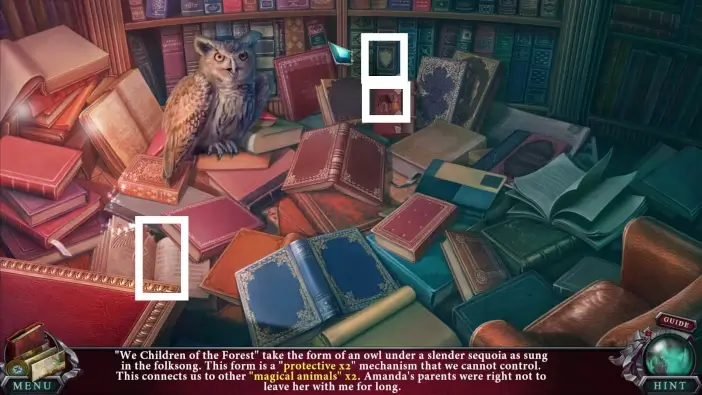
Once you find all the items, the antique key will be added to your inventory.
Exit Tina’s house and go to the well.
Use the antique key to unlock the well.
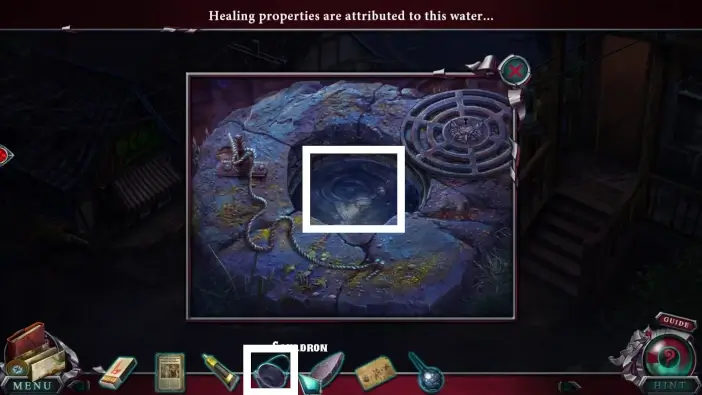
Use the cauldron to take some healing water from the well. Click on the cauldron again to return it to your inventory.
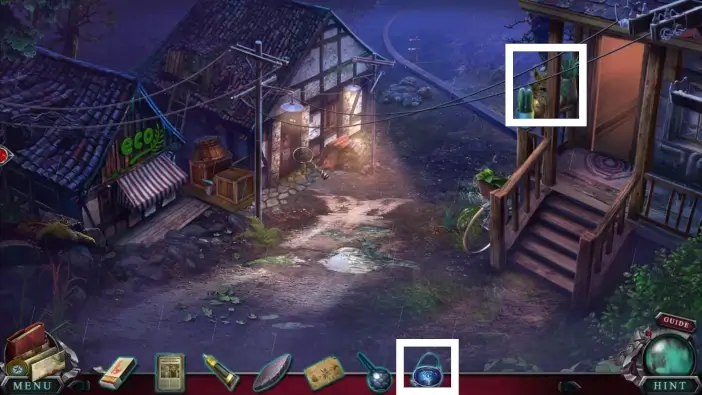
Approach the flowerpots at the porch of Tina’s house. Use the healing waters on the plants in flowerpots.

Place the smoke recipe.

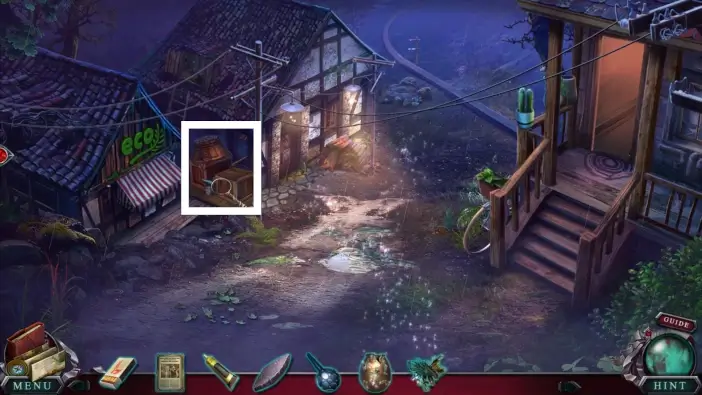
Take the plants from the first and fourth vase, marked in the picture above.

- Take the plants from the table. They will be called “kindling” in your inventory.
- Take the bronze pot. You’ll need it to create an improvised bell in the Keeper’s attic.
Go to the boxes between the eco shop and the Keeper’s house.
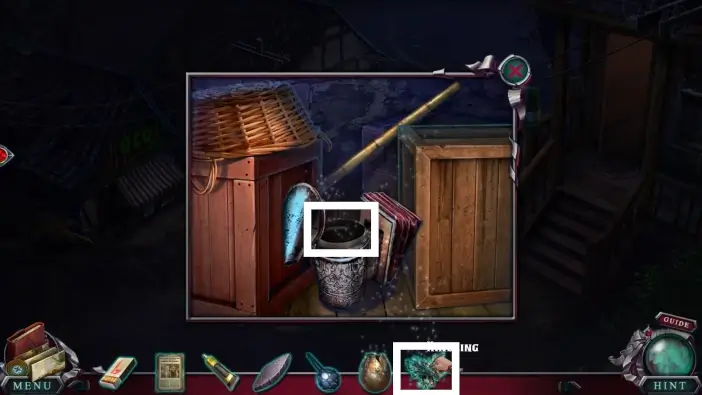
Place the plants for kindling into the pot.
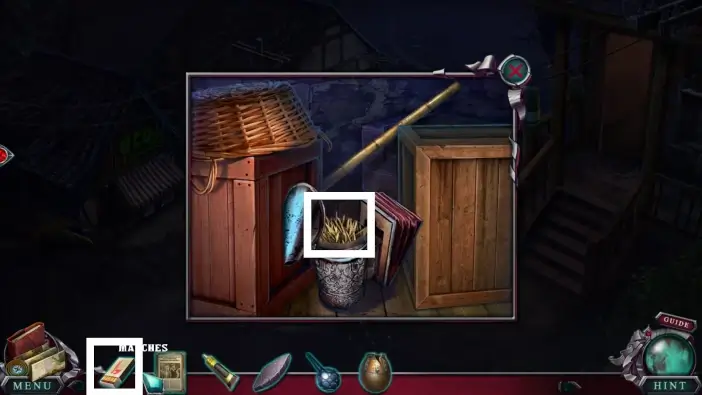
Use matches to burn the kindling. Click on the pot to add it to your inventory as the “Bee Smoker.”

Climb to the attic of the Keeper’s house.
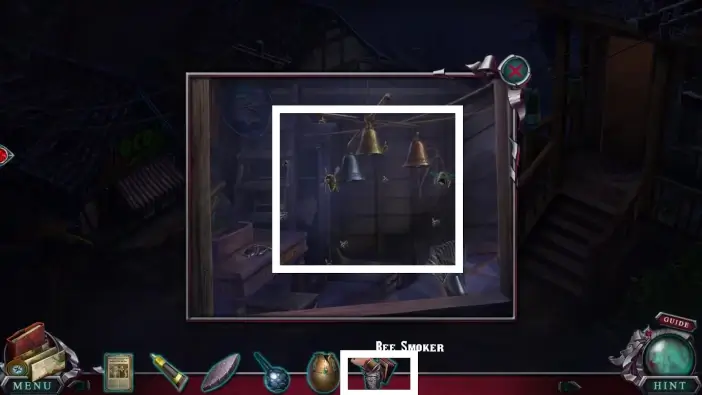
Use the Bee Smoker to remove the bees from the attic.

- In the attic, take the rake.
- Take the clamps.
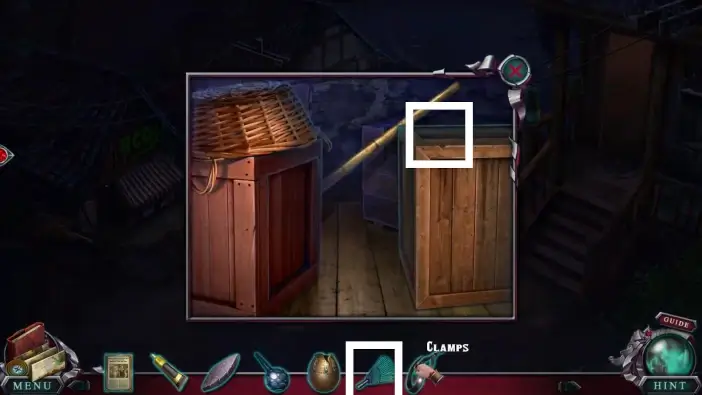
Go to the boxes between houses and place the rake on the box.
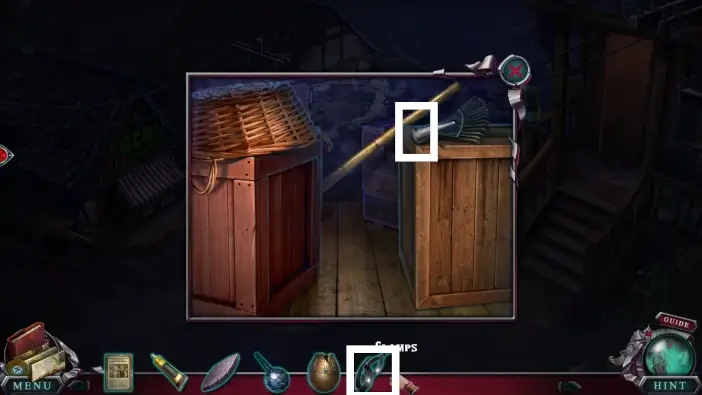
Use the clamps to connect the rake with the handle. Click on the newly created rake to add it to your inventory.
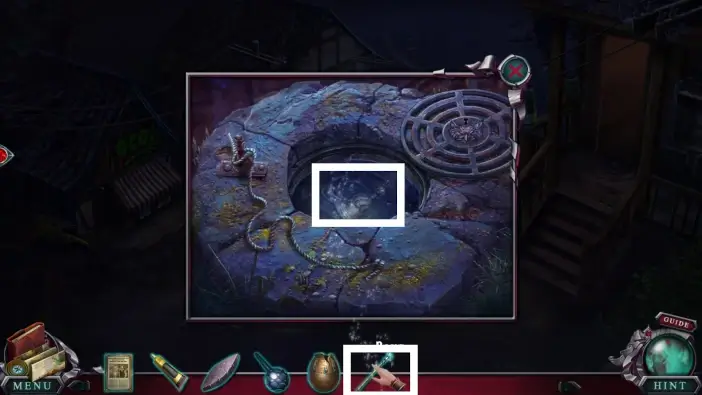
Return to the well and use the rake to pull out the silver bell from the well. Afterwards, click on the silver bell to add it to your inventory.
Return to the attic of the Keeper’s house and place the silver bell where it belongs. You’ll need one more bell to place.
Go inside Tina’s house and approach the mold.
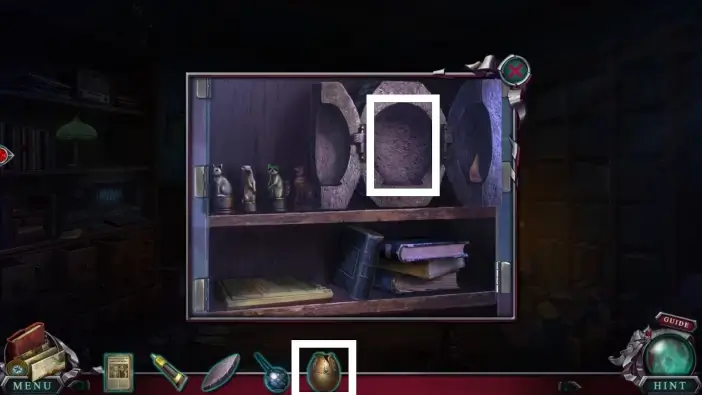
Place the bronze pot into the mold.
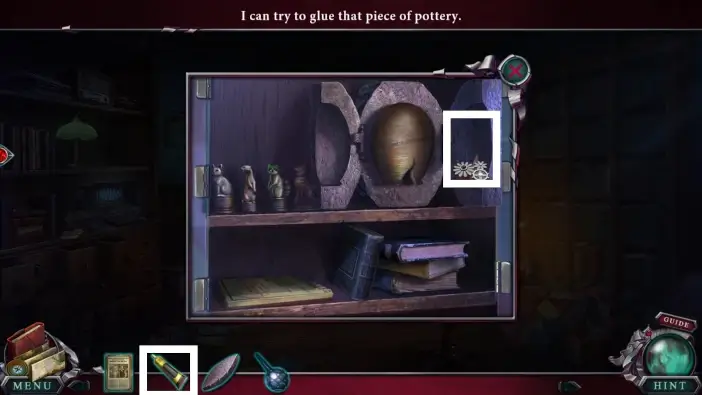
Use glue on a piece of the bronze pot. Amanda will then close and reopen the mold, and the piece will be glued to the pot. Click on the fixed bronze pot to add it to your inventory.
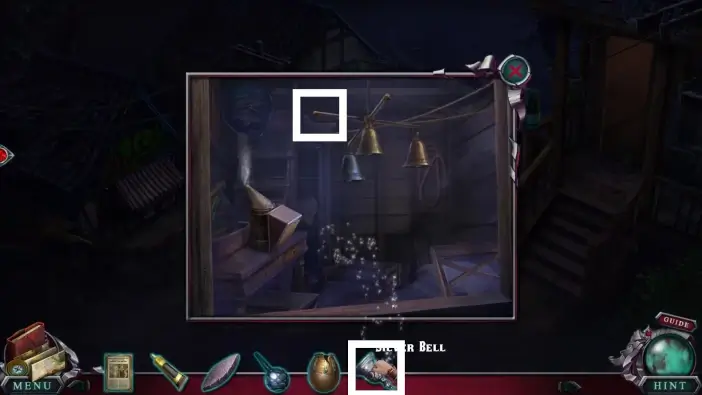
Return to the Keeper’s attic and place the bronze bell where it belongs.
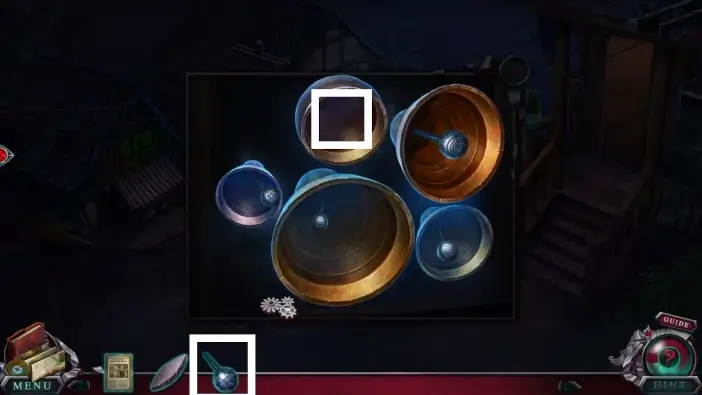
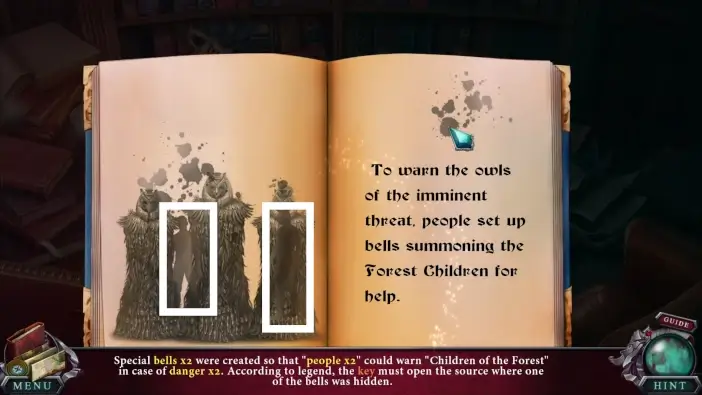
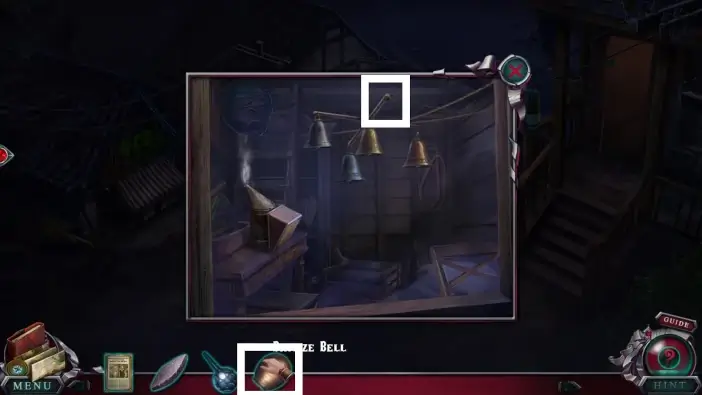
Approach the bells and place the clapper into the bronze pot to create an improvised bell. The clappers need to be rearranged, but you’ll first need to get a clue.
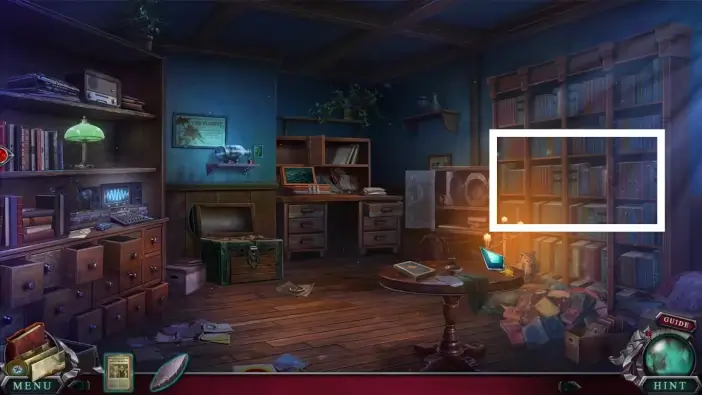
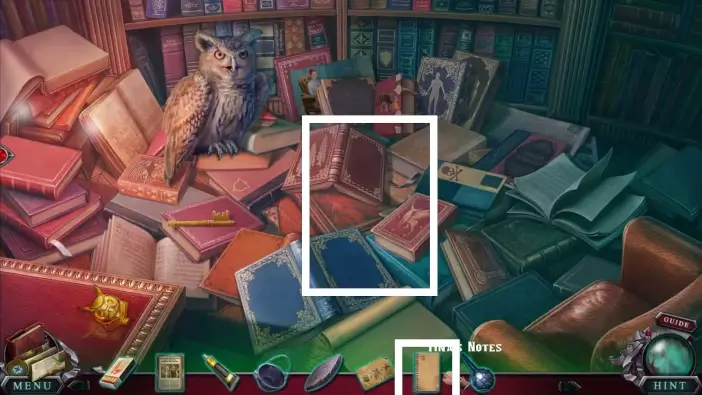
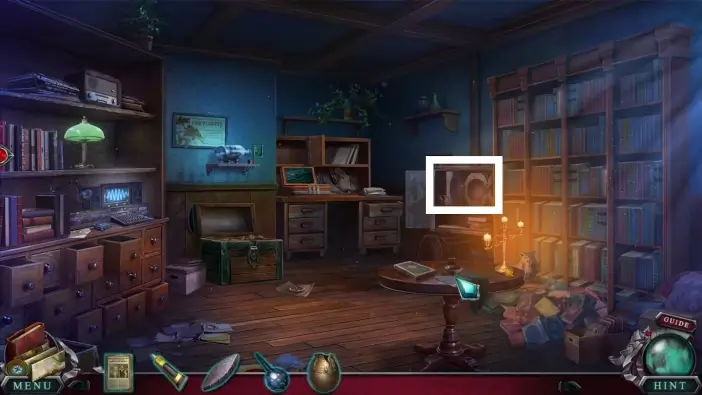
Enter Tina’s house and approach the bookshelves on the right.
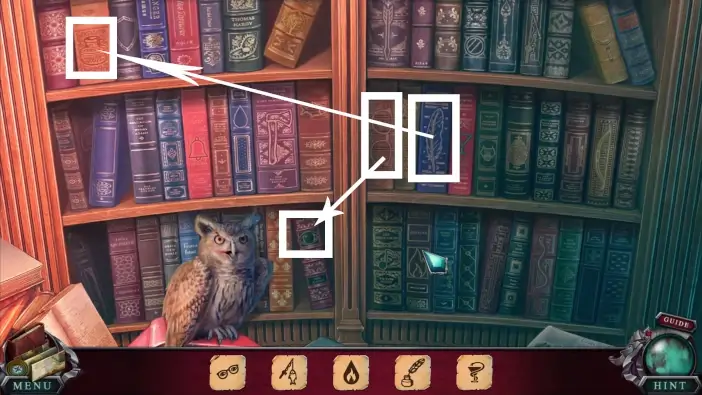
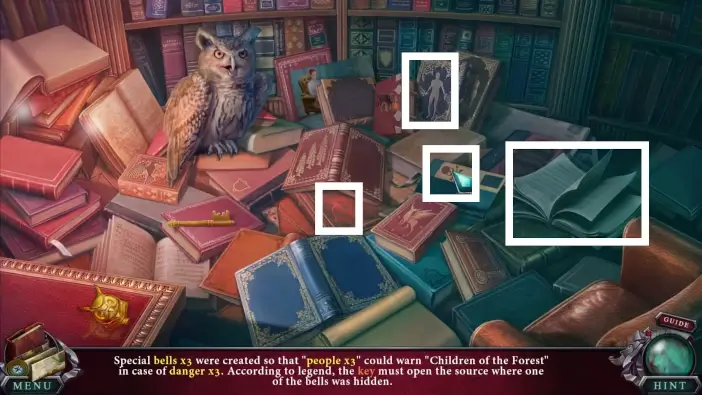
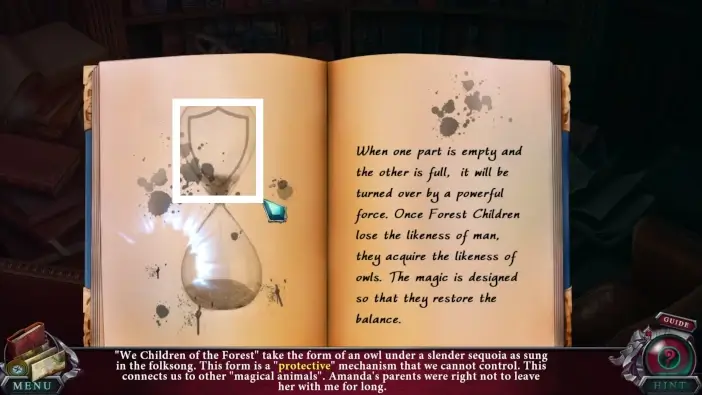
A new mini-game will start. In this mini-game, you’ll need to merge two objects from bookcovers to create a new object that is listed at the bottom of the screen. You’ll need to click on one object and then on the other to combine them. Follow the markers and arrows in the pictures in this guide to achieve this.
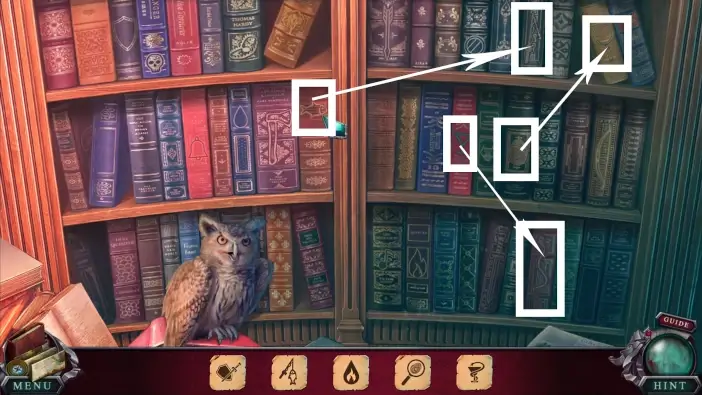
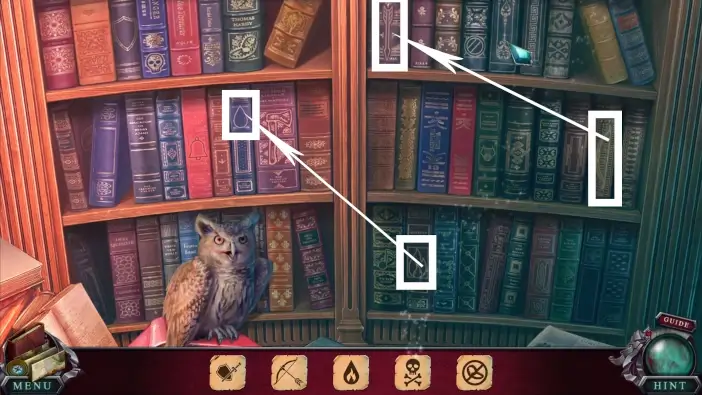
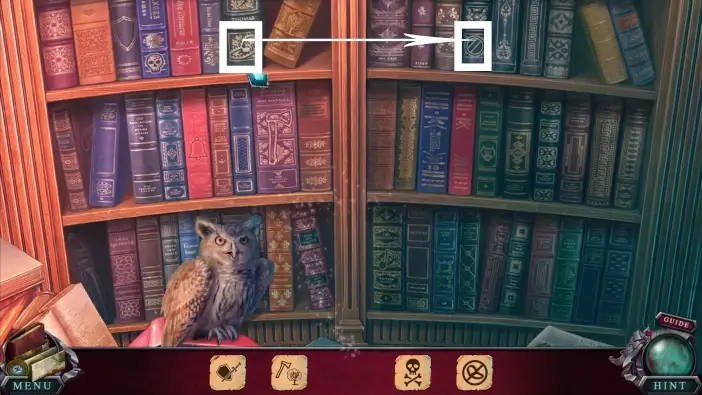
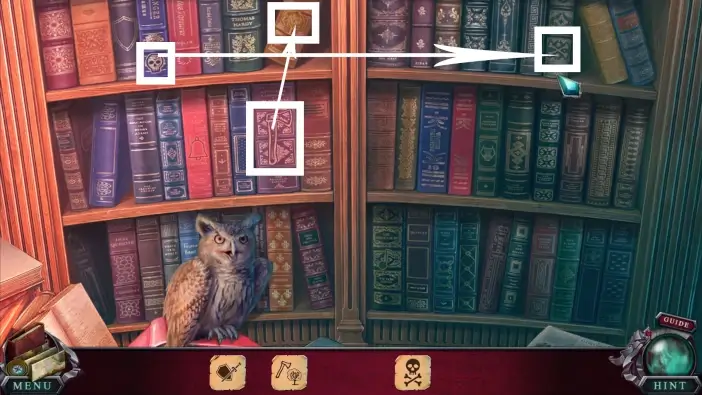
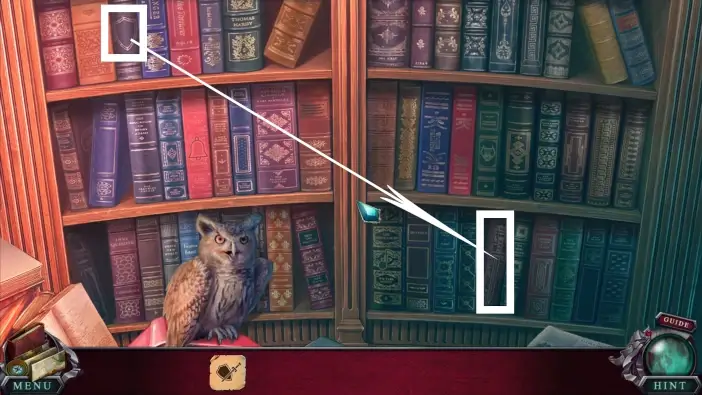
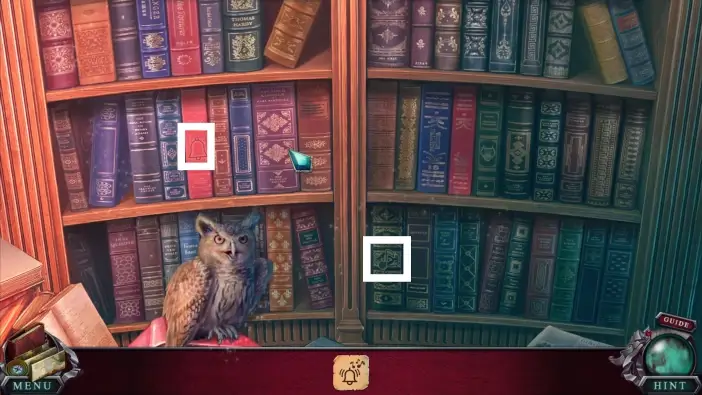
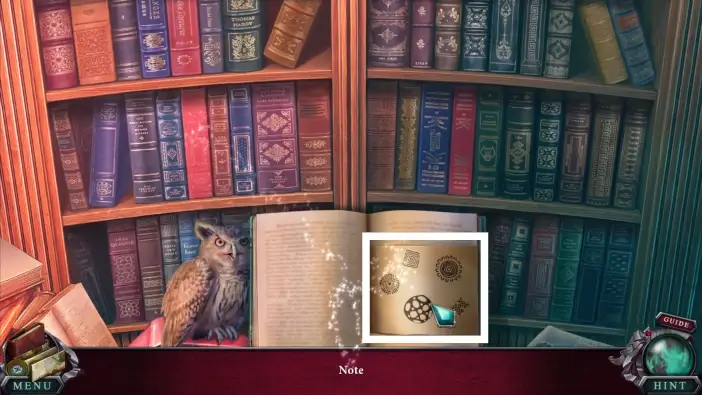
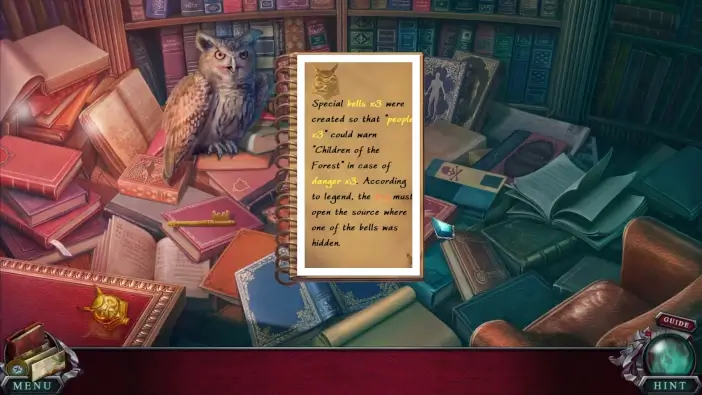
Once you combine all the objects, an open book will appear. Take the note from it. It contains a clue on how to rearrange the clappers on the bells in the Keeper’s attic.
This will mark the end of our guide for Part 2 of the Bonus Chapter of the Edge of Reality: Lost Secrets of the Forest.
Thank you for reading!