Detective – Escape Room Games | Chapter 1: Bitter Memories
Hello everyone and welcome to the walkthrough for Chapter 1 of the “Detective: Escape Room Games”. At the start of the game, our character, the Detective, remembers the case that he began investigating one year ago. The criminal, known as the “Collector”, just eliminated his first victim, and the police force was unable to stop him.
During the investigation, our character lost his partner, Hank Orwell, who was eliminated by the Collector. I guess that Hank got too close to discovering “Collector’s” identity, so he decided to eliminate him.
Naturally, our character vowed that he would catch and imprison the collector. However, the “Collector” decided to lay low, and there wasn’t even a hint of his activities for months.
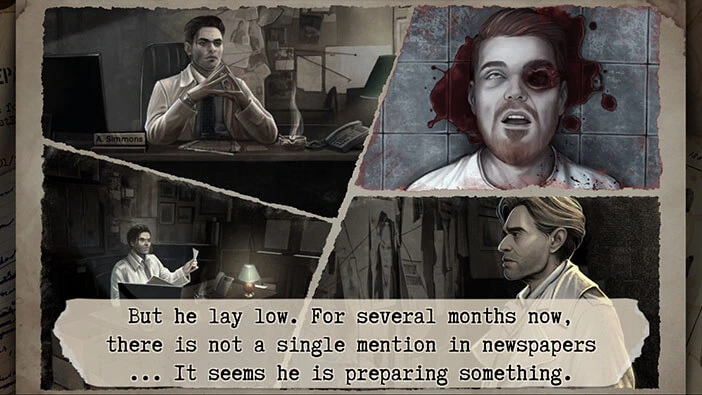
With all that said, our character remembered the events that transpired one year ago, when he lost his partner.
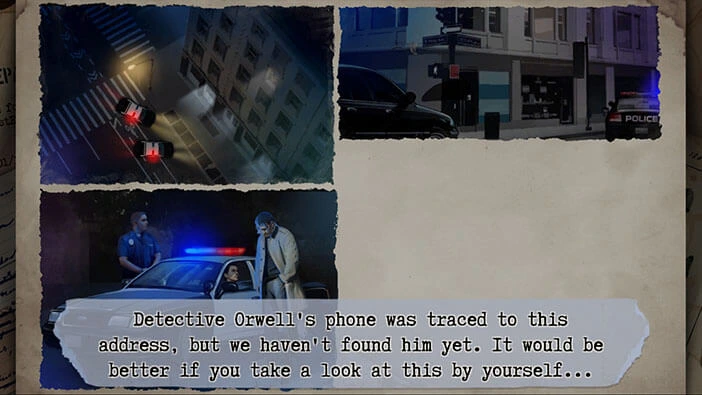
The police officers surrounded a building and waited for our character. When he arrived, they informed him that Orwell’s phone signal was traced to this building, but no one went in to investigate (that’s very strange). The police officer suggested that our character should go in alone, and investigate. So, our character should go in, without backup, and investigate the potential crime scene… That’s a very, very strange suggestion, but let’s move on.
With that said, our character decided to go into the building and investigate.
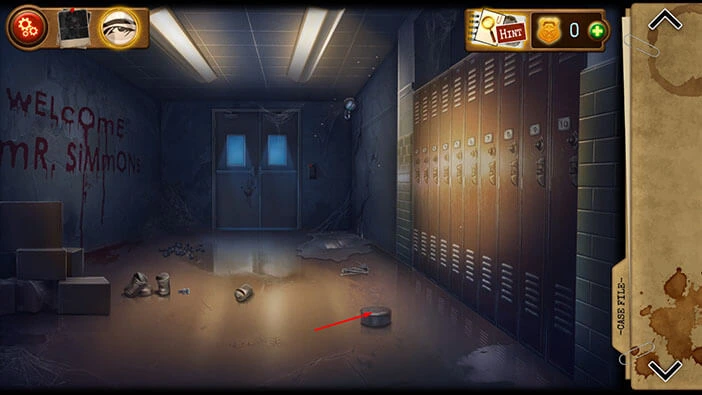
Tap on the tin can located on the floor on the right and you will pick up a “Can lid”.
Next, tap on the “Welcome Mr. Simmons” writing on the wall on the left to take a closer look at it. More specifically, tap on the “O” letter in the “Welcome” word.
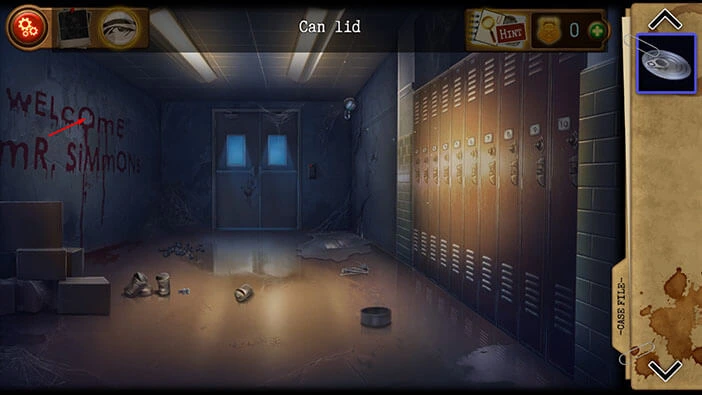
Looks like the criminal used blood to write down these words. Select the “Can lid” from the inventory and use it to remove one layer of the wall (inside the letter “O”).
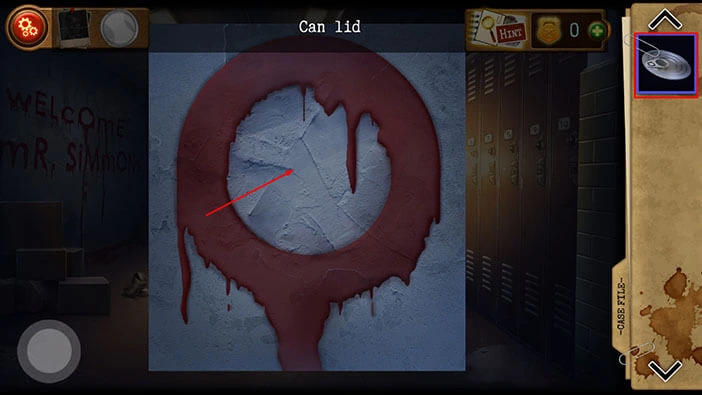
In the hole in the wall, you will find a box, so let’s tap on it to open it. In the box, you will find a “Key”. Tap on it to pick it up, and “Locker key No. 4” will be added to your inventory.
After that, tap on the button in the lower-left corner of the screen to go back.
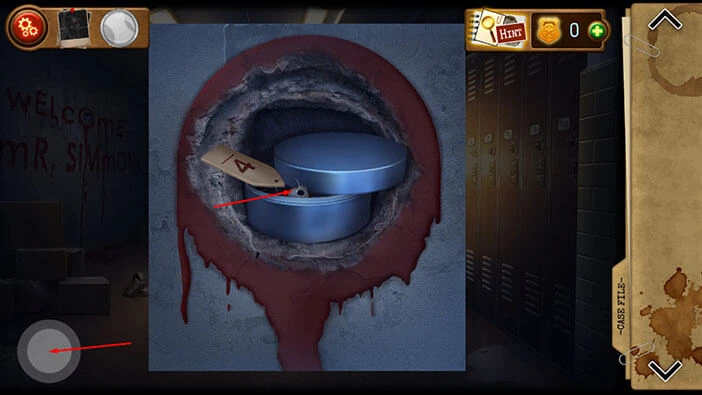
Tap on locker number 4 on the right to take a closer look at it and tap again to start the interaction.
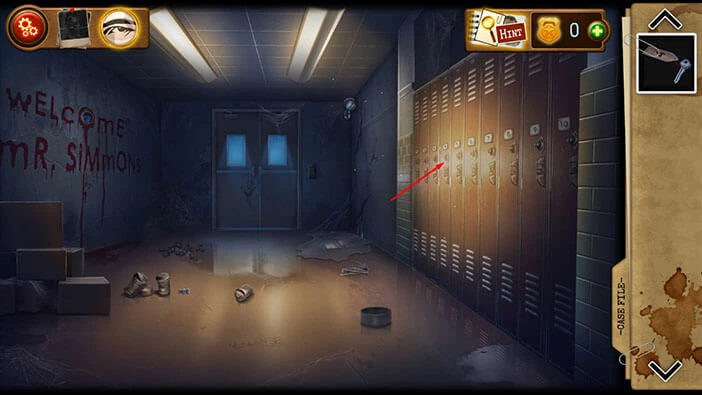
Next, select the “Locker key No. 4” and use it to unlock the locker number 4.
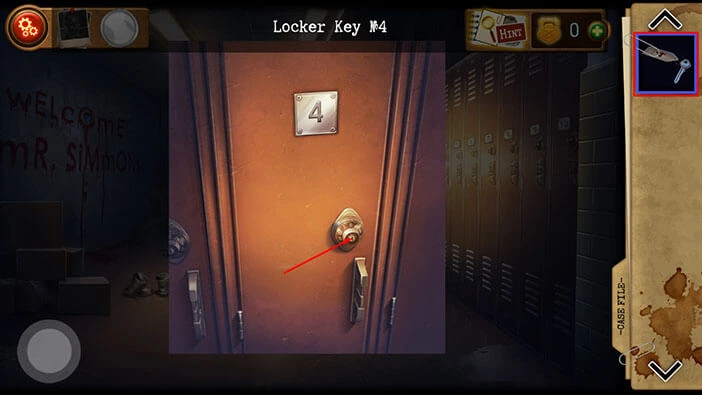
In the locker, you will find a “Mop and a bucket”. Tap on it to pick it up. After that, tap on the button in the lower left corner to go back.
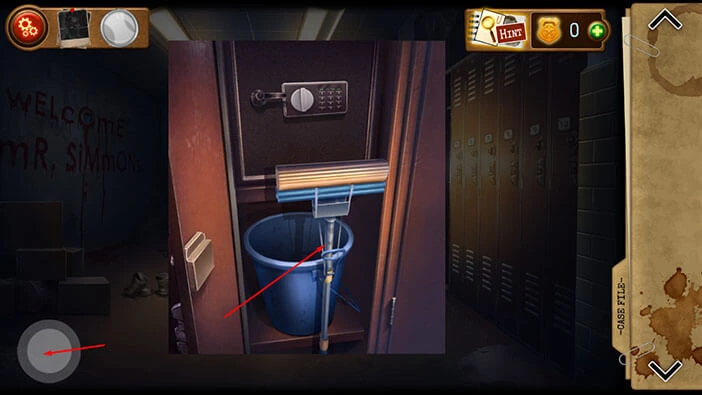
If you take a look at the top right corner of the room, you will notice some fluid, so let’s remove it. Select the “Mop and a bucket” from the inventory and use it to remove the fluid.
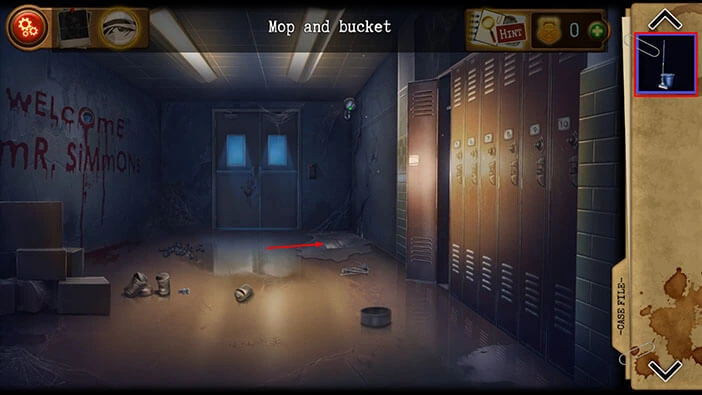
After we removed the water, we can see a floor safe, that was previously hidden below the fluid. We will come back to it in a moment because we will need something to open it.
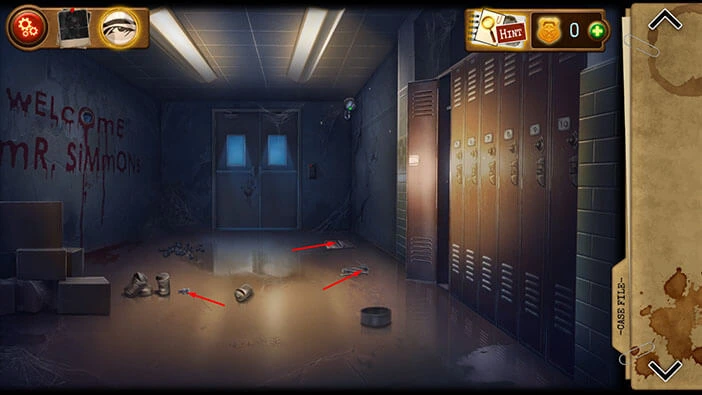
For now, tap on the “Bolts” located on the floor on the left to pick them up. After that, tap on the “Nail” located on the right side of the floor to pick it up.
Lastly, tap on the floor safe to take a closer look at it.
You will notice that two bolts are missing. So, select the “Bolts” from the inventory and insert them into the empty slots.
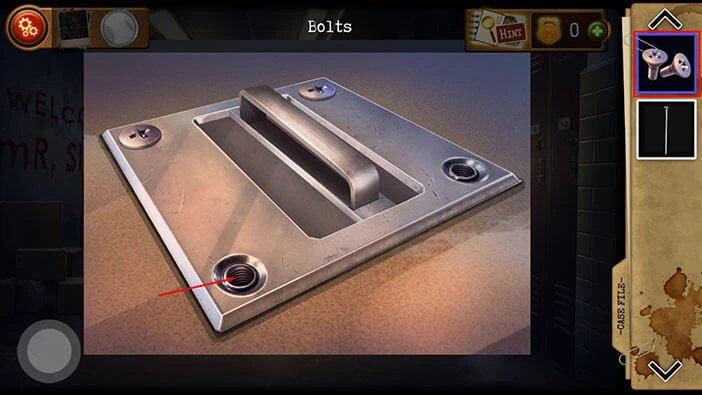
Next, drag from left to right to open the lid.
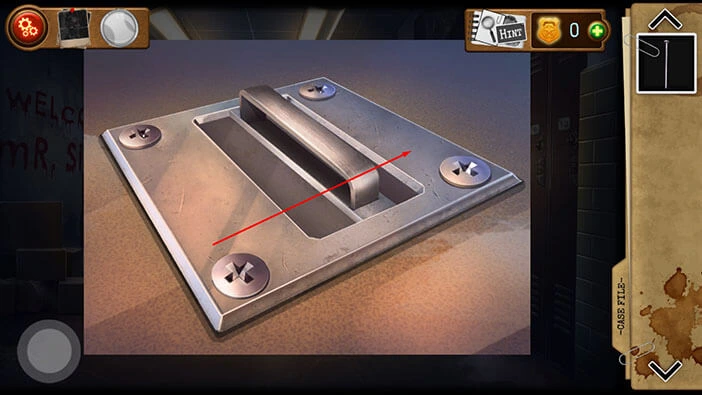
In the floor safe, you will find a key. Tap on it to pick it up and “Locker key No. 7” will be added to your inventory.
After that, tap on the button in the lower left corner to go back.
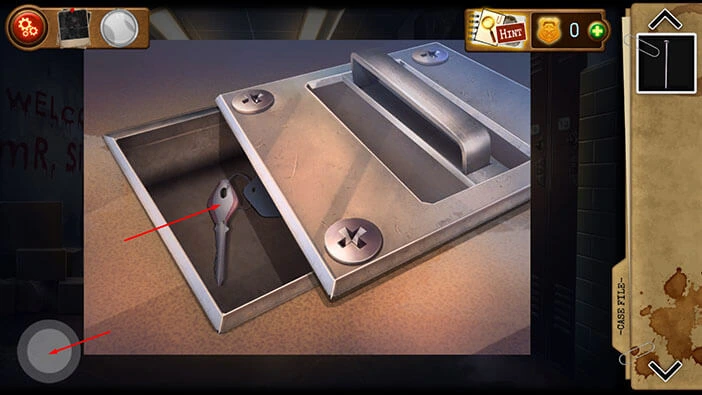
Tap on the locker number to take a closer look at it, and tap again to start the interaction.
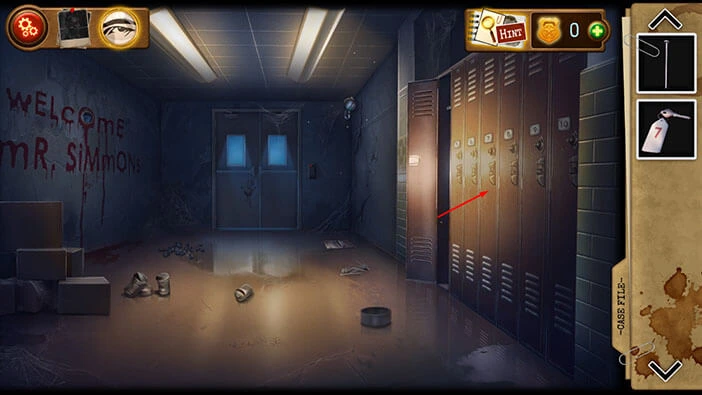
Select the “Locker key No. 7” from the inventory and use it to unlock locker number 7.
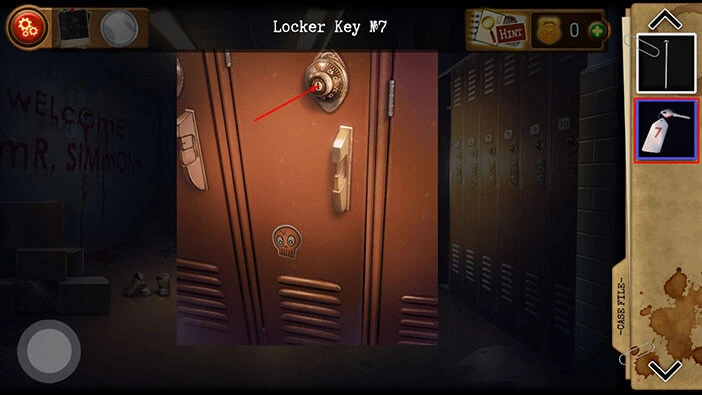
Tap on the note on the left to take a closer look at it, and tap again to start the interaction.
You will see “White ravens whisper to little princess those terrible secrets that should never be revealed.” Memorize/write down this puzzle because we will need it later.
Once you’re done, tap on the screen to go back, then tap on the button in the lower left corner.
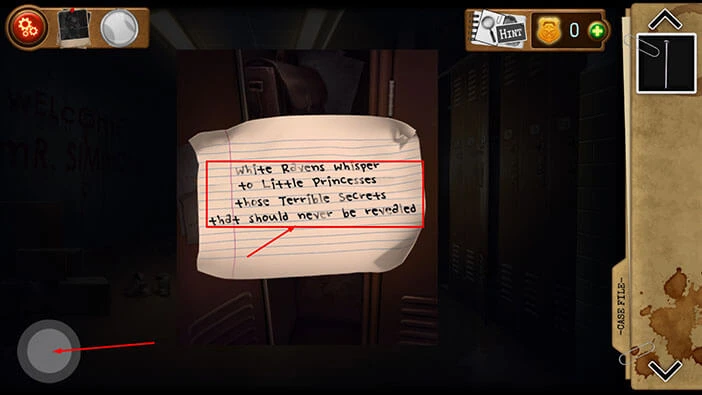
Next, if you take a look at the top shelf, you will notice a blue item. Tap on it to take a closer look.
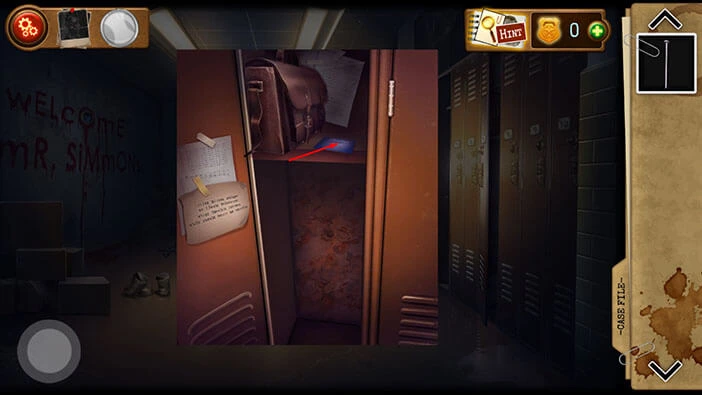
You will see a card with the address, and this is the location of the first crime. Memorize/write down the number on the card, “5247”, because we will need it later.
Once you’re done, tap on the button in the lower left corner to go back.
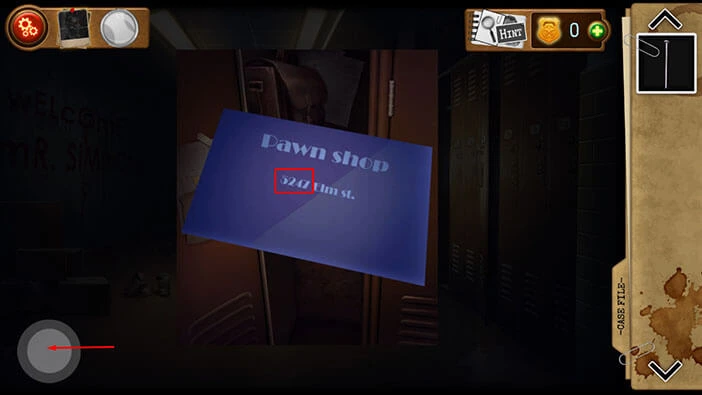
If you take a look at the top left corner of the screen, you will notice a photo, next to the “Settings” gear. Tap on this photo.
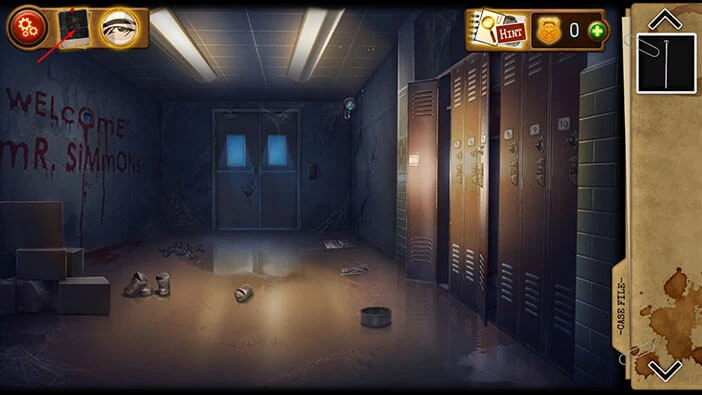
You will notice that the pawn shop card has been added to the list of evidence. Tap on the “X” button in the top right corner to close this window.
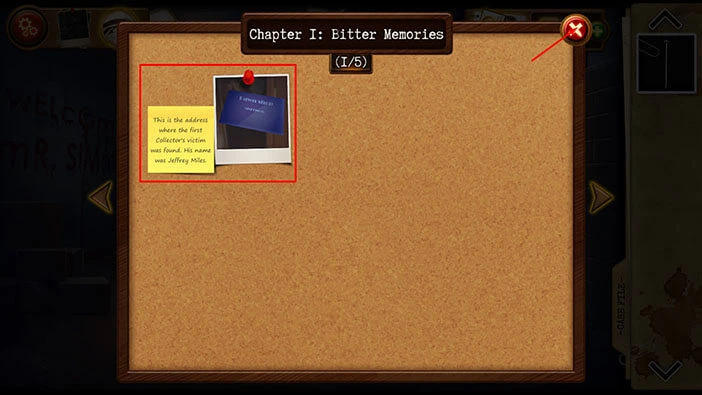
Previously, we saw a safe in the locker number 4. So, let’s tap on the locker to take a closer look at it, then tap on the safe to start the interaction.
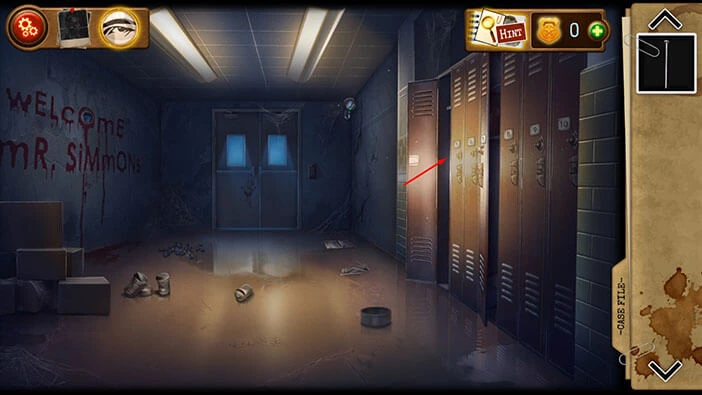
Enter the code “5247” that we discovered on the “Pawnshop” card, and you will unlock the safe.
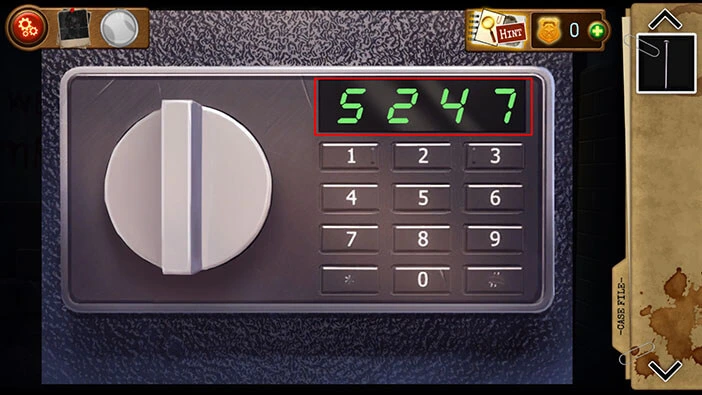
In the safe, you will find three items, a “Hammer head”, a “Battery”, and a “Hammer handle”. Tap on them to pick them up.
Once you’re done, tap on the button in the lower left corner to go back.
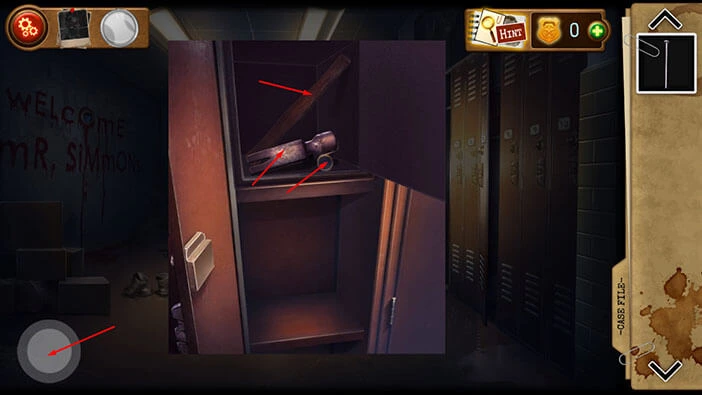
Next, let’s go back to the locker number 7.
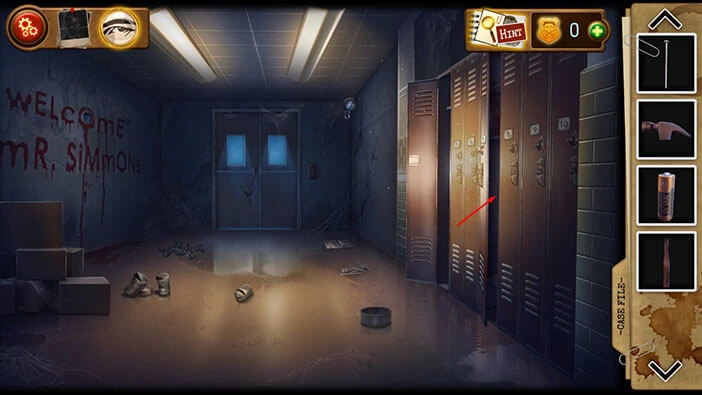
If you take a closer look at the back side of the locker, you will notice that it is rusty, and it shouldn’t be too hard to break it down. Let’s do that.
First, we will assemble a hammer. So, select the “Hammer handle” from the inventory and drag it to the “Hammer head” and you will assemble a “Hammer”.
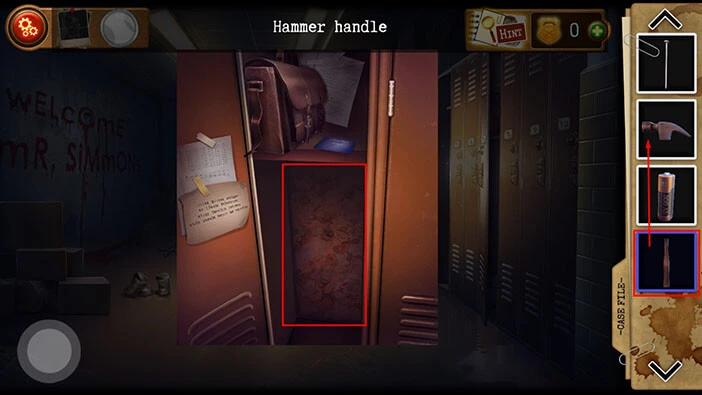
Select the “Hammer” from the inventory and use it to break the back side of the locker.
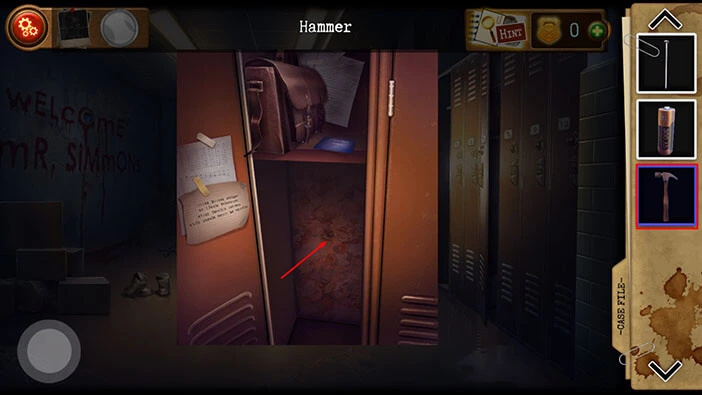
Behind the locker, you will discover a hole in the wall. Let’s see what’s inside.
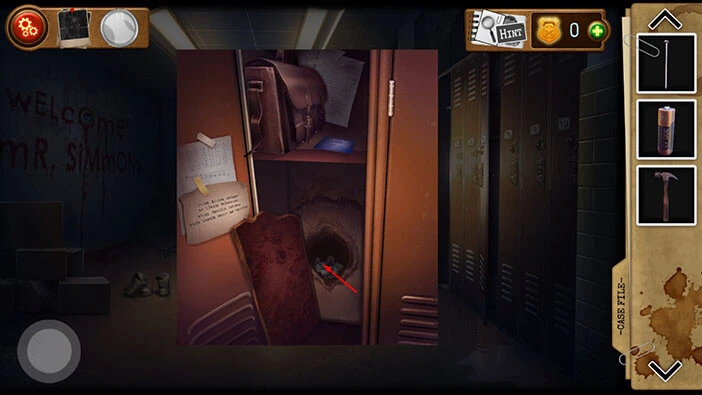
Here, we can see a dozen or so pieces of the photo, and our next task is to assemble the photo. We will do this task in several steps. Let’s begin.
Step 1
First, let’s move the piece with “Viet” letters into the bottom left corner.
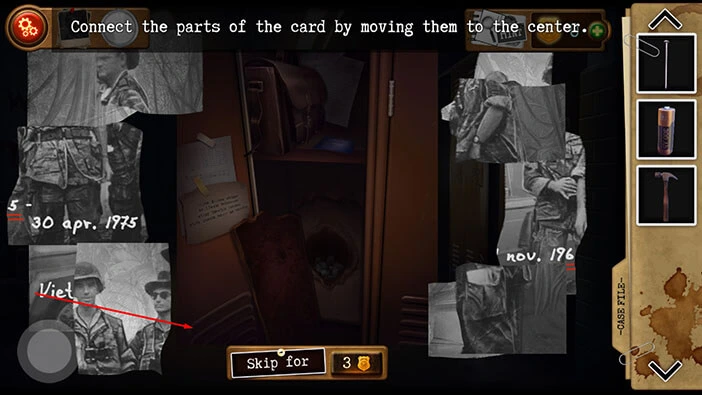
Step 2
On the right side, in the middle, you will notice a photo piece “nov 196”. Let’s take this piece and put it next to (to the right) the previous piece of the photo.
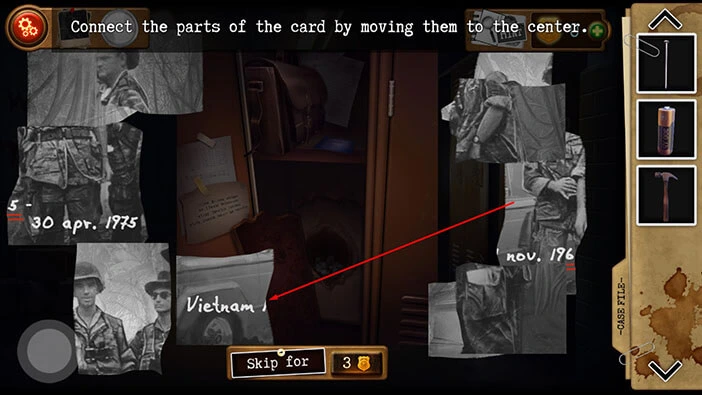
Step 3
On the left side, in the middle, you will notice a photo piece “30 Apr. 1975”. Let’s take this piece and put it next to (to the right) the previous piece of the photo.
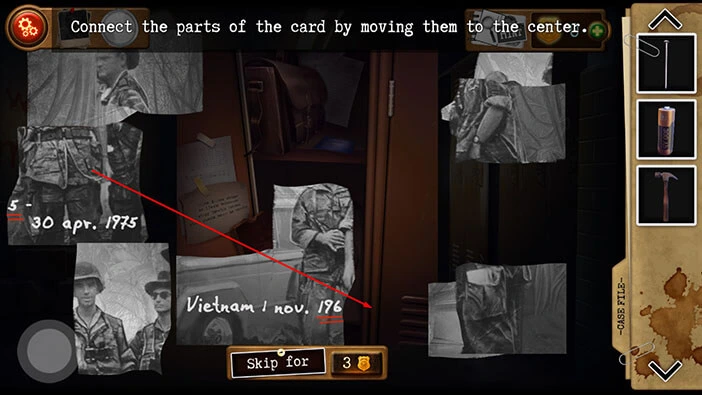
Step 4
In the bottom right corner, you will notice a puzzle piece, sticking out below the other pieces. Select this piece is put it on the left, and you will notice that it fits perfectly as the other part of the car.
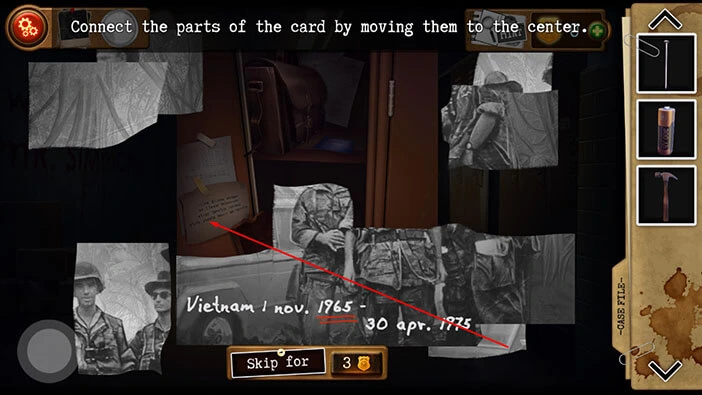
Step 5
Next, take the puzzle pieces located in the top left corner and put them above the car.
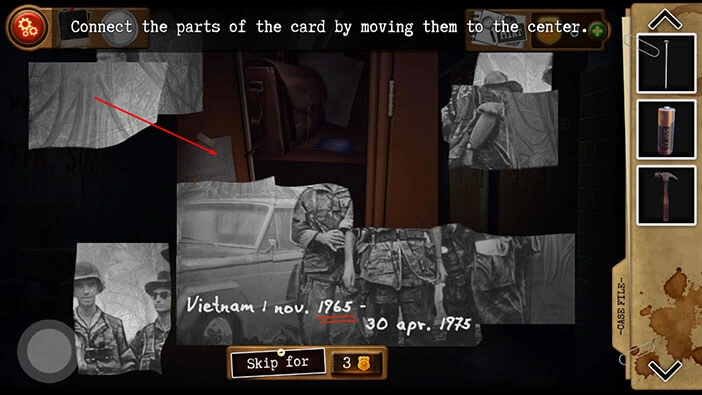
Step 6
Take the piece of photo in the top right corner of the screen and use it to assemble the soldier on the left.
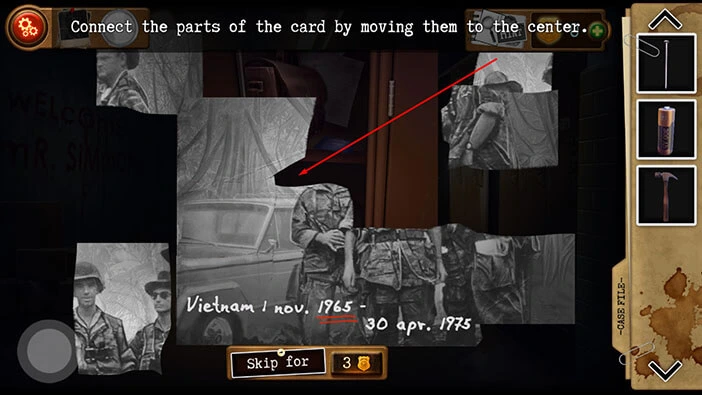
Step 7
Take the piece of the photo located in the bottom left corner and put it next to (to the left) the previous piece of the photo.
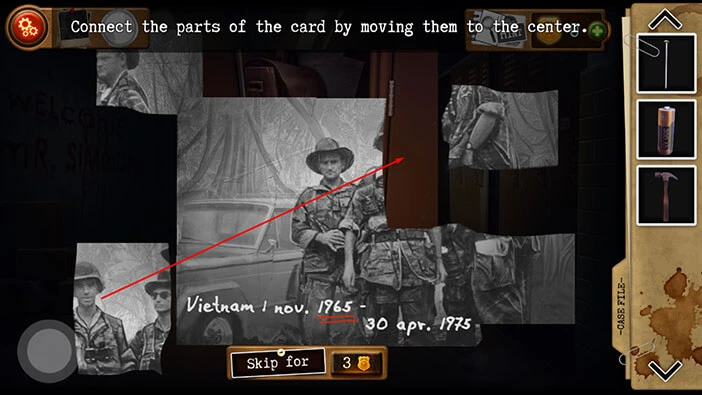
Step 8
Next, take the puzzle piece on the right, and drag it down, integrating it into the rest of the photo.
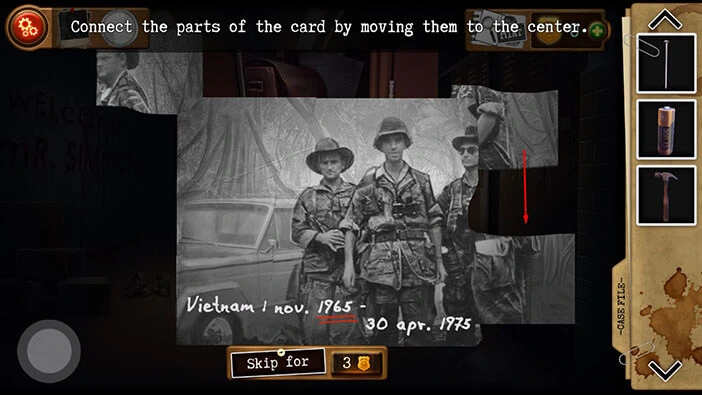
Step 9
Take the last piece of the photo, located in the top left corner, and put it into the top right corner of the photo. With this last step, you will assemble the photo.
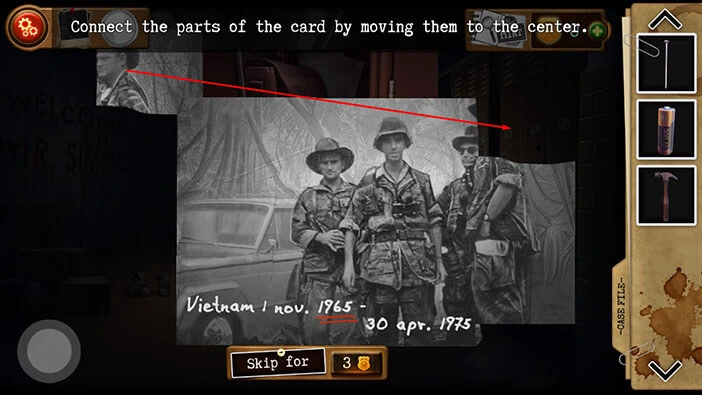
You will notice that the year “1965” is underlined. Memorize/write down this number because we will need it later.
Once you’re done, tap on the button in the lower left button of the screen to go back.
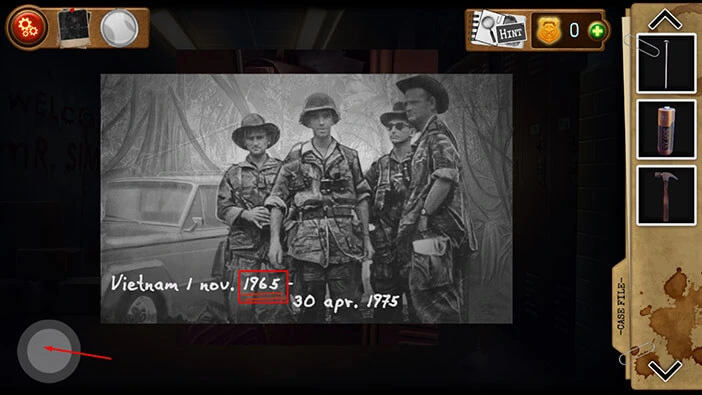
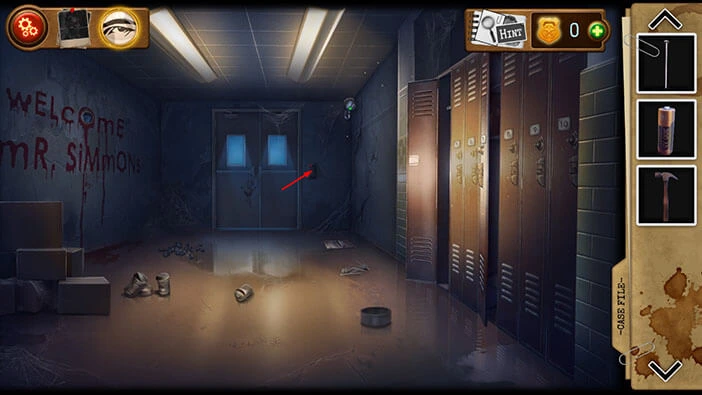
Next to the door in front of you, there is a keypad. Tap on it to take a closer look.
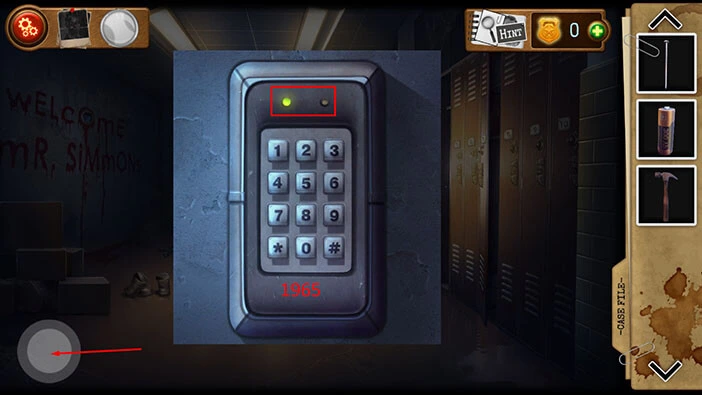
Enter the code “1965” that we discovered by assembling the photo. The light on the door will turn green, indicating that you unlocked the door.
Once you’re done, tap on the button in the lower left corner to go back.
Tap on the door to proceed into the next room.
Let’s explore this room. Tap on the first picture on the wall on the right to take a closer look at it.
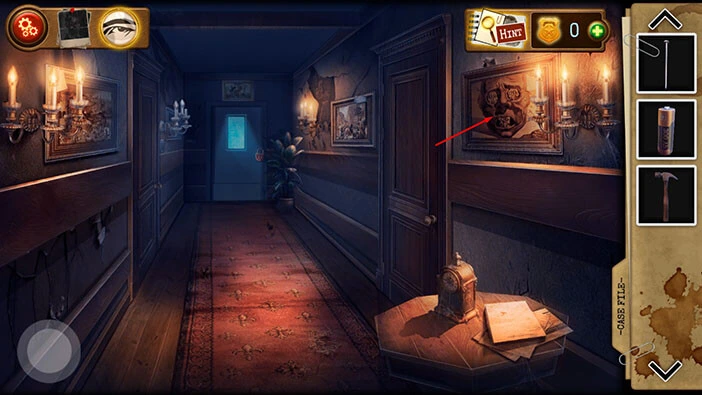
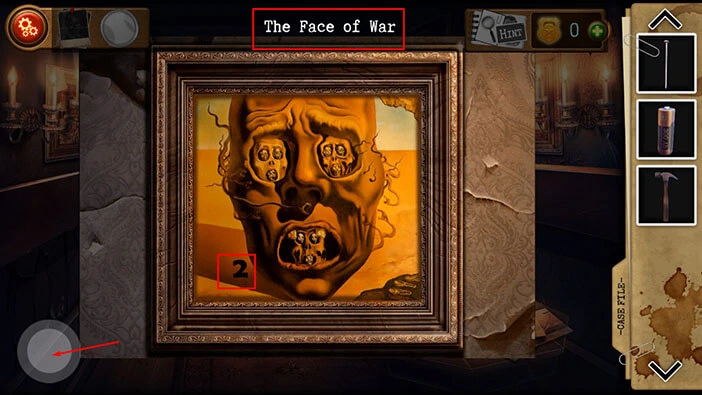
The title of this picture is “The Face of War”. In the picture, we can also see number 2. Memorize/write down the title of the picture, and the number in the picture because we will need this information in order to solve the next puzzle.
Once you’re done, tap on the button in the lower left corner to go back.
Next, tap on the first picture on the wall on the left to take a closer look at it.
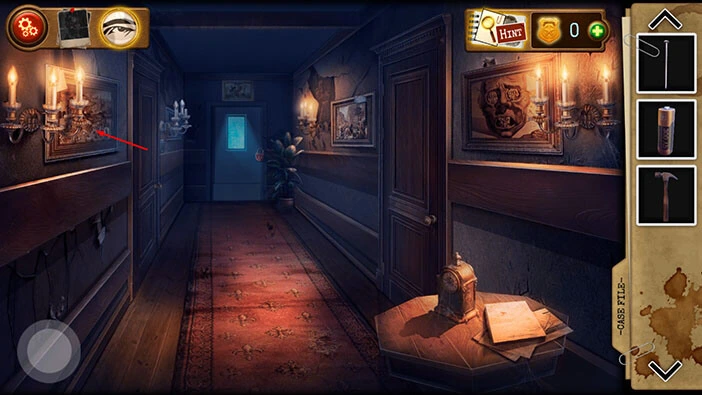
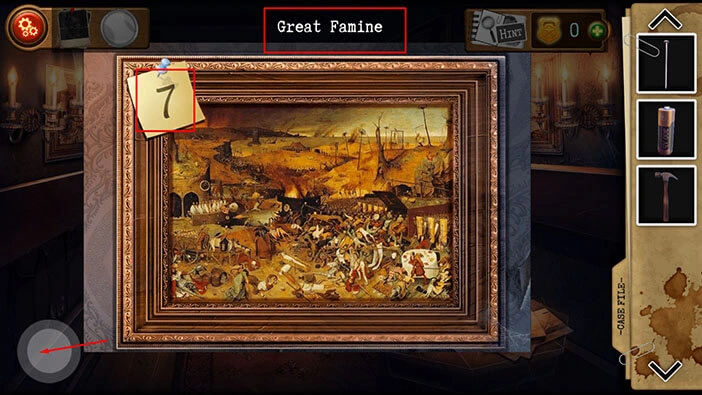
The title of this picture is “Great Famine”. In the picture, we can also see number 7. Memorize/write down the title of the picture, and the number in the picture.
Once you’re done, tap on the button in the lower left corner to go back.
Next, tap on the second picture on the wall on the right to take a closer look at it.
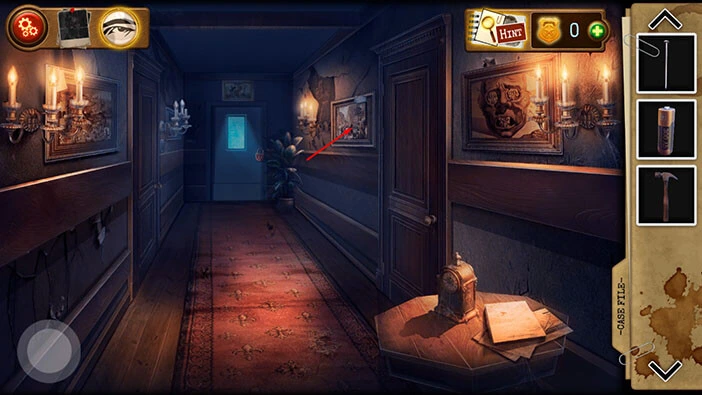
The title of this picture is “Plague of Ashdod”. In the picture, we can also see number 8. Memorize/write down the title of the picture, and the number in the picture.
Once you’re done, tap on the button in the lower left corner to go back.
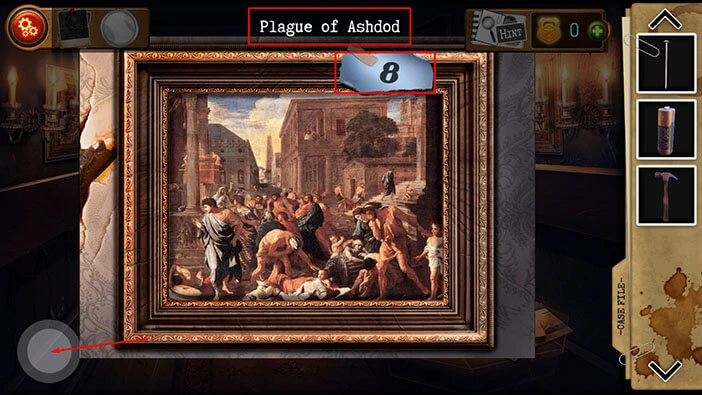
Next, tap on the second picture on the wall on the left (behind the candlestick) to take a closer look at it.
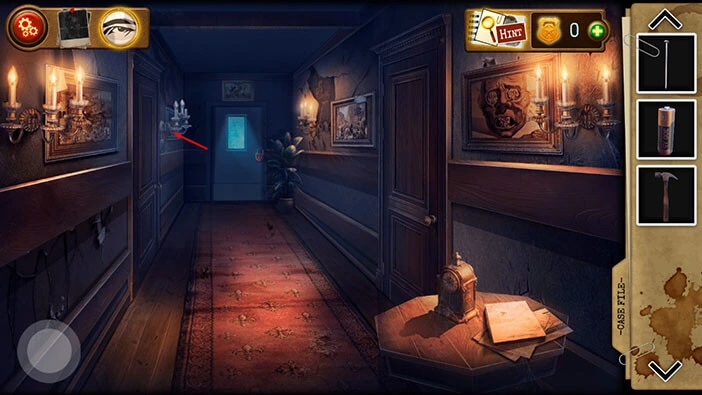
The title of this picture is “The Death of Seneca”. In the picture, we can also see number 5. Memorize/write down the title of the picture, and the number in the picture.
Before we proceed, take a look at the top right corner of the picture, and you will notice a photo sticking out behind the corner. Tap on this photo to pick it up.
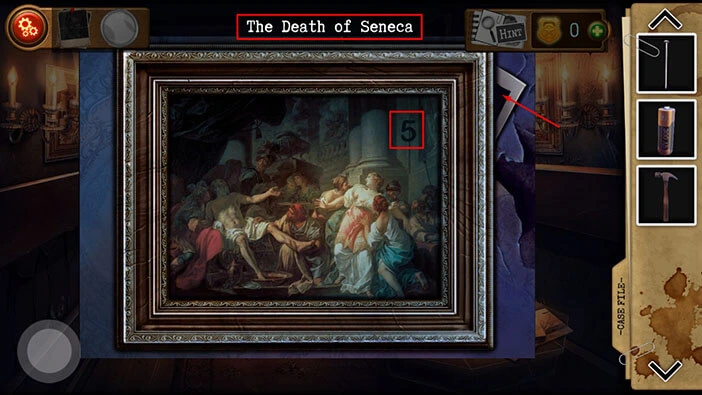
Tap on the photo again and our character will file it as evidence. After that, he will return it back where we found it.
After that, tap on the button in the lower left corner to go back.
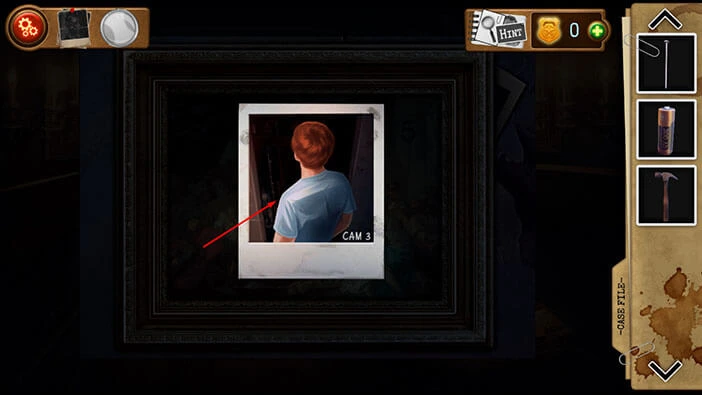
Tap on the evidence button located in the top left corner of the screen (next to the settings button).
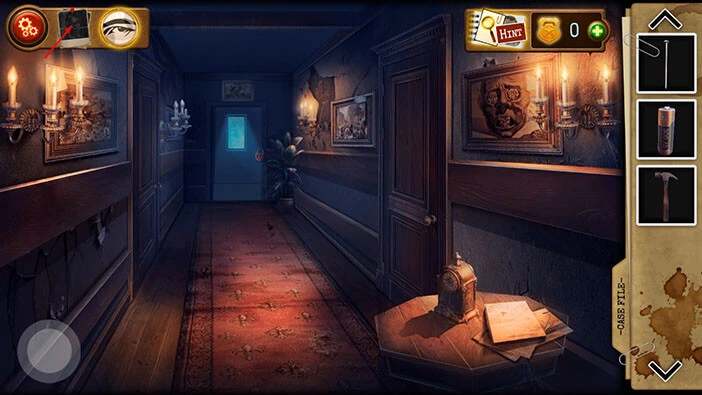
You will notice the photo on the right is part of the evidence. The man in the photo is Hank Orwell, our character’s partner who went into the building but never came out.
Tap on the “Cam 3” photo to take a closer look at it. After that, tap on the photo again to return it to the board.
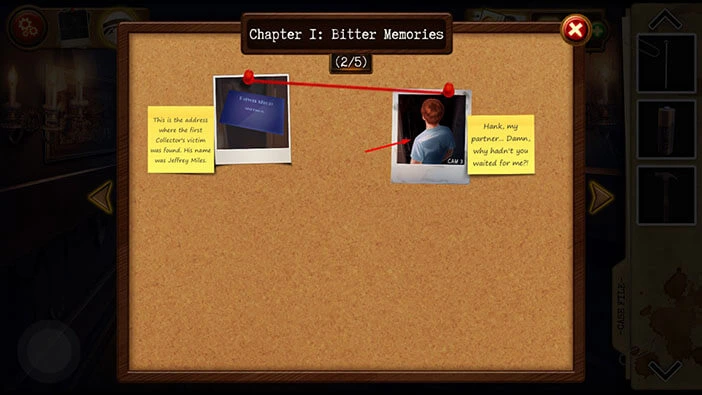
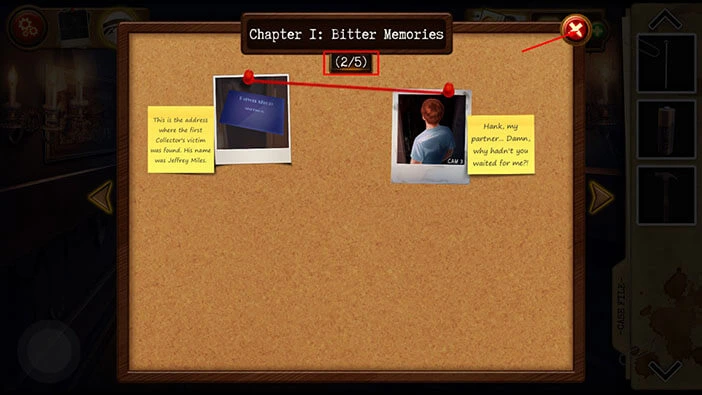
At the top of the board, you will notice that now we have 2/5, so we found two out of five pieces of evidence in this chapter.
After that, tap on the “X” button in the top right corner of the board to go back.
Let’s take a look at the last picture. If you take a look at the door at the end of the hallway, you will notice a picture above it. Tap on the picture to examine it.
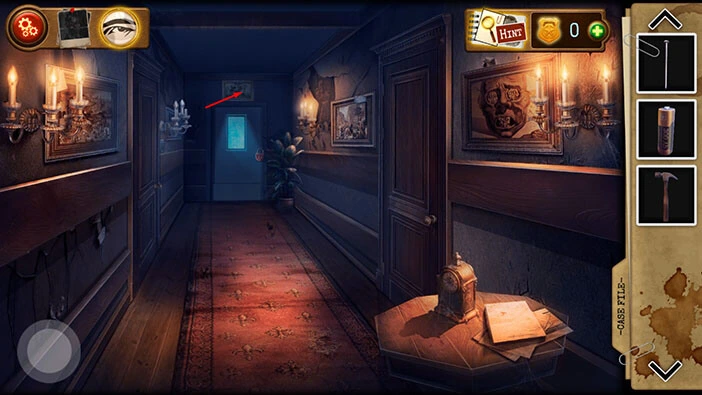
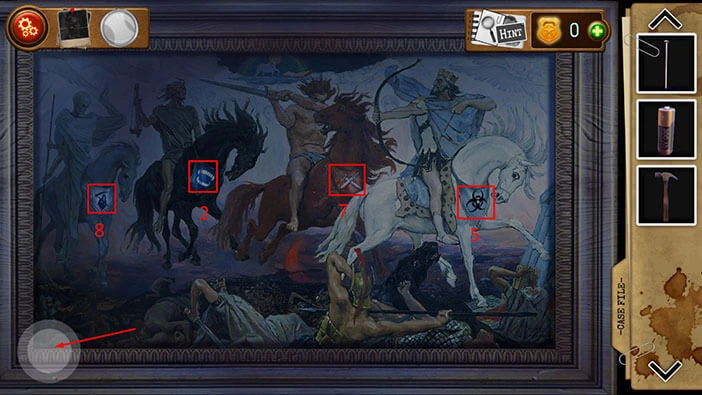
In this picture, we can see four horsemen of the apocalypse. Looking from left to right, we have,
The first horseman = Plague. Previously, we saw a picture titled “Plague of Ashdod” and in this picture, we saw number 8. So, number 8 is the first number.
The second horseman = War. Previously, we saw a picture titled “The Face of War” and in this picture, we saw number 2. So, number 2 is the second number.
The third horseman = Famine. Previously, we saw a picture titled “Great Famine” and in this picture we saw number 7. So, number 7 is the third number.
The fourth horseman = Death. Previously, we saw a picture titled “The Death of Seneca” and in this picture, we saw number 5. So, number 5 is the fourth number.
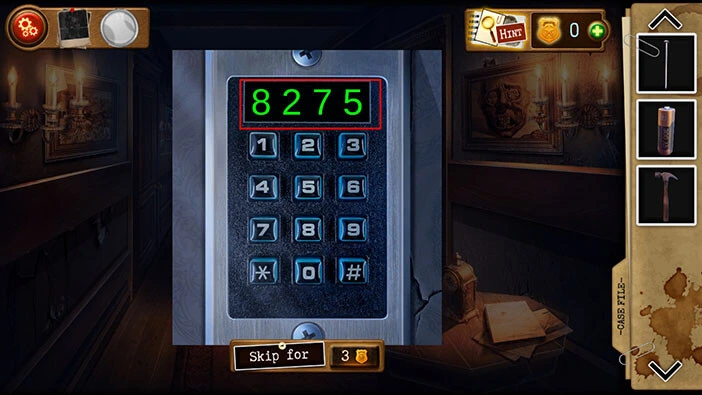
When we put all numbers together, we will get “8275”. Memorize/write down this number, because we will need it for the next puzzle. Once you’re done, tap on the arrow in the lower-left corner of the screen to go back.
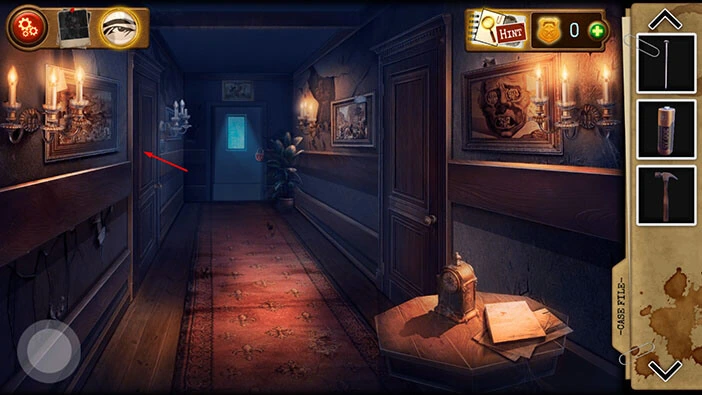
Tap on the door on the left to take a closer look at it.
Enter the code “8275” and you will unlock the door.
Next, tap on the door to proceed to the next room.
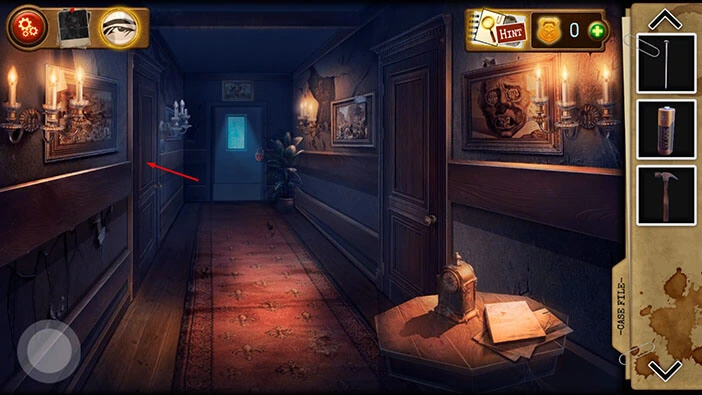
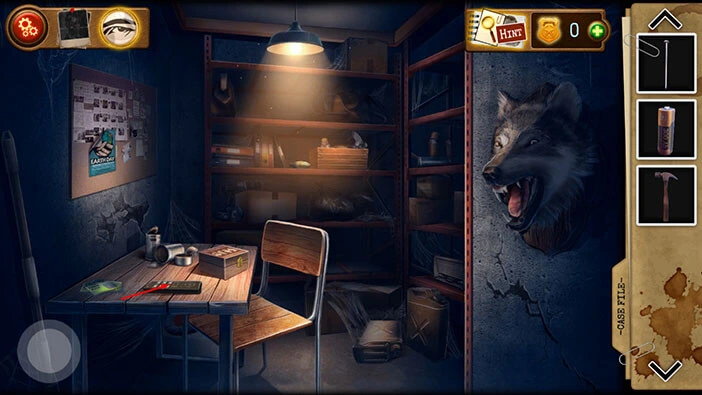
If you take a look at the table on the left, you will notice a remote control. Tap on it to start the interaction.
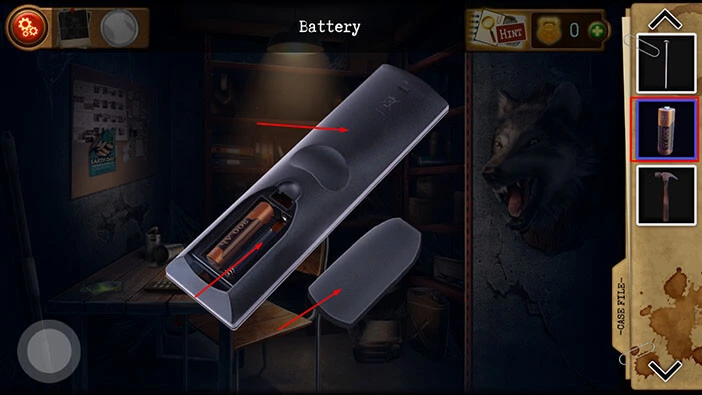
You will notice that one of the batteries in the remote control is missing. So, select the “Battery” from the inventory, and insert it into the empty slot. After that, tap on the lid on the right to attach it to the remote control.
Lastly, tap on the “Remote control” to pick it up.
Next, on the middle shelf in front of you, you will notice a large wooden box. Tap on it to take a closer look.
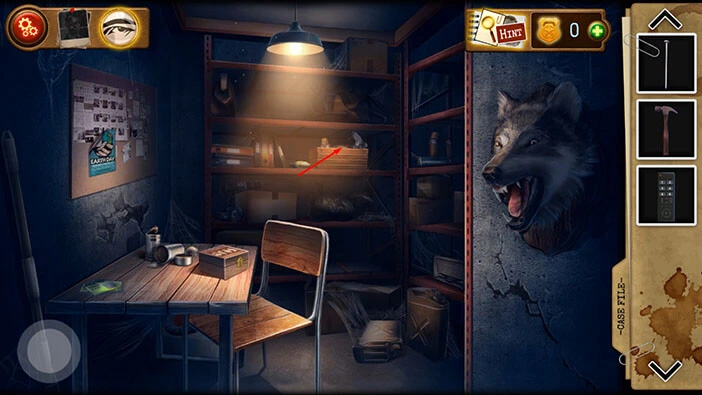
You will notice that there is some kind of box/puzzle at the bottom of the box. Let’s examine it. Drag the items to remove them from the box, and you will eventually reach the smaller box at the bottom.
Once that’s done, tap on the small box to start the interaction.
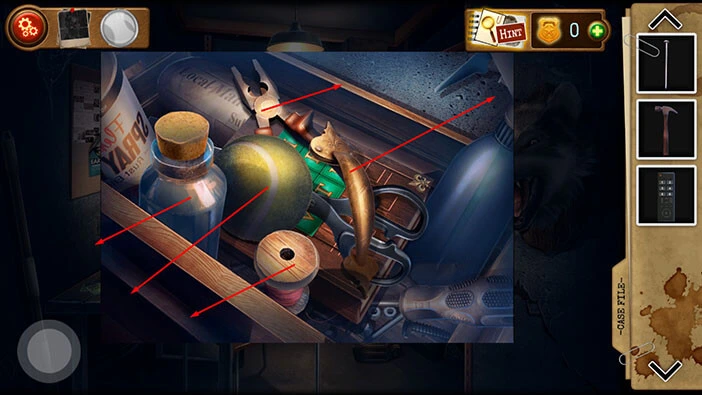
Our next task is to assemble two words by using the letters on the board. Before we do that, we should take a look at the elements (squares) below the grid. There are two rows, and we have five elements per row.
Step 1
Let’s take a look at the first element in the first row. You will notice two lines, a line on the right, and a line at the bottom. If you look at the letter “W” you will notice that it has a red line on the right and a red line at the bottom. So, the lines on the letter “W” match the lines of the first element in the first row. To simplify it, the lines on the elements at the bottom represent the borders of letters in the grid, but only the bordering letters count.
So, the first letter is “W”. Tap on it.
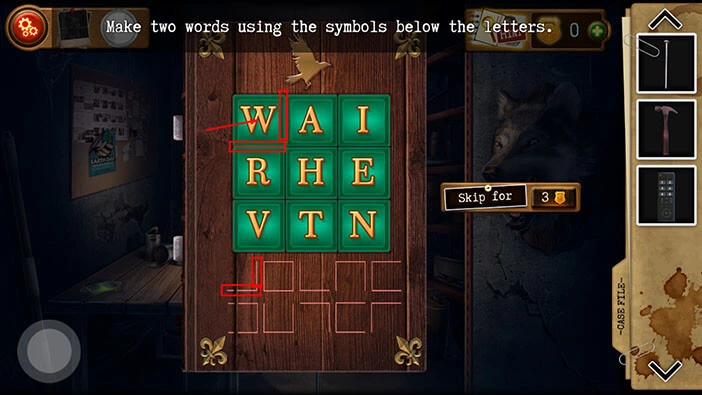
Step 2
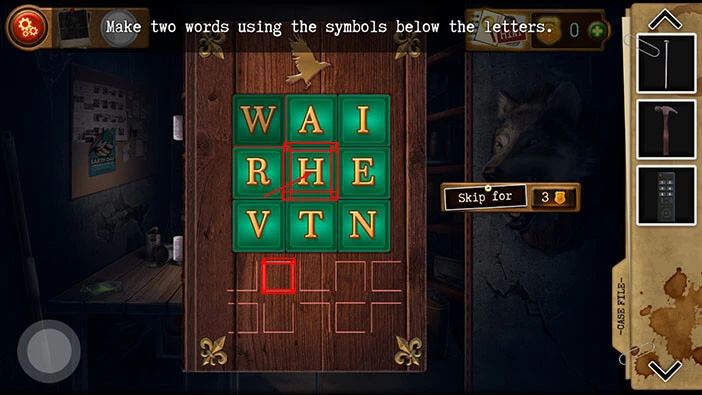
Let’s take a look at the second element in the first row. We can see a line on all four sides. So, we are looking for a letter that is bordering other letters on all four sides. If you take a look at the grid, you will notice that the letter “H” is the only letter that matches this description.
So, the second letter is “H”. Tap on it.
Step 3
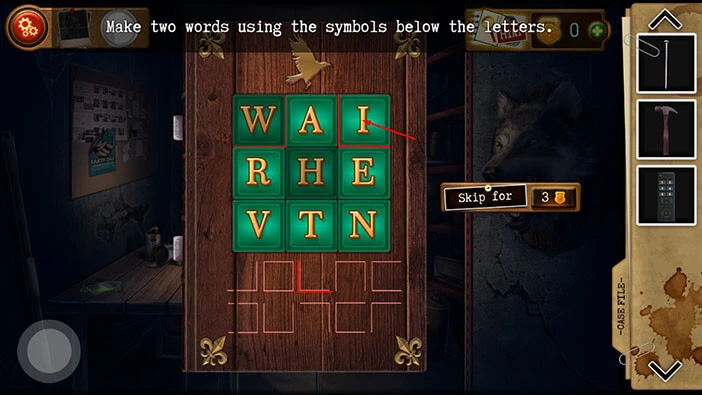
Let’s take a look at the third element in the first row. We can see a line on the left and a line at the bottom. If you take a look at the grid, you will notice that the letter “I” is the only letter that matches this description (it borders the letter “A” on the left, and the letter “E” at the bottom).
So, the third letter is “I”. Tap on it.
Step 4
Let’s take a look at the fourth element in the first row. We can see a line on the left, a line on the right, and the line at the top. If you take a look at the grid, you will notice that the letter “T” is the only letter that matches this description (it borders the letter “H” at the top, the letter “V” on the left, and the letter “N” on the right bottom).
So, the fourth letter is “T”. Tap on it.
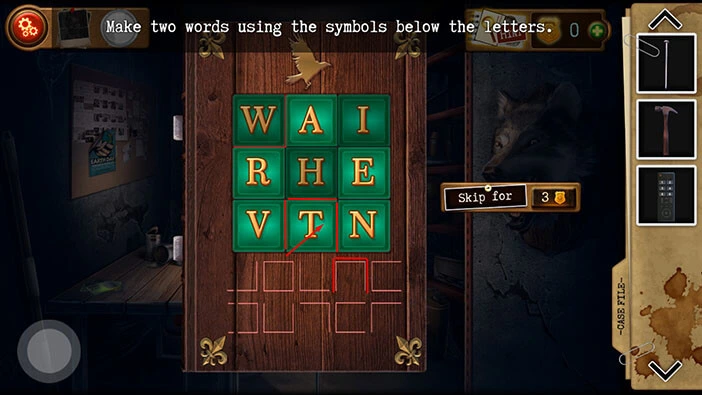
Step 5
Let’s take a look at the fifth element in the first row. We can see a line on the left, the line at the bottom, and the line at the top. If you take a look at the grid, you will notice that the letter “E” is the only letter that matches this description (it borders the letter “I” at the top, the letter “H” on the left, and the letter “N” at the bottom).
So, the fifth letter is “E”. Tap on it. With that, you will assemble the word “WHITE”, the grid will flash green, and the letters will reset.
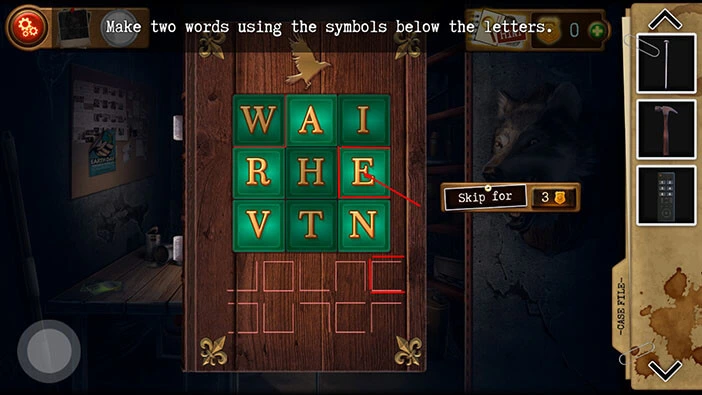
Let’s assemble the second word.
Step 1
Let’s take a look at the first element in the second row. We can see a line on the right, the line at the top, and the line at the bottom. If you take a look at the grid, you will notice that the letter “R” is the only letter that matches this description (it borders the letter “H” on the right, the letter “W” at the top, and the letter “V” at the bottom).
So, the first letter is “R”. Tap on it.
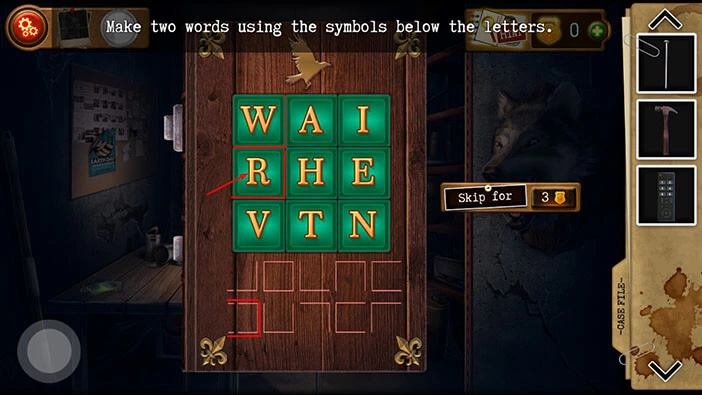
Step 2
Let’s take a look at the second element in the second row. We can see a line on the right, a line on the left, and the line at the bottom. If you take a look at the grid, you will notice that the letter “A” is the only letter that matches this description (it borders the letter “I” on the right, the letter “W” on the left, and the letter “H” at the bottom).
So, the second letter is “A”. Tap on it.
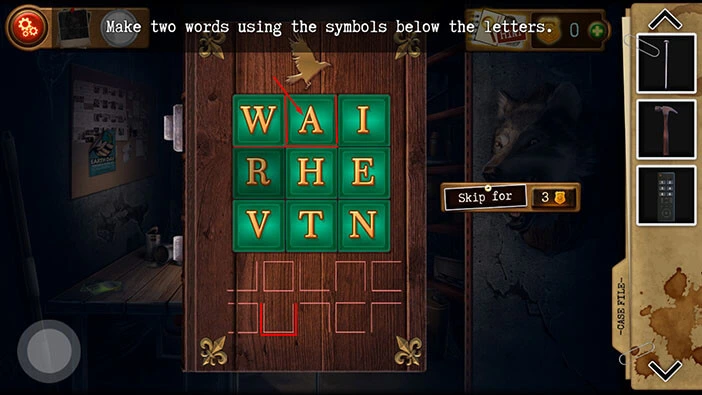
Step 3
Let’s take a look at the third element in the second row. We can see a line on the right and a line at the top. If you take a look at the grid, you will notice that the letter “V” is the only letter that matches this description (it borders the letter “T” on the right, the letter, and the letter “R” at the top).
So, the third letter is “V”. Tap on it.
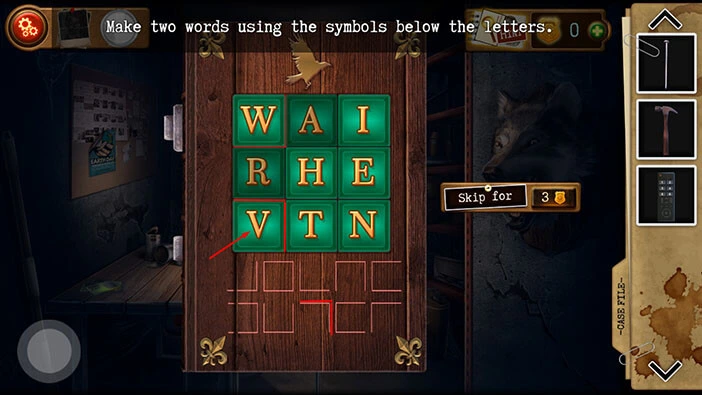
Step 4
Let’s take a look at the fourth element in the second row. We can see a line on the left, the line at the bottom, and the line at the top. If you take a look at the grid, you will notice that the letter “E” is the only letter that matches this description (it borders the letter “H” on the left, the letter “I” at the top, and the letter “N” at the bottom).
So, the fourth letter is “E”. Tap on it.
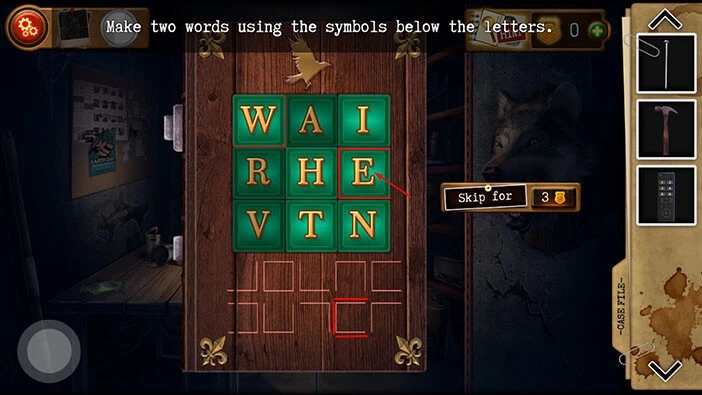
Step 5
Let’s take a look at the fifth element in the second row. We can see a line on the left, and the line at the top. If you take a look at the grid, you will notice that the letter “N” is the only letter that matches this description (it borders the letter “T” on the left, and the letter “E” at the top).
So, the fifth letter is “N”. Tap on it. With that, you will assemble the word “RAVEN”, the grid will flash green, and the box will open.
So, here we assembled the words “White Raven”. Memorize/write down these words because we will need them for one of the next puzzles.
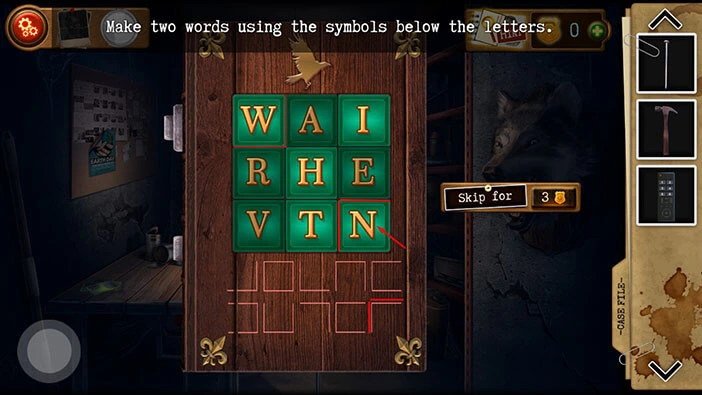
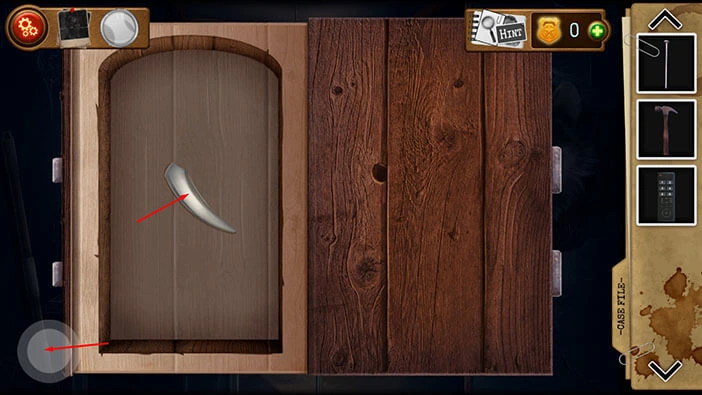
In the box, you will find the “Upper Fang”. Tap on it to pick it up. After that, tap on the button in the bottom left corner to go back.
Just to the right of the large wooden box on the shelf, you will notice a “Light bulb”. Tap on it to pick it up.
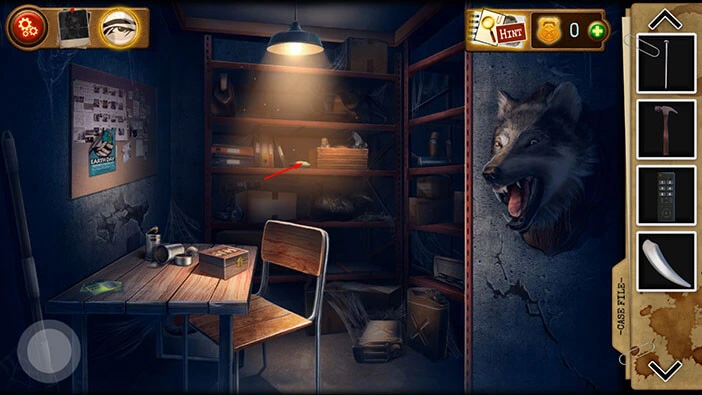
Next, if you look at the table, you will notice some green tickets on the left. Tap on the tickets to take a closer look at them.
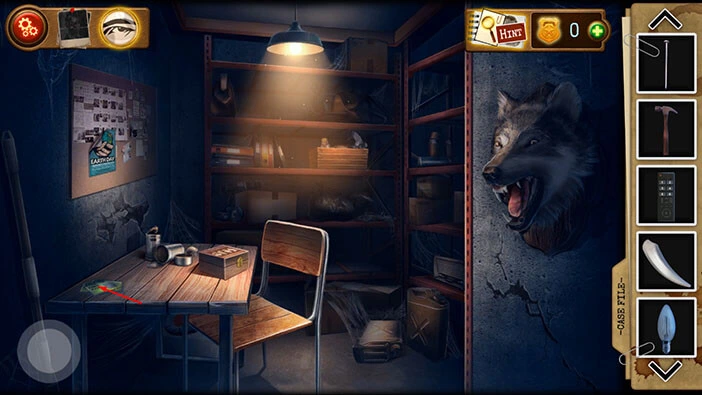
These green tickets are lottery scratchers. Tap on them to shuffle them until you find the one that still hasn’t been scratched.
Select the “Nail” from the inventory and use it to scratch the lottery ticket.
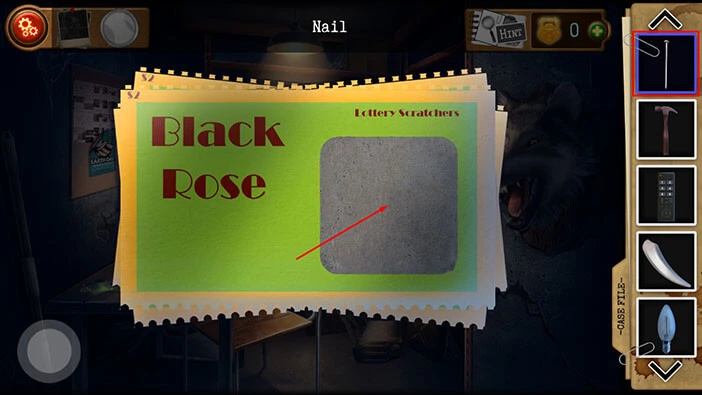
You will see the “Black Rose” instead of “You Lose”. Memorize/write down this information.
Our character will say that the “Collector” left similar tickets on the bodies of his previous victims. So, our character will take a photo of the lottery scratcher and it will be filed as evidence.
Tap on the button in the bottom left corner to go back.
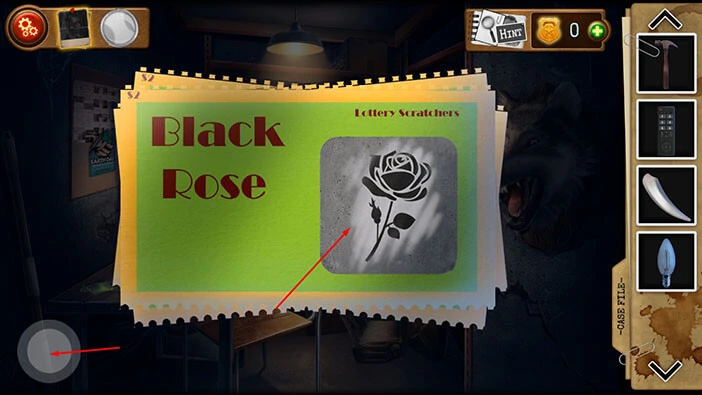
Let’s take a look at the evidence. Tap on the photo icon located in the top left corner of the screen next to the settings icon.
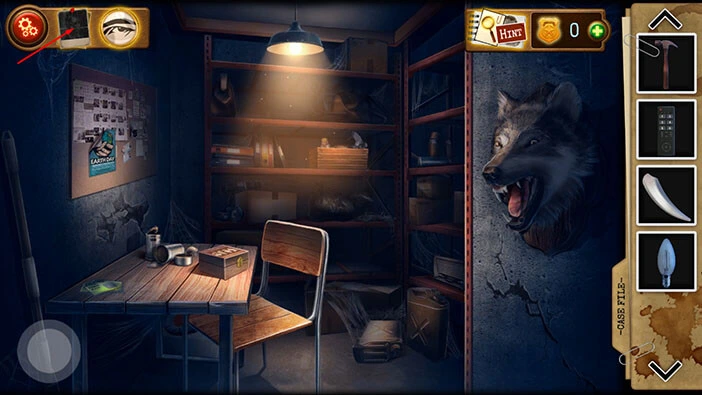
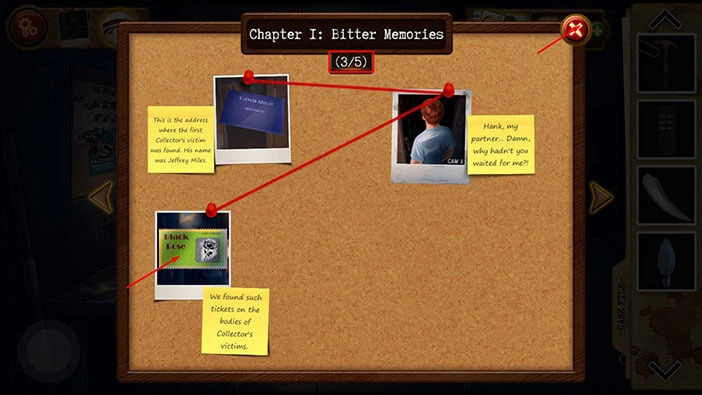
Tap on the “Black Rose” lottery ticket to examine it. You will notice that we found 3/5 pieces of evidence.
After that, tap on the “X” button in the top right corner to go back.
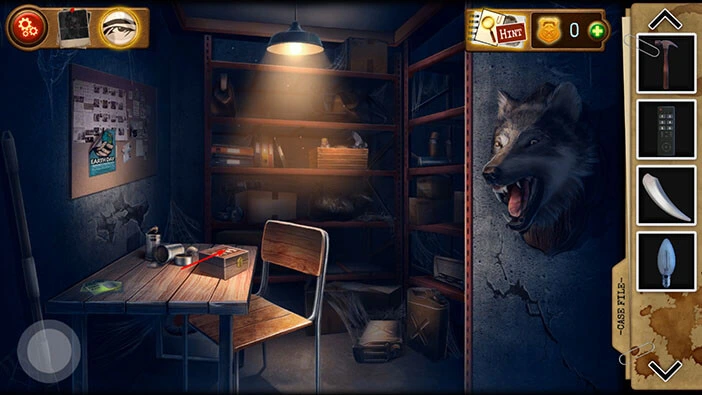
Next, if you take a look at the table again, you will notice a wooden box. Tap on it to take a closer look at it.
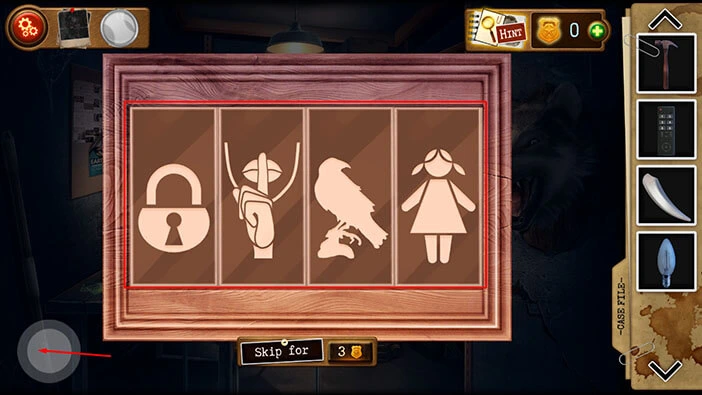
Here, we can see four drawings, and our task is to place them in the correct order. We will come back to it shortly.
For now, tap on the button in the bottom left corner to go back.
Let’s go back to the hallway. Tap on the button in the bottom left corner to go back.
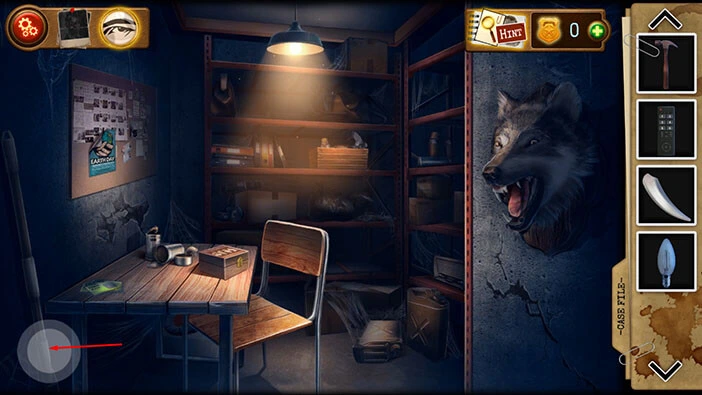
At the very start of the walkthrough, we found the note with message in one of the lockers, and I mentioned that this note will be important, later on. So, let’s go back to the first room and take another look at the note.
Tap on the button in the bottom left corner of the screen.
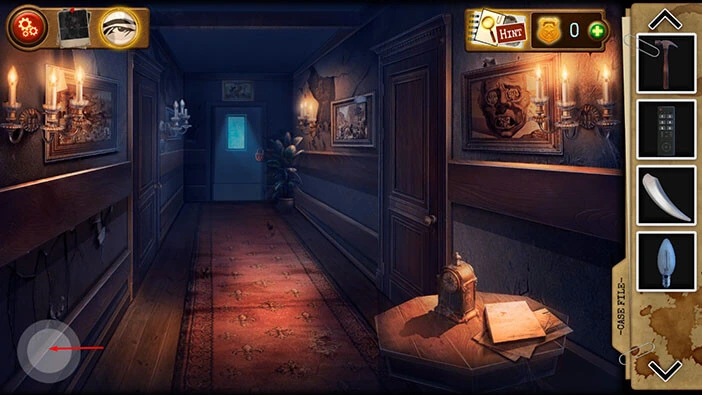
Tap on the locker number 7 to take a closer look at it. You will notice the note that we mentioned, so tap on it to examine it.
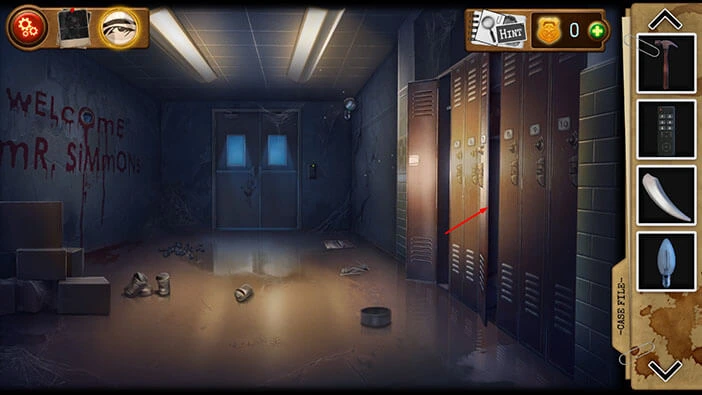
You will notice that the message is written in four rows. You will also notice that the first two words are “White Ravens”. In the previous puzzle, we assembled two words “White Raven”.
Also, in order to open the wooden box, we need to find the correct order for the four symbols, and one of the symbols is the white raven. With all that said, we can conclude that the first symbol is the “White Raven”.
The hint for the rest of the symbols can be found in the message.
“Little Princess” – Little Princess is the second symbol.
“whisper” – Finger over the mouth is the third symbol
“Terrible Secrets” – Padlock is the fourth symbol
Memorize/write down this information. Once you’re done, tap on the button in the bottom left corner to go back.
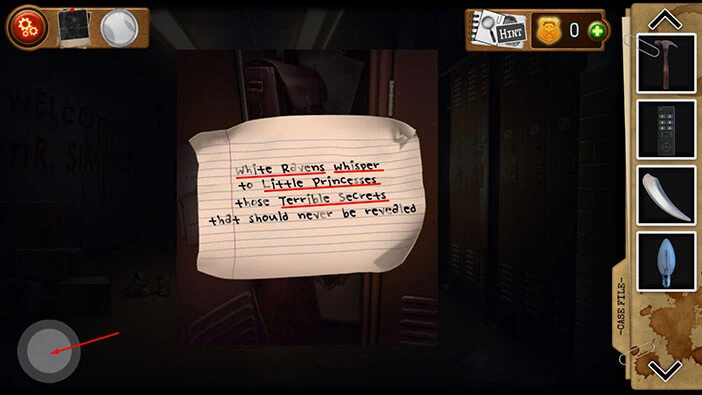
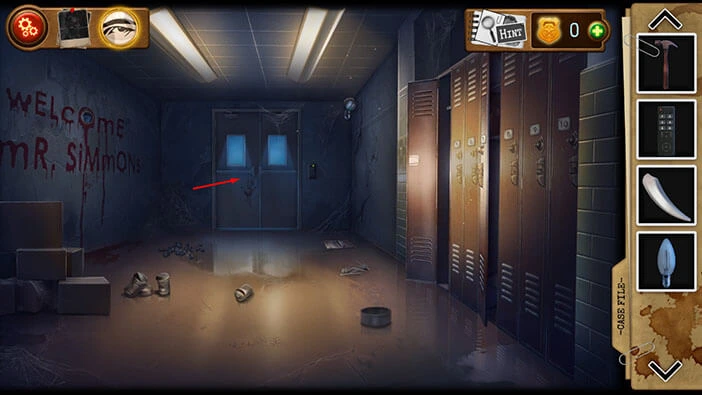
Let’s go back to the room with the wooden box. Tap on the door in front of you to go to the hallway. After that, tap on the door on the left.
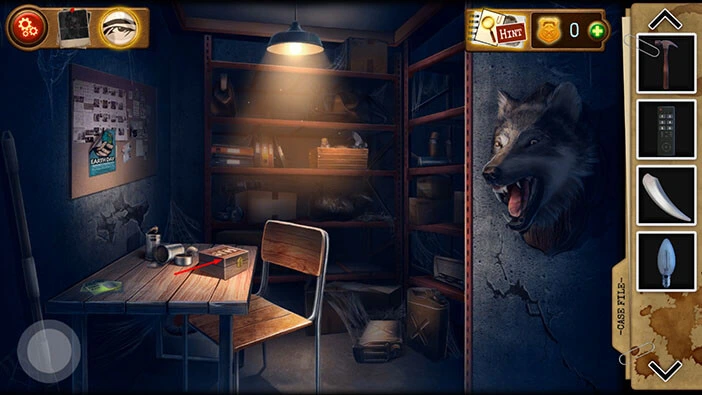
Tap on the wooden box to start the interaction.
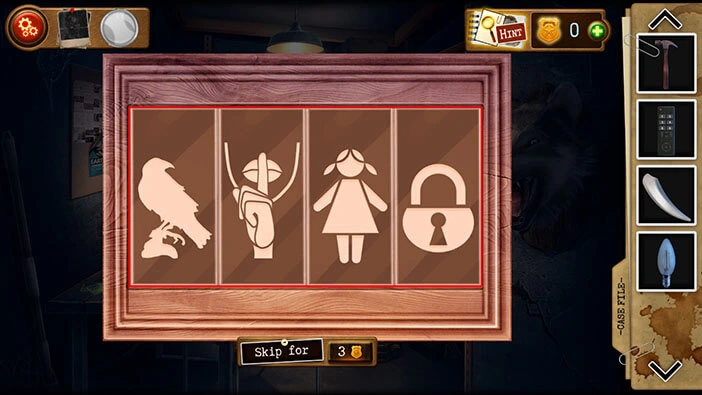
Here, we can see four symbols and we already determined the correct order. Looking from left to right, it should be,
First = The White Raven
Second = Finger on the lips
Third = Little Princess
Fourth = Padlock
Once you enter the symbols in the correct order, the box will open.
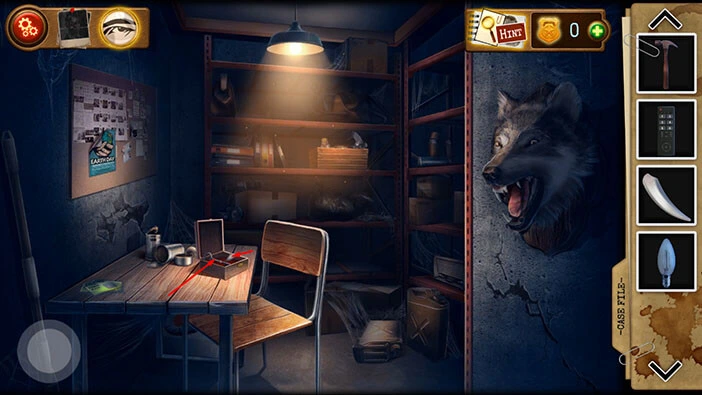
In the box, you will find two items, so tap on them to pick them up. “Lower Fang” and “Door Key” will be added to your inventory.
Next, if you take a look at the wall on the right, you will notice a wolf head trophy. However, it’s missing two of its fangs. We already found both fangs so let’s put them back.
Select the “Upper Fang” and put it into the empty slot in the upper jaw.
Select the “Lower Fang” and put it into the empty slot in the lower jaw.
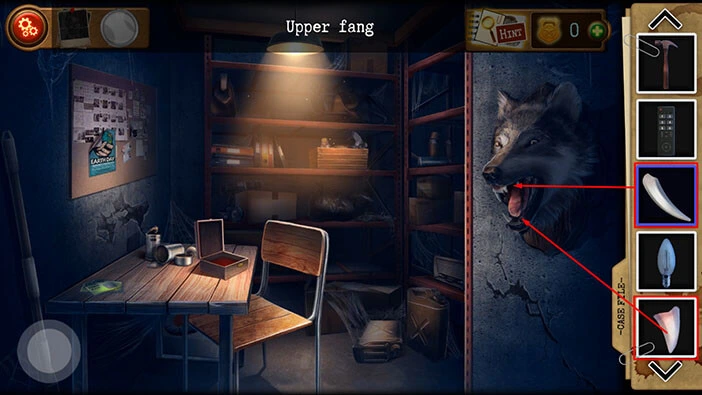
As soon as you put the fangs back into place, our character will hear that something moved in the hallway. So, let’s check it out.
Tap on the button in the bottom left corner of the screen to go back to the hallway.
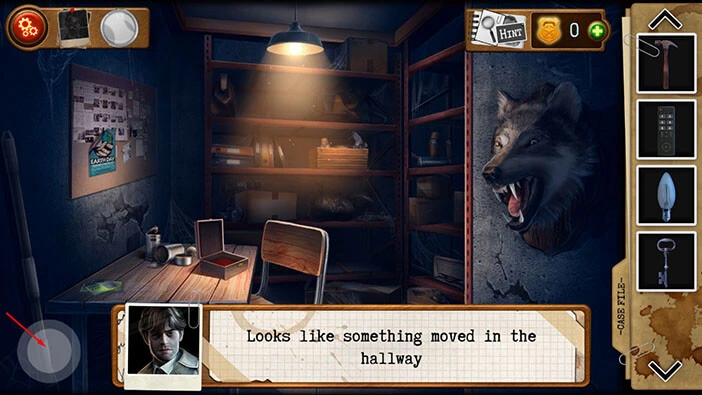
Our character noticed that the picture of the four horsemen of the apocalypse had moved. Let’s take a closer look at it.
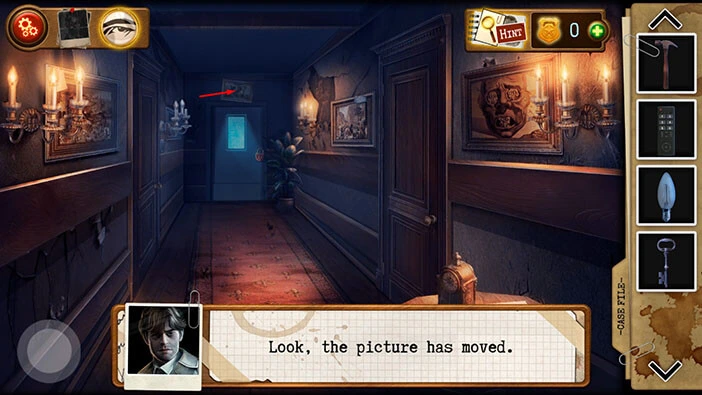
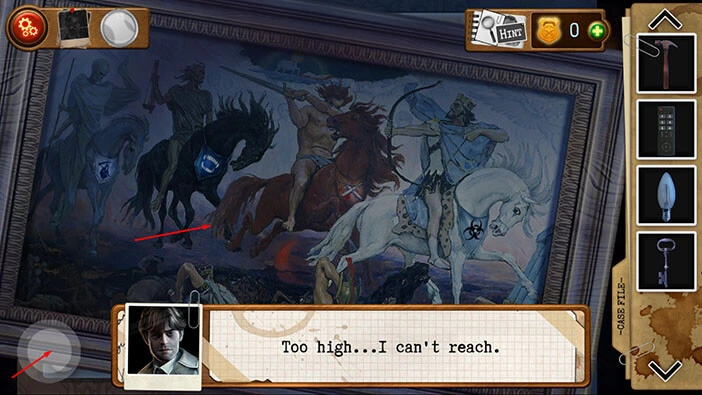
If you tap on the picture, our character will say that it is too high, and he can’t reach it. So, we will have to climb on a ladder or a chair in order to reach the picture.
Tap on the button in the bottom left corner of the screen to go back.
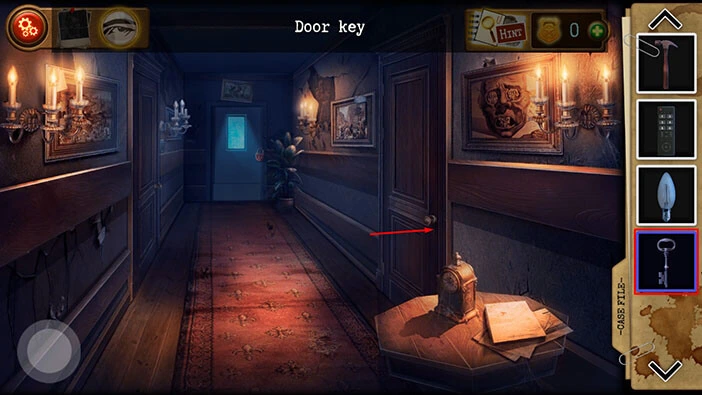
Let’s see what’s behind the door on the right. Select the “Door Key” from the inventory and use it to unlock this door. After that, tap on the door to proceed to the next room.
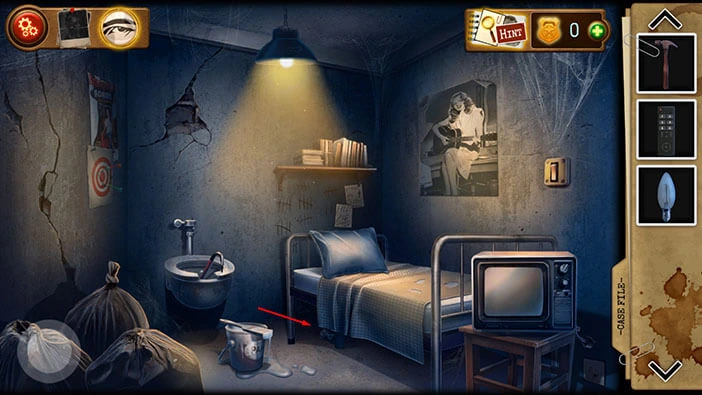
Next, tap on the floor under the bed (below the pillow) to look under the bed.
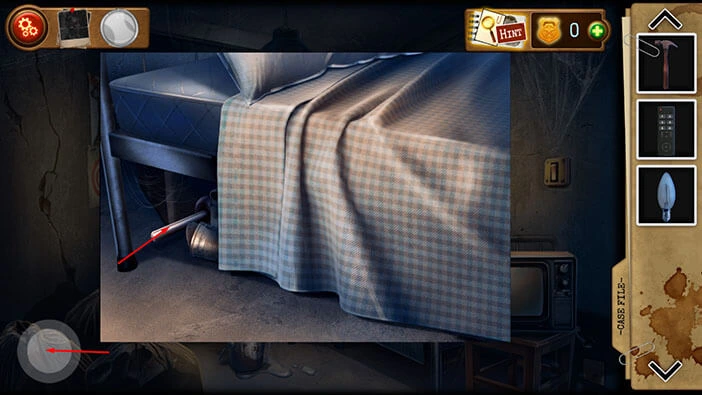
Here, you will find the “Toilet Handle”. Tap on it to pick it up. After that, tap on the button in the bottom left corner to go back.
Next, tap on the switch on the right to turn off the light.
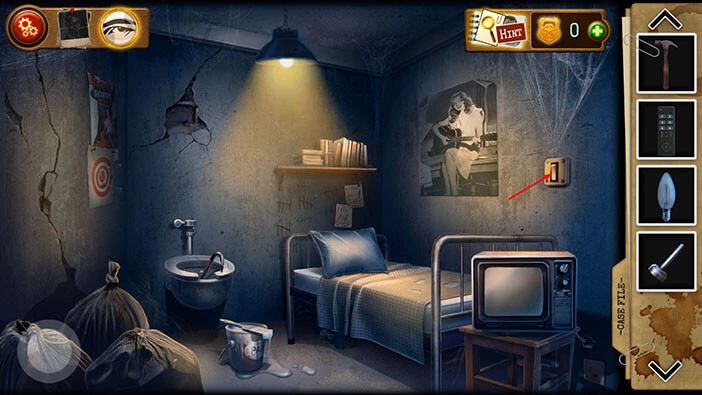
You will see the message “I am always one step ahead” and the drawing of the rose. If you take a look at the top left corner of the wall you will see the Roman numeral I, and a symbol next to it. Memorize/write down this information (Number I and the symbol) because it represents the first symbol for the next puzzle.
Once you’re done, tap on the switch to turn on the light.
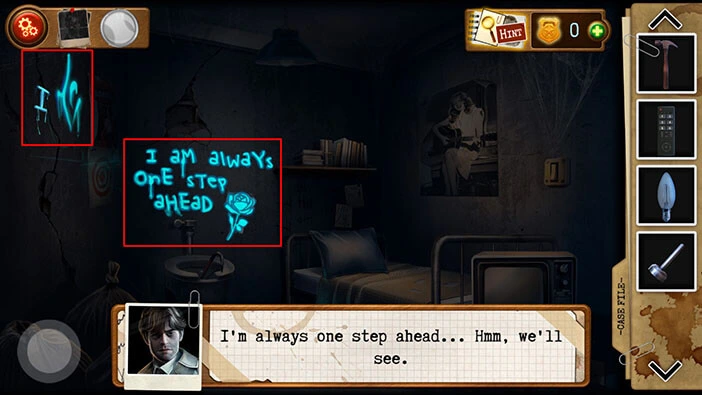
Tap on the toilet to take a closer look at it. You will notice that the toilet handle is missing. So, select the “Toilet handle” from the inventory and insert it into the empty slot. After that, tap on the handle to flush the toilet.
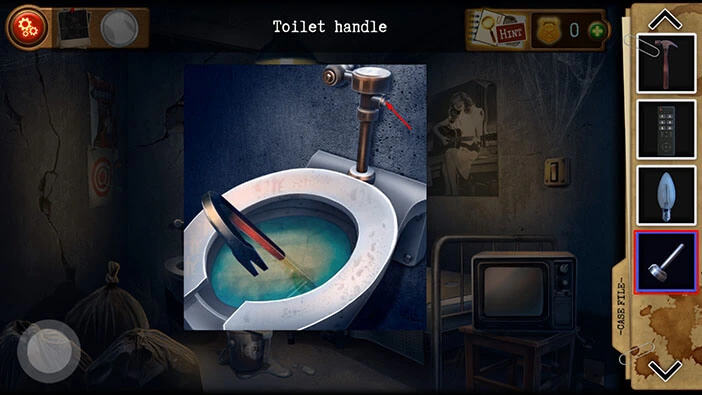
There is no more water in the toilet. So, let’s tap on the “Crowbar” to pick it up. After that, tap on the button in the bottom left corner to go back.
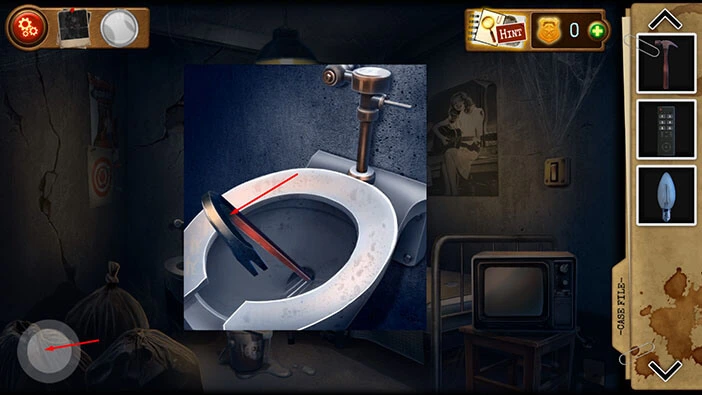
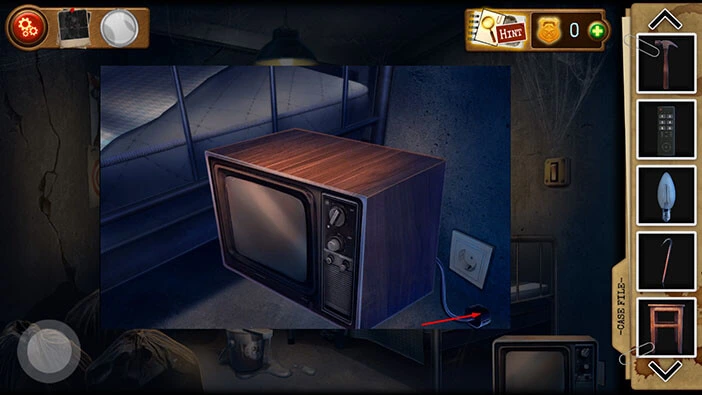
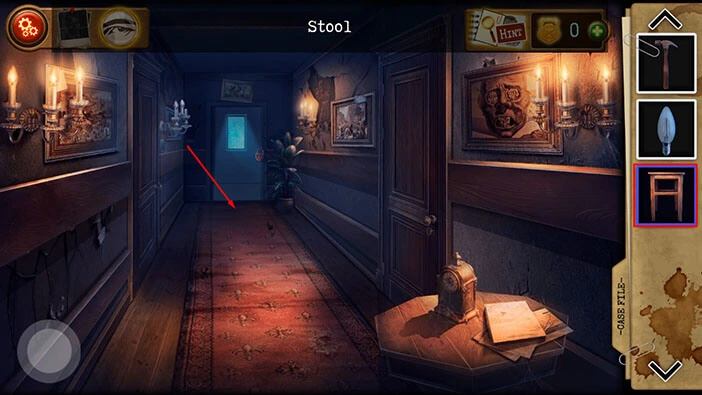
Next, tap on the TV on the right to take a closer look at it. Here, we can see a wooden stool, and we could use it to reach the picture of the four horsemen of the apocalypse. So, let’s tap on the “Stool” to pick it up.
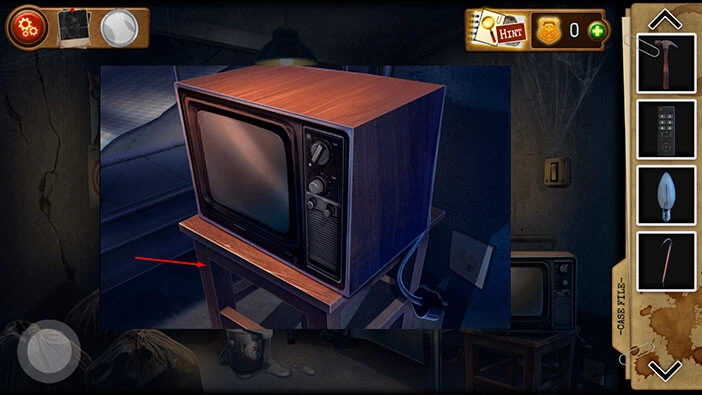
Next, let’s see what’s on TV. First, tap on the TV cable to plug it in.
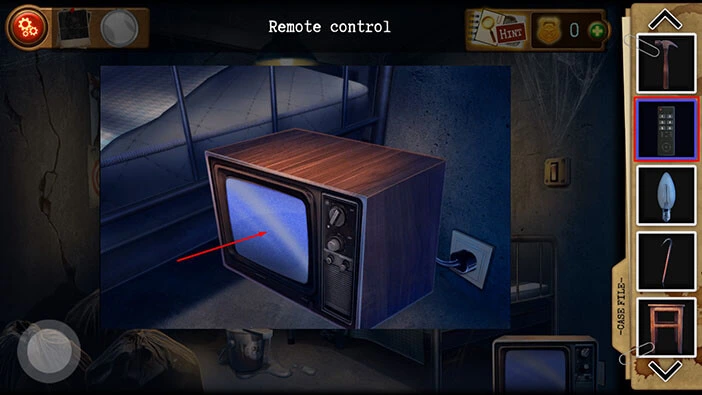
Next, select “Remote Control” from the inventory, then tap on the TV to turn it on.
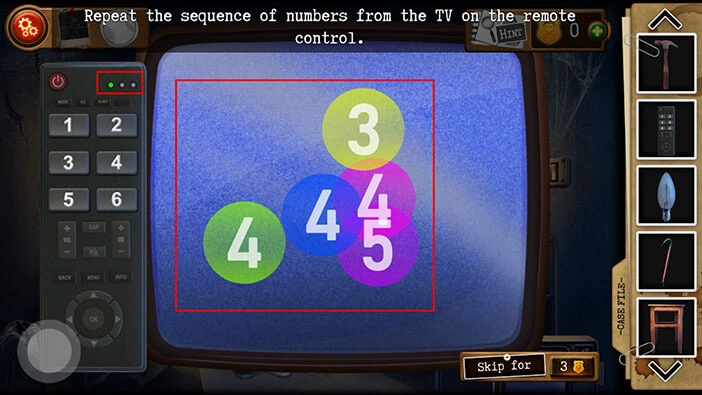
Some numbers will appear on the TV screen, and you should tap on these numbers, on the keypad on the left, in the order in which they appear on the screen.
We will have to do this three times. Once you click on the first batch of numbers, the first green light will be turned on. The numbers are randomized.
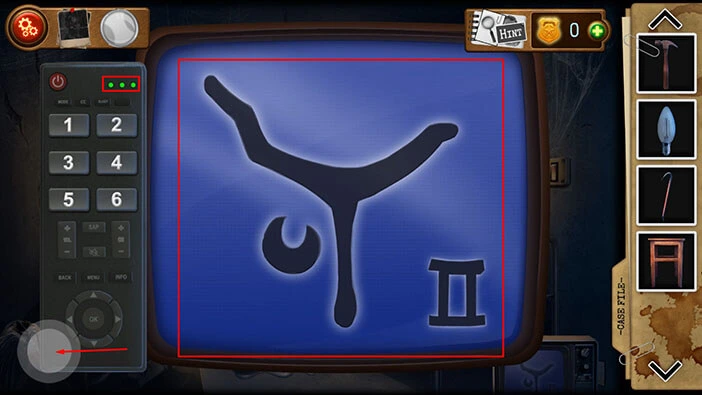
Once you tap on three groups of numbers, all three green lights will be turned on. More importantly, Roman number II and some strange symbols will appear on the screen. Memorize//write down this information (Number II and the symbol) because it represents the second symbol for the next puzzle.
Once you’re done, tap on the button in the bottom left corner of the screen to go back.
Next, if you take a closer look at the wall on the left, you will notice a crack in the wall. So, let’s try to break through the wall.
Select the “Crowbar” from the inventory and use it to break a hole in the wall.
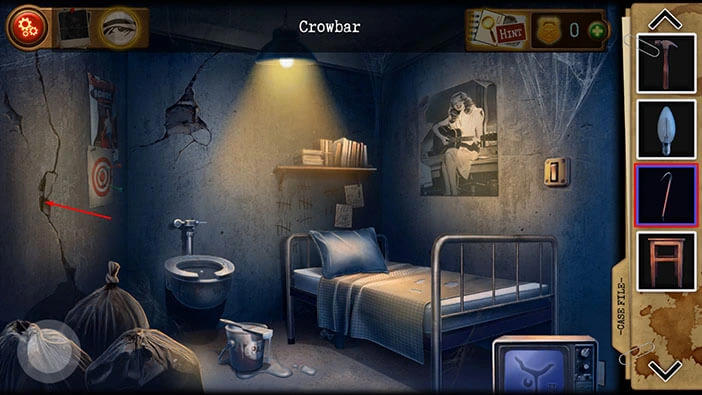
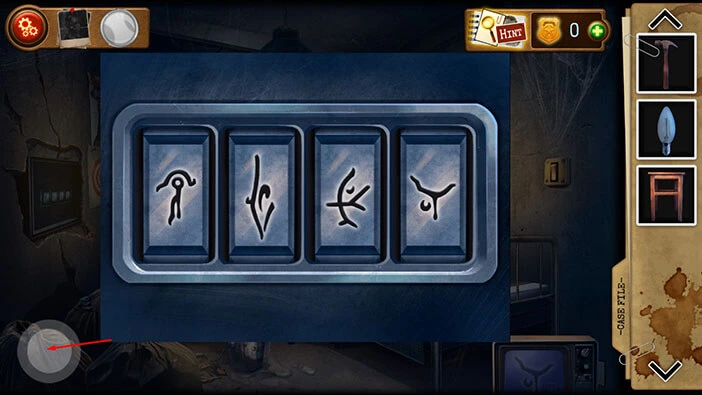
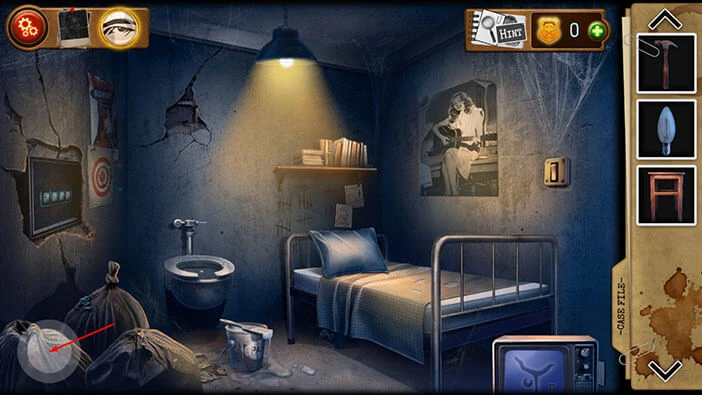
You will discover a hidden wall safe, so let’s tap on it to take a closer look. You will notice four symbols. We discovered two symbols for this puzzle, but we still do not know the other two. So, let’s come back to this puzzle when once we have all four symbols.
Tap on the button in the bottom left corner to go back.
Let’s go back to the hallway. Tap on the button in the bottom left corner to go back.
Let’s look at the picture of four horsemen. Select the “Stool” from the inventory and put it under the picture.
After that, tap on the picture to take a closer look at it, then tap on the picture again to see what’s behind it.
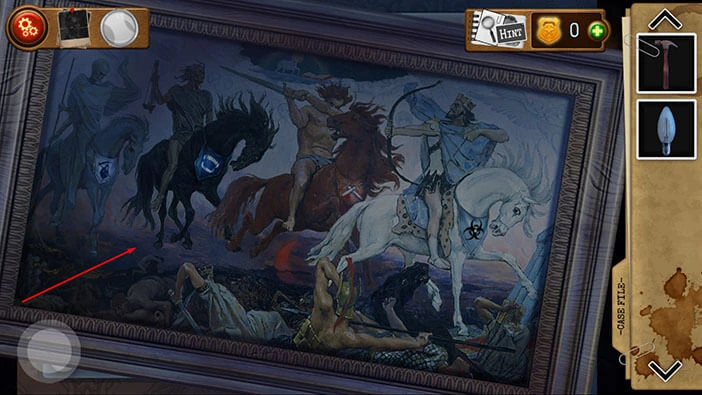
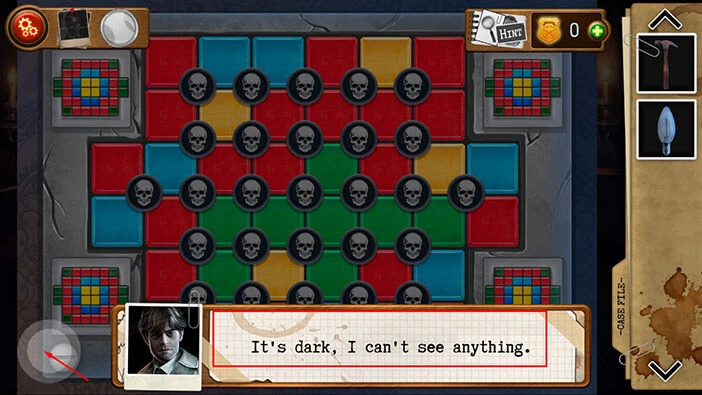
Here, you will discover a large puzzle, and if you tap on it, our character will say that it’s too dark and he can’t interact with this puzzle. So, let’s go back to turn on the light.
Tap on the button in the bottom left corner of the screen to go back.
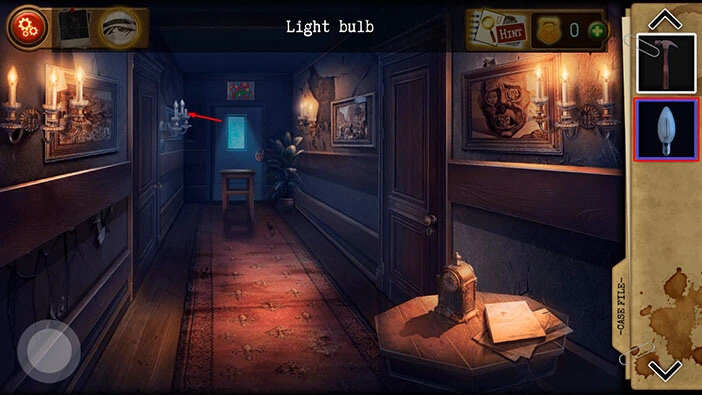
Select the “Light Bulb” from the inventory and tap on the lamp on the wall on the left. With that done, we should have enough light in the hallway.
Tap on the picture of the four horsemen to take a closer look at it.
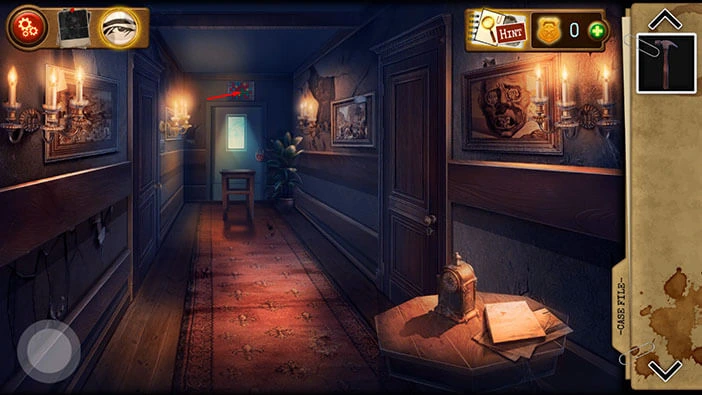
Here we have another puzzle, and we can see the hints in the corner. Well, the goal is quite simple. We should place all green squares in the outer layer, the next layer should be the red squares, the next layer should be blue squares, and in the inner layer, we should have 4 yellow squares. We can rotate the squares on the grid by tapping on the skulls.
We will do this puzzle in multiple steps. Let’s begin.
Step 1
The skulls are arranged in five rows. Tap twice on the first skull (looking from left to right) in the fifth row to rotate the squares.
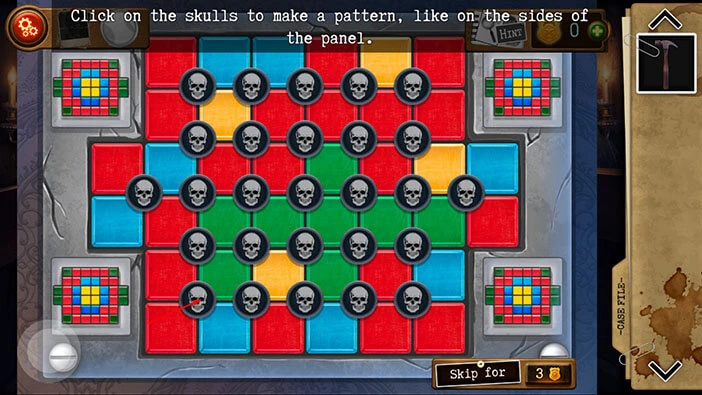
Step 2
Tap twice on the fourth skull in the fifth row to rotate the squares.
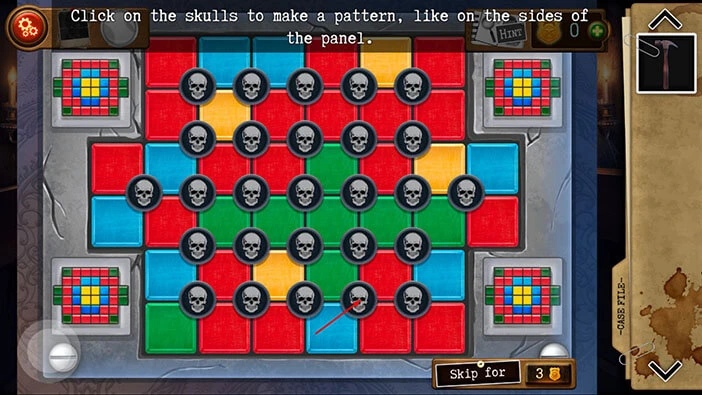
Step 3
Tap three times on the fifth skull in the fifth row to rotate the squares.
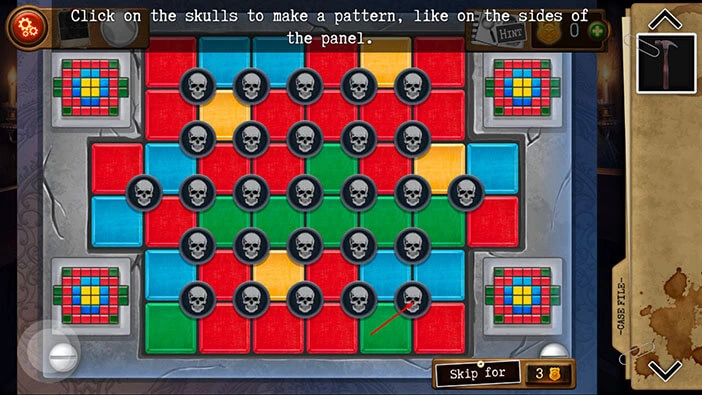
Step 4
Tap twice on the sixth skull in the third row to rotate the squares.
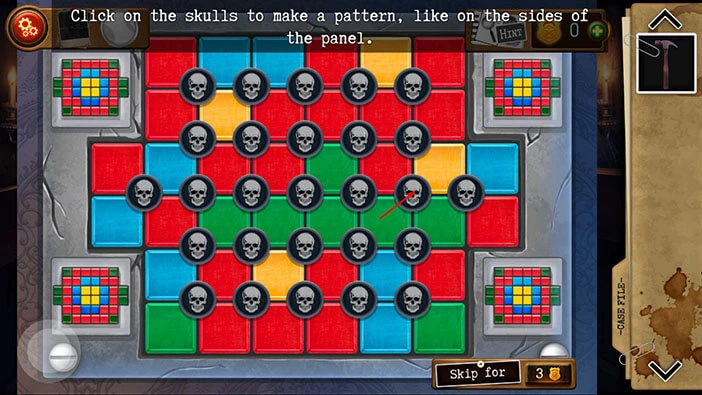
Step 5
Tap once on the seventh skull in the third row to rotate the squares.
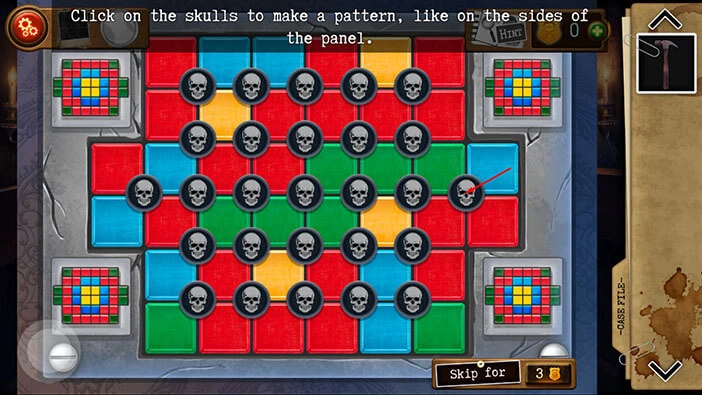
Step 6
Tap once on the sixth skull in the third row to rotate the squares.
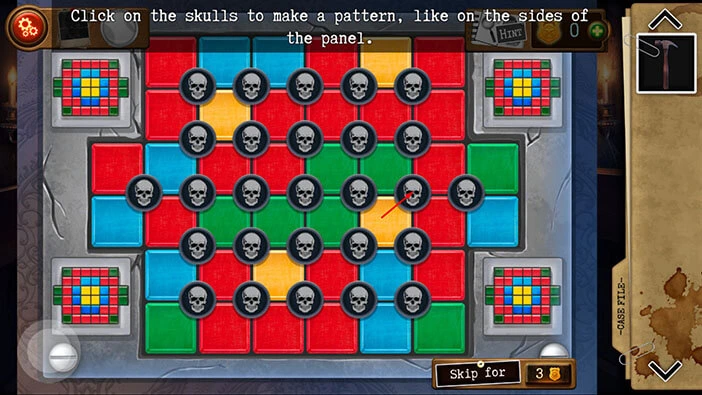
Step 7
Tap once on the seventh skull in the third row to rotate the squares.
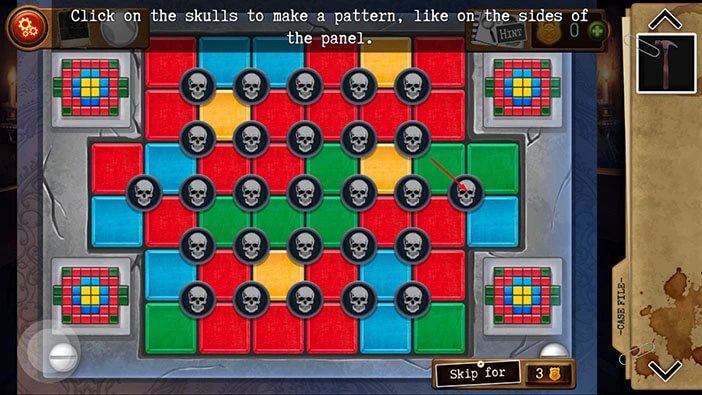
Step 8
Tap once on the third skull in the third row to rotate the squares.
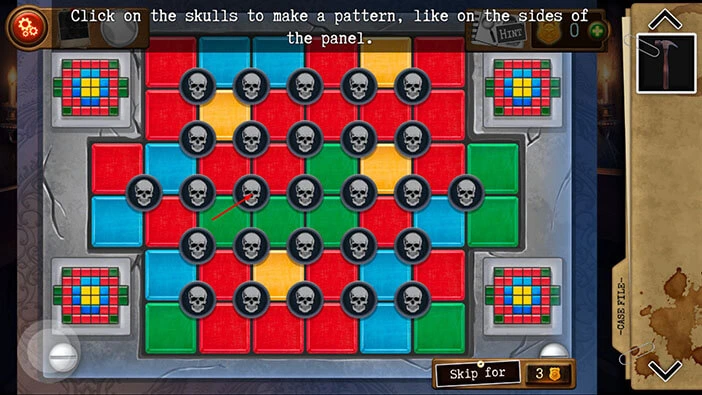
Step 9
Tap once on the second skull in the third row to rotate the squares.
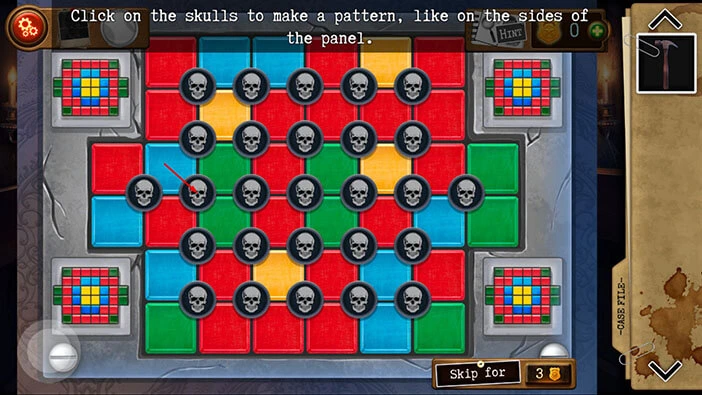
Step 10
Tap once on the first skull in the third row to rotate the squares.
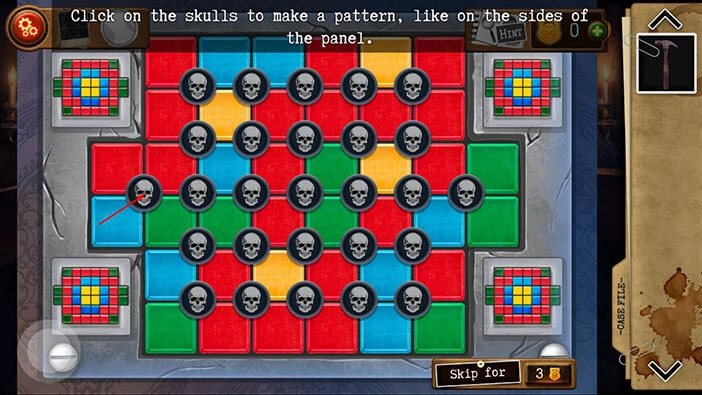
Step 11
Tap once on the second skull in the third row to rotate the squares.
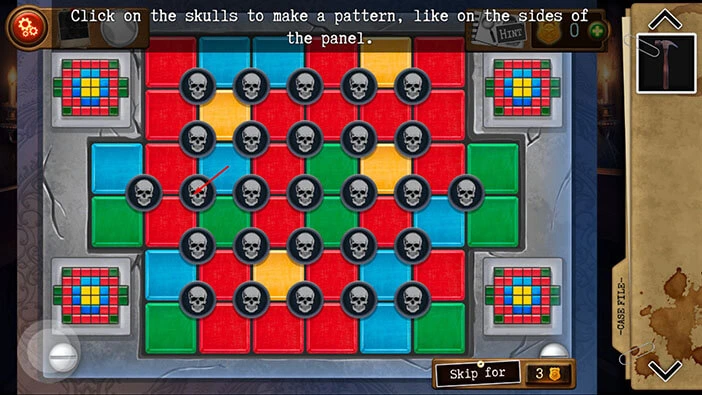
Step 12
Tap once on the first skull in the third row to rotate the squares.
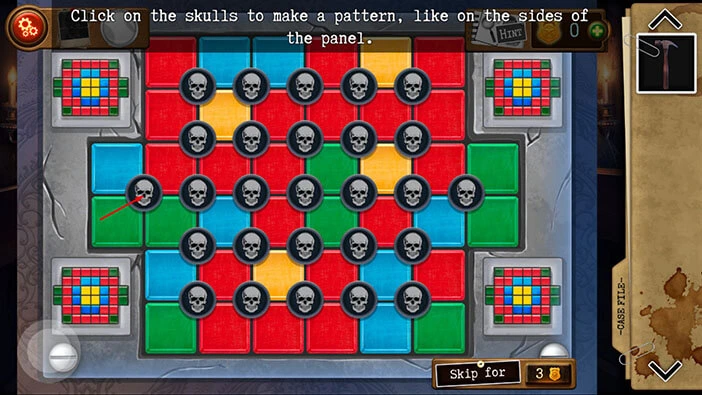
Step 13
Tap twice on the third skull in the second row to rotate the squares.
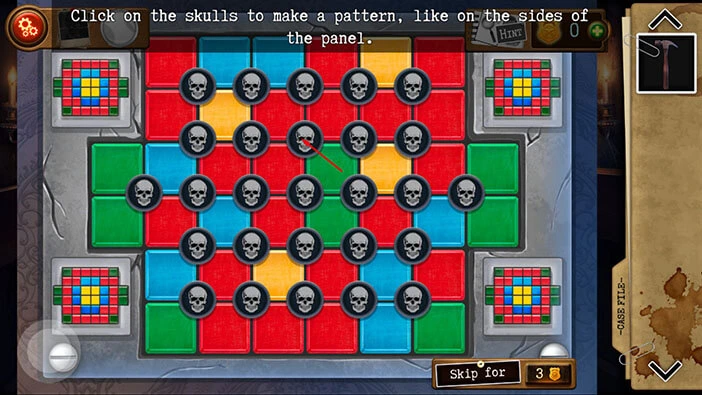
Step 14
Tap twice on the fourth skull in the third row to rotate the squares.
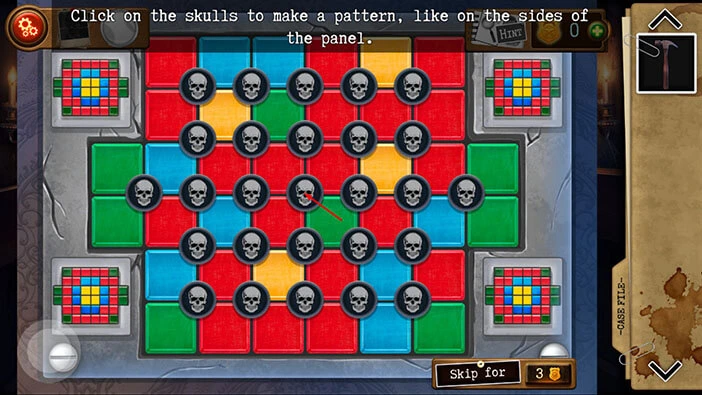
Step 15
Tap twice on the second skull in the first row to rotate the squares.
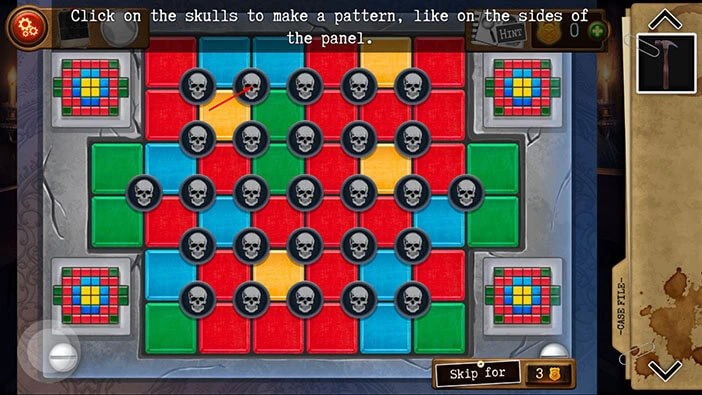
Step 16
Tap three times on the first skull in the first row to rotate the squares.
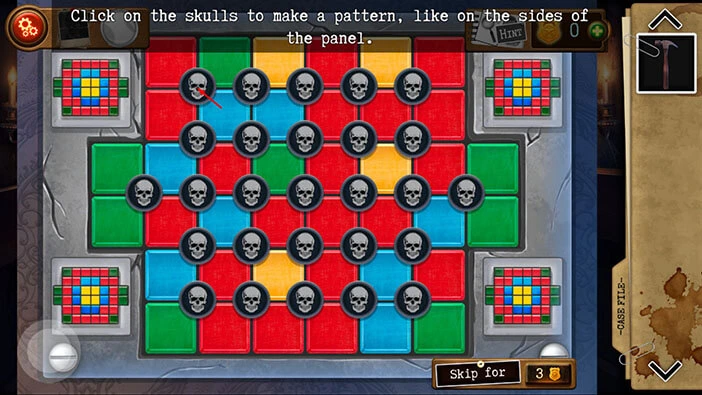
Step 17
Tap twice on the third skull in the second row to rotate the squares.
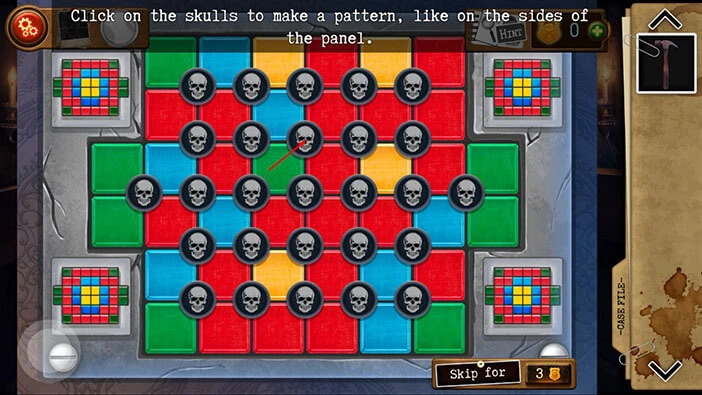
Step 18
Tap twice on the fourth skull in the first row to rotate the squares.
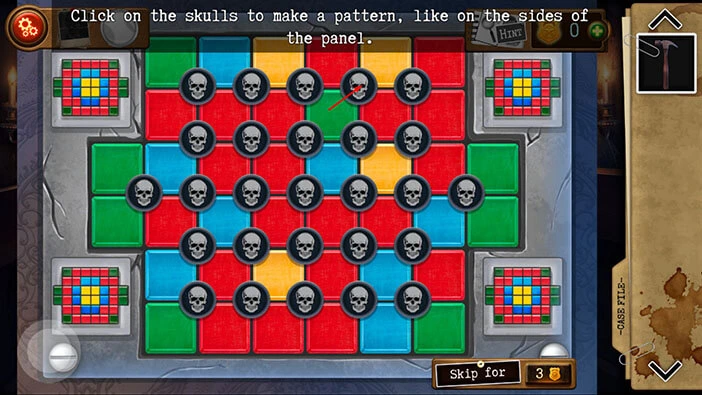
Step 19
Tap once on the fifth skull in the first row to rotate the squares.
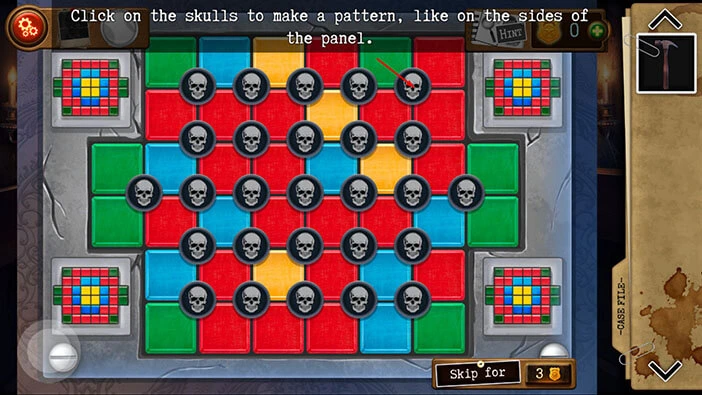
Step 20
Tap once on the fifth skull in the fourth row to rotate the squares.
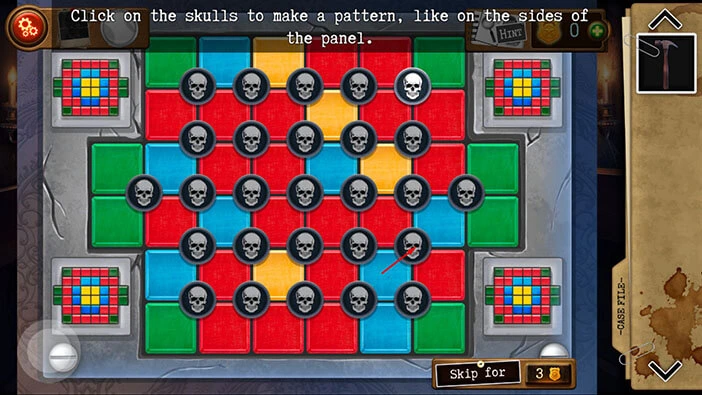
Step 21
Tap twice on the fourth skull in the fifth row to rotate the squares.
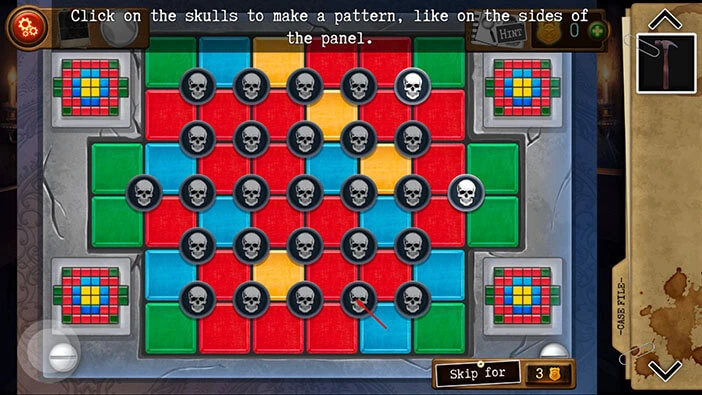
Step 22
Tap twice on the first skull in the second row to rotate the squares.
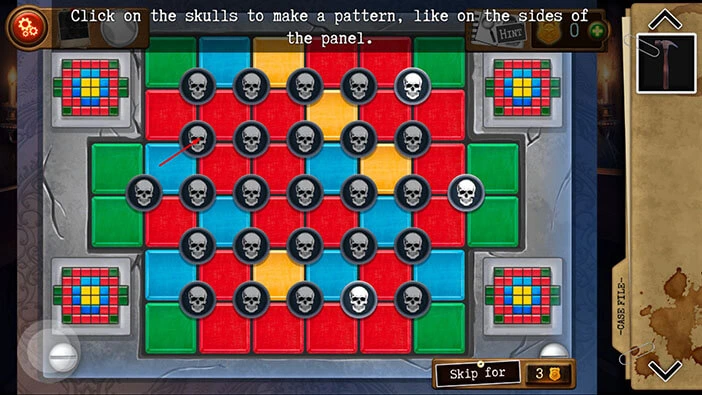
Step 23
Tap once on the second skull in the fourth row to rotate the squares.
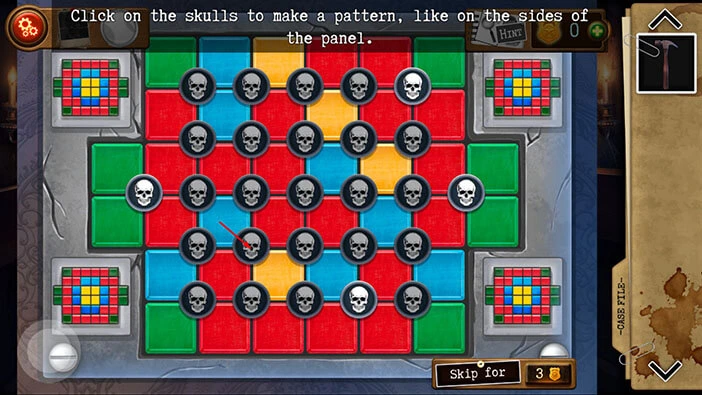
Step 24
Tap three times on the first skull in the fourth row to rotate the squares.
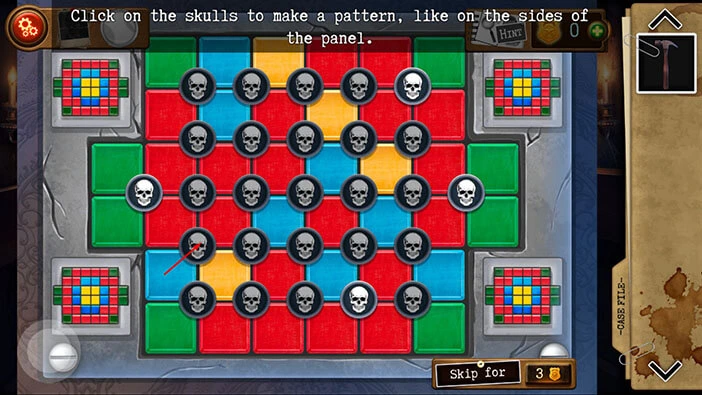
Step 25
Tap three times on the fifth skull in the third row to rotate the squares.
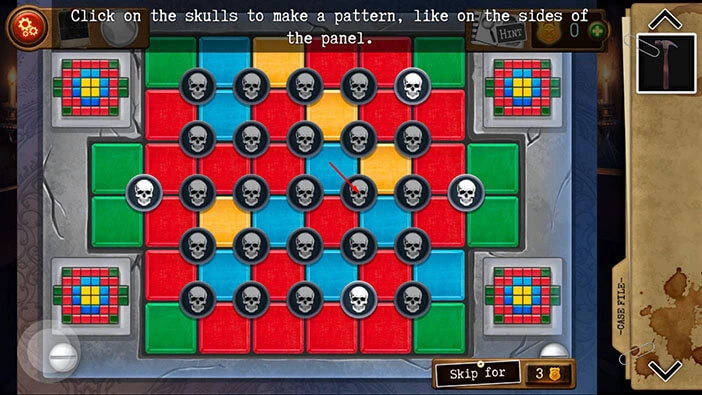
Step 26
Tap once on the fifth skull in the fourth row to rotate the squares.
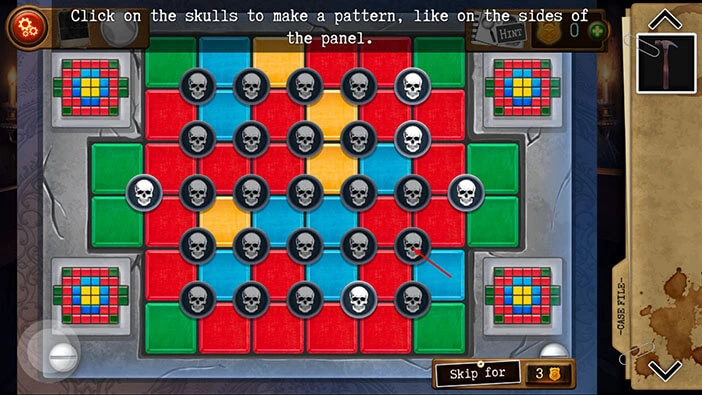
Step 27
Tap once on the third skull in the second row to rotate the squares.
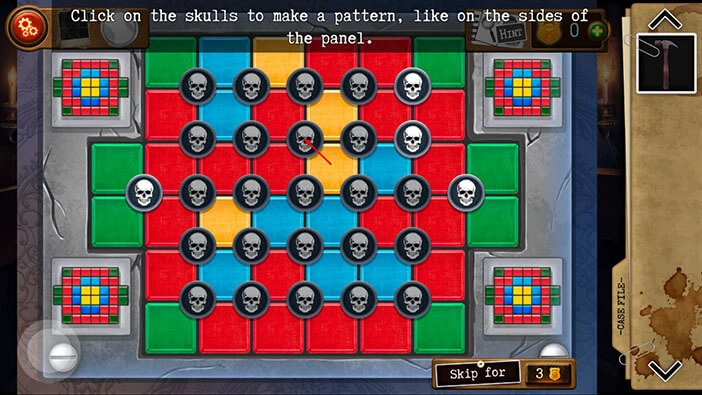
Step 28
Tap twice on the second skull in the first row to rotate the squares.
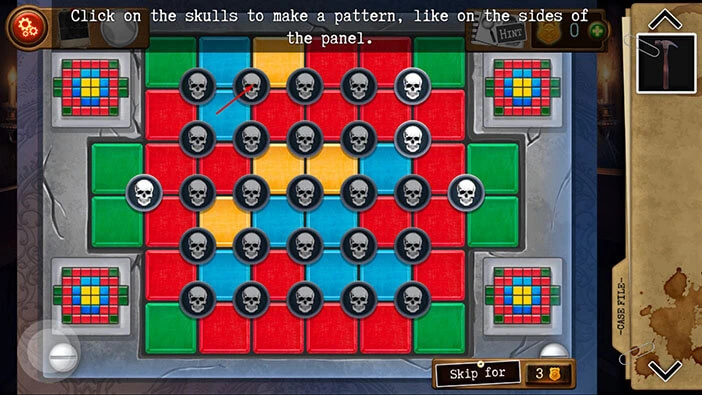
Step 29
Tap once on the second skull in the second row to rotate the squares.
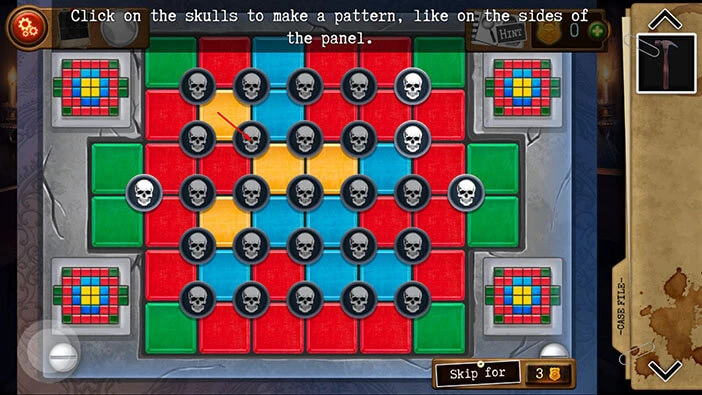
Step 30
Tap once on the second skull in the first row to rotate the squares.
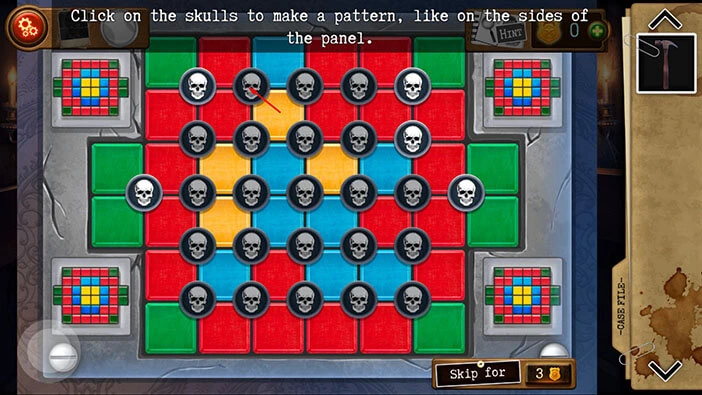
Step 31
Tap twice on the third skull in the second row to rotate the squares.
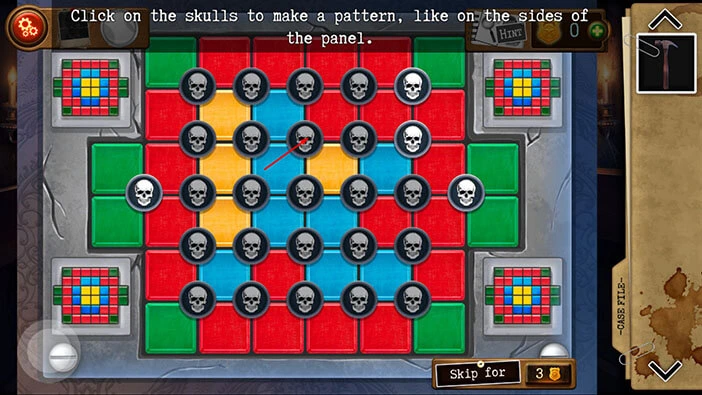
Step 32
Tap twice on the second skull in the second row to rotate the squares.
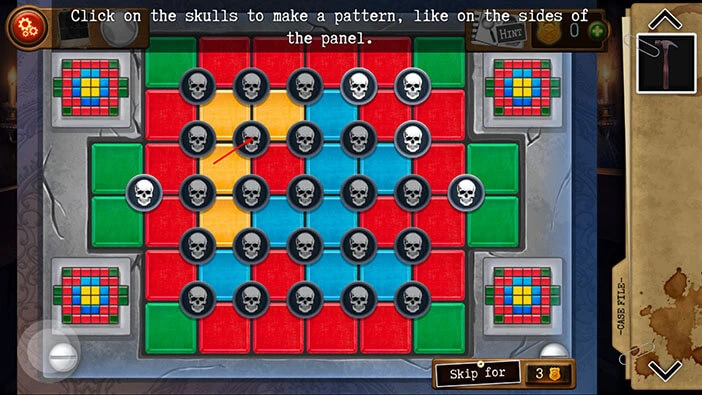
Step 33
Tap once on the second skull in the fourth row to rotate the squares.
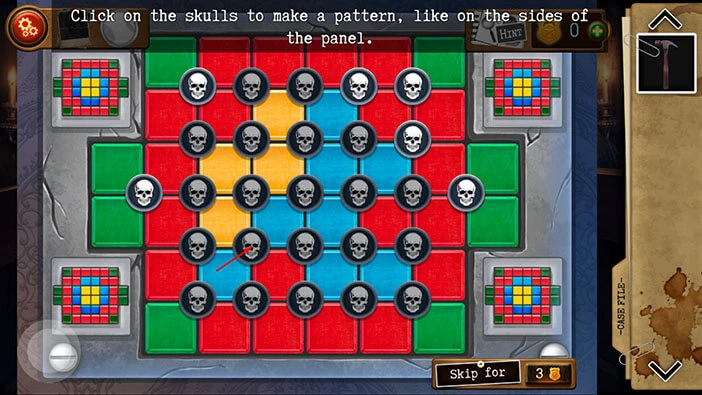
Step 34
Tap once on the fourth skull in the fourth row to rotate the squares.
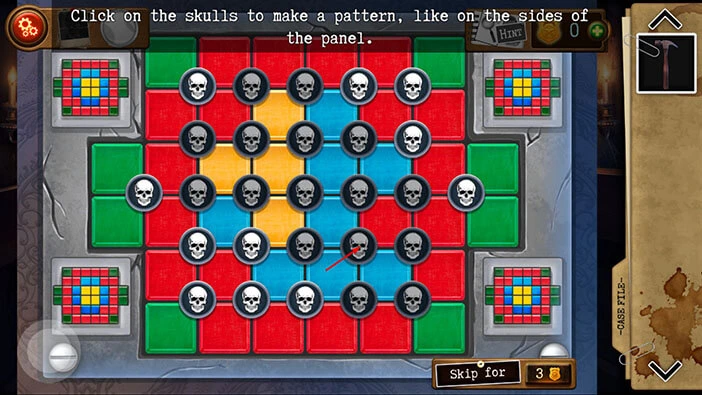
Step 35
Tap three times on the third skull in the second row to rotate the squares.
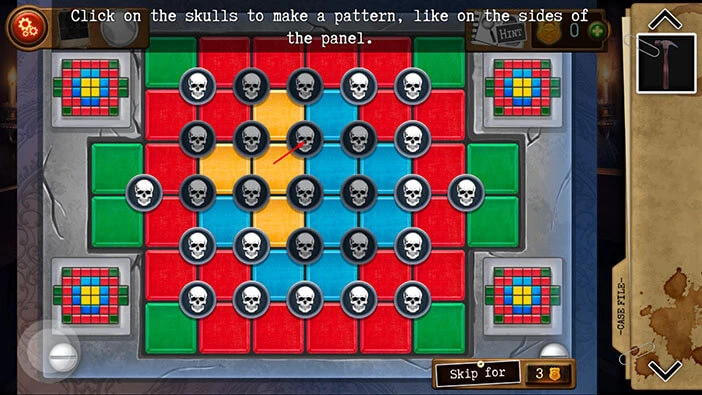
Step 36
Tap once on the fourth skull in the third row to rotate the squares.
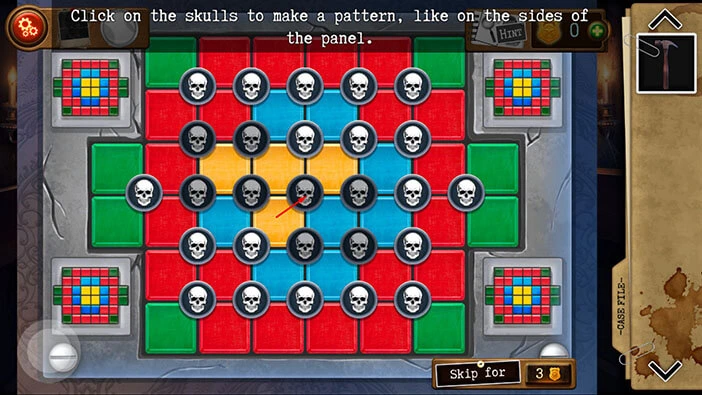
Step 37
Finally, tap once on the third skull in the third row to rotate the squares, and you will solve this puzzle.
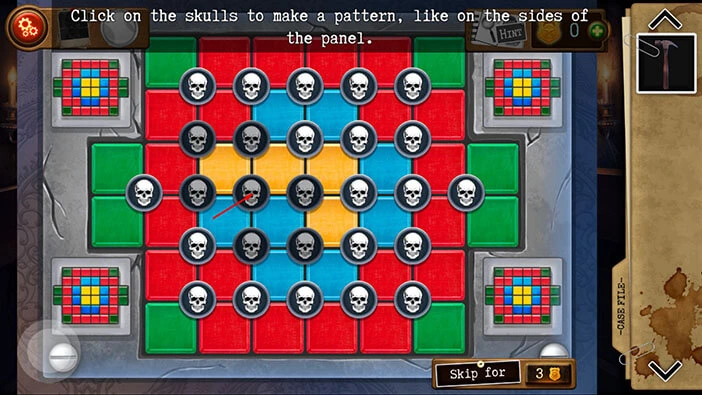
As soon as you solve the puzzle, you will see a display case with a key inside. However, our character can’t break the glass with his bare hands.
So, select the “Hammer” from the inventory and use it to break the glass.
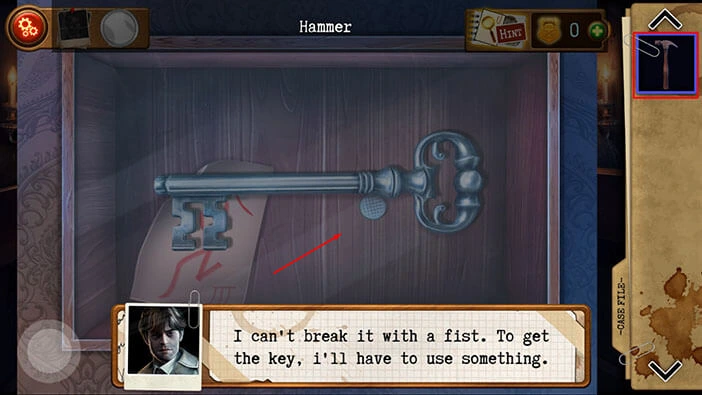
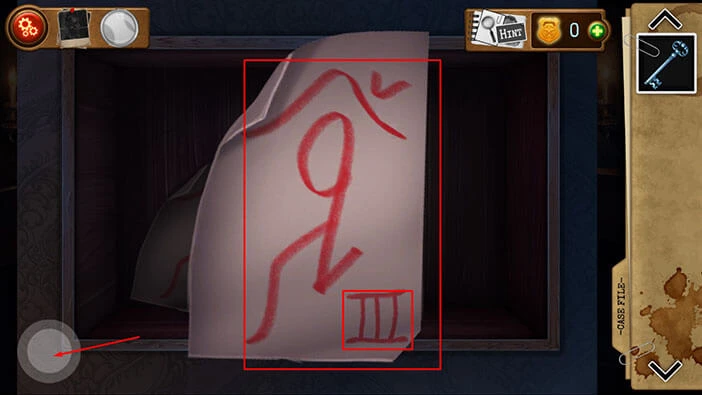
Tap on the key to pick it up and “Big Old Key” will be added to your inventory. Once you pick up the key, our character will automatically examine the note. In the note, you will find another symbol, and below it, we can see the Roman numeral “III”. Memorize/write down this information. So, now we know three out of four symbols.
Once you’re done, tap on the button in the bottom left corner to go back.
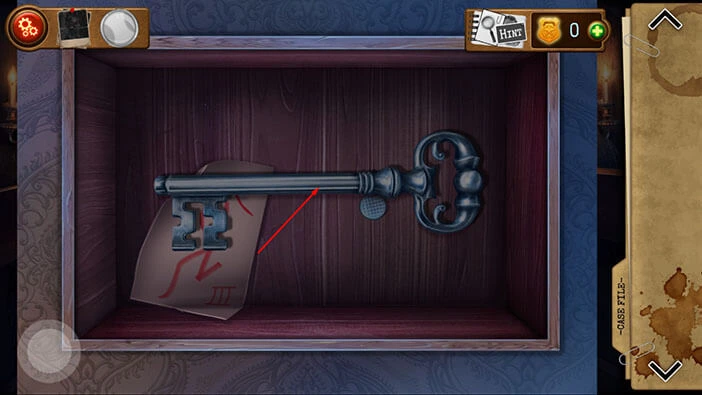
Let’s proceed to the next room. Select the “Old Big Key” from the inventory and use it to unlock the door in front of you.
After that, tap on the door to proceed to the next room.
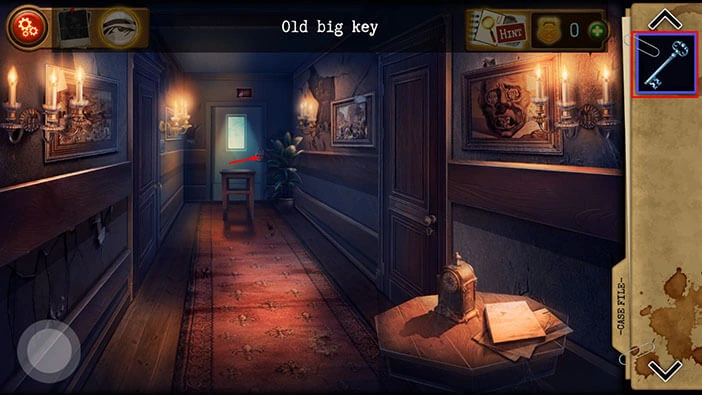
The door automatically closed behind our character, as soon as he stepped into the room. Let’s explore. Tap on the button in the bottom left corner to take a look at the other part of the room.
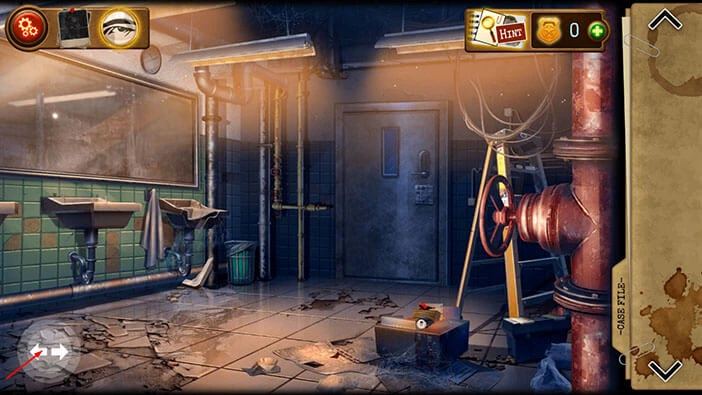
Tap on the toilet to take a closer look at it, and you will see a water tank. Tap on it to open it.
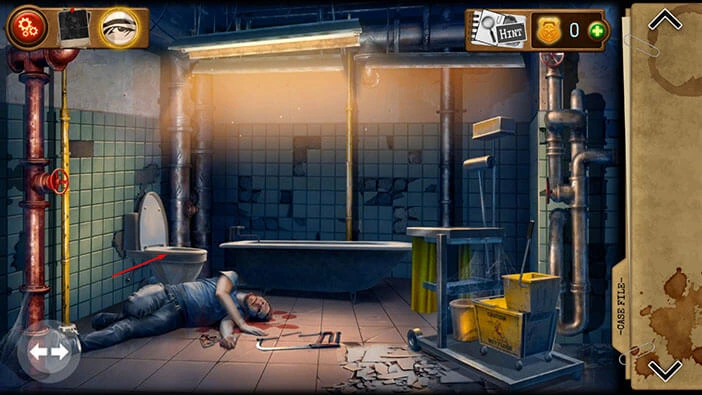
In the water tank, you will find “Wire cutters”. Tap on them to pick them up.
After that, tap on the button in the bottom left corner of the screen to go back.
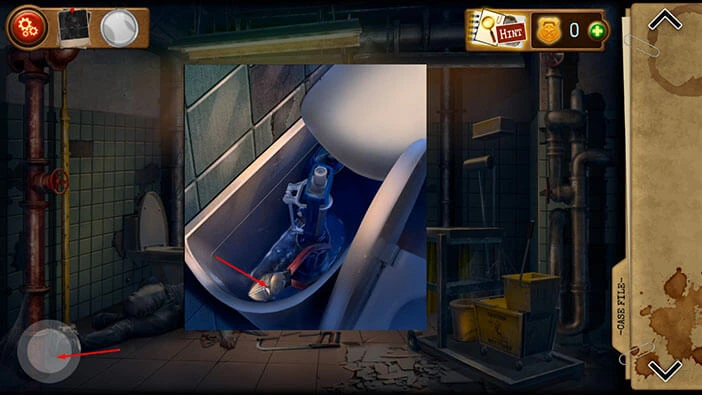
Next, tap on the body to take a closer look at it.
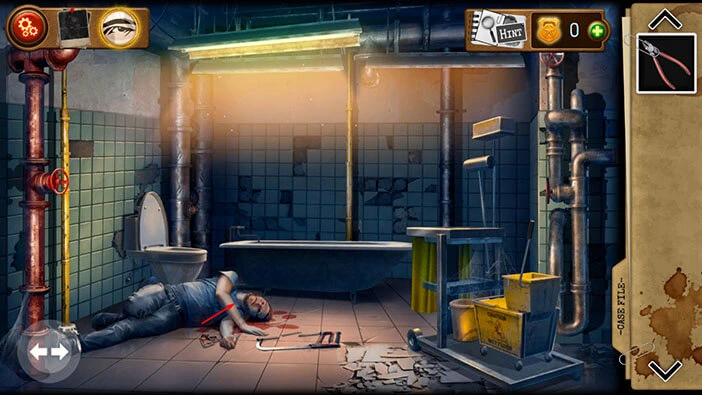
This is our character’s partner Hank Orwell, and now we know that our character discovered his body.
You will notice that Hank’s left eye is missing. You will also notice that there is a rolled-up note in his eye socket. So, select the “Wire cutters” from the inventory and use them to pull out the note.
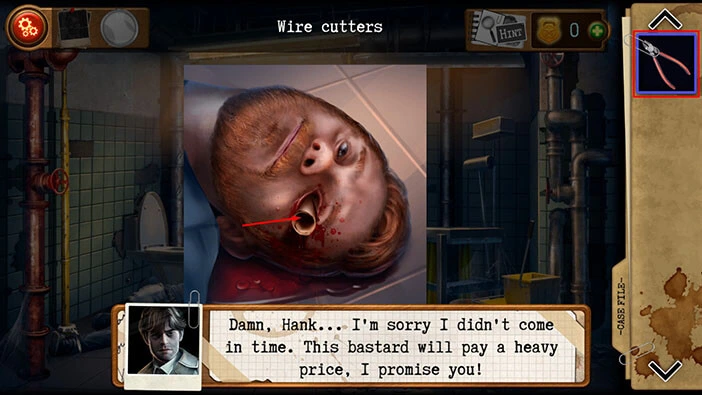
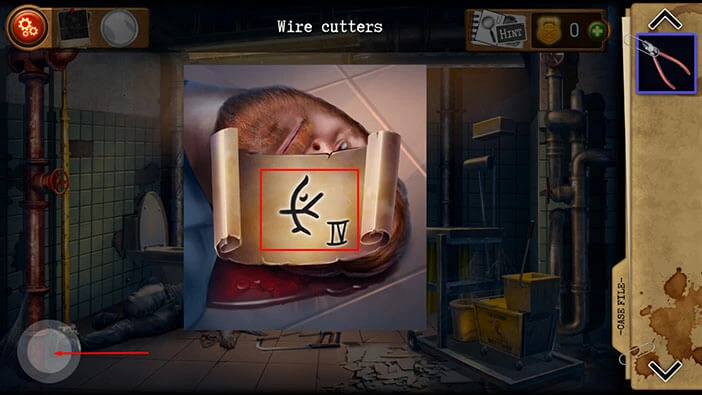
You will discover another strange symbol, and the Roman numeral “IV”. Memorize/write down this information.
So, now we know all four symbols. However, we will have to find a way to get out of this room before we use this newfound information.
Once you’re done, tap on the button in the lower-left corner of the screen to go back.
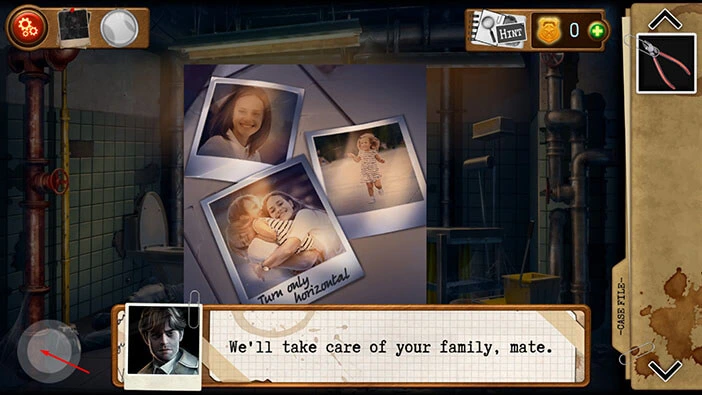
Next, tap on the photos on the floor (just below Hank’s arm) to take a closer look at them.
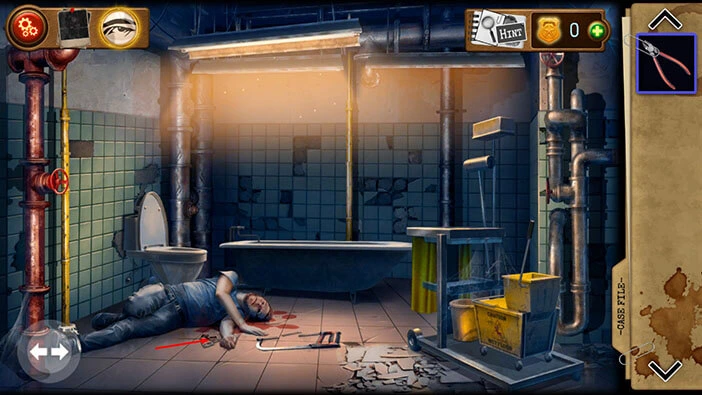
In the photos, we can see Hank and his wife and children. Our character promised that he and the police department would take care of the family of their fallen colleague.
Tap on the button in the lower-left corner of the screen to go back.
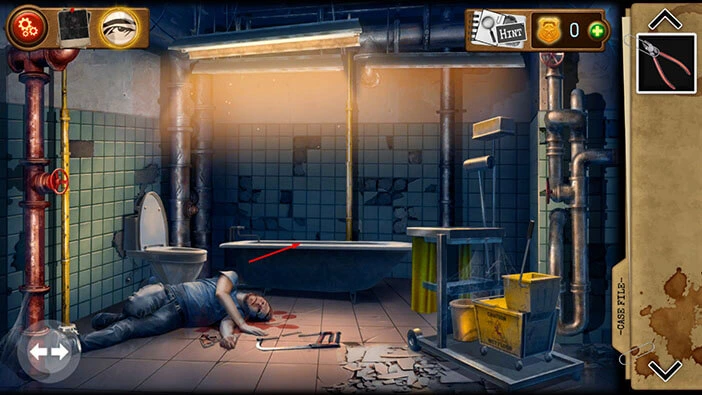
Next, tap on the bathtub to take a closer look at it, and you will discover a black bag. Tap on it to open it.
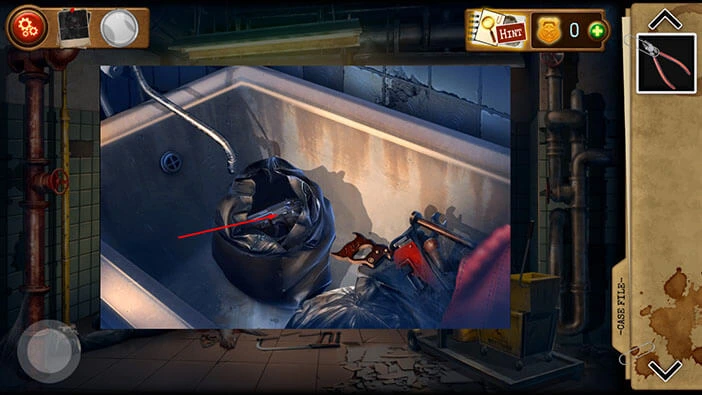
In the bag, you will find a handgun, so let’s tap on it to pick it up. Unfortunately, it seems that the gun is empty. (I just realized that our character went into this building without backup and without his sidearm. That’s extremely strange…)
Once you’re done, tap on the button in the bottom left corner of the screen to go back.
Next, tap on the space between the bathtub and the pipes on the left to take a closer look.
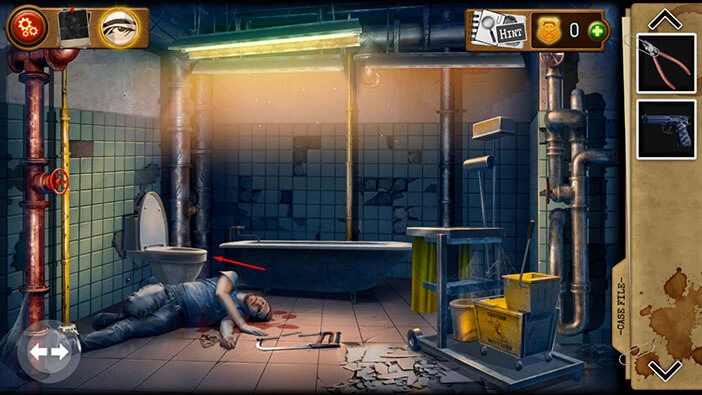
Here, you will find a loaded handgun magazine. Tap on it to pick it up, and “Gun magazine” will be added to your inventory.
After that, tap on the button in the bottom left corner of the screen to go back.
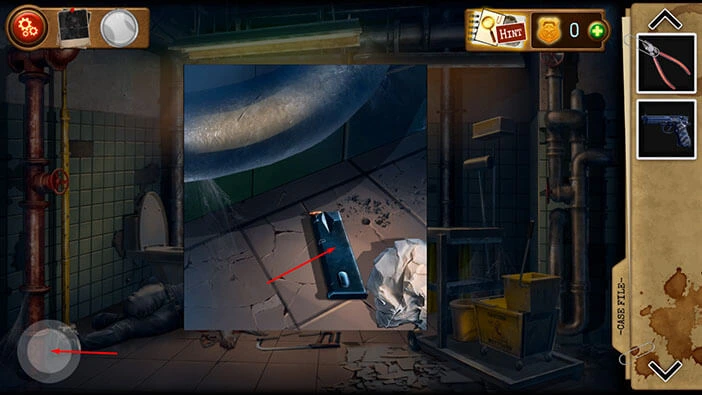
Let’s load the gun. Select the “Gun Magazine” in your inventory and drag it onto the gun. You will get a “Loaded Gun”.
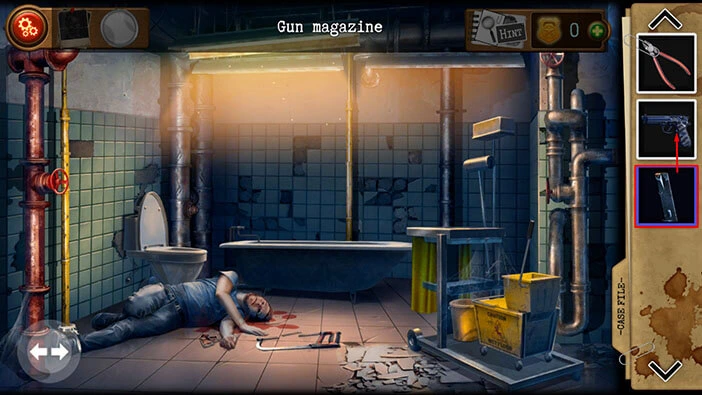
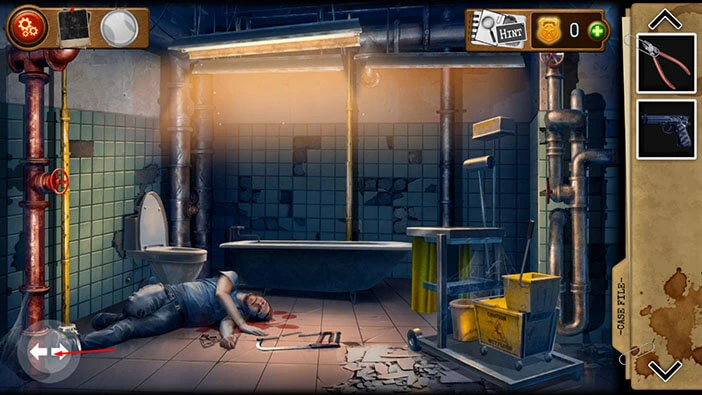
Next, let’s go back to the previous part of the room. Tap on the button in the bottom left corner
Select the “Loaded Gun” from the inventory and use it to shoot at the large mirror in front of you.
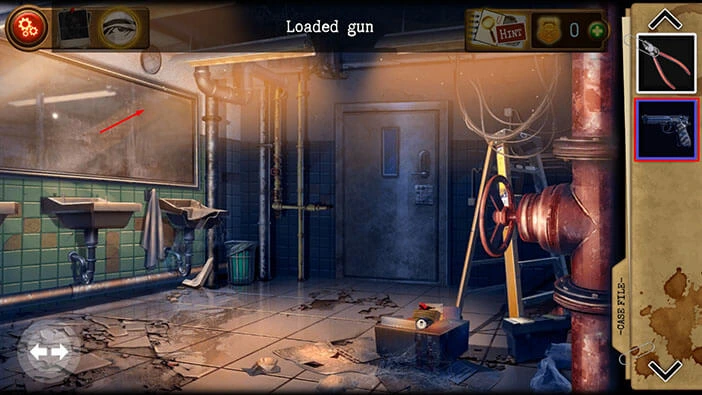
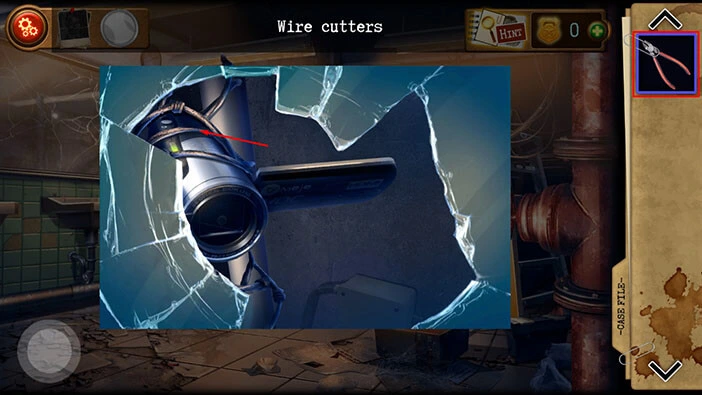
You will discover a hidden camera behind the glass. Tap on it to take a closer look.
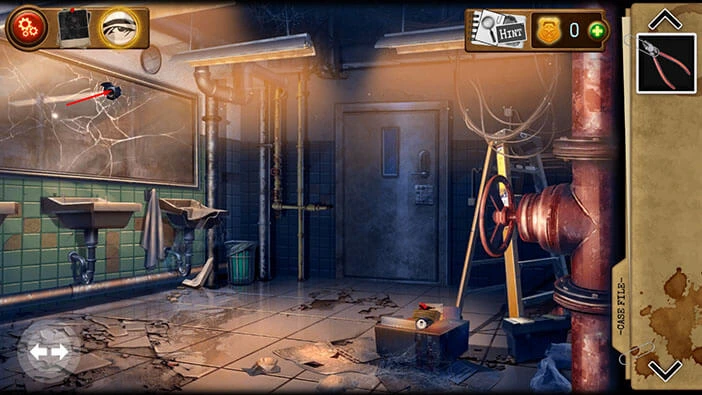
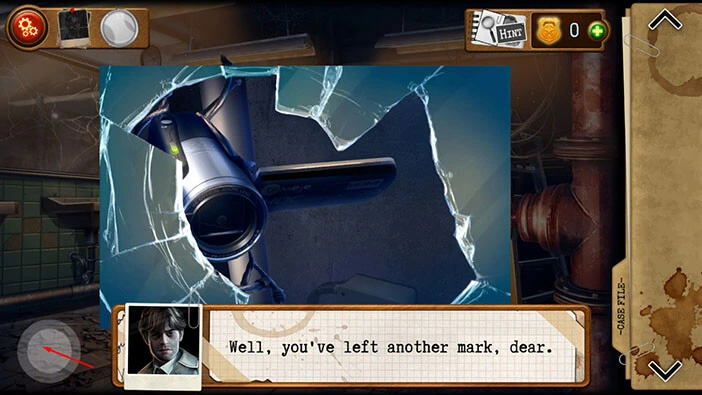
The camera is attached to the pipe with wire. So, select the “Wire cutters” from the inventory and use them to cut the wire. After that, tap on the camera to start the interaction.
Our character will take out the videotape, and it will put it in the evidence box.
Tap on the button in the bottom left corner of the screen to go back.
Next, tap on the photo in the top left corner of the screen (next to the setting button) to look at the evidence.
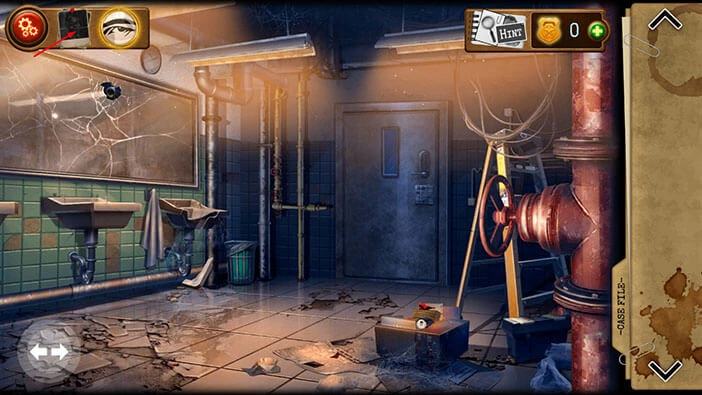
Tap on the “Hank’s death videotape” to examine it. You will notice that we now have 4/5 pieces of evidence.
Tap on the “X” button in the top right corner of the screen to go back.
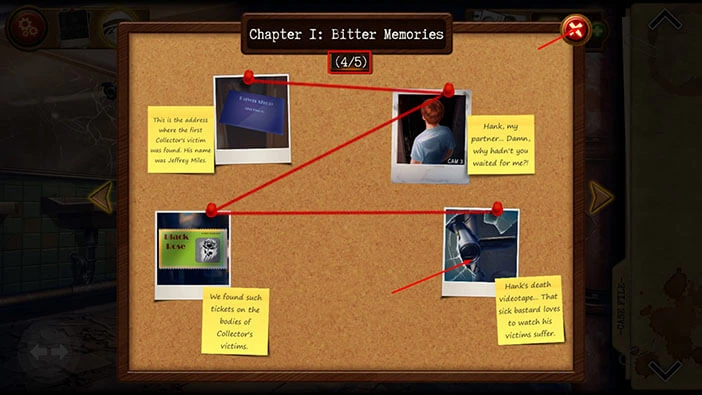
Ok, we gathered all the information we could find in this room, so we should now try to unlock the door and get out.
Tap on the door to start the interaction.
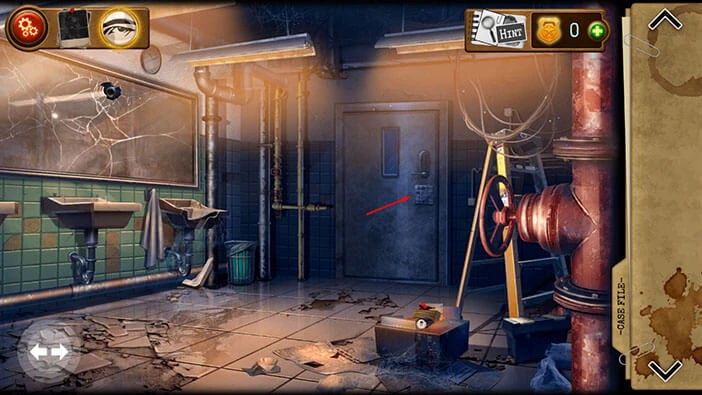
Here, we have another puzzle. Our task is to rotate the levers until they are all in vertical position. We will do this puzzle in several steps. Let’s begin.
Step 1
Tap on the first lever in the first row.
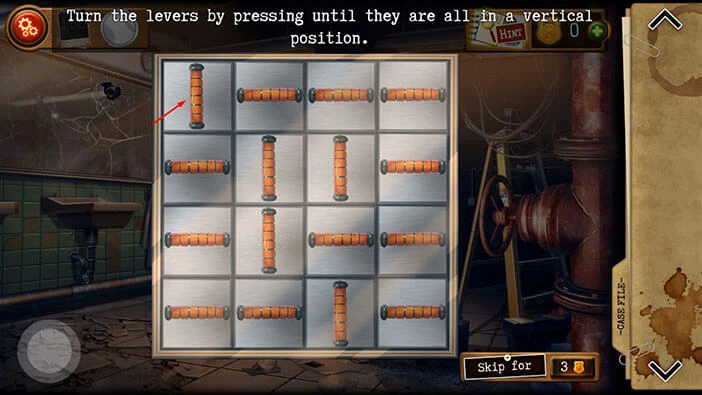
Step 2
Tap on the fourth lever in the second row.
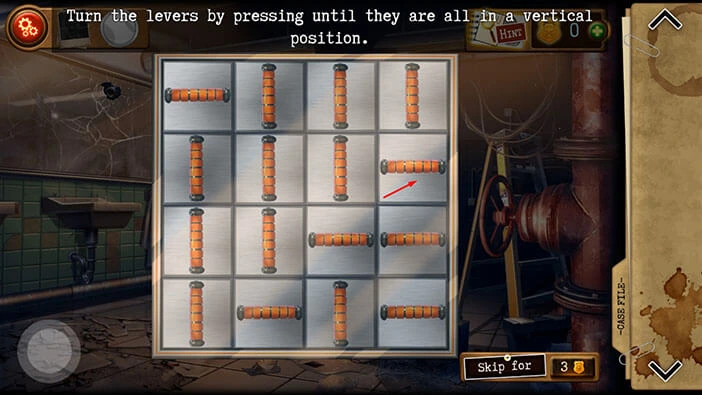
Step 3
Tap on the fourth lever in the third row.
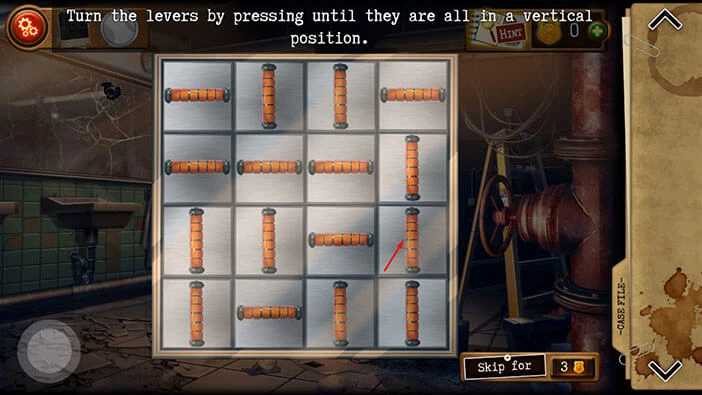
Step 4
Tap on the third lever in the fourth row.
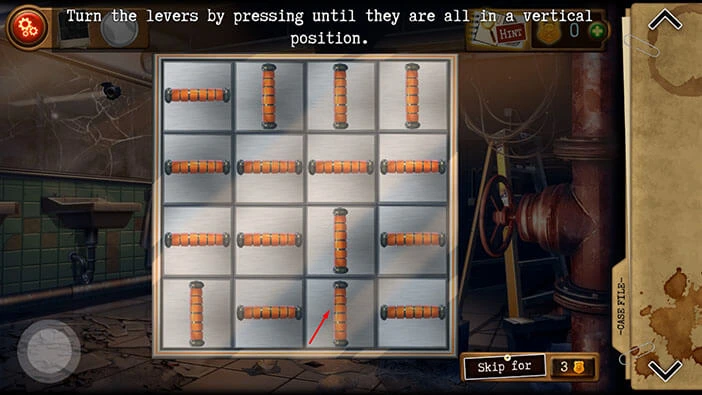
Step 5
Tap on the second lever in the third row.
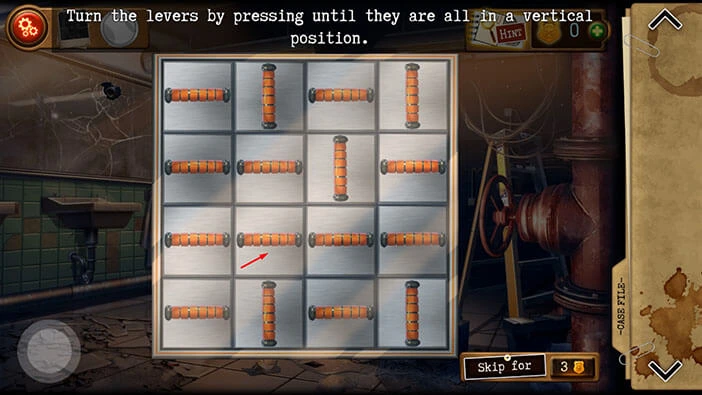
Step 6
Tap on the fourth lever in the second row.
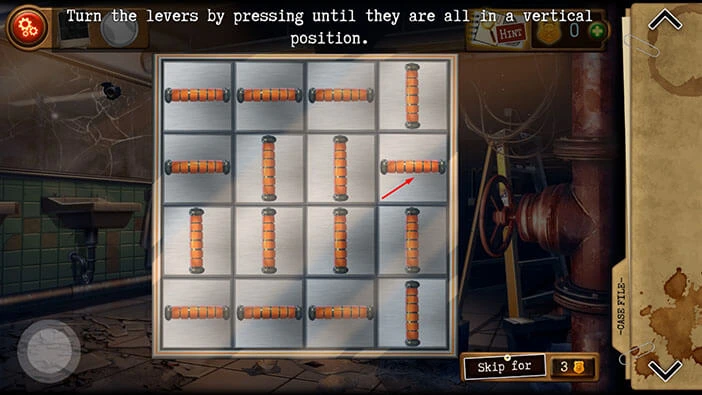
Step 7
Tap on the first lever in the second row.
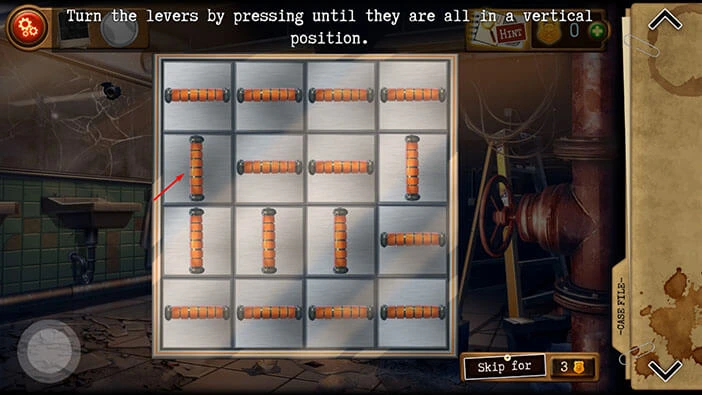
Step 8
Tap on the first lever in the third row.
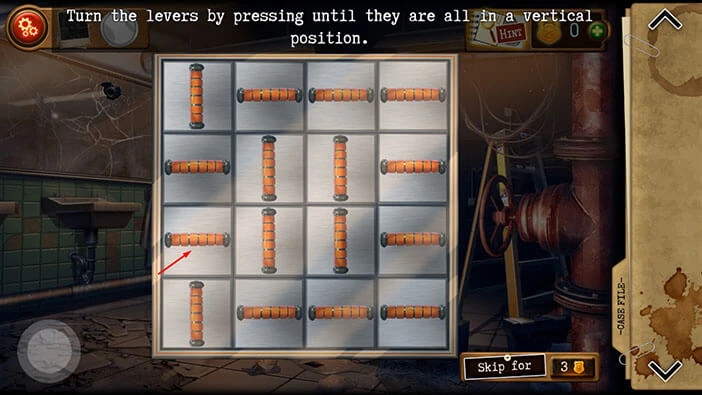
Step 9
Tap on the fourth lever in the second row.
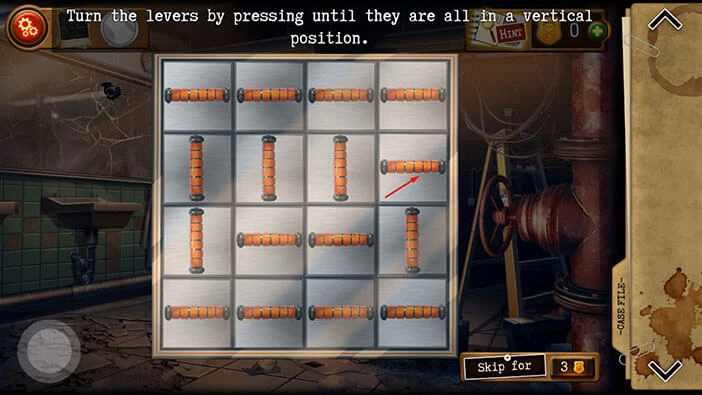
Step 10
Tap on the first lever in the third row.
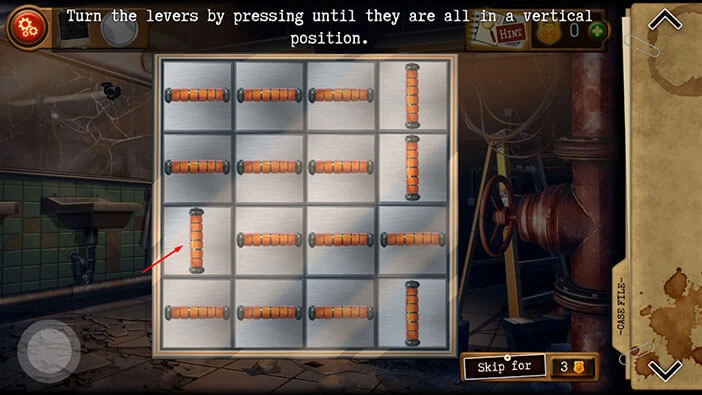
Step 11
Tap on the fourth lever in the fourth row.
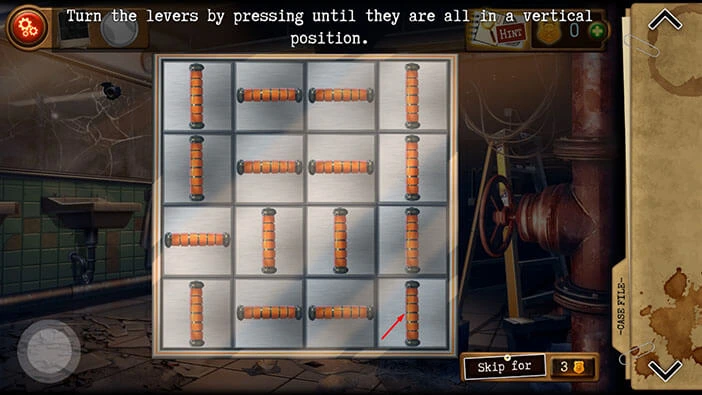
Step 12
Tap on the first lever in the first row.
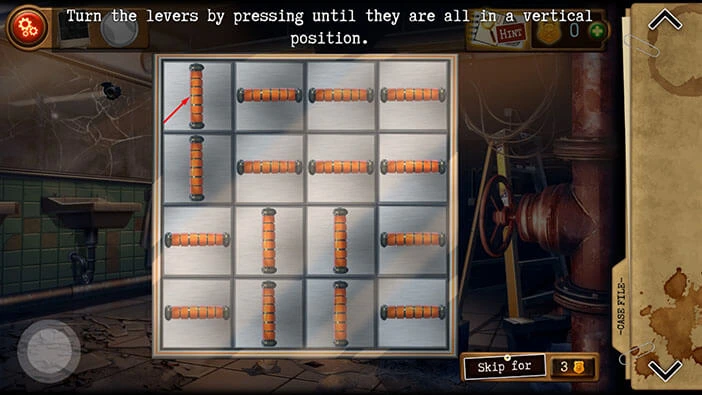
Step 13
Tap on the first lever in the second row.
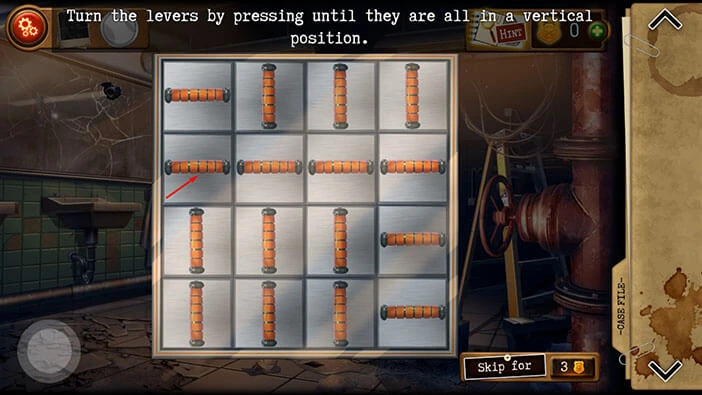
Step 14
Tap on the fourth lever in the fourth row.
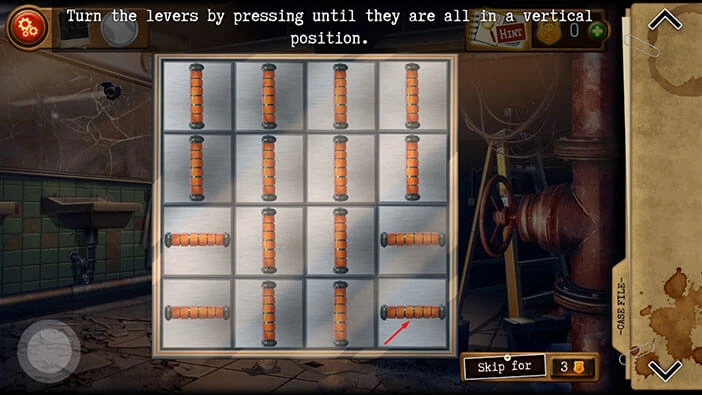
Step 15
Tap on the fourth lever in the third row.
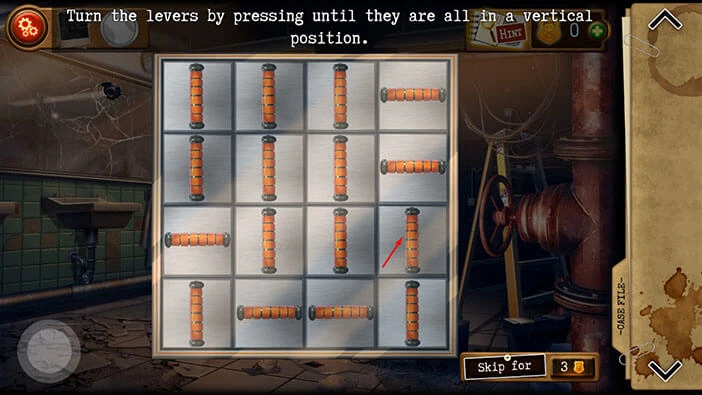
Step 16
Tap on the first lever in the third row.
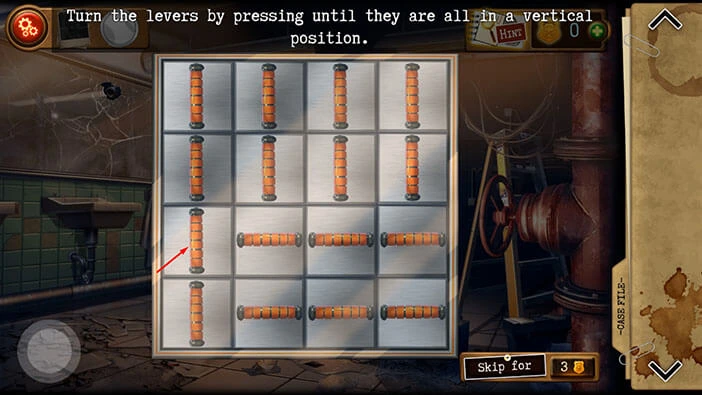
Step 17
Finally, tap on the first lever in the fourth row and you will unlock the door.
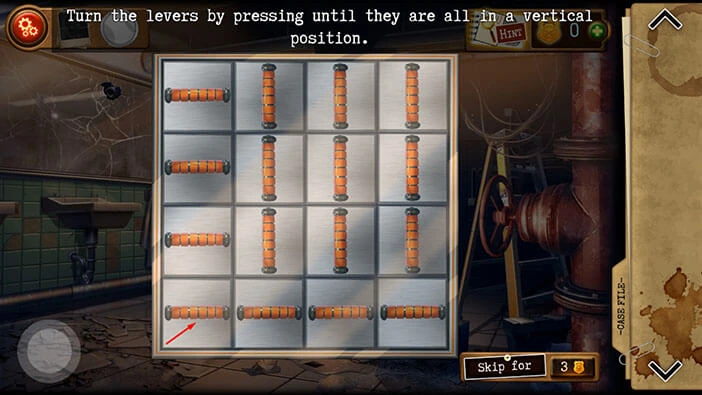
Tap on the door to go back to the hallway.
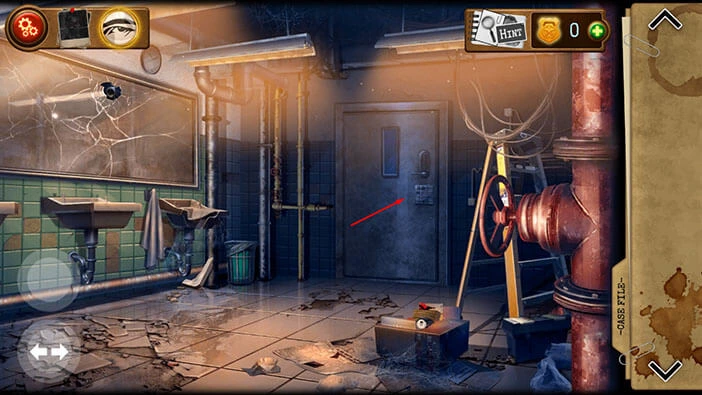
We now have all four symbols, so let’s unlock the wall safe. Tap on the door on the right.
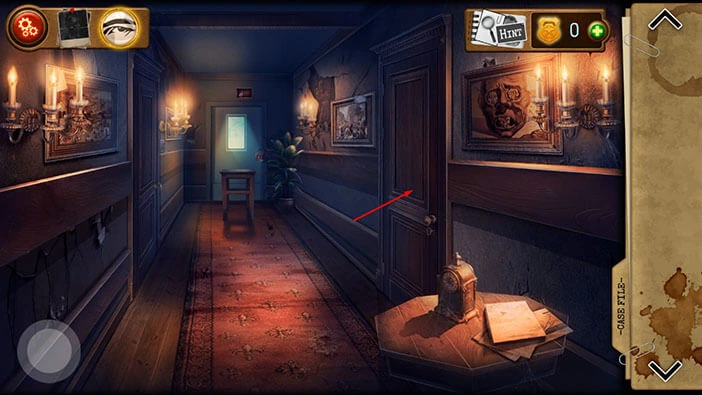
Tap on the wall safe on the wall on the left to start the interaction.
If you didn’t write down the symbols, here’s how you can find them.
Turn off the light in this room, and you will find the first symbol on the wall on the left.
Tap on the TV (also in this room) and you will find the second symbol.
For the third symbol, you should go back to the hallway, and look under the picture of the four horsemen of the apocalypse. Here, you will find the note with the third symbol.
You can find the fourth symbol in the last room, in Hank’s eye socket.
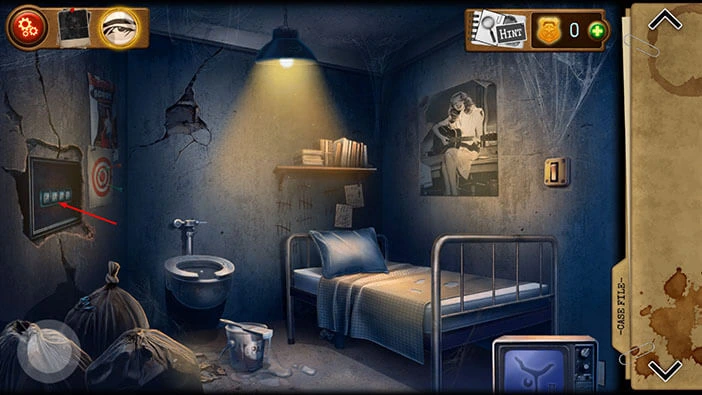
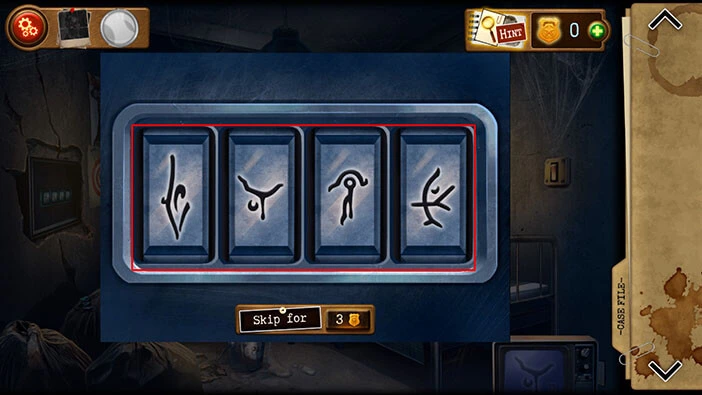
Enter the symbols that you discovered, and you will unlock the safe.
Tap on the note in the safe to examine it.
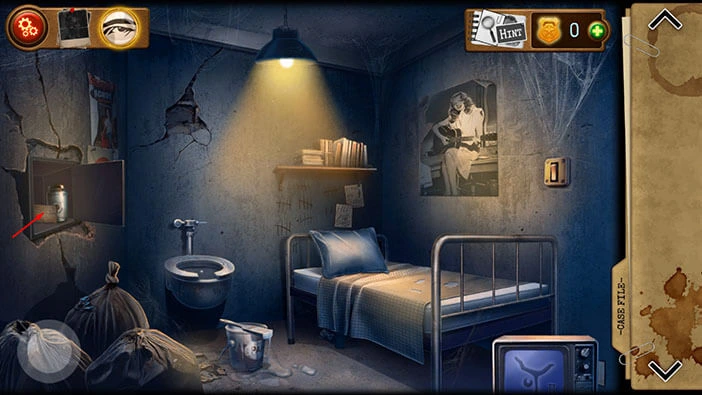
It’s the note from the “Collector” and it will be added to the evidence. Let’s tap on the photo in the top left corner of the screen to take a look at the evidence.
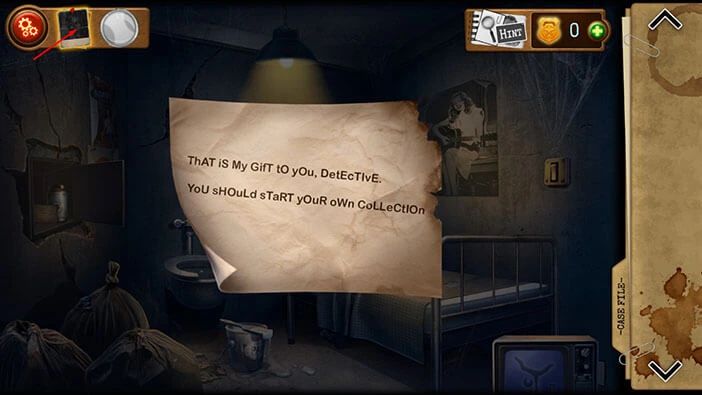
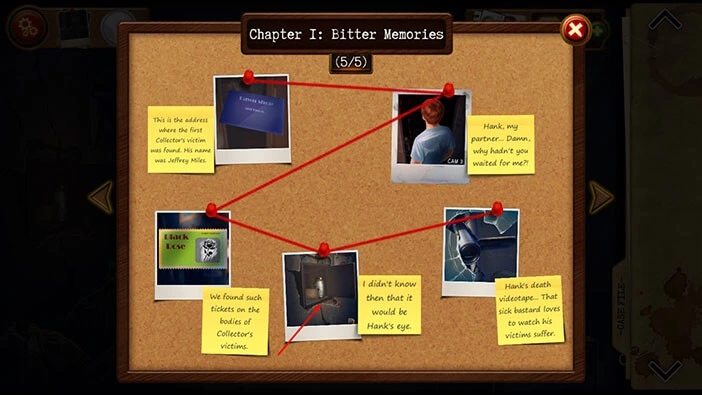
Looks like the Hank’s eye is in the jar in the safe. We have 5/5 pieces of evidence. Tap on the last piece of evidence to examine it.
After that, tap on the “X” button in the top right corner to go back.
Tap on the message in the safe again to look at it, and tap again to start the interaction. With this done, you will finish the first chapter.
At the end of the chapter, we can see our character, grieving because of the death of his partner. However, he is determined to catch the “Collector” and bring him to justice.
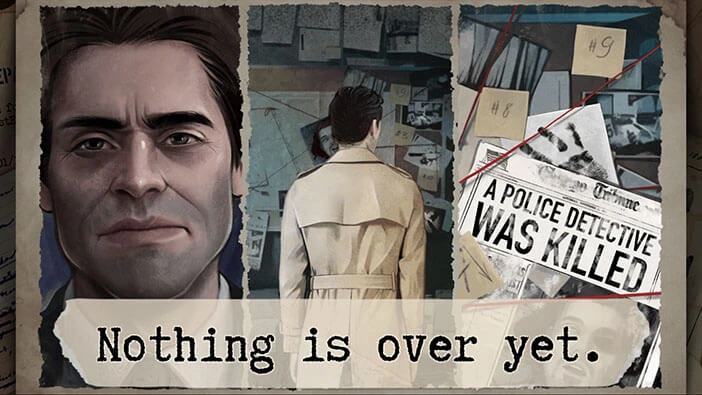
We reached the end of the first chapter of the walkthrough. You can check out the walkthrough for the second chapter, “Breadcrumbs”, by tapping on the “Next Part” button.
Thank you for reading.