Can you escape the 100 room 17 | Levels 33-36
Hello everyone and welcome to the ninth part of the walkthrough for “Can you escape the 100 room 17”. In the ninth part of the walkthrough, we will cover levels 33 to 36.
Level 33
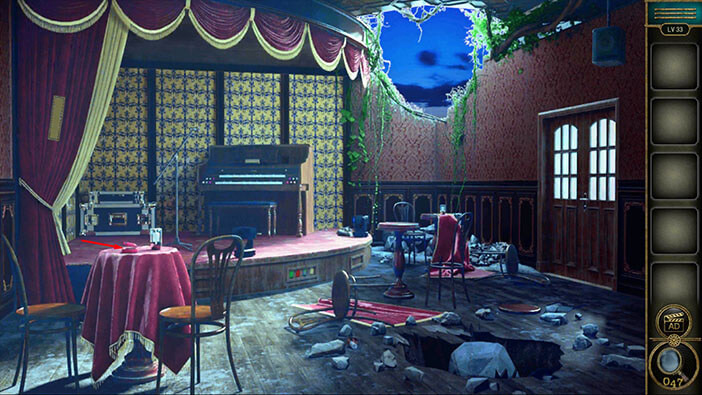
Let’s explore the thirty-third level. On the table on the right, you will notice a small, pink box. Tap on it to take a closer look, and tap again to open it.
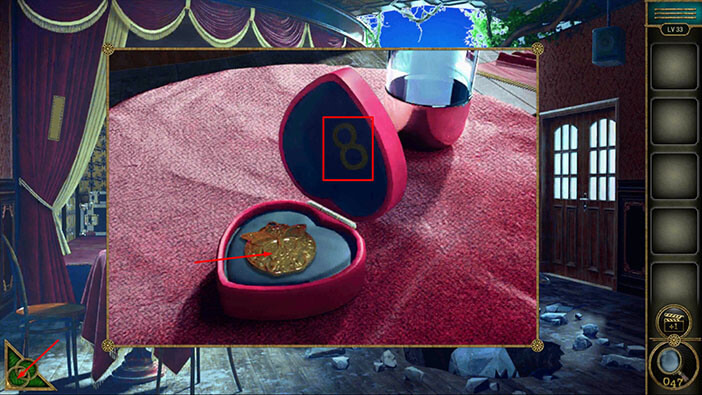
In the box, you will find a “Badge”. Tap on it to pick it up. Here, you will also notice Yellow number 8. Let’s memorize/write down this information, Yellow number 8.
Once you’re done, tap on the green button in the bottom left corner of the screen to go back.
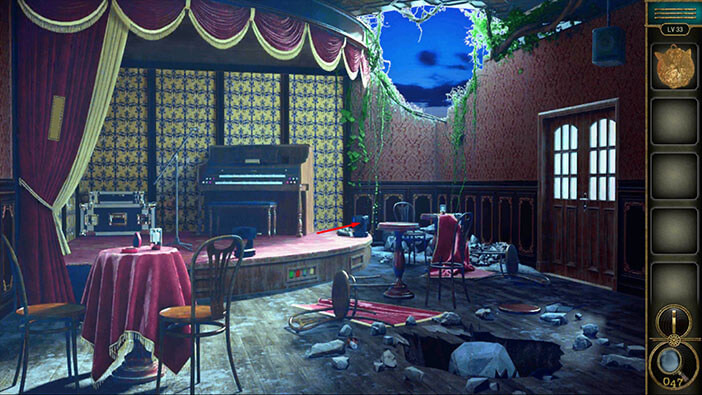
Next, let’s tap on the camera on the right side of the stage, to take a closer look at it.
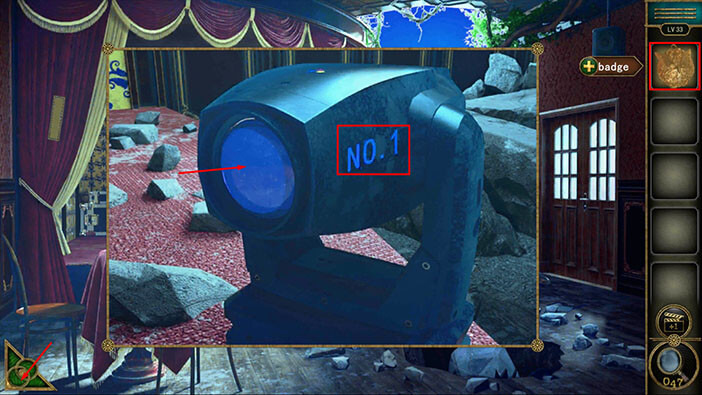
Select the “Badge” from the inventory and use it to get the “Convex mirror”.
Also, here you will notice a Blue number 1. Let’s memorize/write down this information, Blue number 1.
Once you’re done, tap on the green button in the bottom left corner of the screen to go back.
Next, let’s tap on the patch on the curtain on the left to take a closer look at it.
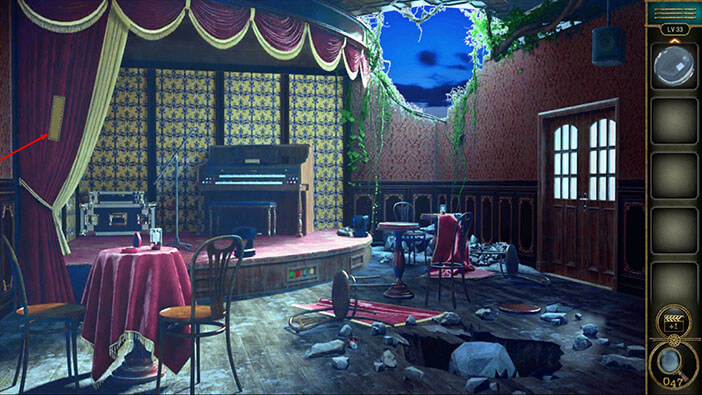
Let’s select the “Convex mirror” from the inventory and use it to remove the patch.
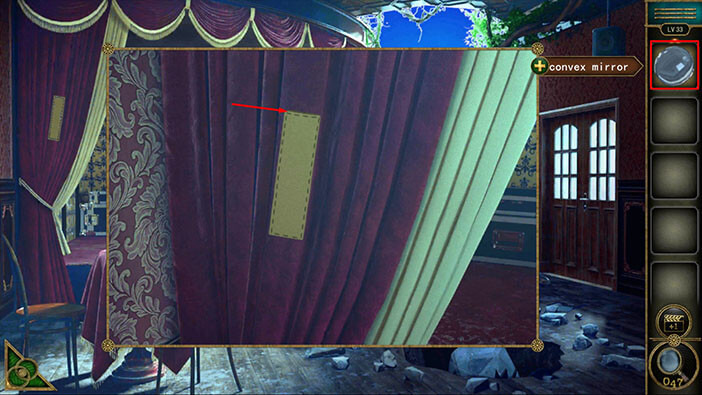
Under the patch, you will discover the green number 5. Let’s memorize/write down this information, Green number 5. Also, when you remove the patch, the “Paper with hints” will be added to your inventory.
After that, tap on the green button in the bottom left corner of the screen to go back.
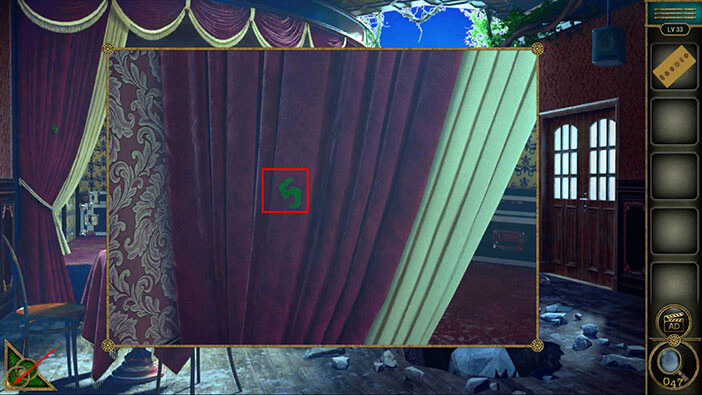
Next, tap on the piano in front of you to take a closer look at it.
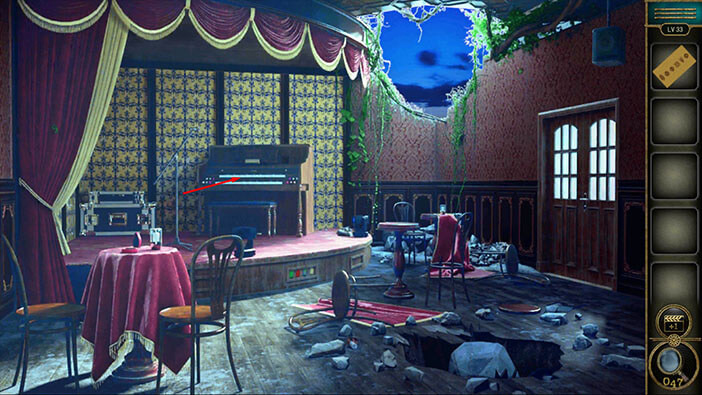
Next, select “Paper with hints” from the inventory and put it on the piano.
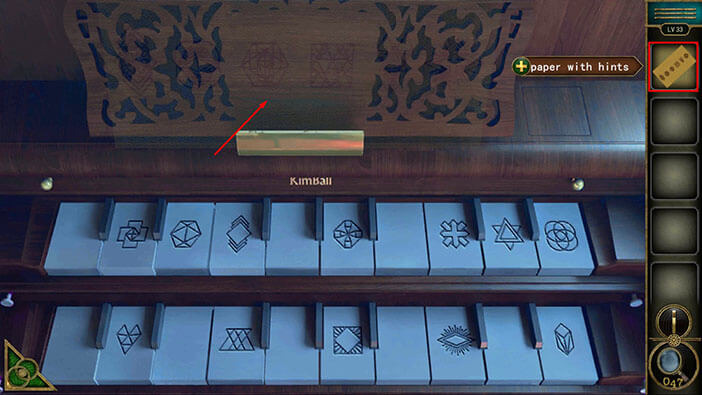
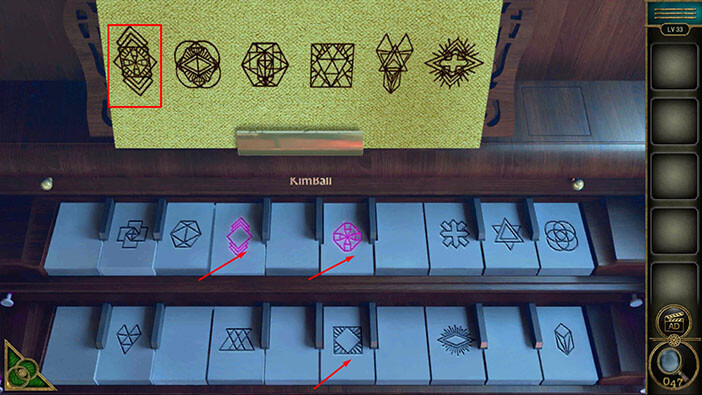
Here, we have another puzzle. If you take a look at the piano keys, you will notice several symbols. Next, if we examine the “Paper with hints” we will notice six symbols, but these symbols are more complex than the symbols on the piano keys.
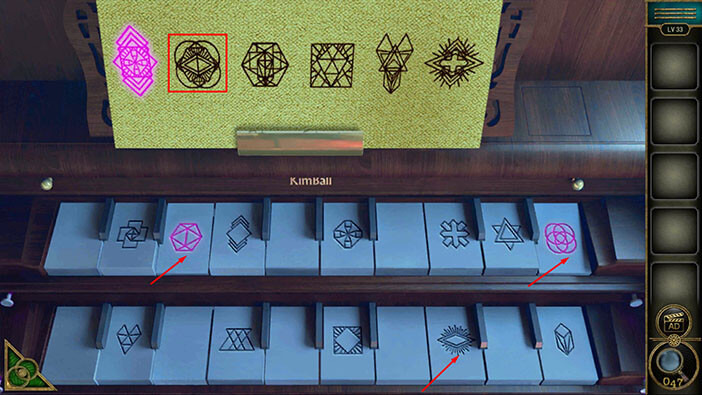
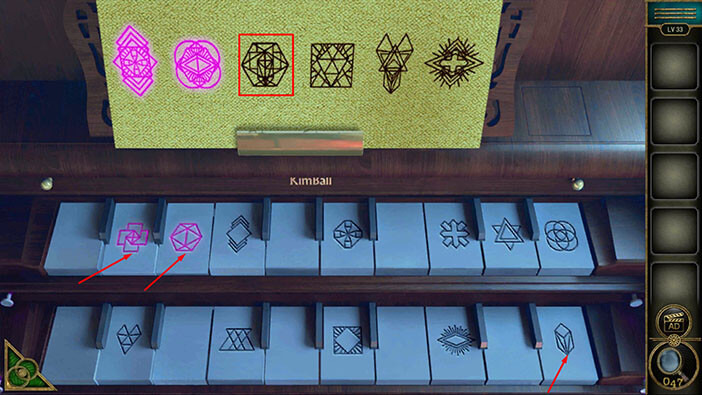
So, our task is to tap on the specific piano keys, and assemble the symbols from the “Paper with hints”. Each symbol on the “Paper with hints” is a combination of three piano key symbols.
We will do this puzzle in several steps. Let’s begin.
Step 1
We will begin with the first symbol (looking from left to right). To assemble this symbol, tap on the third key with the symbol in the top row. After that, tap on the fourth key with the symbol in the top row. Lastly, tap on the third key with the symbol in the bottom row.
Step 2
Let’s assemble the second symbol. To do that, tap on the second key with the symbol in the top row. After that, tap on the seventh key with the symbol in the top row. Lastly, tap on the fourth key with the symbol in the bottom row.
Step 3
Let’s assemble the third symbol. To do that, tap on the first key with the symbol in the top row. After that, tap on the second key with the symbol in the top row. Lastly, tap on the fifth key with the symbol in the bottom row.
Step 4
Let’s assemble the fourth symbol. To do that, tap on the first key with the symbol in the bottom row. After that, tap on the second key with the symbol in the bottom row. Lastly, tap on the third key with the symbol in the bottom row.
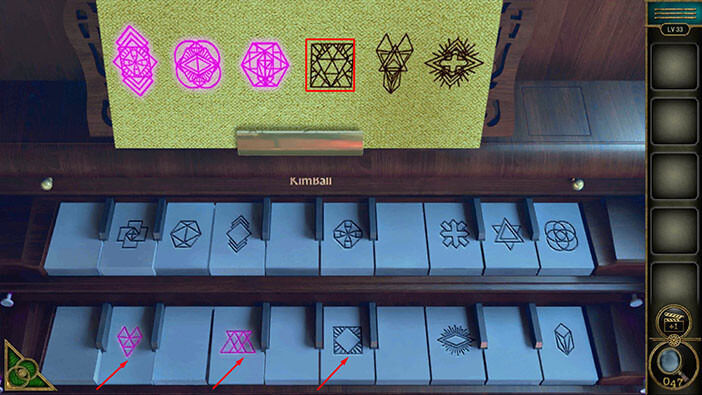
Step 5
Let’s assemble the fifth symbol. To do that, tap on the sixth key with the symbol in the top row. After that, tap on the first key with the symbol in the bottom row. Lastly, tap on the fifth key with the symbol in the bottom row.
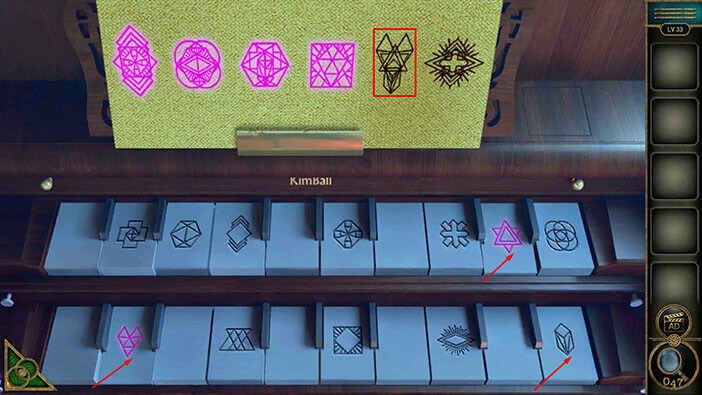
Step 6
Let’s assemble the sixth symbol. To do that, tap on the third key with the symbol in the top row. After that, tap on the fifth key with the symbol in the top row. Lastly, tap on the fourth key with the symbol in the bottom row.
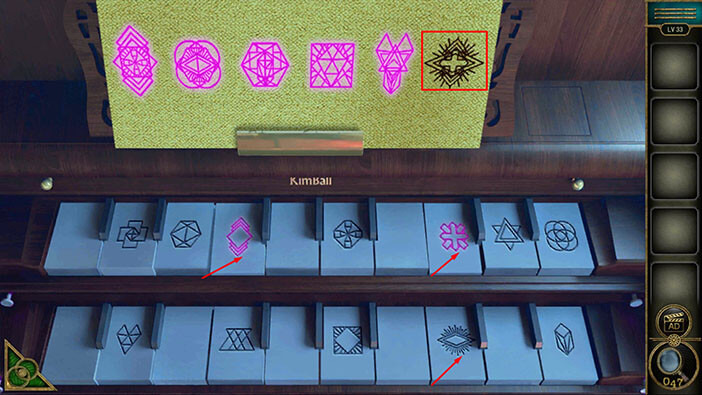
Once you assemble all six symbols, the small compartment on the right will open and inside you will find a “Red ball”. Tap on it to pick it up.
After that, tap on the green button in the bottom left corner of the screen to go back.
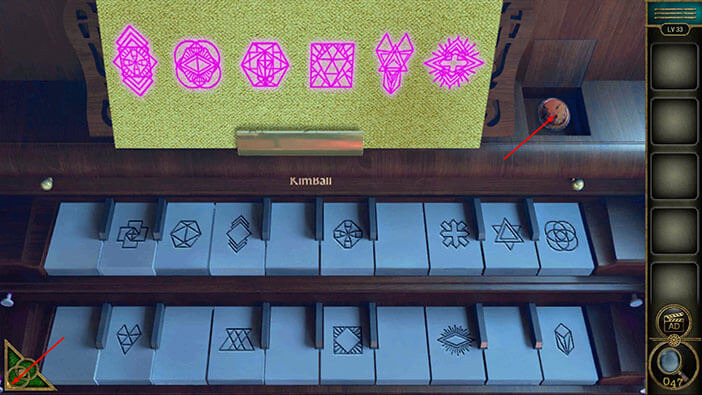
The loudspeaker will fall to the floor on the right side of the room. Let’s tap on it to take a closer look.
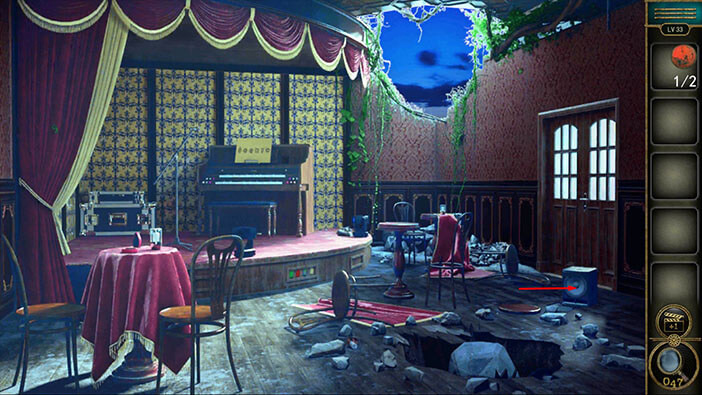
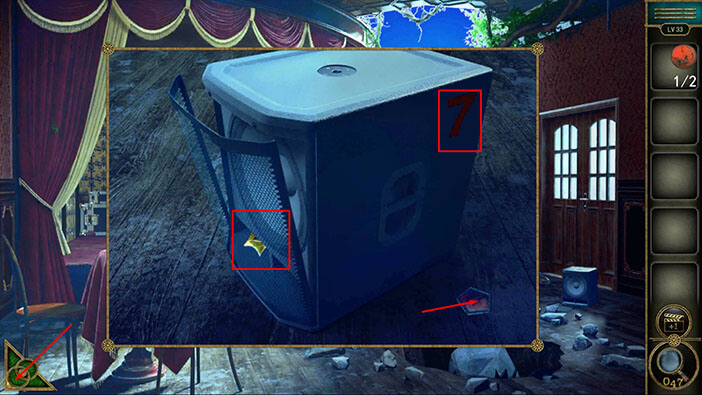
On the right side of the loudspeaker, you will notice a “Pentagon”. Tap on it to pick it up. In the top right corner of the loudspeaker, you will notice the red number 7. Let’s memorize/write down this information, red number 7.
Also, you will notice an “Achievement star” in the loudspeaker. We will come back to it in a moment. For now, let’s tap on the green button in the bottom left corner of the screen to go back.
Next, let’s tap on the four buttons located just below the stage, to take a closer look at it.
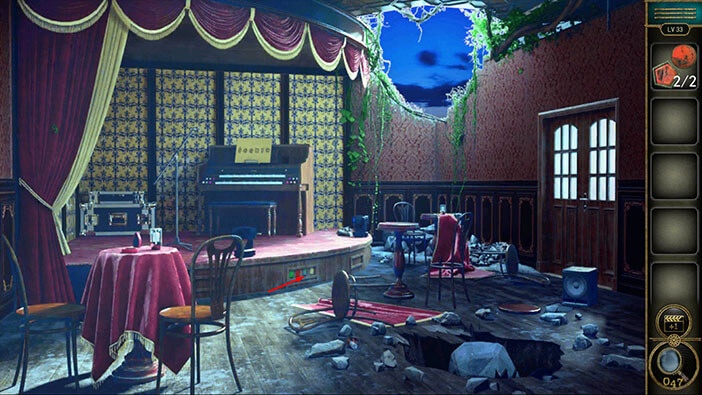
Here, we will need a four-digit code in order to solve this puzzle, and each number has a background of a different color. We already discovered the Yellow number 8, the Blue number 1, the Green number 5, and the Red number 7.
So, let’s enter the code “5718”.
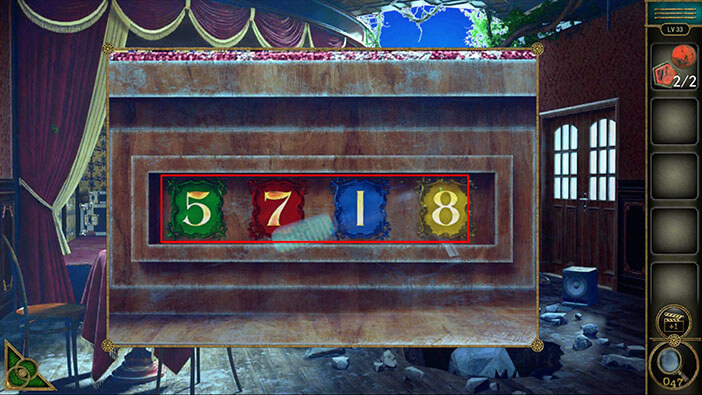
As soon as you enter the correct code, you will unlock and open the small compartment. Inside, you will find a “Laser knife”. Tap on it to pick it up.
After that, tap on the green button in the bottom left corner of the screen to go back.
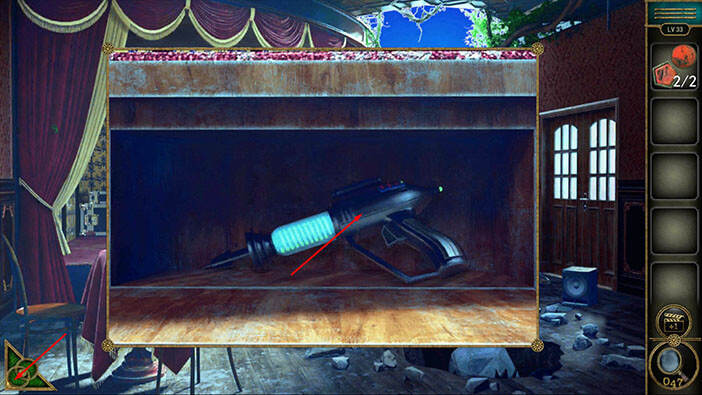
Let’s take the achievement star. Tap on the loudspeaker on the right to take a closer look at it.
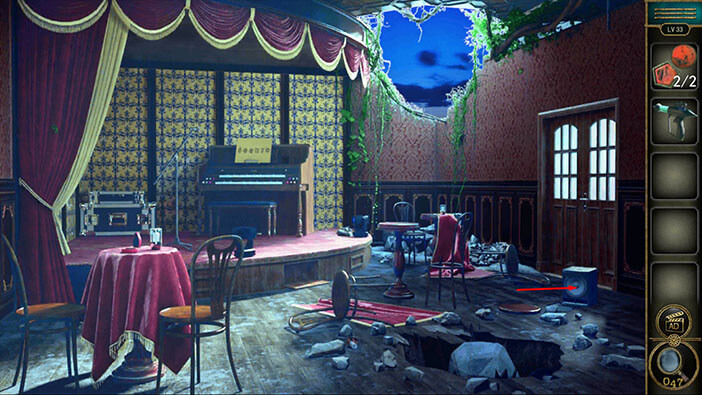
Select the “Laser knife” from the inventory and use it to open the loudspeaker.
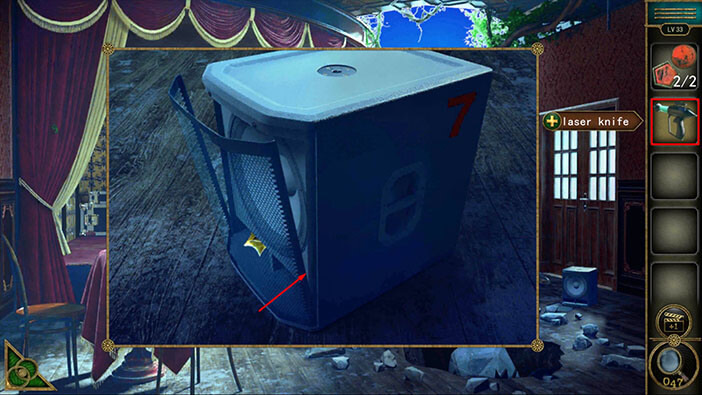
Let’s tap on the “Achievement star” to pick it up. After that, tap on the green button in the bottom left corner of the screen to go back.
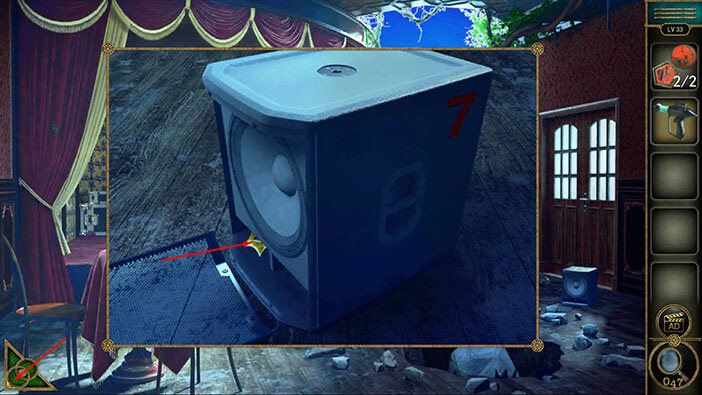
Next, let’s tap on the large rock on the right to take a closer look at it.
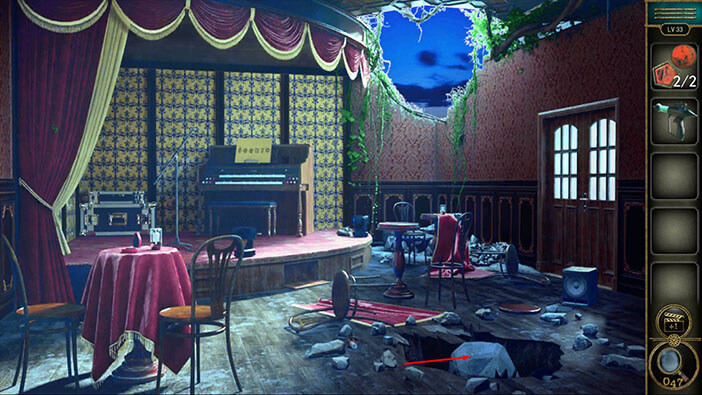
Select the “Laser knife” from the inventory and use it to cut the rock. After that, tap on the rock to open it.
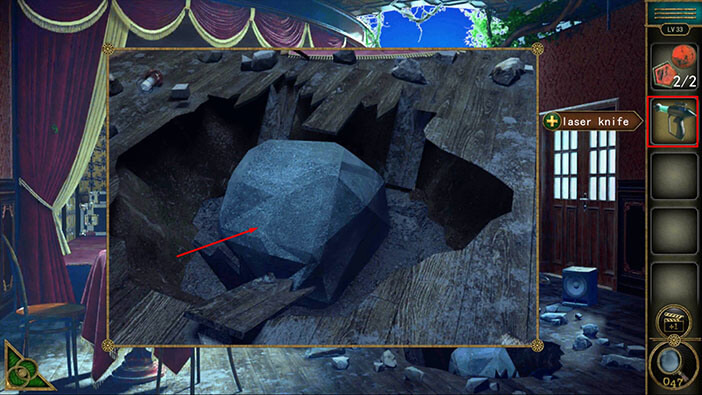
Inside the rock, you will find a “Signal transmitter”. Let’s tap on it to pick it up.
After that, tap on the green button in the bottom left corner of the screen to go back.
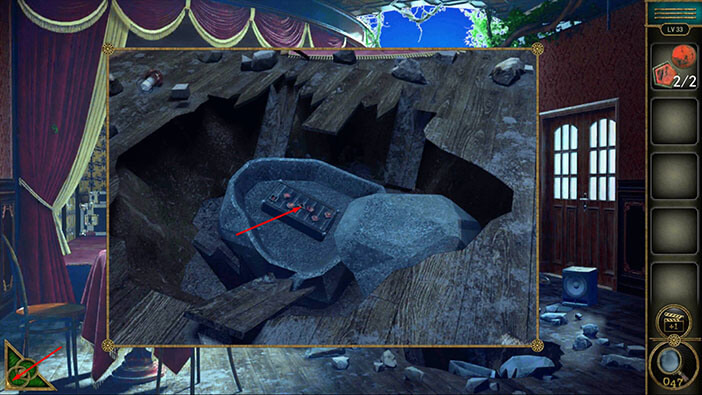
Next, tap on the “Signal transmitter” to start the interaction.
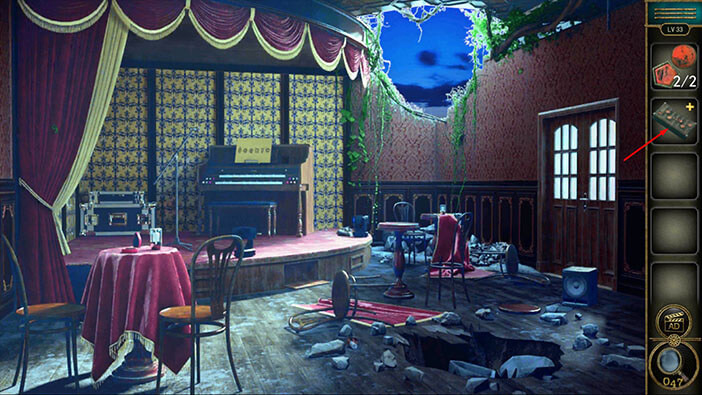
You will notice that two slots of the “Signal transmitter” are empty. So, let’s select the “Pentagon and Red ball” from the inventory and insert them into the empty slots.
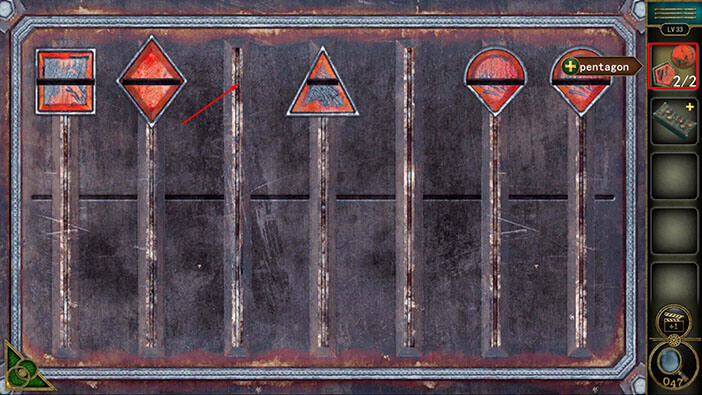
Here, we have another puzzle. Our task is to position all the symbols on the horizontal line in the middle. We will do this puzzle in several steps. Let’s begin.
Step 1
Select the first symbol (square) and drag it to the middle (horizontal line). With that, you will also move down the fourth symbol.
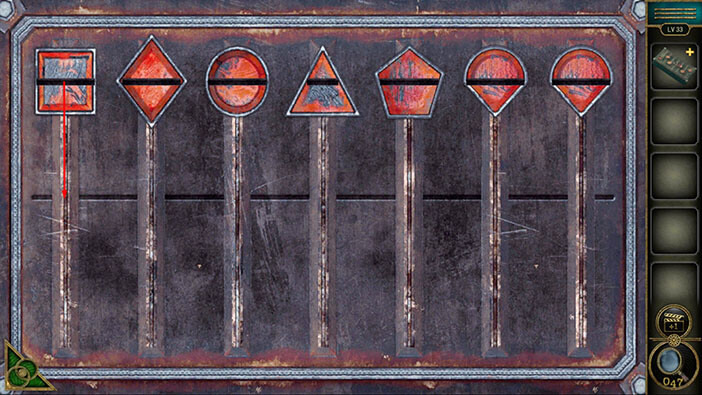
Step 2
Select the second symbol (rhombus) and drag it to the middle (horizontal line). With that, you will also move down the fifth symbol.
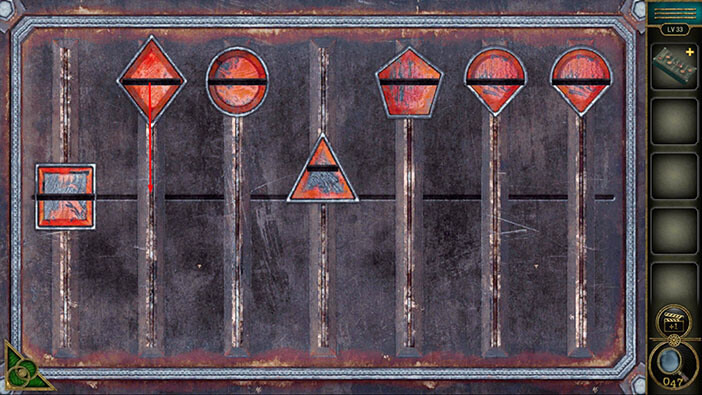
Step 3
Select the third symbol (circle) and drag it to the middle (horizontal line). With that, you will also move down the second symbol.
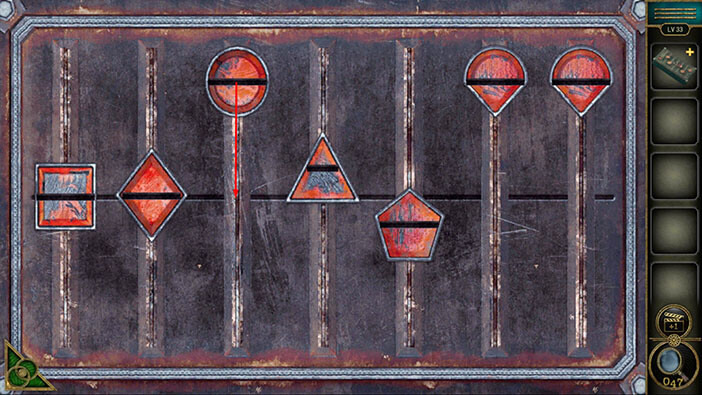
Step 4
Select the fourth symbol (triangle) and drag it to the middle (horizontal line). With that, you will also move up the third symbol, and you will move down the sixth symbol.
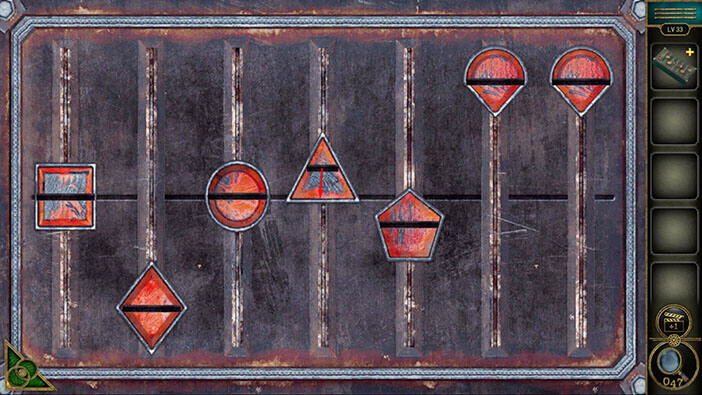
Step 5
Select the third symbol (circle) and drag it to the middle (horizontal line). With that, you will also move down the second symbol.
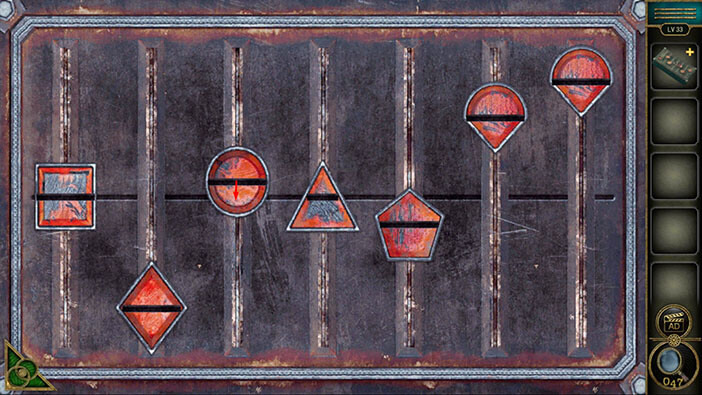
Step 6
Select the second symbol (rhombus) and drag it close to the top (near the top). With that, you will also drag the fifth symbol to the top.
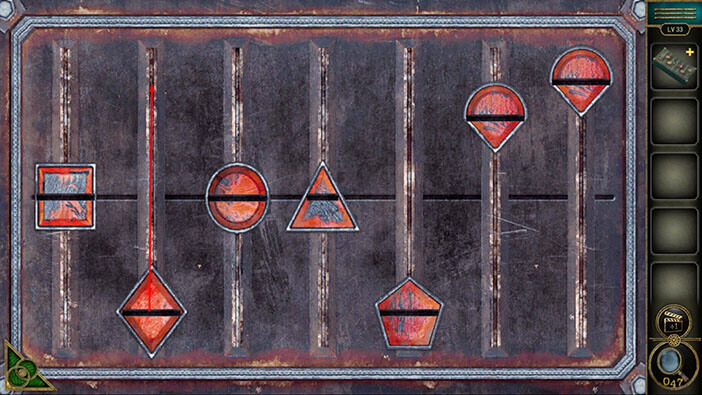
Step 7
Select the second symbol (rhombus) and drag it to the middle (horizontal line). With that, you will also drag the fifth symbol to the horizontal line.
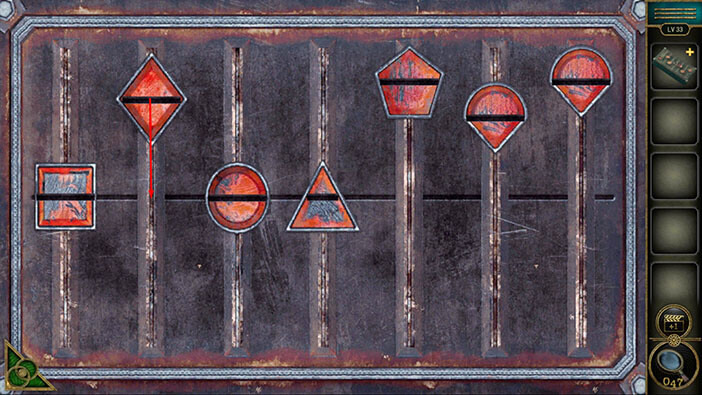
Step 8
Select the sixth symbol and drag it to the bottom. With that, you will also drag the seventh symbol to the top.
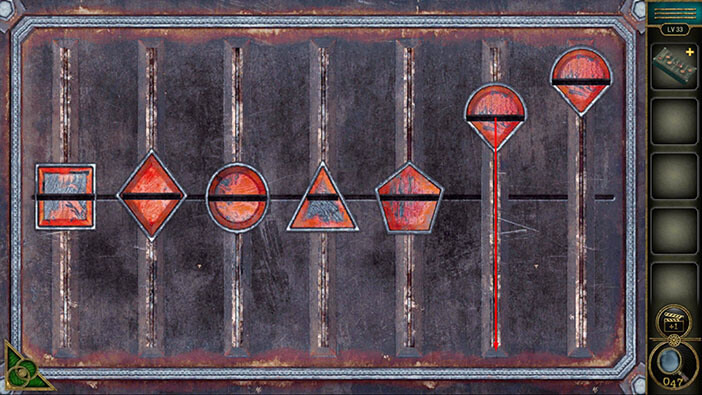
Step 9
Select the sixth symbol and drag it to the middle (horizontal line). With that, you will also drag the seventh symbol to the horizontal line.
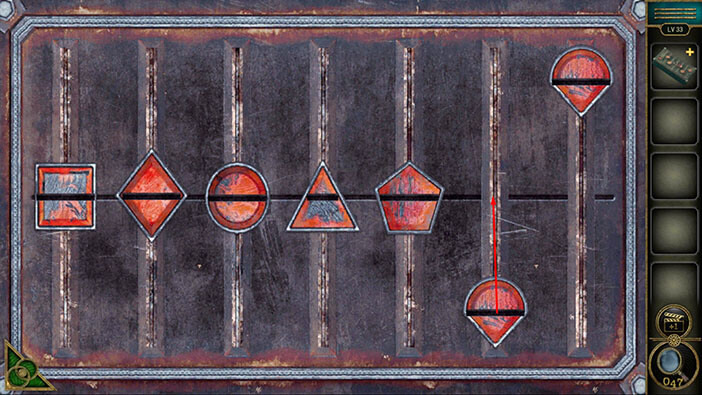
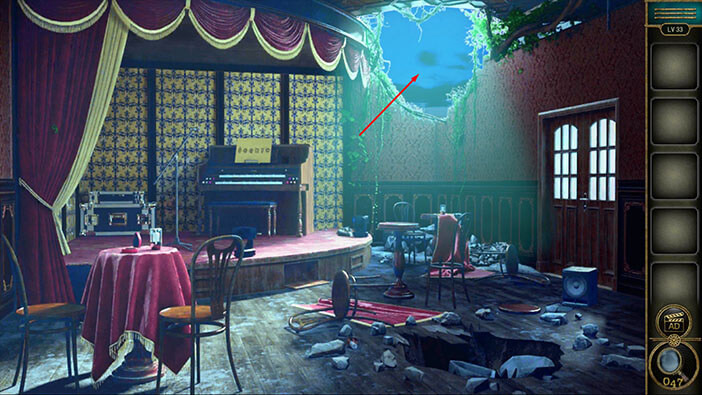
As soon as you solve this puzzle, “UFO” will arrive to take you away. Let’s tap on the hole in the roof to proceed to the next level.
Level 34
Let’s explore the thirty-fourth level. Tap on the floor to take a closer look at it, and tap again to open it.
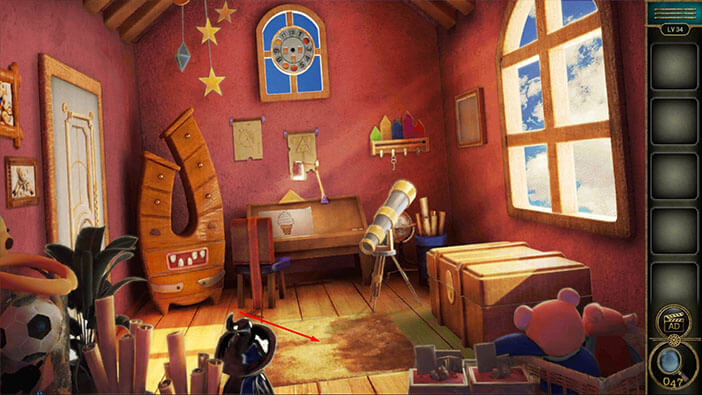
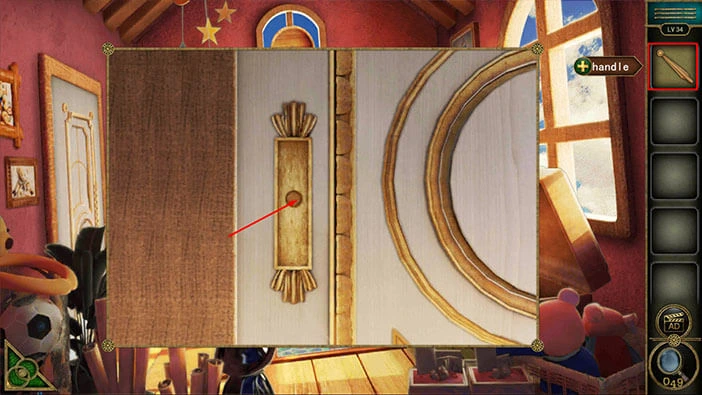
In the bottle left corner of the puzzle, you will notice a “Handle”. Tap on it to pick it up. Here, we can also see some kind of puzzle. We will come back to it later, almost at the very end of the level.
For now, let’s tap on the green button in the bottom left corner of the screen to go back.
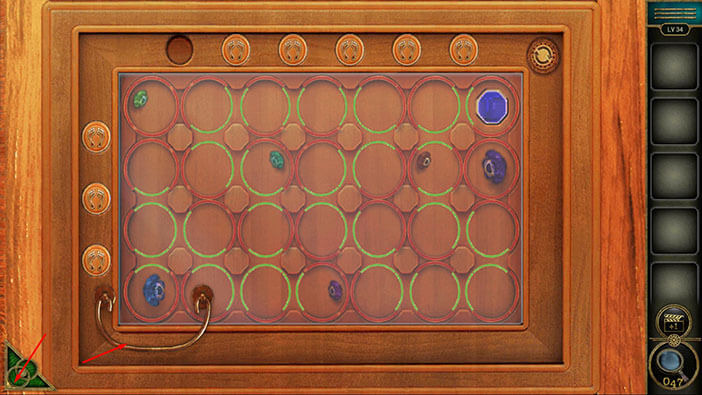
Next, let’s tap on the cabinet, located in the left corner of the room, to take a closer look at it.
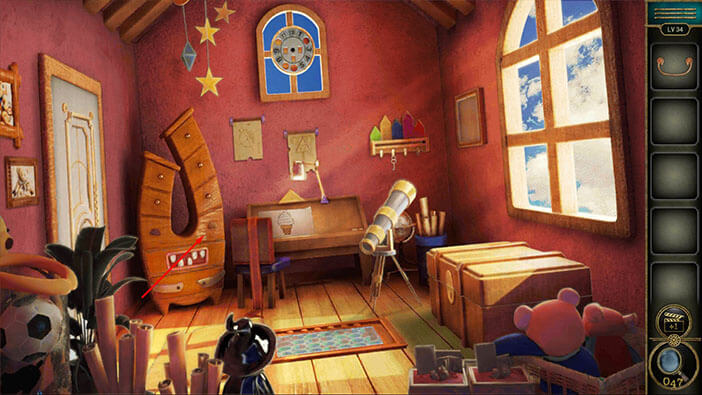
At the bottom of the cabinet, you will notice a drawer without a handle. So, let’s select the “Handle” from the inventory and insert it into the empty slot.
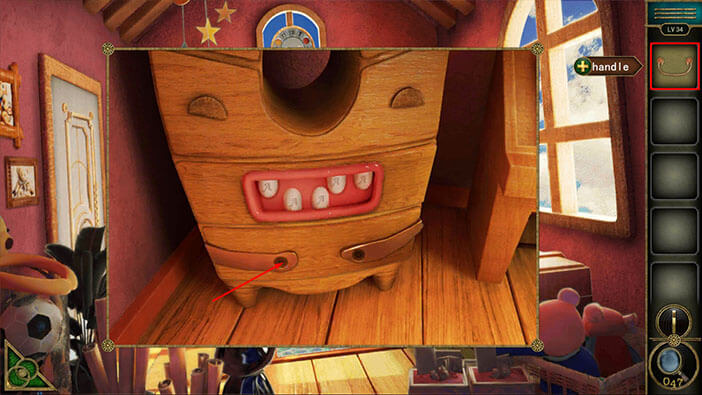
Our character will automatically open the drawer, and inside you will find a “Palette”. Tap on it to pick it up.
After that, tap on the green button in the bottom left corner of the screen to go back.
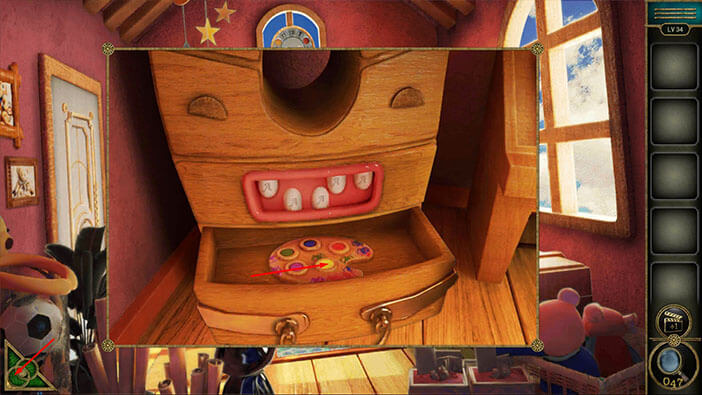
Next, if you take a look at the ceiling on the left side of the room, you will notice several start hanging from it. Tap on the stars and you will get the “Achievement star”.
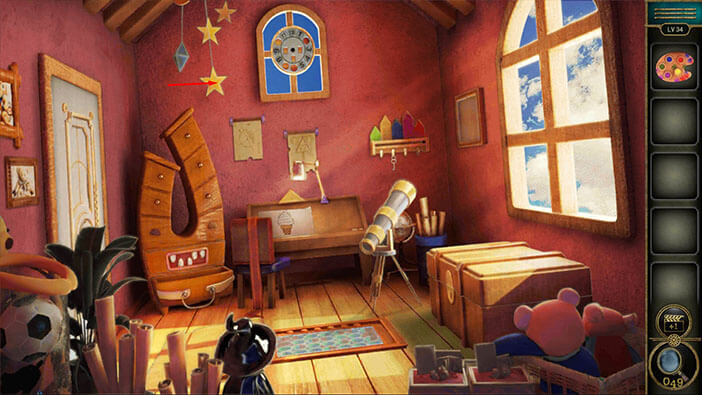
Next, if you take a look at the wall in the right corner of the room, you will notice a small wall shelf. Let’s tap on it to take a closer look.
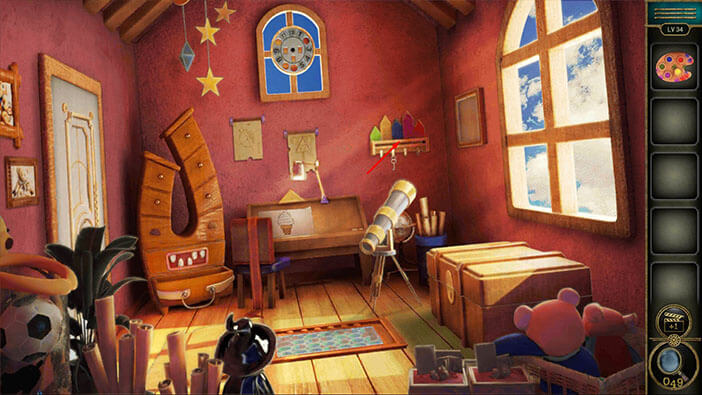
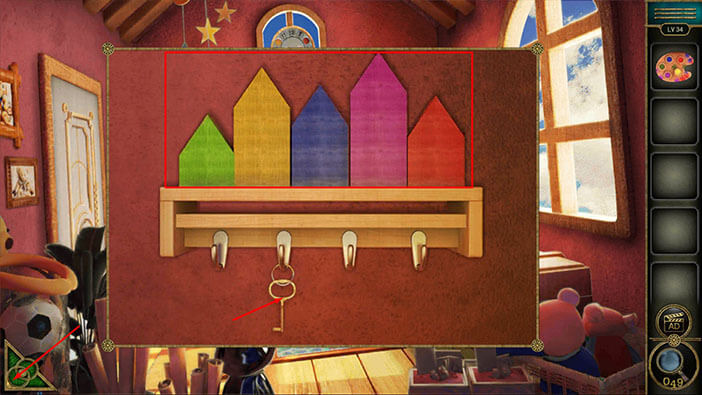
Here, you will find a “Key” so let’s tap on it to pick it up. Before we proceed, let’s examine the boards above the shelf. Our task is to memorize/write down the color of the boards, starting with the smallest. Let’s do that.
The first board (the smallest board) = Green
The second board = Red
The third board = Blue
The fourth board = Yellow
The fifth board = Purple
Once you’re done, tap on the green button in the bottom left corner of the screen to go back.
Next, you will notice a drawing on the table in front of you. Let’s tap on it to take a closer look.
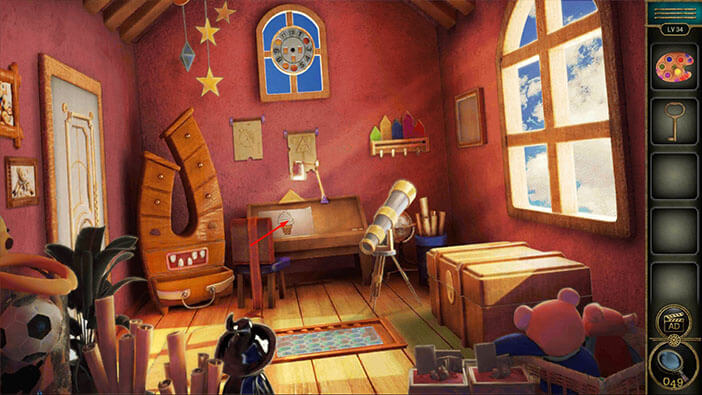
Let’s select the “Palette” from the inventory and place it on the right side of the table.
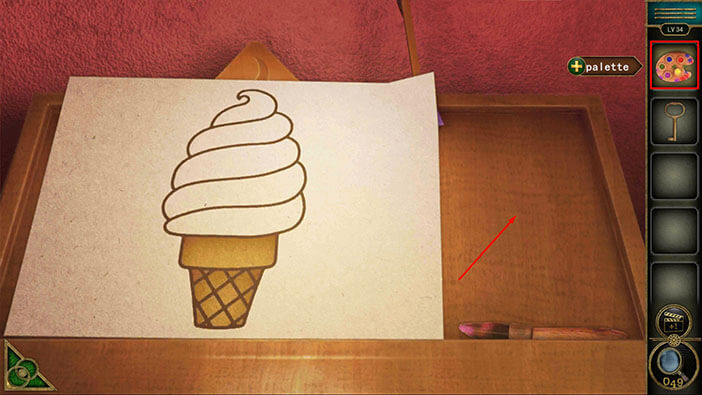
Here, we have another puzzle. Our task is to paint the ice cream. If you pay attention to the ice cream, you will notice that it consists of five parts of different sizes, just like the boards that we saw previously. So, the smallest part of the ice cream should match the color of the largest board, etc.
We will do this puzzle in several steps. Let’s begin.
Step 1
Tap on the Green color on the palette to select it, then tap on the first part of the ice cream (looking from bottom to top) to paint it green.
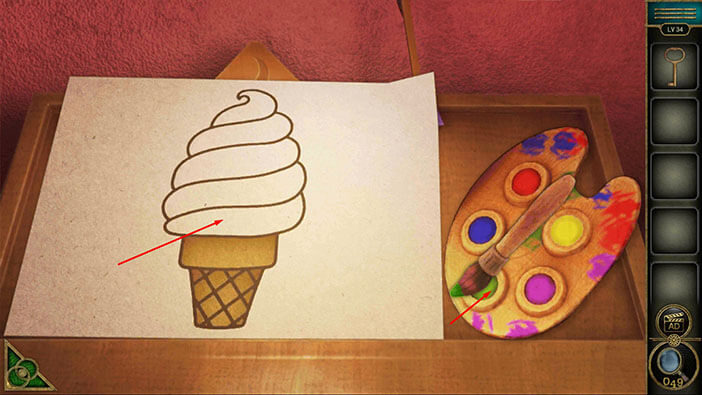
Step 2
Tap on the Red color on the palette to select it, then tap on the second part of the ice cream to paint it red.
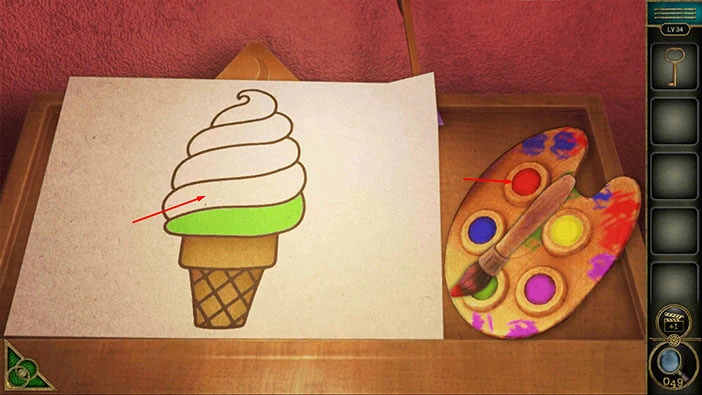
Step 3
Tap on the Blue color on the palette to select it, then tap on the third part of the ice cream to paint it blue.
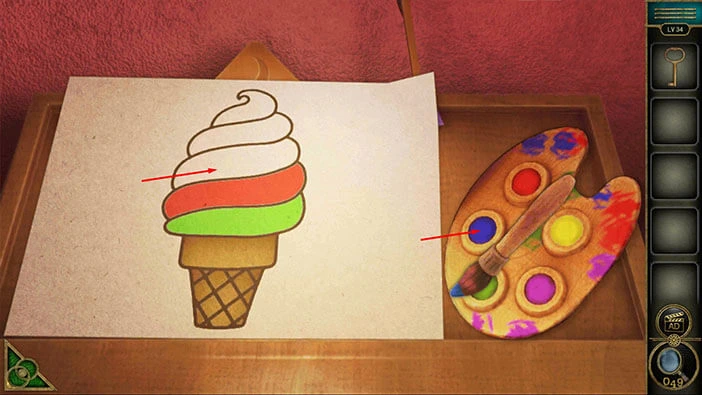
Step 4
Tap on the Yellow color on the palette to select it, then tap on the fourth part of the ice cream to paint it yellow.
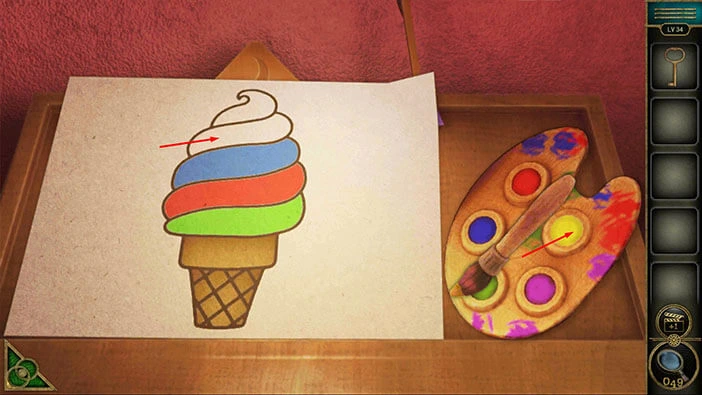
Step 5
Tap on the Purple color on the palette to select it, then tap on the fifth part of the ice cream to paint it purple. After that, tap on the “Drawing” to pick it up.
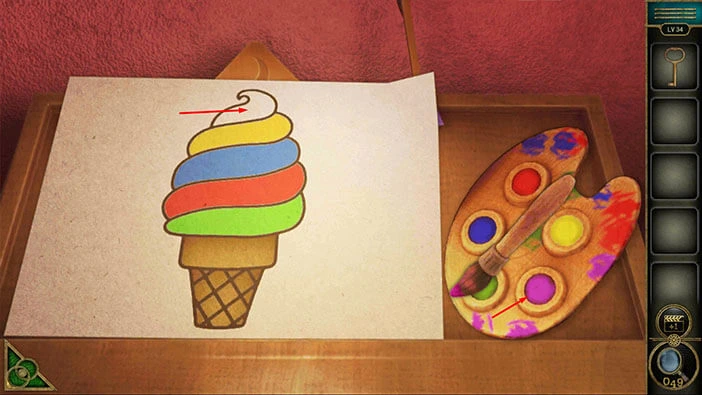
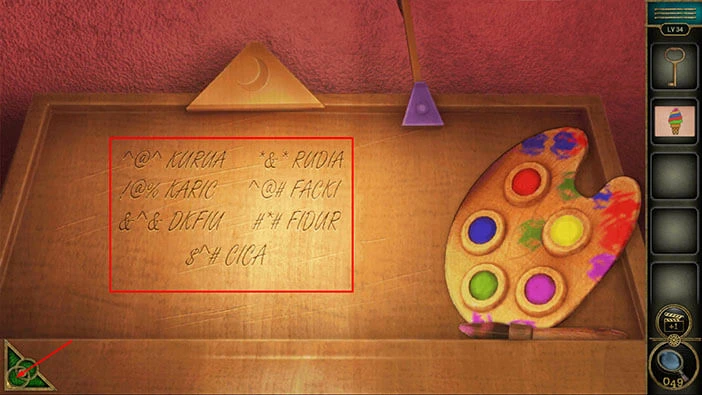
Under the drawing, you will discover a hint for one of the following puzzles. We will come back to it later in the walkthrough. For now, tap on the green button in the bottom left corner of the screen to go back.
Next, let’s tap on the large, wooden chest on the right to take a closer look at it.
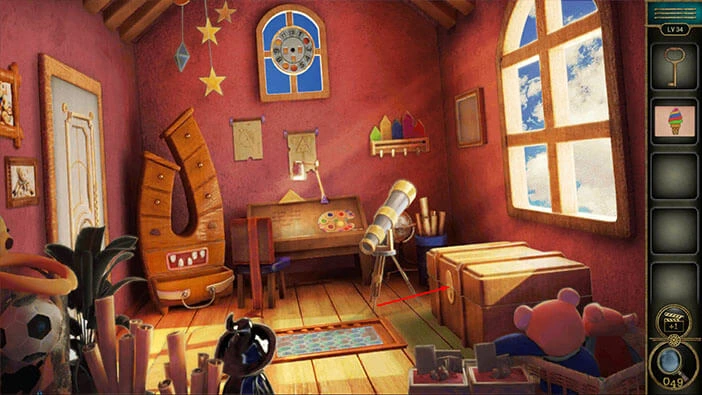
Select the “Key” from the inventory and use it to unlock the chest.
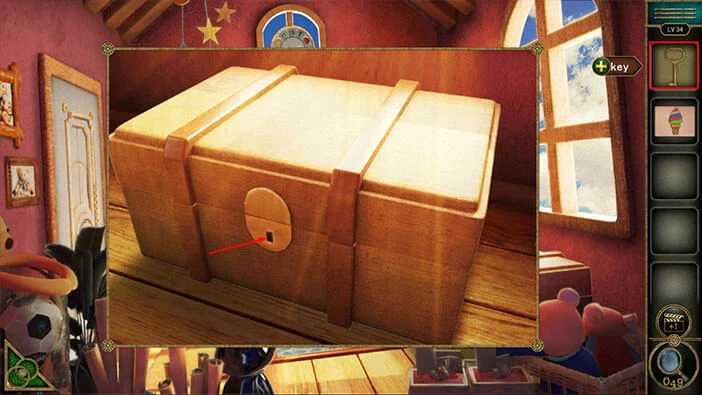
In the chest, you will find a “Spanner”. Tap on it to pick it up.
After that, tap on the green button in the bottom left corner of the screen to go back.
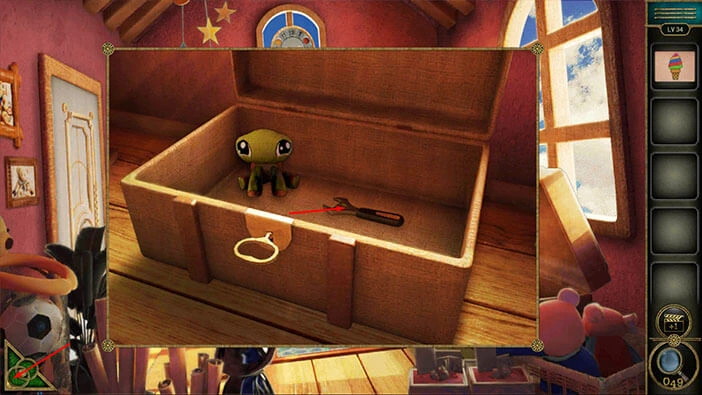
Next, let’s tap on the large clock to take a closer look at it.
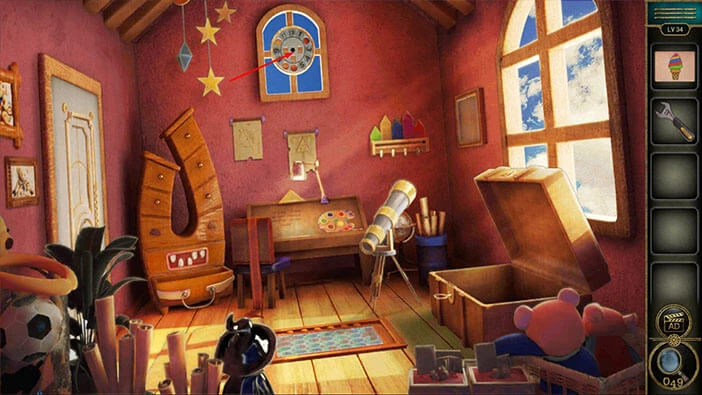
Select the “Spanner” from the inventory and use it to remove the screw that is holding the “Watch dial”. After that, tap on the “Watch dial” to pick it up.
Once you’re done, tap on the green button in the bottom left corner of the screen to go back.
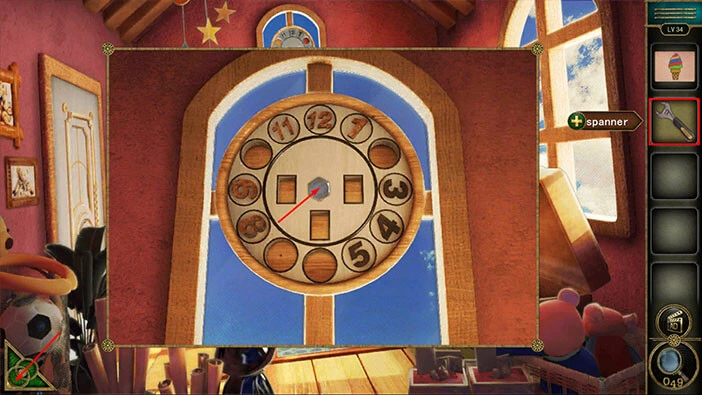
Next, let’s tap on the frame, located on the wall on the right, to take a closer look at it.
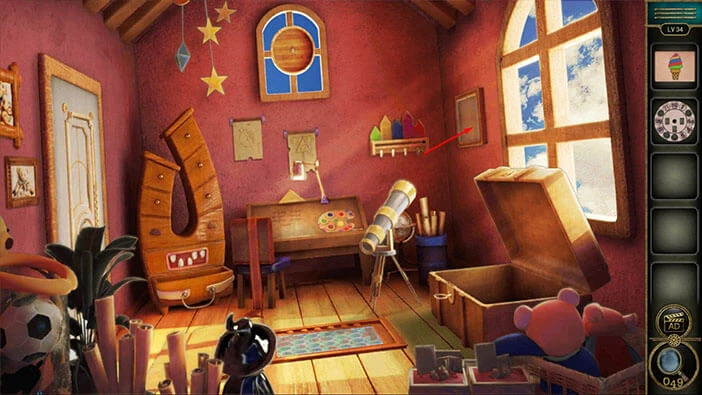
Select the “Drawing” from the inventory and place it into the frame.
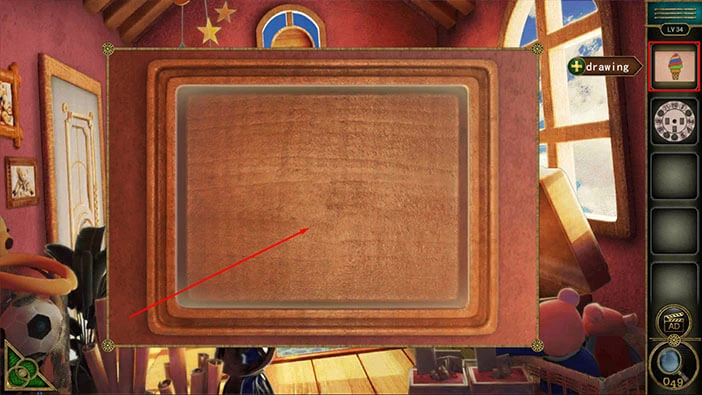
Once you place the drawing into the frame, our character will open the secret compartment in the frame, and here you will see several symbols.
Let’s select the “Watch dial” from the inventory and place it into the frame.
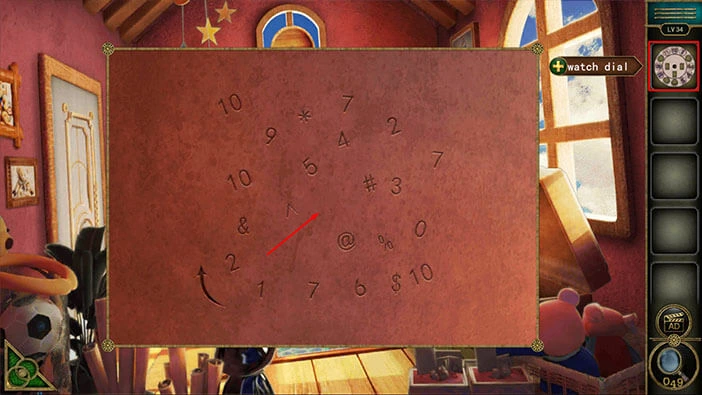
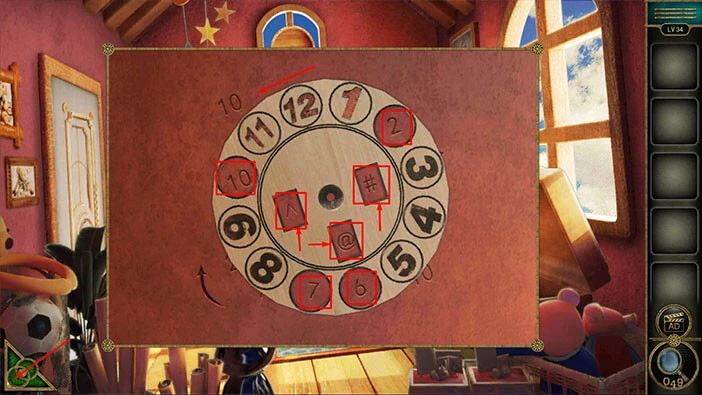
You will notice that the four digits of the dial are missing, 2, 6, 7, 10. So, let’s rotate the dial until we find the missing digits. Let’s do that.
Once you align the dial, you will notice three symbols in the middle of the dial. These symbols are, an “Arrow pointing up”, #, and @. Let’s memorize/write down these there symbols because we will need this information for the next puzzle.
Once you’re done, tap on the green button in the bottom left corner of the screen to go back.
Next, let’s tap on the table with the color palette to take a closer look at it.
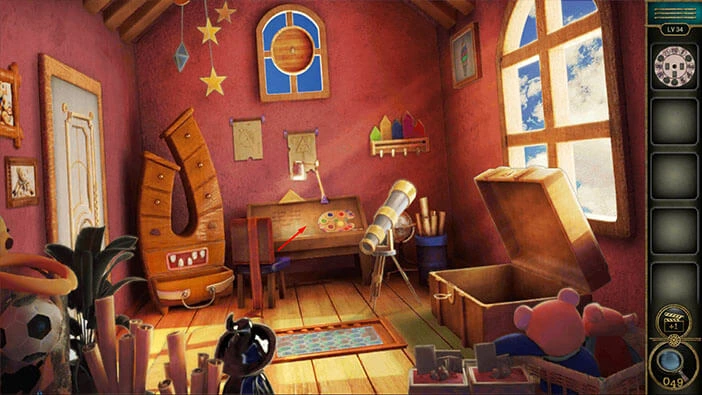
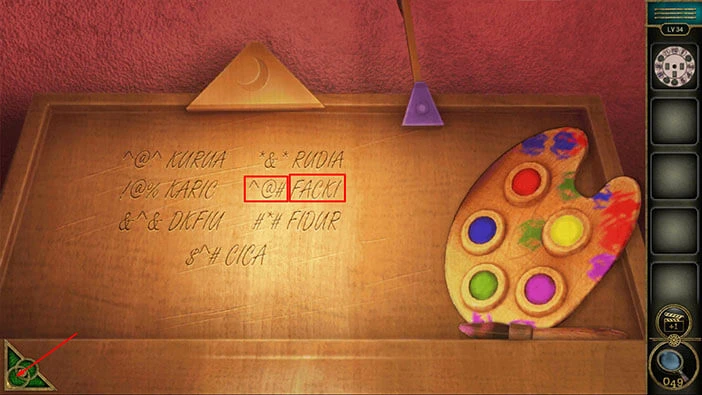
Here, we can see seven words, and there are three symbols in front of each word. Our task is to find the symbols that match the symbols that we saw on the dial. The symbols that we saw on the dial were “Arrow pointing up”, #, and @ and we can see these symbols in front of the second word in the second column.
The word is “FACKI”. Let’s memorize/write down this word because it represents the hint for the next puzzle.
Once you’re done, tap on the green button in the bottom left corner of the screen to go back.
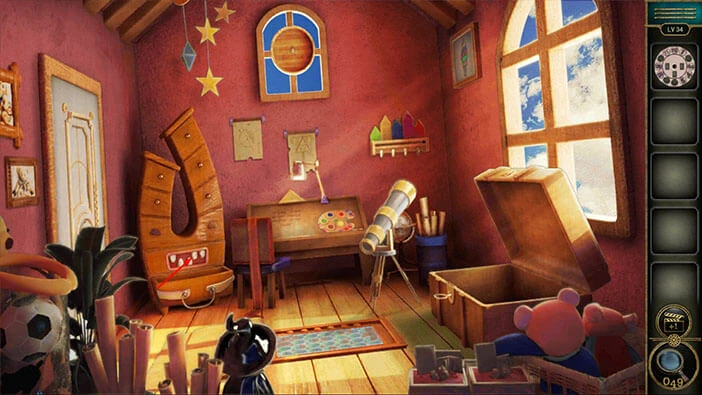
Next, let’s tap on the cabinet on the left to take a closer look at it, and tap again to start the interaction.
Here, we can see five slots with letters. Let’s enter the word “FACKI” that we just discovered.
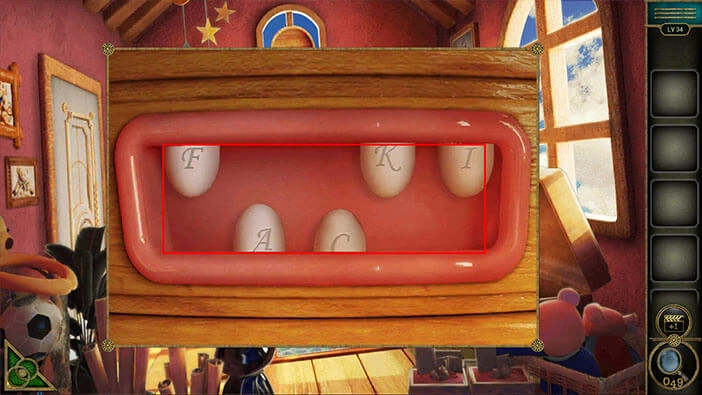
You will open the drawer as soon as you enter the correct password, and inside you will find a “Round block”. Tap on it to pick it up.
After that, tap on the green button in the bottom left corner of the screen to go back.
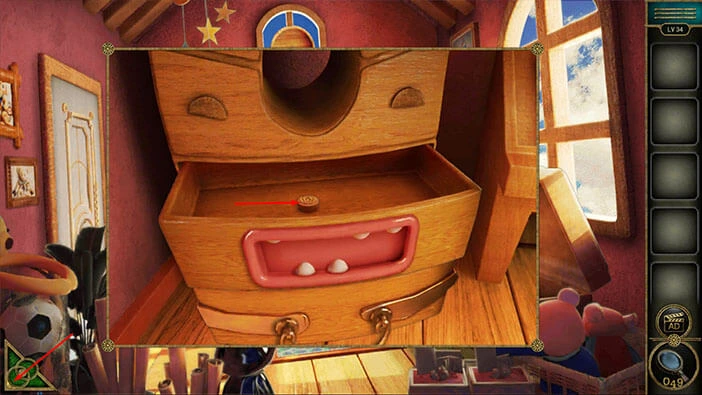
Next, let’s tap on the board on the floor to take a closer look at it.
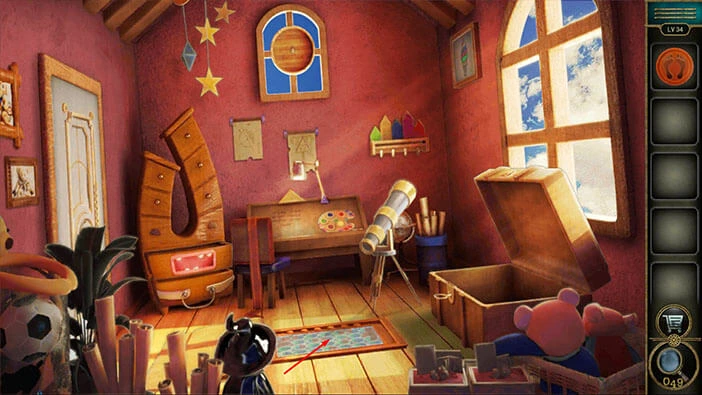
You will notice that one of the buttons on the board is missing. So, let’s select the “Round block” from the inventory and insert it into the empty slot.
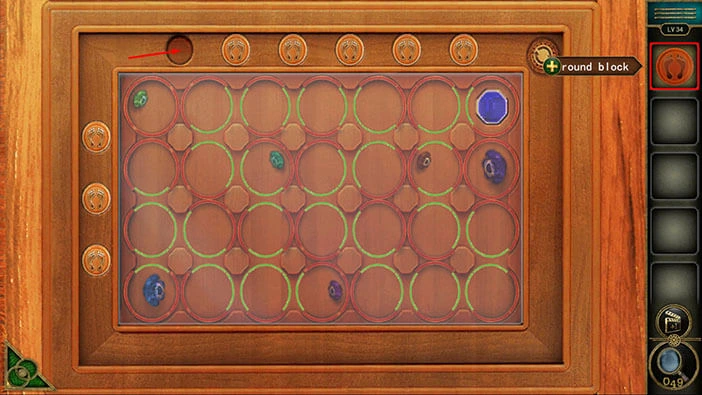
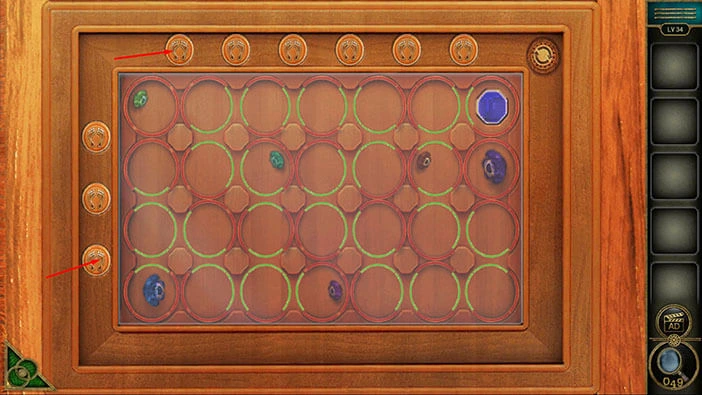
Here, we have another puzzle. We are controlling the blue gem in the bottom left corner of the puzzle and our task is to bring it to the blue gem in the top right corner of the puzzle.
We will do this puzzle in several steps. Let’s begin.
Step 1
Tap on the third button in the column on the left. After that, tap on the first button in the top row.
Step 2
Tap on the third button in the column on the left. After that, tap on the second button in the top row.
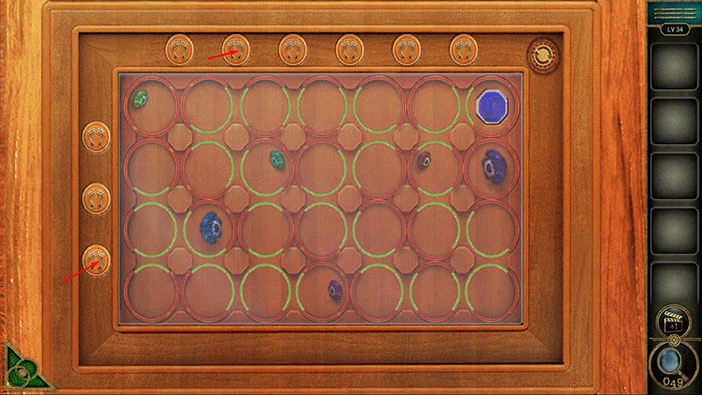
Step 3
Tap on the third button in the column on the left. After that, tap on the second button in the column on the left.
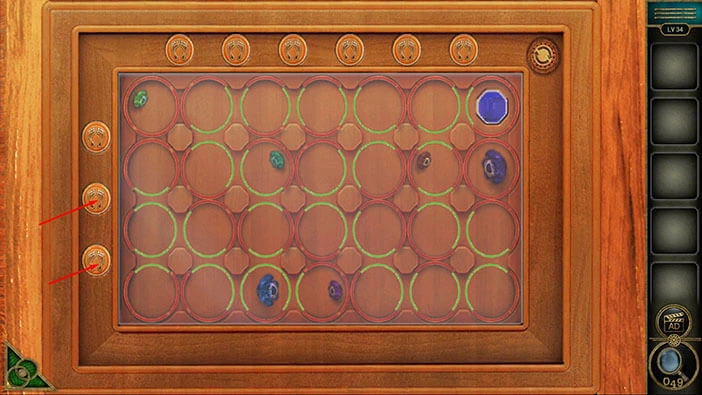
Step 4
Tap on the second button in the top row. After that, tap on the first button in the column on the left.
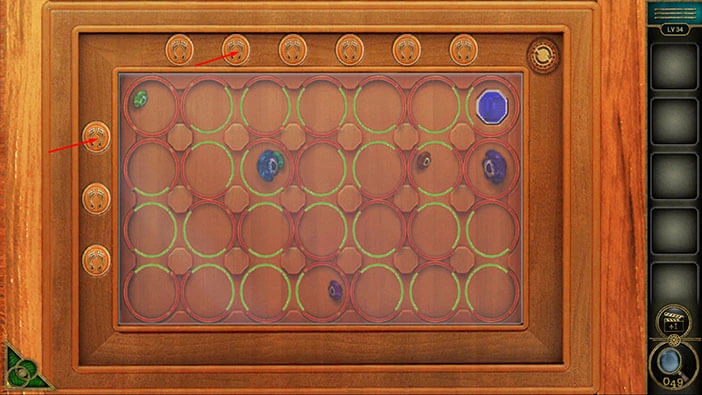
Step 5
Tap on the second button in the top row. After that, tap on the third button in the top row.
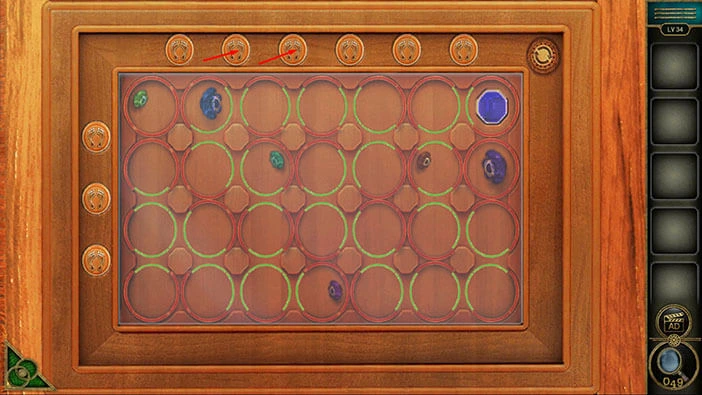
Step 6
Tap on the fourth button in the top row. After that, tap on the first button in the column on the left.
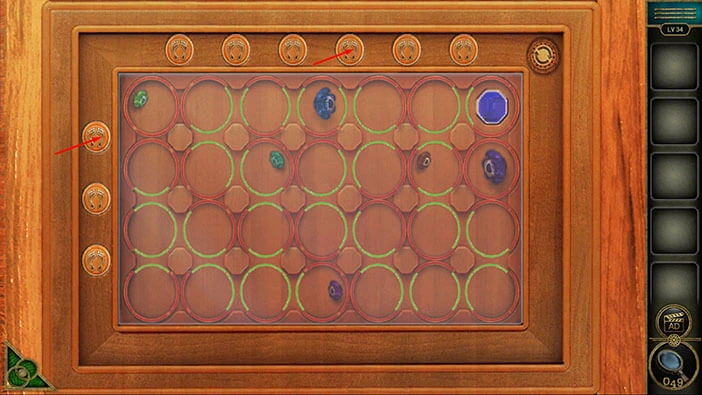
Step 6
Tap on the fourth button in the top row. After that, tap on the second button in the column on the left.
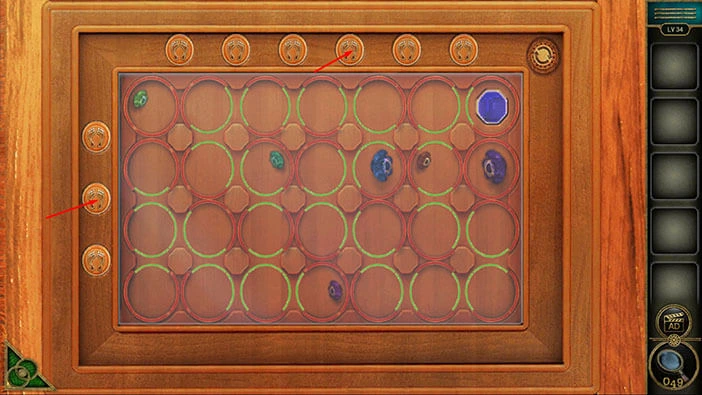
Step 7
Tap on the fourth button in the top row. After that, tap on the third button in the column on the left.
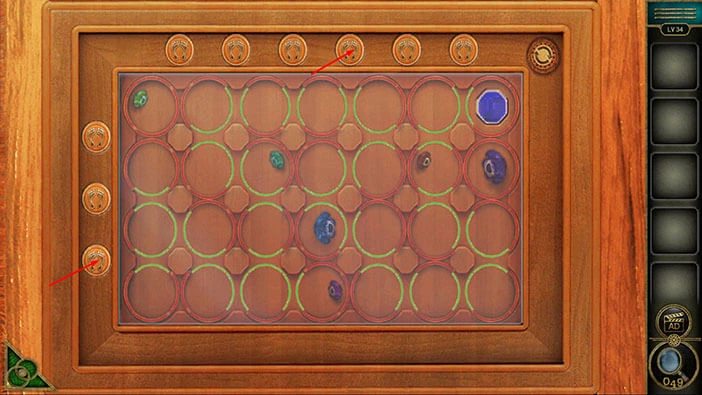
Step 8
Tap on the fifth button in the top row. After that, tap on the sixth button in the top row.
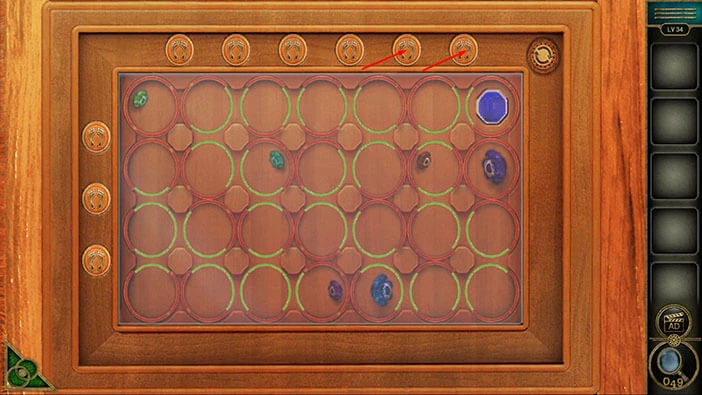
Step 9
Tap on the third button in the column on the left. After that, tap on the sixth button in the top row.
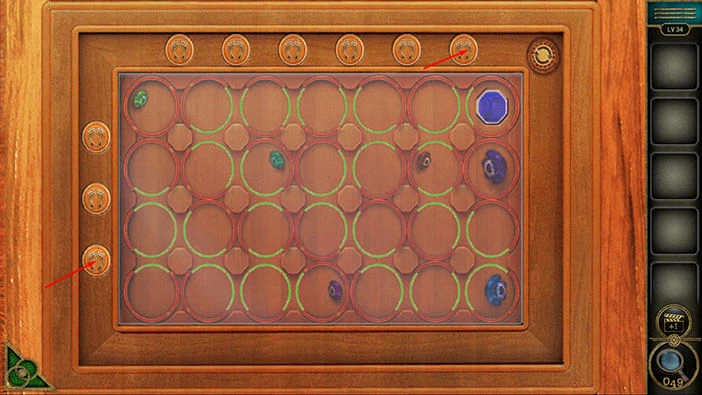
Step 10
Tap on the second button in the column on the left. After that, tap on the first button in the column on the left.
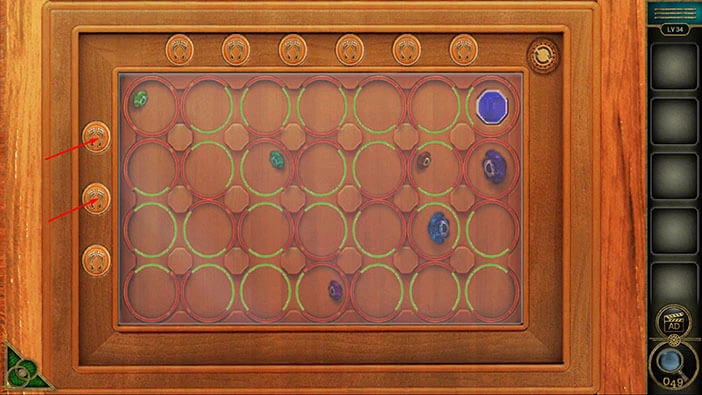
Step 11
Lastly, tap on the sixth button in the top row, and you will solve this puzzle.
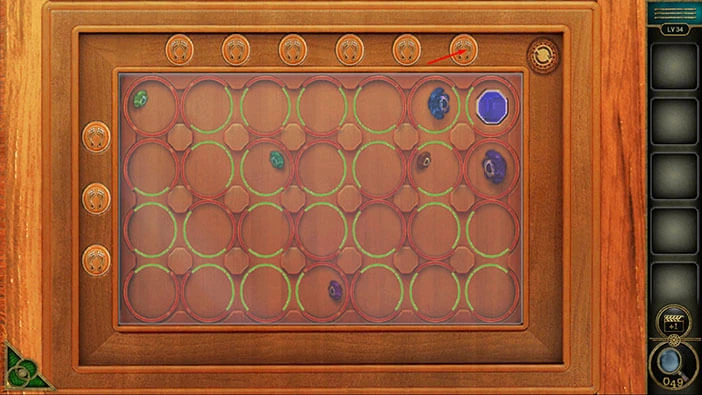
When you solve the puzzle, the board will open and our character will automatically pick up the “Handle”. Tap on the green button in the bottom left corner of the screen to go back.
Next, let’s tap on the door on the left to take a closer look at it.
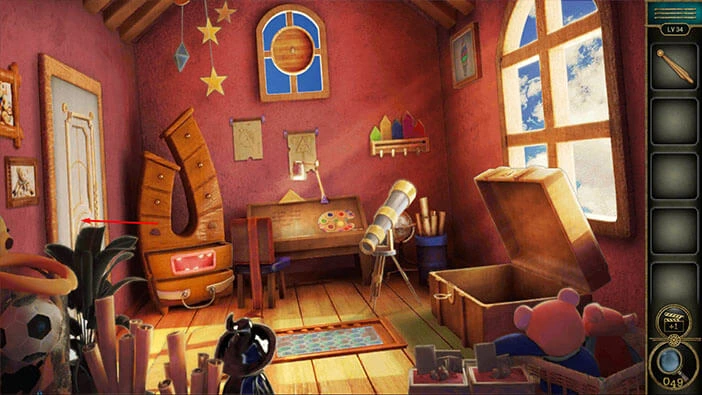
You will notice that the door knob is missing. So, let’s select the “Handle” from the inventory and insert it into the empty slot.
After that, tap on the door a few times, and you will proceed to the next level.
Level 35
Let’s explore the thirty-fifth level. Tap on the chair in front of you to take a closer look at it.
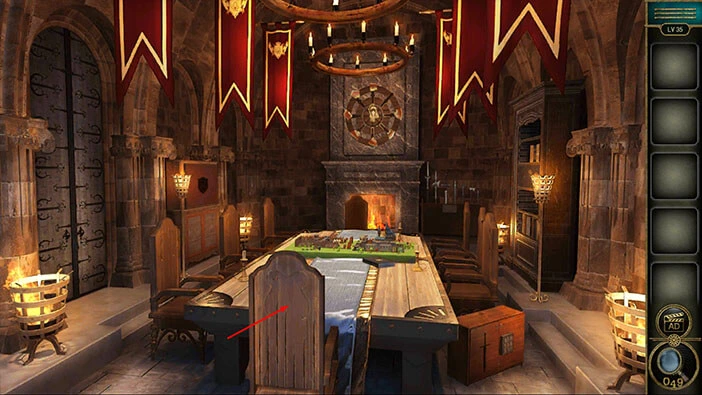
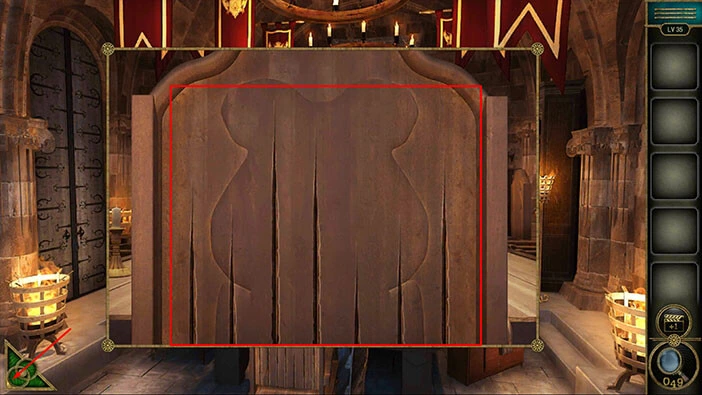
If you pay attention to the chair, you will notice seven cracks of varying sizes. Let’s memorize/write down the size of the cracks because this information represents the hint for the next puzzle.
We will mark the largest crack with the number 7 and the smallest with the number 1. So, looking from left to right, we have,
4, 3, 7, 6, 1, 2, 5.
Once you’re done, tap on the green button in the bottom left corner of the screen to go back.
Next, in the top right corner of the room, you will notice a weapon stand with several medieval weapons. Let’s tap on it to take a closer look.
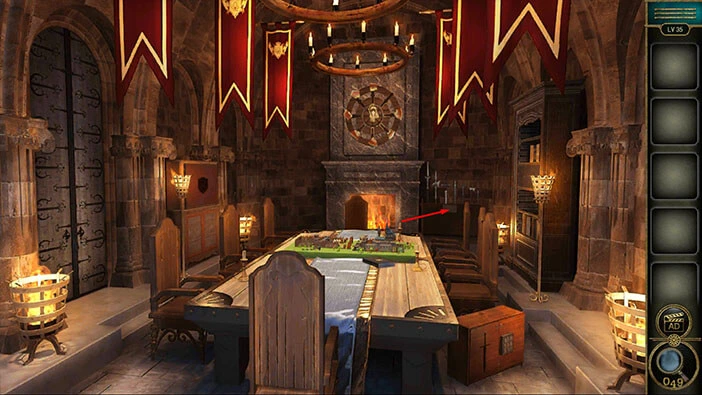
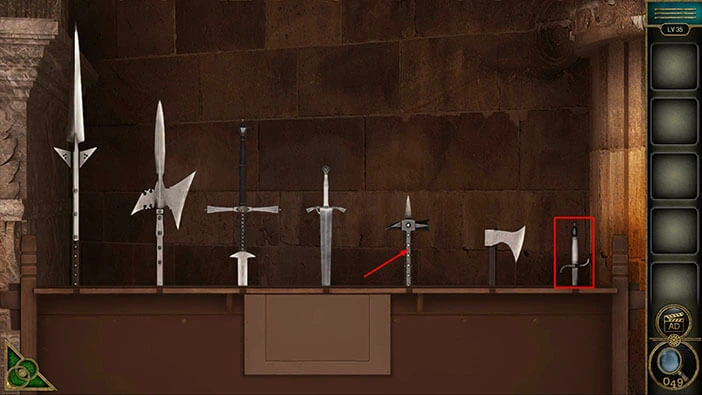
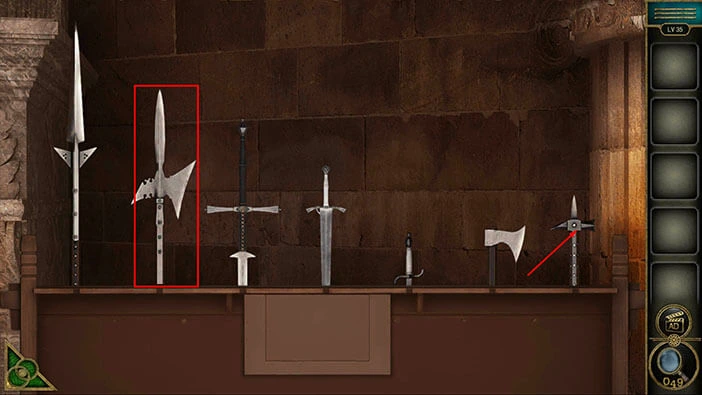
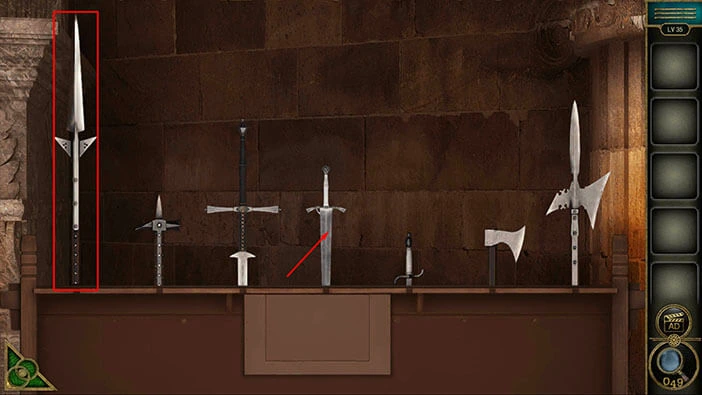
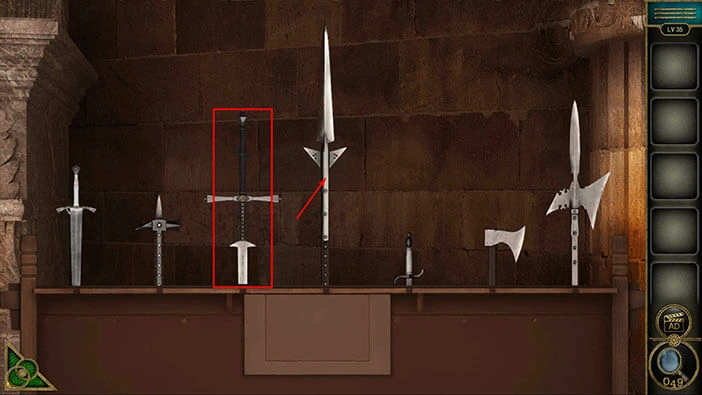
Here, we can see seven medieval weapons of varying sizes. So, our next task is to arrange the weapon by size, and this arrangement should match the size of the cracks on the chair.
We will do this in several steps. Let’s begin.
Step 1
Select the seventh weapon (Scimitar) then tap on the fifth weapon (Warhammer) to swap their positions.
Step 2
Select the second weapon (Halberd) then tap on the seventh weapon (Warhammer) to swap their positions.
Step 3
Select the first weapon (Spear) then tap on the fourth weapon (Sword) to swap their positions.
Step 4
Select the third weapon (Greatsword) then tap on the fourth weapon (Spear) to swap their positions.
Step 5
Lastly, select the fourth weapon (Greatsword) then tap on the seventh weapon (Halberd) to swap their positions. With that, you will solve this puzzle.
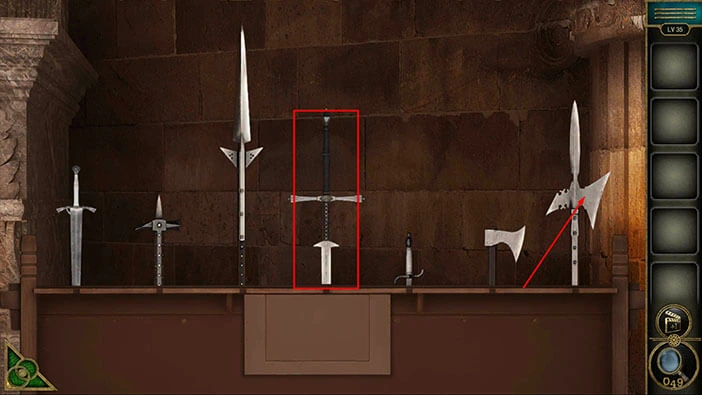
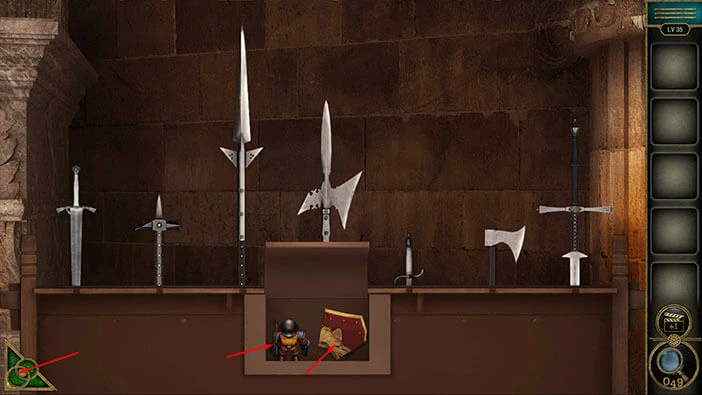
The secret compartment will open as soon as you solve the puzzle. In the compartment, you will find a “Shield fragment” and a “Toy soldier”. Tap on these two items to pick them up.
After that, tap on the green button in the bottom left corner of the screen to go back.
Next, if you take a look at the chimney, above the fireplace, you will notice a large, wooden wheel. Let’s tap on this wheel to take a closer look at it.
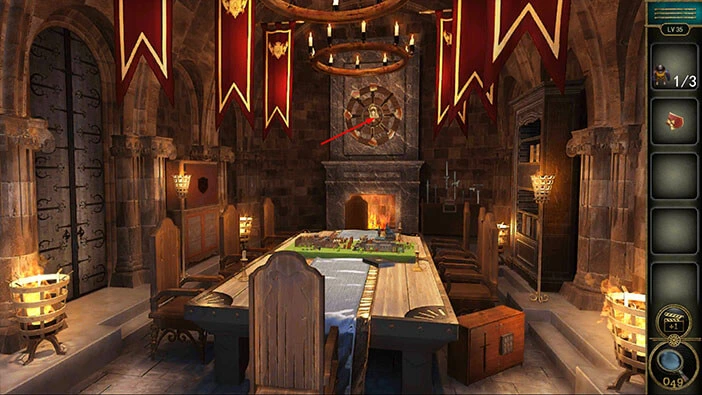
You will notice that one shield fragment is missing. So, let’s select the “Shield fragment” in our inventory and insert it into the empty slot.
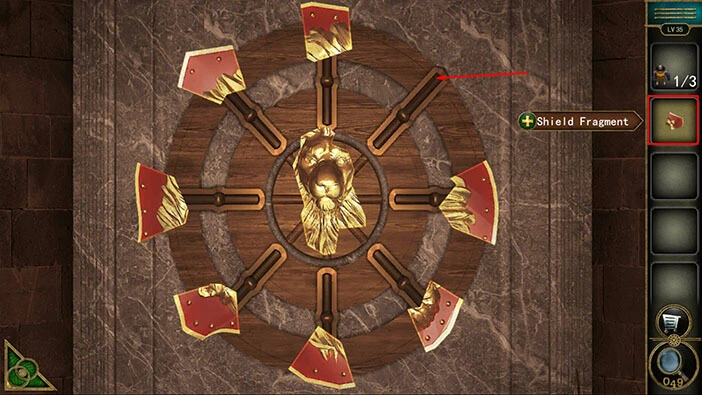
Here, we have another puzzle. Our task is to assemble the shield in the center of the wheel. We will do this puzzle in several steps. Let’s begin.
Step 1
Tap on the shield fragment in the top right to attach it to the shield in the middle.
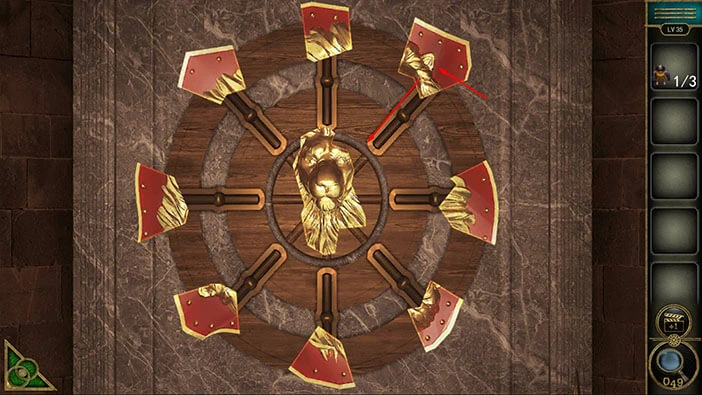
Step 2
Tap twice on the shield in the middle to rotate it. After that, tap on the shield fragment at the top to attach it to the shield.
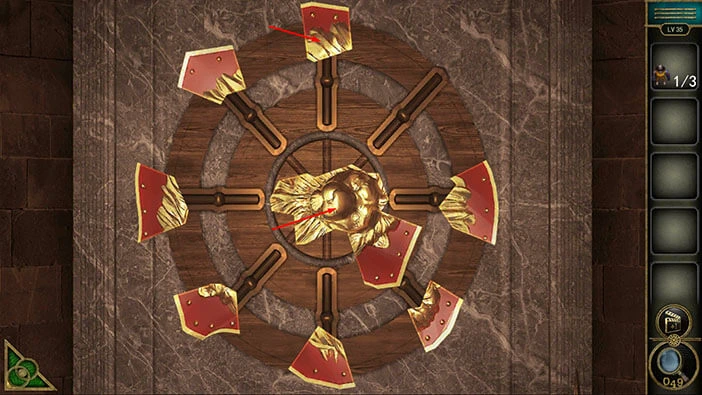
Step 3
Tap once on the shield in the middle to rotate it. After that, tap on the shield fragment in the bottom right to attach it to the shield.
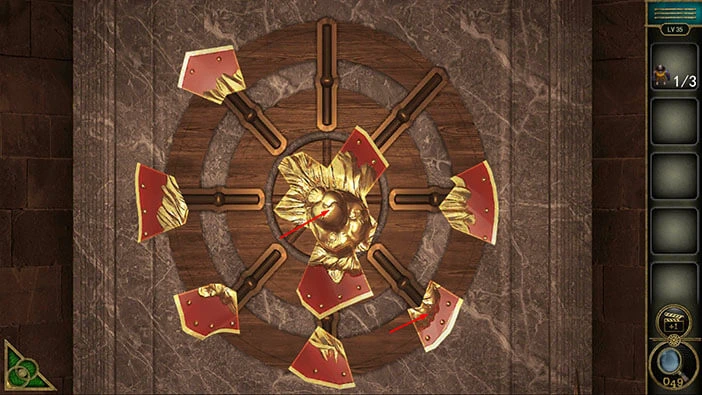
Step 4
After that, tap on the shield fragment in the top left to attach it to the shield.
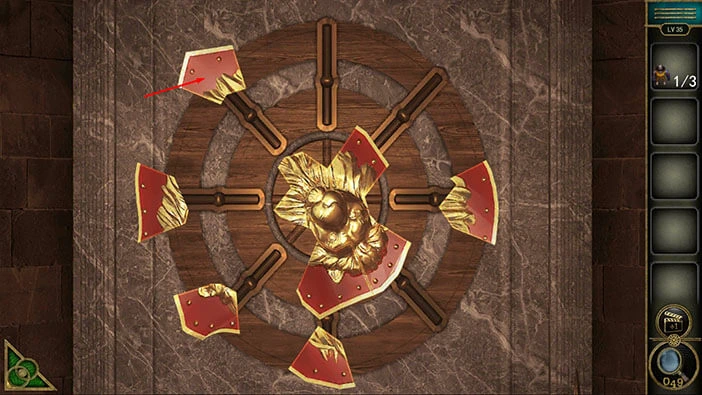
Step 5
Tap once on the shield in the middle to rotate it. After that, tap on the shield fragment on the left to attach it to the shield.
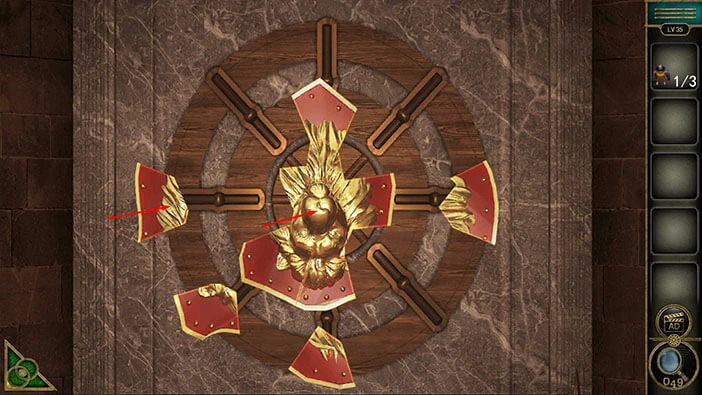
Step 6
Tap twice on the shield in the middle to rotate it. After that, tap on the shield fragment in the bottom left to attach it to the shield.
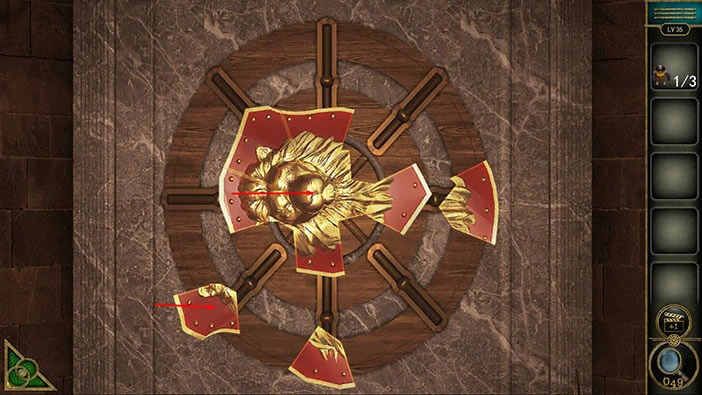
Step 7
Lastly, tap once on the shield in the middle to rotate it. After that, tap on the shield fragment on the right, and the shield fragment at the bottom, to attach it to the shield in the middle.
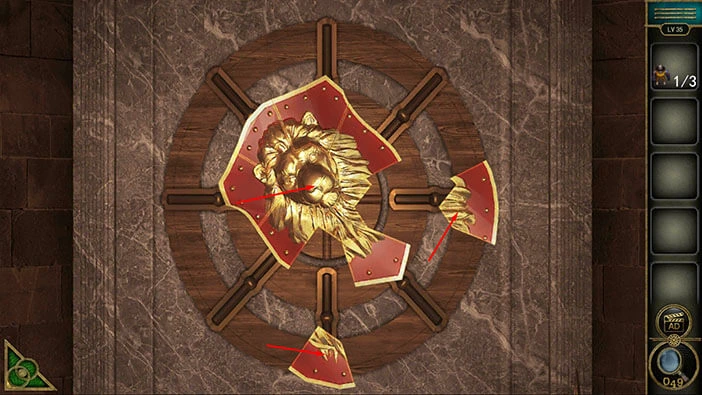
With the last step done, we assembled the shield. So, let’s tap on the “Shield” to pick it up.
After that, tap on the green button in the bottom left corner of the screen to go back.
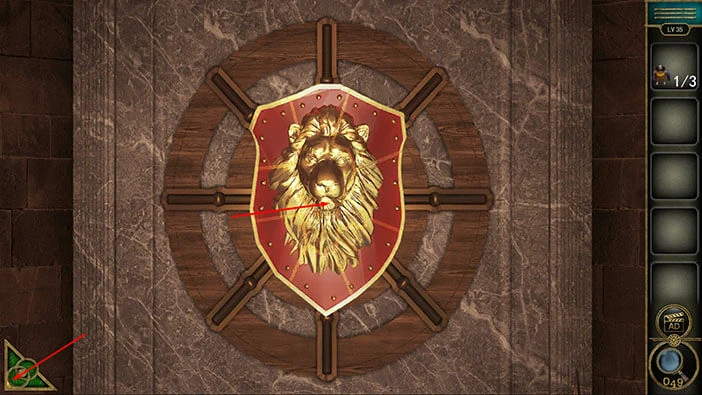
Next, if you take a look at the left side of the room, you will notice a cabinet with an empty slot that is shaped like a shield. So, let’s tap on this slot to take a closer look at it.
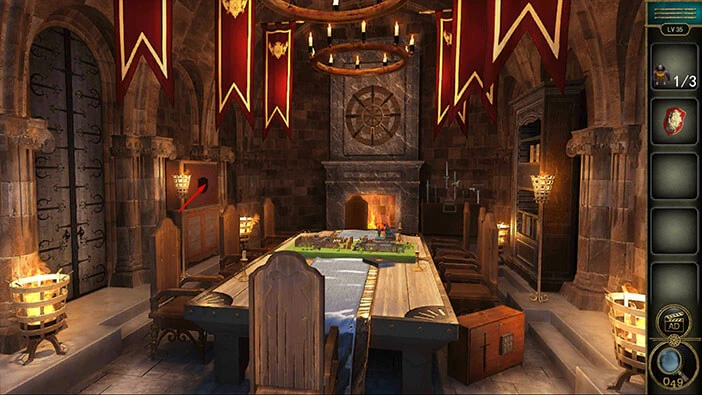
Select the shield from the inventory and insert it into the empty slot.
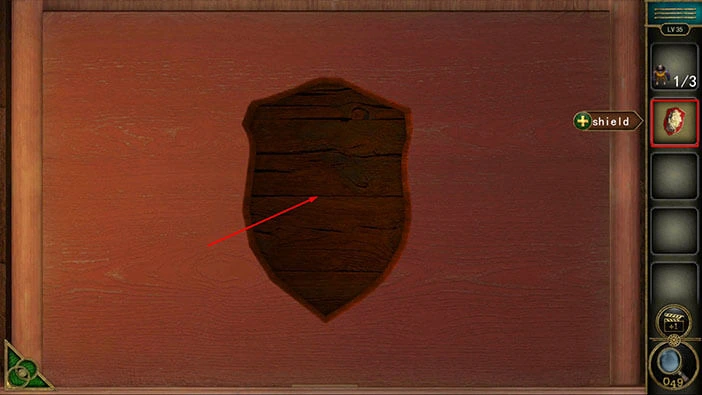
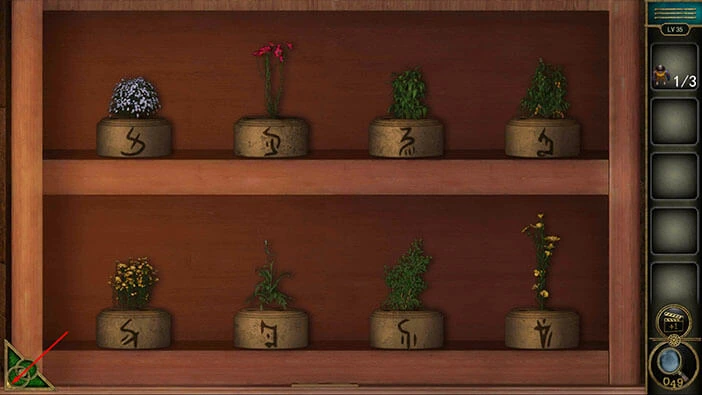
The cabinet door will open as soon as you enter the shield in the empty slot. In the cabinet, we can see eight plants and there is a different symbol below each plant.
We will come back to the shelves with plants in a moment. For now, tap on the green button in the bottom left corner of the screen to go back.
Next, if you take a look at the table, you will notice a large board game. Let’s tap on it to take a closer look.
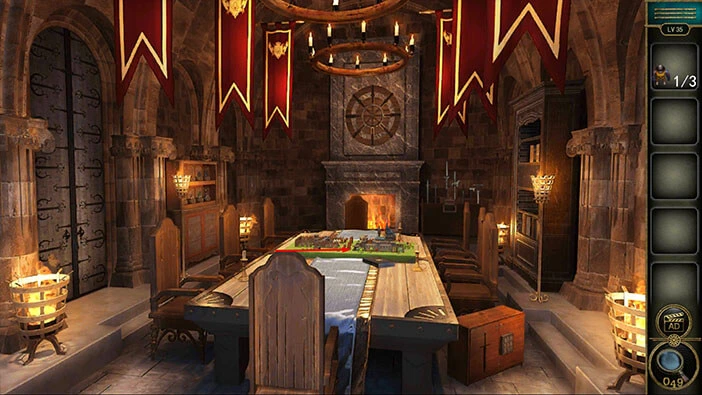
Just below the board game, you will notice a “Book” and a “Paper with hints”. Tap on these two items to pick them up.
Also, here we can see a board game. You will also notice a small soldier in the bottom left corner of the board, and that the other three slots next to it are empty. We already found one toy soldier, and we will come back to this puzzle at the end of this level.
For now, tap on the green button in the bottom left corner of the screen to go back.
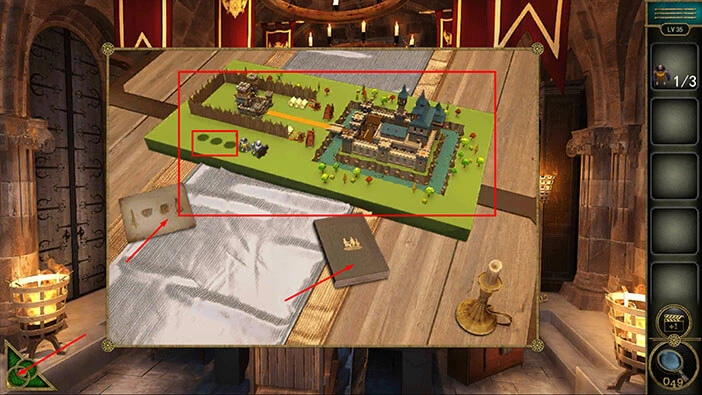
Next, let’s go back to the shelves with plants.
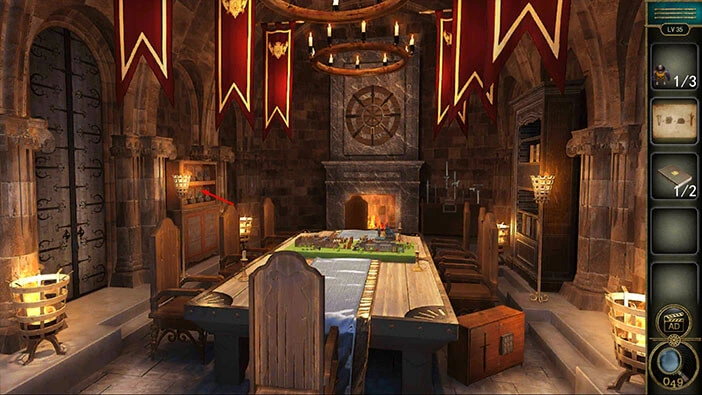
Let’s tap on the “Paper with hints” in our inventory to examine it.
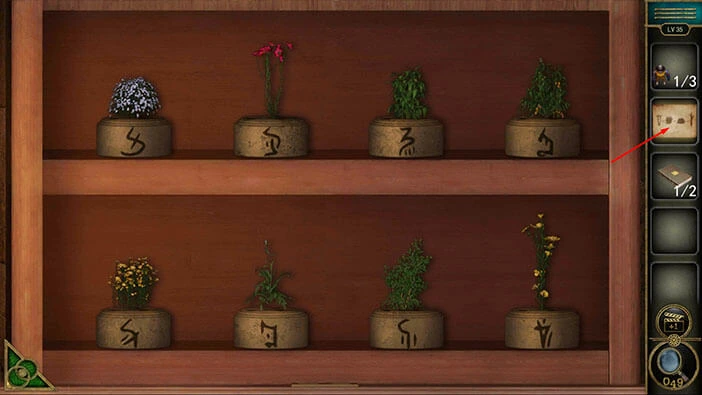
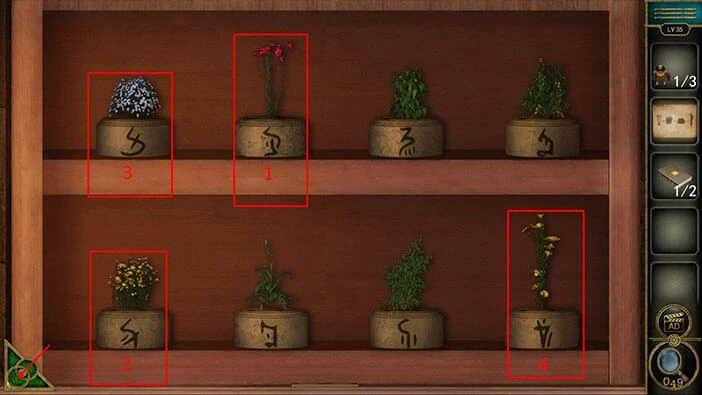
Here, we can see four plants. Memorize/write down the order of the plants, because that is the first part of the hint for the next puzzle.
Once you’re done, tap on the empty slot in the inventory to put down the “Paper with the hint”.
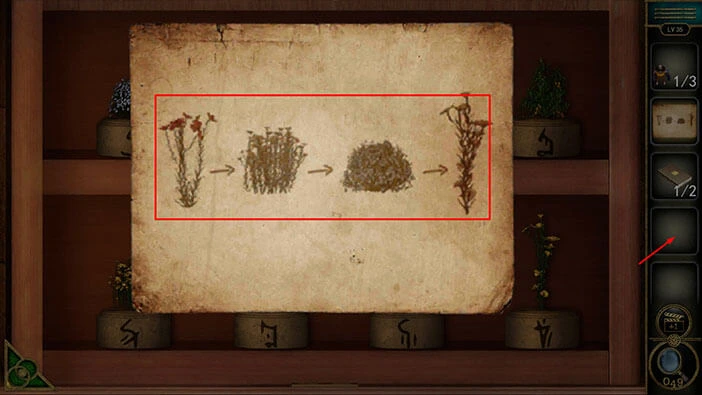
Now, let’s find the plants that we saw on the hint, and memorize/write down the symbols below them.
First symbol = The symbol below the second plant on the top shelf
Second symbol = The symbol below the first plant on the bottom shelf
Third symbol = The symbol below the first plant on the top shelf
Fourth symbol = The symbol below the fourth plant on the bottom shelf
Once you’re done, tap on the green button in the bottom left corner of the screen to go back.
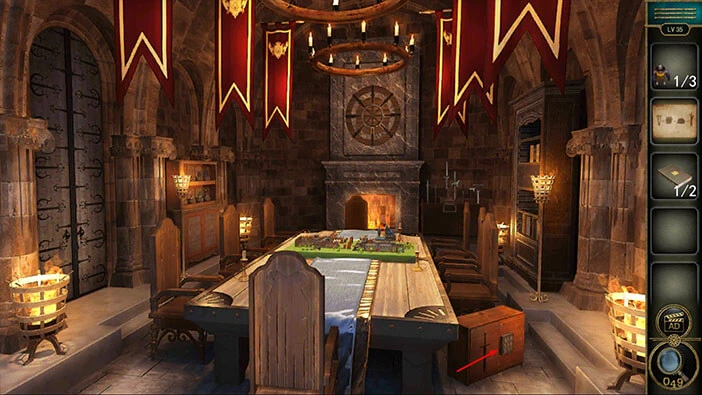
Next, let’s tap on the wooden cabinet, located on the right side of the table, to take a closer look at it, then tap on the keypad on the right to start the interaction.
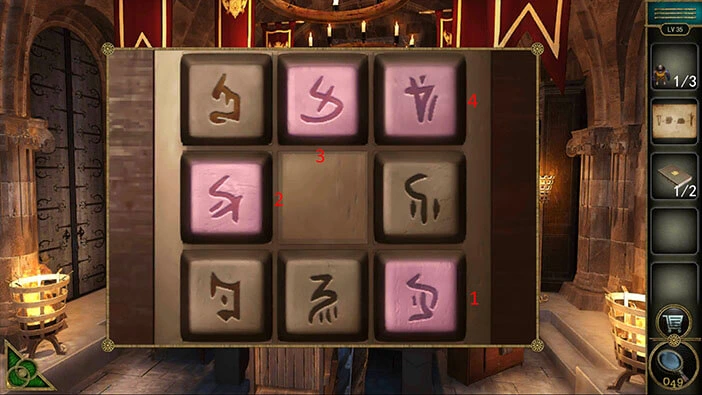
Let’s tap on the four symbols that we discovered by examining the symbols below the plants.
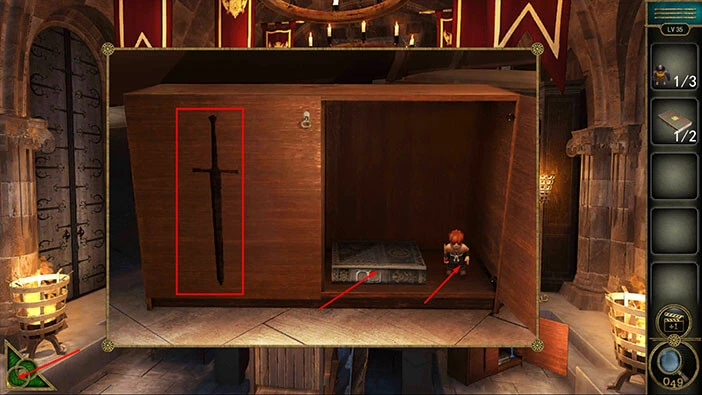
The right cabinet door will open as soon as you tap on the correct symbols. In the cabinet on the right, you will find another “Book” and another “Toy soldier”. Let’s tap on these two items to pick them up.
Also, if you look at the cabinet door on the left, you will see an empty slot shaped like a sword. We will come back to it in a moment.
For now, let’s tap on the green button in the bottom left corner of the screen to go back.
Next, let’s tap on the bookshelf on the right to take a closer look at it.
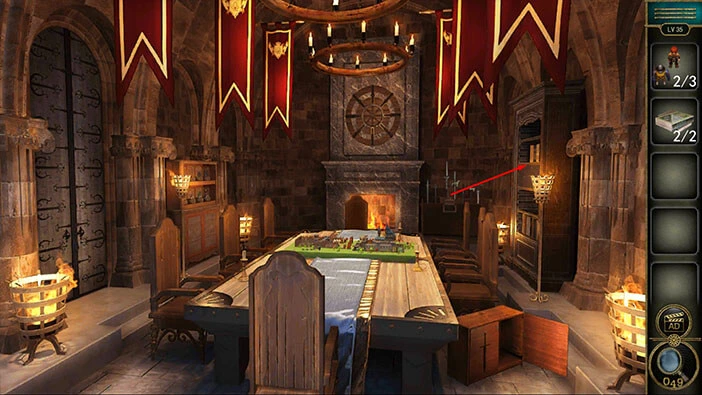
You will notice that two books are missing. So, let’s select the “Books” from our inventory and insert them into the empty slots.
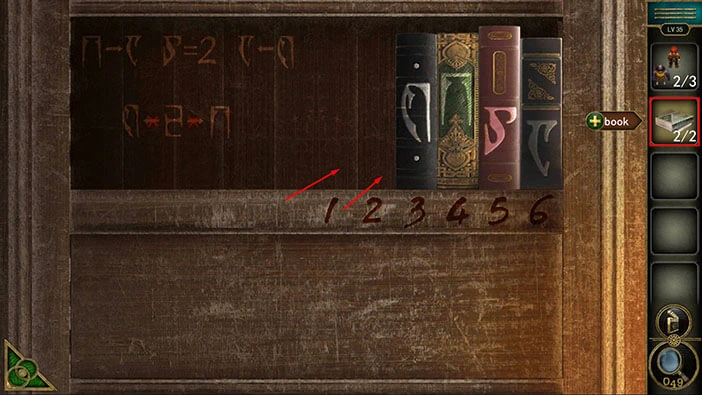
Here, we have another puzzle. Our task is to rearrange the books, and we can do that by following the hints on the left side.
We will do this puzzle in several steps. Let’s begin.
Step 1
If we take a look at the second hint, we can conclude that the book with this symbol should be in the number 2 position. So, let’s select the fifth book, and swap its position with the second book.
Step 2
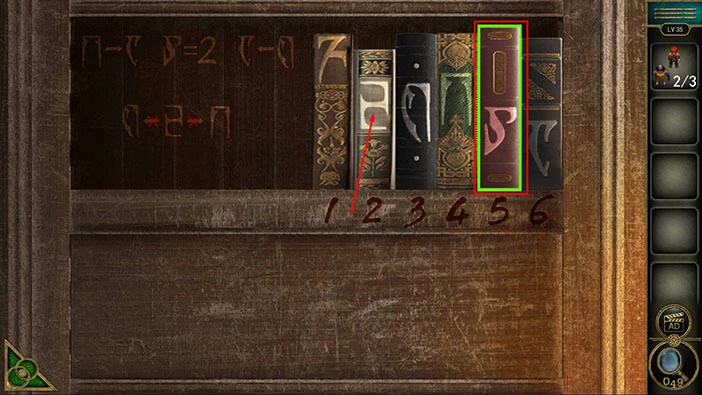
If we take a look at the second and the third hints, we can conclude that the books with these three symbols should be next to each other. So, let’s select the fourth book and swap its position with the third book.
Step 3
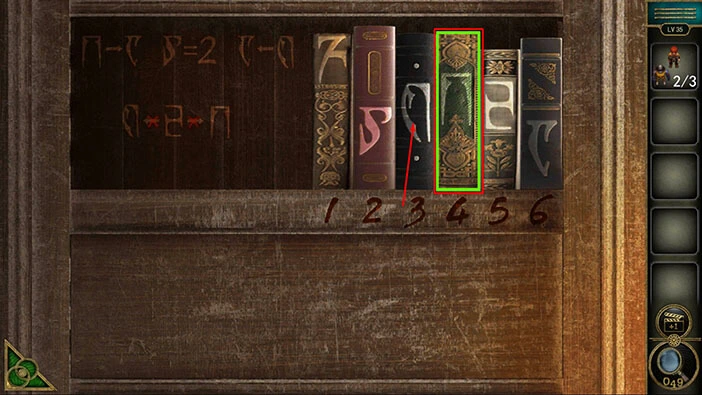
Let’s select the sixth book and swap its position with the fourth book.
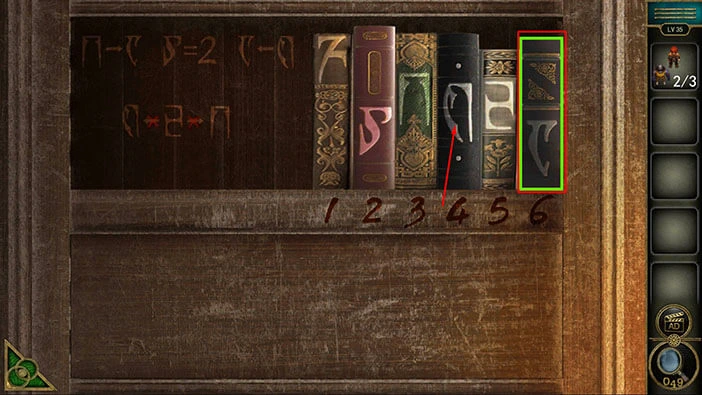
Step 4
Let’s select the sixth book and swap its position with the fifth book.
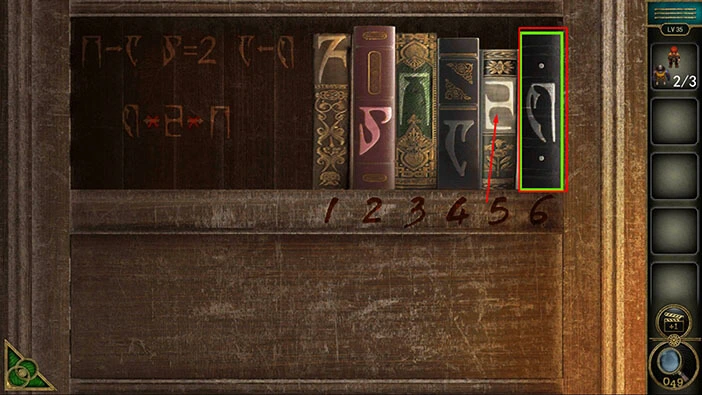
Step 5
If we take a look at the last hint, we can conclude that the books with these three symbols shouldn’t be placed next to each other. Right now, the sixth and fifth symbols are next to each other, and that is the only “mistake” in our arrangement. So, let’s select the sixth book and swap its position with the first book.
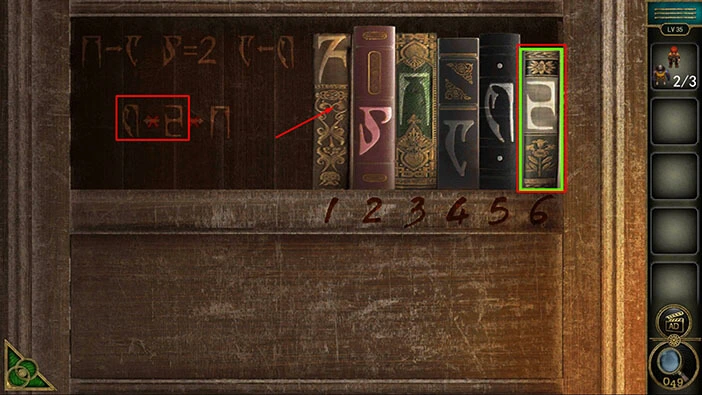
The compartment under the shelf will open as soon as you arrange the books. Inside you will find a “Sword” so let’s tap on it to pick it up.
Also, if you pay attention to the top right corner of the compartment, you will notice a drawing of the star. Tap on it, and you will get another “Achievement star”.
Once you’re done, tap on the green button in the bottom left corner of the screen to go back.
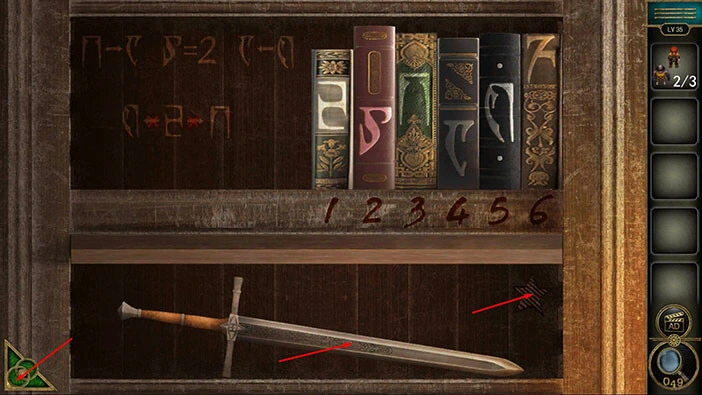
We found the “Sword” so let’s go back to the cabinet on the right side of the table.
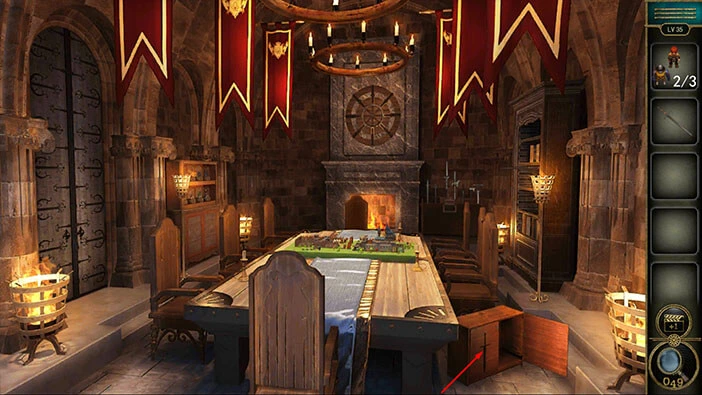
Let’s select the “Sword” from the inventory and insert it inventory and insert it into the empty slot.
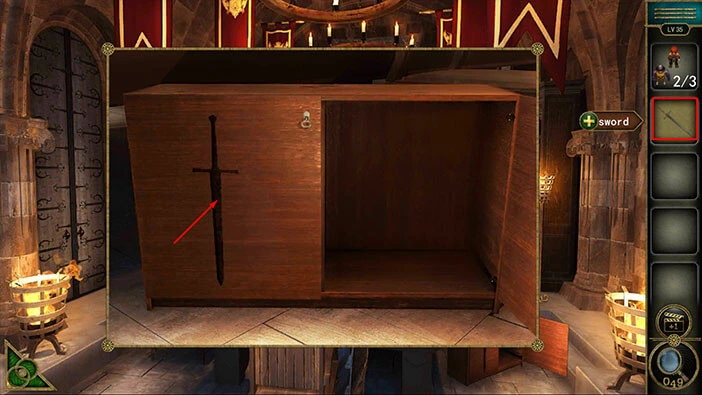
You will open the left side of the cabinet, and inside you will find another “Toy soldier”. Let’s tap on it to pick it up.
After that, tap on the green button in the bottom left corner of the screen to go back.
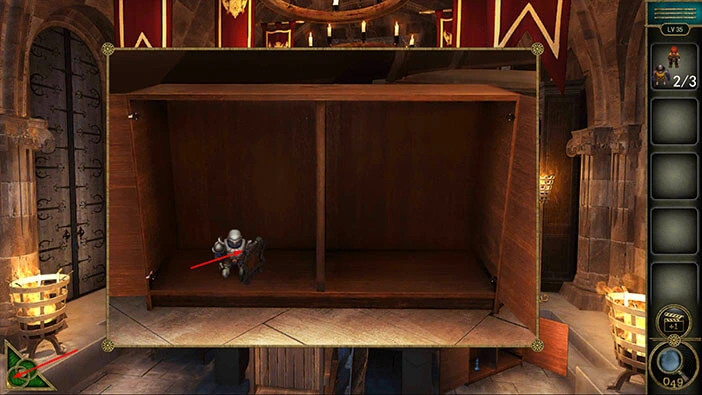
We have found all three toy soldiers, so let’s go back to the board game. Tap on it to take a closer look, and tap again to start the interaction.
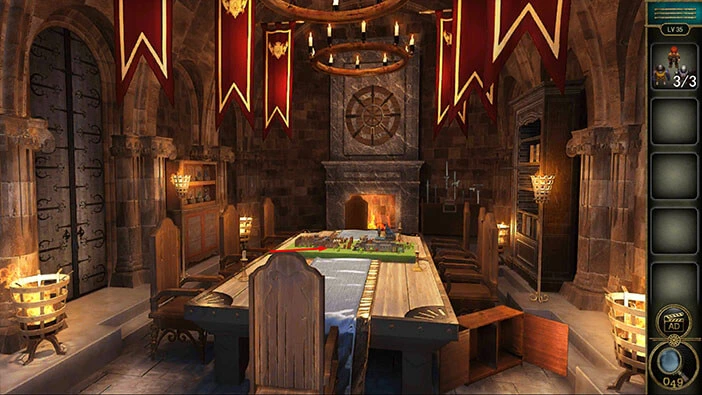
The three slots on the left are empty, so let’s select the “Pawns” from the inventory and insert them into the empty slots.
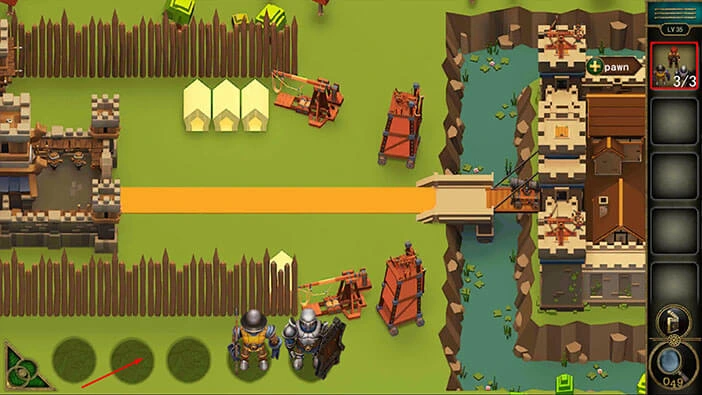
Our next task is to use the toy soldier and create a formation that can breach the castle on the left. The correct formation is,
First slot = Knight
Second slot = Spearman
Third slot = Knight
Fourth slot = Spearman
Fifth slot = Archer
Once you arrange the pawns, the game will automatically begin. The first four pawns will fall, but the last one, the archer, will manage to breach the castle on the right.
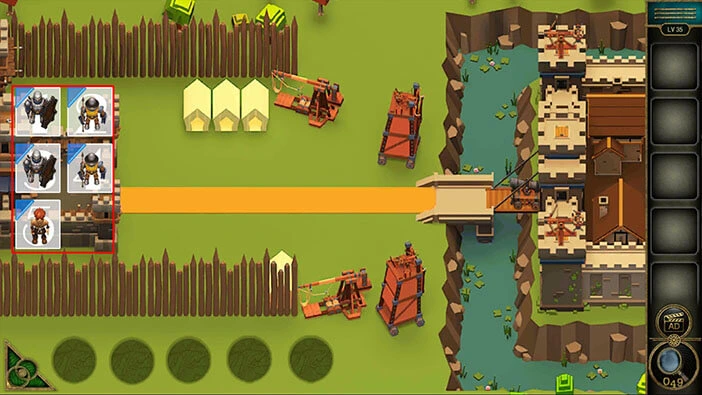
The roof of the castle on the right will open and inside you will find a “Key”. Let’s tap on it to pick it up.
After that, tap on the green button in the bottom left corner of the screen to go back.
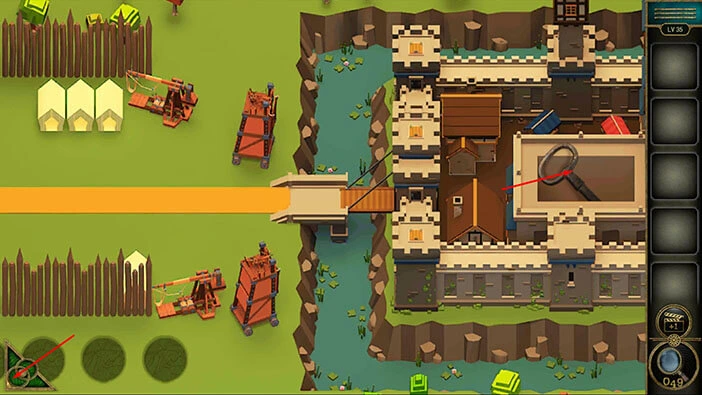
Next, let’s tap on the large door on the left to take a closer look at it.
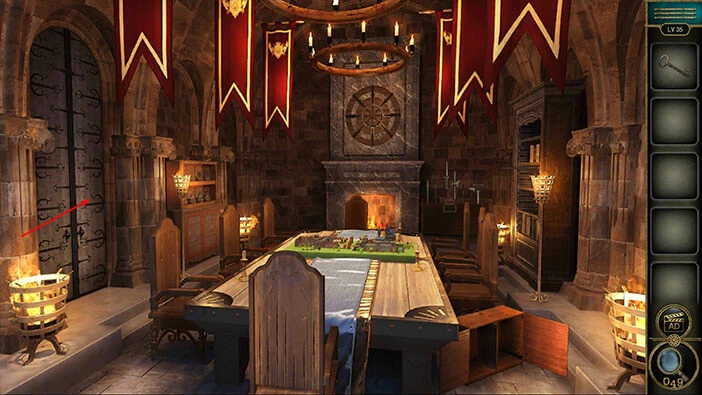
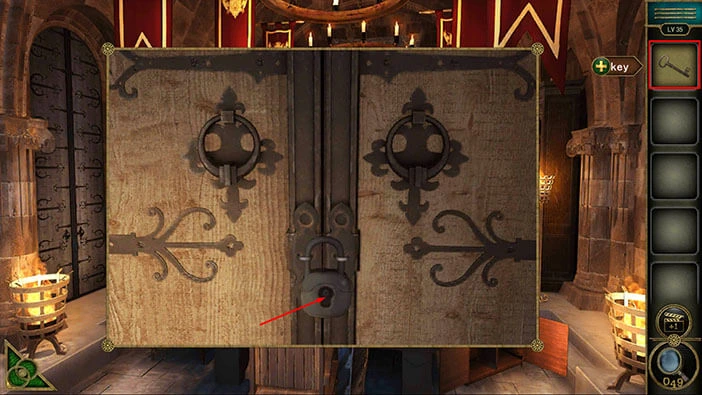
Select the “Key” from the inventory and use it to unlock the padlock. After that, tap on the door to proceed to the next level.
Level 36
Let’s explore the thirty-sixth level. Tap on the folders on the table in front of you to take a closer look at them.
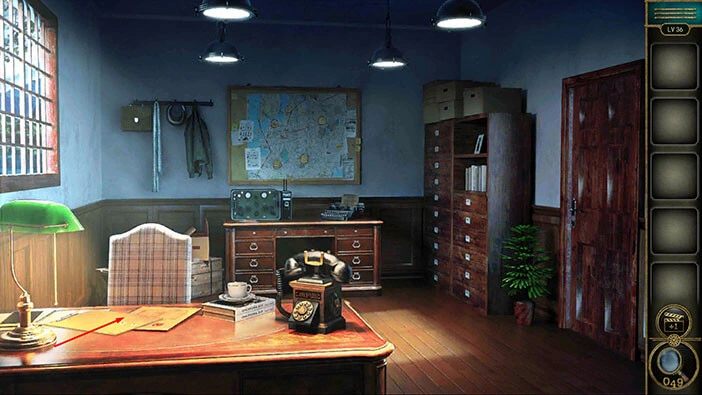
Tap on the folder to open it, and two items will drop out of it.
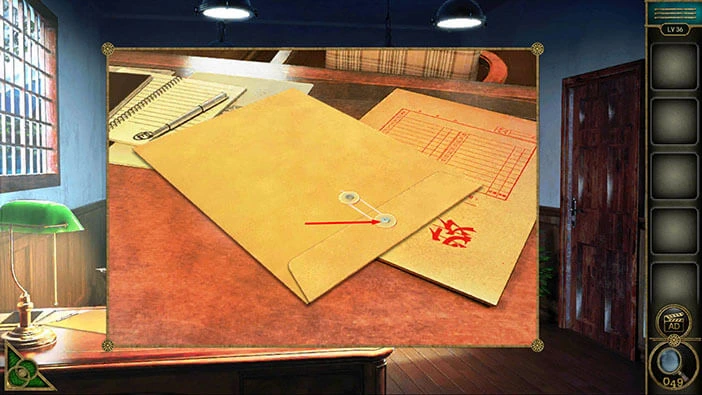
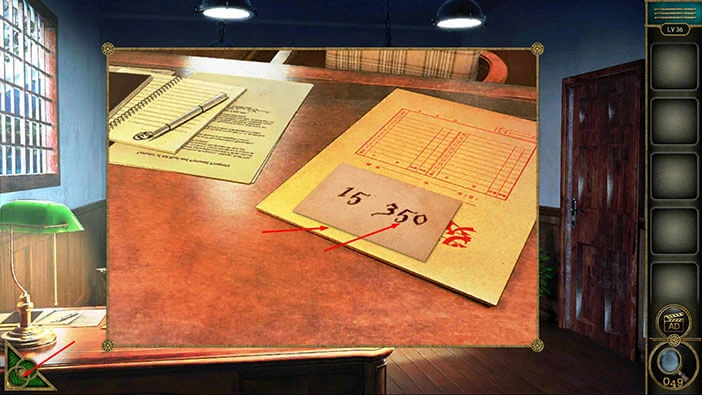
Tap on the “Paper with hints” to pick it up. Once you pick it up, below it you will find a “Key” so let’s take it.
Once you’re done, tap on the green button in the bottom left corner of the screen to go back.
If you take a look at the top right corner of the room, you will notice a suitcase, hanging from the coat rack. Let’s tap on the suitcase to take a closer look at it.
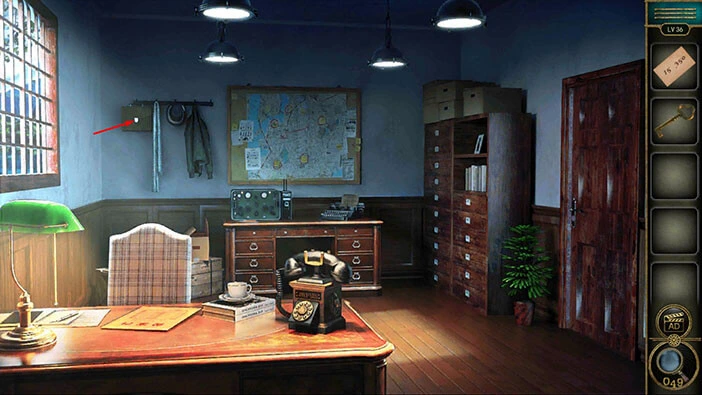
Select the “Key” from the inventory and use it to unlock the suitcase.
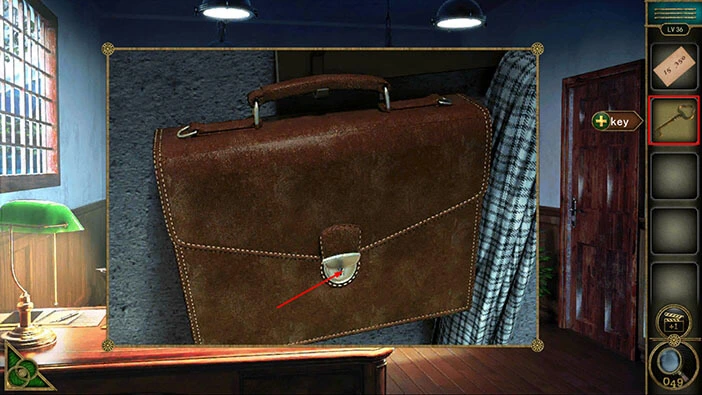
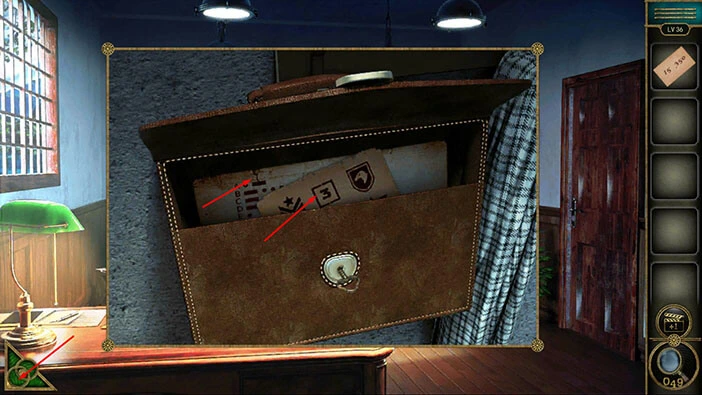
In the suitcase, you will find, a “Game hint” and a “Morse code”. Tap on these two items to pick them up.
After that, tap on the green button in the bottom left corner of the screen to go back.
Next, let’s tap on the bookshelf on the right to take a closer look at it.
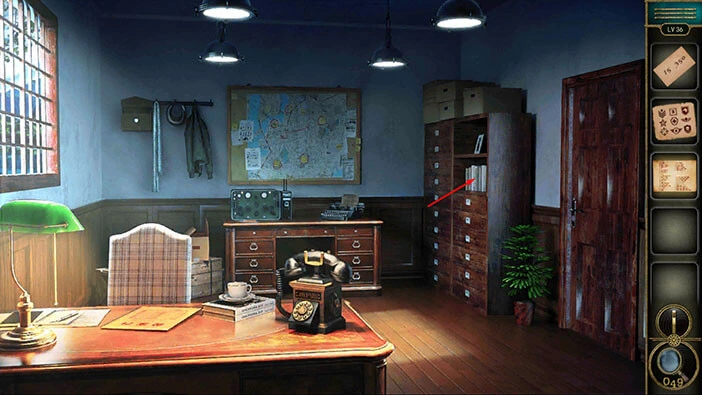
Here, we can see nine books. Above them, you will notice an empty frame. So, let’s select the “Game hint” from the inventory and insert it into the empty frame.
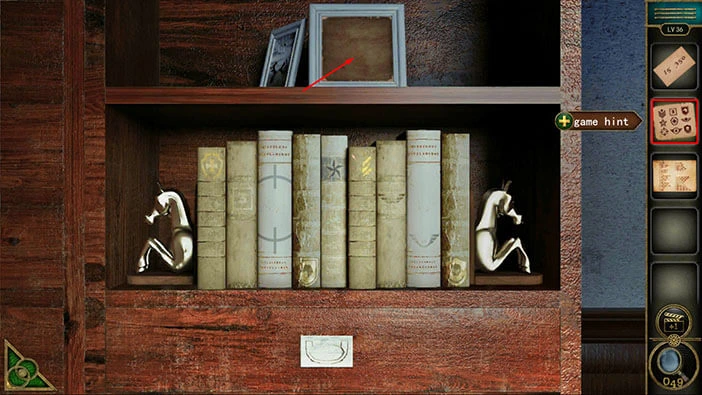
Now, we can see nine symbols. Our next task is to find these nine symbols on the cover of the books below. We will do this puzzle in several steps. Let’s begin.
Step 1
If you take a look at the cover of the fifth book, you will notice a part of the first symbol. So, let’s tap on the fifth book to activate the symbol.
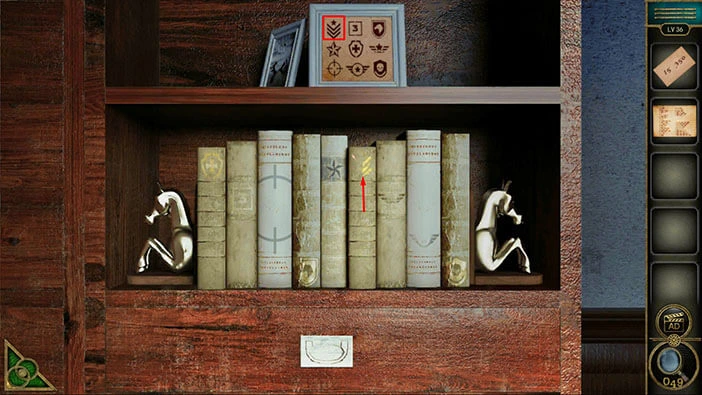
Step 2
You will notice the second symbol on the cover of the second book, so let’s tap on it to activate it.
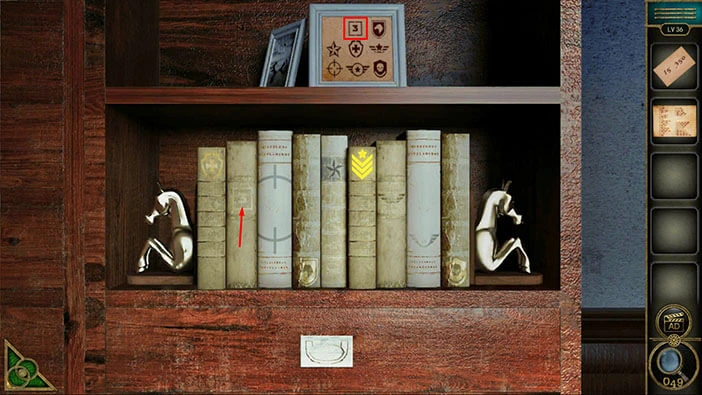
Step 3
You will notice the third symbol on the cover of the fourth book, so let’s tap on it to activate it.
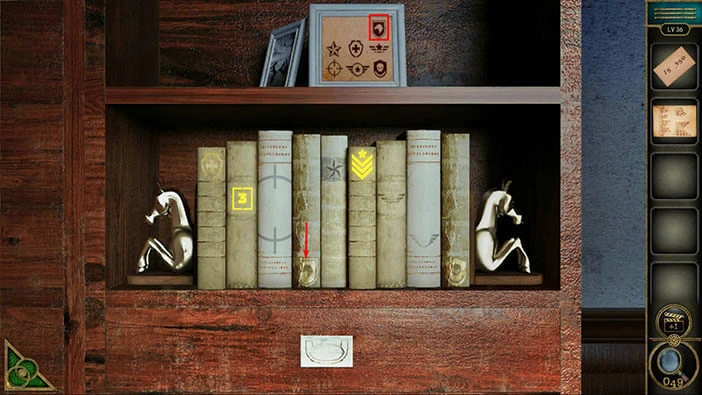
Step 4
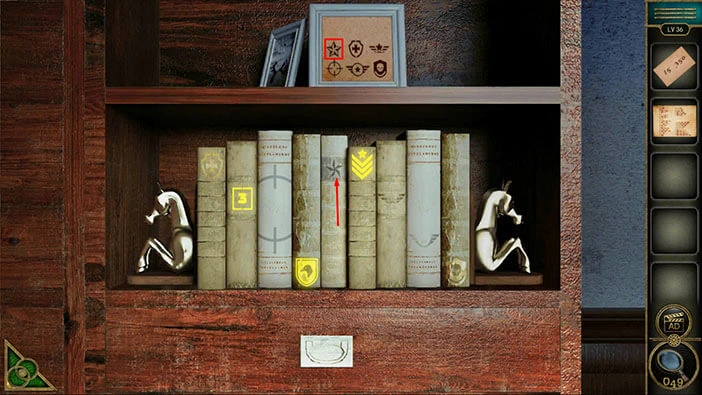
You will notice the fourth symbol on the cover of the fifth book, so let’s tap on it to activate it.
Step 5
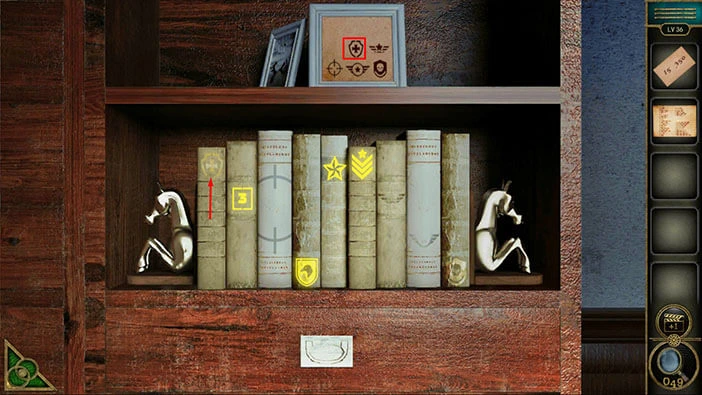
You will notice the fifth symbol on the cover of the first book, so let’s tap on it to activate it.
Step 6
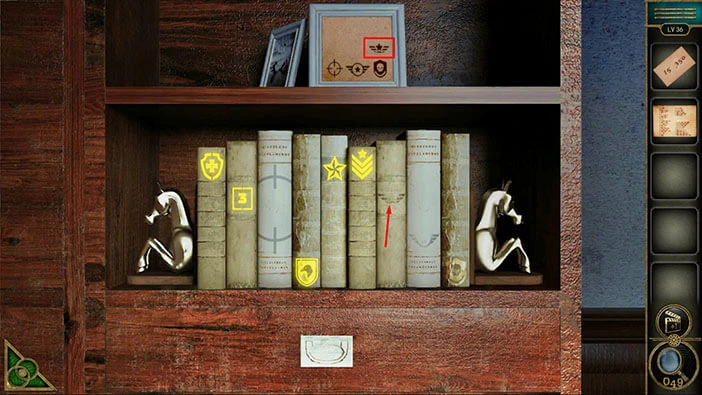
You will notice the sixth symbol on the cover of the seventh book, so let’s tap on it to activate it.
Step 7
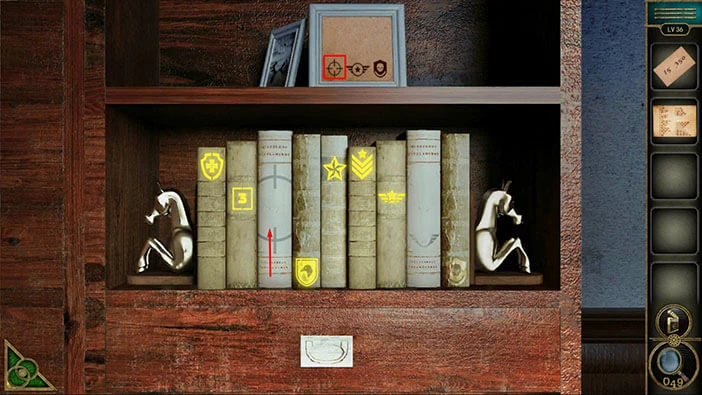
You will notice the seventh symbol on the cover of the third book, so let’s tap on it to activate it.
Step 8
You will notice the eighth symbol on the cover of the eighth book, so let’s tap on it to activate it.
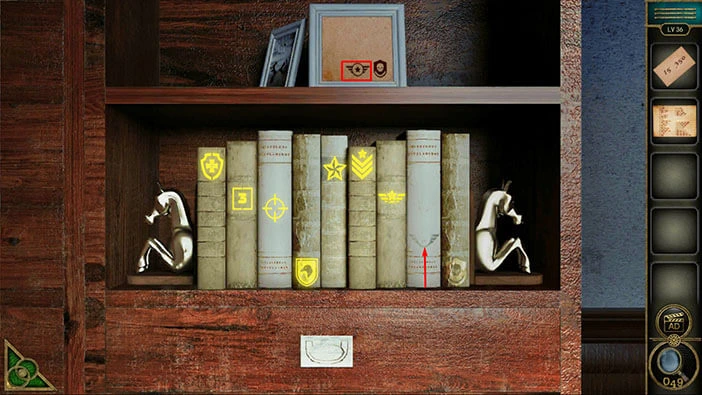
Step 9
Lastly, you will notice the ninth symbol on the cover of the ninth book, so let’s tap on it to activate it.
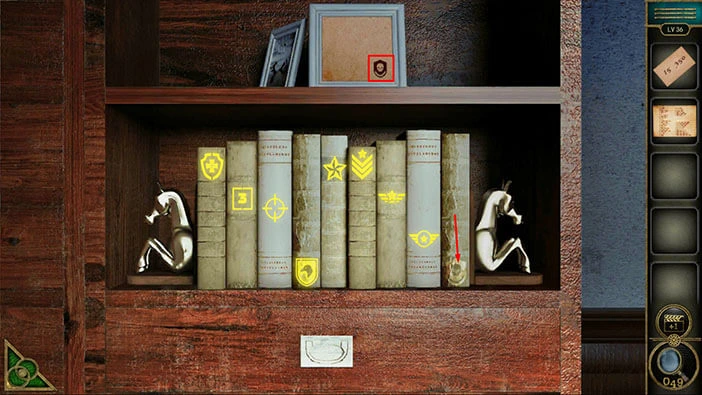
The secret compartment below the bookshelf will open as soon as you activate all symbols. Inside you will find a “Screwdriver” and a “Plug”. Let’s tap on these two items to pick them up.
After that, tap on the green button in the bottom left corner of the screen to go back.
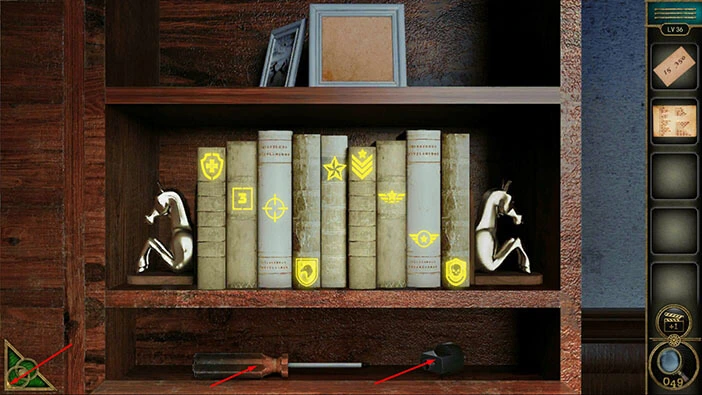
Next, if you take a look at the desk, just below the map, you will notice a radio. Let’s tap on the radio to take a closer look at it.
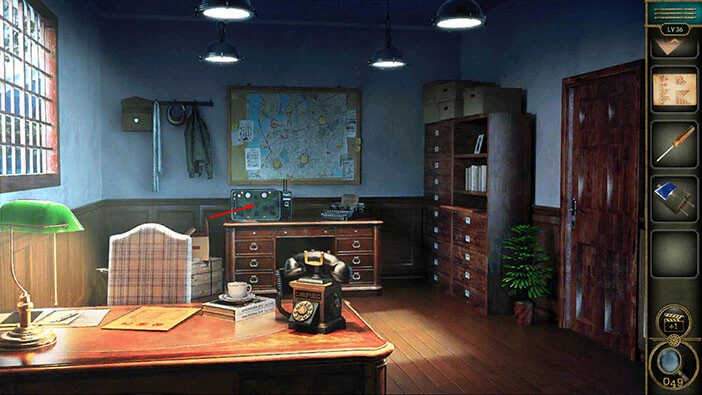
Select the “Screwdriver” from the inventory and use it to open the radio. After that, tap on the radio to start the interaction.
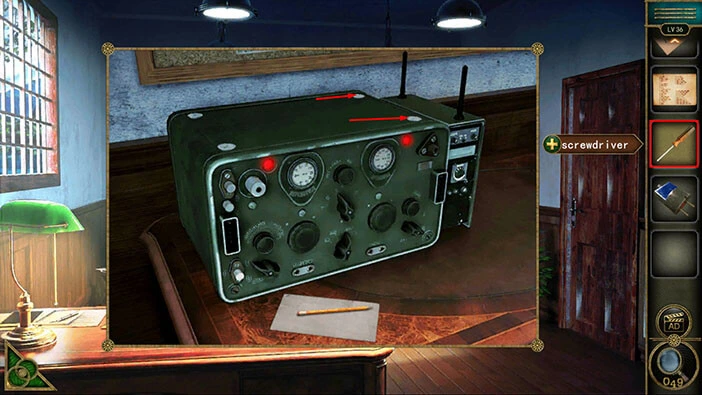
Here, you will notice that the first plug on the right is missing, so let’s select the “Plug” from the inventory and insert it into the empty slot.
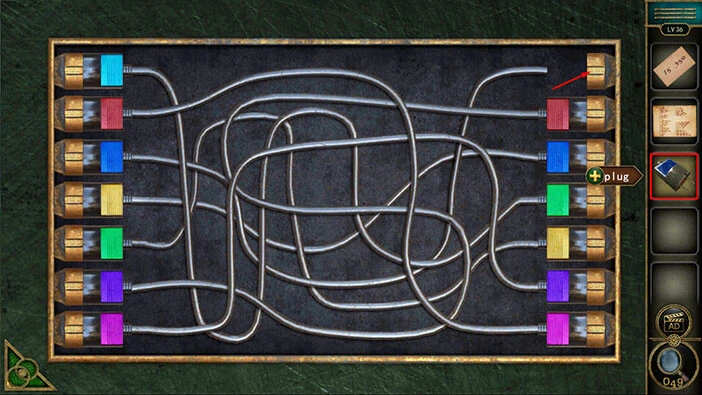
Here, we have another puzzle. Our task is to follow the cables from the left side and discover the slot that they are connected to on the right. Once we determine that, we should insert the plug of the matching color into the slot on the right.
We will do this puzzle in several steps. Let’s begin.
Step 1
If you follow the cable from the light blue plug on the left you will discover that it is connected to the fourth slot on the right. So, let’s select the light blue plug on the right (the first plug) and swap its position with the fourth plug.
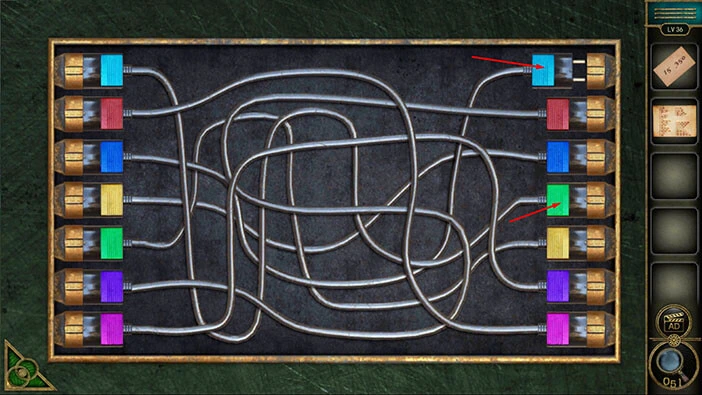
Step 2
If you follow the cable from the red plug on the left you will discover that it is connected to the seventh slot on the right. So, let’s select the red plug on the right (the second plug) and swap its position with the seventh plug.
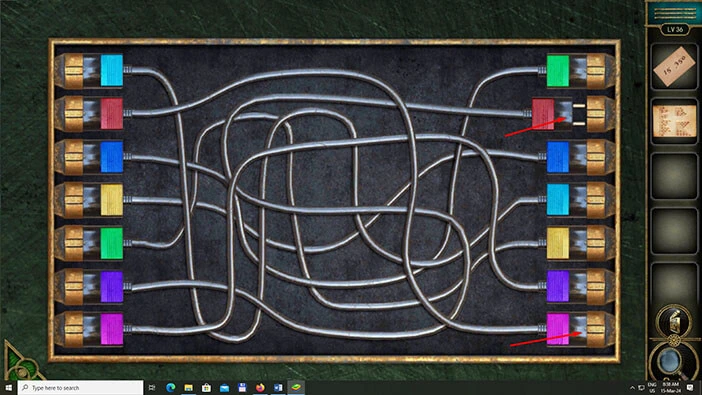
Step 3
If you follow the cable from the blue plug on the left you will discover that it is connected to the first slot on the right. So, let’s select the blue plug on the right (the third plug) and swap its position with the first plug.
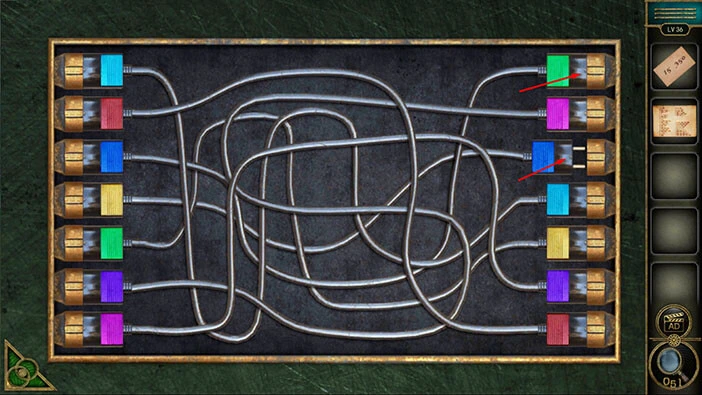
Step 4
If you follow the cable from the yellow plug on the left you will discover that it is connected to the third slot on the right. So, let’s select the yellow plug on the right (the fifth plug) and swap its position with the third plug.
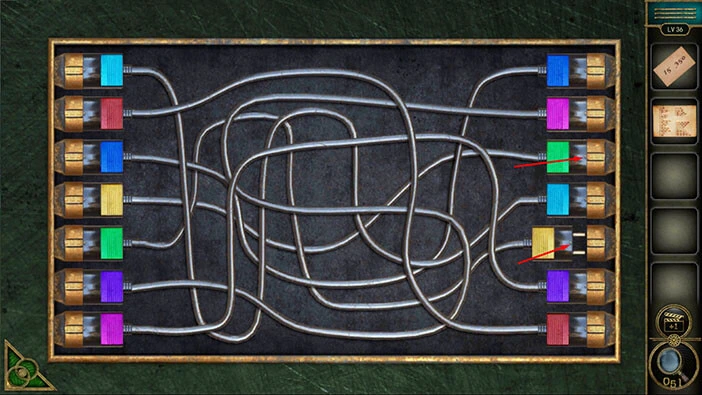
Step 5
If you follow the cable from the green plug on the left you will discover that it is already connected to the green plug on the right. Let’s proceed.
If you follow the cable from the purple plug on the left you will discover that it is connected to the second slot on the right. So, let’s select the purple plug on the right (the sixth plug) and swap its position with the second plug.
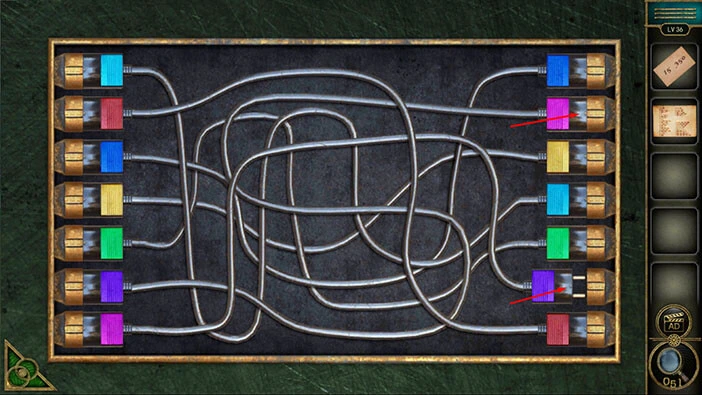
Next, let’s tap on the front side of the radio to examine it.
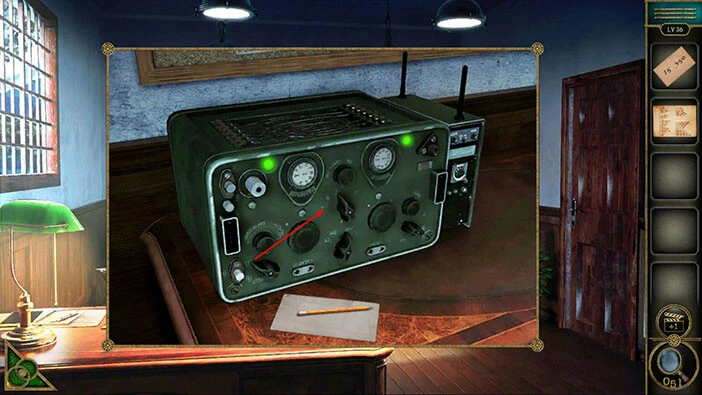
Here, our task is to set the dials on the left and right to the correct positions. To do that, let’s first tap on the “Paper with hints” in our inventory to examine it.
The value on the left is 15.
The value on the right is 350.
Let’s memorize this information. After that, tap on the empty inventory slot to put down the “Paper with hints”.
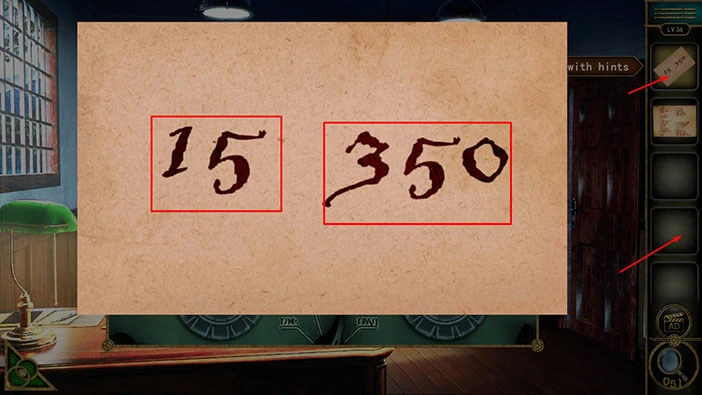
Let’s set the rotate the two dials at the bottom. The arrow at the dial on the left should point to 15, and the arrow on the dial on the right should point to 350.
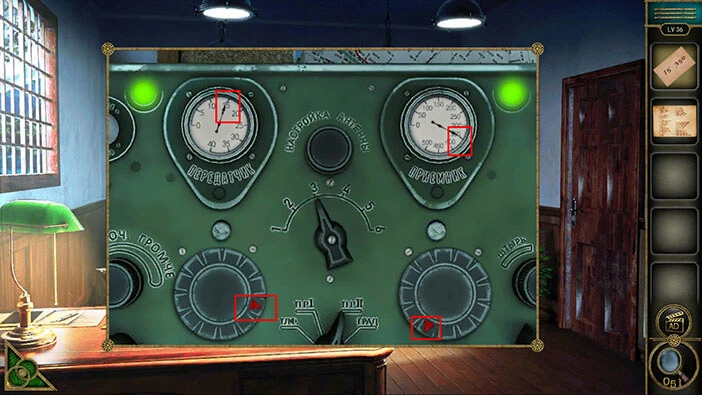
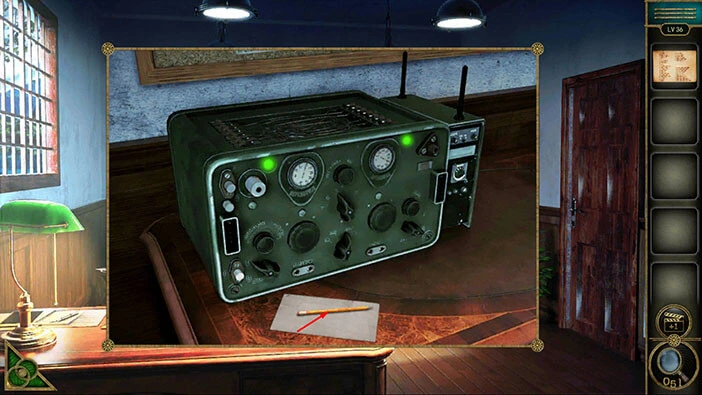
You will hear the Morse’s code in the background, as soon as you set the dials to the correct values. So, let’s tap on the pencil to write down Morse’s code.
After that, tap on the paper to pick it up, and “Morse’s code” will be added to your inventory. Once you’re done, tap on the green button in the bottom left corner of the screen to go back.
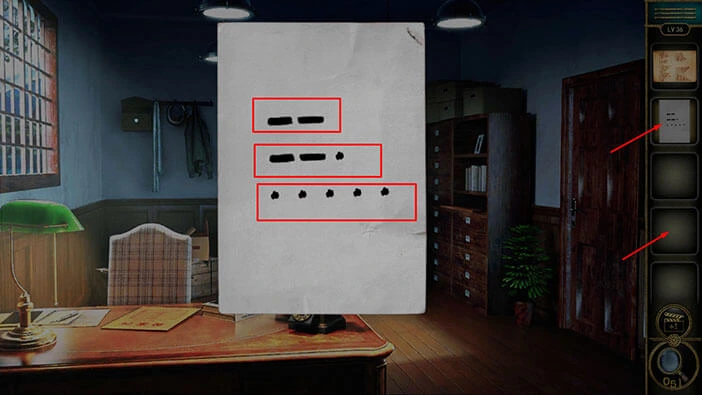
Next, let’s tap on the “Morse’s code” in our inventory to examine it. Here, we can see three entries.
First entry = Dash / Dash
Second entry = Dash / Dash / Dot
Third entry = Five dots
Let’s memorize/write down this information because we will need it in a moment. Once you’re done, tap on the empty inventory slot to put down the “Morse’s code”.
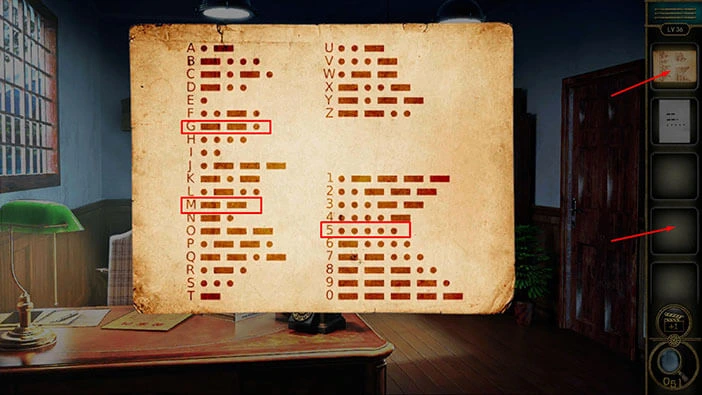
Next, let’s tap on the other “Morse code” in our inventory (the developers should have named differently these two notes) to examine it. Here, our task is to find the Morse’s code entries that we wrote down.
First entry = Dash / Dash = “M”
Second entry = Dash / Dash / Dot = “G”
Third entry = Five dots = “5”
When we put it all together, we will get the hint “MG5”. Let’s memorize/write down this information because we will need it for the next puzzle.
Once you’re done, tap on the empty inventory slot to put down the note.
Next, let’s tap on the map to take a closer look at it.
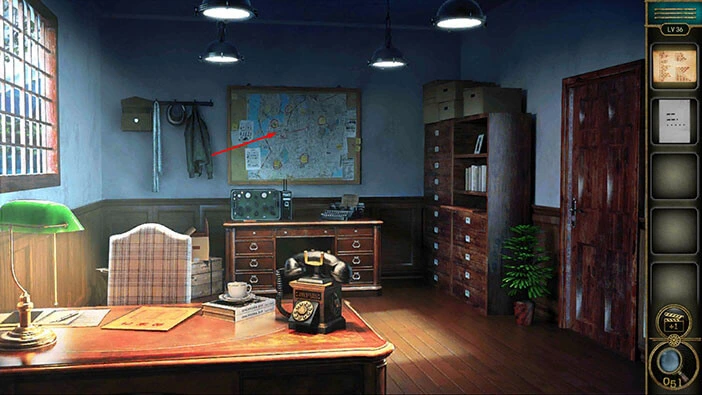
Next, let’s tap on the note at the top of the map to take a closer look at it.
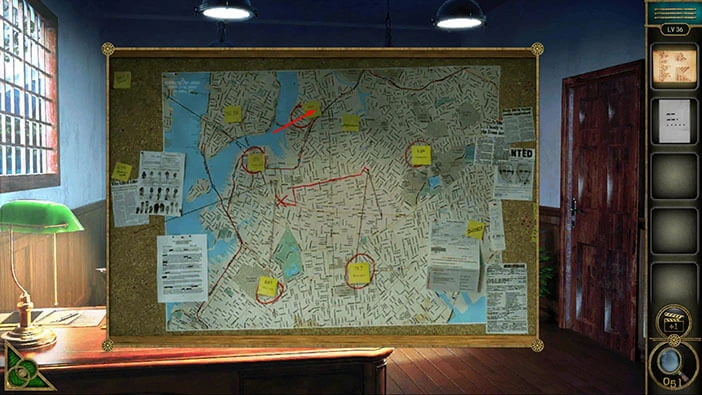
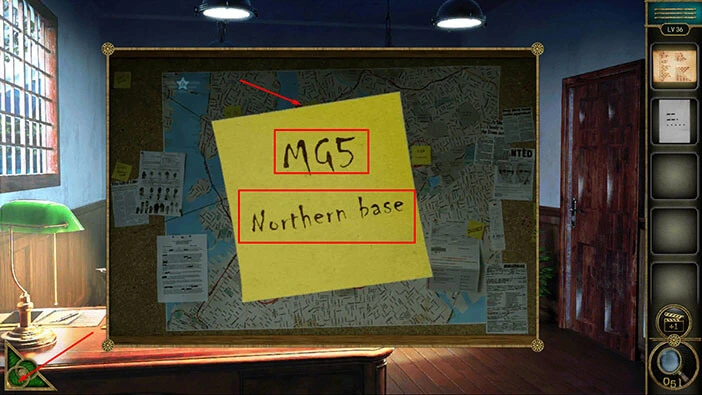
Here, we can see “MG5” so we found the correct note. Below the “MG5,” we can see the name of this spot on the map “Northern base”. Let’s memorize/write down this information (“Northern base”) because we will need it for the next puzzle.
Once you’re done, tap on the green button in the bottom left corner of the screen to go back.
Next, just to the right of the radio, you will notice a typewriter. Let’s tap on it to take a closer look.
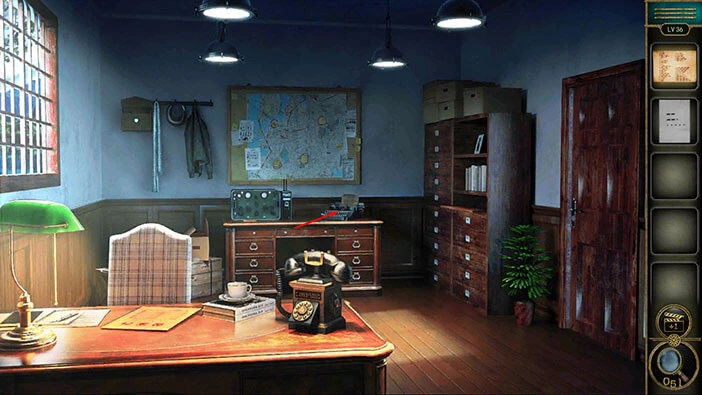
Tap on the typewriter keys and enter the text “northernbase” (no capital letters, no space between the words) that we previously discovered.
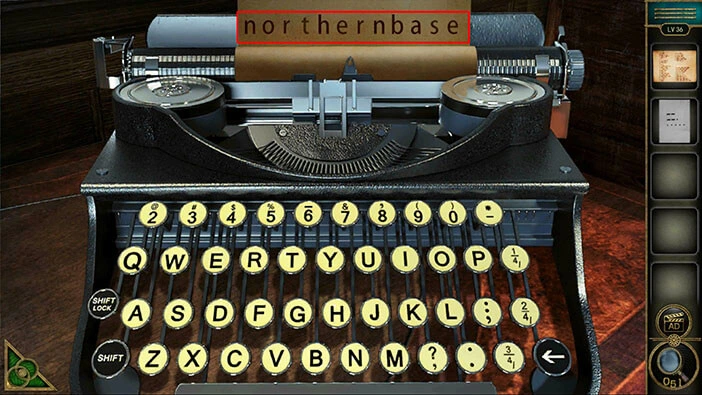
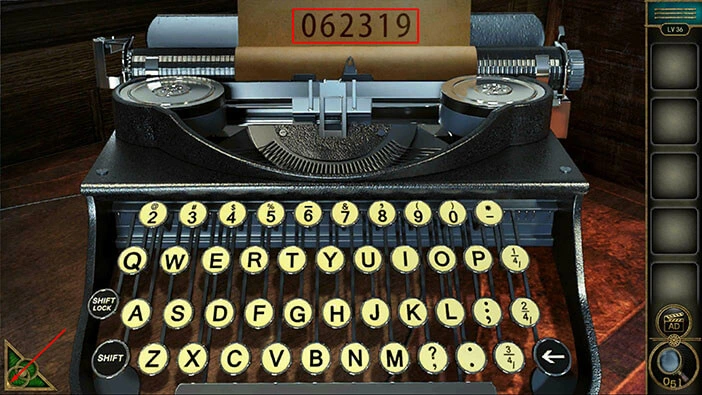
Once you enter the text, the number “062319” will appear on the paper. Let’s memorize/write down this number.
After that, tap on the green button in the bottom left corner of the screen to go back.
Next, let’s tap on the telephone to take a closer look at it, and tap again to start the interaction.
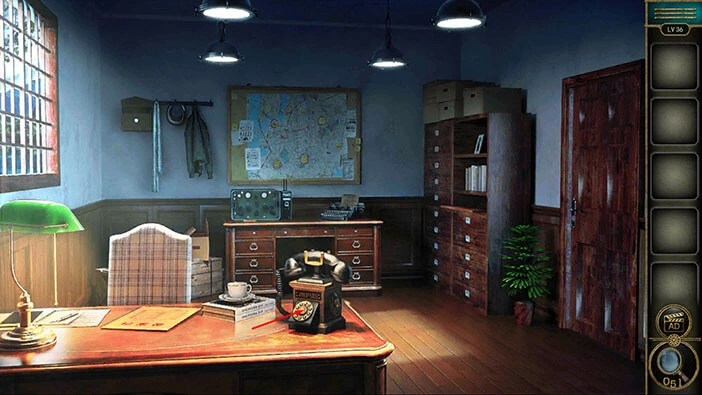
Let’s dial the number “062319”.
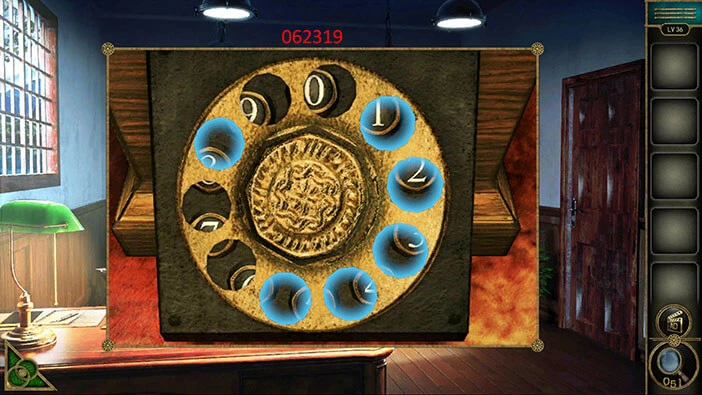
The voice on the other side will instruct you to “Evacuate”. Once you finish the conversation, the small drawer below the telephone will open and inside you will find a “Badge”. Let’s tap on it to pick it up.
After that, tap on the green button in the bottom left corner of the screen to go back.
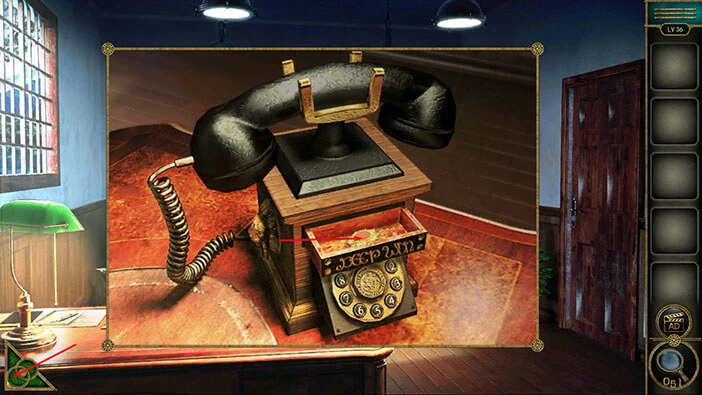
Before we proceed, let’s go back to the map.
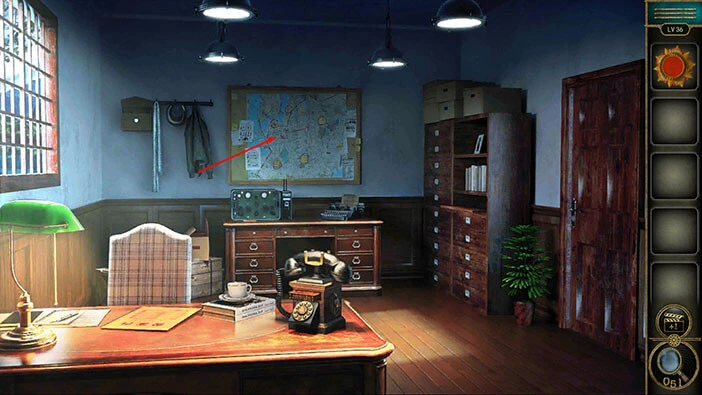
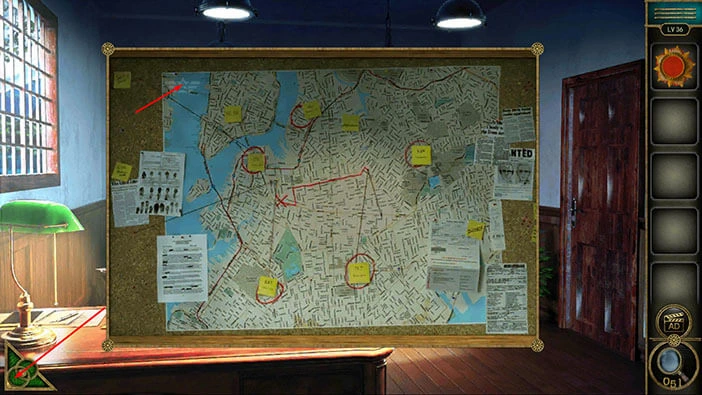
In the top left corner of the map, you will notice a star. Tap on it, and you will get another “Achievement star”.
Once you’re done, tap on the green button in the bottom left corner of the screen to go back.
Next, let’s tap on the door on the right to take a closer look at it.
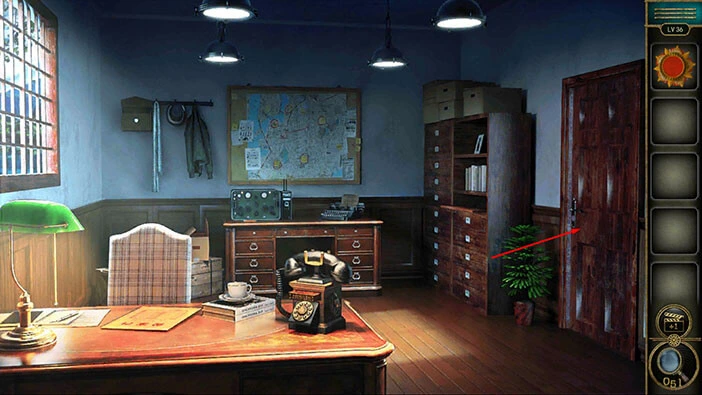
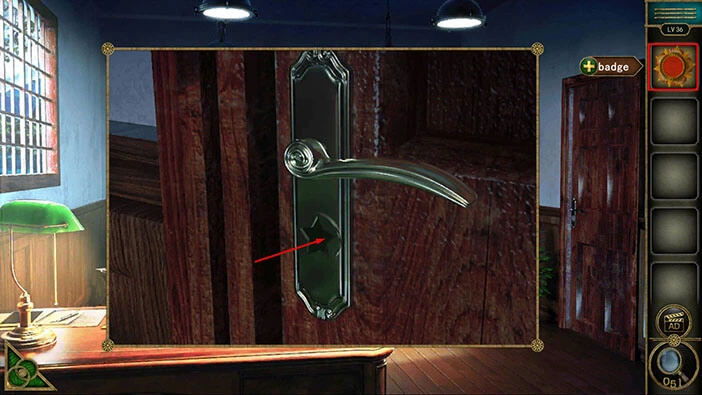
Select the “Badge” from the inventory and insert it into the empty slot. With that, you will unlock and open the door, so let’s tap on it to proceed to the next level.
With that, we have reached the end of the ninth part of the walkthrough. If you want to see the tenth part, tap on the next part button. In the tenth part of the walkthrough, we will cover levels 37-40.
Thank you for reading.