Can you escape the 100 room 17 | Levels 25-28
Hello everyone and welcome to the seventh part of the walkthrough for “Can you escape the 100 room 17”. In the seventh part of the walkthrough, we will cover levels 25 to 28.
Level 25
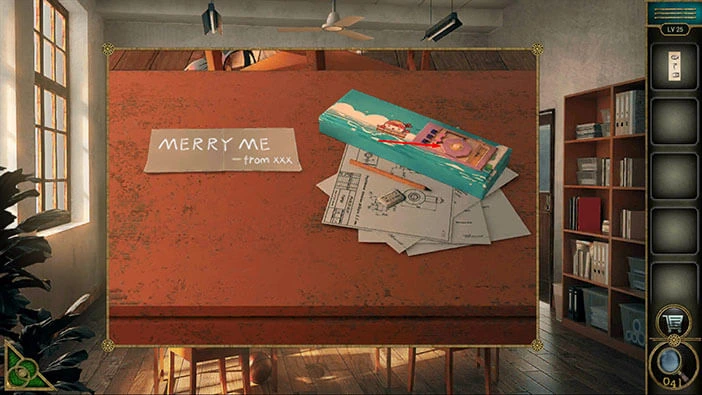
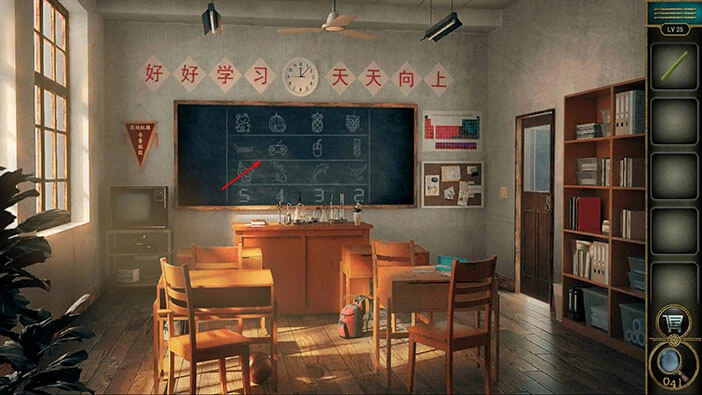
Let’s explore the twenty-fifth level. Let’s tap on the first table on the right to take a closer look at it.

On the left side of the table, you will notice a “Book”. Let’s tap on it to pick it up.
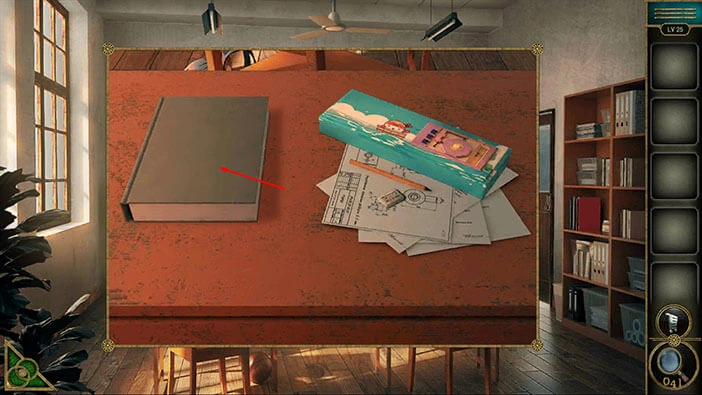
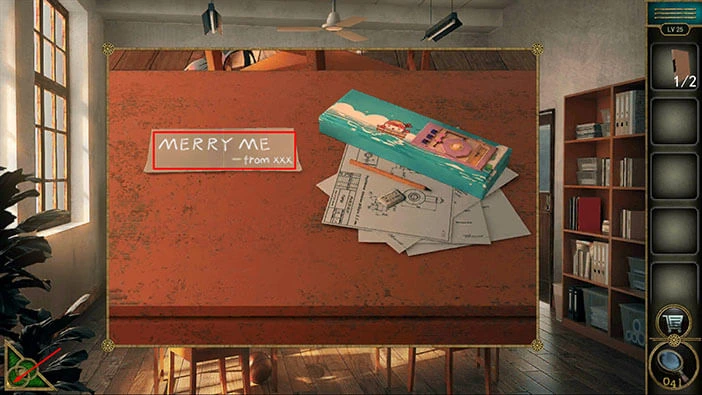
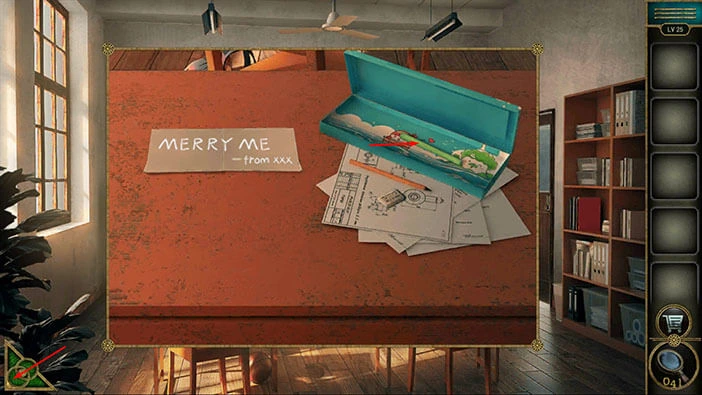
Under the book, you will discover a note. Tap on it to open it, and you will see the message “Merry me” from xxx.
We will come back to it a bit later. For now, tap on the green button in the bottom left corner of the screen to go back.
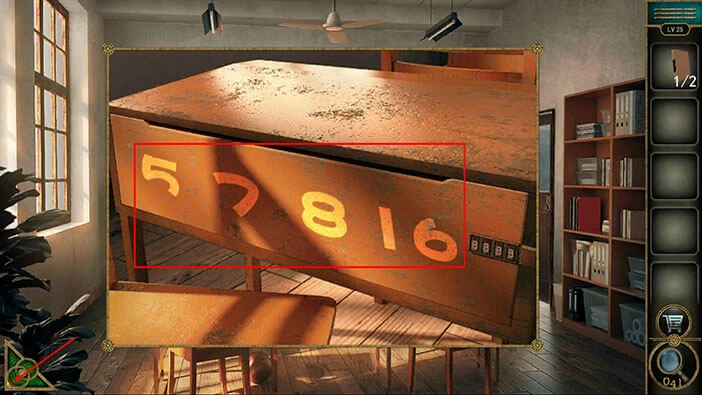
Next, let’s tap on the first table on the left to take a closer look at it.

Here, you will see the numbers 5, 7, 8, and 16. Let’s memorize/write down these numbers because they represent a hint for the next puzzle. Also, on the right side of the drawer, you will notice four slots with letters. The numbers that we just discovered will help us discover the letters for this password.
Once you’re done, tap on the green button in the bottom left corner of the screen to go back.
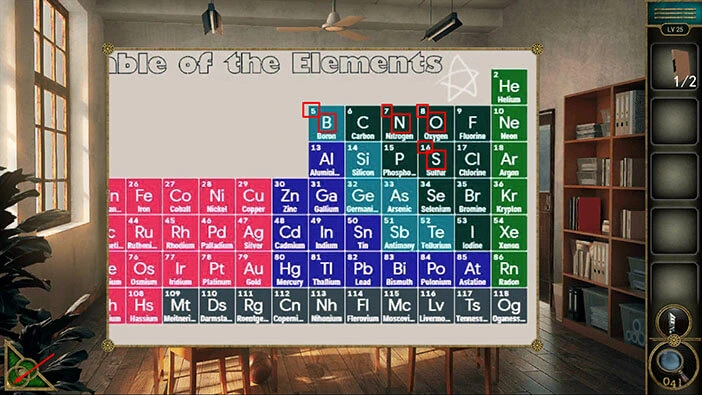
Next, on the wall, just to the right of the board, you will notice a table of elements. Let’s tap on it to take a closer look.
Here, we should look for the elements that match the numbers that we discovered on the table (these numbers were 5, 7, 8, and 16). Let’s do that.
Inside the element number 5, we can see the letter “B”.
Inside the element number 7, we can see the letter “N”.
Inside the element number 8, we can see the letter “O”.
Inside the element number 16, we can see the letter “S”.
When we put it all together, we will get the password “BNOS”. Let’s memorize/write down this password because we will need it to unlock the drawer.
Once you’re done, tap on the green button in the bottom left corner of the screen to go back.
Next, let’s tap on the first table on the left to take a closer look at it. On the right side, you will notice four black slots. Tap on them to start the interaction.
Enter the password “BNOS” that we just discovered.
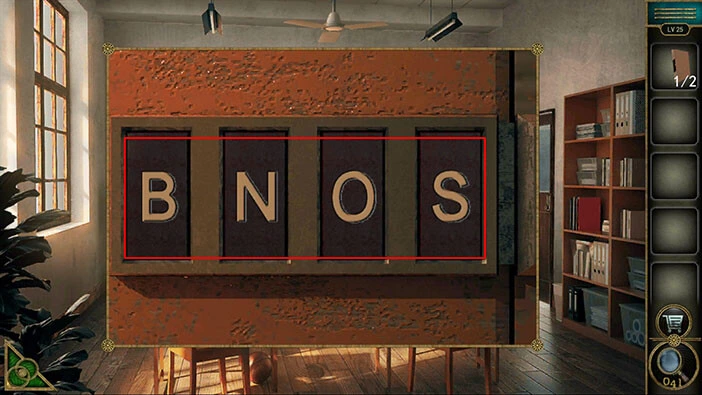
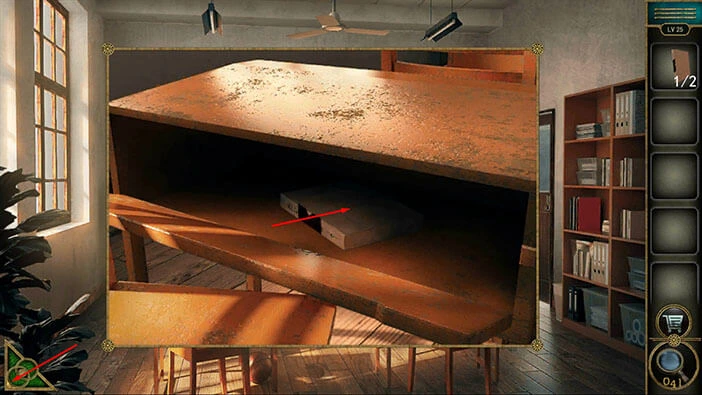
As soon as you enter the correct password you will open the drawer, and inside you will find another “Book”. Tap on it to pick it up.
After that, tap on the green button in the bottom left corner of the screen to go back.
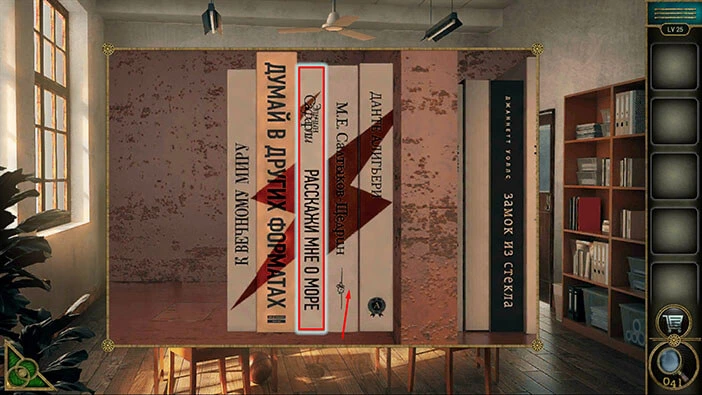
Next, let’s tap on the bookshelf on the right to take a closer look at it.
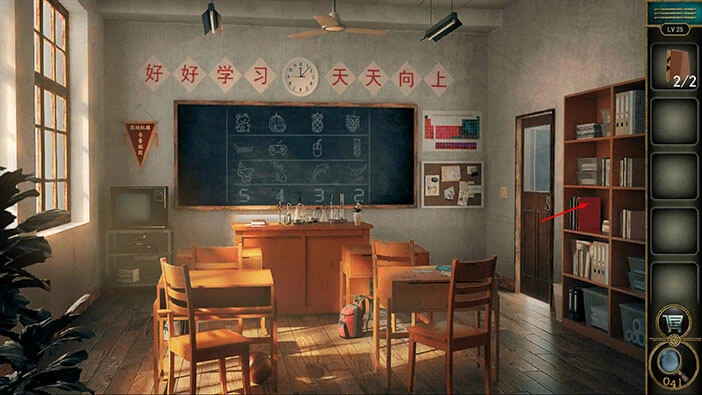
Here, you will notice three books on the shelf on the left, and you will also notice that two books are missing. So, let’s select the “Books” from the inventory and insert them into the empty slots.
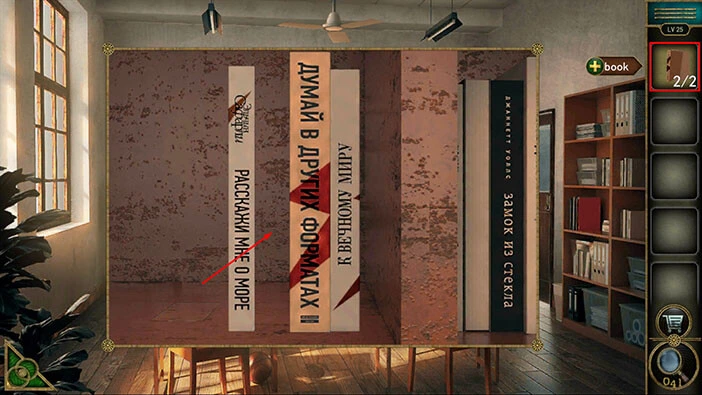
Our next task is to rearrange the books because they should form an image of lightning. We will do this puzzle in several steps. Let’s begin.
Step 1
Select the second book (looking from left to right) and swap its position with the fourth book.
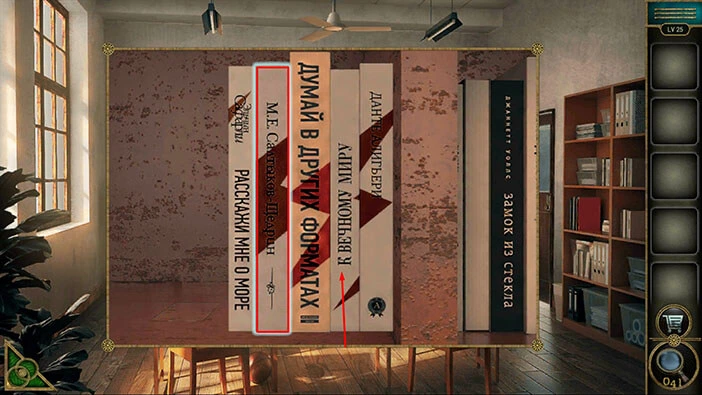
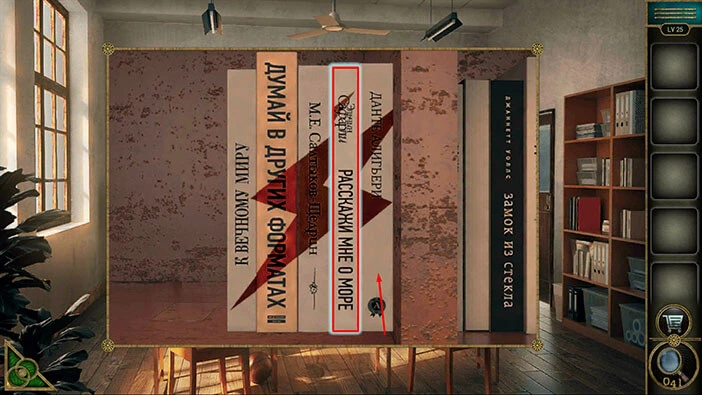
Step 2
Select the first book and swap its position with the second book.

Step 3
Select the second book and swap its position with the third book.
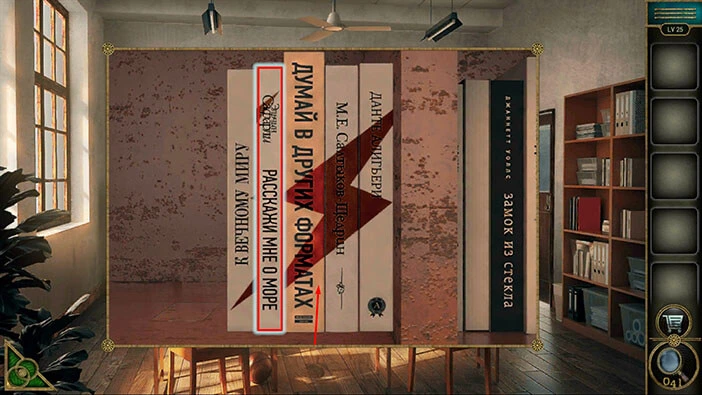
Step 4
Select the third book and swap its position with the fourth book.
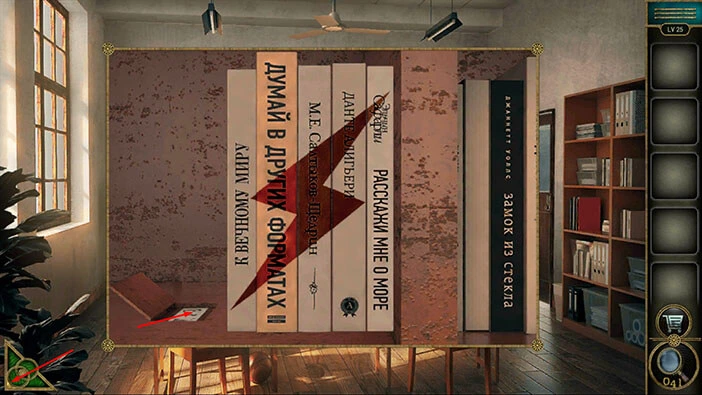
Step 5
Lastly, select the fourth book and swap its position with the fifth book.
As soon as you arrange the books, the secret compartment on the left will open and inside you will find a “Paper with hints”. Tap on it to pick it up.
After that, tap on the green button in the bottom left corner of the screen to go back.
Next, let’s tap on the first table on the right to take a closer look at it.
Next, tap on the blue box on the right to start the interaction.
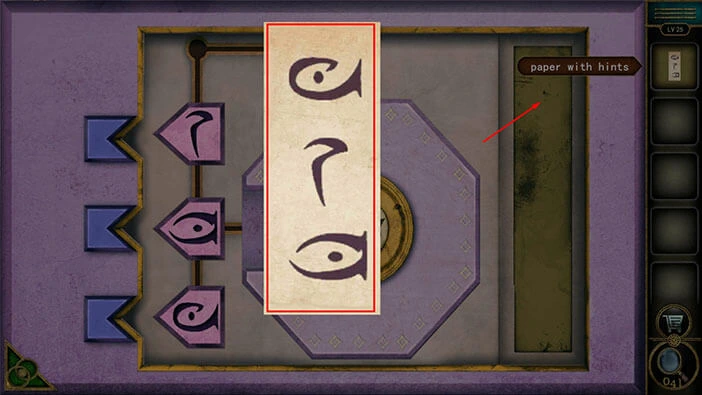
Here, we can see three symbols. Tap on the “Paper with hints” in your inventory to examine it.

On the paper with hints, we can see the correct order of symbols. So, looking from the bottom,
The first symbol should be “Hook with dot” (that’s how I see it).
The second symbol should be a “Question mark” (that’s how I see it).
The third symbol should be “Two pincers” (that’s how I see it).
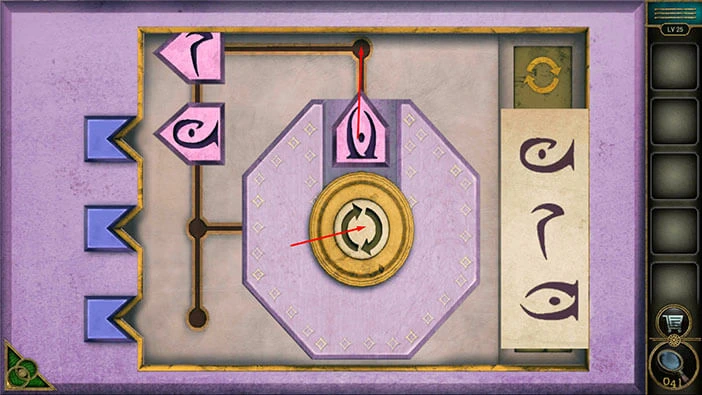
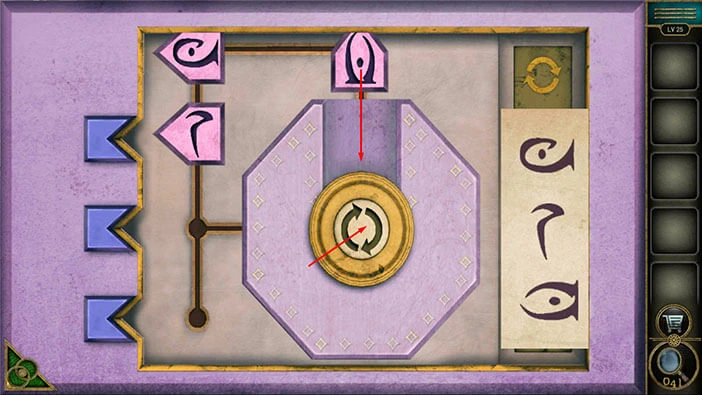
Tap on the right side of the puzzle to place down the hint.
Our next task is to rearrange the symbols, and their order should match the order of the symbols on the “Paper with hints”. We will do this in several steps. Let’s begin.
Step 1
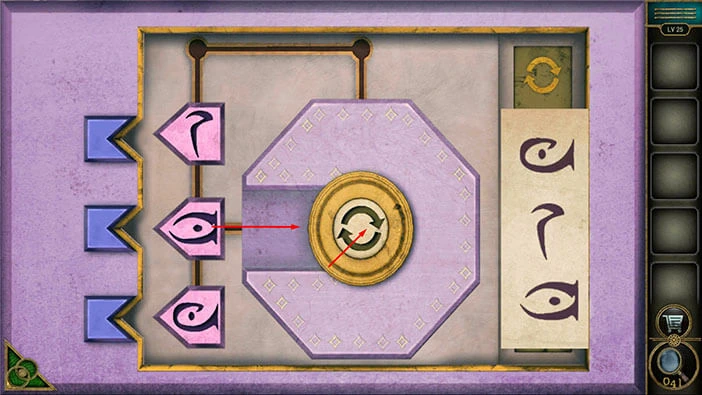
Select the “Two pincers” symbol and drag it into the middle (to the right). After that, tap on the two arrows in the middle of the disk to rotate it.
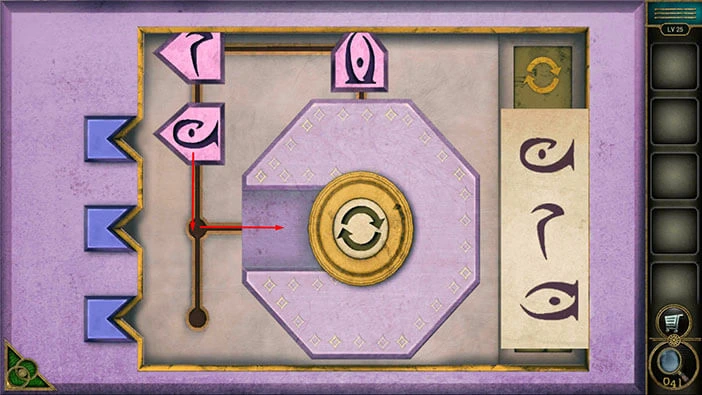
Step 2
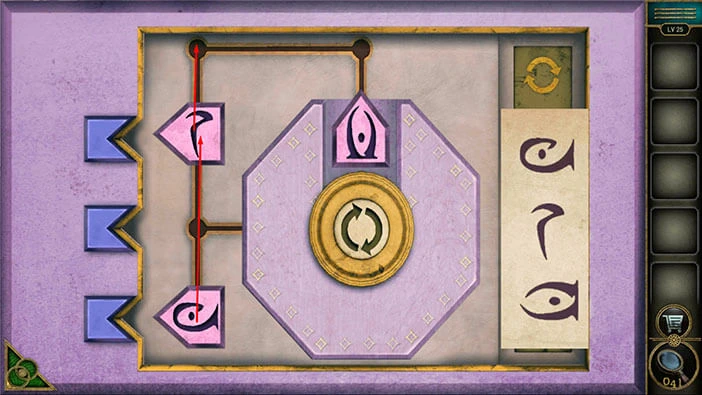
Select the “Question mark” symbol and drag it one slot up. After that, select the “Hook with dot” symbol and drag it two slots up.
Step 3
Select the “Two pincers” symbol and drag it one slot up. After that, tap on the two arrows in the middle of the disk to rotate it.
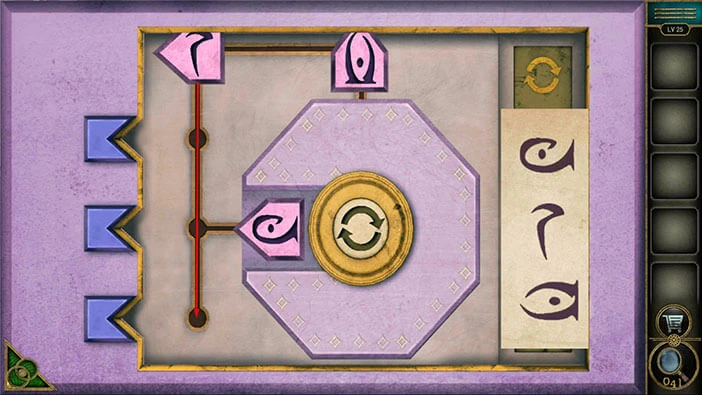
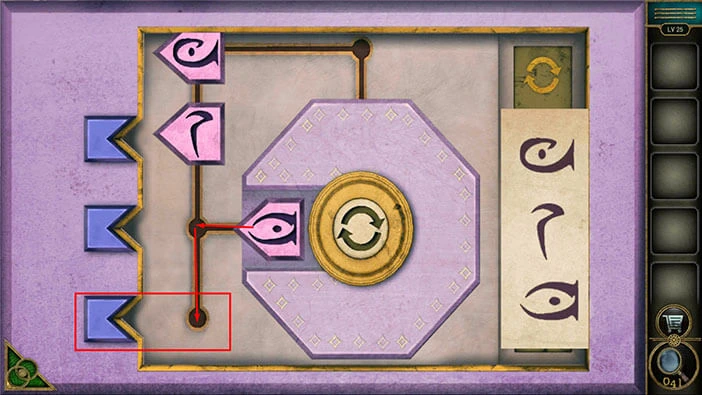
Step 4
Select the “Hook with dot” symbol and drag it one slot down, and then one slot to the right.
Step 5
Select the “Question mark” symbol and drag it three slots down.
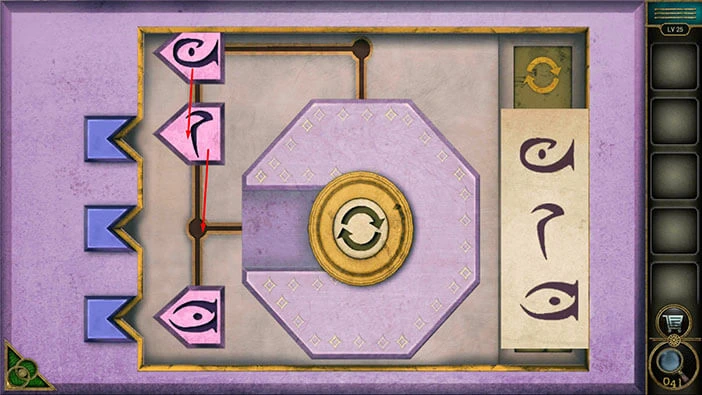
Step 6
Select the “Hook with dot” symbol and drag it one slot to the left, and then two slots up.
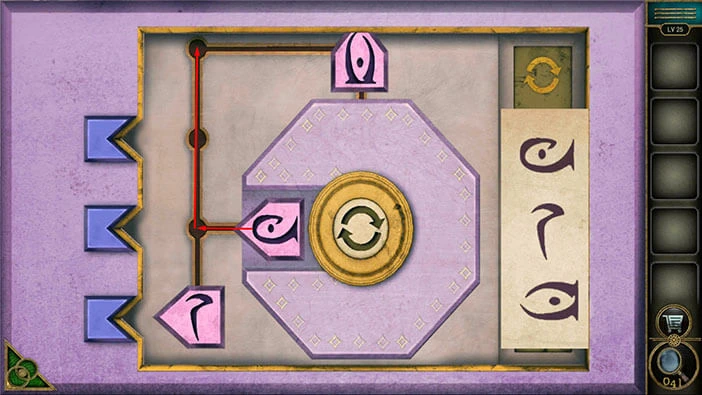
Step 7
Select the “Question mark” symbol and drag it two slots up. After that, tap on the two arrows in the middle of the disk to rotate it.

Step 8
Select the “Two pincers” symbol and drag it one slot down. After that, tap on the two arrows in the middle of the disk to rotate it.
Step 9
Select the “Two pincers” symbol and drag it one slot to the left, and then one slot down. With that, we will place the “Two pincers” symbol into the correct slot.
Step 10
Select the “Question mark” symbol and drag it one slot down. After that, select the “Hook with dot” symbol and drag it one slot down. With that, you will place all three symbols into the correct slots.
As soon as you solve the puzzle the blue box will open and inside you will find “Chalk”. Tap on it to pick it up.
After that, tap on the green button in the bottom left corner of the screen to go back.
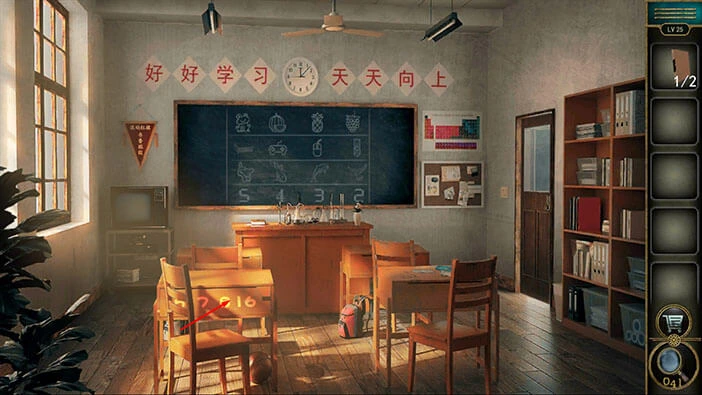
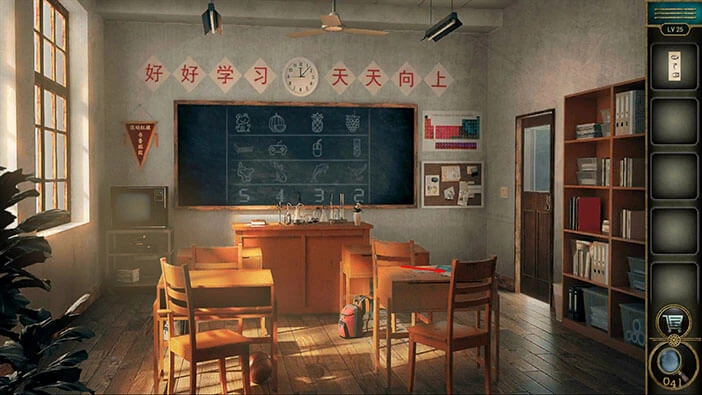
Next, tap on the board to start the interaction.
Select the “Chalk” from the inventory and tap on the board to start the interaction.
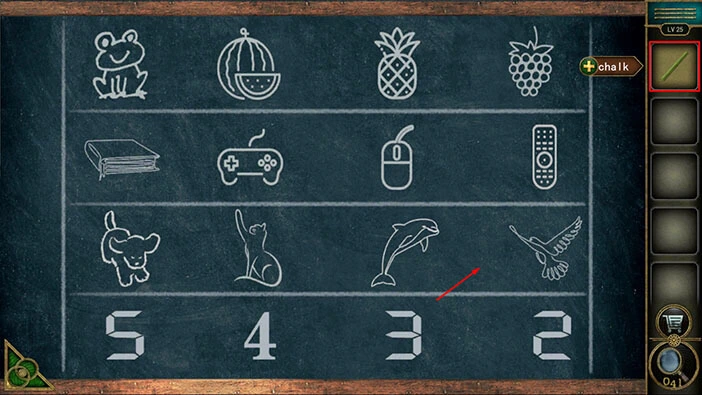
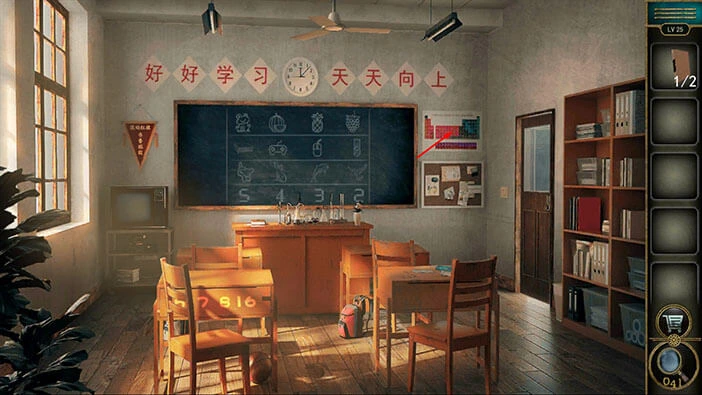
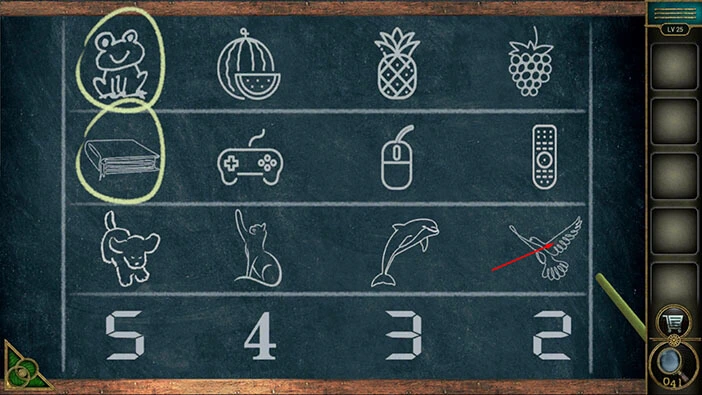
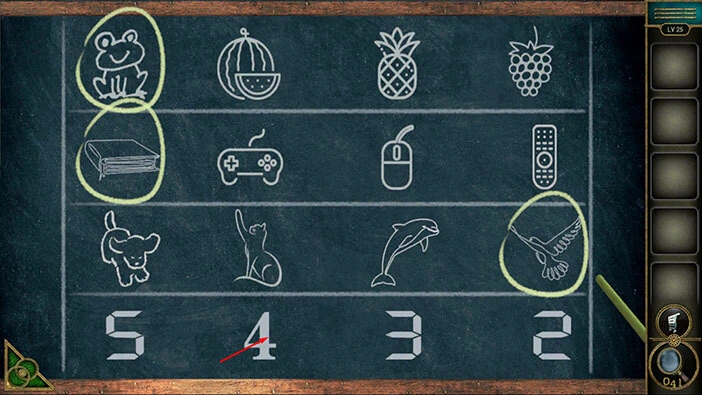
Here we have another puzzle. Our task is to identify one item in each row that is different from the other three items. We will do this in several steps. Let’s begin.
Step 1
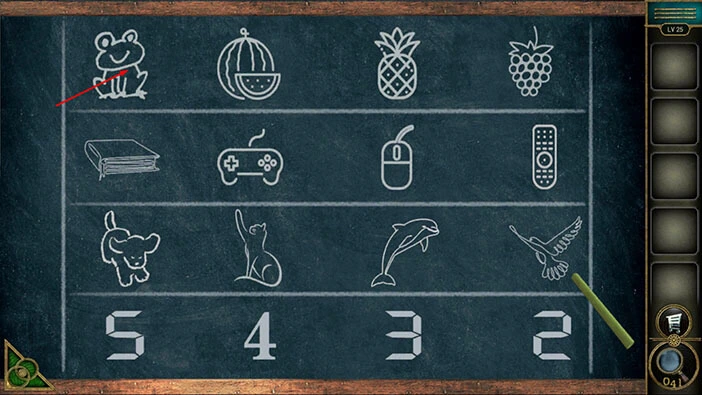
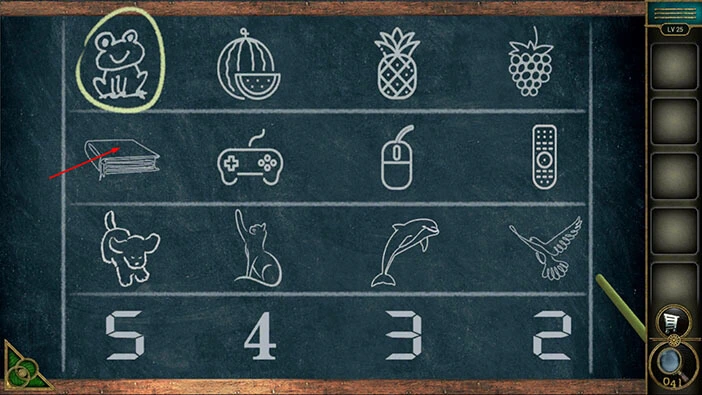
In the first row, we have a frog, a watermelon, a pineapple, and grapes. We have three types of fruit and one animal. So, let’s tap on the frog because it doesn’t match the other three items.
Step 2
In the second row, we have a book, a gamepad, a computer mouse, and a remote control. We have three electronic devices and one book. So, let’s tap on the book because it doesn’t match the other three items.
Step 3
In the third row, we have a dog, a cat, a dolphin, and a bird. Dogs can walk, cats can walk, dolphins can swim, and birds can fly. So, that’s not it.
On the other hand, all animals except the bird are mammals. So, let’s tap on the bird because it doesn’t match the other three animals.
Step 4
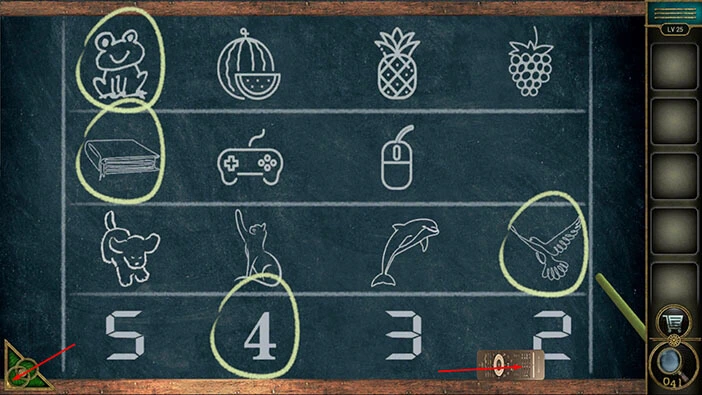
In the fourth row, we can see numbers, 5, 4, 3, 2. You will notice that the number 4 was written in a different font than the other three numbers. So, let’s tap on the number 4 because it doesn’t match the other three numbers.
As soon as you select the correct items in each row, the “Remote control” will materialize. Let’s tap on it to pick it up.
After that, tap on the green button in the bottom left corner of the screen to go back.
Next, in the left corner of the room, you will notice a TV. Let’s tap on it to take a closer look.

Next, select the “Remote control” from the inventory and use it to turn on the TV.
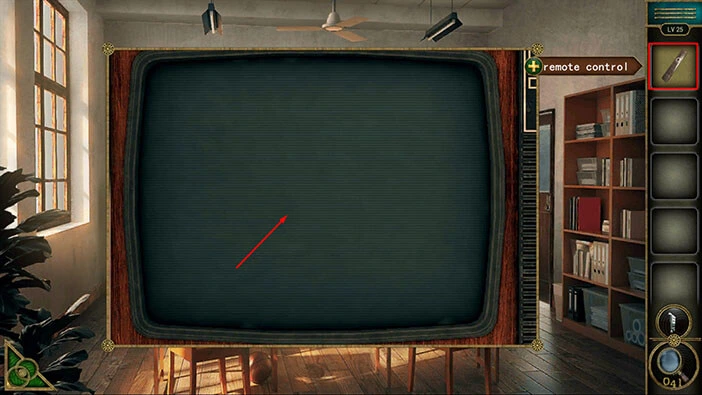
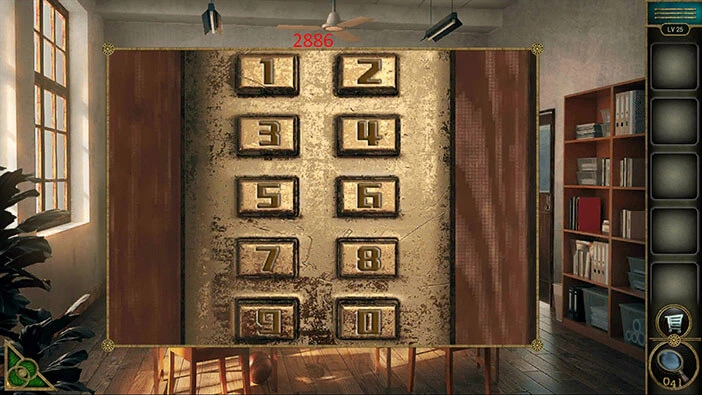
Numbers “2886” will appear on the screen. Memorize/write down this information because we will need it in order to unlock the front door.
Once you’re done, tap on the green button in the bottom left corner of the screen to go back.

Tap on the door on the right to take a closer look at it, and tap again to start the interaction.
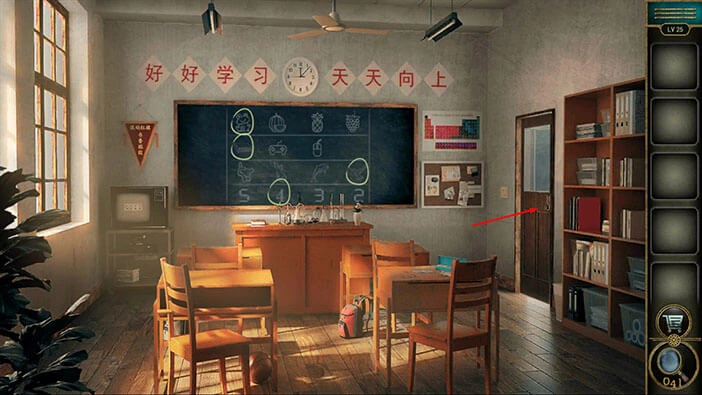
Enter the code “2886” and you will unlock the door. After that, tap on the door to proceed to the next level.
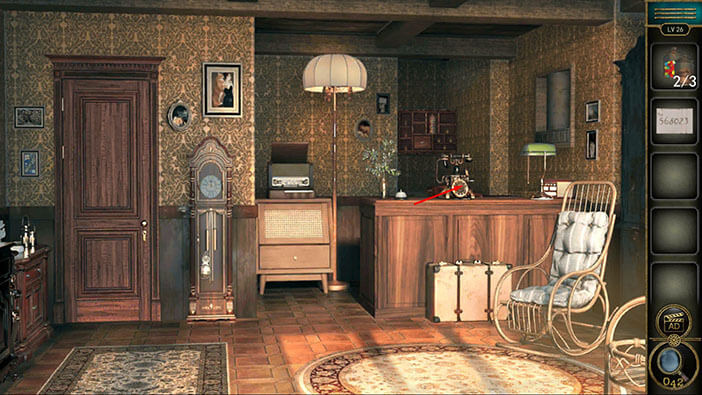
Level 26
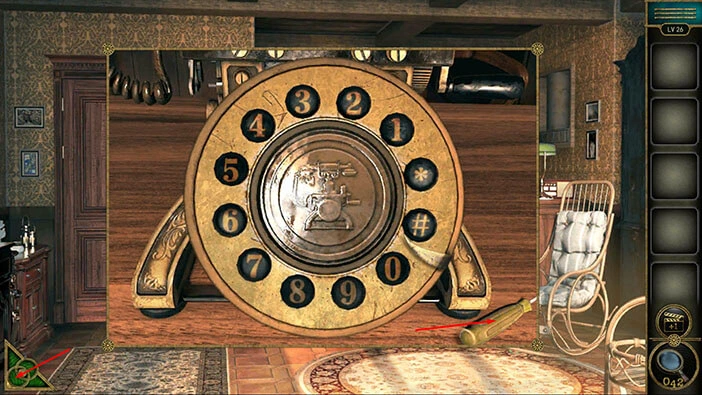
Let’s explore the twenty-sixth level. Tap on the telephone to take a closer look at it.

On the right, you will notice a “Screwdriver”. Tap on it to pick it up.
After that, tap on the green button in the bottom left corner of the screen to go back.
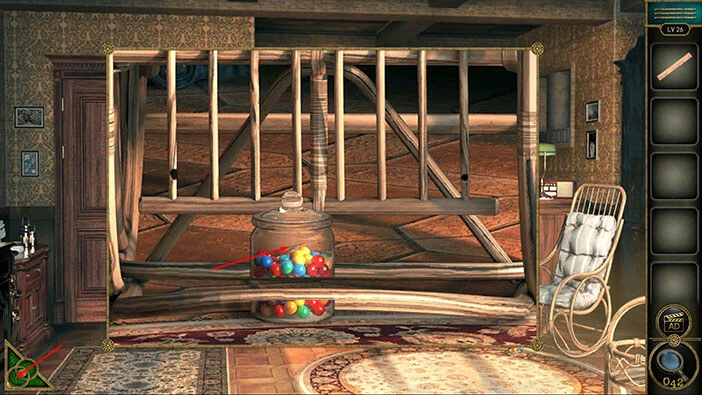
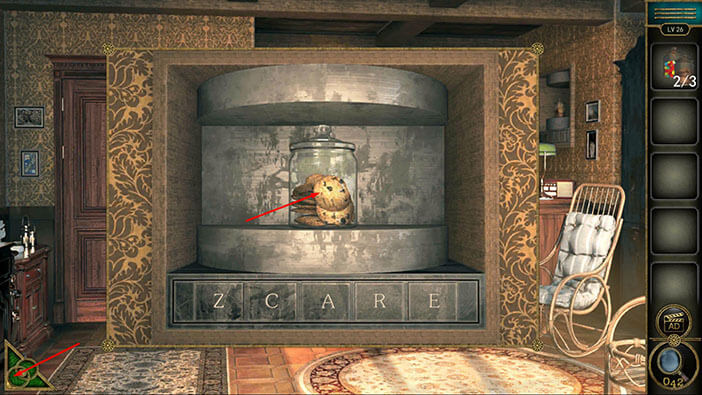
Next, tap on the bottom of the chair on the right to take a closer look at it.

Here, you will notice a “Candy Jar” but we can’t reach it because the plank is blocking us. So, let’s select the “Screwdriver” from the inventory and use it to remove the plank.
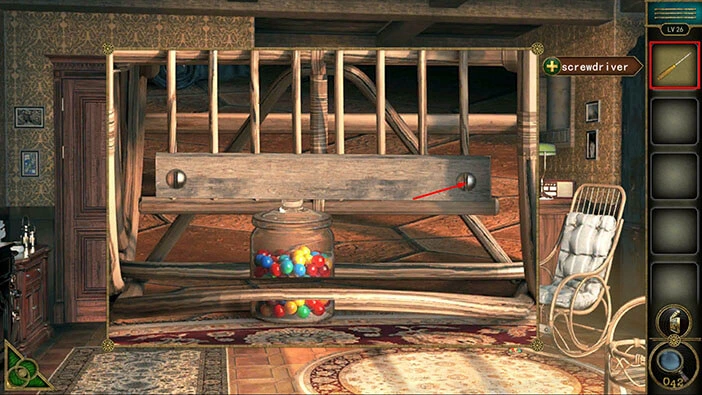
“Board” will be automatically added to your inventory. Let’s tap on the “Candy Jar” to pick it up since we can now reach it.
Once you’re done, tap on the green button in the bottom left corner of the screen to go back.
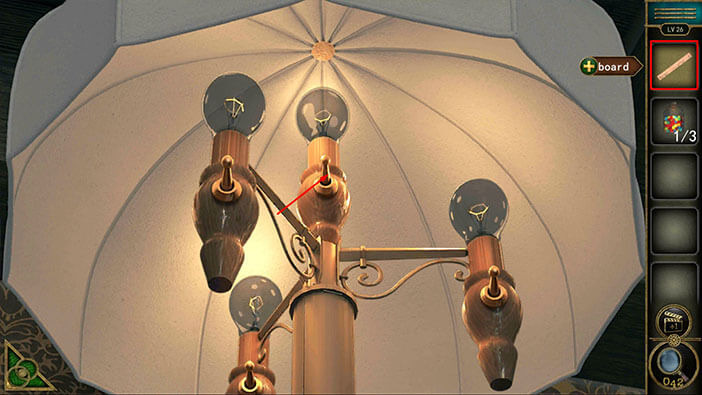
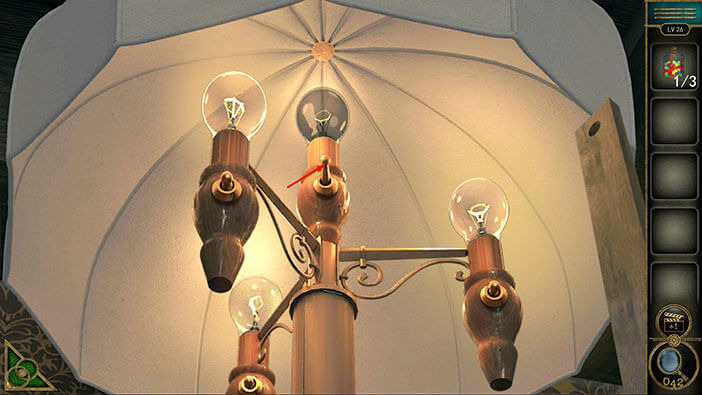
Next, let’s tap on the lamp to take a closer look at it.

You will notice that two light bulbs are flickering. A few moments later, these two lights will be turned off.
So, here we have another puzzle. Our task is to reactivate all four light bulbs. We will do this in several steps. Let’s begin.
Step 1
Select the “Board” from the inventory and use it to turn on the switch below the light bulb at the top.
Step 2
Tap on the switch below the light bulb in the top left to turn it on.
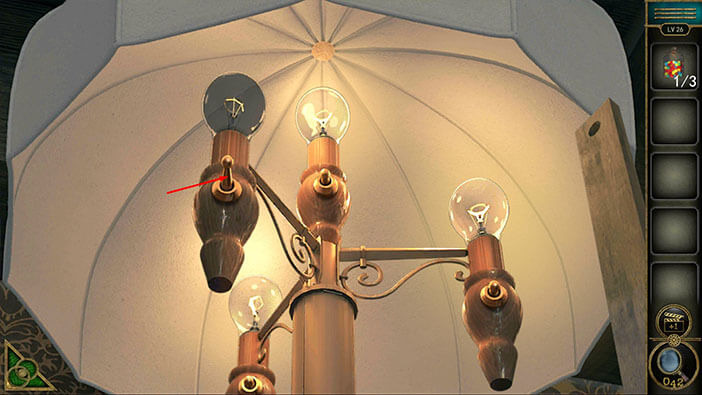
Step 3
Tap on the switch below the light bulb in the bottom left to turn it on.
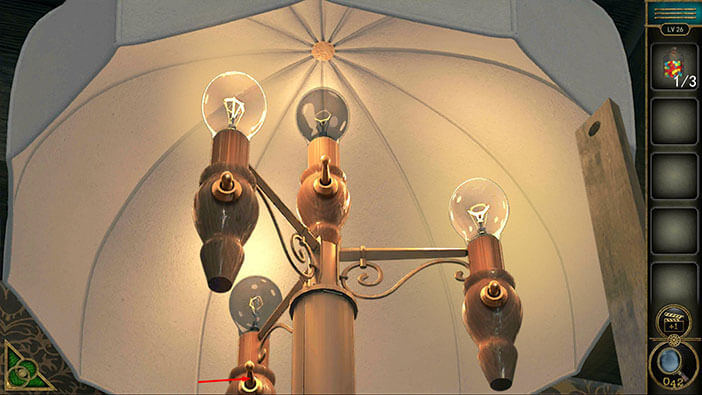
Step 4
Tap on the switch below the light bulb at the top to turn it on.
Step 5
Lastly, tap on the switch below the light bulb in the bottom right to turn it on.
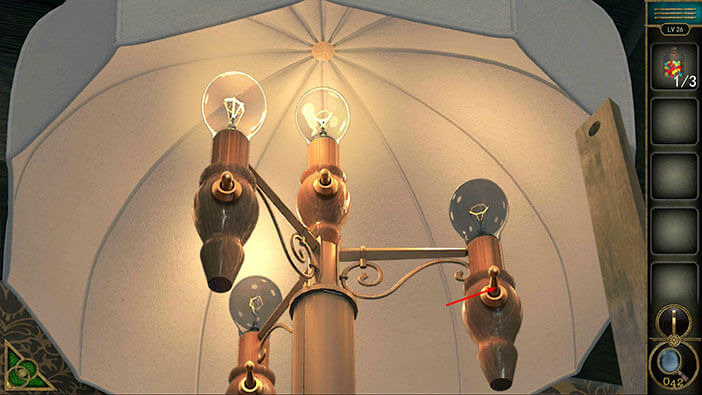
As soon as you turn on all five light bulbs, a “Clock hand” will appear, so let’s tap on it to pick it up.
After that, tap on the green button in the bottom left corner of the screen to go back.
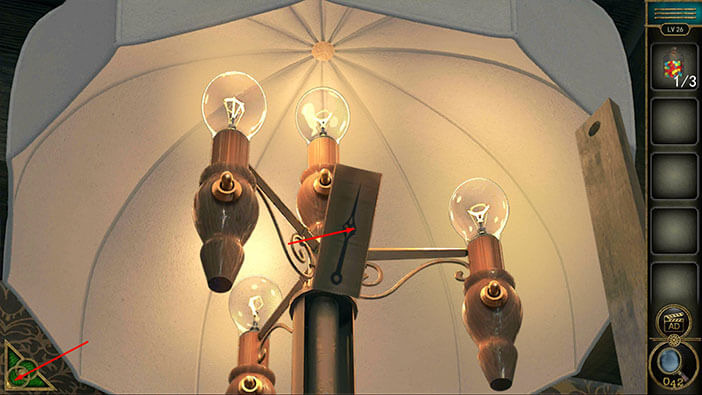
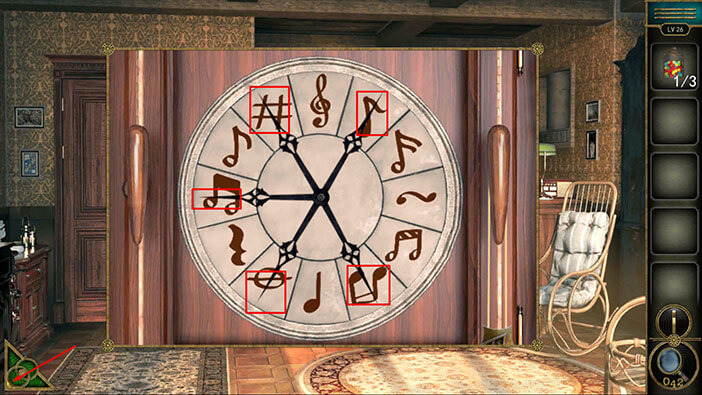
Next, let’s tap on the clock, located just to the right of the door, to take a closer look at it.

You will notice that the clock hands are missing. So, let’s select the “Clock hand” from the inventory and insert it into the empty slot. After that, tap on the clock hand to start the interaction.
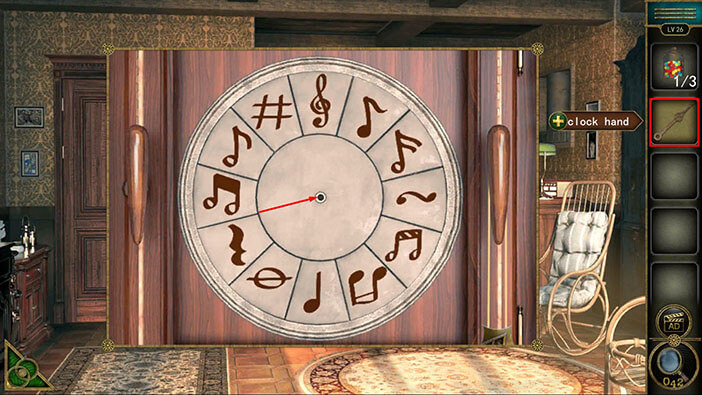
Five clock hands will appear, and each will point to a certain note. Our task is to memorize/write down the notes. We should start from the number twelve and work our way clockwise (the first note is at the 1 o’clock position, the second note is at the 5 o’clock position, etc.)
Once you’re done, tap on the green button in the bottom left corner of the screen to go back.
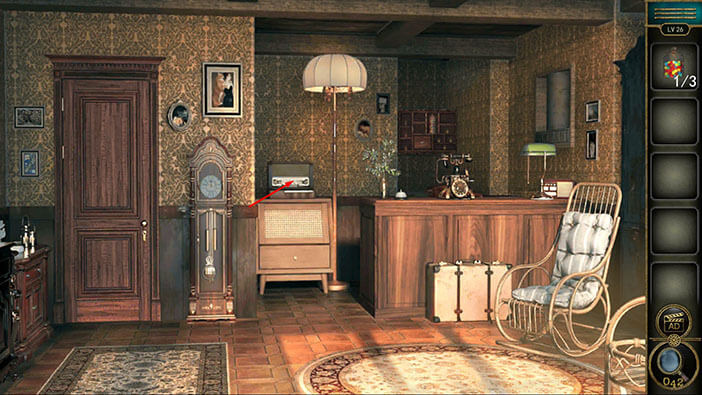
Next, tap on the radio, located just below the lamp, to take a closer look at it, and tap again to start the interaction.
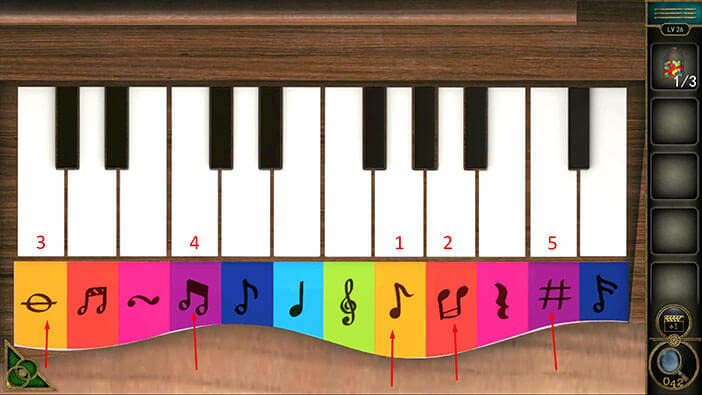
Let’s tap on the notes that we saw on the clock.
First, tap on the eighth note.
Second, tap on the ninth note.
Third, tap on the first note.
Fourth, tap on the fourth note.
Fifth, tap on the tenth note.
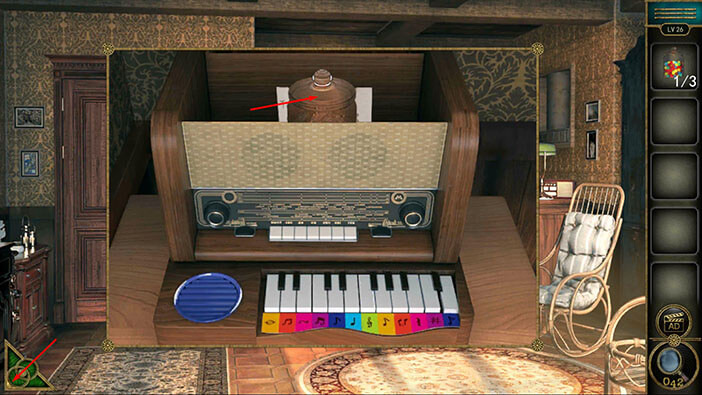
As soon as you tap on the correct notes, the top of the radio will open, and inside you will find another “Candy Jar” and the “Note with telephone number”. Tap on them to pick them up.
After that, tap on the green button in the bottom left corner of the screen to go back.
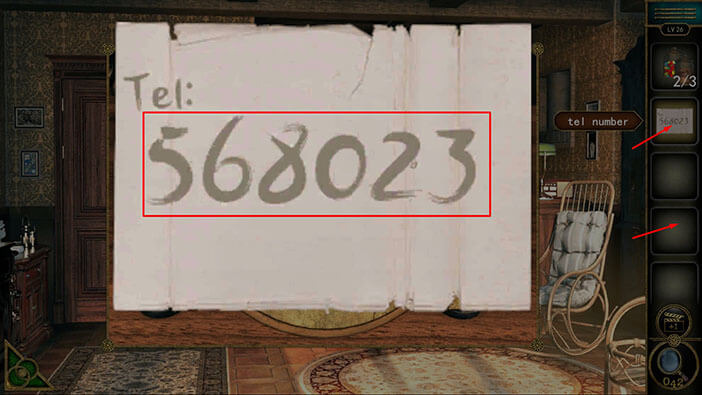
Next, let’s tap on the telephone again to take a closer look at it.
Tap on the “Note with telephone number” to examine it. We will see the number “568023”. Let’s memorize/write down this number.
Once you’re done, tap on the empty inventory slot to put down the note.
Let’s dial the number that we saw on the note. The number was “568023”.
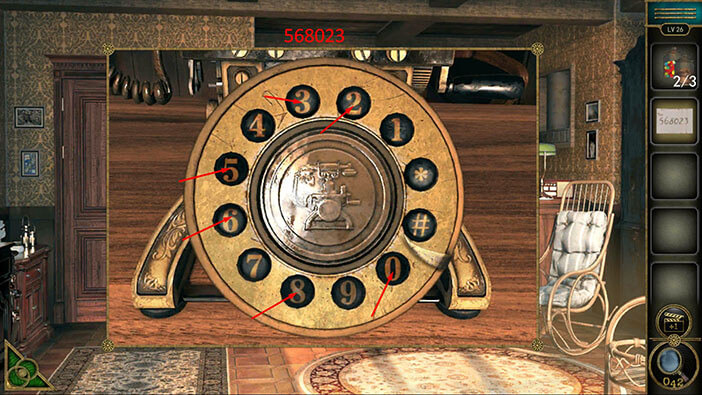
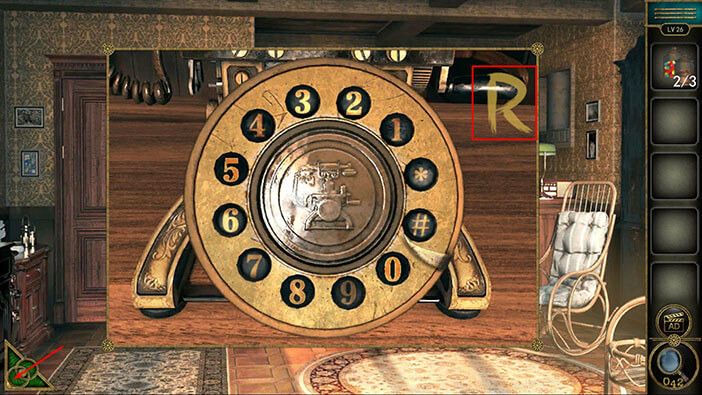
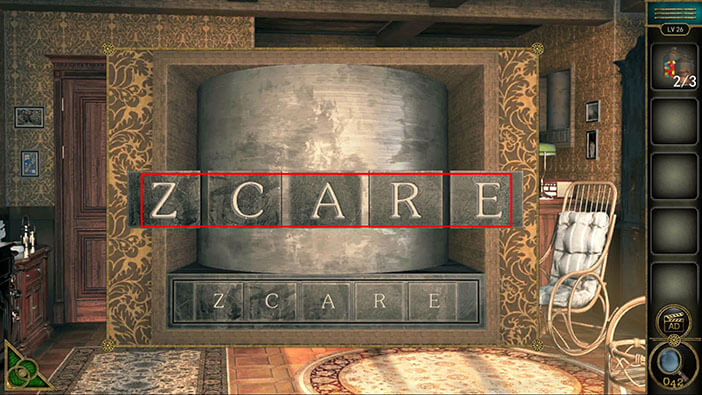
Once you dial the correct number, the five letters will appear, “ZCARE”. Let’s memorize/write down these letters because they represent a hint for the next puzzle.
Once you’re done, tap on the green button in the bottom left corner of the screen to go back.
Next, let’s tap on the pillar on the wall on the right to take a closer look at it. Here, you will notice a five-letter password. Tap on it to start the interaction.

Let’s enter the password that we previously discovered. The password was “ZCARE”.
Once you enter the correct password, you will discover another “Candy Jar”. Tap on it to pick it up.
After that, tap on the green button in the bottom left corner of the screen to go back.
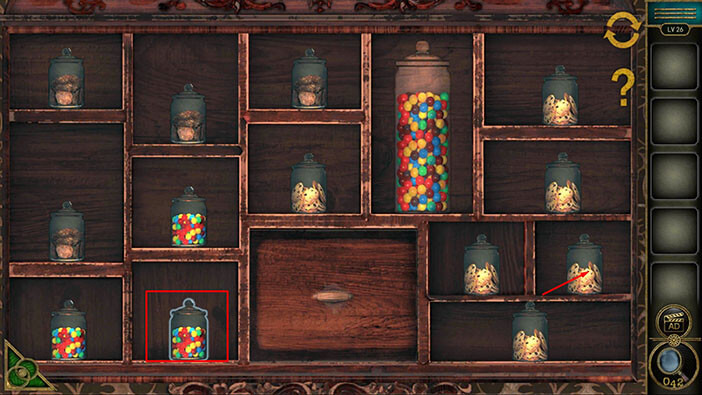
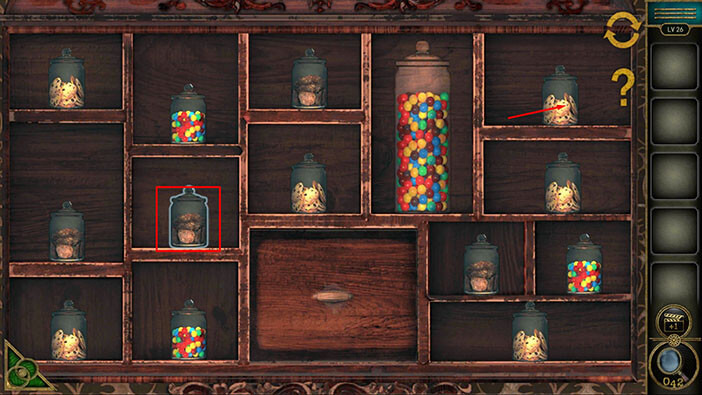
Next, let’s tap on the shelf to take a closer look at it.
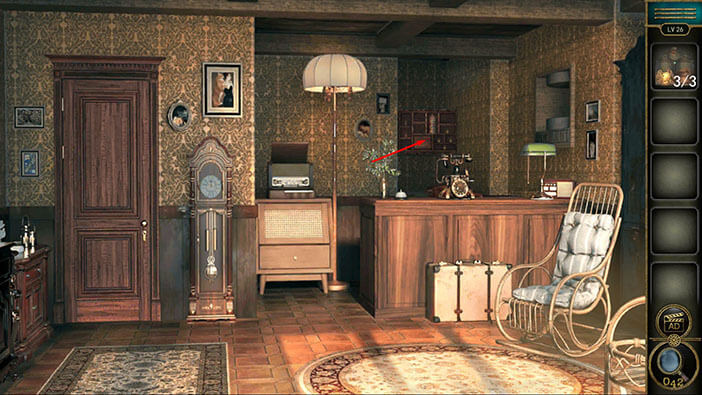
You will notice shelves with “Candy Jars”, but you will notice that three shelves are empty. So, let’s select the “Jars” from the inventory and put them on the empty shelves.
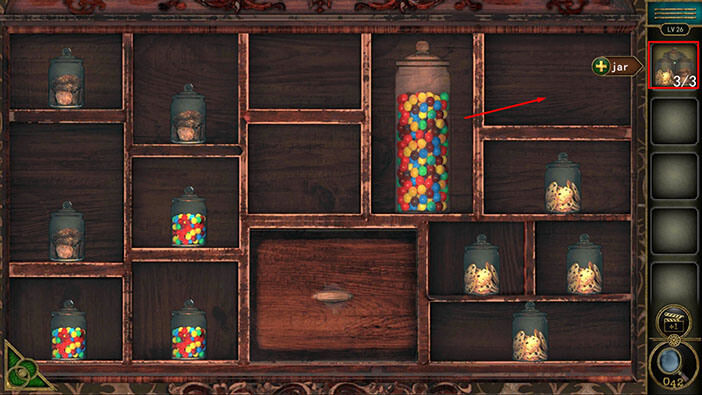
Next, let’s tap on the question mark on the right to take a look at the hint.
Here, we can see that two jars of the same type shouldn’t be placed vertically next to each other. Let’s tap on the question mark again to go back.

Our next task is to rearrange the jars. We will do that in several steps. Let’s begin.
Step 1
You will notice that the jars are divided into three rows on the left side, and four rows on the right side.
Let’s select the second jar in the third row on the left, and swap its position with the second jar in the third row on the right.
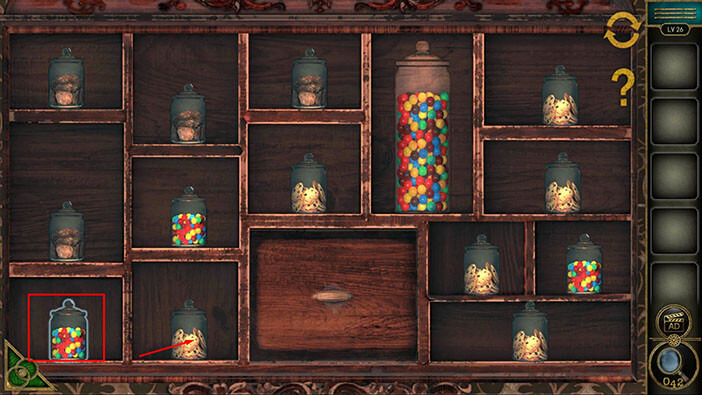
Step 2
Let’s select the first jar in the third row on the left, and swap its position with the second jar in the third row on the left.
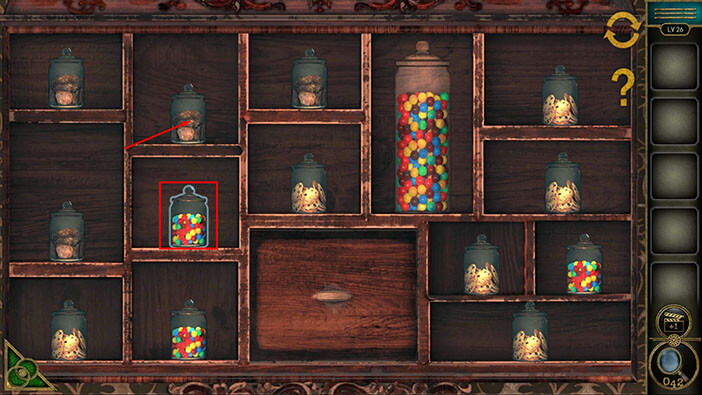
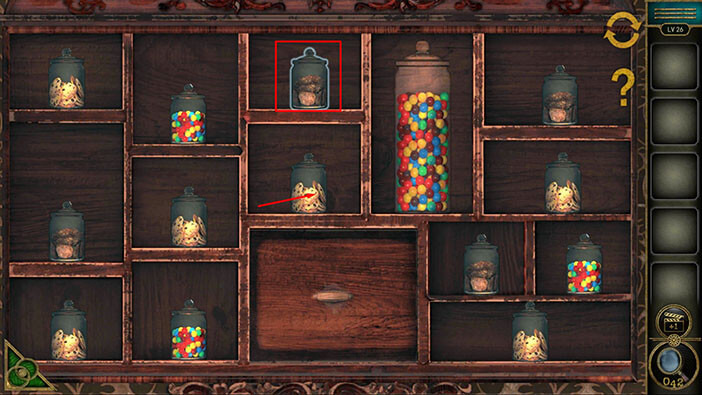
Step 3
Let’s select the second jar in the second row on the left, and swap its position with the second jar in the first row on the left.
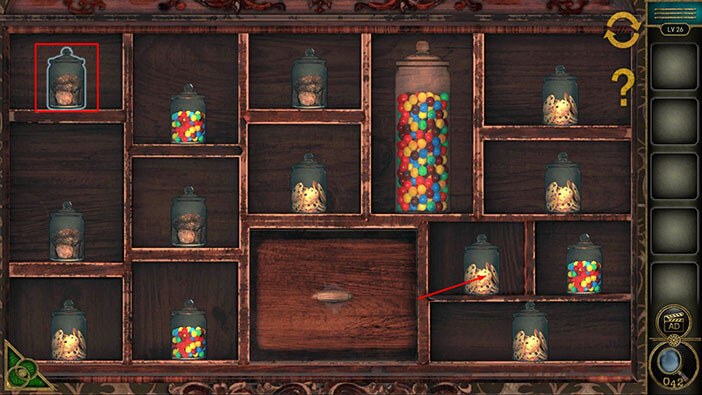
Step 4
Let’s select the first jar in the first row on the left, and swap its position with the first jar in the third row on the right.
Step 5
Let’s select the second jar in the second row on the left, and swap its position with the first jar in the first row on the right.
Step 6
Lastly, let’s select the third jar in the first row on the left, and swap its position with the third jar in the second row on the left.
As soon as you rearrange the jars, the compartment at the bottom of the shelf will open, and inside you will find a “Key”. Let’s tap on it to pick it up.
After that, tap on the green button in the bottom left corner of the screen to go back.
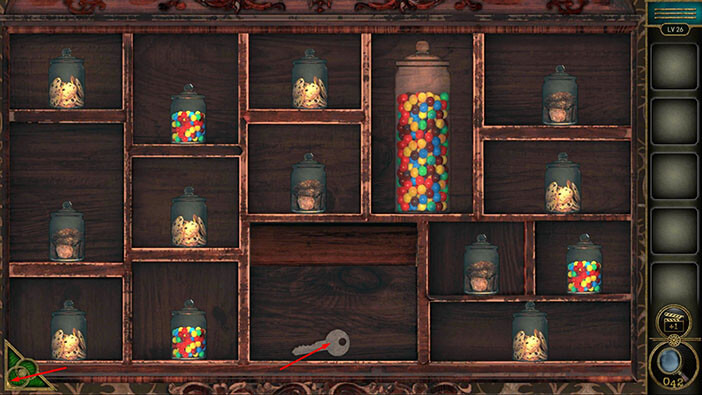
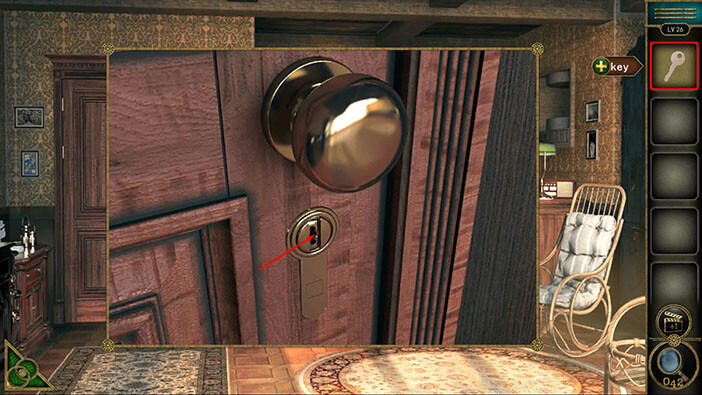
Let’s tap on the door on the left to take a closer look at it. Select the “Key” from the inventory and use it to unlock the door.
After that, tap on the door to proceed to the next level.
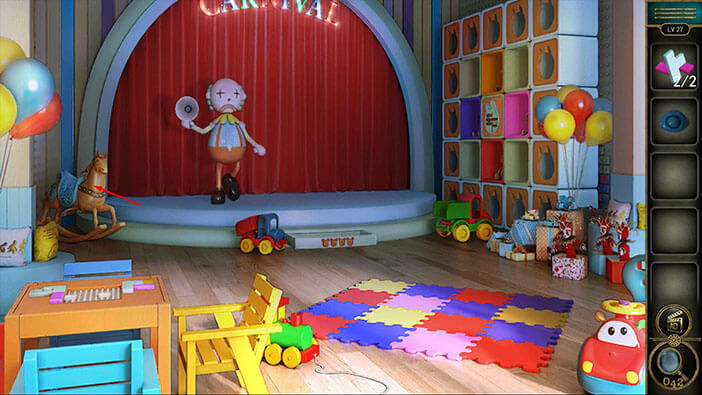
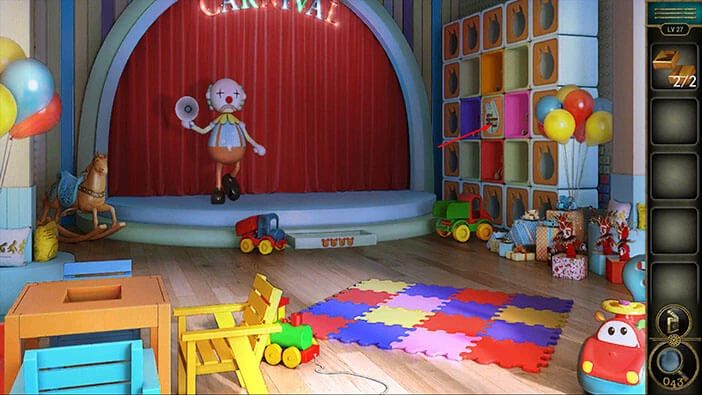
Level 27
Let’s explore the twenty-seventh level. On the right side of the floor, you will notice a very colorful carpet. Let’s tap on it to take a closer look.
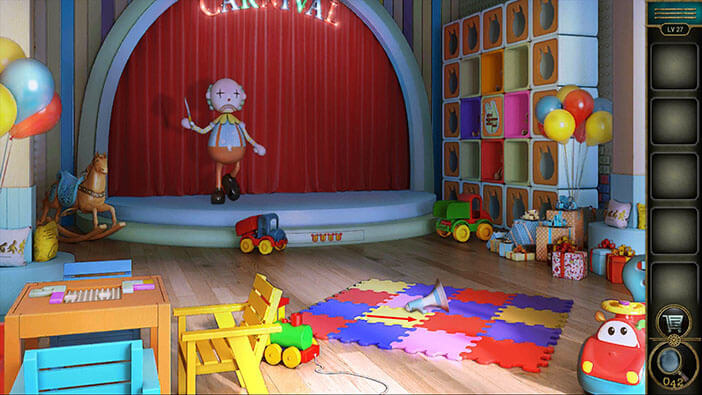
Here, you will find a “Loudspeaker”. Let’s tap on it to pick it up.
After that, tap on the green button in the bottom left corner of the screen to go back.
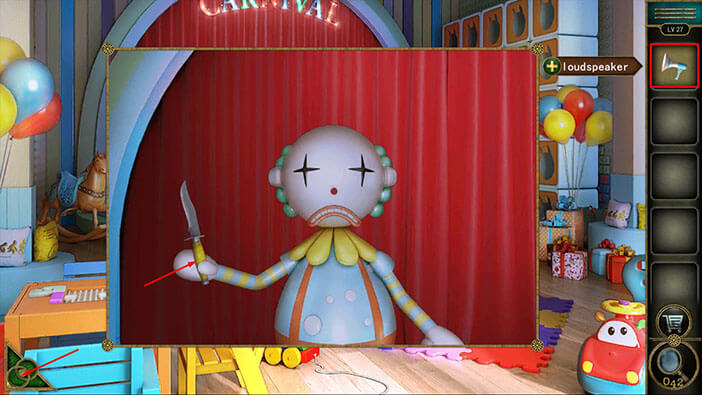
Next, let’s tap on the clown to take a closer look at it.

You will notice that the clown is holding a knife. So, let’s select the “Loudspeaker” from the inventory and give it to the clown. Once the clown takes the “Loudspeaker” you will get the “Knife” (that it was previously holding).
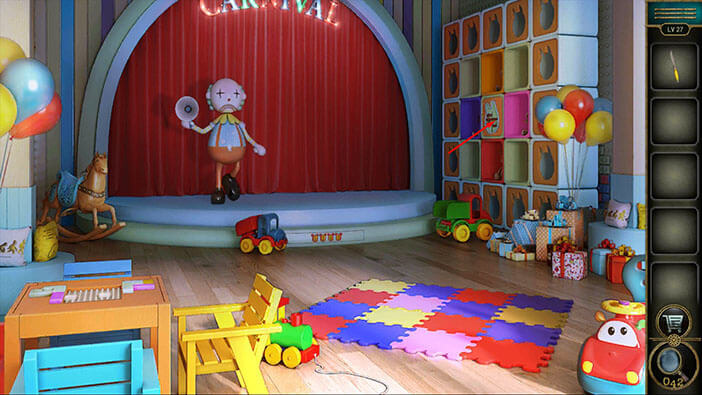
Once you’re done, tap on the green button in the bottom left corner of the screen to go back.
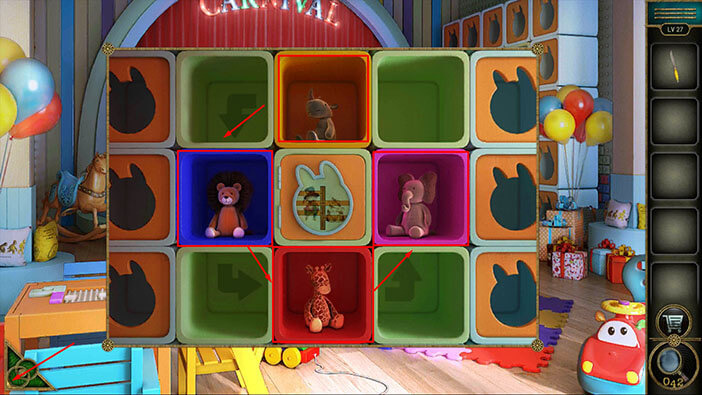
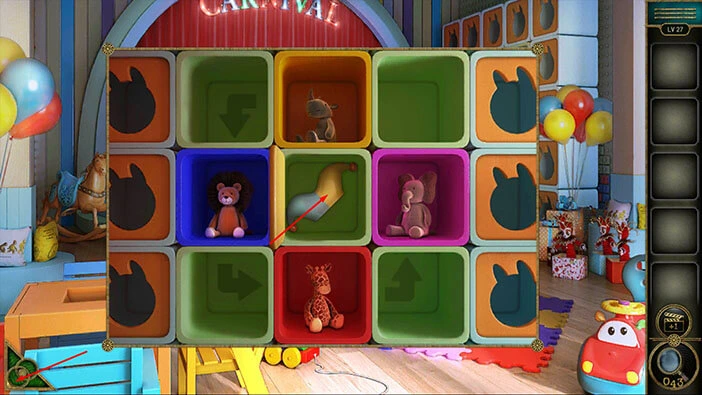
Next, let’s tap on the large shelf on the right to take a closer look at it.
Let’s look at the animals inside the cubes. The orange cube at the top is our starting point, so the first color = Yellow.
Next, we can see an arrow pointing from the yellow cube to the blue cube. So, the second color = Blue.
Next, we can see an arrow pointing from the blue cube to the red cube. So, the third color = Red.
Next, we can see an arrow pointing from the red cube to the pink cube. So, the fourth color = Pink.
With all that said, we have the following order of colors, Yellow, Blue, Red, and Pink. Memorize/write down this information because we will need it for the next puzzle.
Once you’re done, tap on the green button in the bottom left corner of the screen to go back.
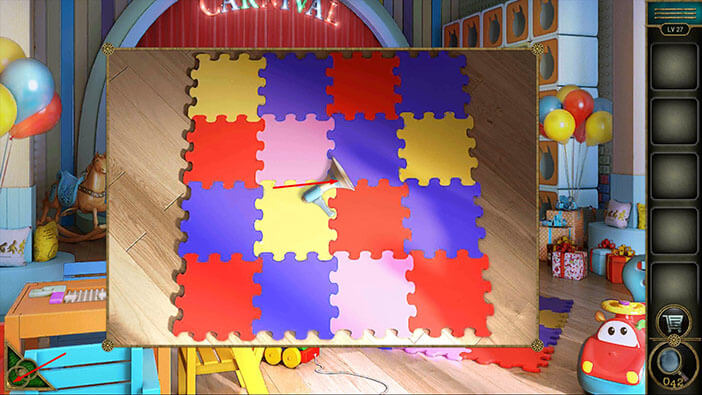
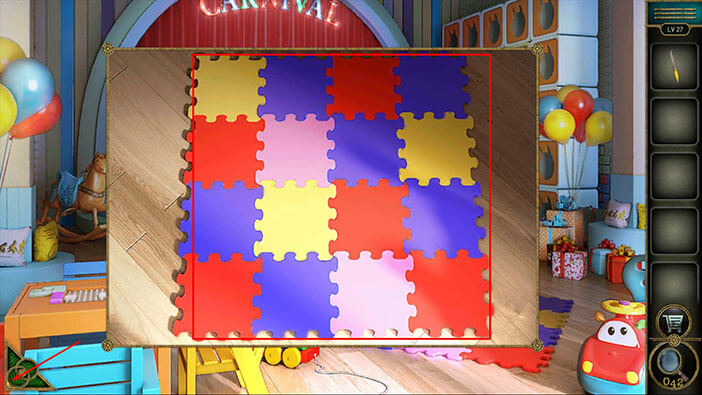
Let’s take another look at the colorful carpet.

You will notice that the carpet has sixteen parts (squares) and the colors of the squares are matching the colors of the cubes that we saw previously.
So, let’s count the number of the squares, following the order of the colors that we already discovered. So, here we have,
Yellow = 3 squares
Blue = 6 squares
Red = 5 squares
Pink = 2 squares
When we put this information together, we will get the number “3652”. Memorize/write down this number, because it represents the solution for the next puzzle.
Once you’re done, tap on the green button in the bottom left corner of the screen to go back.
Next, below the stage, just to the right of the toy truck, you will notice a secret compartment. Let’s tap on it to take a closer look, and tap again to start the interaction.

Let’s enter the code “3652” that we discovered previously.
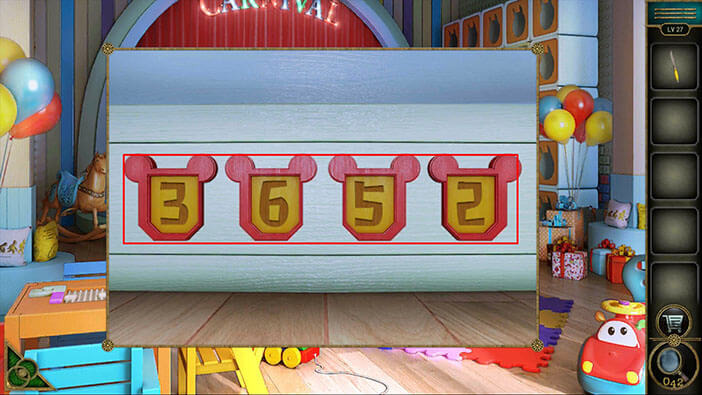
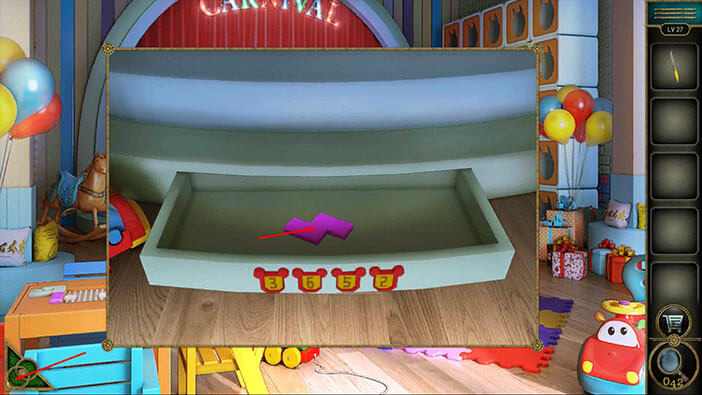
You will unlock the drawer, and inside you will find “Building Blocks”. Tap on them to pick them up.
After that, tap on the green button in the bottom left corner of the screen to go back.
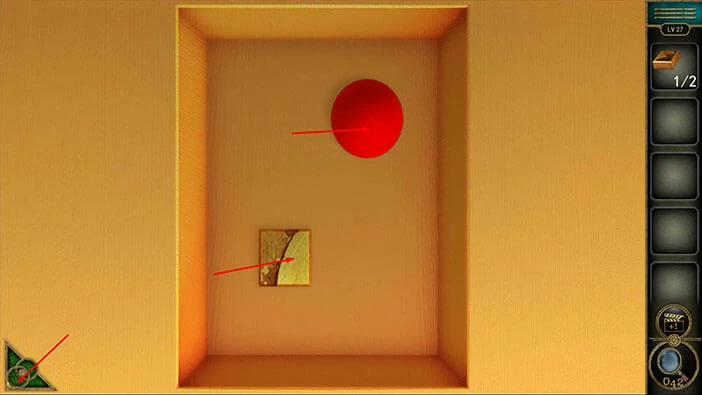
Next, let’s tap on the presents on the right to take a closer look at them.

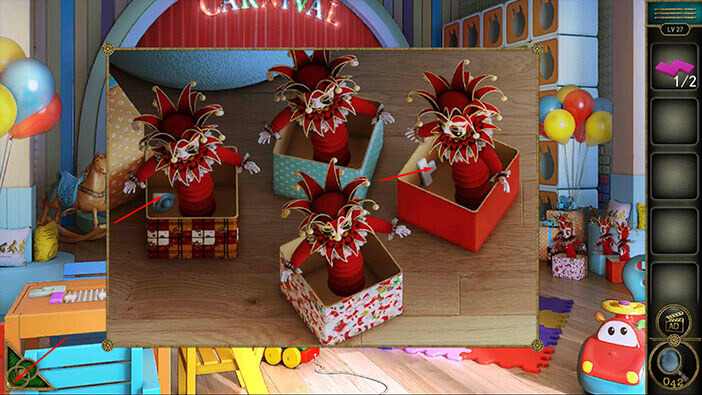
Select the “Knife” from the inventory and use it to open the presents.
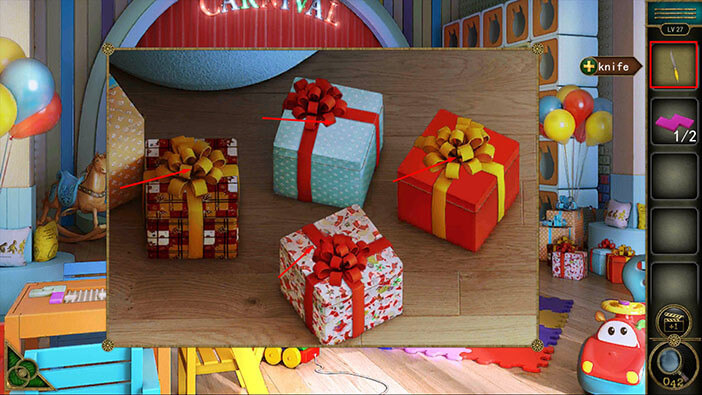
In the box on the right, you will notice another “Building Block” and in the box on the left you will find an “Eye”. Tap on these items to pick them up.
After that, tap on the green button in the bottom left corner of the screen to go back.
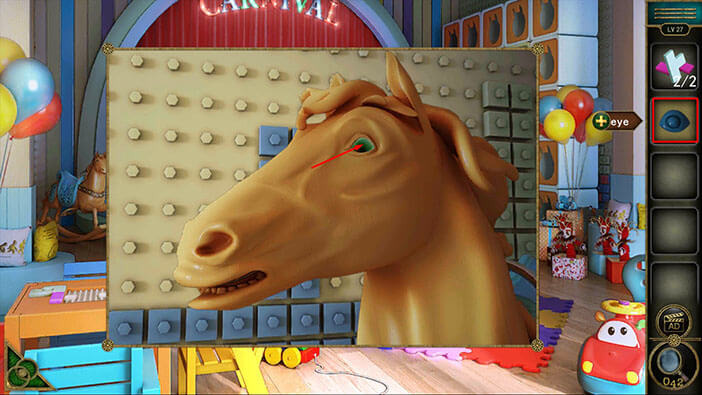
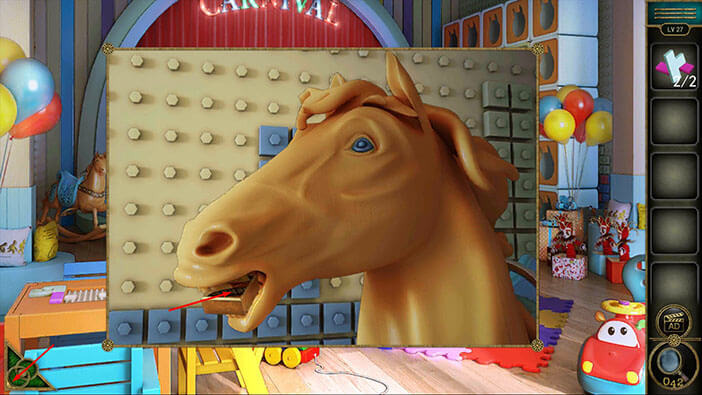
Next, let’s tap on the wooden horse in the left corner of the room to take a closer look at it.
You will notice that the horse is missing an eye. So, let’s select the “Eye” from the inventory and insert it into the empty eye socket.
The horse will open its mouth, and inside you will find a “Game prop”. Tap on it to pick it up.
After that, tap on the green button in the bottom left corner of the screen to go back.
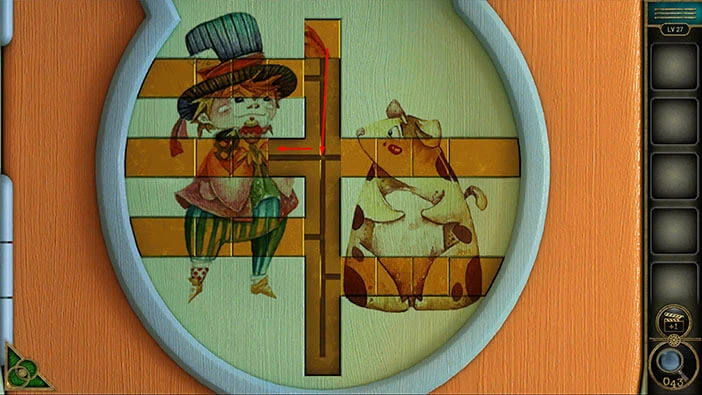
Next, let’s tap on the puzzle, located on the table on the left, to take a closer look at it.

Next, let’s select the “Building blocks” from the inventory and place them on the table.
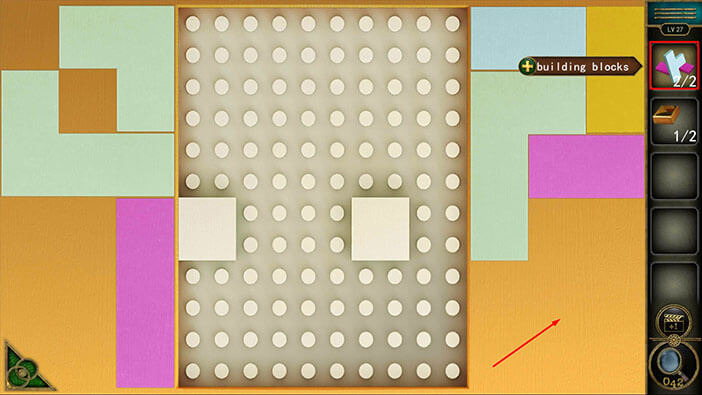
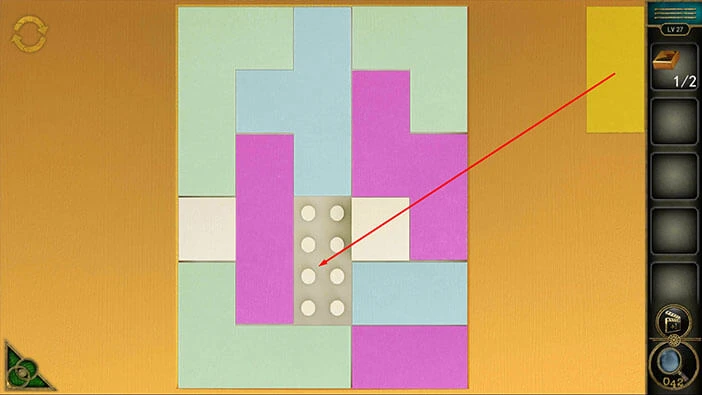
Our next task is to assemble the puzzle by using the building blocks. We will do this puzzle in several steps. Let’s begin.
Step 1
Select the building block located in the bottom left corner on the left side, and place it next to the white square on the right side.
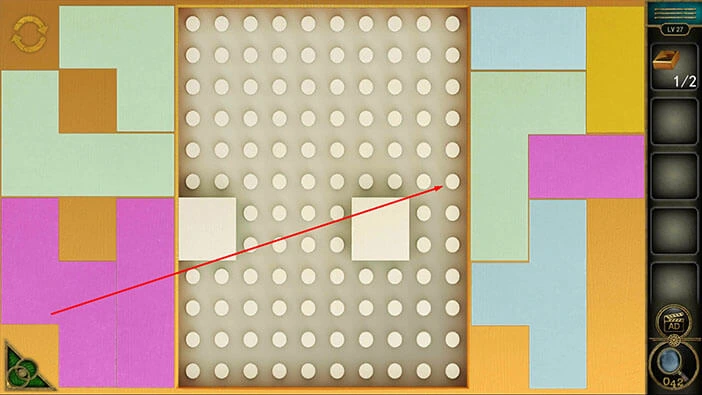
Step 2
Select the building block located in the top left corner on the left side, and place it into the bottom left corner of the puzzle.
Step 3
Select the building block located in the top right corner on the left side, and place it into the top right corner of the puzzle.
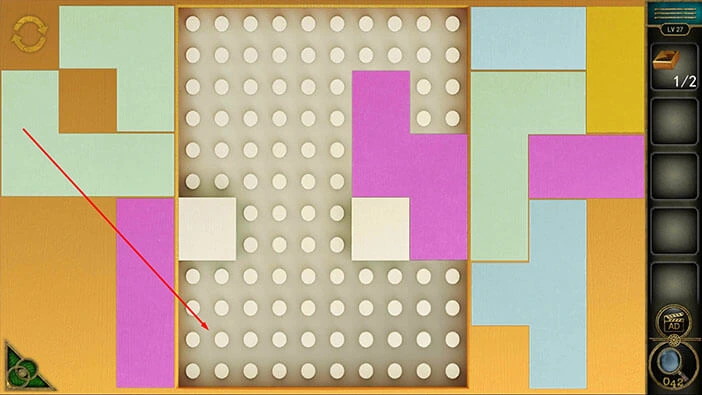
Step 4
Select the building block located in the top left corner on the right side, and place it into the top left corner of the puzzle.
Step 5
Select the building block located in the bottom left corner on the right side, and place it at the top of the puzzle.
Step 6
Select the last building block on the left side, and place it on the left side of the puzzle.
Step 7
Select the horizontal building block on the right side, and place it into the bottom right corner of the puzzle.
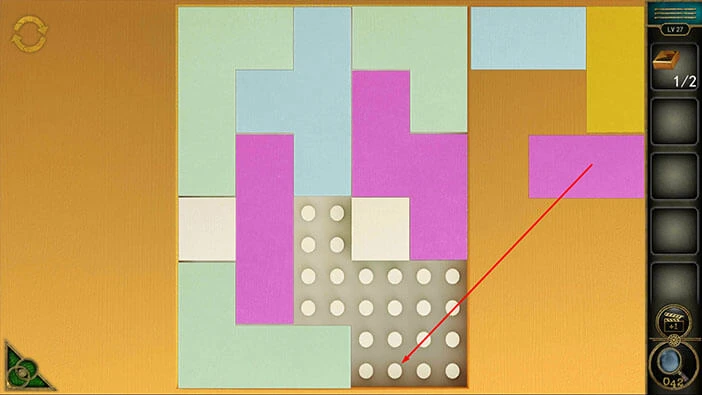
Step 8
Select the other horizontal building block on the right side, and place it into the bottom right corner of the puzzle.

Step 9
Select the last building block on the right side, and place it into the empty space.
As soon as you solve the puzzle, you will open the secret compartment in the table. Here, you will discover another “Game prop” and the “Red Nose”. Tap on these two items to pick them up.
After that, tap on the green button in the bottom left corner of the screen to go back.
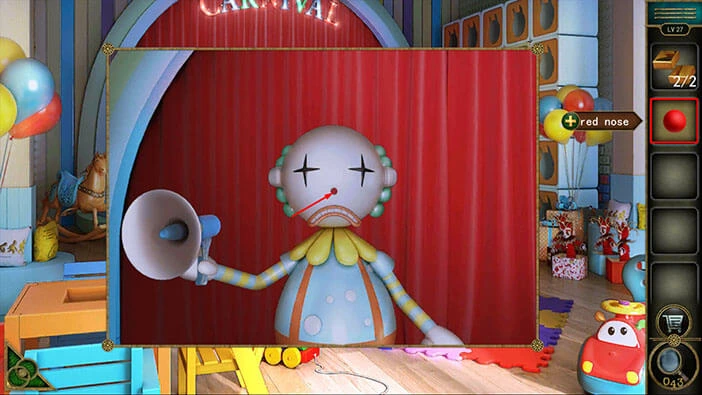
Let’s tap on the clown again to take a closer look at it.

You will notice that the clown doesn’t have a nose. So, let’s select the “Red Nose” from the inventory and insert it into the empty slot.
We will come back to the clown a bit later. For now, let’s tap on the green button in the bottom left corner of the screen to go back.
Next, let’s tap on the shelf on the right, again, to take a closer look at the cubes. After that, tap on the cube in the middle to start the interaction.
You will notice that the two puzzle pieces are missing. So, let’s select the “Game props” from the inventory and insert them into the empty slots.
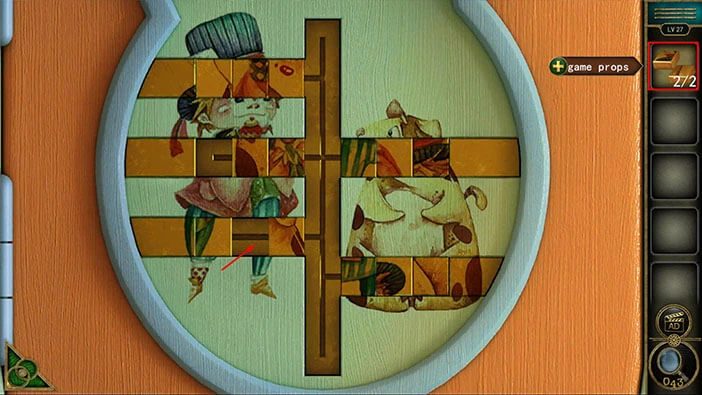
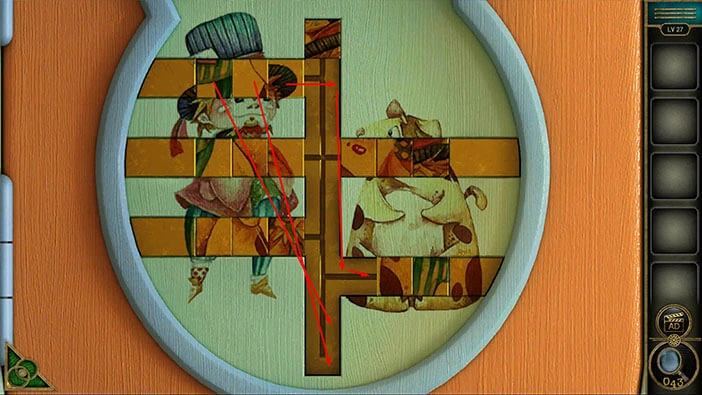
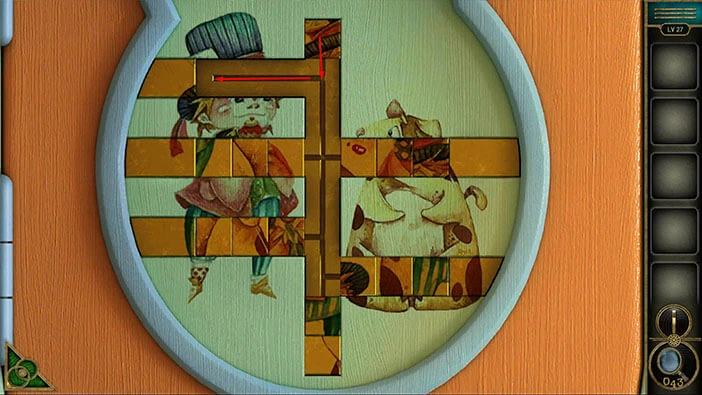
Our next task is to assemble the puzzle. We will do this in several steps. Let’s begin.
NOTE: This is one of the randomized puzzles, so the puzzle pieces might be in different positions in your game.
Step 1
Select the first puzzle piece from the second row on the right, and drag it all the way to the top.

Step 2
Select the third piece in the first row on the left, and drag it to the first slot in the second row on the right.
After that, select the other two pieces in the first row on the left, and drag them to the bottom.
Step 3
Next, select the puzzle piece at the top, and drag it into the first slot in the first row on the left.
Step 4
Select the first and second puzzle pieces from the first row on the right, and drag them to the bottom.

Step 5
Select the third piece from the first row on the right, and drag it into the second slot in the first row on the left.

Step 6
Next, let’s select the first piece at the bottom, and drag it to the top. After that, let’s select the second piece from the bottom, and drag it to the third slot in the first row on the right.

Step 7
Next, let’s select the first puzzle piece from the second row on the right, and drag it into the third slot in the first row on the left.

Step 8
Next, let’s select the puzzle piece from the top and drag it into the first slot in the first row on the right. After that, select the first puzzle piece in the third row on the right, and drag it to the top.
Step 9
Select the two puzzle pieces from the first row on the right and drag them to the top.

Step 10
Select the second puzzle piece from the row on the left and drag it to the third slot in the first row on the right.

Step 11
Select the puzzle piece from the top, and drag it into the second slot in the first row on the right.

Step 12
Select the third puzzle piece from the first row on the left, and drag it into the first slot in the first row on the right. After that, take the other two puzzle pieces from the first row on the left, and drag them to the bottom.
Step 13
Select the first puzzle piece at the top, and drag it into the first slot in the second row on the left. After that, take the other puzzle piece at the top, and drag it into the second slot in the second row on the left.

Step 14
Select the first puzzle piece from the first row on the right, and drag it to the top.
Step 15
Select the first puzzle piece from the bottom, and drag it into the third slot in the second row on the left. After that, select the next puzzle piece from the bottom, and drag it into the first slot in the first row on the right.
Step 16
Select the second and third puzzle pieces from the second row on the right and drag them to the top.

Step 17
Select the first puzzle piece from the third row on the left, and drag it into the third slot in the second row on the right.
Step 18
Select the puzzle piece from the top and drag it into the first slot in the third row on the left.
Step 19
Select the puzzle piece from the bottom and drag it into the second slot in the third row on the left.

Step 20
Select the first slot in the first row on the right, and drag it into the second slot in the second row on the right.

Step 21
Select the puzzle piece from the bottom, and drag it into the first slot in the first row on the right.
Step 22
Select the puzzle piece at the top, and drag it into the first slot in the second row on the right.

Step 23
Select the third puzzle piece from the second row on the left, and drag it into the third slot in the third row on the left.
Step 24
Lastly, select the puzzle piece from the top, and drag it into the third slot in the second row on the left.
As soon as you assemble the puzzle, the secret compartment will open and inside you will find a “Hat”. Tap on it to pick it up.
After that, tap on the green button in the bottom left corner of the screen to go back.
Let’s tap on the clown again to take a closer look at it.

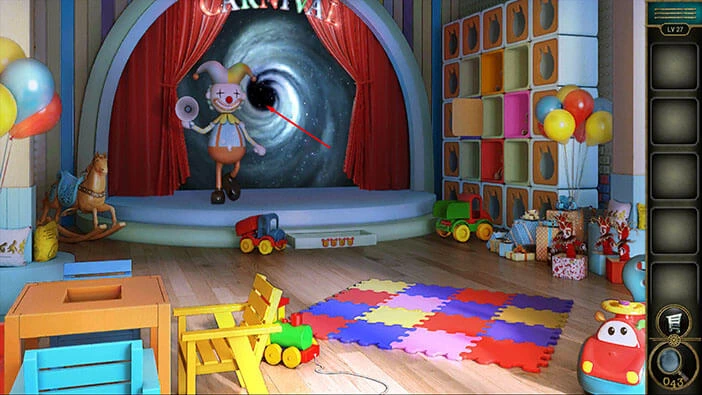
Select the “Heat” from the inventory and put it on the clown’s head.
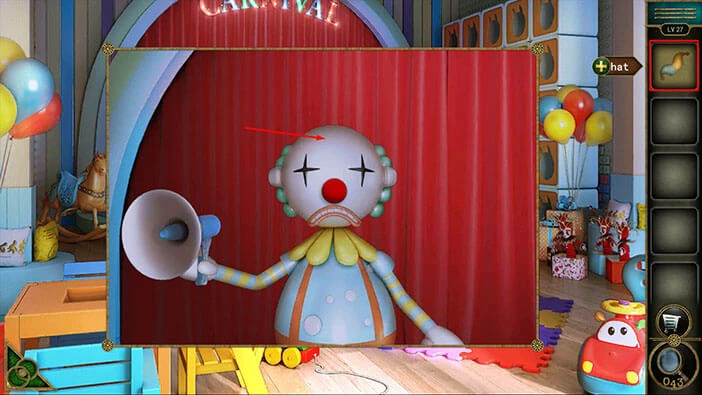
With that, you will open the portal behind the clown. Let’s tap on the portal to proceed to the next level.
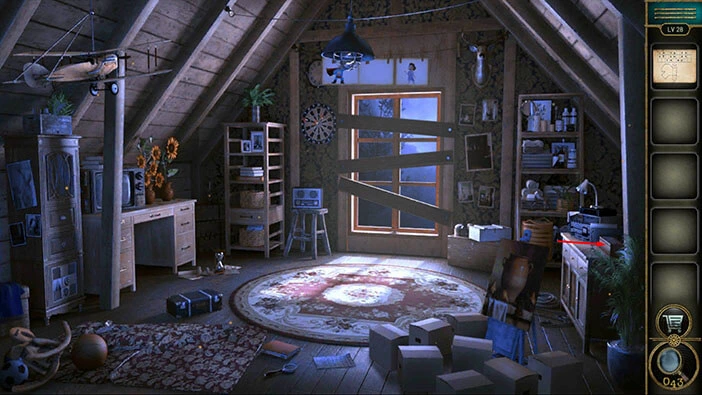
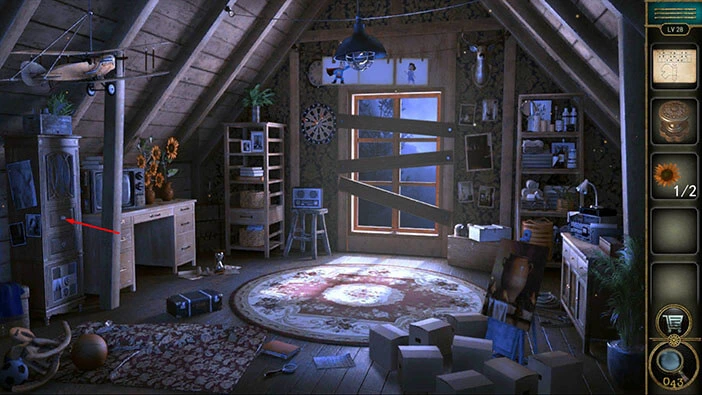
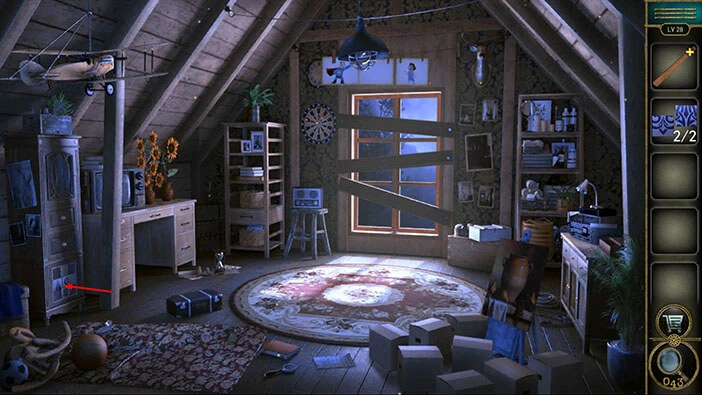
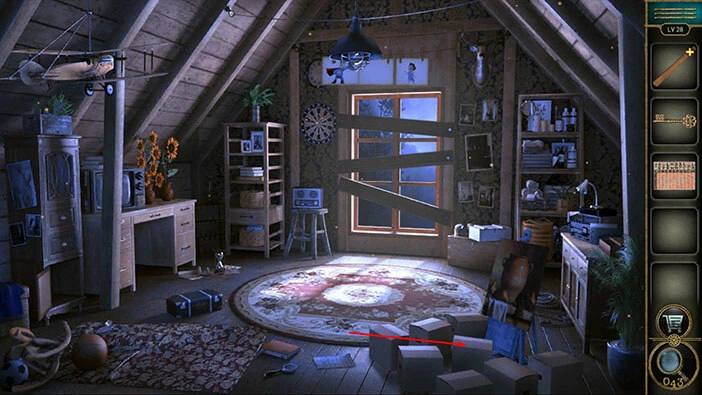
Level 28
Let’s explore the twenty-eighth level. Let’s tap on the note above the window to take a closer look at it.
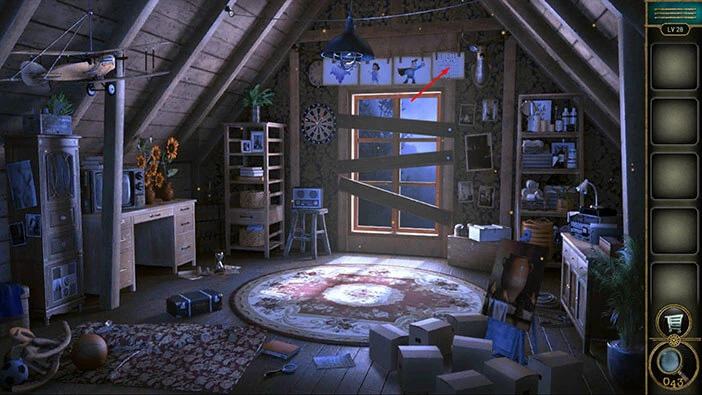
Tap on the “Paper with hints” on the right to pick it up.
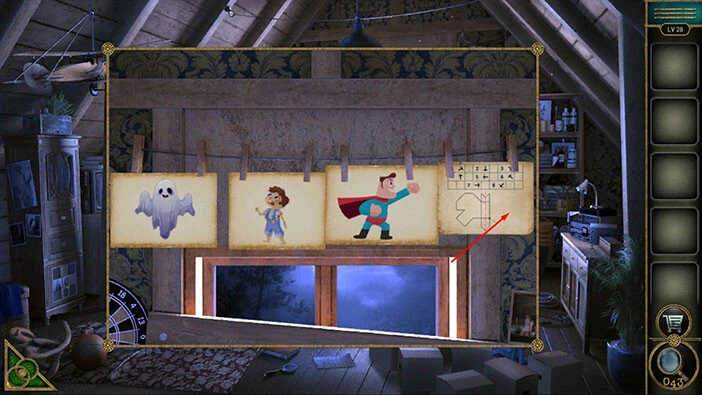
Let’s rearrange the pictures. Tap on the picture of a boy to select it, then tap on the picture of a Superman to swap their positions.
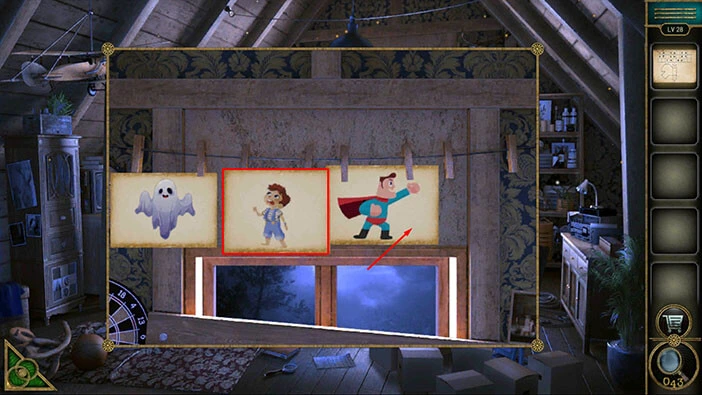
Next, let’s tap on the picture of a Superman to select it, then tap on the picture of a ghost to swap their positions.
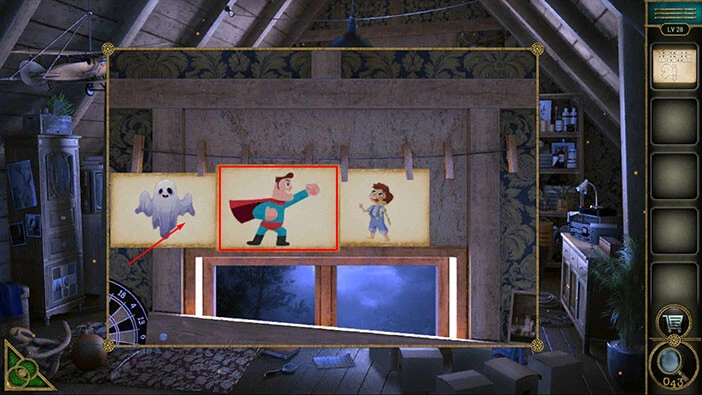
Superman will fire a laser from his eyes and it will destroy the ghost. Instead of the ghost, an “Achievement Star” will appear. Tap on it to pick it up.
After that, tap on the green button in the bottom left corner of the screen to go back.

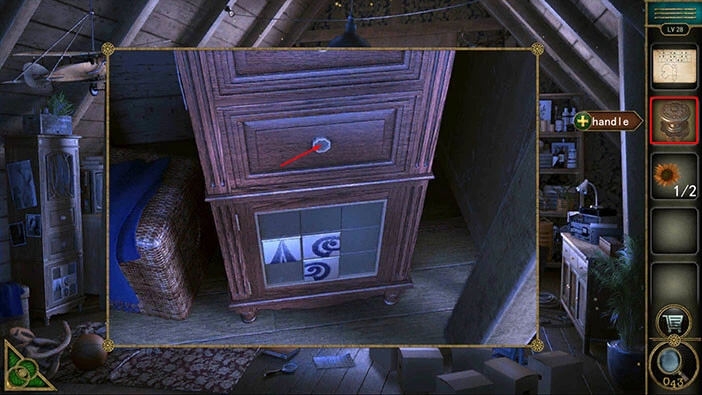
Next, on the cabinet on the right you will notice a small box. Let’s tap on it to take a closer look.
Here, you will notice a “Handle” and a “Grape”. Tap on these two items to pick them up.
After that, tap on the green button in the bottom left corner of the screen to go back.
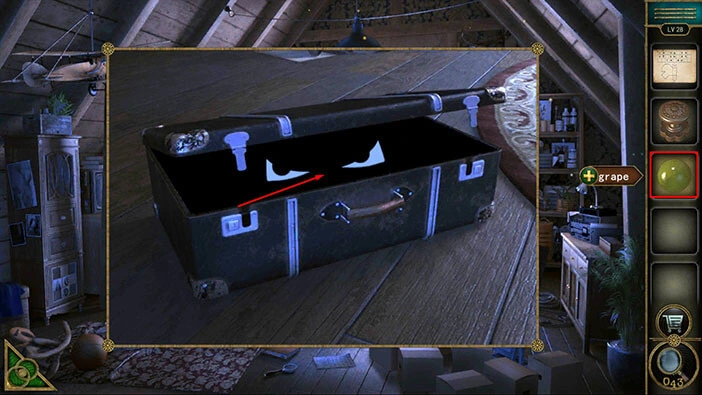
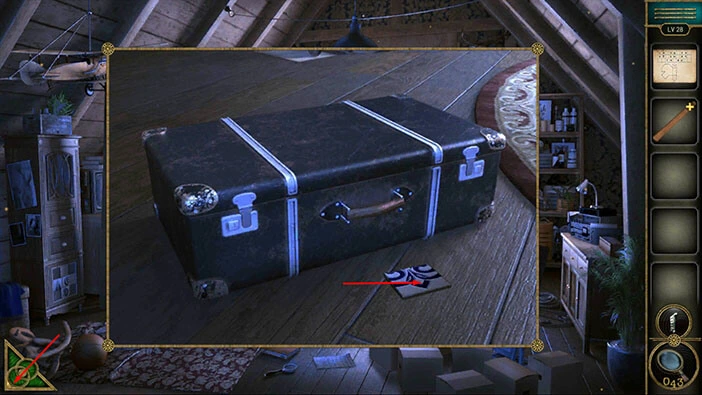
On the right side of the floor, you will notice a suitcase. Let’s tap on it to take a closer look. Tap on the suitcase again to start the interaction. Two large eyes will appear from the suitcase, so it looks like some strange animal is hidden inside.

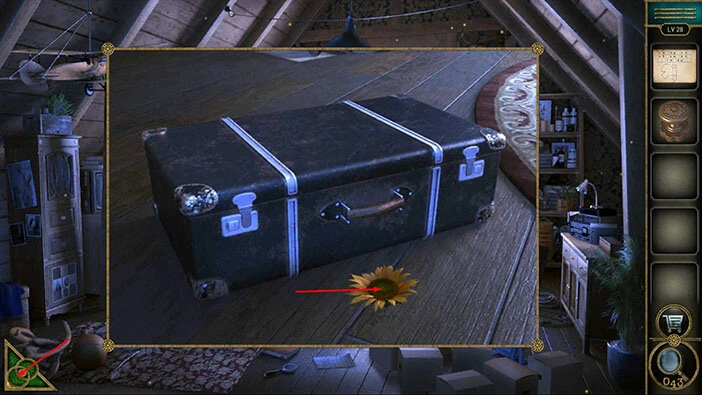
Let’s select the “Grape” from the inventory and give it to the monster in the suitcase.
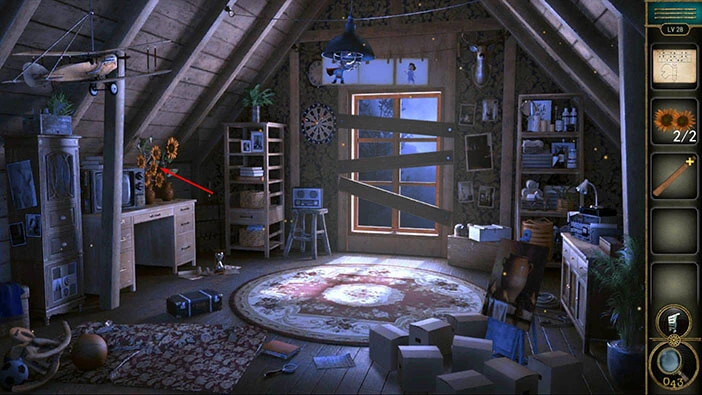
The monster will take the “Grape” and it will give you a “Sunflower”. Tap on it to pick it up.
After that, tap on the green button in the bottom left corner of the screen to go back.
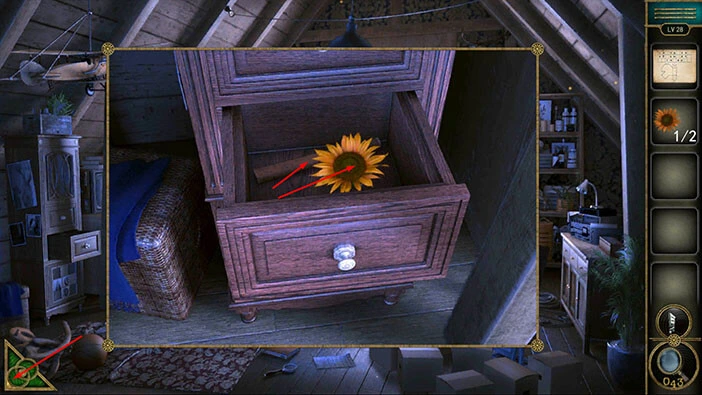
Next, let’s tap on the cabinet on the left to take a closer look at it.
You will notice that there is no handle on the drawer. So, let’s select the “Handle” from the inventory and insert it into the empty slot.
In the drawer, you will find a “Sunflower” and a “Hammer handle”. Tap on these two items to pick them up.
After that, tap on the green button in the bottom left corner of the screen to go back.
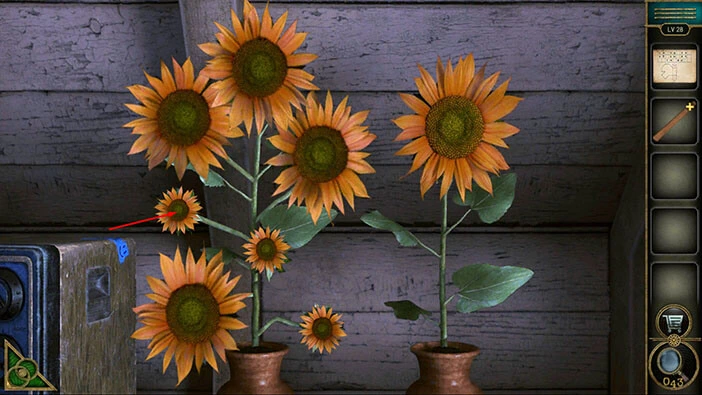
If you take a look at the desk on the left, you will notice several sunflowers. Tap on them to take a closer look.
You will probably notice that two sunflowers are missing from the plant on the left. So, let’s select the “Sunflowers” from the inventory and insert them into the empty slots.
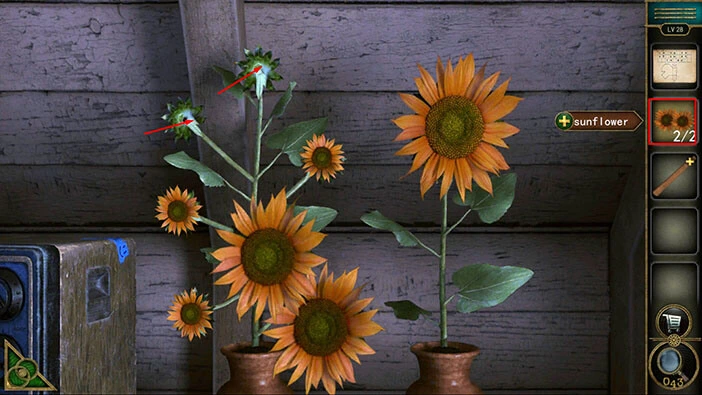
You will also notice that some sunflowers are larger than others. Our next task is to change the size of all sunflowers to large. We will do this puzzle in several steps. Let’s begin.
Step 1
Tap on the small sunflower in the top right.
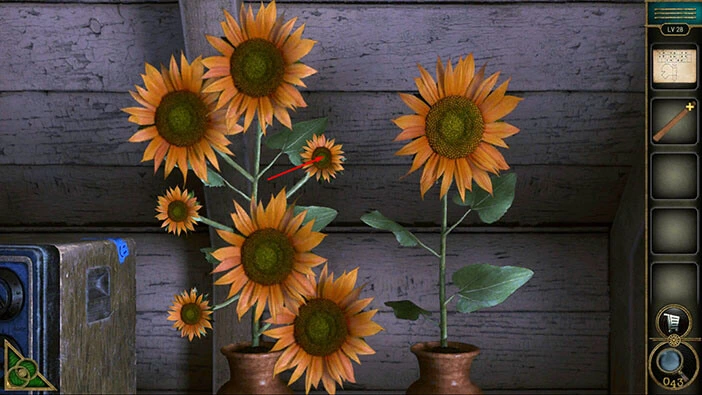
Step 2
Tap on the small sunflower at the top.
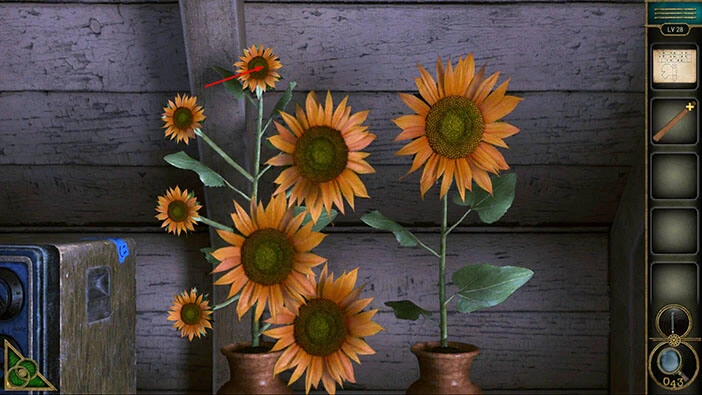
Step 3
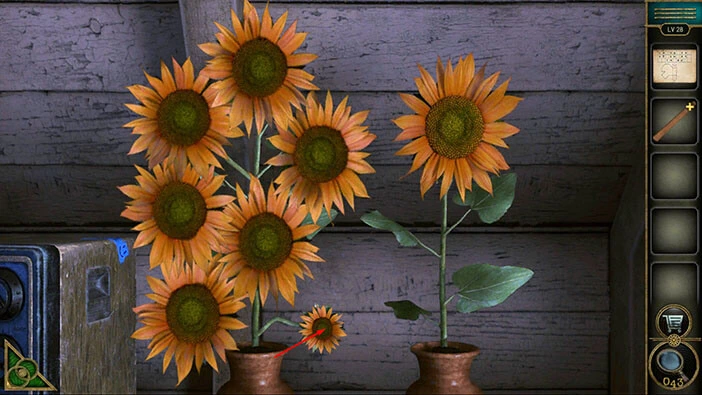
Tap on the small sunflower at the bottom left.
Step 4
Tap on the small sunflower on the left.
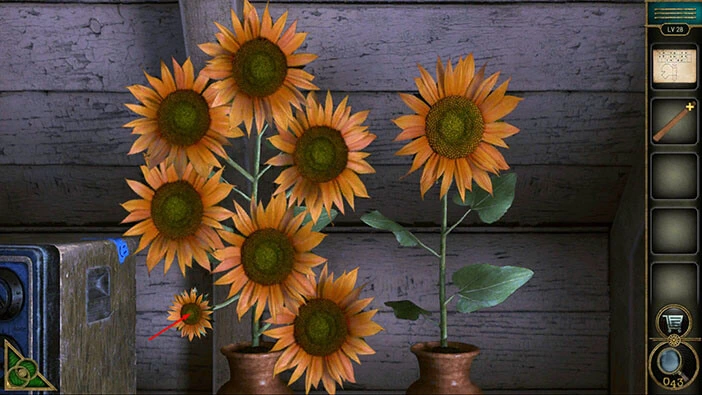
Step 5
Lastly, let’s tap on the small sunflower in the bottom right.
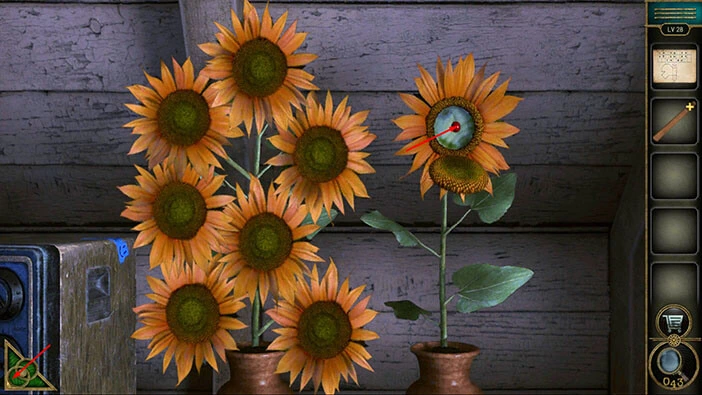
As soon as you solve the previous puzzle, the sunflower on the right will open, and inside you will find a “Cherry”. Tap on it to pick it up.
After that, tap on the green button in the bottom left corner of the screen to go back.
Let’s tap on the suitcase to take a closer look at it, and we will tap again to start the interaction with the monster in the suitcase.

Select the “Cherry” from the inventory and give it to the monster.
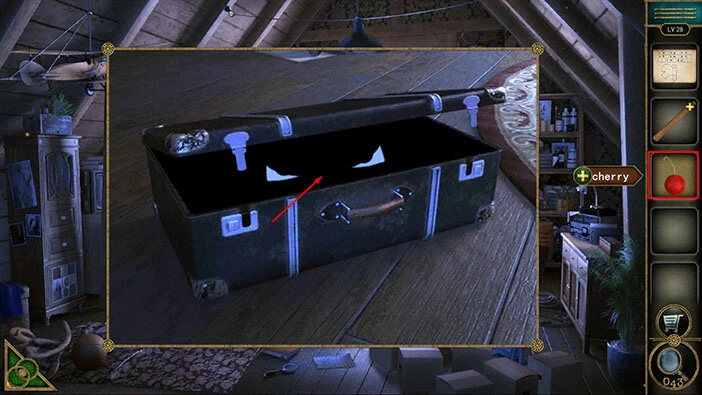
The monster will take the “Cherry” and it will give you a “Puzzle piece”. So, let’s tap on the “Game Prop” to pick it up.
After that, tap on the green button in the bottom left corner of the screen to go back.
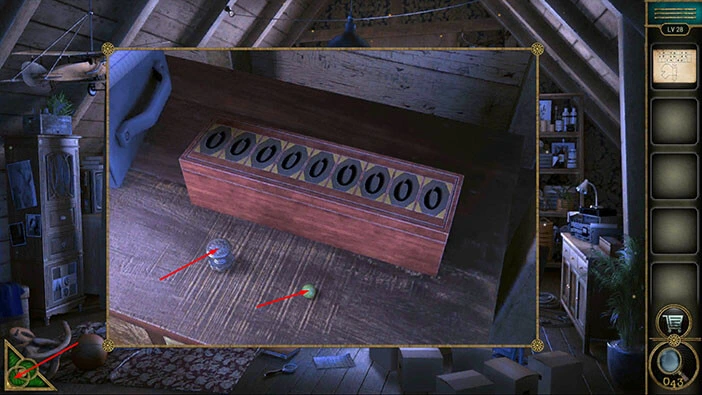
Next, let’s tap on the small box on the table on the right to take a closer look at it, and tap again to start the interaction.

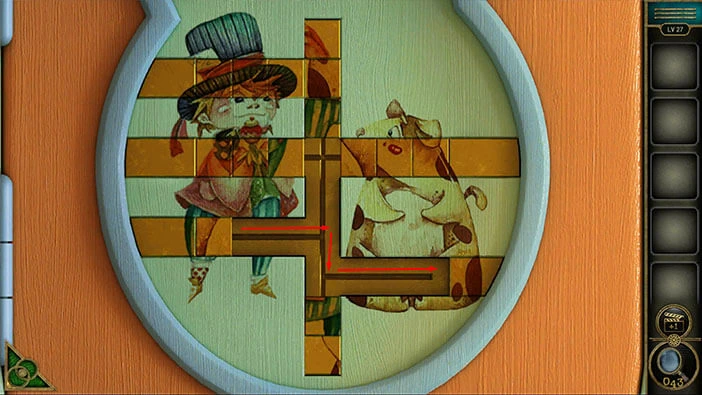
We will need a nine-digit code in order to unlock the box. Let’s tap on the “Paper with hints” in our inventory to examine it.
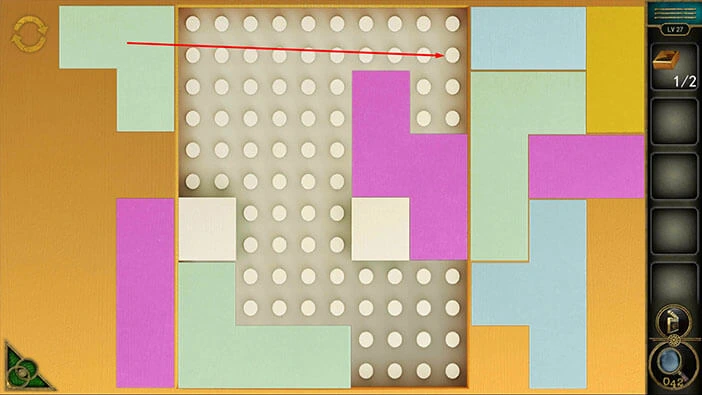
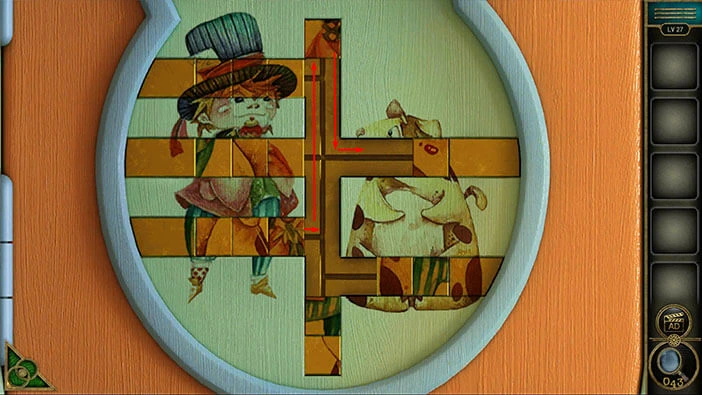
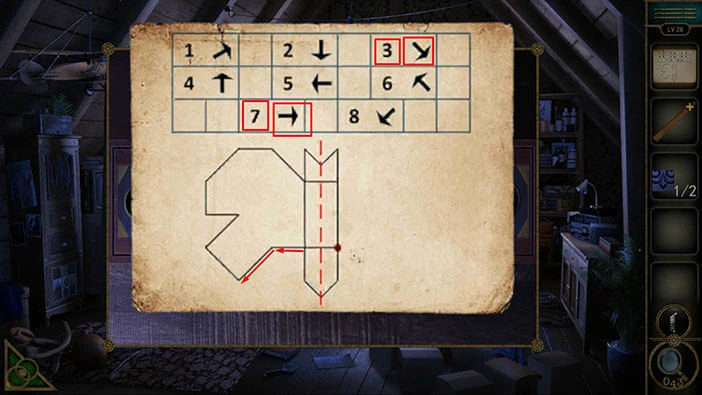
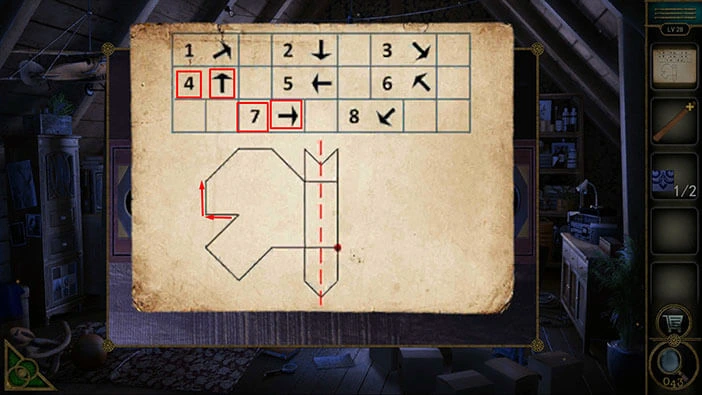
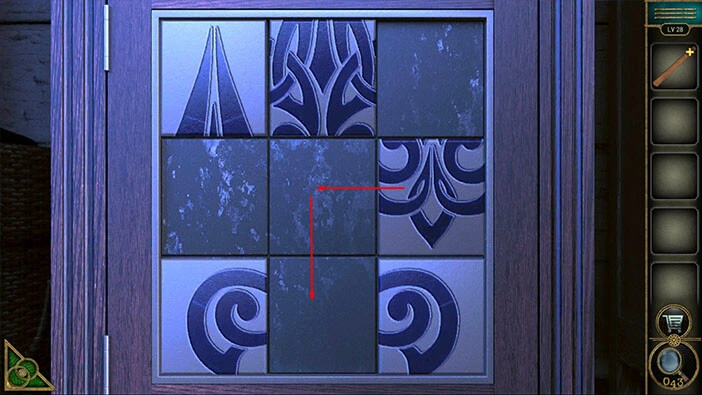
Here, we can see a drawing at the bottom, and the red line represents the middle of the paper. The red dot on the line represents the starting point. Our task is to create the same shape on the right. We can recreate the shape by using the arrows at the top. Once we identify the correct arrow, we will also discover one of the digits.
We will do this puzzle in several steps. Let’s begin.
Step 1
We should start by drawing the line to the right, and next to this line, we have the number 7. So, this is our first number. Next, the line should point down and to the right, and we can see the number 3 next to this arrow. So, the number 3 is our second number.
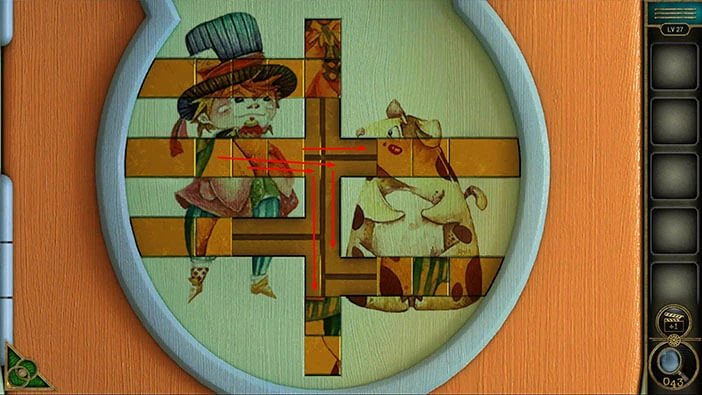
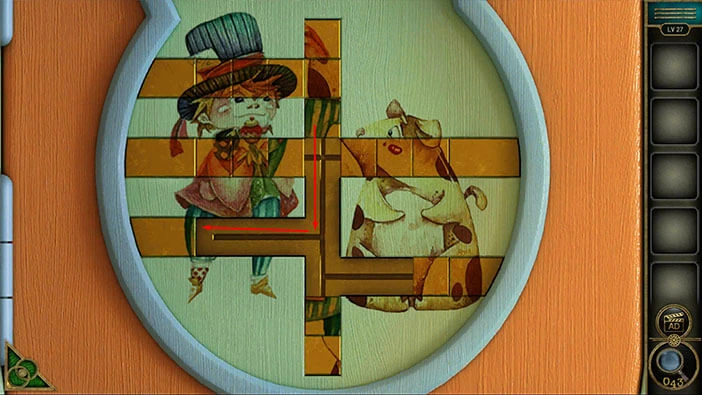
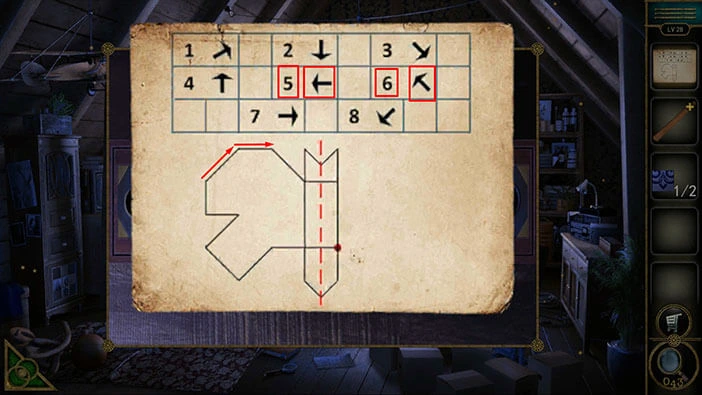
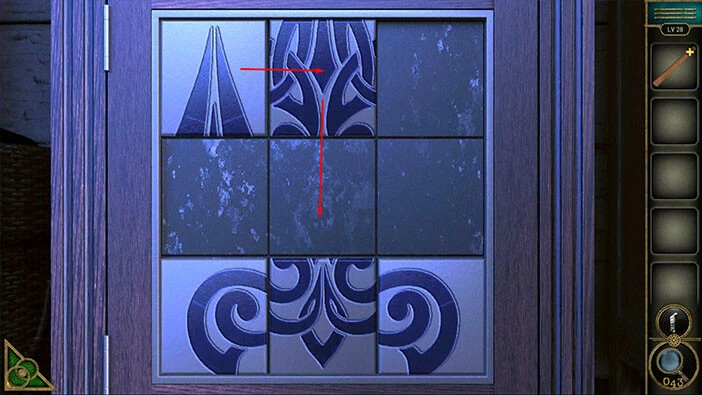
Step 2
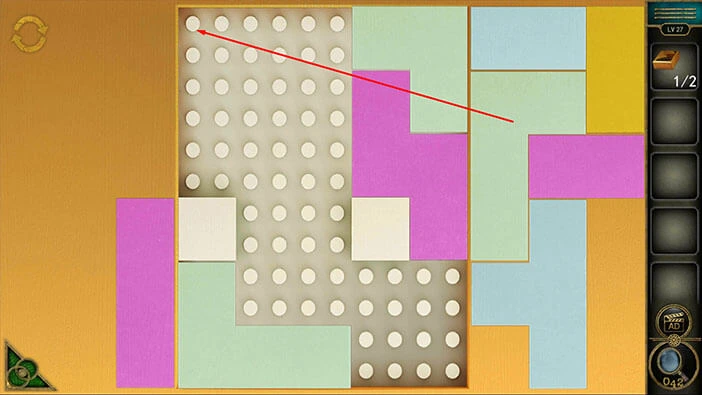
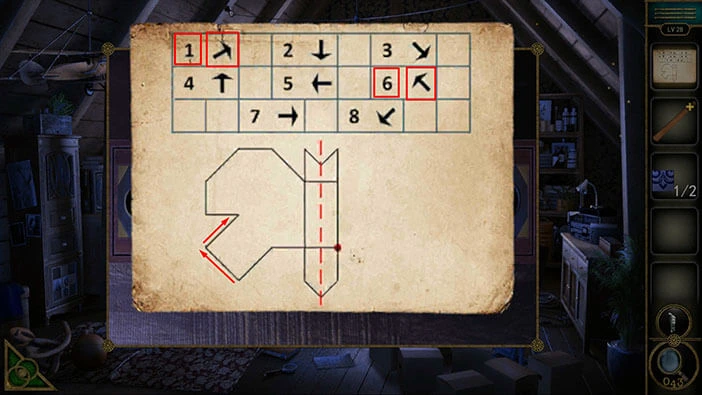
Next, we should draw the line up and to the right, and next to this line, we have the number 1. This is our third number. Next, the line should point up and to the left, and we can see the number 6 next to this arrow. This is our fourth number.
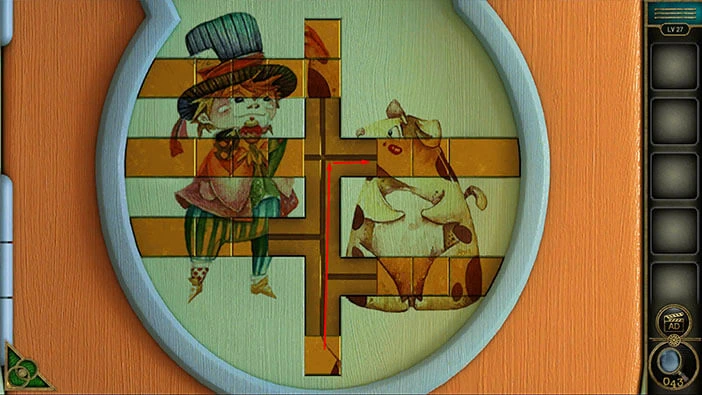
Step 3
Next, we should draw the line to the right, and next to this line, we have the number 7. This is our fifth number. Next, the line should point up, and we can see the number 4 next to this arrow. This is our sixth number.
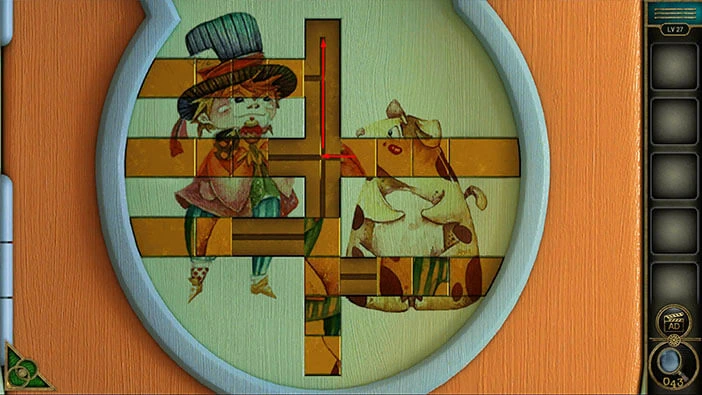
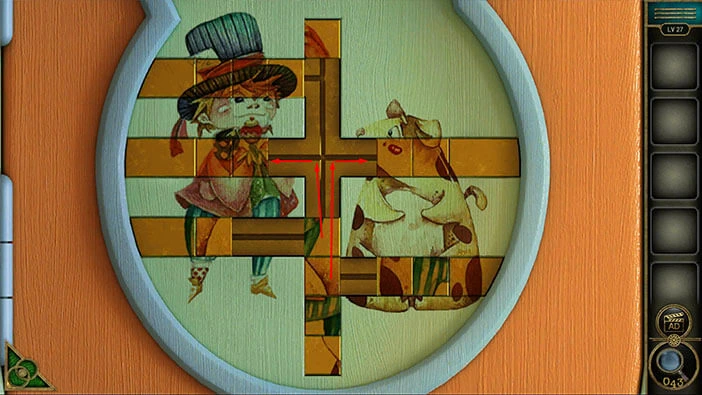
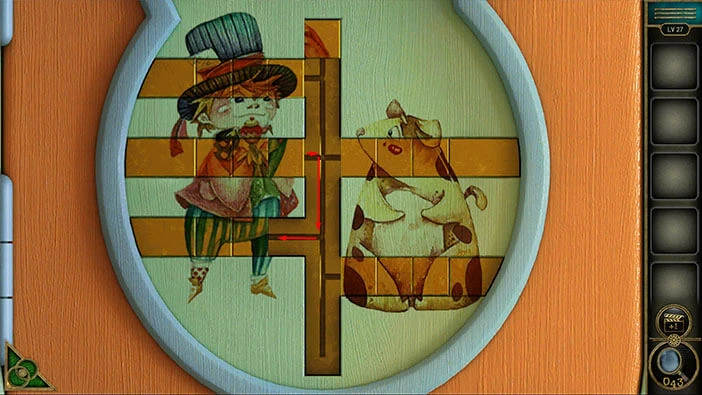
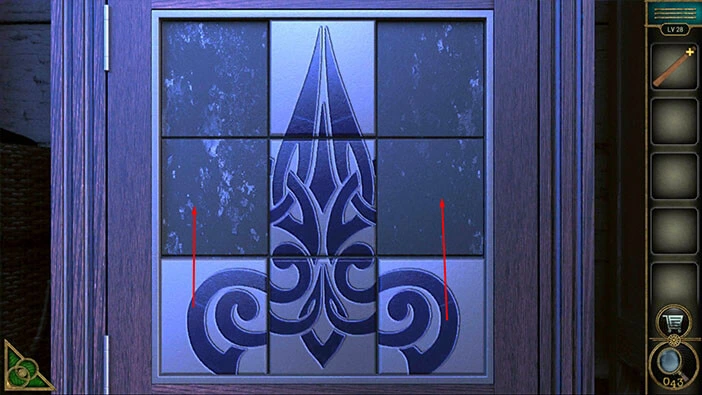
Step 4
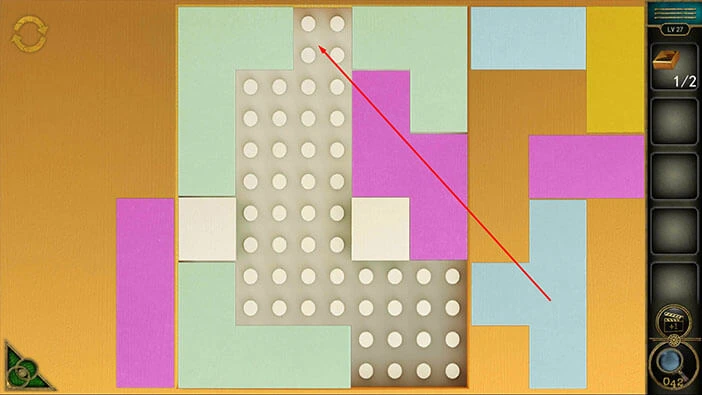
Next, we should draw the line up and to the left, and next to this line, we have the number 6. This is our seventh number. Next, the line should point to the left, and we can see the number 5 next to this arrow. This is our ninth number.
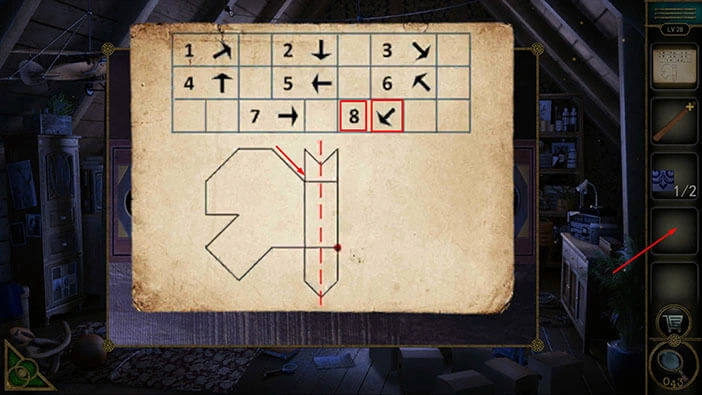
Step 5
Lastly, we should draw the line down and to the left, and next to this line, we have the number 8. This is our ninth number.
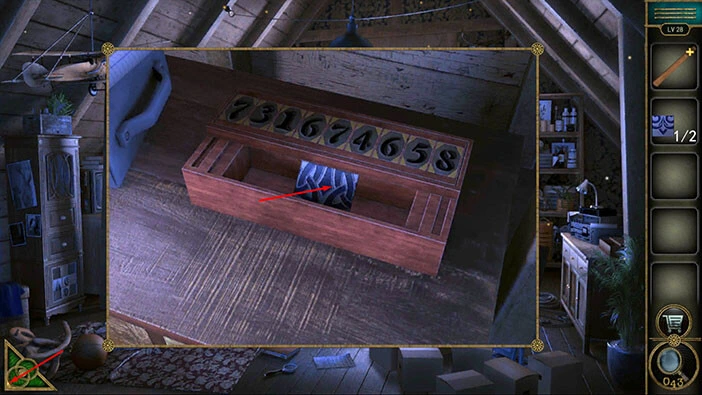
When we put it all together, we will get the number “731674658”. Memorize/write down this number because we will use it to unlock the box.
Once you’re done, tap on the empty inventory slot to put down the “Note with hint”.
Enter the code “731674658” and you will unlock the box.

In the box, you will find another “Puzzle piece”. Let’s tap on it to pick it up.
After that, tap on the green button in the bottom left corner of the screen to go back.
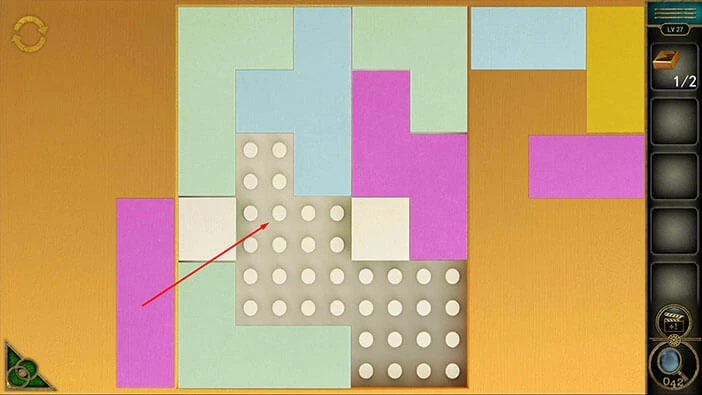
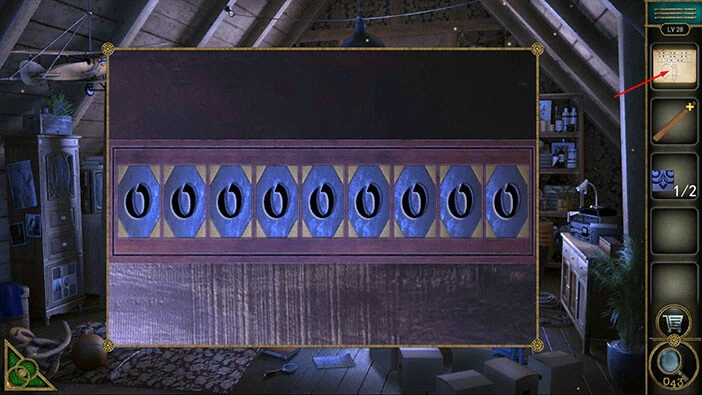
Next, let’s tap on the lower half of the cabinet on the left. Here, you will see another puzzle. Tap on it to start the interaction.
Two puzzle pieces are missing, so let’s select the “Puzzle pieces” from the inventory and insert them into the empty slots.
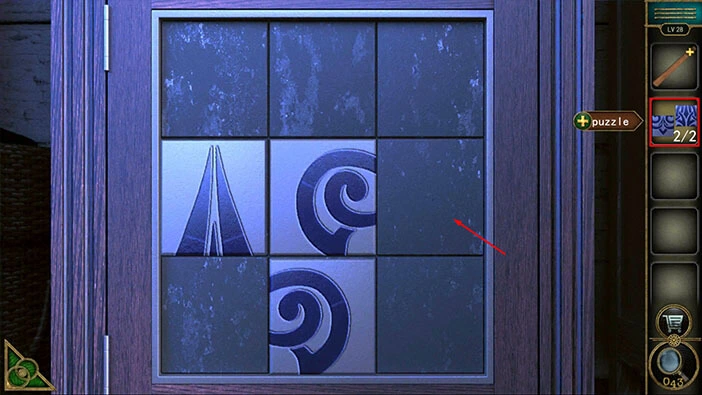
Our next task is to assemble this puzzle. We will do this in several steps. Let’s begin.
Step 1
Select the puzzle piece located in the first slot in the second row, and drag it one slot up. After that, select the puzzle piece in the second slot in the second row and drag it one slot to the left.
Step 2
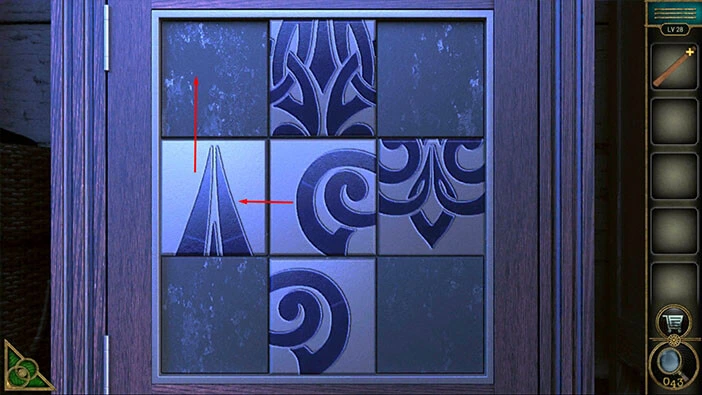
Select the puzzle piece located in the first slot in the second row, and drag it one slot down. After that, select the puzzle piece in the second slot in the third row and drag it one slot to the right.
Step 3
Select the puzzle piece located in the third slot in the second row, and drag it one slot to the left, and then one slot down.
Step 4
Select the puzzle piece located in the second slot in the first row, and drag it one slot down. After that, select the puzzle piece in the first slot in the first row and drag it one slot to the right.
Step 5
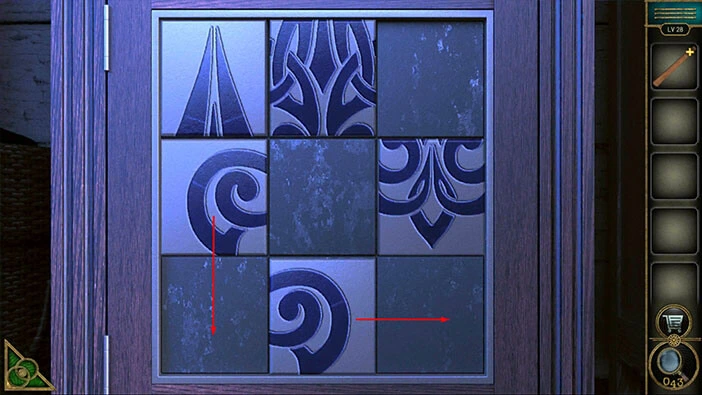
Select the puzzle piece located in the first slot in the third row, and drag it one slot up. After that, select the puzzle piece in the third slot in the third row and drag it one slot up.
With that, you will solve the puzzle, and you will unlock the cabinet door. Inside you will find a “Key” and a “Paper with hints”. Tap on these two items to pick them up.
After that, tap on the green button in the bottom left corner of the screen to go back.

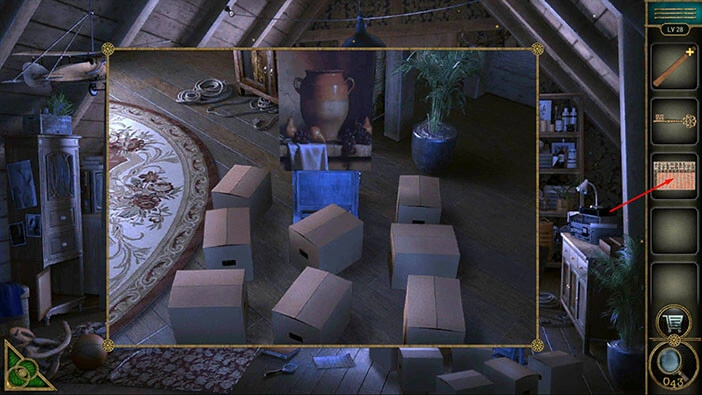
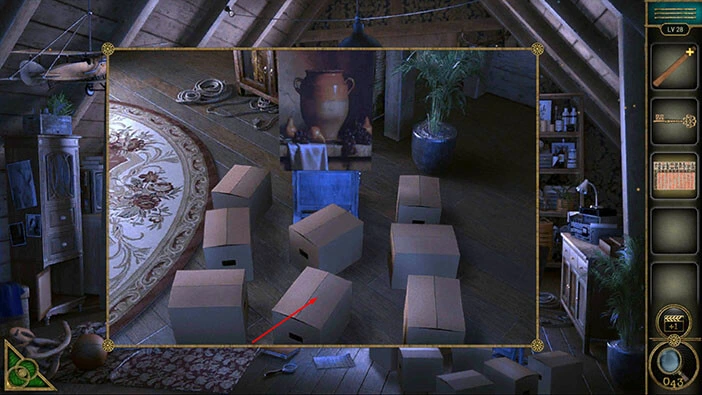
Next, let’s tap on the boxes on the right to take a closer look at them.
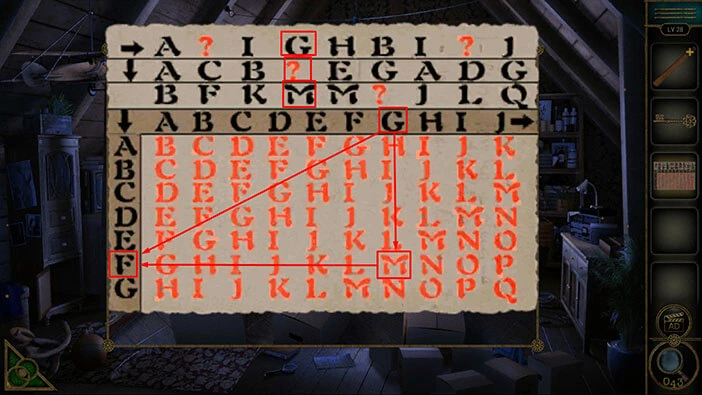
There are several letters in these boxes, and our task is to determine the order of these letters. To do that, we will have to take a look at the “Paper with hints” in our inventory.
Ok, this hint might seem very complicated at first, but it is actually quite simple once you figure it out.
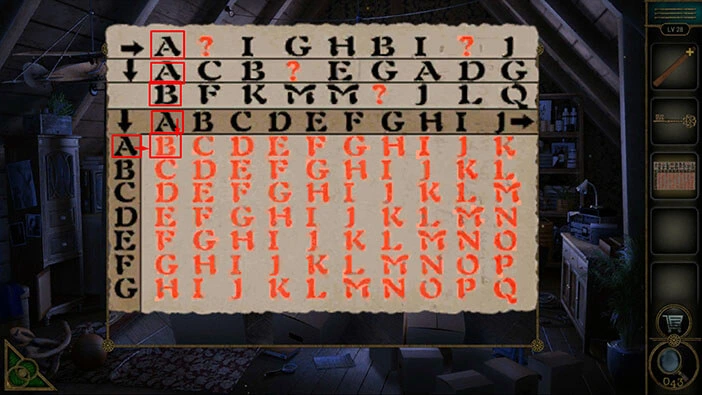
Here, we can see the letters arranged in three rows at the top. Below these three rows, we can see the table with the same letters.
The first row starts with the arrow pointing to the right. The arrow tells us that the letters in this row represent the horizontal letters in the table below.
The second row starts with the arrow pointing down. The arrow tells us that the letters in this row represent the vertical letters in the table below.
There is no arrow at the start of the third row. The letters in this row represent the combination of the letters in the first two rows, and we can discover them by looking at the table below (the red letter in the table).
Ok, let’s discover the correct letters. We will do this puzzle in several steps. Let’s begin.
Step 1
First, let me demonstrate an example that shows the logic behind the rows and the table. Let’s take a look at the first letter in each row. Here, we have the letter “A” in the first row (horizontal), also the letter “A” in the second row (vertical). The result of these two letters is the letter “B” in the third row (the red letter “B” in the table). Take a look at the image below.
Step 2
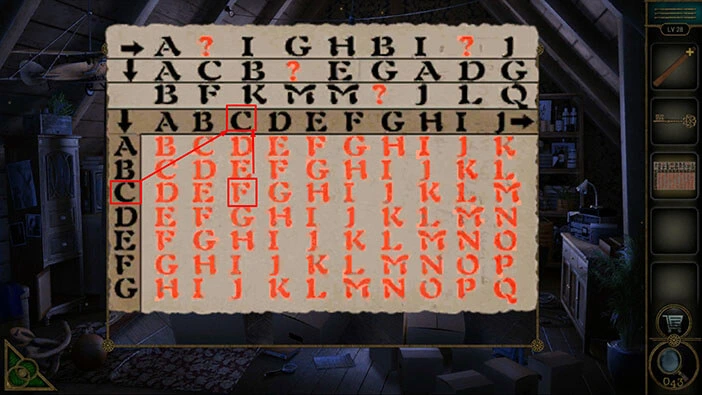
Ok, let’s discover the first letter. The first letter that we should discover is the second letter in the first (horizontal) row.
The combination of the unknown letter in the horizontal row, and the letter “C” in the vertical row will give us the letter “F”. If we take a look at the table, we will discover that the letter that we are looking for in the horizontal row is the letter “C”. Take a look at the image below.
So, the first letter is the letter “C”. Let’s memorize/write down this information.
Step 3
Ok, let’s discover the second letter. The second letter that we should discover is the eighth letter in the first (horizontal) row.
The combination of the unknown letter in the horizontal row, and the letter “D” in the vertical row will give us the letter “L”. If we take a look at the table, we will discover that the letter that we are looking for in the horizontal row is the letter “H”. Take a look at the image below.
So, the second letter is the letter “H”. Let’s memorize/write down this information.
Step 4
Ok, let’s discover the third letter. The third letter that we should discover is the fourth letter in the second (vertical) row.
The combination of the unknown letter in the vertical row, and the letter “G” in the horizontal row will give us the letter “M”. If we take a look at the table, we will discover that the letter that we are looking for in the vertical row is the letter “F”. Take a look at the image below.
So, the third letter is the letter “F”. Let’s memorize/write down this information.
Step 5
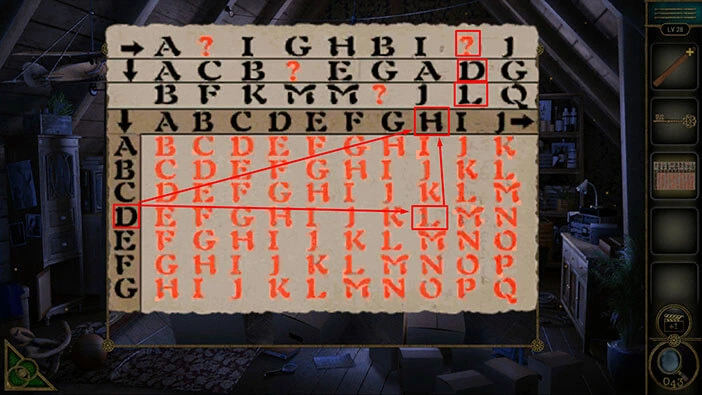
Ok, let’s discover the fourth letter. The fourth letter that we should discover is the sixth letter in the third (table, red letter) row.
The combination of the letter B in the horizontal row and the letter “G” in the vertical row will get us the mysterious, red letter, in the table. If we take a look at the table, we will discover that the letter that we are looking for is the red letter “I”. Take a look at the image below.
The fourth letter is the letter “I”. So, we have the letters “CHFI”. Let’s memorize/write down this information.
Once you’re done, tap on the empty inventory slot to put down the note with hints.

Ok, we should now open the boxes, and find the letters that we discovered. Finding the correct letter is a trial and error process, but I will skip right to the correct box.
The first letter was the letter “C”. Tap on the second box in the third row, and you will discover the letter “C”.
The second letter was the letter “H”. Tap on the third box in the second row, and you will discover the letter “H”.

The third letter was the letter “F”. Tap on the third box in the first row, and you will discover the letter “F”.

The fourth letter was the letter “I”. Tap on the second box in the second row, and you will discover the letter “I”.
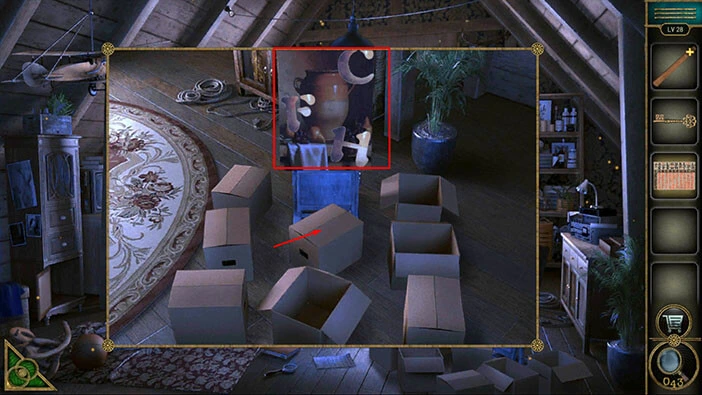
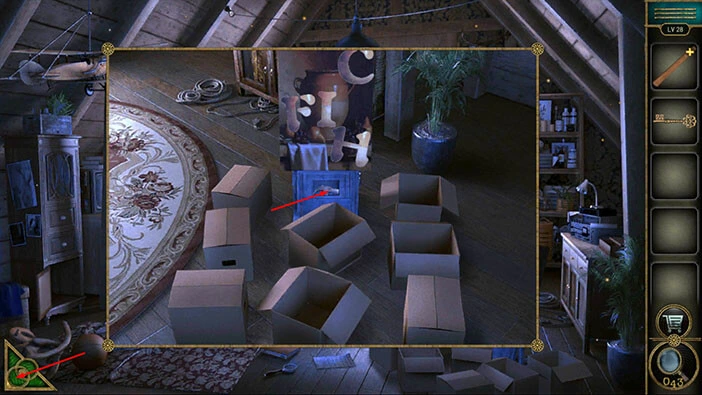
Once you have all four letters, the blue box will open, and inside you will find a “Hammer”. Tap on it to pick it up.
After that, tap on the green button in the bottom left corner of the screen to go back.
Let’s assemble the hammer. Select the “Hammer handle” in your inventory and it will appear in the middle of the screen. After that, select the “Hammer” from the inventory and attach it to the handle.
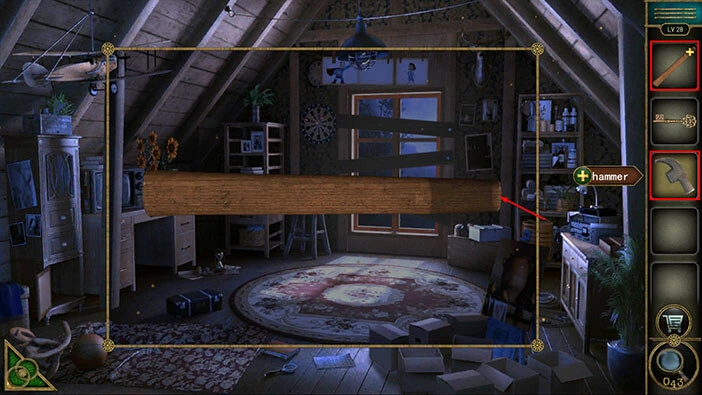
Next, let’s tap on the boarded window to take a closer look at it.

Select the “Hammer” from the inventory and use it to remove the boards.
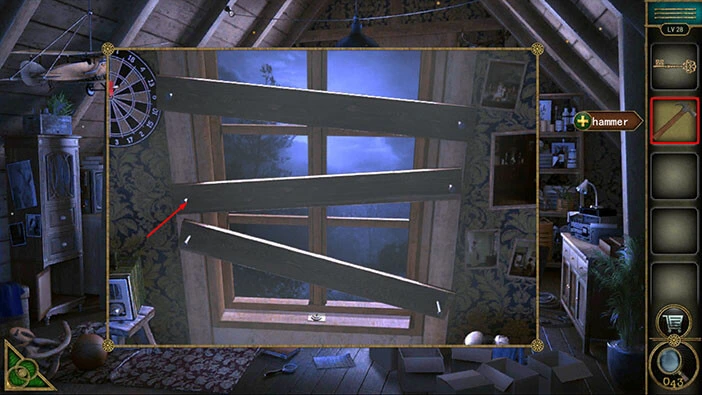
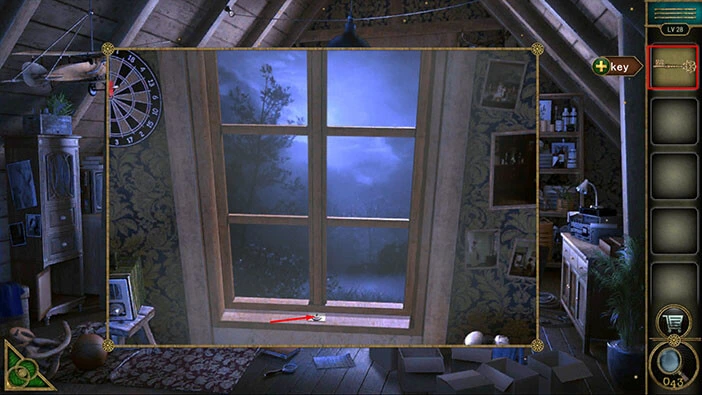
At the bottom of the window, you will notice a keyhole. Select the “Key” from the inventory and tap on the keyhole to take a closer look at it, Tap on the keyhole again to unlock the window.
With that, you will unlock and open the window, so let’s tap on it to proceed to the next level.
With that, we have reached the end of the seventh part of the walkthrough. If you want to see the eighth part, tap on the next part button. In the eighth part of the walkthrough, we will cover levels 29-32.
Thank you for reading.