Legendary Tales 5 – Chapter 2: Ancients Technologies | Part 1
Intro
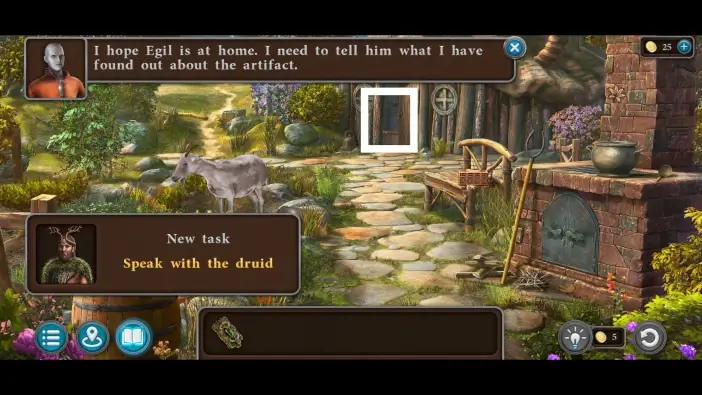
Welcome to our walkthrough for Part 1 of Chapter 2 of “Legendary Tales 5” from “FIVE-BN GAMES”. Many use the devices of the Ancients, but no one knows how they work or how to fix them. Except for the Ancients themselves.
Walkthrough
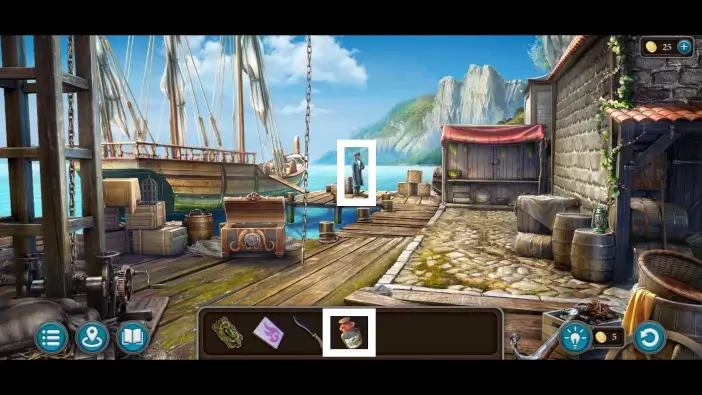
Enter Egil’s house and speak with him. A new cutscene will begin.
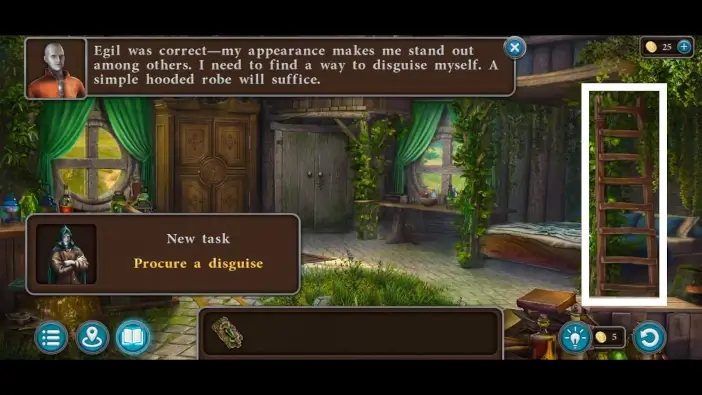
Once the conversation is over, take the ladder and exit the house.
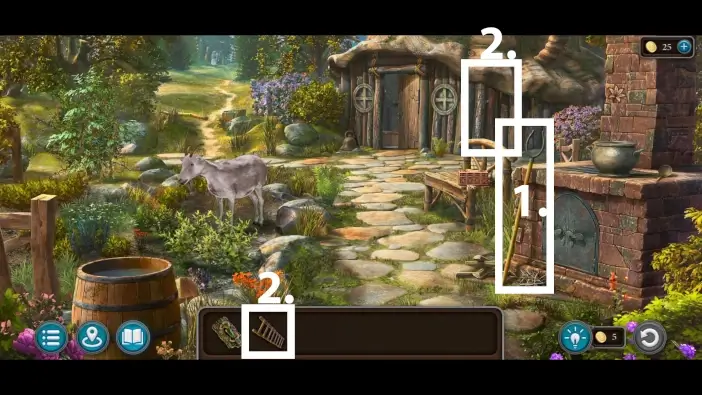
- Take the pot hook near the oven. You’ll need it to reach one carved flower under the bed in Egil’s house.
- Place the ladder against the house and climb to the roof of Egil’s house.
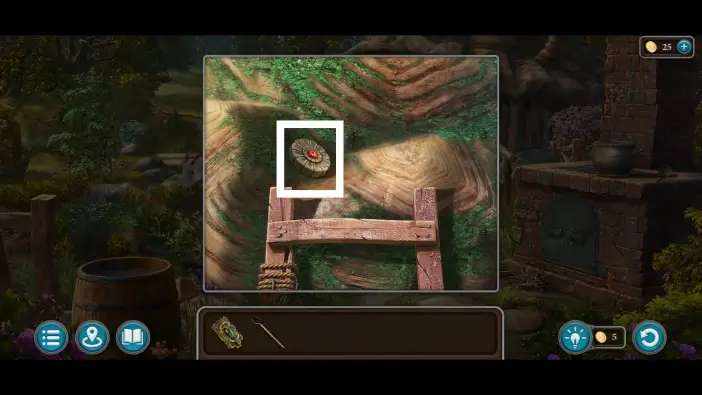
Pick up the first carved flower. You’ll need four carved flowers to open a cabinet in Egil’s house.
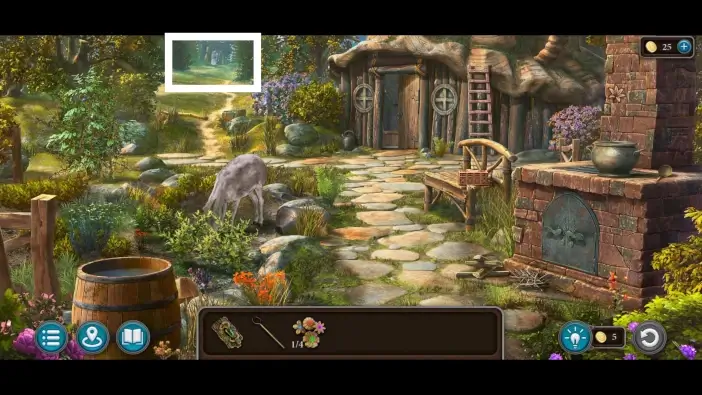
Go to the forest.
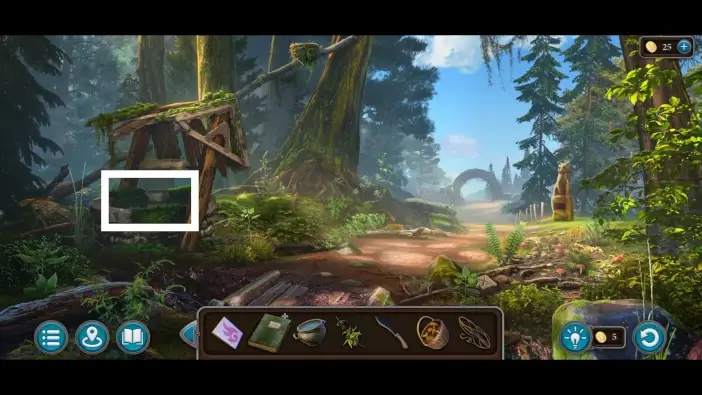
Approach the collapsed well.
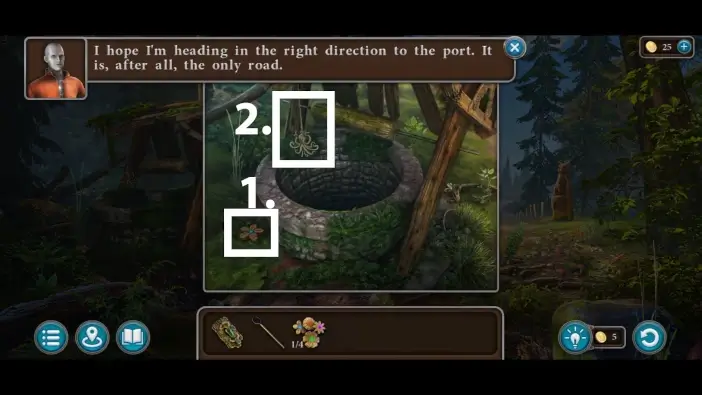
- Pick up the second carved flower from the ground.
- Try to take the hanging item, but it will fall into the well. You’ll need to find a way to take it later.
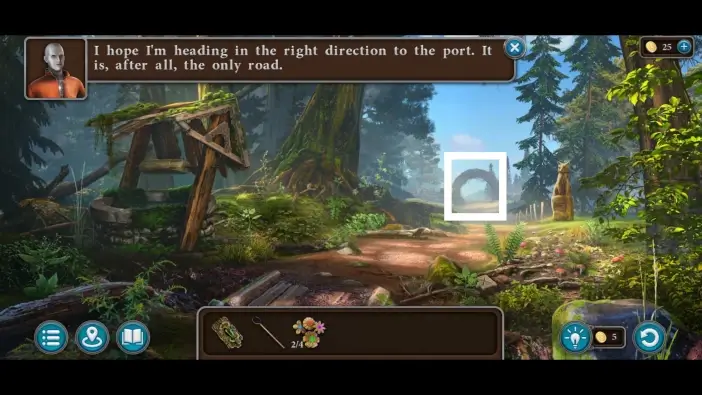
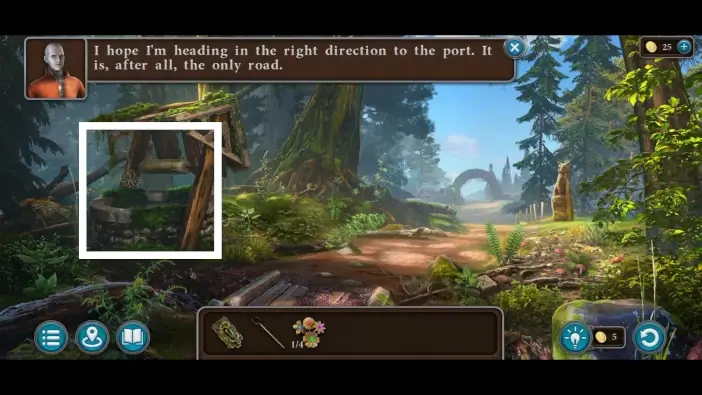
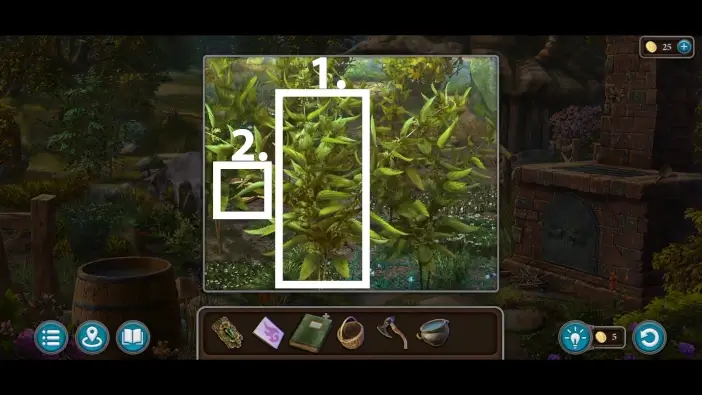
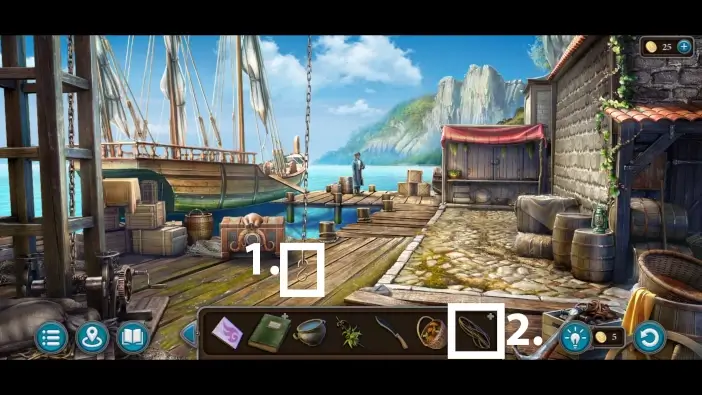
Go towards the port.
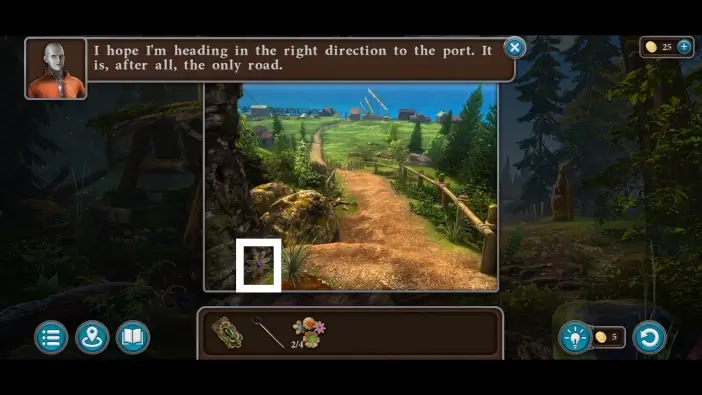
On the path before the port, pick up the third carved flower.
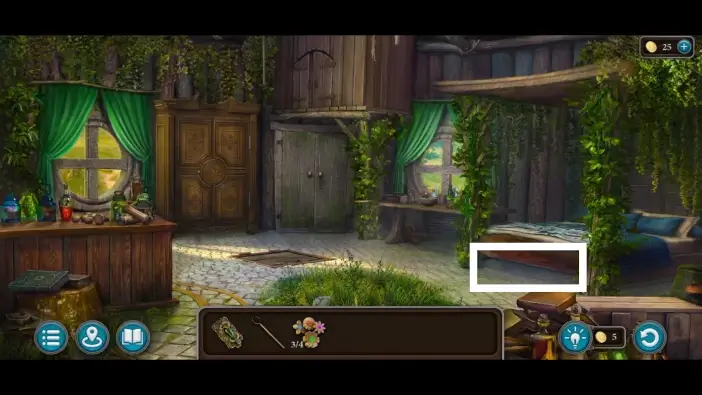
Return to Egil’s house and approach the bed.
Use the pot hook to reach the fourth carved flower under the bed.
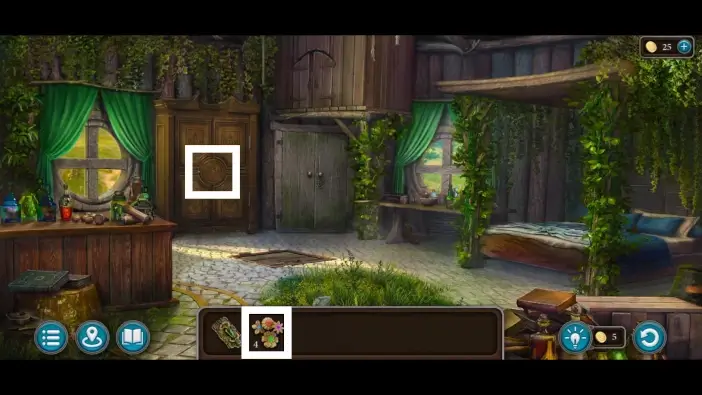
Place the four carved flowers into the slots on Egil’s cabinet to start a new puzzle challenge.
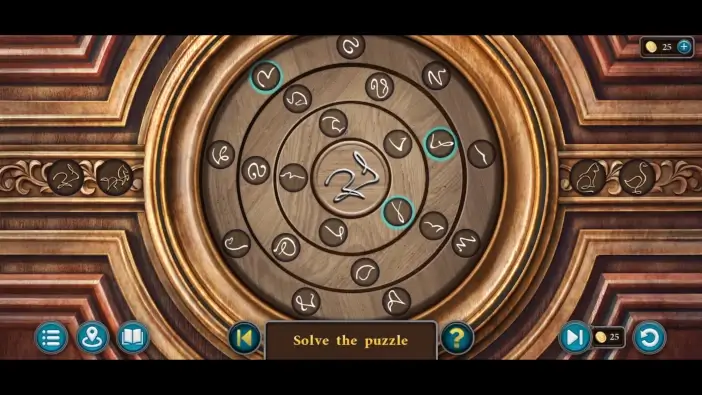
In this puzzle challenge, there will be three rings, each ring containing circles with certain drawing patterns. In each ring, there will be one small circle shining. You’ll need to rotate the three rings so that the correct pattern is in shining circles. The correct patterns are the ones that, together, form the drawing of an animal in the center of the puzzle. This puzzle will have four stages, each stage for a different animal. The solutions are in the picture above and the pictures below.
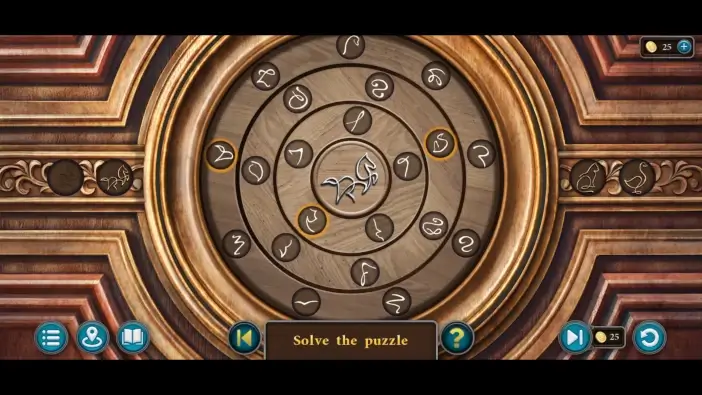
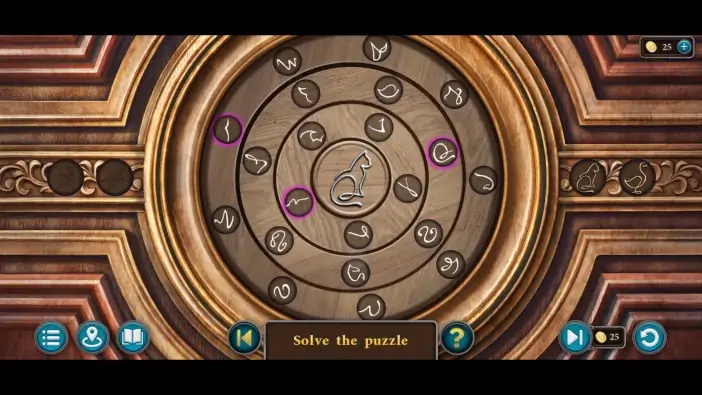
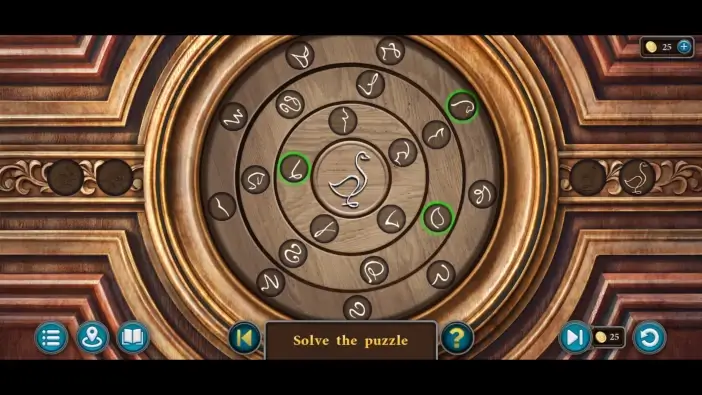
Once you solve all four stages, the cabinet will be unlocked.
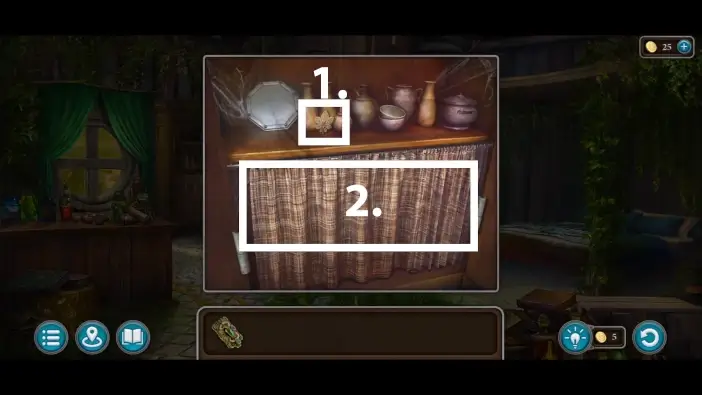
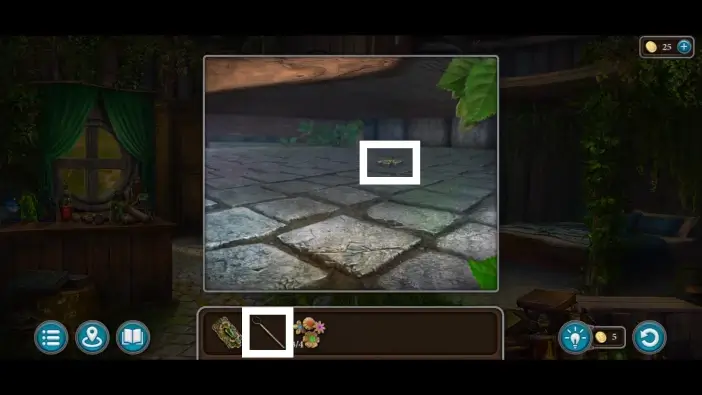
- In the cabinet, take the first wooden leaf from the shelf. You’ll need two wooden leaves to unlock one box in Egil’s courtyard.
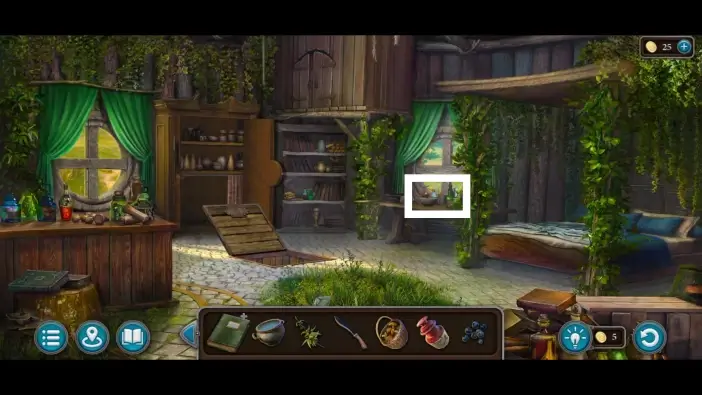
- Move the curtain.
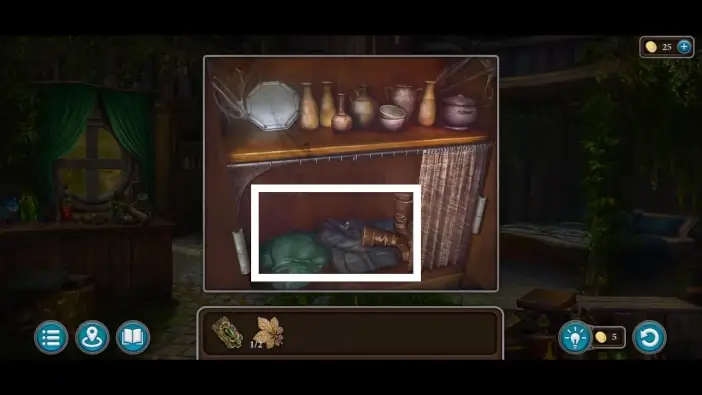
Take all the clothes to unlock the port area and progress the story. These clothes will not go to your inventory.

Return to the path leading to the port and go to the port.
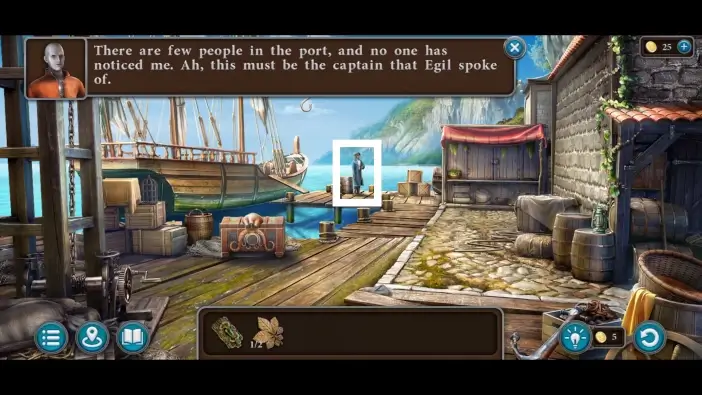
Speak with the captain. Before letting you on his ship, you’ll need to create and give him the Remedy for Purple Rot for his daughter.
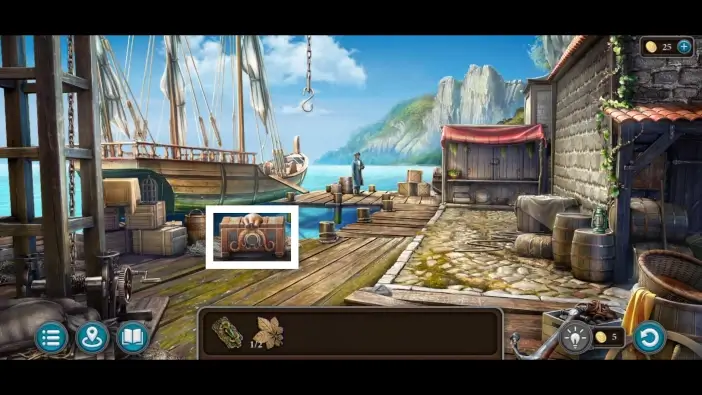
While still in the port, approach the chest on the left.
Pick up the second wooden leaf from the ground.
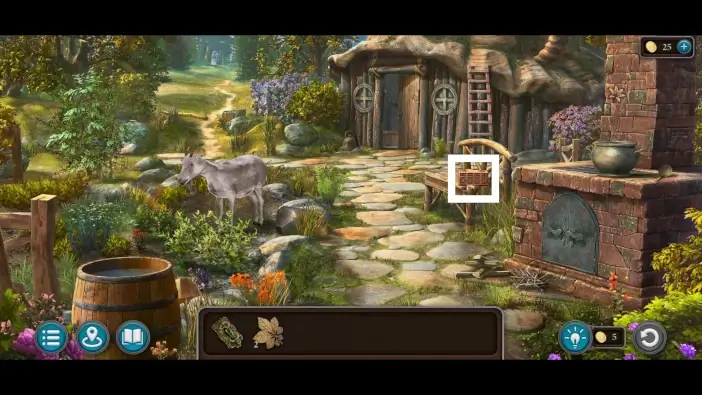
Go to Egil’s courtyard and approach the small wooden box.
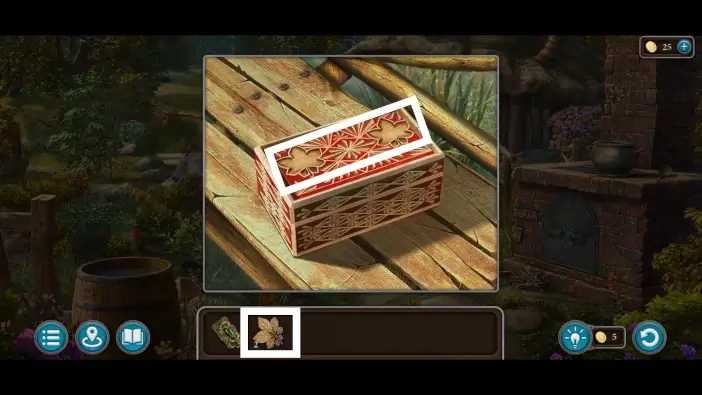
Use the two wooden leaves you’ve collected so far to unlock the box.
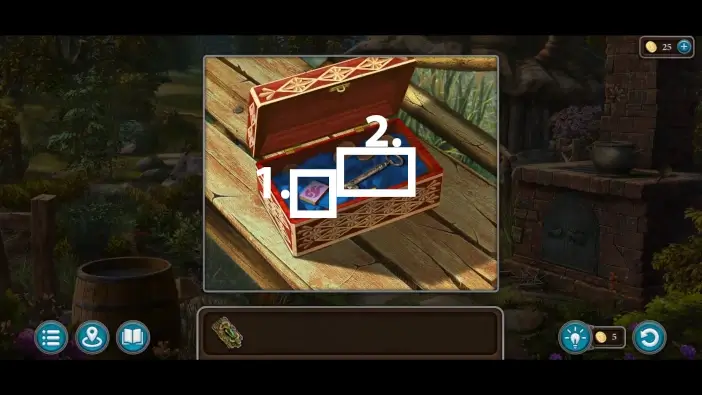
- Take the box of matches from the box. You’ll use it many times.
- Take the key for another cabinet in Egil’s house.
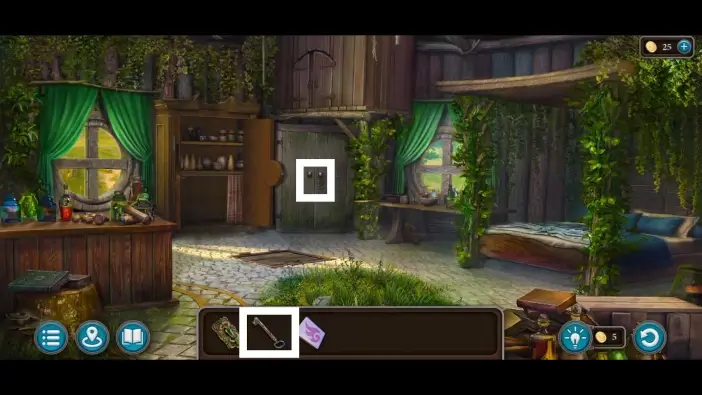
Enter Egil’s house and unlock the second cabinet using the key you’ve just found in the box.
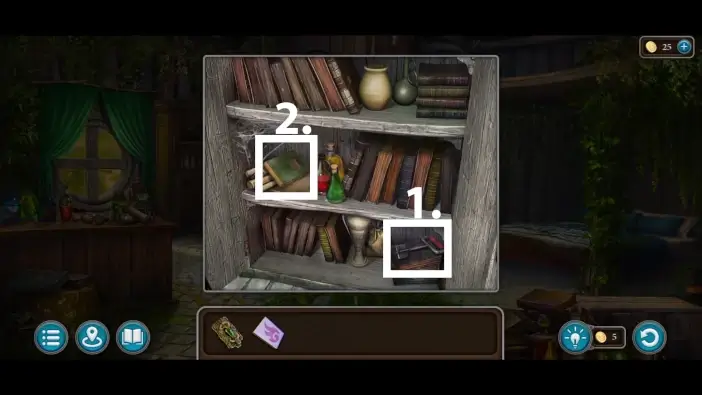
- From the cabinet, take the handle. You’ll use it for a trapdoor.
- Take and read the Children’s Ailments Handbook. In this book, you will find the recipe for the Remedy for Purple Rot. The book will be added to your inventory.
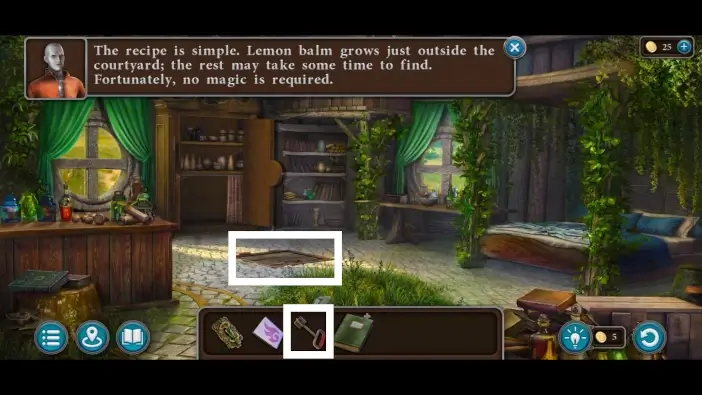
Use the handle from the cabinet to open the trapdoor.
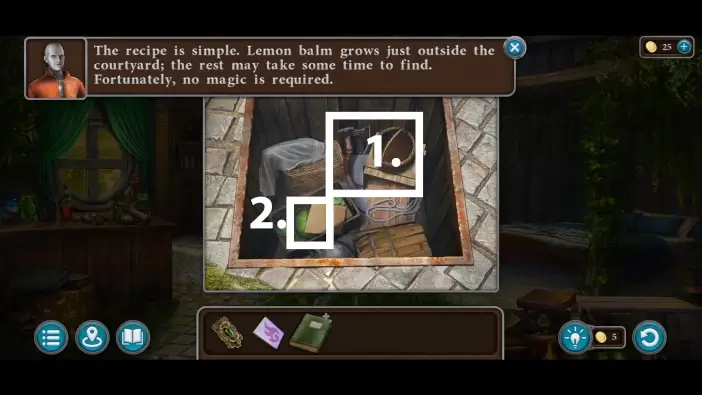
- Take the basket and the axe. You’ll need the basket to collect mushrooms and the axe to cut the tree roots.
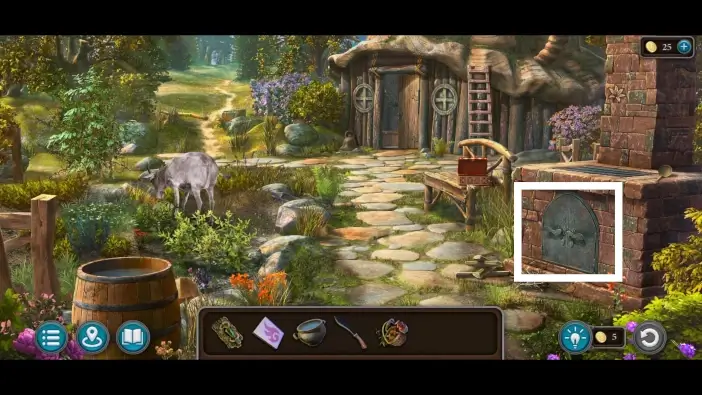
- Take the cabbage. You’ll use it to lure the goat in Egil’s courtyard.
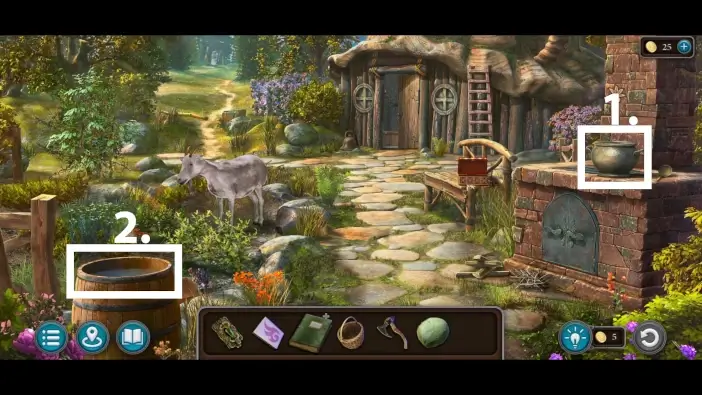
- In Egil’s courtyard, take the cauldron from the oven. You will create the Remedy for Purple Rot in it.
- Approach the barrel of water on the left.
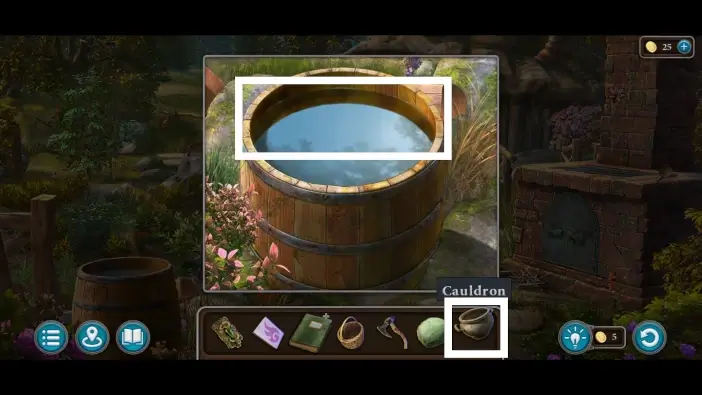
Fill the cauldron with water from the barrel.
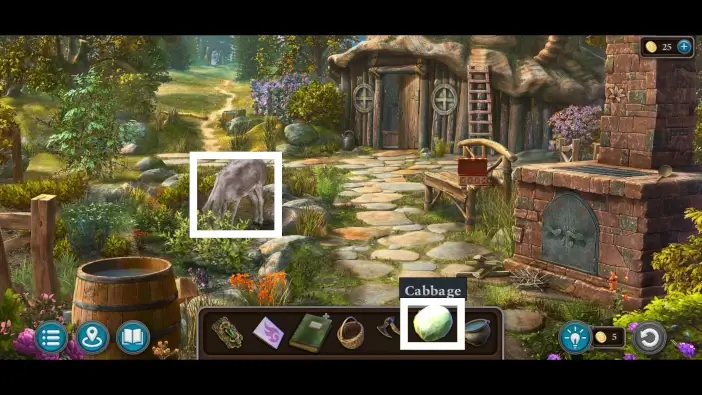
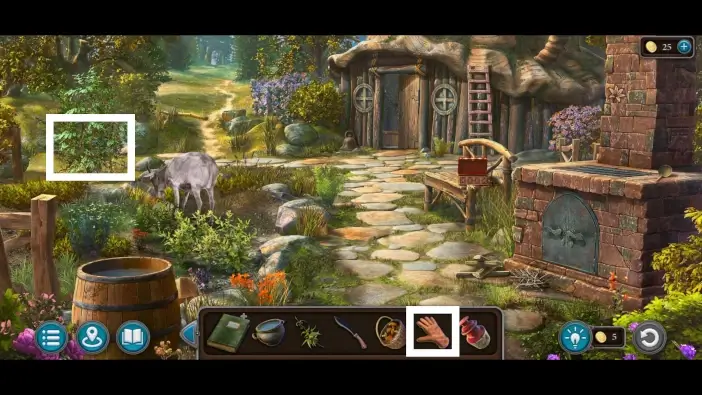
Give cabbage to the goat.
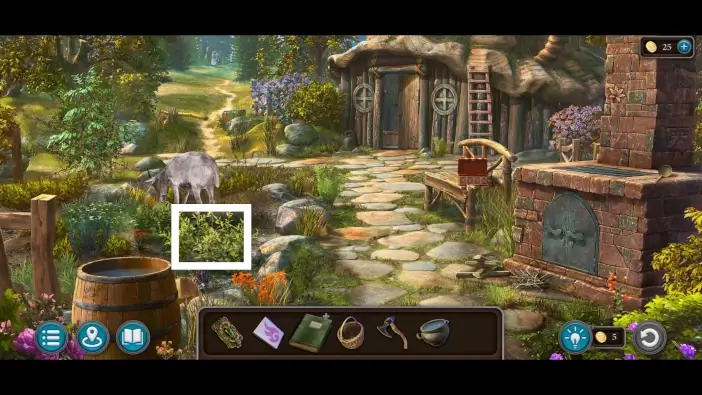
While the goat is distracted, approach the lemon balm.
- Take one lemon balm. It is an ingredient for the Remedy for Purple Rot.
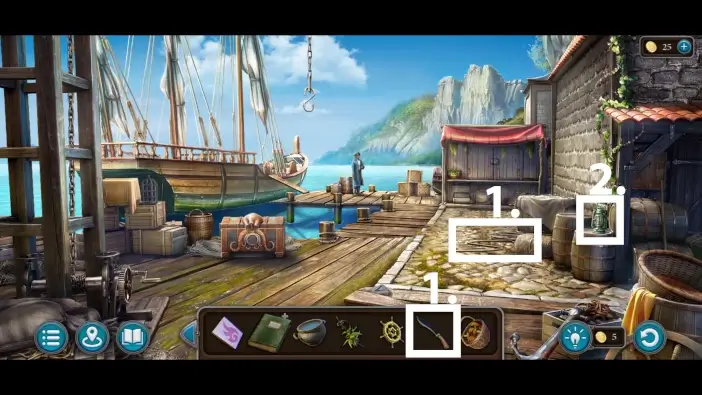
- Pick up the steering wheel handle. It is a key for the lantern.
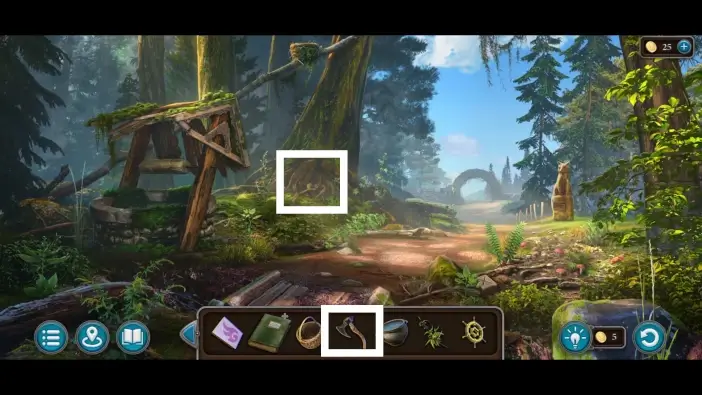
Go to the well area and use the axe to cut the roots.
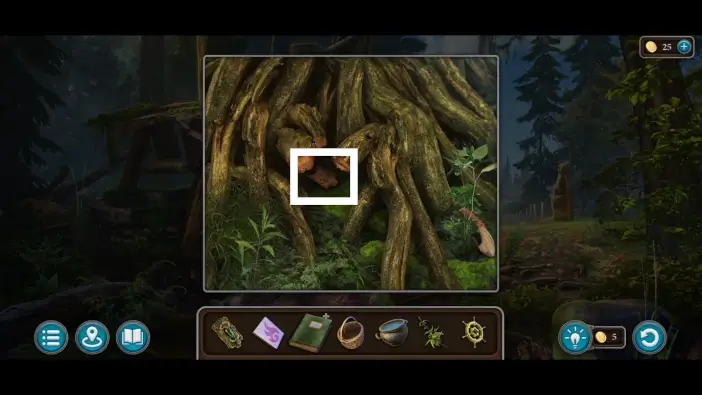
Once you cut some of the roots, take the fox-shaped item.
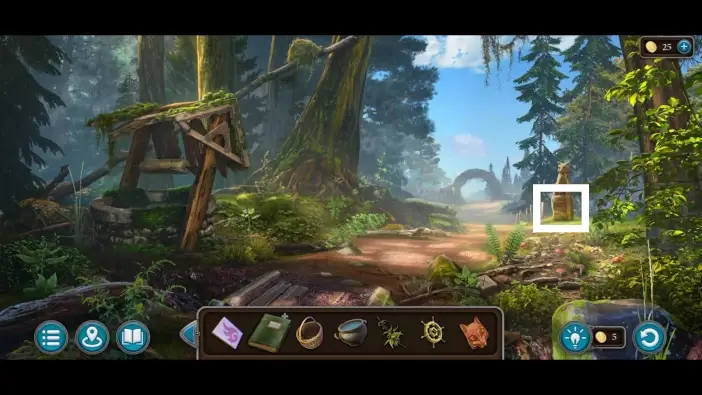
Approach the fox statue on the right and place the fox-shaped item into the slot there to start a new puzzle challenge.
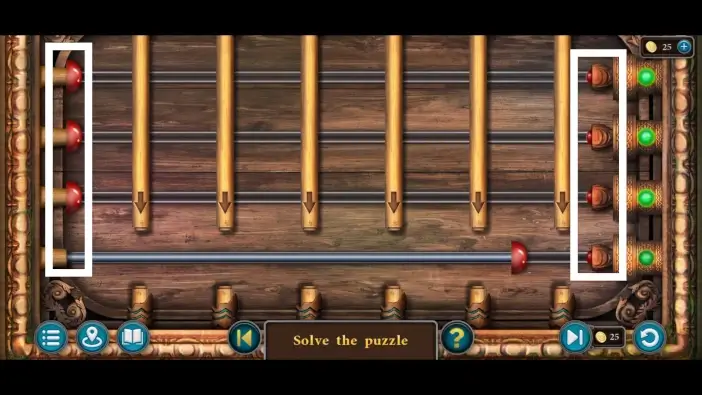
In this puzzle challenge, you’ll need to click on the left bar in one of the rows, and that bar will extend to the button on the right. You’ll need to do that for every row, but each time, you’ll need to remove all obstacles. When you move one obstacle up or down, it will influence the position of other obstacles, so you’ll need to find the right sequence of movements.
Once you complete this puzzle, challenge, take the machete. You will use it to cut the rope in the port.
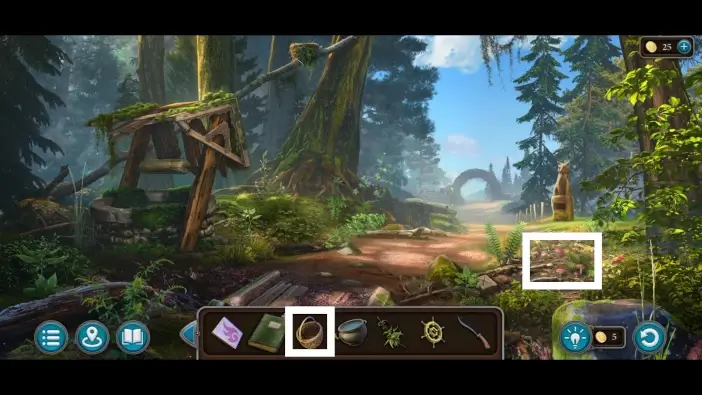
While still in the well area, place the basket on the ground on the right, and a new mini-game will start.
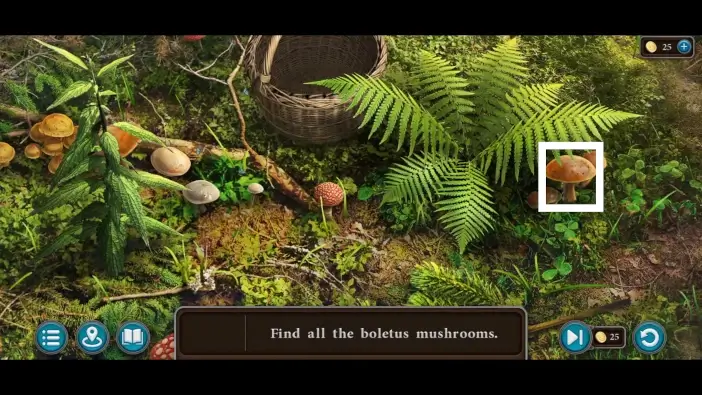
In the following mini-game, you’ll need to find 10 boletus mushrooms. They are one of the ingredients for the Remedy for Purple Rot. You can move in all directions to search for more mushrooms, and some of them are hidden behind the leaves. See the marked mushrooms in this guide to find them more easily.
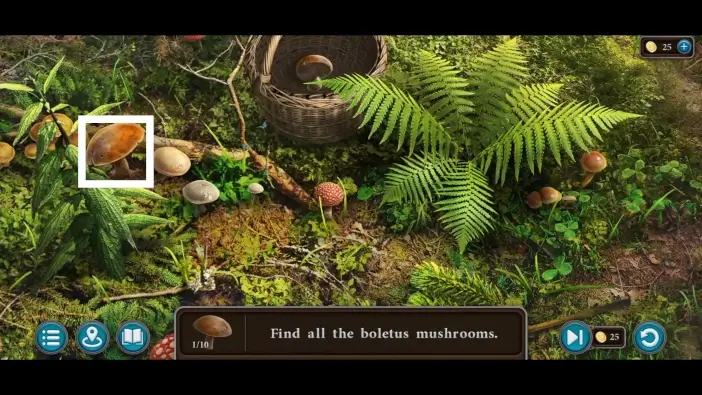
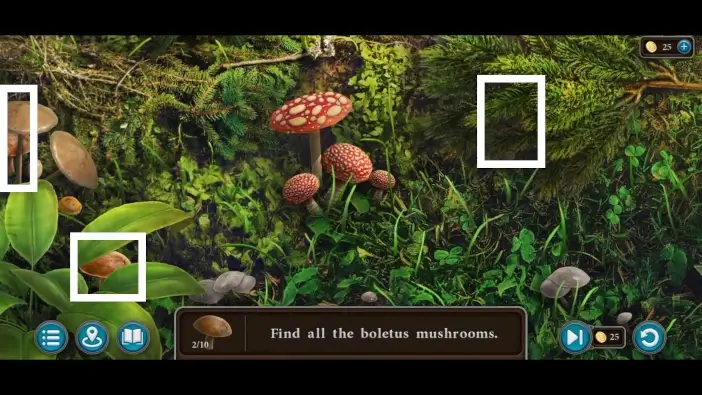
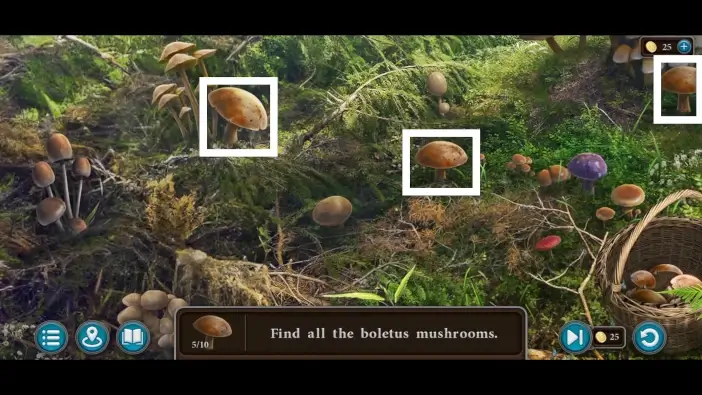
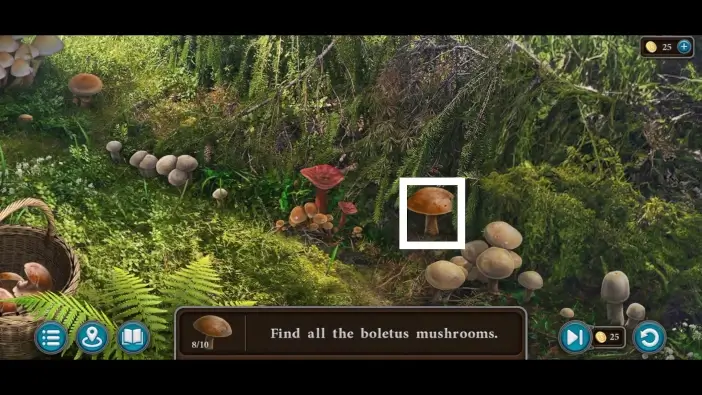
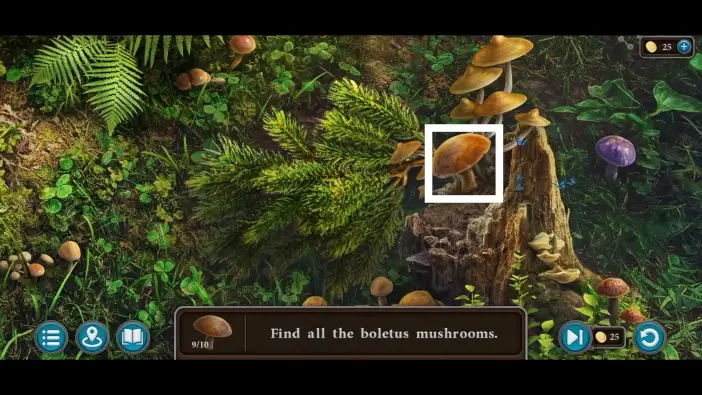
Once you find all 10 mushrooms, the “boletus mushrooms” item will be added to your inventory.
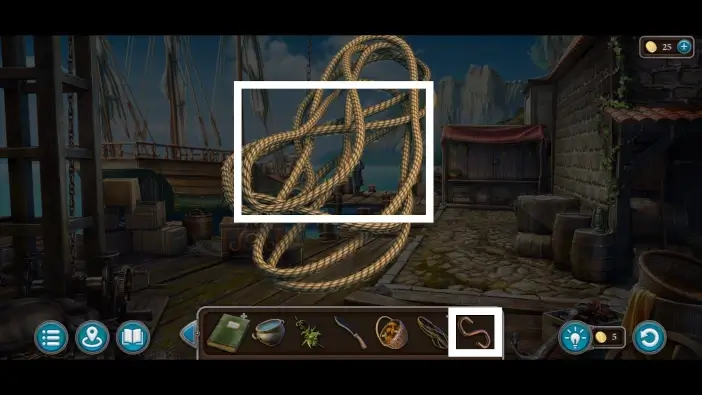
- In the port, approach the rope on the ground, cut it with the machete from your inventory, and then take the rope. You’ll need the rope to reach the item that fell in the well.
- Approach the lantern on the barrel.
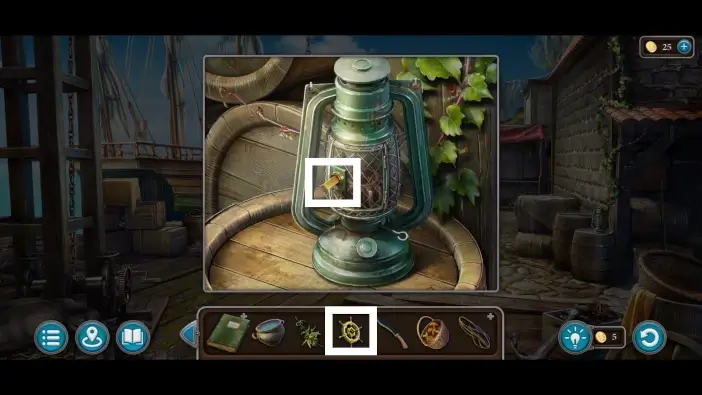
Attach the steering wheel handle to the lantern and then open it. Take the gear that is inside the lantern.
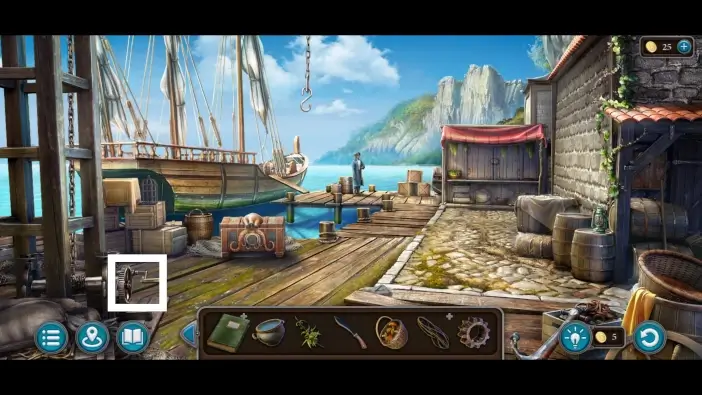
Approach the mechanism on the left.
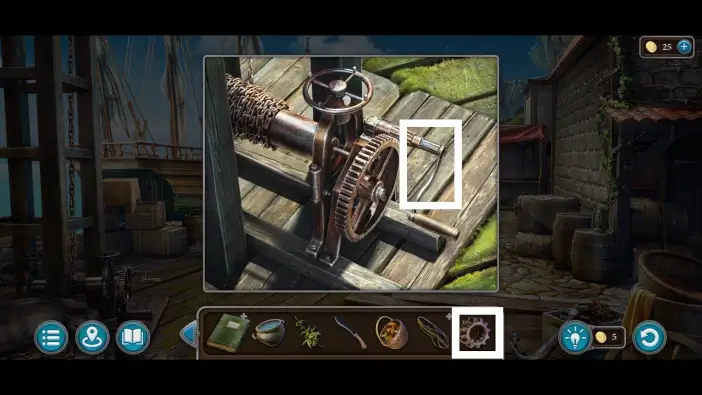
Place the gear behind the handle and then use the handle to lower the chain.
- Take the hook from the chain.
- Click on the rope in your inventory to examine it.
Attach the hook to the rope. The “rope with hook” item will be added to your inventory.
Return to the collapsed well in the forest area.
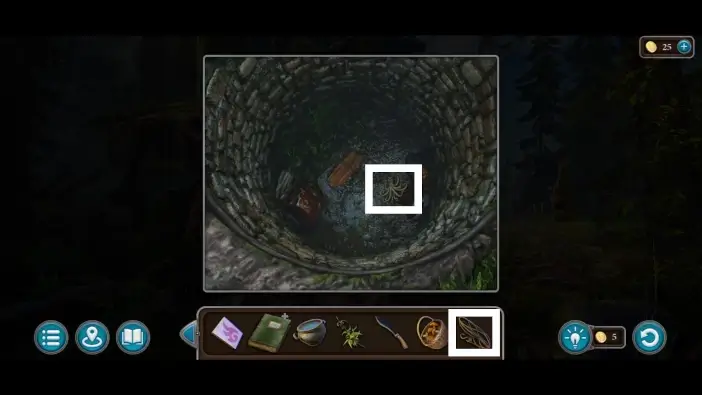
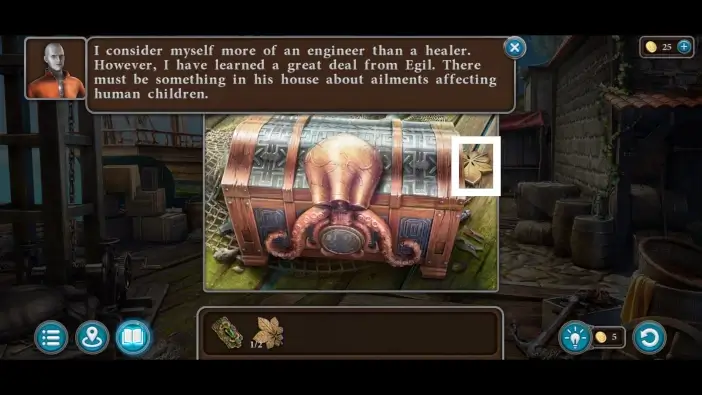
Use the rope with the hook to get the octopus-shaped item.
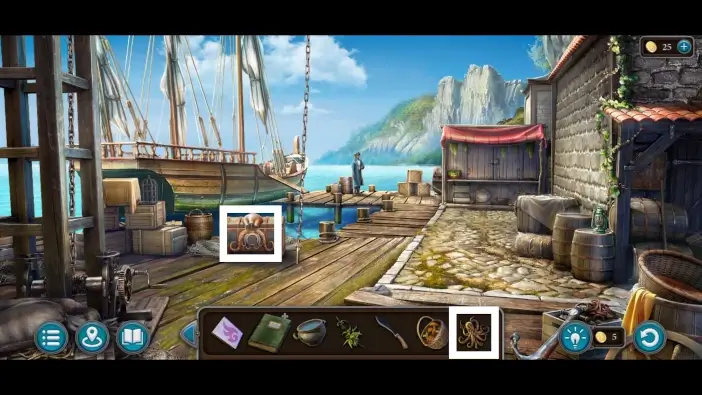
Go to the port, approach the large chest on the left, and place the octopus-shaped item on it. This will start a new puzzle challenge.
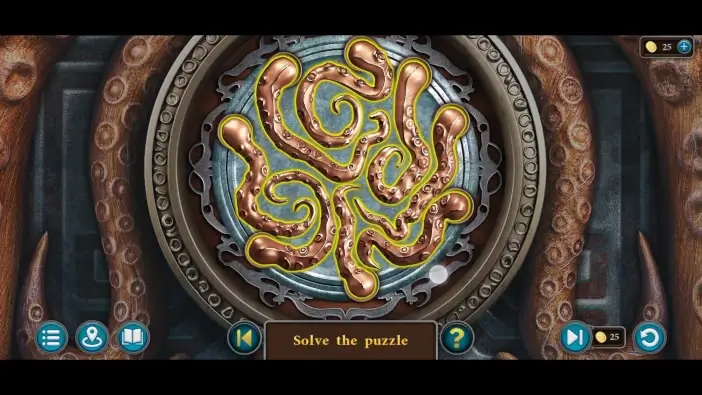
In this puzzle challenge, rearrange the octopus’s tentacles like in the picture above to unlock the chest. Make sure the tentacles do not overlap.
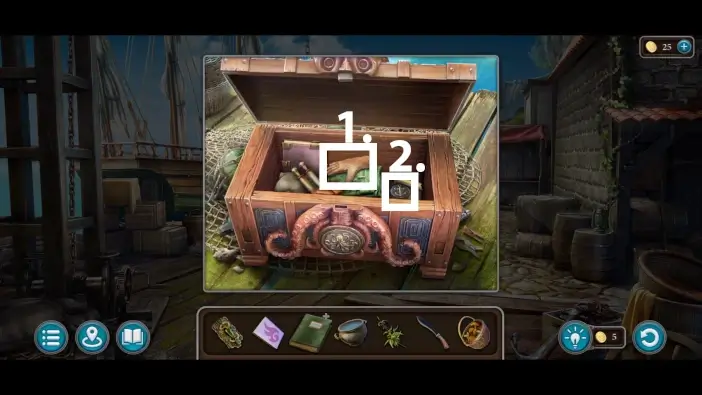
- Take the glove from the chest. You’ll use it to gather sloe.
- Collect the fisherman’s token.
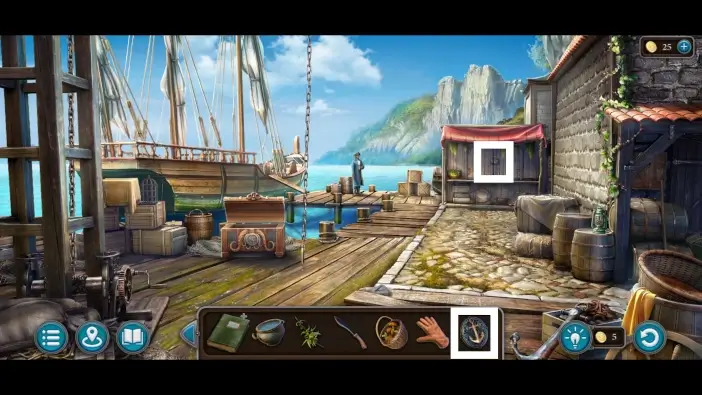
Use the fisherman’s token to unlock the cabinet on the far side of the port. You will start the new mini-game.
In this mini-game, you’ll need to find all the items that are listed. You will use items to find the other ones. These items are present only for this mini-game, and you’ll not have them after you complete this challenge.
Approach the fur and the map on the wall in the left corner.
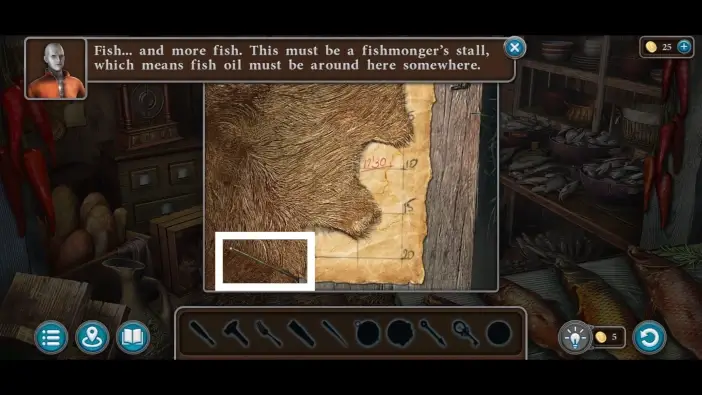
Remove the fur and take the spoke.
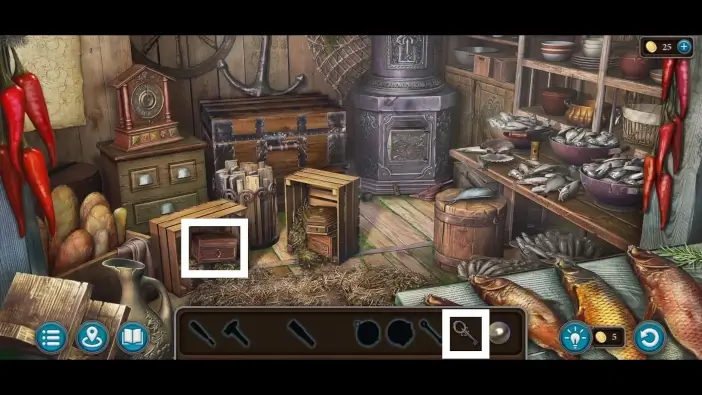
- Approach the wooden chest and take the fork that is on it.
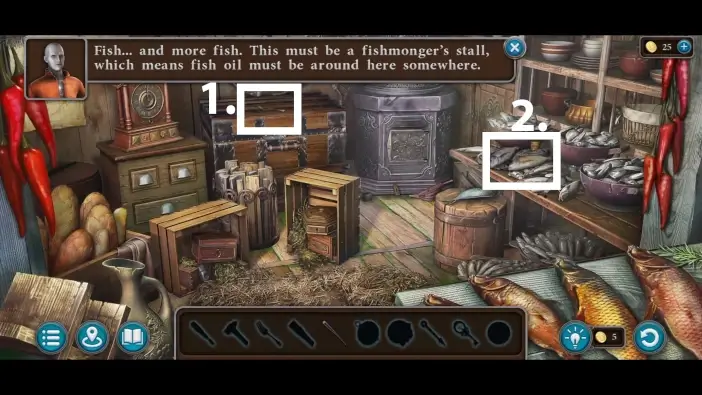
- Approach the right table full of fish.
Remove several fish to see the stuck key. Use the spoke to get the small key.
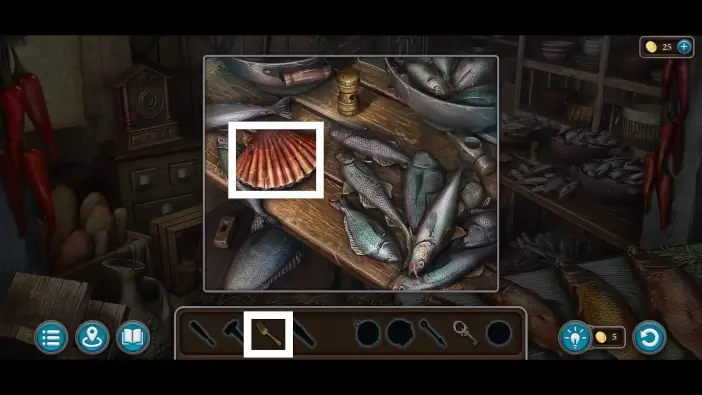
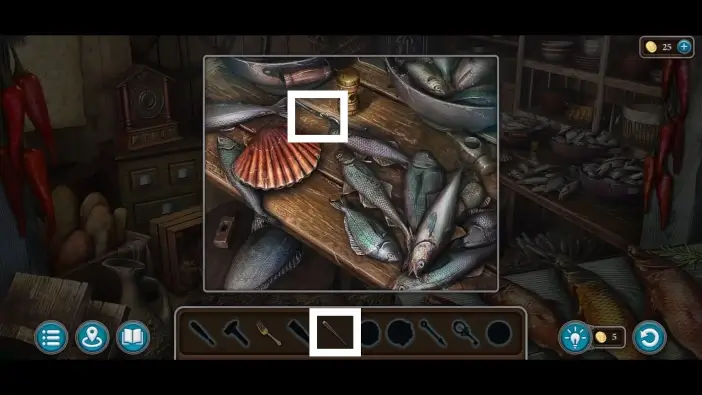
On the same table, use the fork to open the seashell and take the pearl.
Use the key you just got to unlock the small chest on the left.
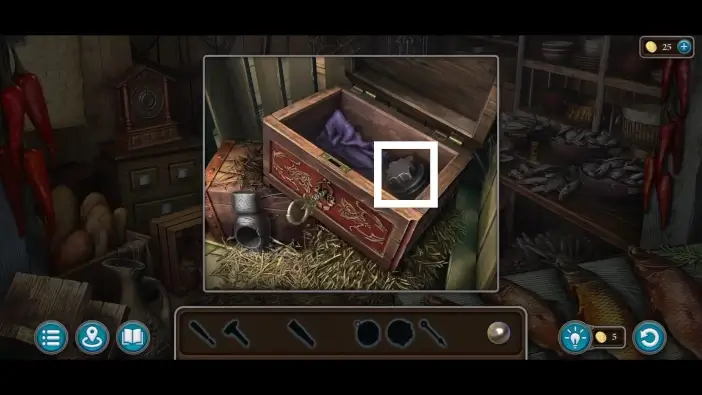
Once you unlock it, take the knob from the chest.
- Use a pearl to open the metal box in the center. Grab the compass from the box.
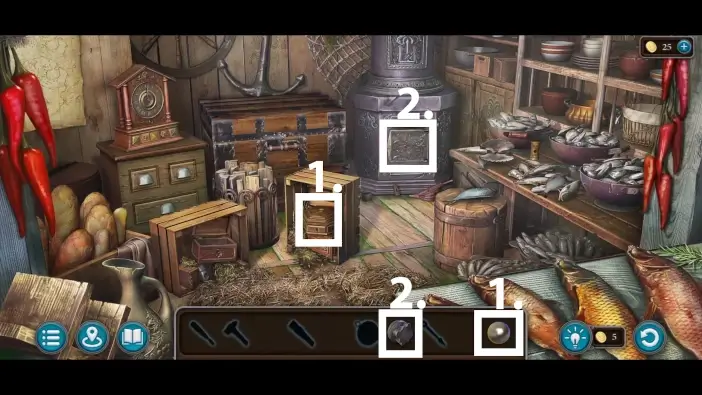
- Attach the knob to the furnace door and open it.
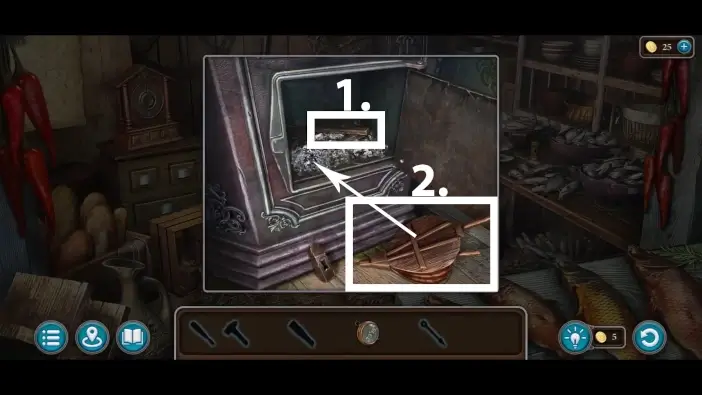
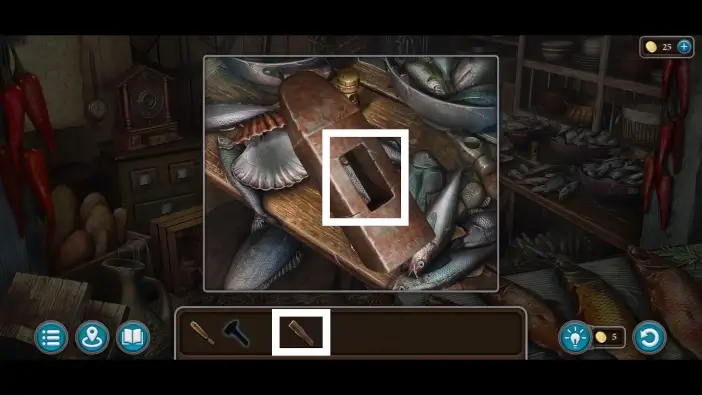
- Take the hammer handle from the furnace.
- Use the bellows to remove some of the dust.

Once you removed the dust, take the clock hand from the furnace.
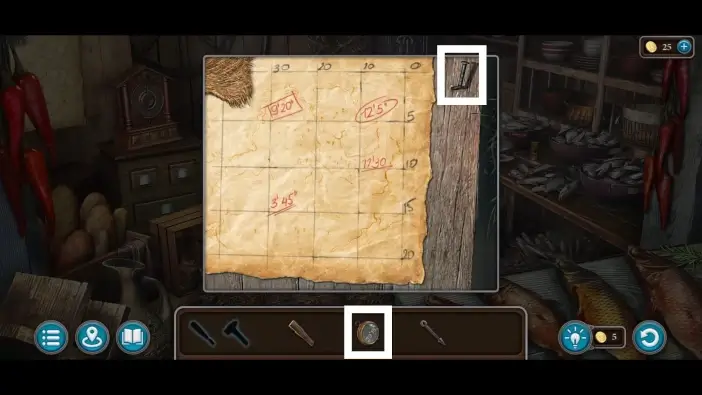
Return to the map on the wall in the left corner and hang the compass on the nail next to it. 30 and 15 degrees will be written on the compass.
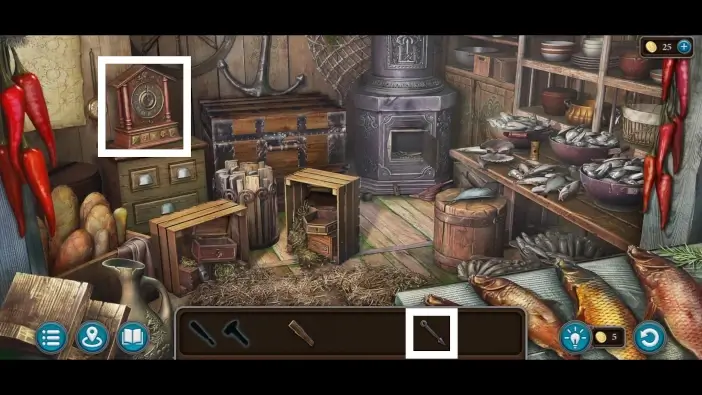
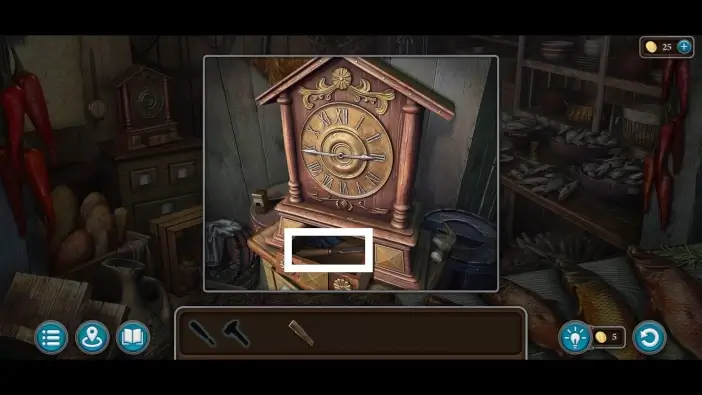
Approach the clock and attach the missing clock hand.
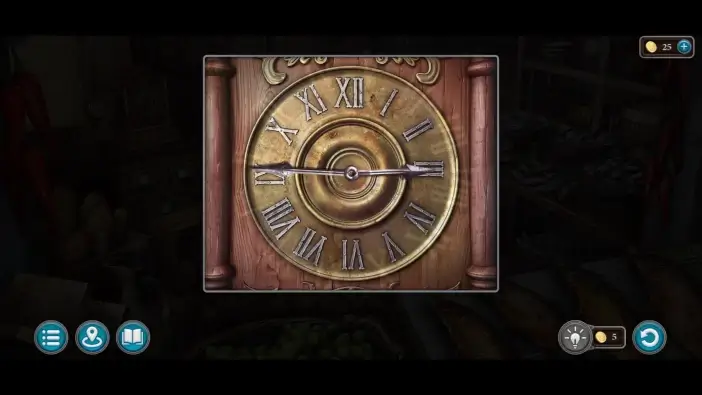
Following the clue from the compass, move the clockhands like in the picture above.
After solving the puzzle, a drawer will open below the clock. Take the chisel from the drawer.

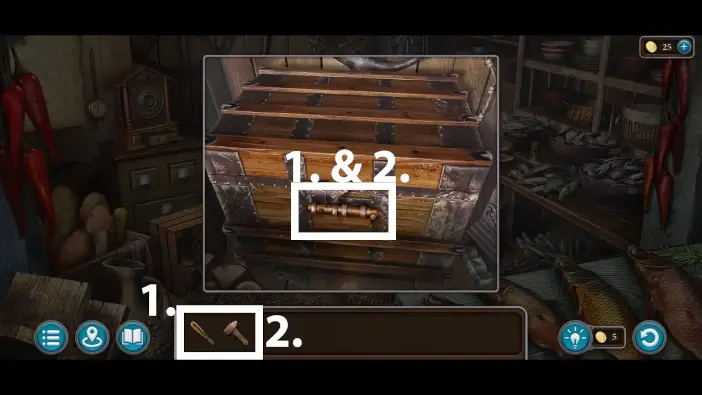
Return to the fish table and pick up the head of the hammer.
Attach the handle to the head to create a functional hammer.
- Return to the large chest in the room and place the chisel.
- Use a hammer to hit the chisel and open the chest.
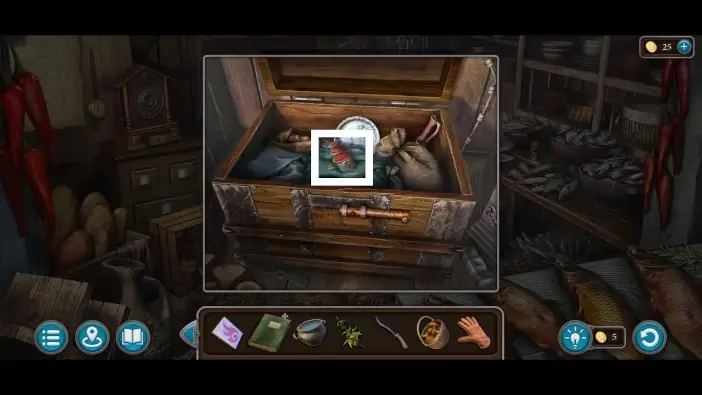
Take the fish oil from the chest. This is one of the ingredients for the Remedy for Purple Rot.
Go to Egil’s courtyard and use a glove to gather some sloes. They are an ingredient for the Remedy for Purple Rot as well.
Enter Egil’s house and approach the alchemy working desk.
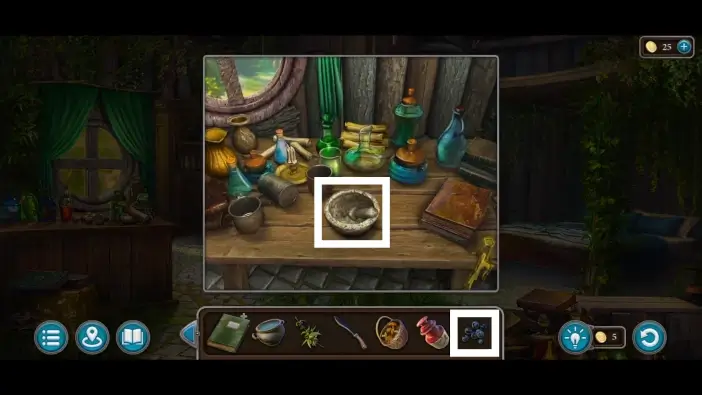
Place the sloes into the mortar to crush them. Afterwards, click on the mortar again to add the “Crushed sloes” item to your inventory.
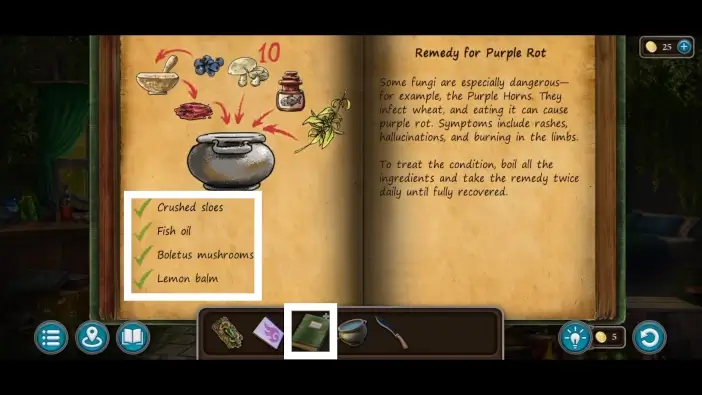
Open the Children’s Ailments Handbook from your inventory and move all the ingredients from your inventory to the list on the book page to tick the entire list. The “Ingredients” item will be added to your inventory.
Exit the house and open the oven in Egil’s courtyard.
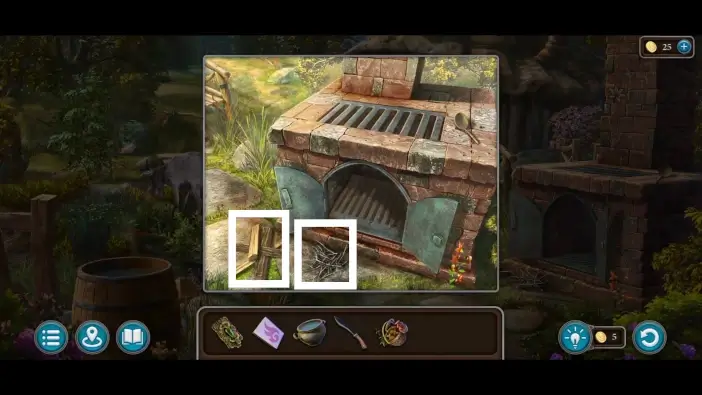
Place tinder and firewood into the oven.
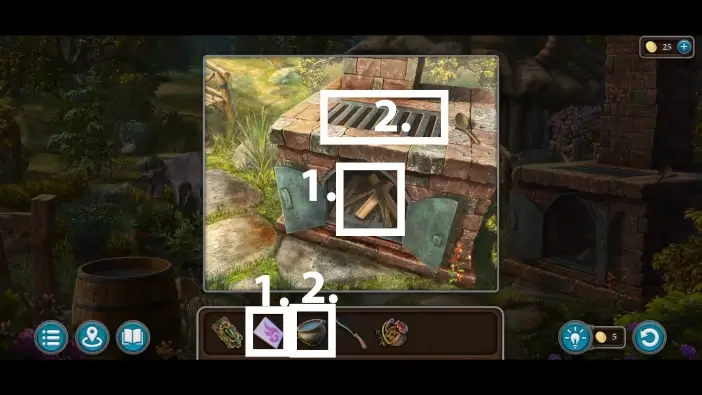
- Use matches to burn the firewood.
- Place the cauldron of water on the oven.
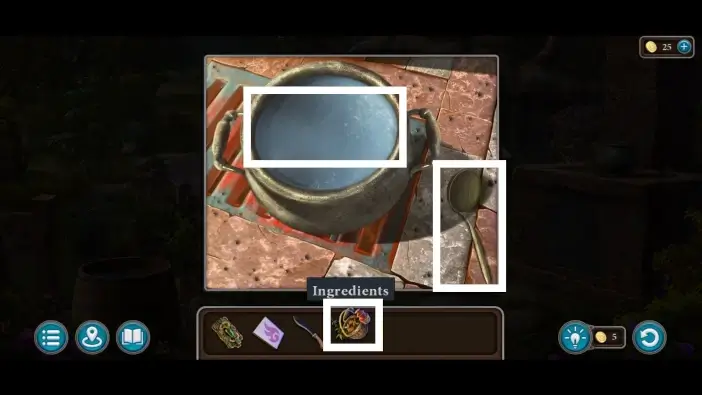
Pour the ingredients into the cauldron and use the ladle to mix them. The remedy will be added to your inventory.
Give the Remedy for the Purple Rot to the captain. A new cutscene will start, and the captain will agree to bring you to the island where the Al Karankah is.
This will mark the end of Part 1 of our guide for Chapter 2 of Legendary Tales 5.
Thank you for reading!