Strange Case 2 Asylum Escape Chapter 3
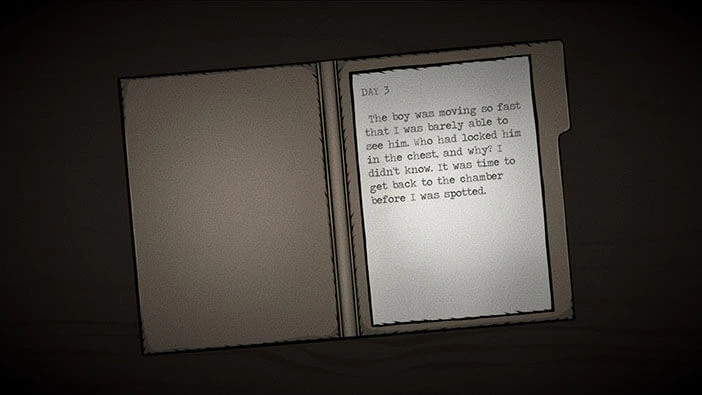
Hello everyone and welcome to the walkthrough for Chapter 3 of ” Strange Case 2: Asylum Escape”. At the end of Chapter 2, our character unlocked a huge chest by solving three puzzles and unlocking the three locks. In the chest, he found a boy. However, once the boy got out of the chest, he looked at our character for a few moments and then ran away at supernatural speed.
Our character was wondering who locked away the boy and why. And was that boy human or some otherworldly being? He was moving way too fast for a human being. However, our character realizes that he can’t continue his investigation, because he should go back to his room before the hospital worker returns.
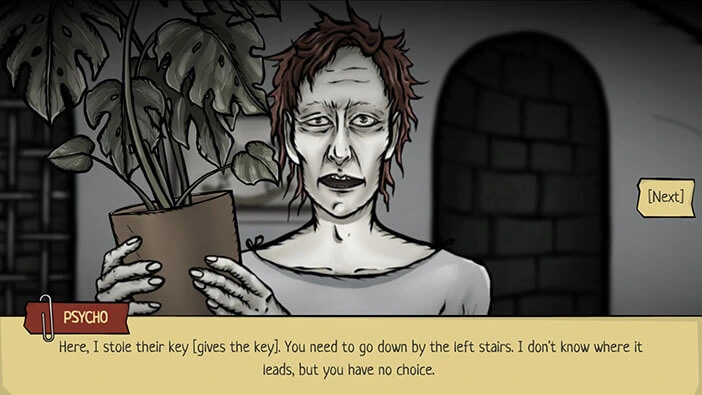
You will see a “Psycho” standing in front of a doorway that leads downstairs. Tap on him to start the interaction.
Well, it’s fortunate that we ran into the “Psycho” because he will warn you that the doctor and his employees have discovered that you aren’t in your room, and they are now looking for you. The Psycho will also mention that you’re next – he is probably suggesting that they want to perform the same “experiment” on our character as the one that we saw during the previous night.
Lastly, the Psycho managed to steal the key to the other passage that leads downstairs. He will try to delay the doctor and his cronies while you make your escape.
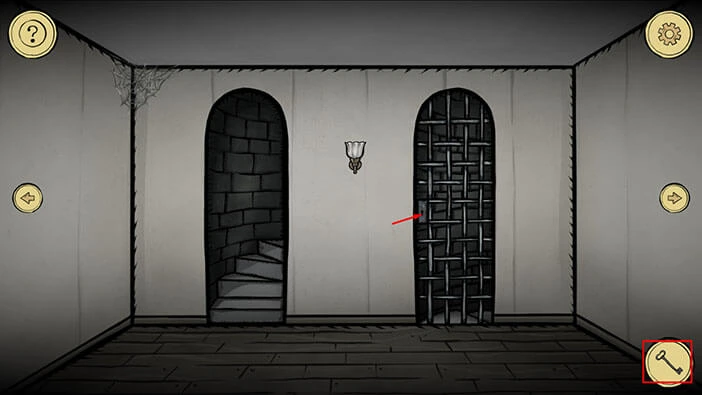
Well, let’s listen to his advice. Tap on the suitcase icon to open the inventory and select “Some Key”. After that, tap on the door on the left to unlock them, then tap again to go to the next room.
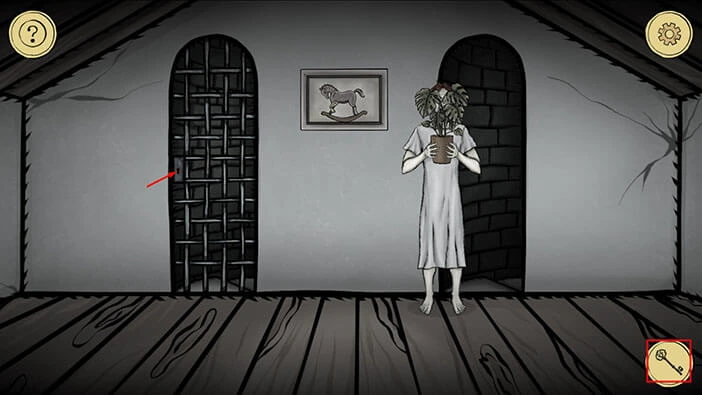
Tap on the picture on the wall to take a closer look at it.
Here, we can see two hospital workers holding a birthdate cake for someone who is celebrating his 150th birthday! Wow! Memorize/write down the number “150” because we will need it to solve the next puzzle.
After that, tap on the picture to flip it over, and take a look at its backside.
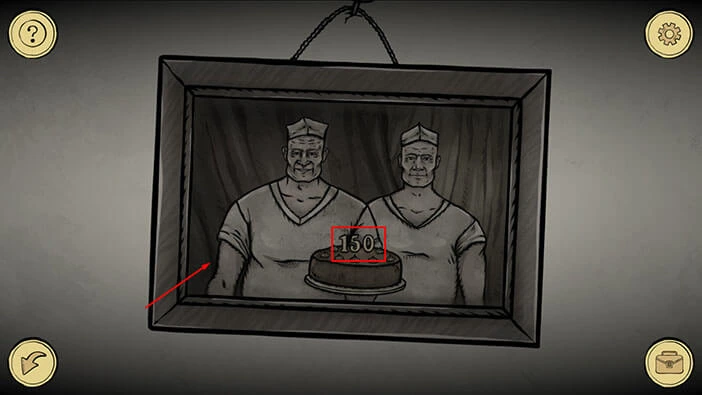
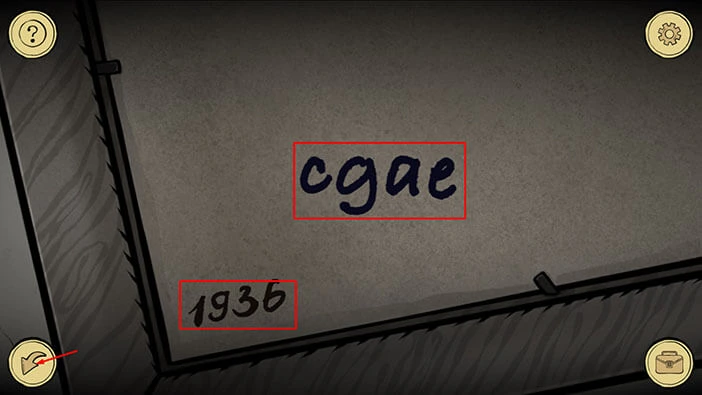
We can see the number “1936” in the lower-left corner of the picture. This number represents the year when this picture was taken. So, we have someone that celebrated his 150th birthday, in 1936. Based on this information, we can discover the year when this person was born.
Year = 1936 – 150 = 1786.
We can also see four letters “CGAE”. Memorize/write down the number “1786” and the letters “CGAE” because we will need this information in order to solve the next puzzle.
Once you’re done, tap on the arrow in the lower left corner to go back.
Tap on the arrow on the right to proceed to the next room.
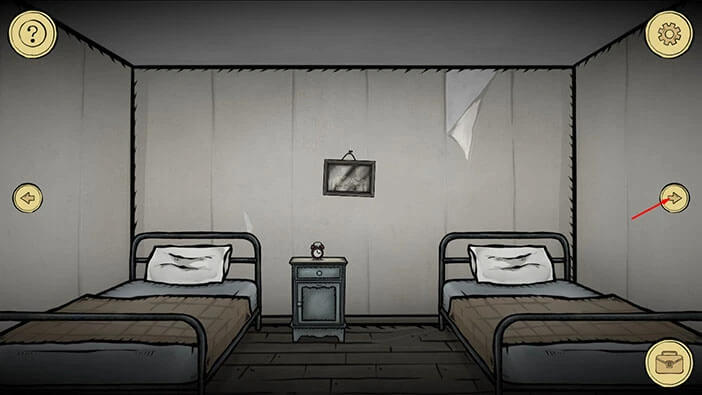
In this room, you will notice a chessboard on a table. Tap on the chessboard to take a closer look at it.
On the vertical sides of the chessboard, we can see the numbers ranging from 1 to 8. On the horizontal sides of the chessboard, we can see the letters arranged in alphabetic order ranging from “A” to “H”.
Ok, previously we discovered the number “1786” and the letters “CGAE”. So, if we assign the first numeral to the first letter, we will get “C1”, “G7”, “A8”, and “E6”. Memorize/write down these pairs of numbers and letters because they represent the coordinates on the chessboard.
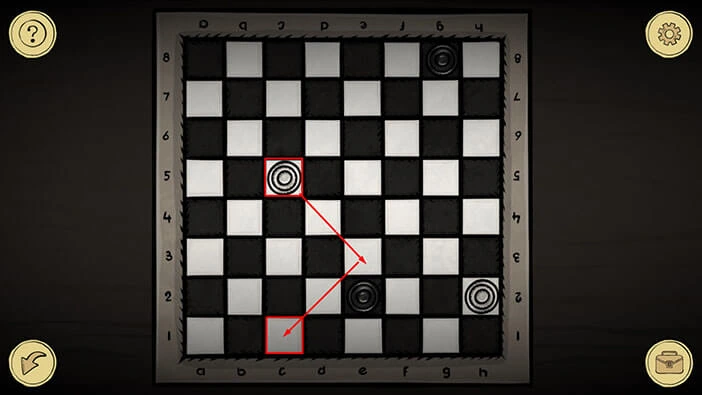
We can also see two white discs and two black discs and our task is to place these discs on the correct coordinates on the chessboard. We will start with the white disc located at the coordinates “C5”. Our task is to get it to “C1”, but the white disc can only move diagonally on the white fields.
We will do this puzzle in several steps. Let’s begin.
Step 1
Move the white disc located at the coordinates “C5” and move it two fields down and to the right. After that, move the same disc three fields down and to the left and it will be at the position “C1”.
Step 2
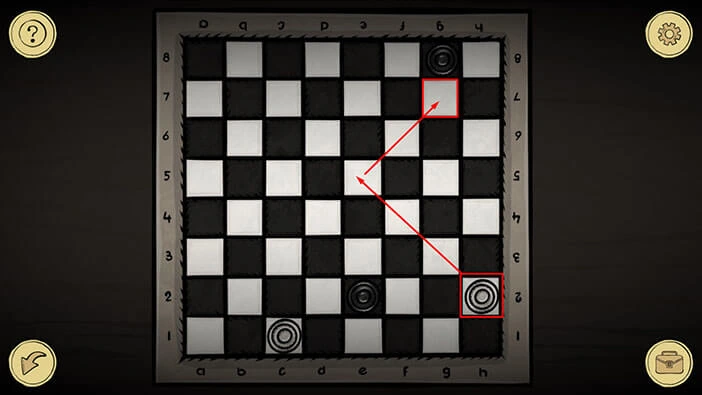
Next, we should place the other white disc at the position “G7”. This disc is currently at the position “H2”.
So, select this disc and move it three fields up and to the left. After that, move the same disc two fields up and to the right and you will place it at the position “G7”.
Step 3
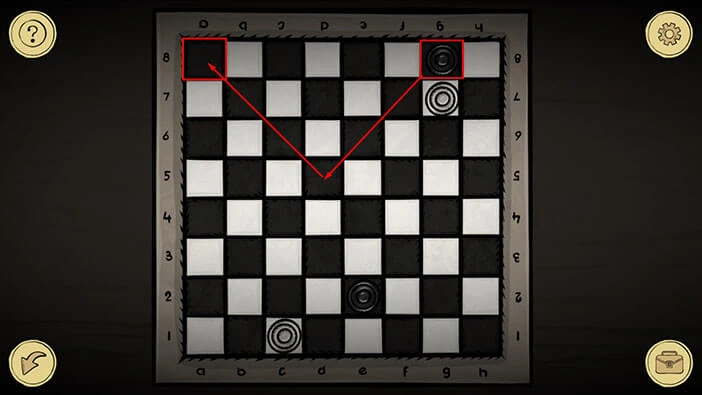
Next, we should take the black disc located at the position “G8” and place it at the position “A8”.
So, select this disc and move it three fields down and to the left. After that, move the same disc three fields up and to the left and you will place it at the position “A8”.
Step 4
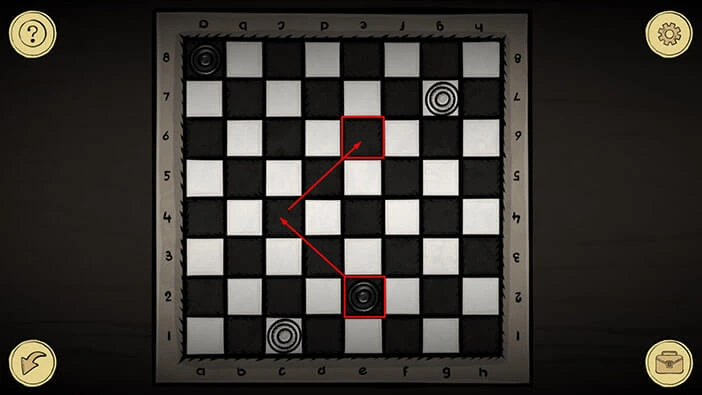
Lastly, we should take the black disc located at the position “E2” and place it at the position “E6”.
So, select this disc and move it two fields up and to the left. After that, move the same disc two fields up and to the right and you will place it at the position “E6”.
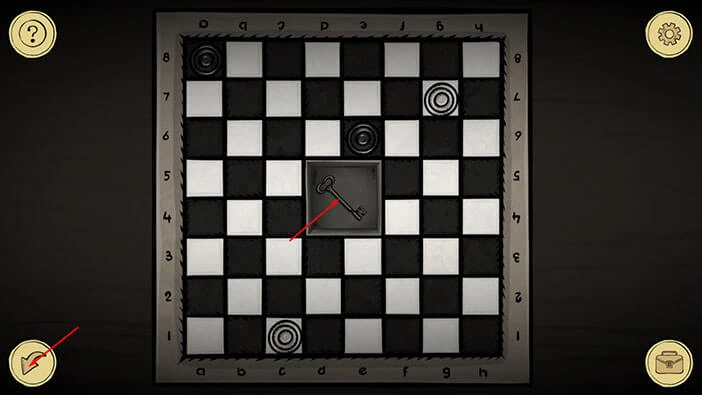
The secret compartment in the middle of the chessboard will open as soon as you place the discs in the correct positions, and inside you will find a “Key”. Tap on it to pick it up.
After that, tap on the arrow in the lower left corner to go back.
Tap on the arrow on the right to go back to the previous room.
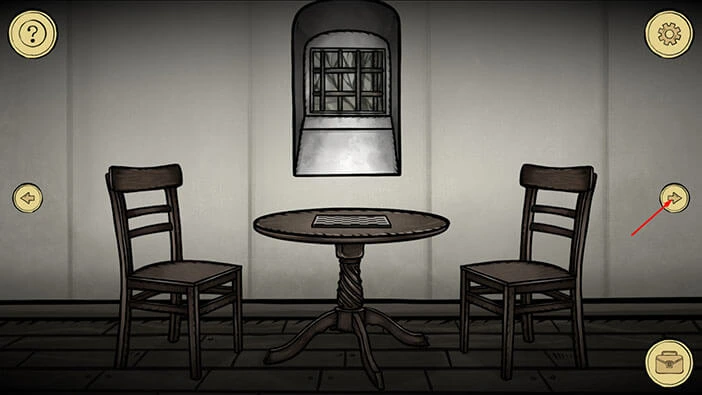
Next, tap on the suitcase icon to open the inventory and select “Key”. After that, tap on the door on the right to unlock it, and tap again to proceed into the next room.
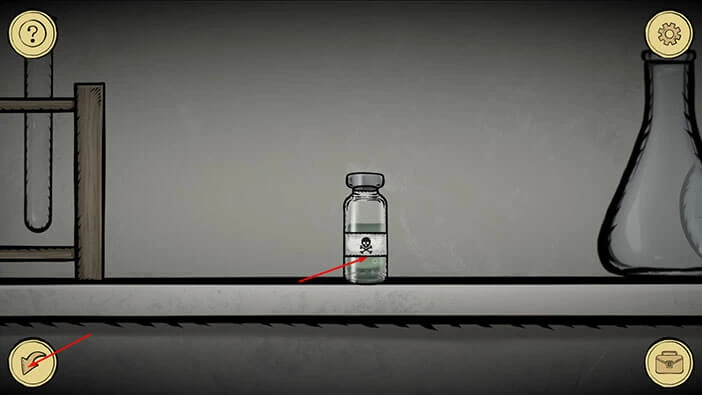
Tap on the shelf on the right to take a closer look at it. Here, you will find a small vial with “Poison”. Tap on it to pick it up.
After that, tap on the arrow in the lower left corner to go back.
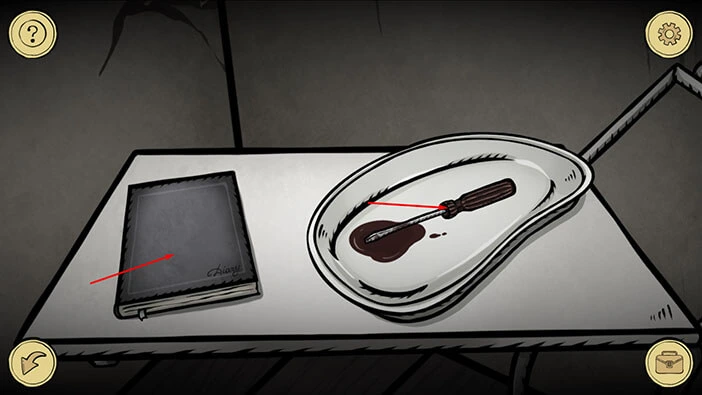
Next, tap on the cart on the left to take a closer look at it. Here, you will find a bloodstained screwdriver. Tap on it to pick it up, and “Screwdriver” will be added to your inventory.
After that, tap on the book on the left to examine it.
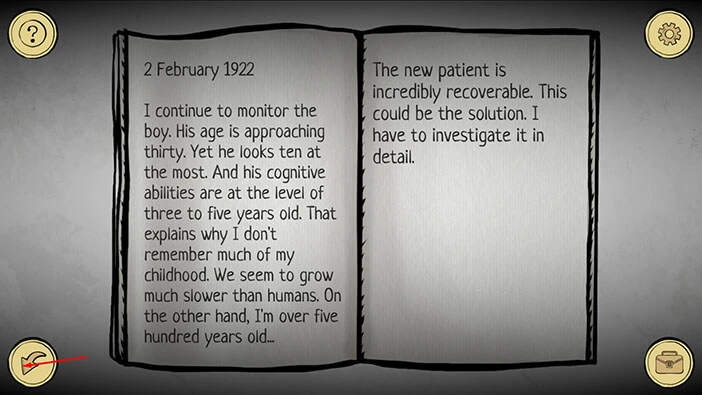
Hmm, this is someone’s diary. It looks like this person found a little boy in the alleyway, starving and hunting rats for food. So, this person adopted the boy but had to lock him up, because the boy was a ghoul with uncontrollable hunger, and he devoured the patients. This older person was also a ghoul.
Hmm, this older person could be Doctor Death. We already saw a young boy, and our character should consider himself lucky. The young ghoul was probably craving human flesh, but surprisingly, he decided to run away. Also, this explains how a person could live 150 years and celebrate his 150th birthday.
Interesting. Tap on the page on the right to take a look at the next page.
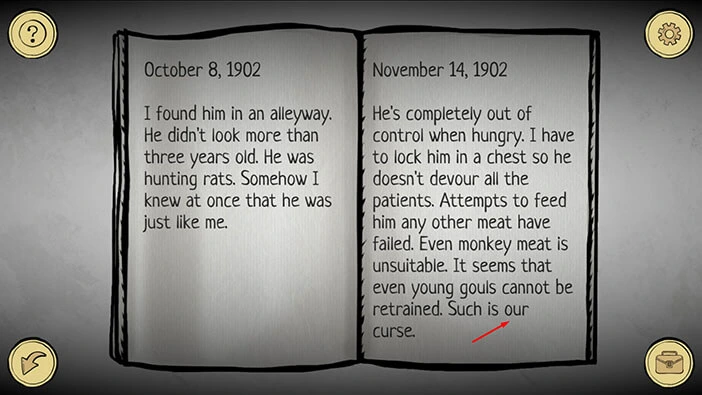
The boy is over thirty years old, yet, he looks like he’s ten at most. I think we can now presume that the older ghoul is actually Doctor Death. At this point, he is over 500 years old. Wow. Next, he talks about a patient who has recovered from his wounds at an incredible rate, and he believes that this patient might be a solution to his problem.
Could he be talking about our character? Maybe our character changed somehow when he was slashed by the demon, and gained some kind of regenerative ability? I guess we will find out soon enough.
Tap on the arrow in the lower left corner to go back.
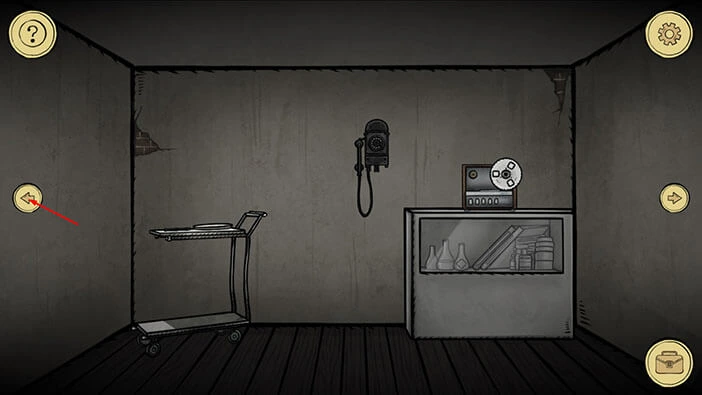
Tap on the arrow on the left to proceed to the next room.
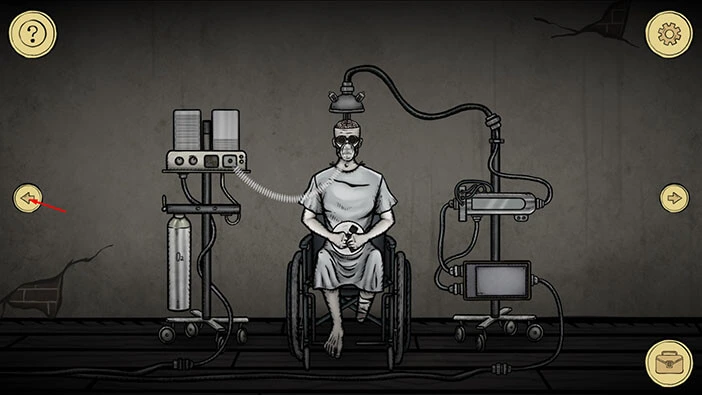
Here, we can see a patient in a wheelchair, whose brain is hooked up to some kind of machine. Also, it seems that his left leg is missing. Possibly, eaten by the ghouls?
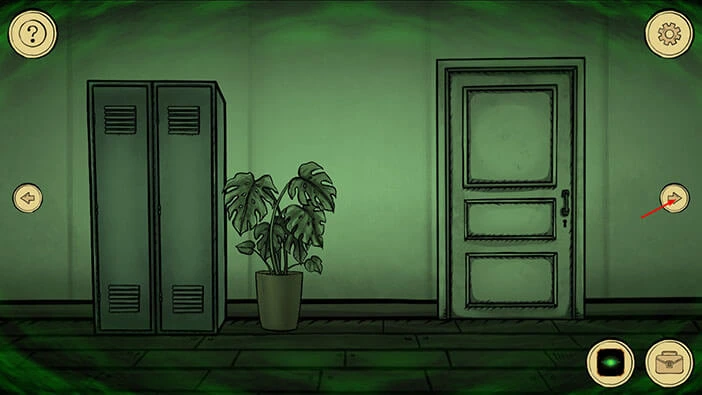
We will come back to this room a bit later. Tap on the arrow on the left to proceed to the next room.
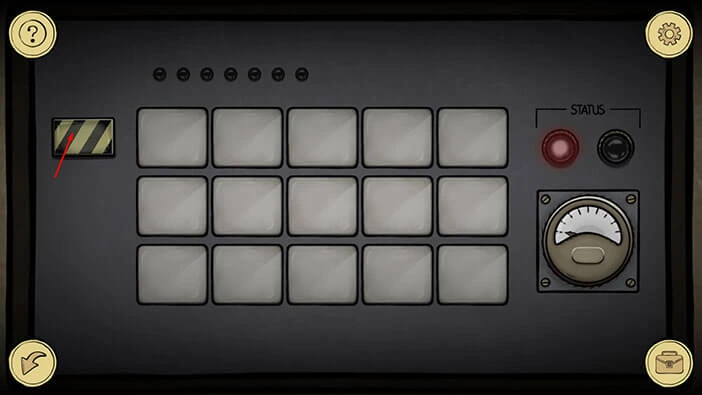
Tap on the machine on the left side of the door to take a closer look at it. After that, tap on the button on the left to start the interaction.
Some images will appear on the three-by-five grid, and they will disappear after several seconds. Here, we have a simple memory game. Our task is to memorize the positions of the images and find the matching pairs.
Well, this is one of the randomized puzzles, so the matching pairs of images will be at different positions in your game. However, in the image below you can see the screenshot of the images that I got when I turned on the machine.
With that said, you could use the same approach and take a screenshot of the symbols in the grid once they are generated, and use this screenshot to solve the puzzle.
NOTE: The skull image doesn’t have a pair.
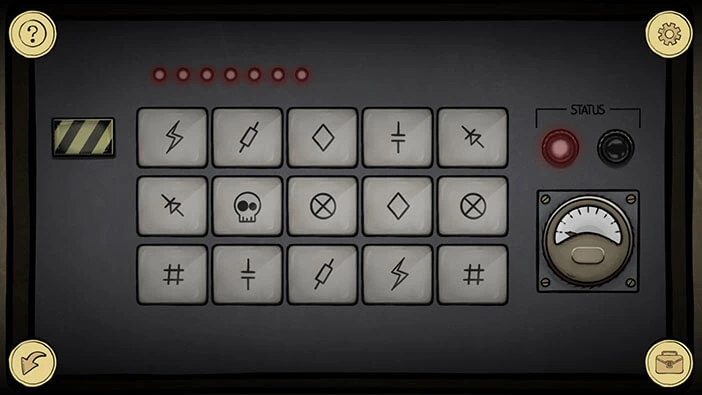
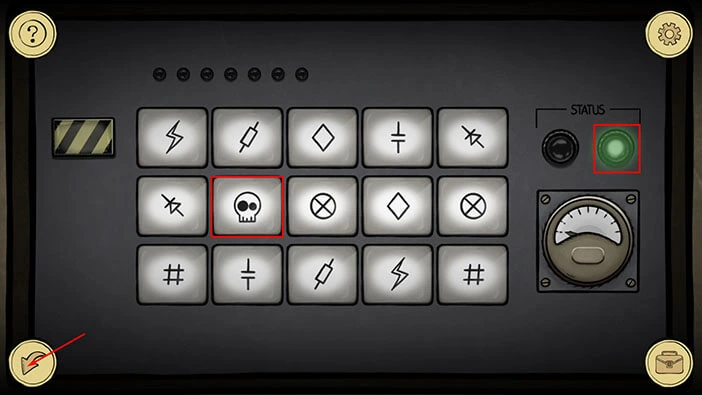
In the image below you can see the solution for the puzzle that was generated in my game (walkthrough) and the solution will probably be different in your game, because, as I mentioned previously, this is one of the randomized puzzles.
As soon as you complete the puzzle, the green light on the right side of the machine will be turned on. Once this happens, tap on the arrow in the lower left corner to go back.
By solving the previous puzzle, we have restored the power to the machine on the right. Tap on it to start the interaction.
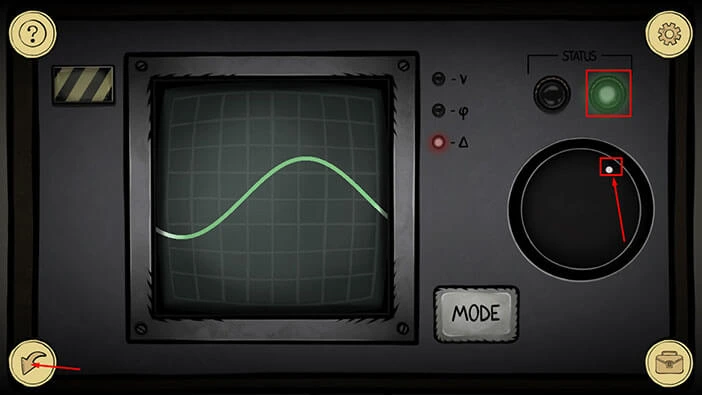
Here, you will see green and white waves (lines) on the display on the left. The lines are currently out of sync, and our task is to synchronize them (the lines should be moving over each other). We can do this by making adjustments to the dot on the display on the right. Here, we have to set up three values marked by the letter “V”, a “Triangle”, and a “Strange Symbol”. The red light indicates which symbol is currently selected, and we can change the selected symbol by tapping on the “Mode” button.
Let’s begin. The “Triangle” mode is currently selected, so let’s begin by setting the value for this mode.
Step 1
Move the white dot clockwise, and place it at the 2 o’clock position. After that, tap on the “Mode” button to switch to “V”.
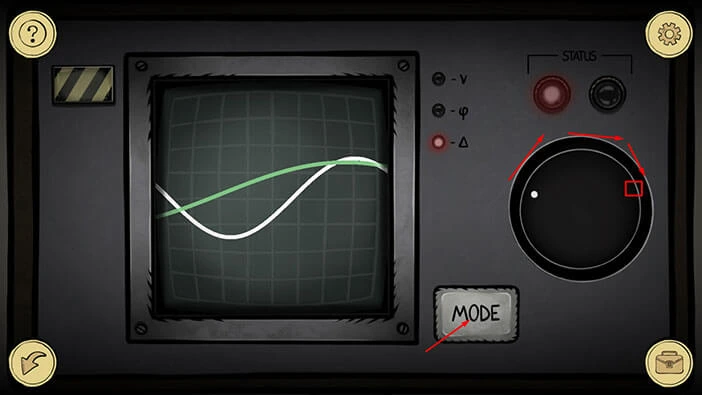
Step 2
The “V” mode is currently selected. Move the white dot counterclockwise, and place it at the 6 o’clock position.
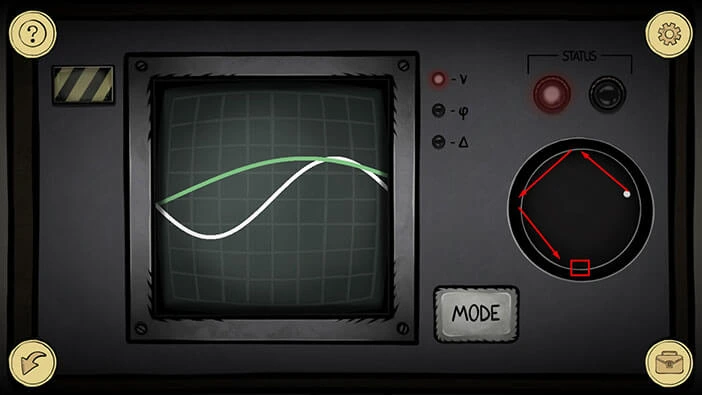
Step 3
The “V” mode is still selected. Move the white dot clockwise, and place it at the 4 o’clock position.
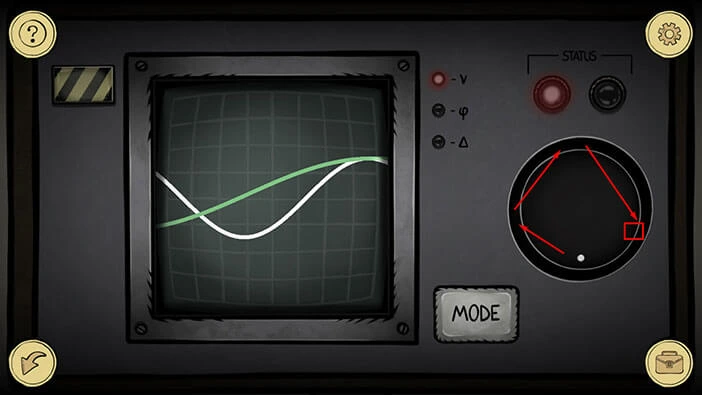
Step 4
The “V” mode is still selected. Move the white dot counterclockwise, and place it at the 12 o’clock position. After that, tap on the “Mode” button to switch to “Strange Symbol”.
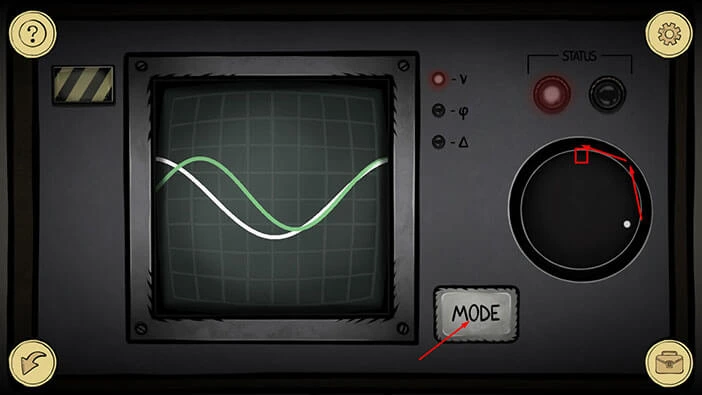
Step 5
The “Strange Symbol” mode is currently selected. Move the white dot counterclockwise, and place it at the 11 o’clock position. After that, tap on the “Mode” button to switch to “Triangle”.
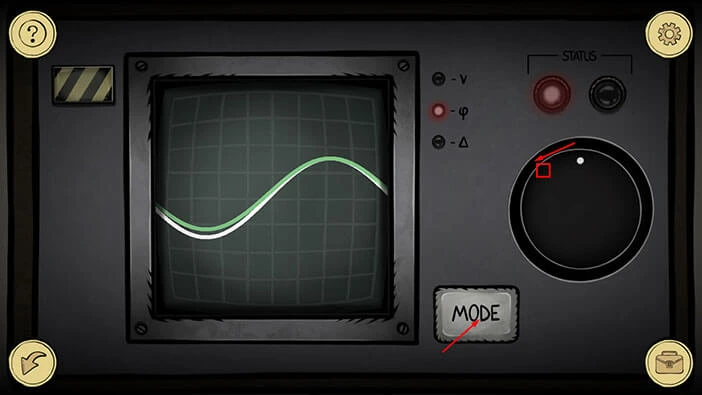
Step 6
The “Triangle” mode is currently selected. Move the white dot clockwise, and place it at the 4 o’clock position. After that, tap on the “Mode” button to switch to “V”.
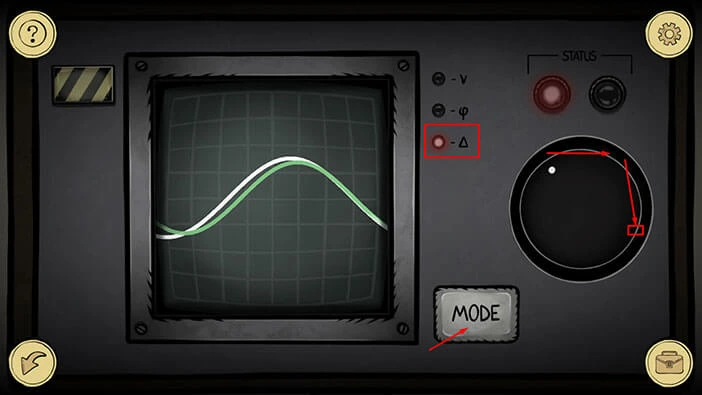
Step 7
The “V” mode is currently selected. Move the white dot counterclockwise, and place it at the 1 o’clock position. With this step you will turn on the green light in the top right corner, indicating that we restored the power to the machine.
Tap on the arrow in the lower left corner to go back.
Let’s go back to the previous room. Tap on the arrow on the right.
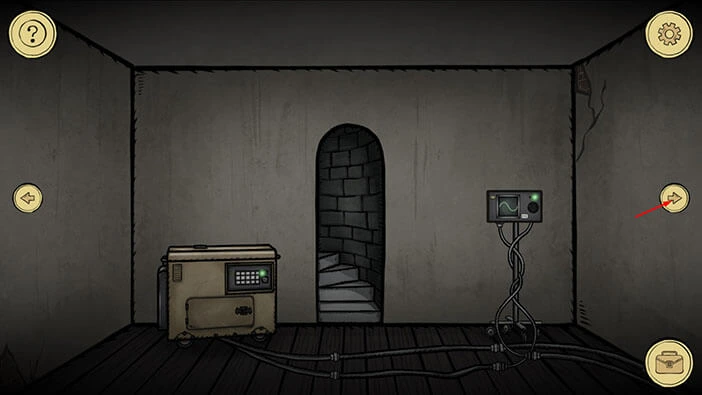
Ok, let’s proceed to the next puzzle. Tap on the machine on the right, the one with three red lights, to start the interaction.
Next, tap on the suitcase icon to open the inventory and select “Screwdriver”. After that, tap on the screw in the top right corner to remove it. Repeat the process and remove the screw in the lower left corner.
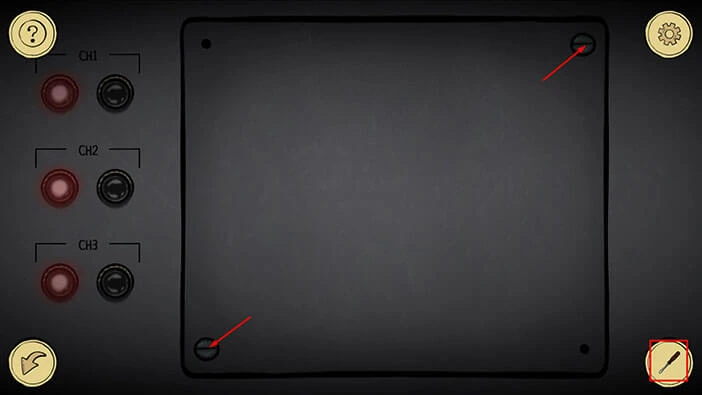
You will remove the panel, as soon as you remove the two screws. Here, you will see three small circuit boards. So, tap on the circuit board on the left to start the interaction.
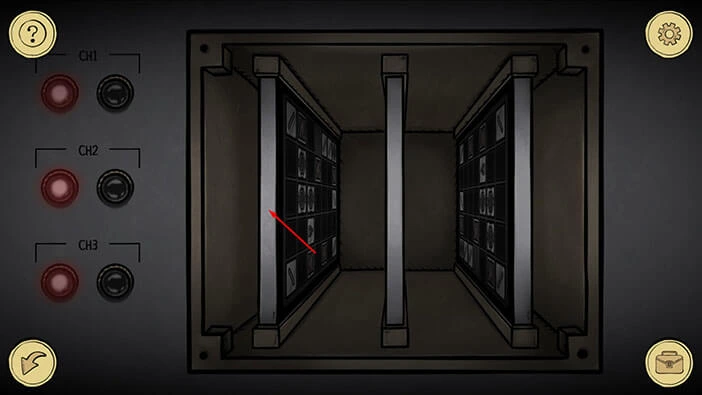
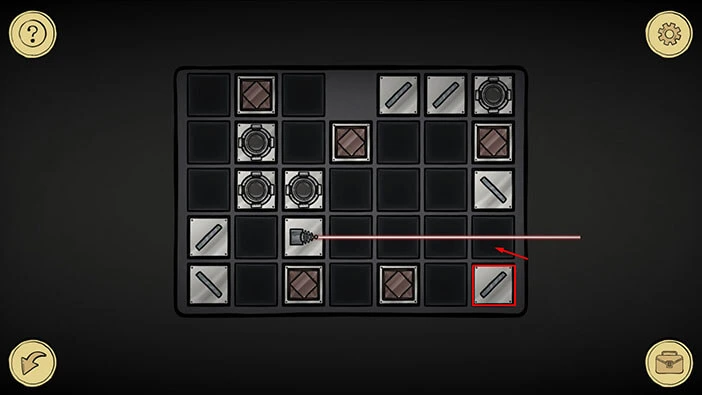
Here, we have another puzzle. Our task is to move the laser ray through all four lenses (rounded symbol). We can do this by moving the other elements on the grid and rerouting the laser. We will do this puzzle in several steps. Let’s begin.
Step 1
Select the seventh element (left to right) in the fifth row (top to bottom), then tap on the seventh field in the fourth row to move the element.
Step 2
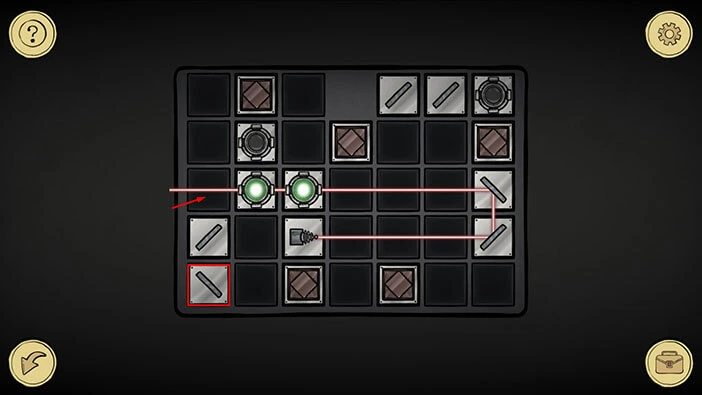
Select the first element in the fifth row, then tap on the first field in the third row to move the element.
Step 3
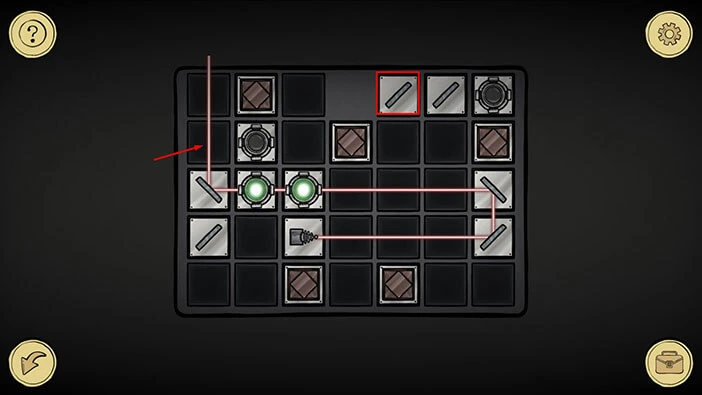
Select the fifth element in the first row, then tap on the first field in the second row to move the element.
Step 4
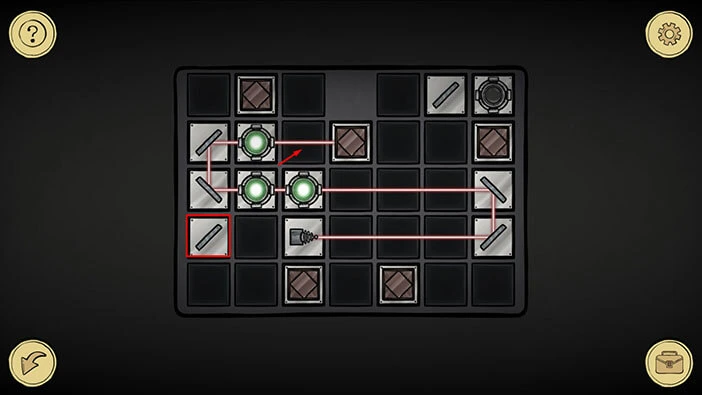
Select the first element in the fourth row, then tap on the third field in the second row to move the element.
Step 5
Select the sixth element in the first row, then tap on the third field in the first row to move the element.
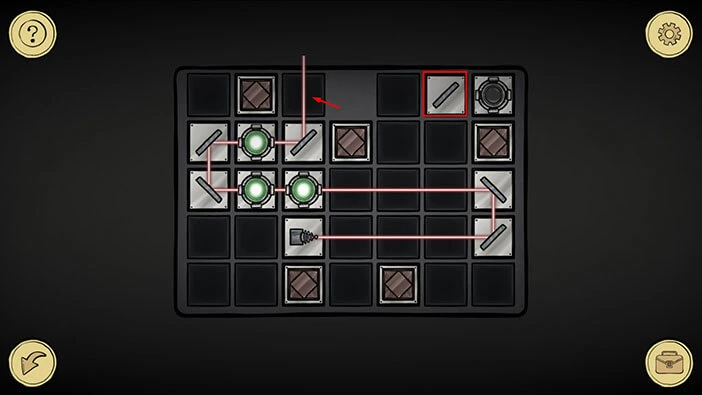
Once you complete the fifth step, you will turn on the green lights of all four round elements. Tap on the arrow in the lower left corner to go back.
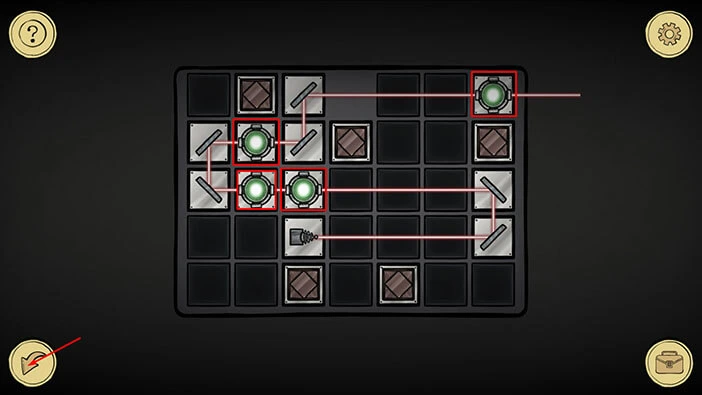
If you take a look at the left side of the screen, you will notice the green light below the “CH1”. Our next task is to also set up the “CH2”. So, let’s tap on the circuit board in the middle to start the interaction.
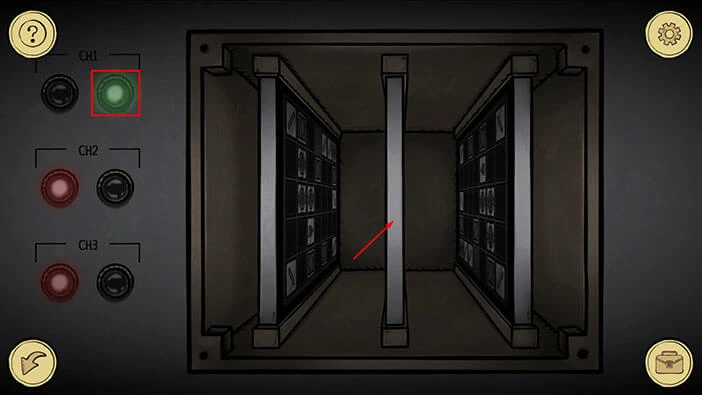
Step 1
Select the first element in the first row, then tap on the sixth field in the first row to move the element.
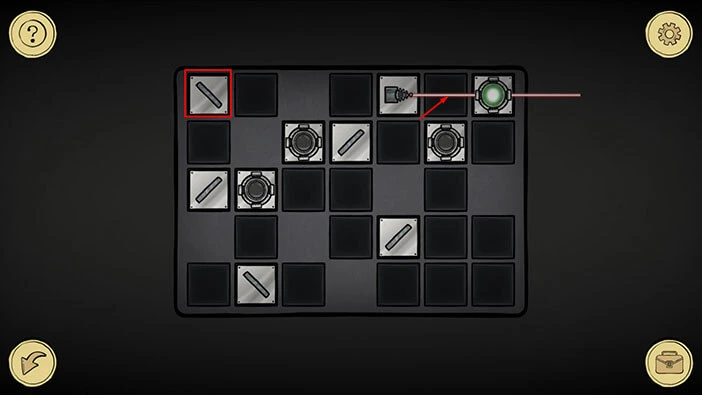
Step 2
Select the fifth element in the fourth row, then tap on the sixth field in the third row to move the element.
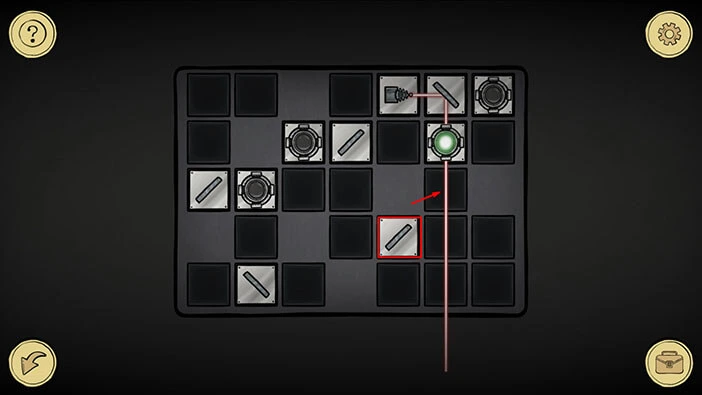
Step 3
Select the first element in the third row, then tap on the first field in the first row to move the element.
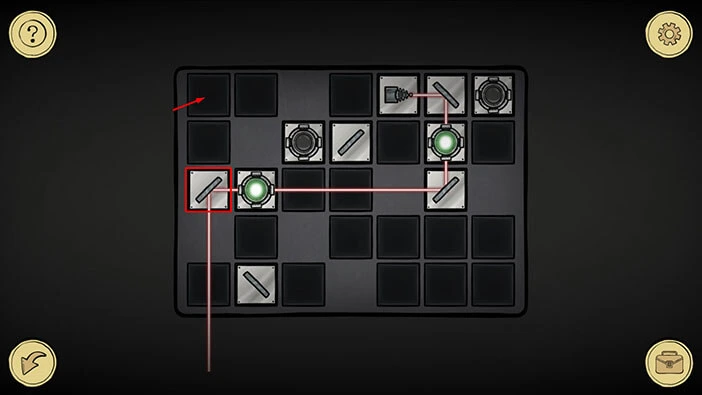
Step 4
Select the second element in the fifth row, then tap on the first field in the third row to move the element.
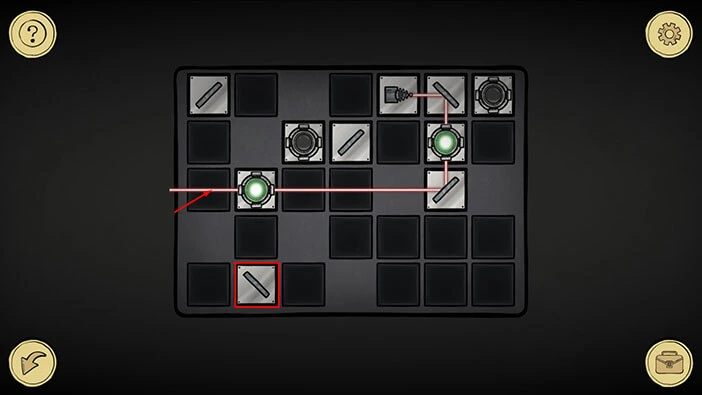
Step 5
Select the first element in the first row, then tap on the first field in the second row to move the element.
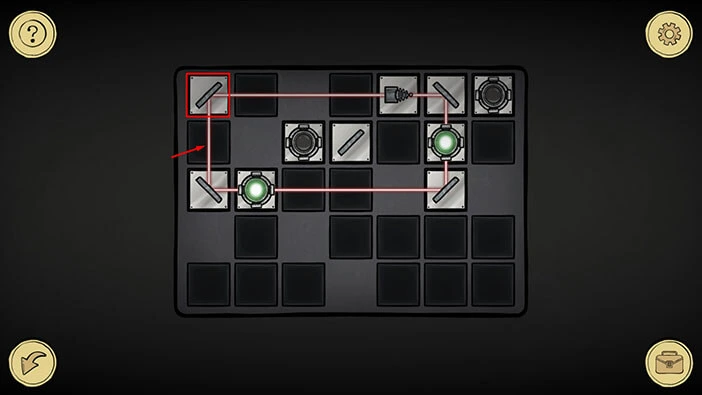
Step 6
Select the fourth element in the second row, then tap on the seventh field in the second row to move the element.
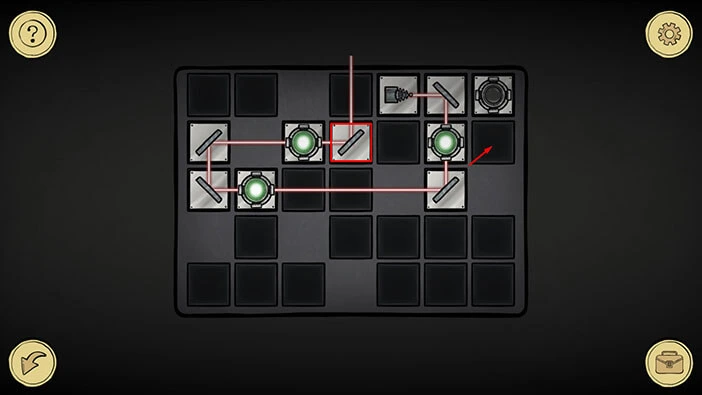
Once you complete the sixth step, you will turn on the green lights of all four round elements. Let’s tap on the arrow in the lower left corner to go back.
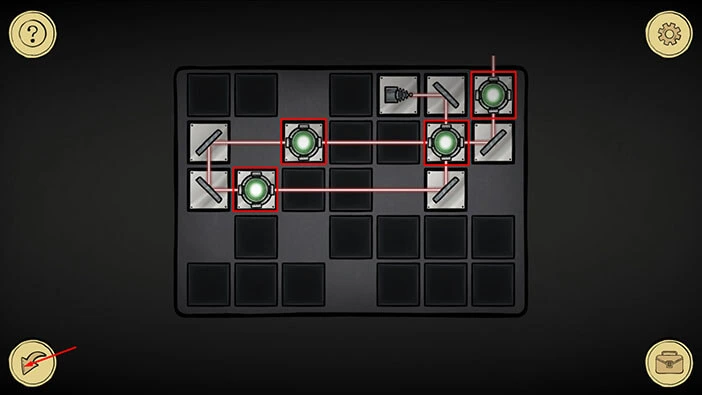
If you take a look at the left side of the screen, you will notice the green light below the “CH2”. Now, we just have to set up the “CH3”. So, let’s tap on the circuit board on the right to start the interaction.
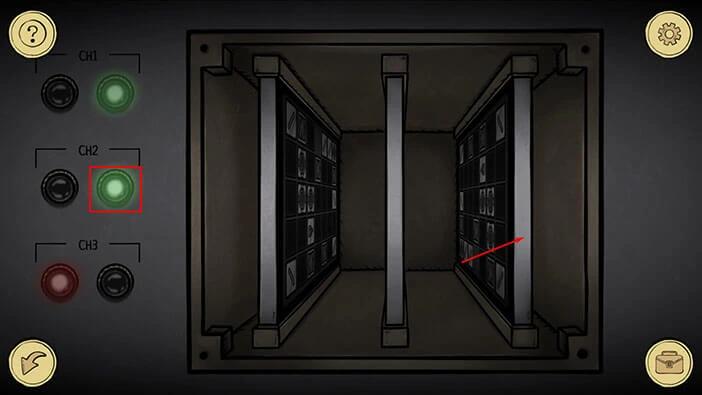
Step 1
Select the second element in the fifth row, then tap on the third field in the first row to move the element.
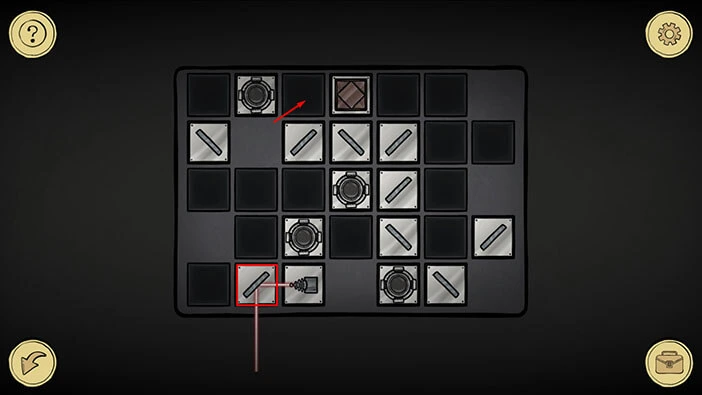
Step 2
Select the fourth element in the second row, then tap on the second field in the third row to move the element.
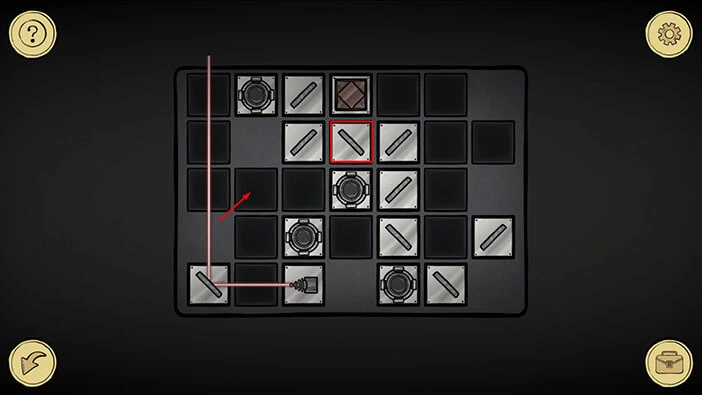
Step 3
Select the third element in the first row, then tap on the first field in the first row to move the element.
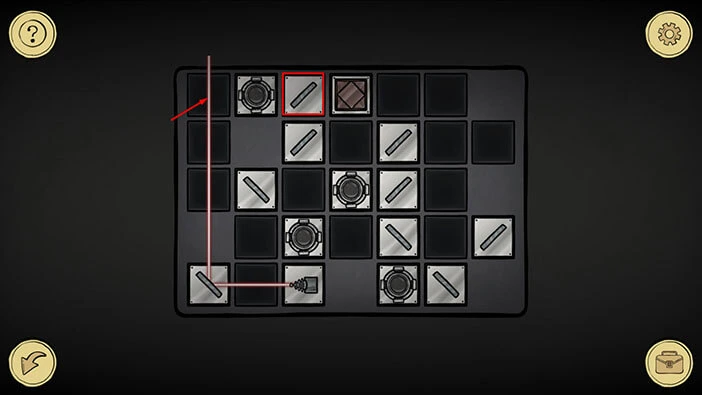
Step 4
Select the third element in the second row, then tap on the fifth field in the first row to move the element.
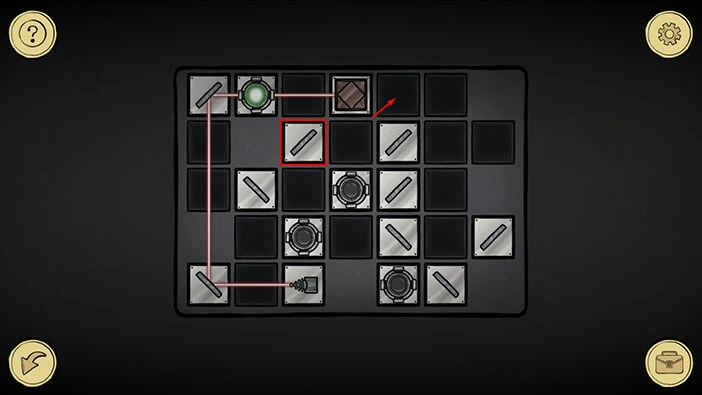
Step 5
Select the second element in the third row, then tap on the third field in the first row to move the element.
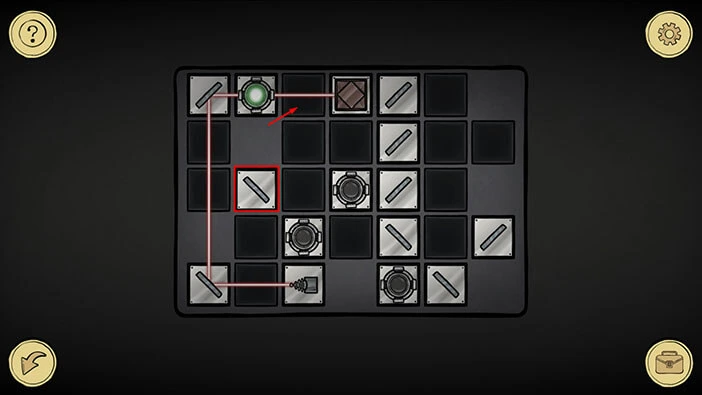
Step 6
Select the fifth element in the fourth row, then tap on the third field in the third row to move the element.
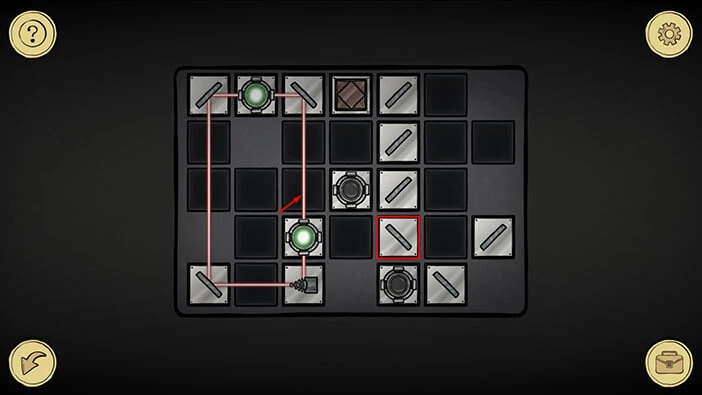
Step 7
Select the third element in the third row, then tap on the fourth field in the second row to move the element.
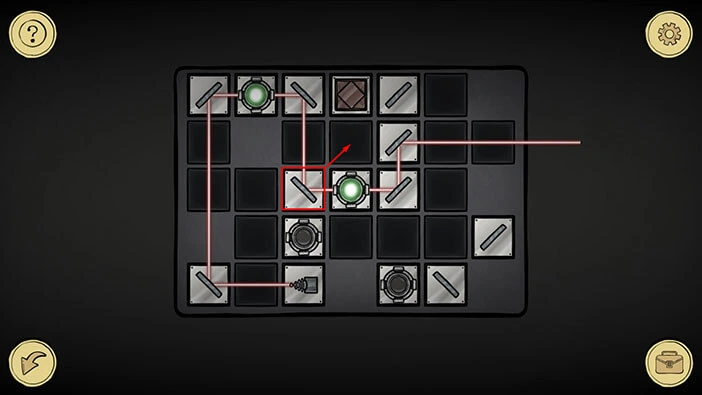
Step 8
Select the seventh element in the fourth row, then tap on the third field in the third row to move the element.
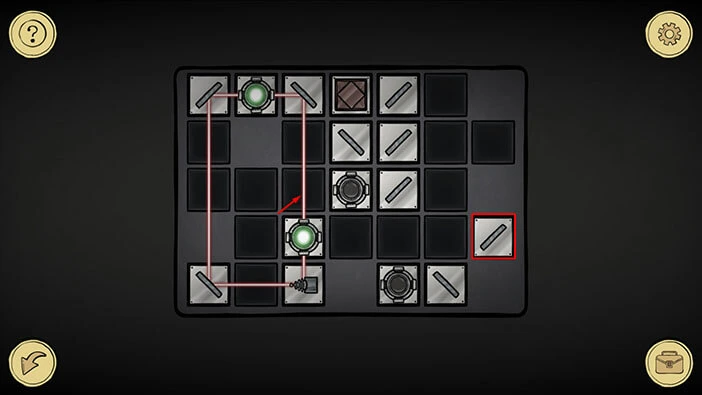
Step 9
Select the fifth element in the second row, then tap on the second field in the third row to move the element.
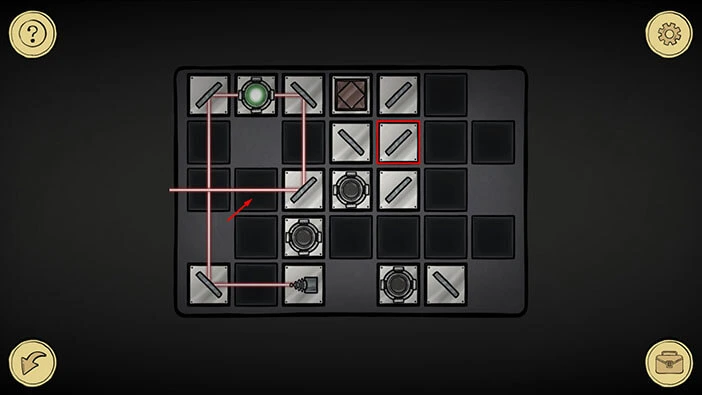
Step 10
Select the sixth element in the fifth row, then tap on the second field in the fourth row to move the element.
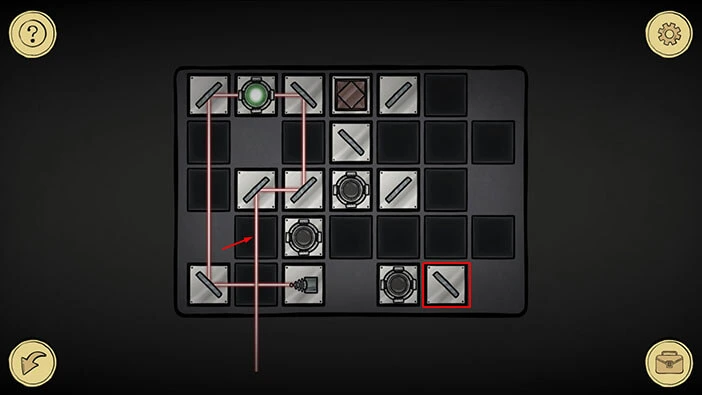
Step 11
Select the fifth element in the third row, then tap on the fourth field in the fourth row to move the element.
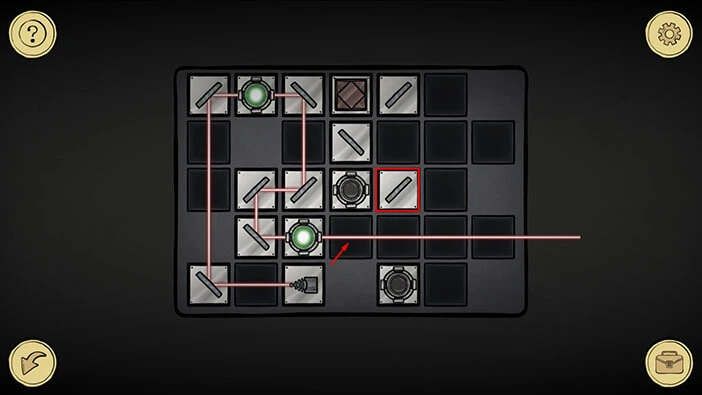
Step 12
Select the fourth element in the second row, then tap on the fifth field in the second row to move the element.
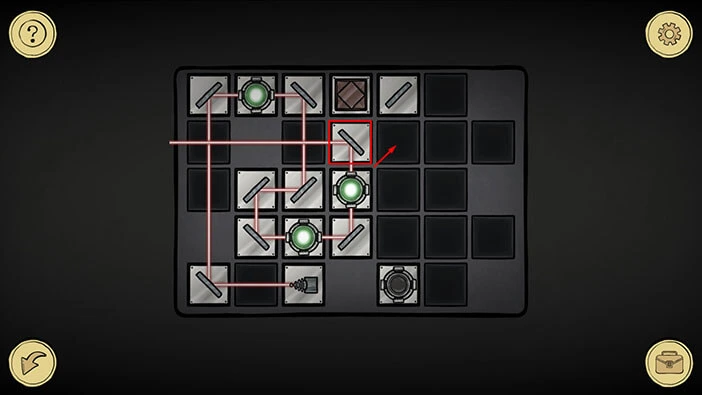
Step 13
Select the fifth element in the first row, then tap on the fourth field in the second row to move the element.
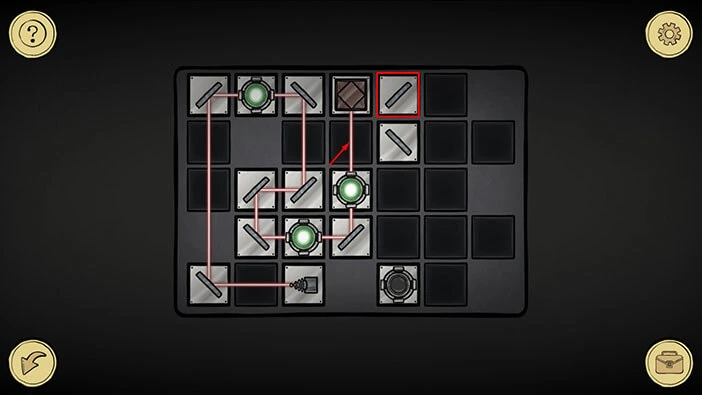
Once you complete the last step, you will turn on the green lights of all four round elements. Let’s tap on the arrow in the lower left corner to go back.
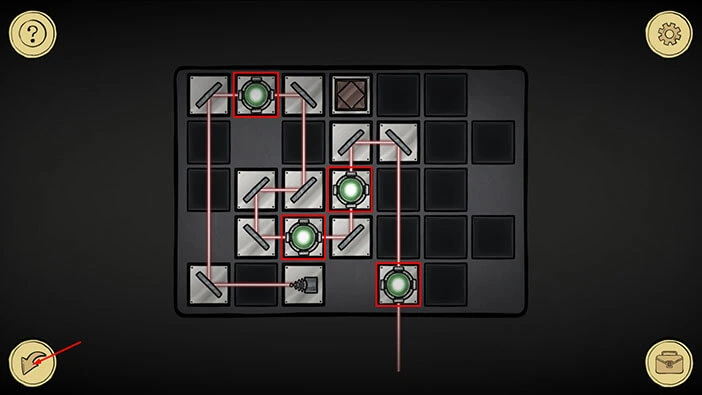
Ok, we can now see three green lights on the machine in the bottom right. Let’s tap on the machine above it to proceed to our next task.
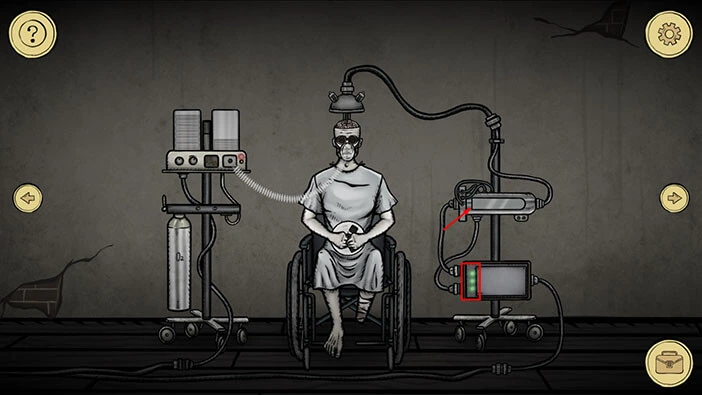
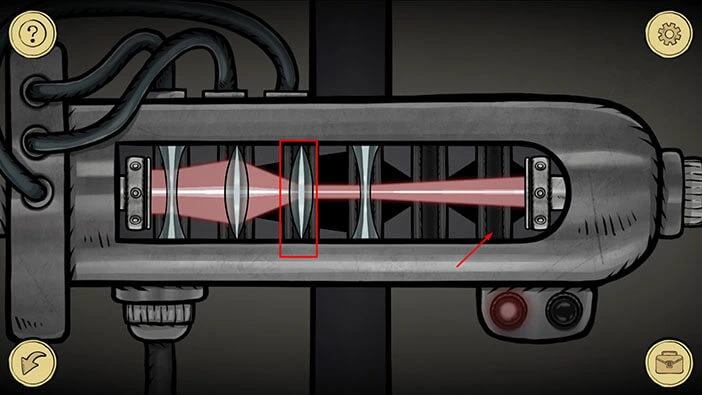
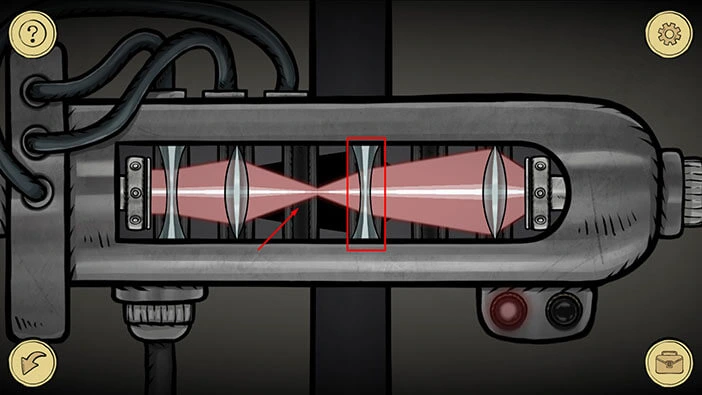
Here, we have another puzzle. Our task is to readjust the pieces in the middle of the machine, and reshape the pink thing (I have no idea what’s that). We will do this in several steps. Let’s begin.
Step 1
Select the third item (looking from left to right) and put it in the sixth (last) slot.
Step 2
Select the item in the fourth slot and place it in the third slot.
Step 3
Select the item in the second slot and place it in the fourth slot.
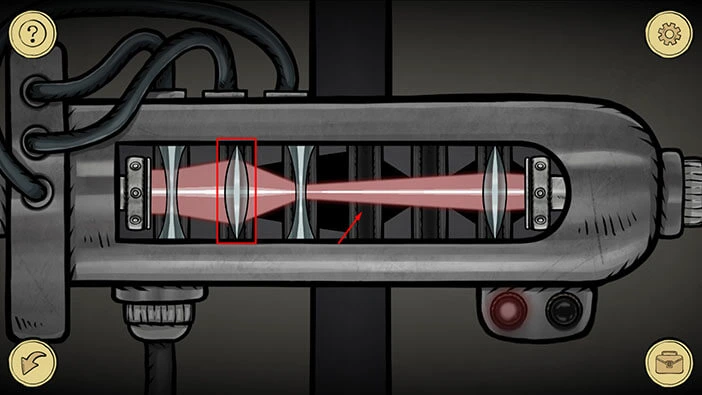
Step 4
Lastly, select the item in the first slot and place it in the second slot.
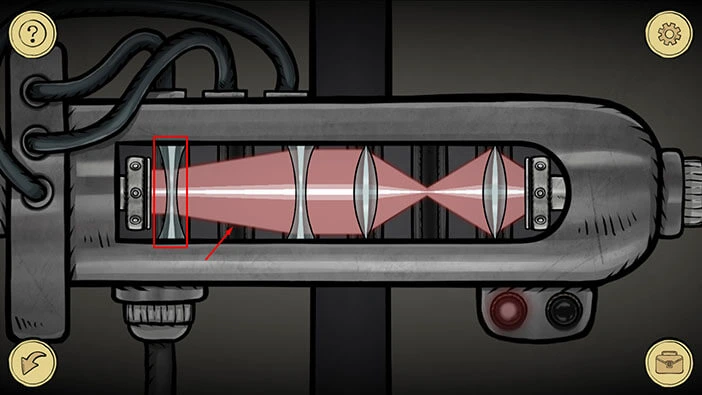
You will turn on the green light in the bottom right corner of the machine, as soon as you complete the last step. Tap on the arrow in the lower left corner to go back.
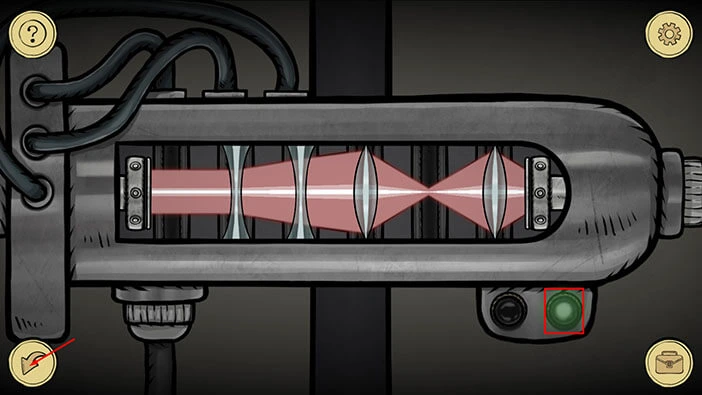
Ok, great, we can see the green lights on both machines on the right, so we’re making progress. Let’s continue. Tap on the patient’s brain to start the interaction.
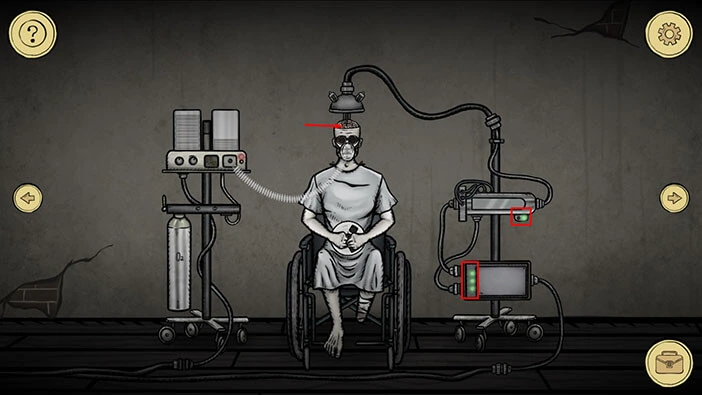
Here, we have another puzzle. We can see 8 nodes connected with red lines. Our task is to reorder the nodes so that lines no longer intersect with each other. The line will change its color to green if it doesn’t intersect with another line. We will do this puzzle in several steps. Let’s begin.
Step 1
Take the green node in the top right and drag it below the green node on the left.
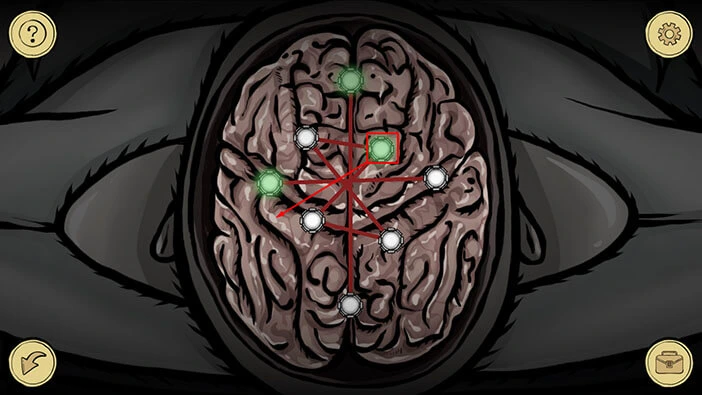
Step 2
Take the green node on the left and drag it above the white node on the right.
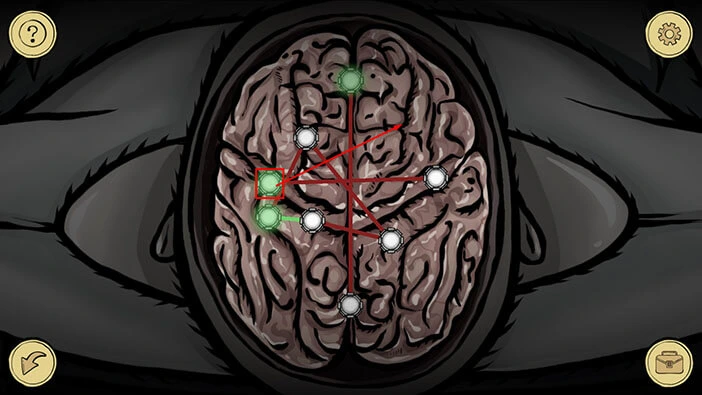
Step 3
Lastly, take the green node at the top and drag it just to the left of the green at the bottom. With this step, you will solve the first part of the puzzle, and we will proceed to the second part.
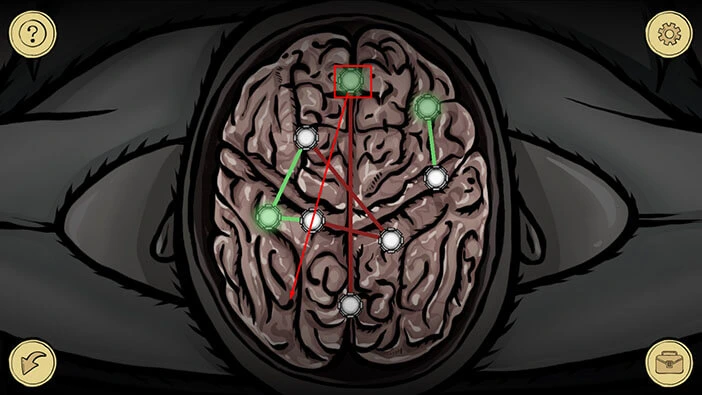
Here, we can see 6 nodes connected with red lines and we have the same task as before. Again we will do this in several steps.
Step 1
Take the green node at the top and drag it between the two white nodes at the bottom.
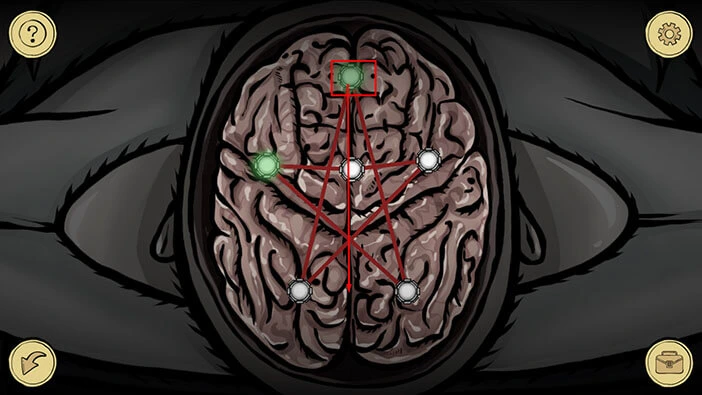
Step 2
Take the green node in the upper left, and drag it to the lower left corner.
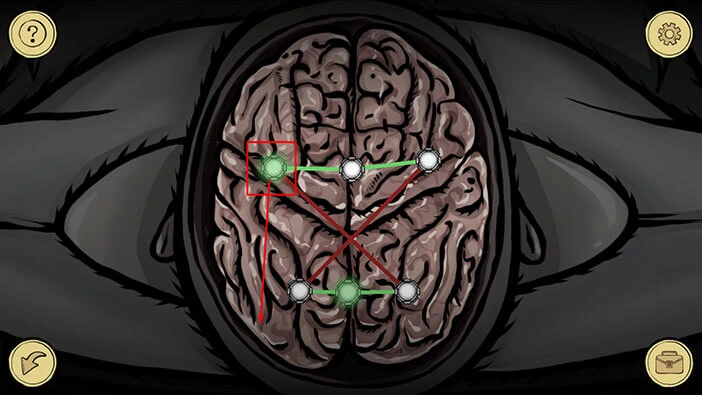
Here, we can see 7 nodes connected with red lines and we have the same task as before. Again we will do this in several steps.
Step 1
Take the green node on the left, and drag it below the white node on the right.
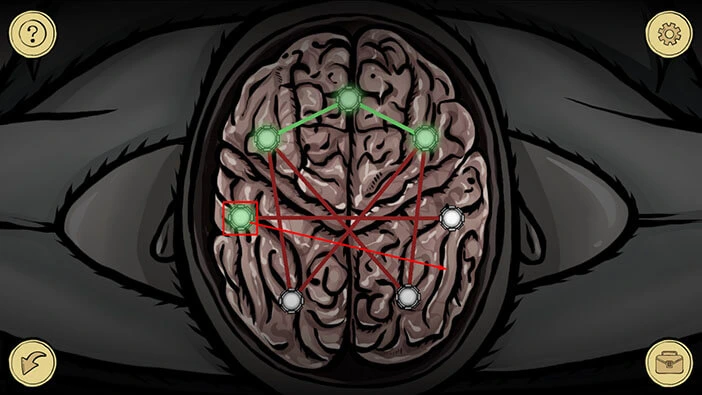
Step 2
Take the green node in the top left, and drag it between the two white dots at the bottom.
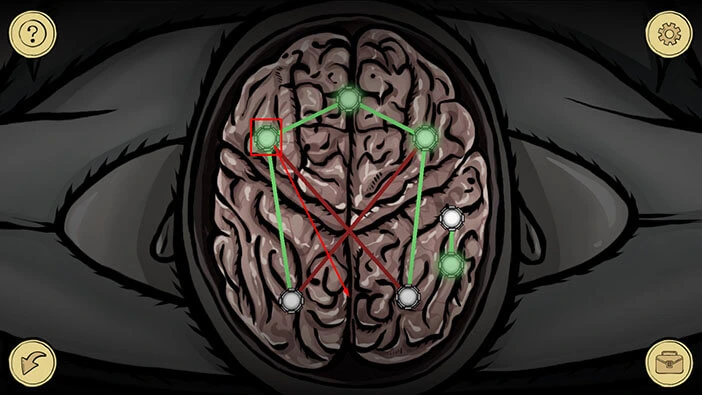
Step 3
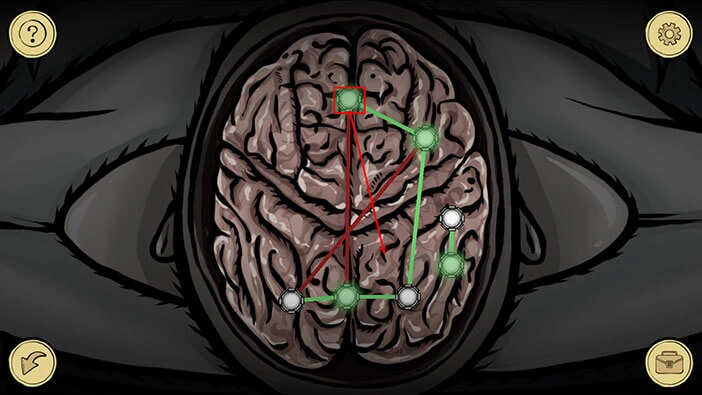
Lastly, take the green node at the top, and drag it inside the “triangle” in the bottom right. With this step, you will solve the puzzle.
Next, tap on the patient’s glasses to take a closer look at them.
Here, we can see two small levers on the glasses, and we can adjust these levers. Let’s take a lever on the right and move to the top mark.
After that, tap on the arrow in the lower left corner to go back.
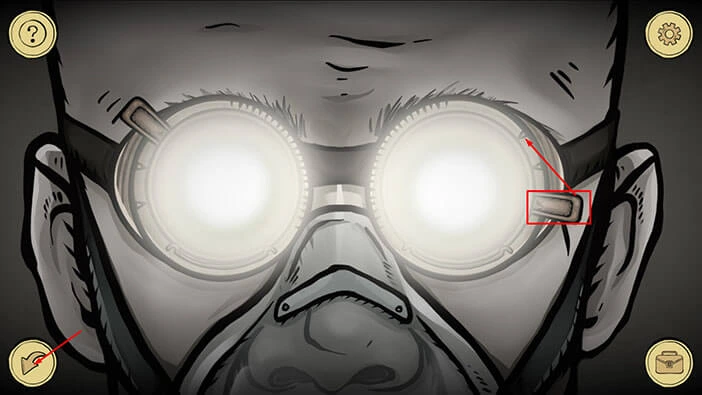
We should now take a look at the effects of the changes that we made by moving the lever on the glasses. Tap twice on the arrow on the right.
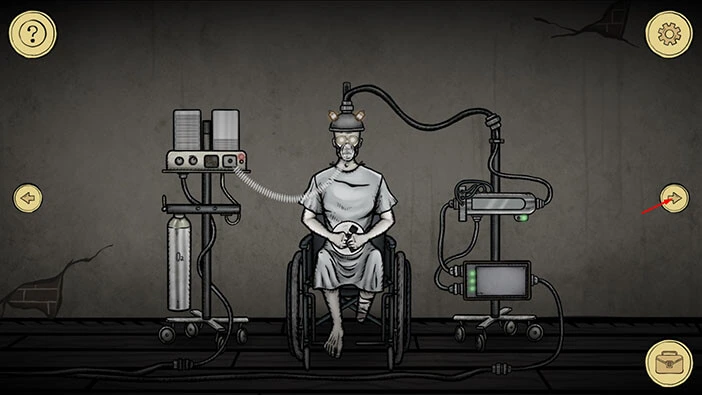
Ok, we can see some numbers forming on the wall, but we still do not have a clear picture. To see a clear picture, we will have to readjust the levers on the glasses. Let’s do that. Tap twice on the arrow on the left to go back to the room with a patient.
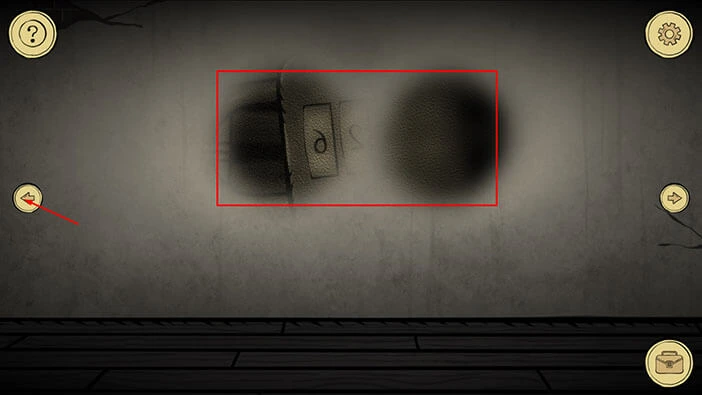
Tap on the glasses again to start the interaction. Take the lever on the left and set it to the middle mark.
After that, tap on the arrow in the lower left corner to go back.
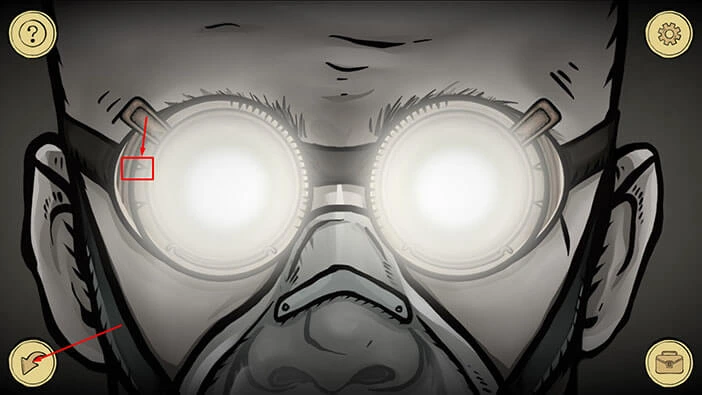
Next, tap twice on the arrow on the right to go back to the previous room.
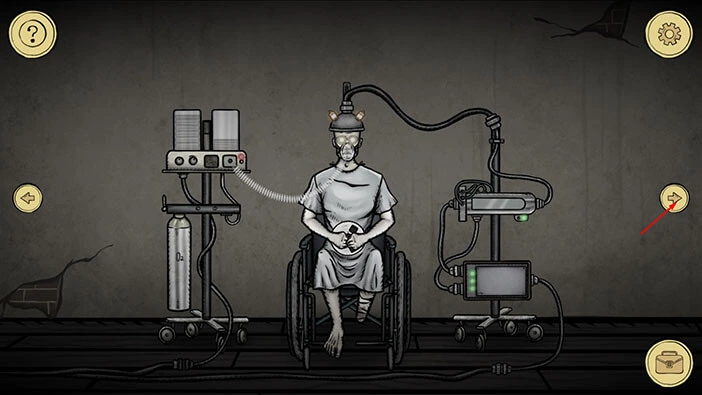
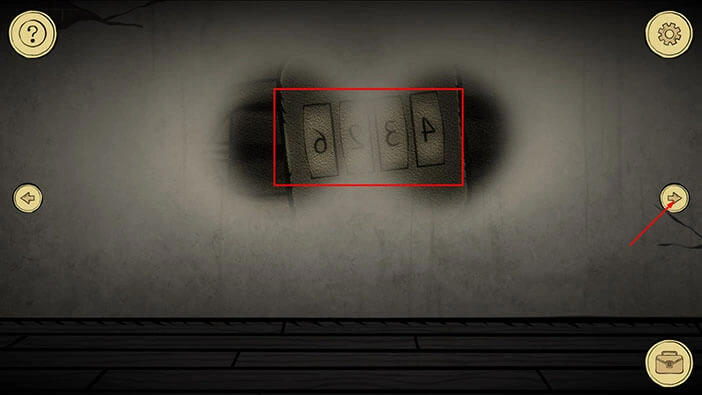
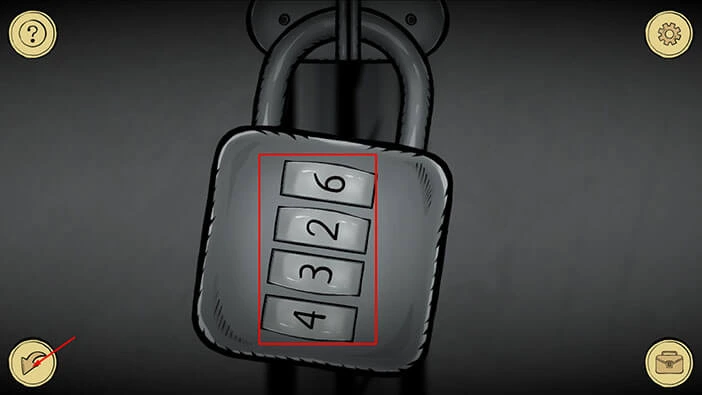
Now, we can see four numbers on the wall, but these numbers are upside down. So, let’s memorize/write down this number because it represents the solution for the next puzzle. The number is “4326”.
Once you’re done, tap on the arrow on the right to proceed to the next room.
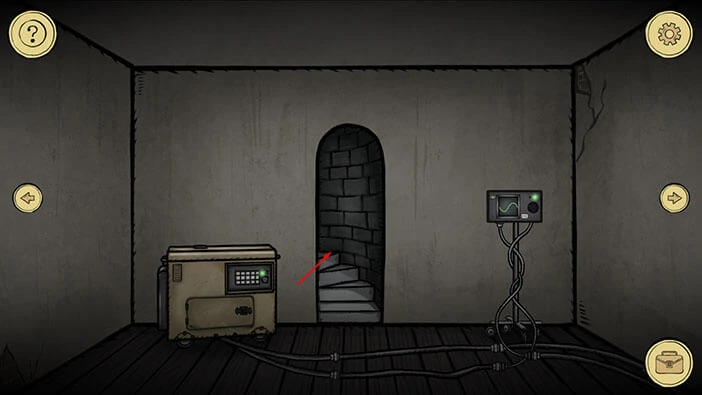
Let’s go upstairs.
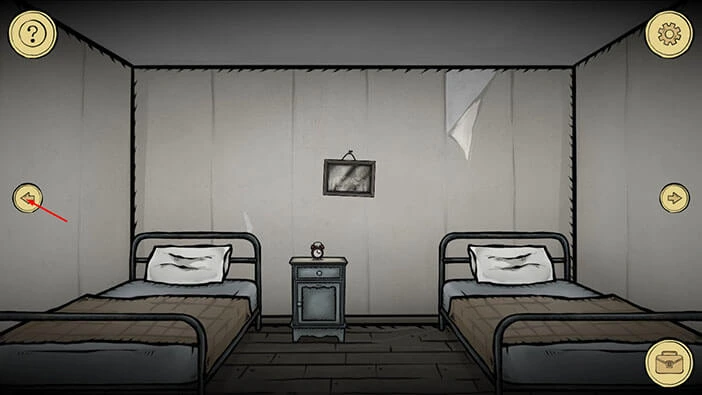
We are now inside the bedroom. Let’s go to the first room on the left.
Tap on the padlock on the locker on the left to start the interaction. Enter the code “4326” and you will unlock the padlock.
After that, tap on the arrow in the lower left corner to go back.
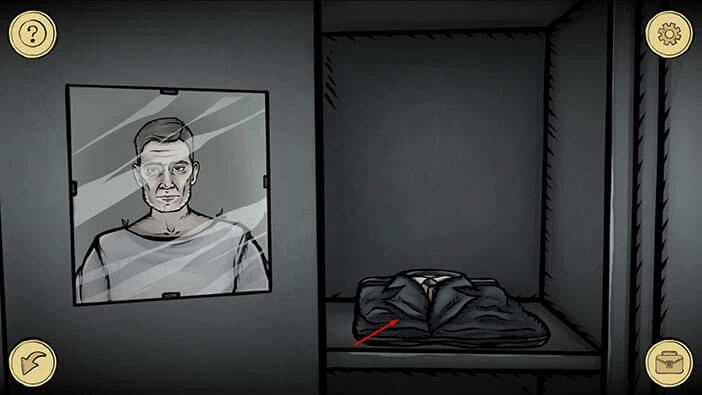
Tap on the locker again to take a look inside you will find your clothes. Tap on it to pick it up.
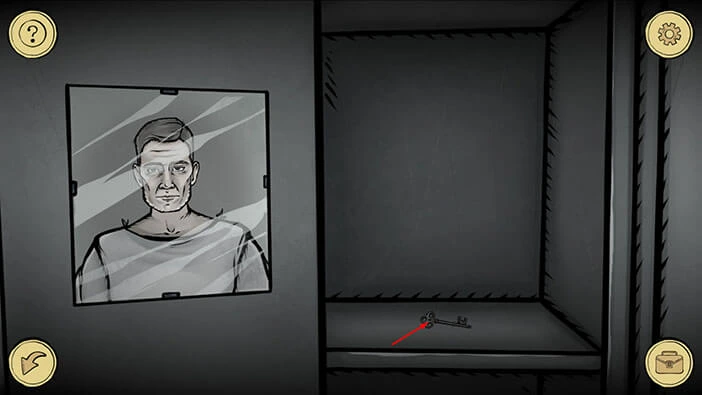
Below it, you will also find a “Key”, so let’s pick it up.
Ok, it’s time to change from this hospital gown. Tap on the suitcase icon to open the inventory, and select “Cloth”. After that, tap on the mirror to put it on.
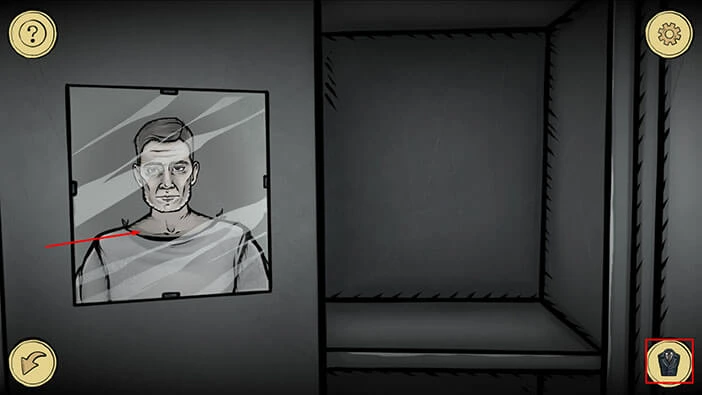
Tap on the arrow in the lower left corner to go back. We should now go back to the bedroom and use this key to unlock the nightstand. So, tap on the arrow on the right.
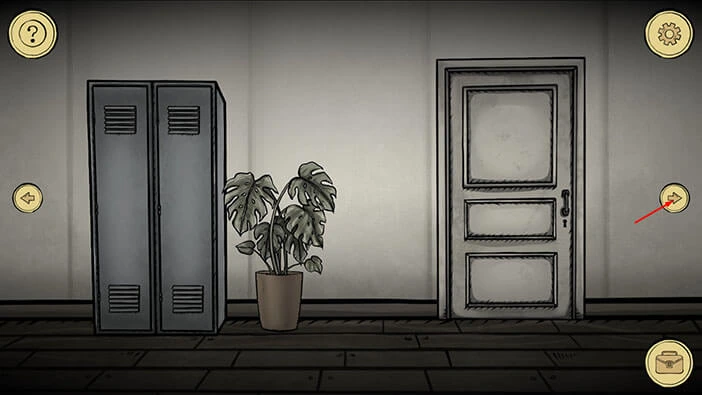
Tap on the nightstand to take a closer look at it. Tap on the suitcase icon to open the inventory and select “Key”. After that, tap on the keyhole to unlock the small door.
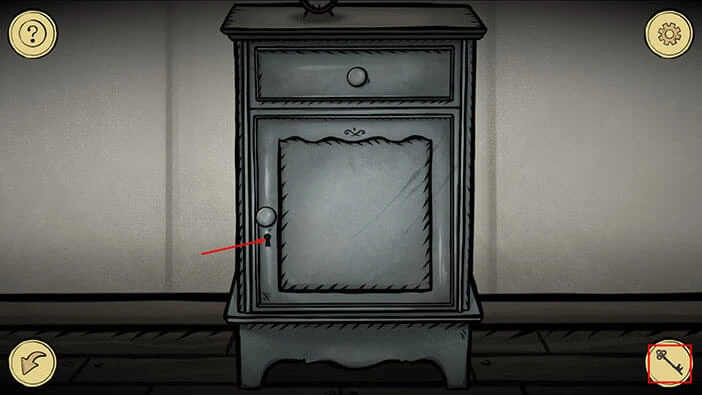
Tap on the “Hat” to pick it up. After that, tap on the arrow in the lower left corner to go back.
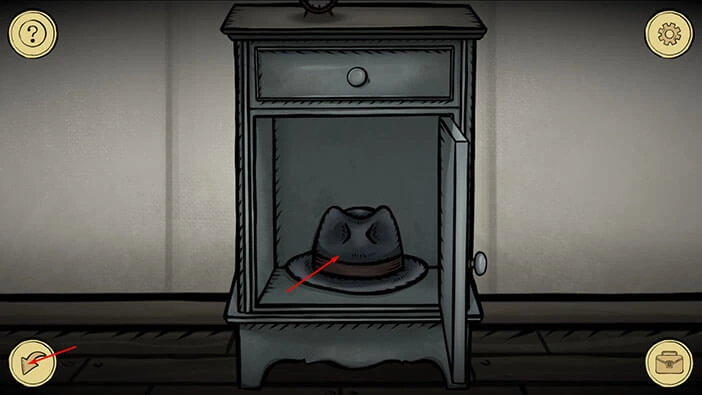
Ok, let’s go back to the previous room and put on the hat (for some reason we have to do that in front of the mirror). Tap on the arrow on the left.
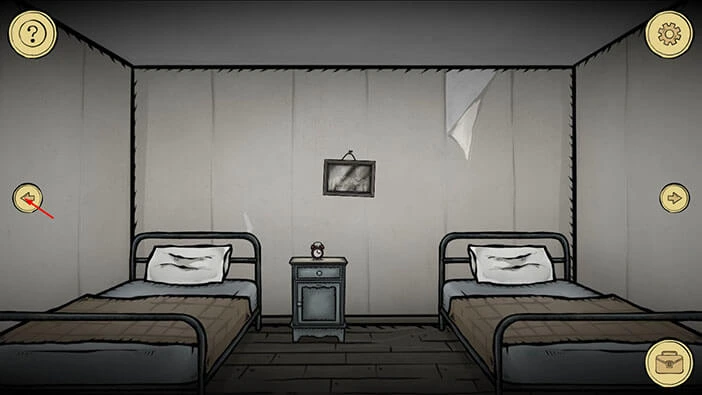
Tap on the locker to start the interaction. Tap on the suitcase icon to open the inventory and select “Hat”. After that, tap on the mirror to put on the hat.
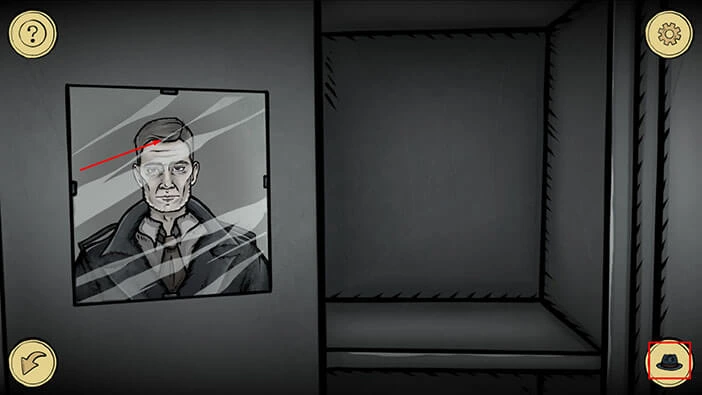
We are now all dressed up, so we can start the next interaction. Again, tap on the suitcase icon to open the inventory and select “Trinket”. After that, tap on the mirror.
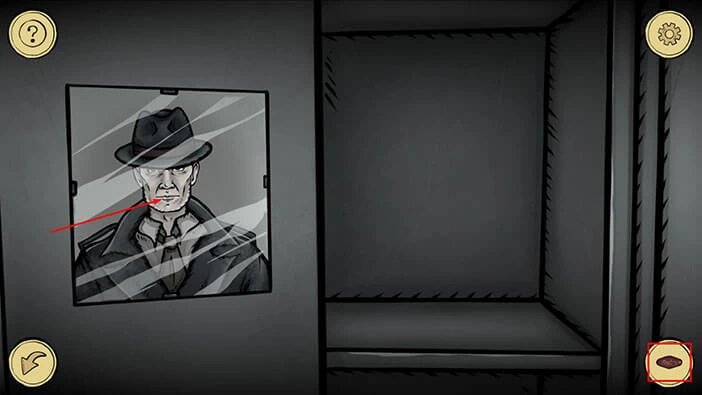
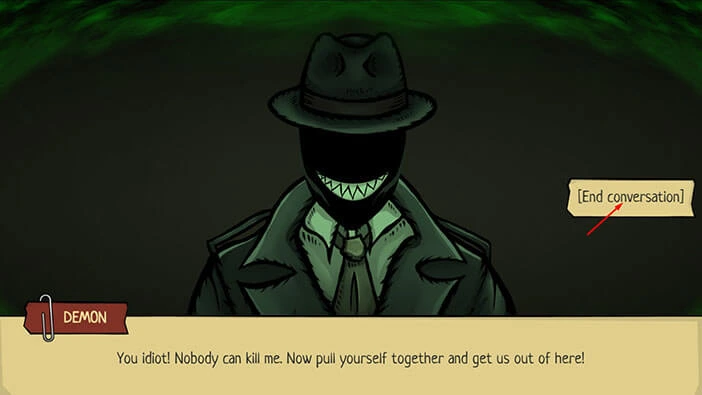
Well, looks like our theory was correct. The demon did get into the body of our character, and that’s why he gained supernatural regenerative abilities. The demon was afraid that our character would be eaten by the ghouls. Luckily, that didn’t happen.
Also, the demon explains that he can’t be killed, and he seems willing to help us get out of this place. Tap on the “End conversation” button. After the dialogue, our character will regain the “Ghost Vision” ability that he had in the previous game (“Strange Case: The Alchemist”).
The “Ghost Vision” ability will be automatically activated, so let’s use it to discover the things that we couldn’t see without it. Tap on the arrow in the lower left corner to go back.
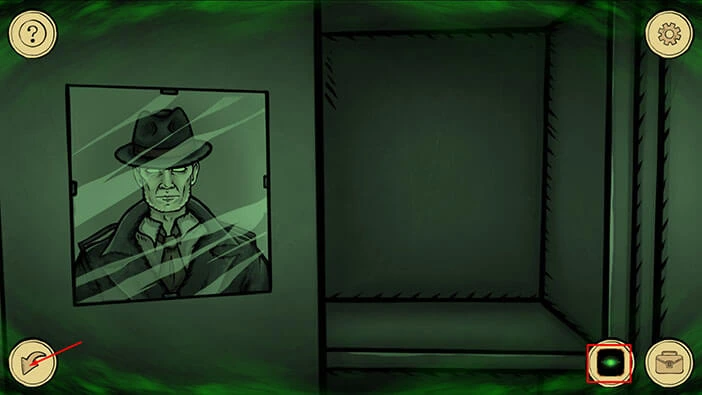
Tap on the arrow on the right to go to the bedroom.
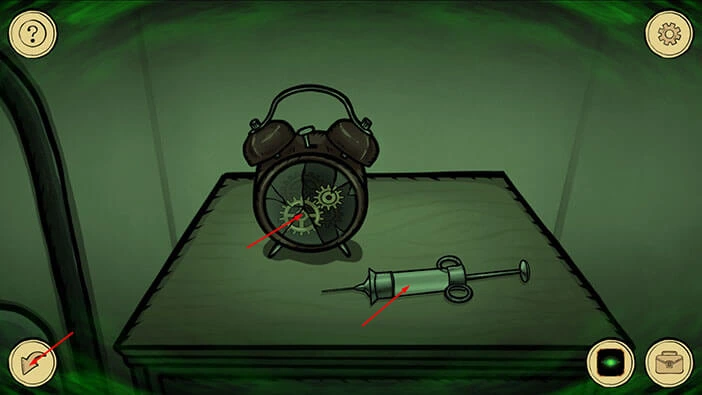
Next, tap on the top nightstand again to take a closer look at it. Because of the ghost vision, we can now see a “Syringe” on the nightstand. Tap on it to pick it up.
Next, tap on the clock, and “Gears” will be added to your inventory. After that, tap on the arrow in the lower left corner to go back.
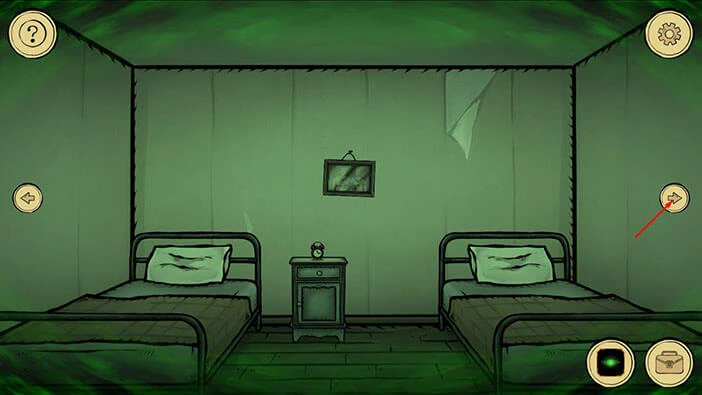
Next, tap twice on the arrow on the right to go back to the room with the staircase.
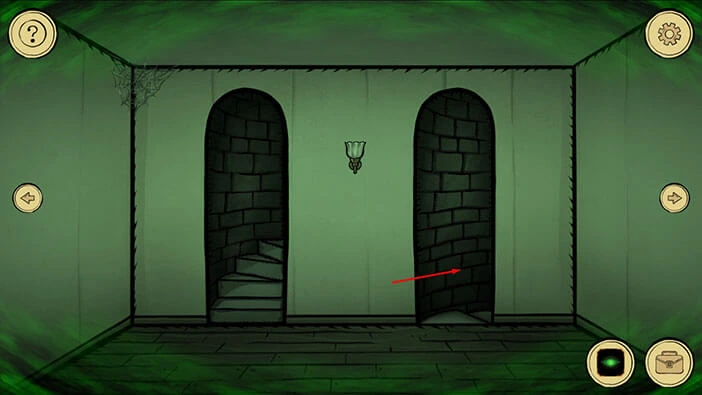
Tap on the doorway on the right to go downstairs.
Let’s go back to the room with the patient with the amputated leg. Tap on the arrow on the left.
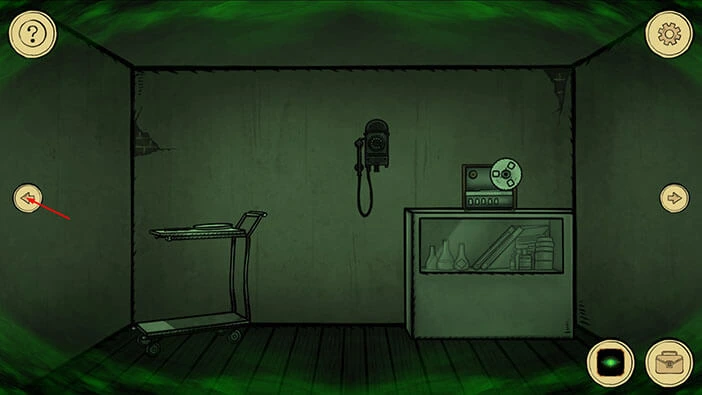
Let’s tap on the machine on the left to start the interaction.
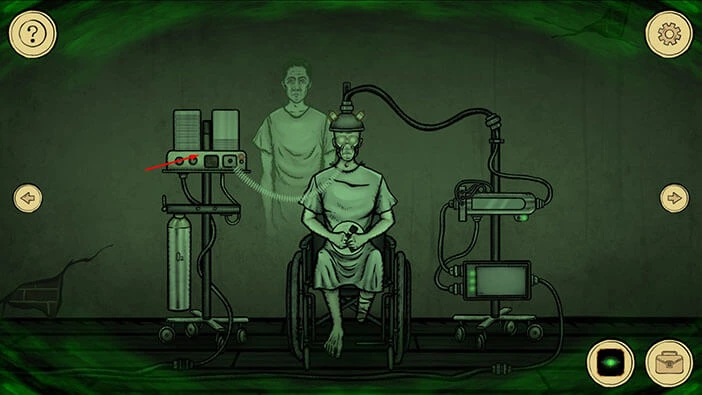
Here, we can see two empty slots on the left. So, tap on the suitcase icon to open the inventory and select “Gears”. After that, tap on the empty slots on the left to insert the gears.
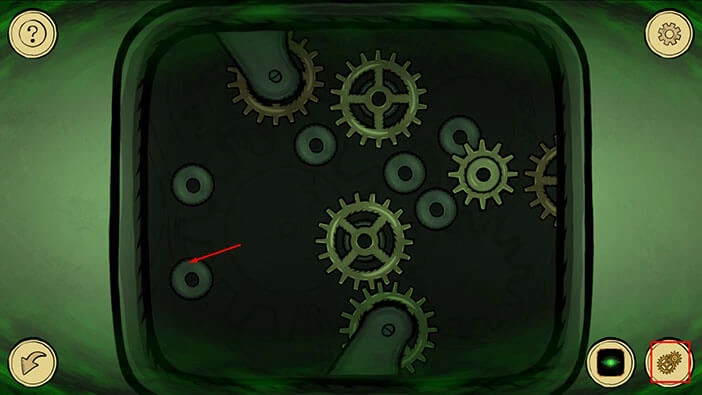
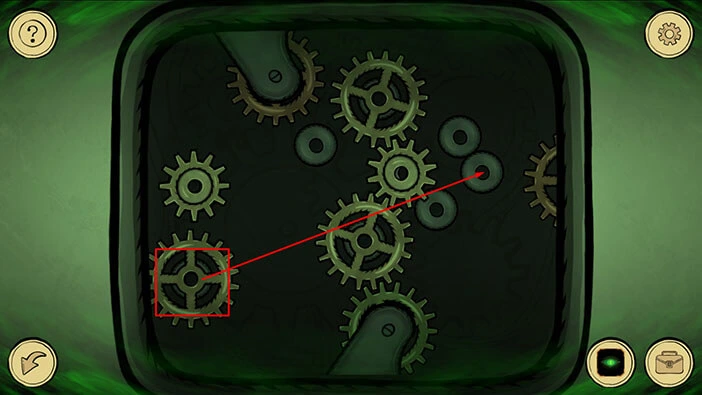
Let’s proceed to the puzzle. At the bottom, we can see a rotating large gear, and this gear can’t be moved. Besides that gear, we also have two large gears and two small gears.
Our task is to rearrange the gears and connect them with the stationary gear at the top. We will do this puzzle in several steps. Let’s begin.
Step 1
Take the small gear on the right, and insert it into the middle slot (between the two large gears).
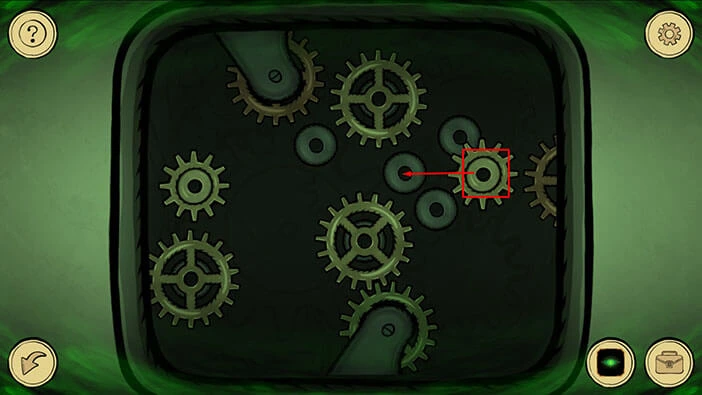
Step 2
Take the large gear from the left, and place it into the slot on the right.
Step 3
Lastly, take the small gear from the left, and place it into the empty slot in the top left and you will solve this puzzle.
After that, tap on the arrow in the lower left corner to go back.
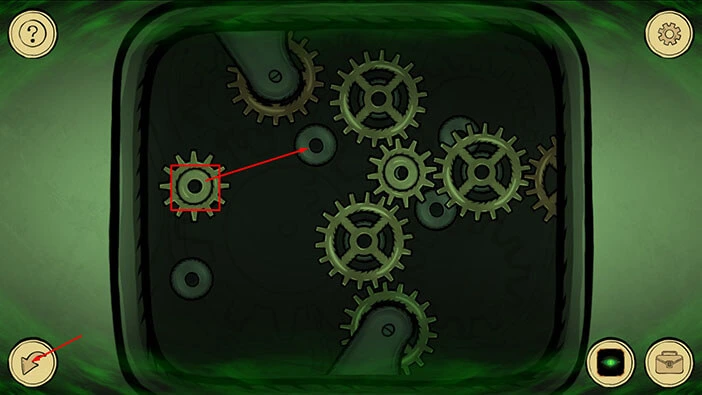
Since we have the “Ghost Vision” we can see a ghost, standing behind the patient. Let’s tap on the patient to start the interaction.
The patient is in pain, and he will ask us to end his suffering… Tap on the “End Conversation” button.
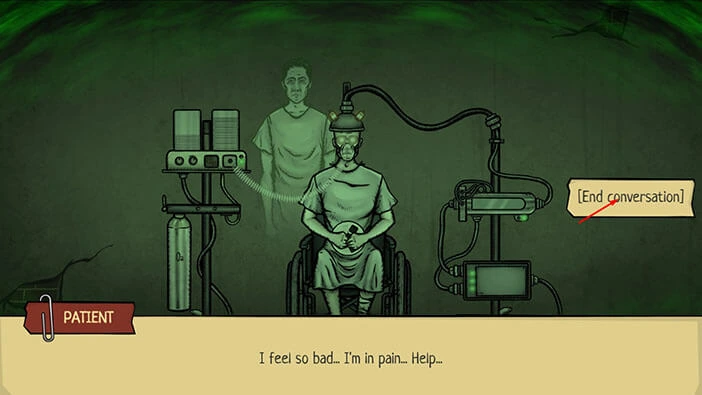
Tap on the suitcase icon to open the inventory. After that, drag the “Syringe” and combine it with the poison. “Syringe with poison” will be added to your inventory.
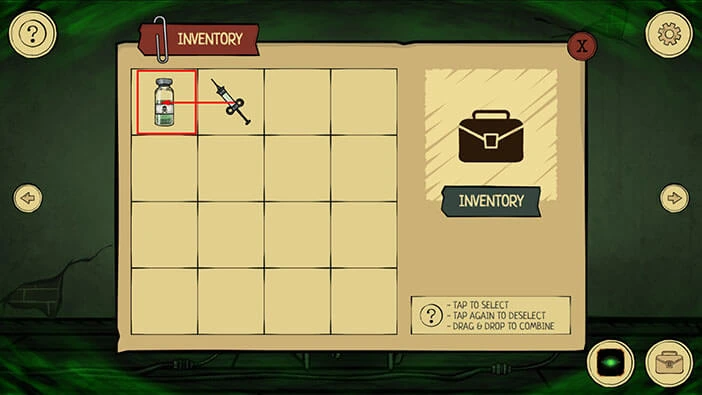
Select the “Syringe with poison” from the inventory. After that, tap on the patient to start the interaction.
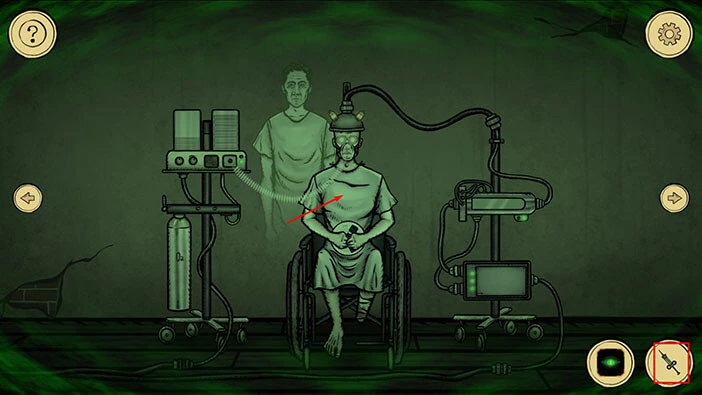
Let’s end his suffering. Tap on the “Give a syringe” button.
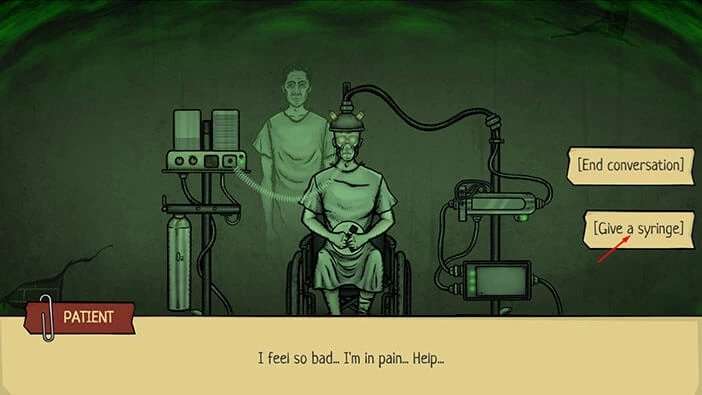
The patient will let go of a “Reel” that he was holding tightly in his hands. Tap on the “Reel” to pick it up.
After that, tap on the arrow on the right to proceed to the next room.
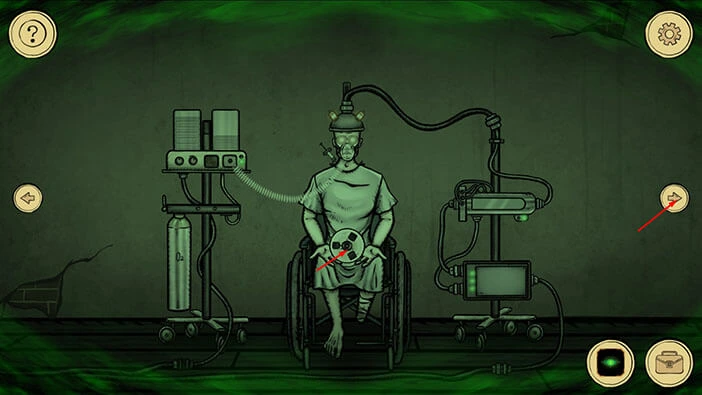
Tap on the radio, located on the shelf on the right, to take a closer look at it. Here, we can see an empty slot on the left. So, tap on the suitcase icon to open the inventory, and select “Reel” and insert it into the slot on the left.
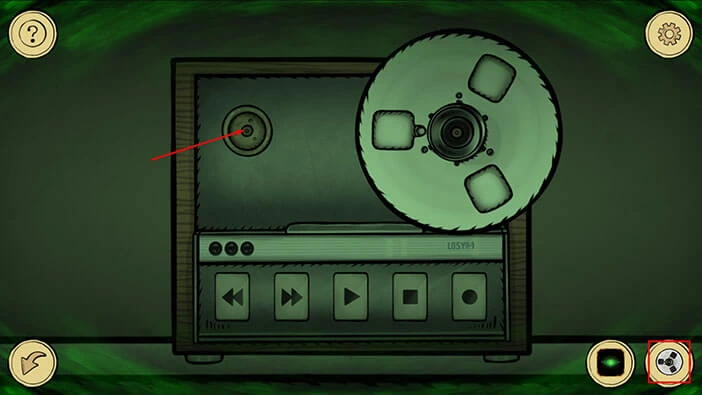
As soon as you insert the Reel into the empty slot, the buttons at the bottom of the radio will light up in a certain sequence. Our task is to memorize/write down this sequence and press the buttons in the same order. So,
First, tap on the “Pause” button.
Second, tap on the “Rewind” button.
Third, tap on the “Record” button.
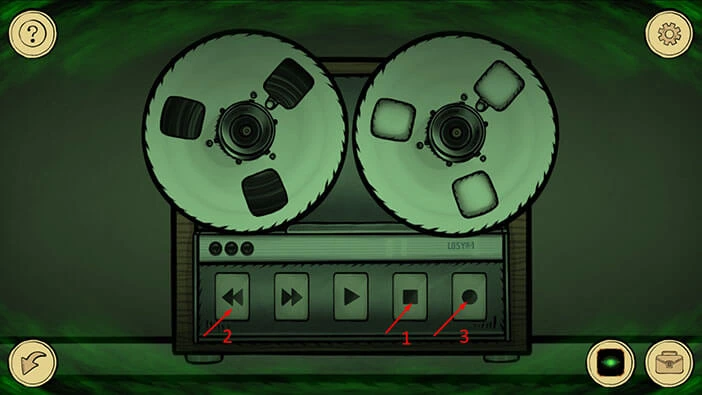
After you complete the first sequence, you will turn on the first of the three red lights. Next, we have another sequence of buttons. So,
First, tap on the “Forward” button.
Second, tap on the “Play” button.
Third, tap on the “Rewind” button.
Lastly, tap on the “Record” button.
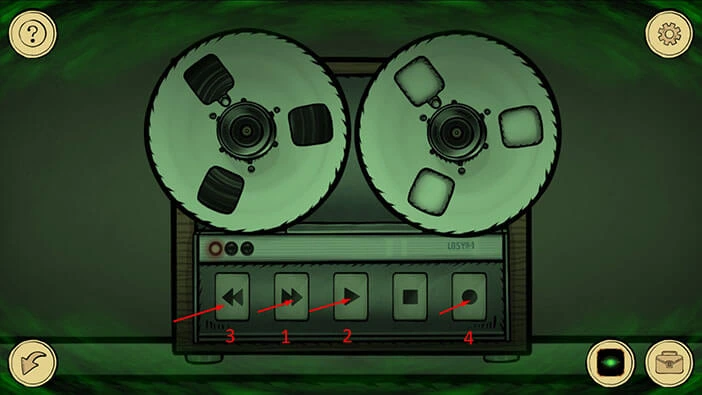
After you complete the second sequence, you will turn on the second of the three red lights. Next, we have a sequence of five buttons. So,
First, tap on the “Pause” button.
Second, tap on the “Play” button.
Third, tap on the “Record” button.
Fourth, tap on the “Forward” button.
Lastly, tap on the “Rewind” button.
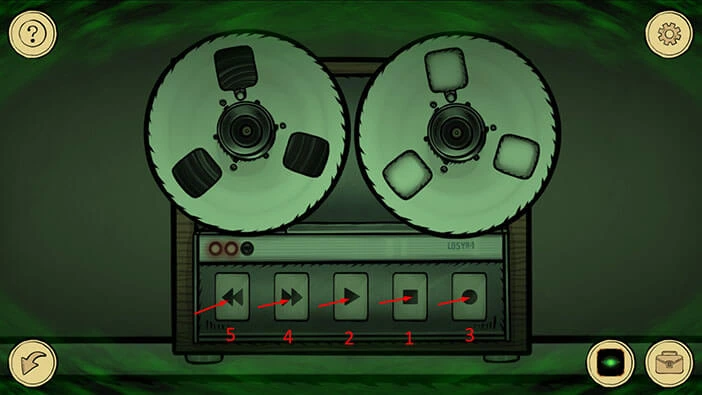
As soon as you complete the third sequence, the message “Urgently, to the operating room” will be played on the radio. We can use this message to lure out the hospital worker who is guarding the exit of the building. We can do this by using a phone in this room. Let’s put this plan into motion.
Tap twice on the arrow on the right to go to the staircase.
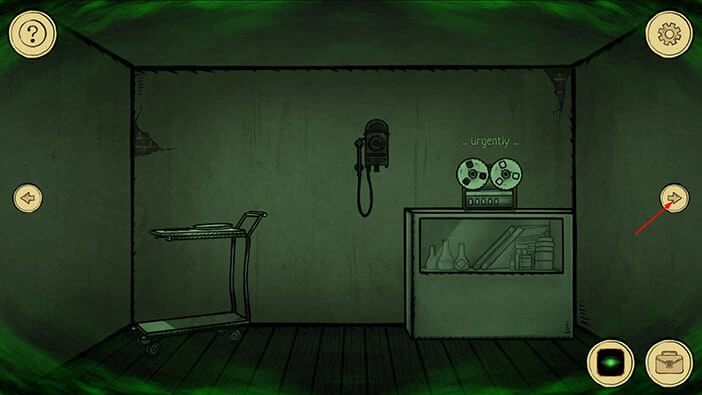
Let’s go upstairs.
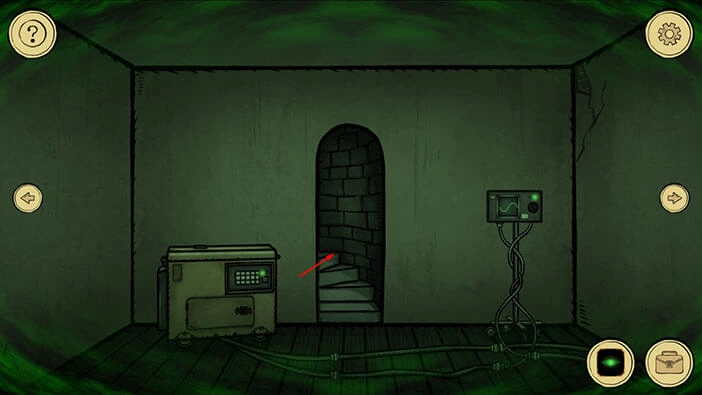
We are now in the bedroom. From here, let’s go to the next room on the left.
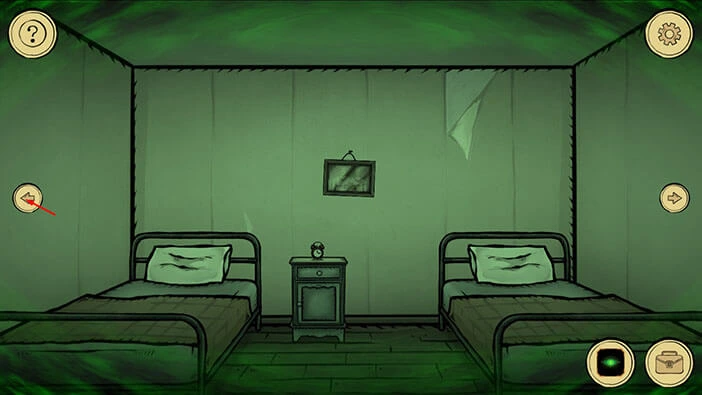
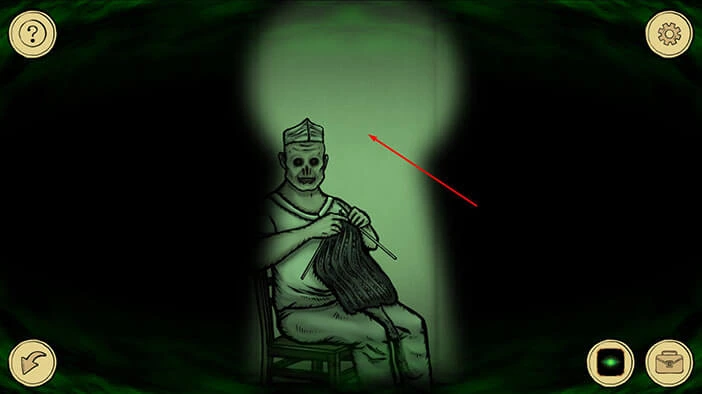
Tap on the keyhole on the door to take a closer look. We can see that a hospital worker is sitting in this room, and, interestingly enough, knitting. Also, ghost vision enables us to see the worker’s true form, and we can clearly see that he is also one of the ghouls.
Since we are in ghost form, we can tap on the keyhole to go into the room, without being detected. So, let’s do that.
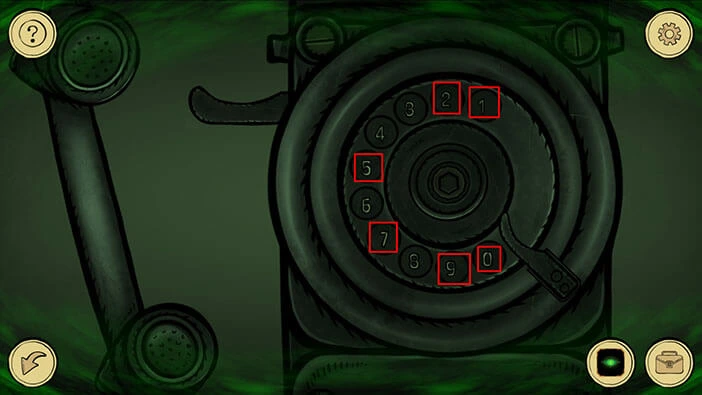
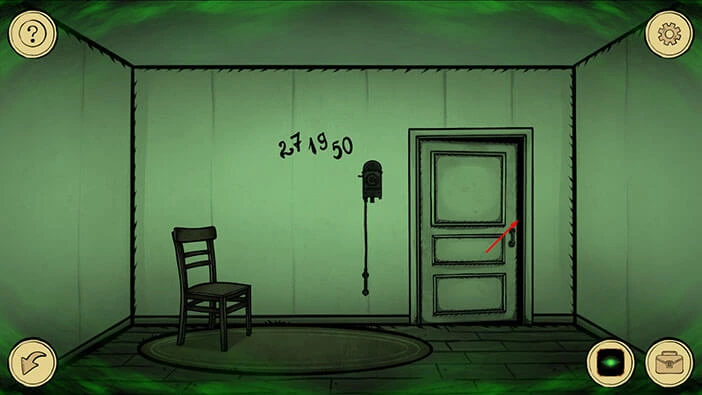
We can see a phone, and six numbers written on the wall. These numbers represent the phone number, so let’s write them down. The numbers are “271950”. We will use this number to call the worker, and then we will play the recording to lure out the worker.
Let’s do that. Tap on the arrow in the lower left corner to go back to the hallway.
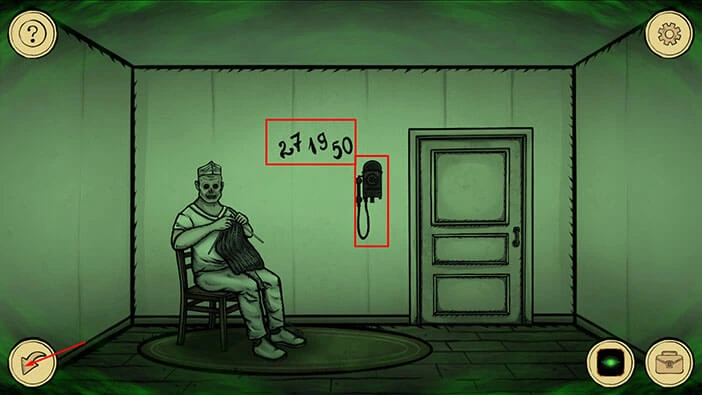
Let’s go back to the room with a phone. To get there, tap once on the arrow on the left.
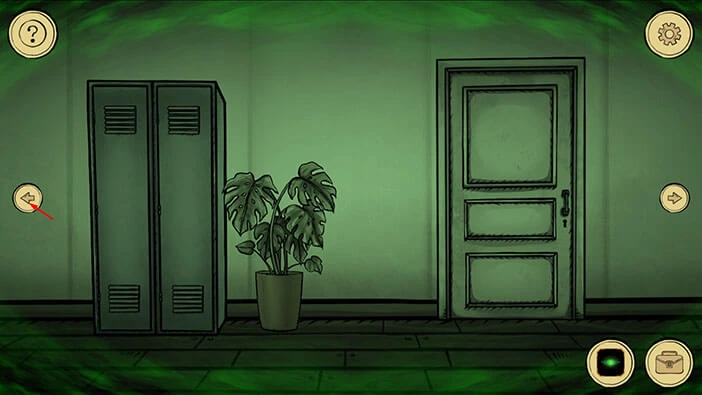
Next, tap on the doorway on the right to go downstairs.
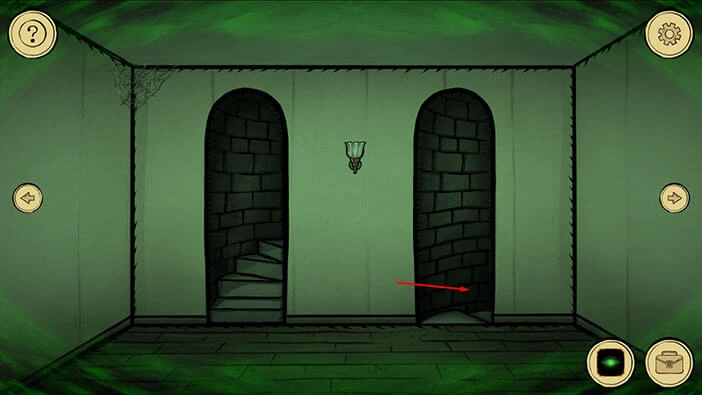
Tap on the phone to start the interaction. Next, let’s dial the number “271950”.
The orderly will answer the phone call. Let’s play the recording with the Doctor’s voice and lure him out. Tap on the “put the handset next to the recorder”.
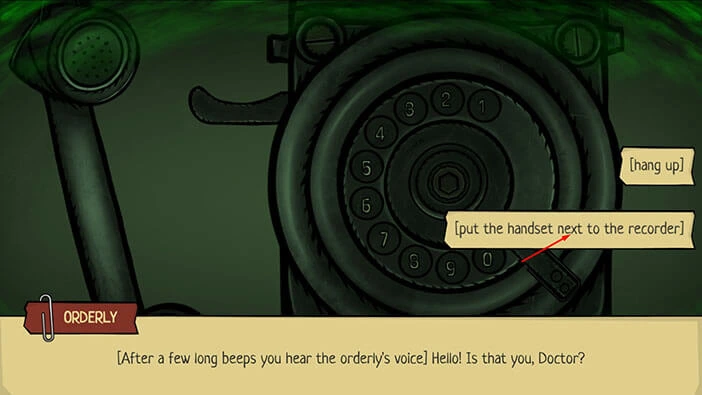
Well, the hospital worker is now probably rushing to the operating room, and we can use this moment to escape. So, let’s go back to the room which he was guarding. Tap twice on the right arrow to return to the staircase.
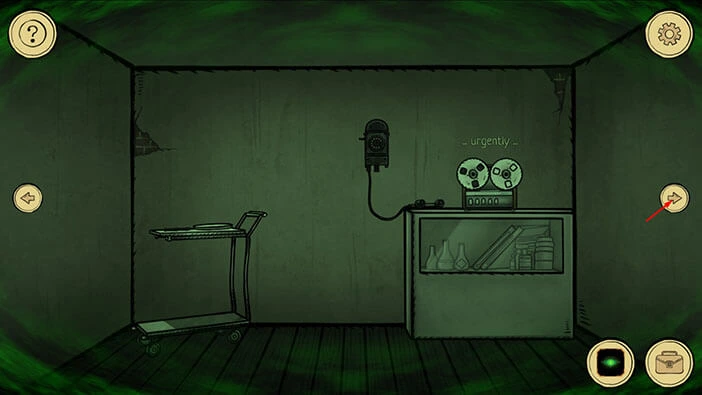
Next, tap on the staircase to go back, upstairs.
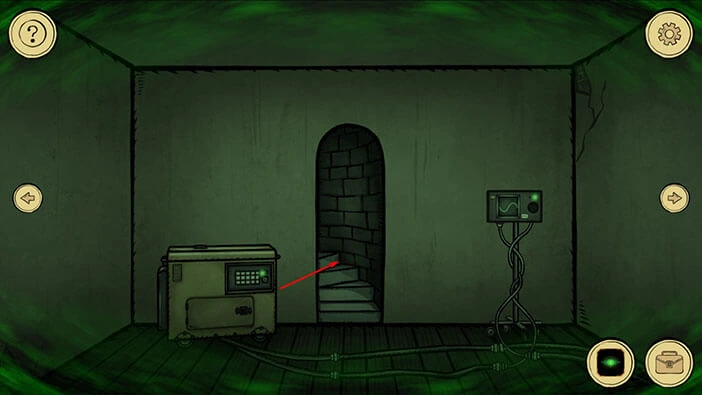
We are now in the bedroom. Tap on the arrow on the left to go to the next room.
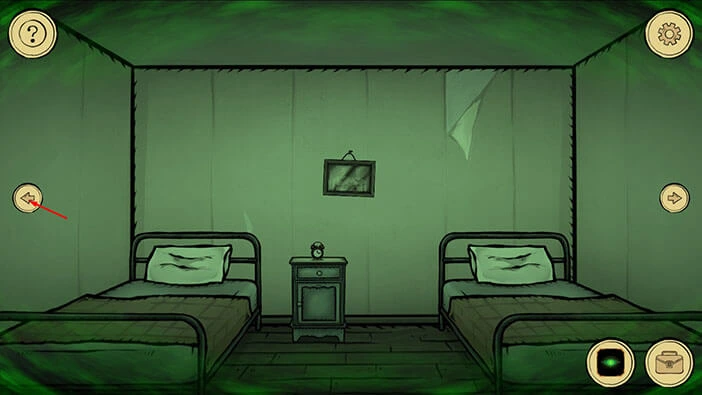
Tap on the keyhole on the door to take a closer look. We can see that the hospital worker has left his post, so let’s go into the room. Tap on the keyhole.
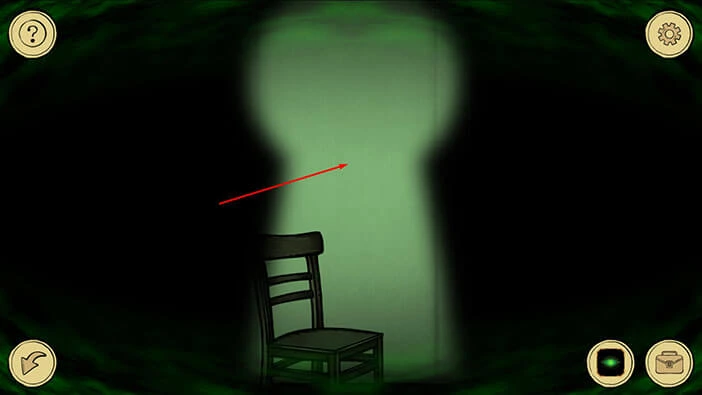
Tap on the door and you will escape from the hospital.
With that, we came to the end of this walkthrough, but I think we can expect a sequel. If you’re interested in Escape Room games, check out our guides for the other games of this genre.
Thank you for reading.