Nowhere House | Part III
Hello everyone and welcome to Part 3 of our walkthrough for “Nowhere House” an escape room game created by the Dark Dome. Nowhere House is the third game in the series, and like the other games, the story is set in Hidden Town, which is filled with all kinds of mysteries. In this walkthrough, we will show you how to solve all the puzzles and finish the game.
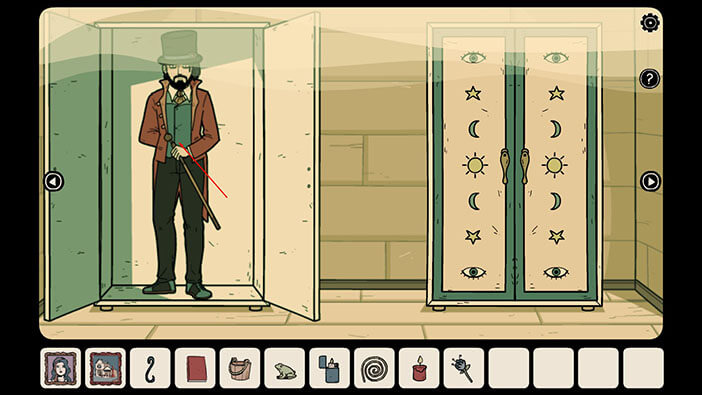
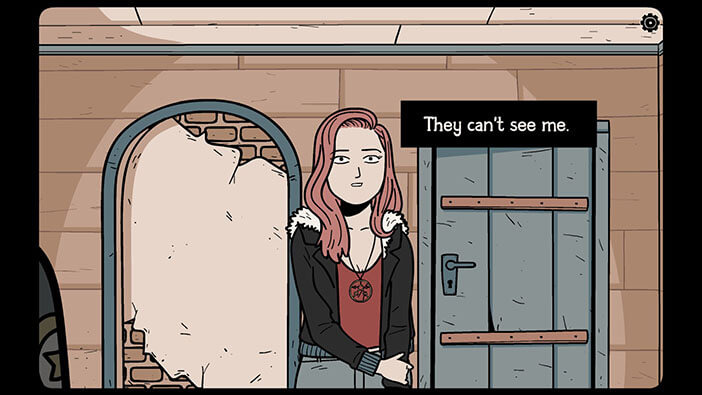
At the end of the second part, Meridia gave us the “Green Key” and told us to follow her.
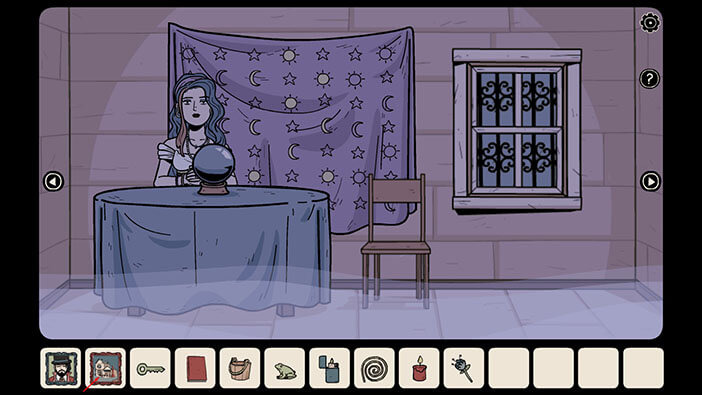
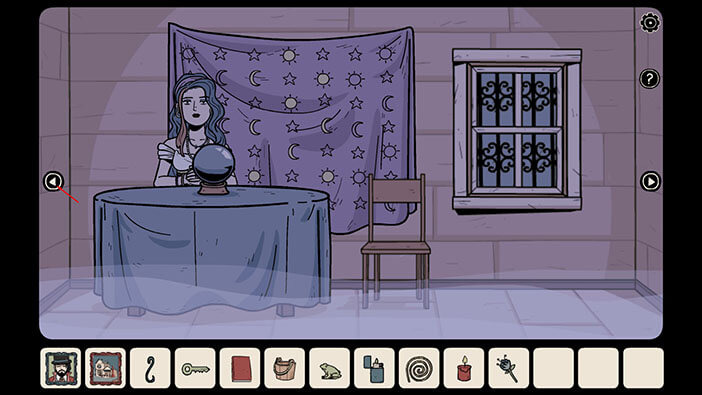
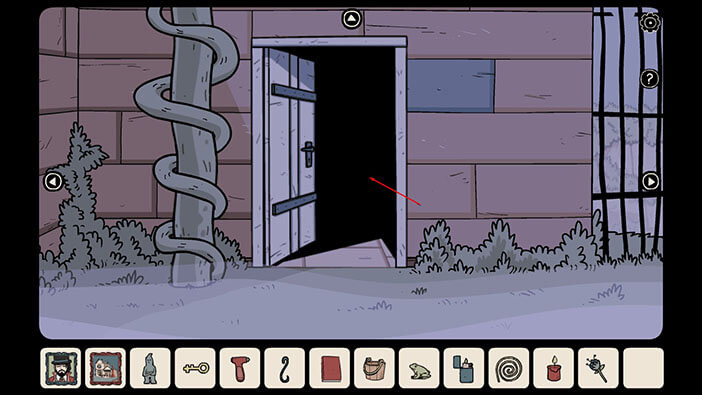
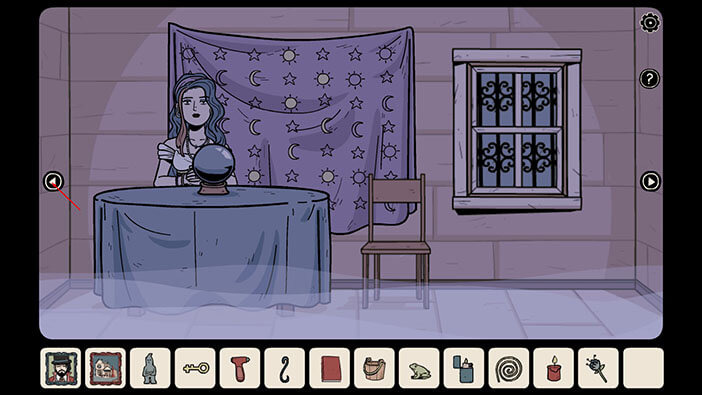
Meridia is in the room with the crystal ball. To get there, go through the brown door, and then go to the first room on the left.
Tap on the magic ball to take a closer look at it, and you will find another Owl. Well, after that an eye of the witch will appear inside the crystal ball.
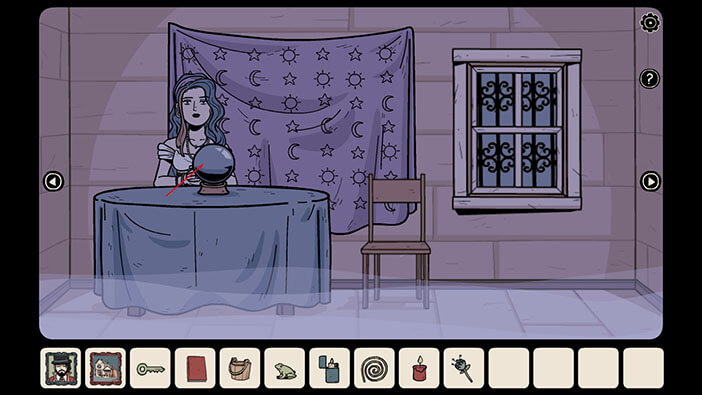
Pay attention to the drapes behind Meridia. Then tap on her.
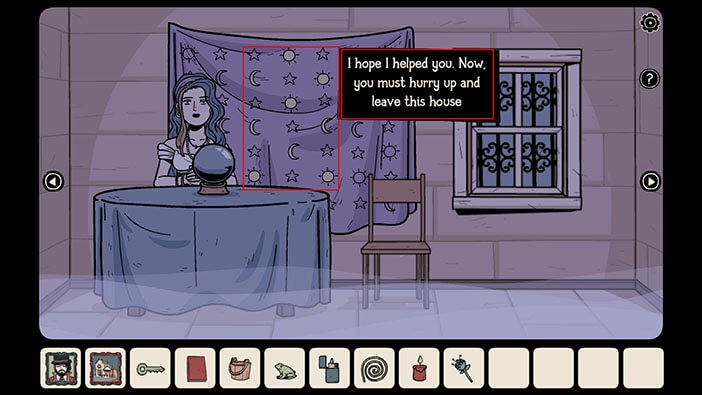
Meridia will cast a spell and advise you to get out of the house.
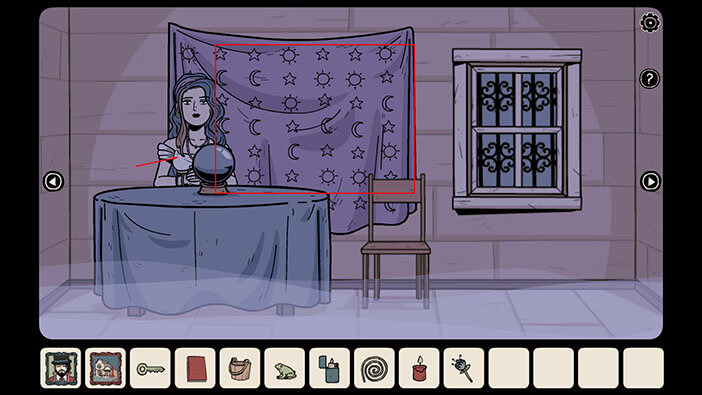
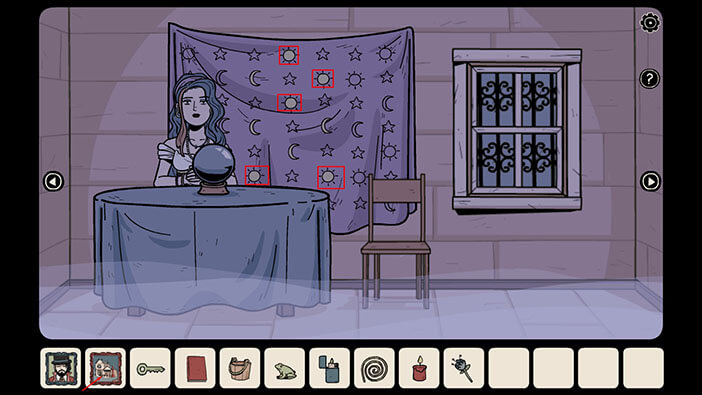
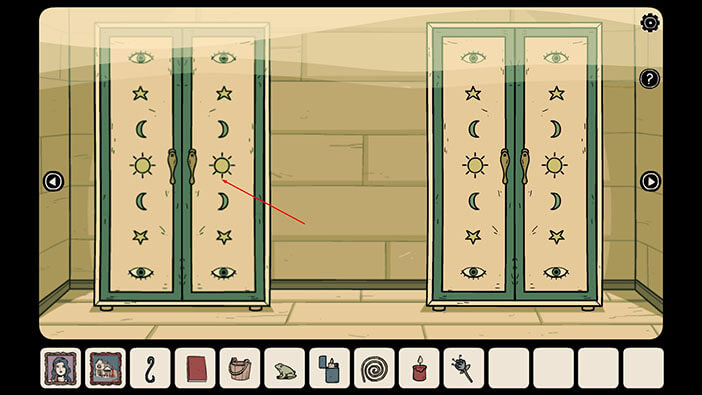
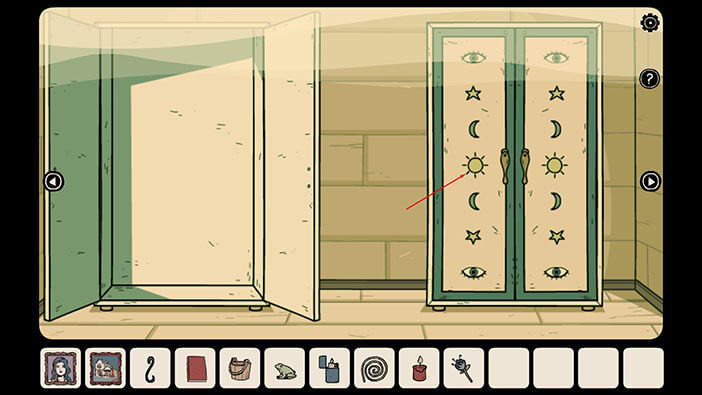
However, the drapes behind will change. Now some of the suns and moons are marked with yellow like they are shining.
Let’s go back to Adria’s world.
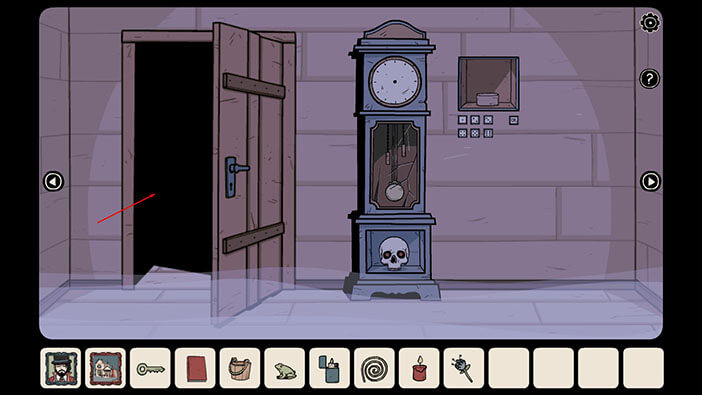
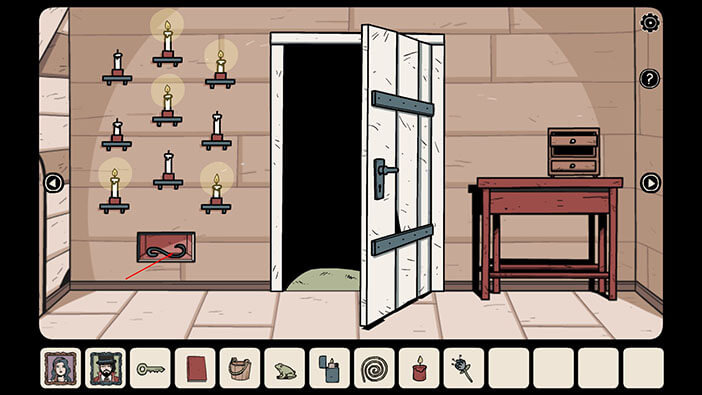
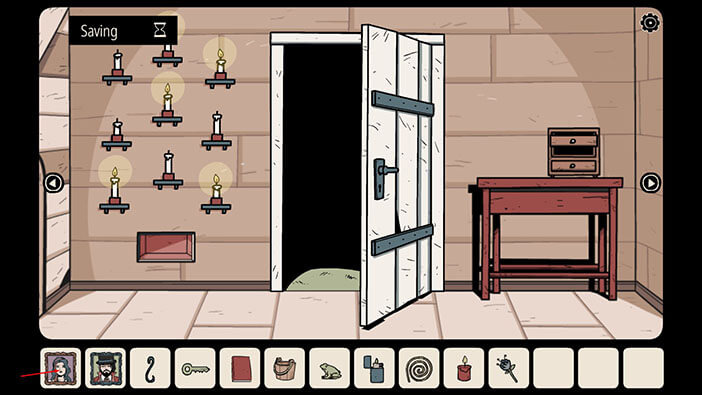
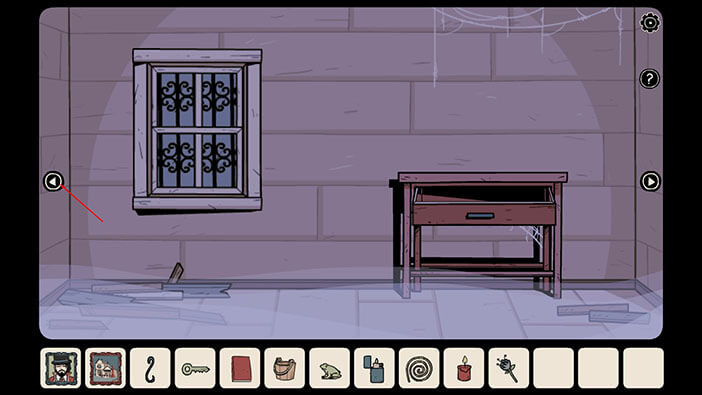
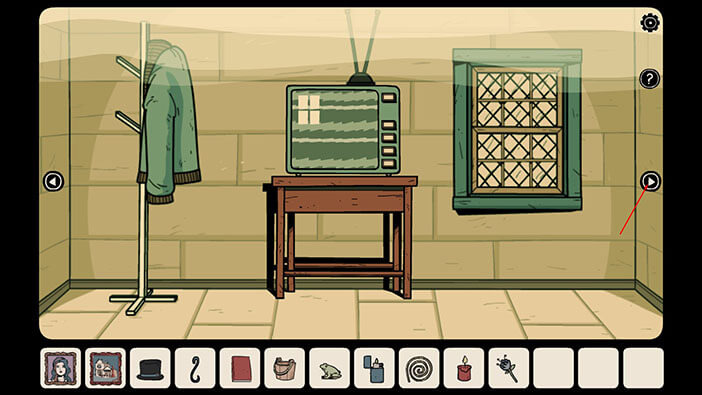
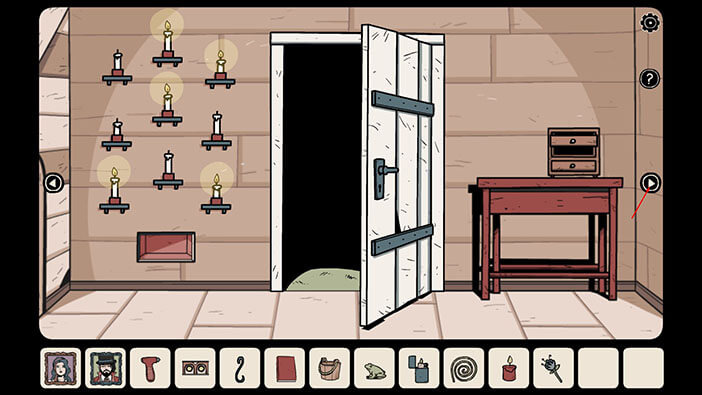
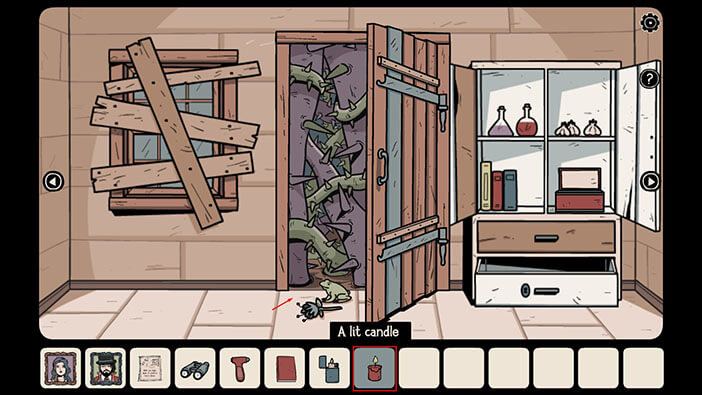
Go to the room with the candles. It’s the second one on the right.

Pay attention to the pattern of candles on the wall. Then go back to Meridia’s world.
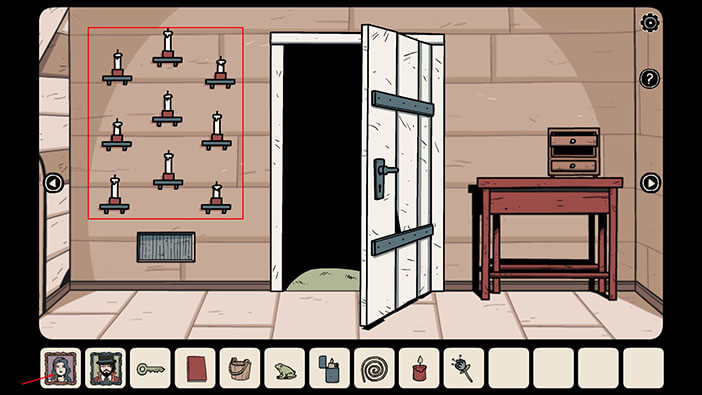
If we take a look at the candles and switch to Meiridia’s world we can see that candles are arranged in the same pattern as the marked suns and moons on the drapes. So, let’s presume that the moon means that the candle at that position shouldn’t be lit and that the sun means that the candle at that position should be lit. So, let’s mark these positions, and light up the candles marked with a sun in our world (you can also switch between worlds and look at the candles one by one if that’s easier for you). So, let’s write down/memorize the position of the suns (lit candles)
First = Candle in the first row (the only one)
Second = Right candle in the second row
Third = Candle in the third row (the only one)
Fourth and Fifth = both candles in the sixth row
Ok, let’s go back to Adria’s world.
NOTE: The correct position of the lit candles (suns) might be different in your game, but you can still figure out which candles should be lit by looking at the drapes.
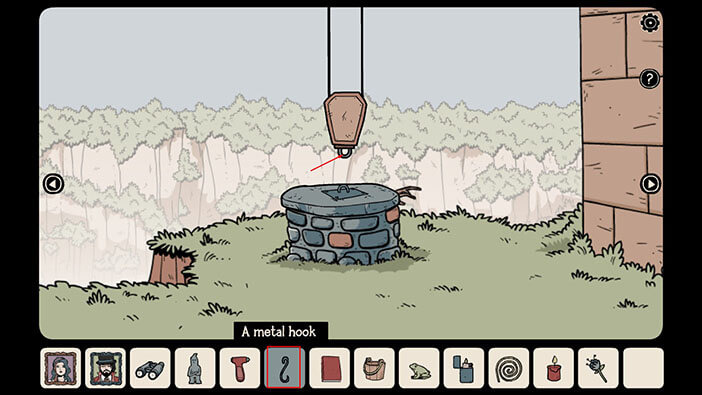
Ok, let’s light up the candles that are in the same position as the suns on the drapes. Select the “Lighter” from the inventory and light up these candles.
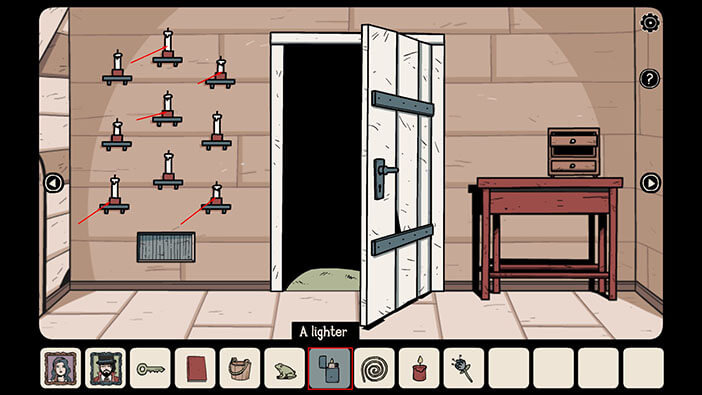
As soon as you light the correct candles, the small compartment in the wall will open up. Tap on the item inside it to pick it up and a “Metal Hook” will be added to your inventory.
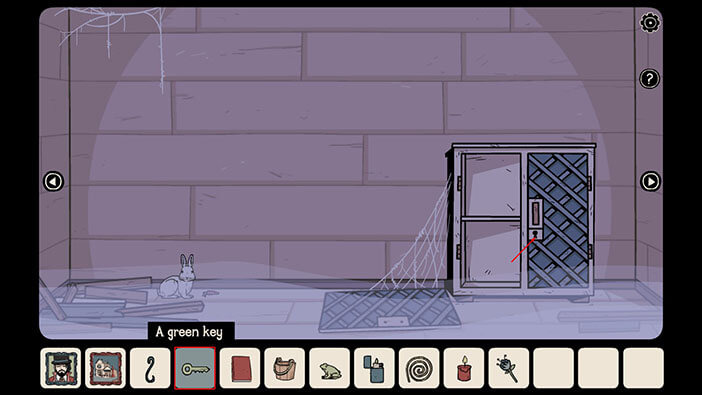
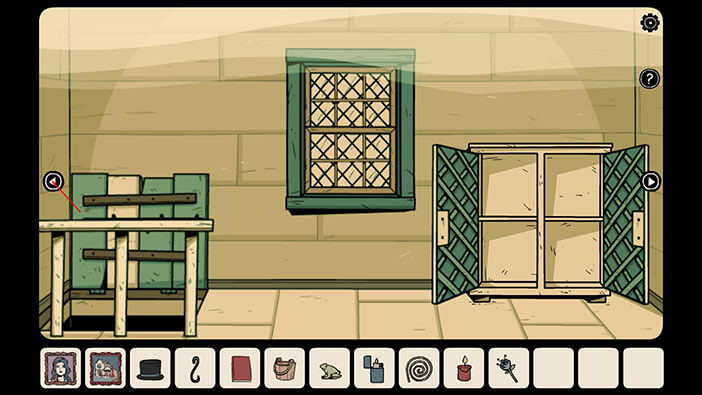
Ok, the “Green Key” that Meridia gave us can be used to open the locked cabinet door in the attic in her world. So, let’s go to Meridia’s world.
To get to the attic, go two rooms to the left, and then through the white door.
You will be outside, in the backyard. Tap twice on the arrow on the right, and then tap on the giant plant to go to the attic.
Once there, tap on the left arrow and you will see the locked cabinet door.
Select the “Green Key” from the inventory and tap on the keyhole on the cabinet door to unlock it.
Tap on the cabinet door to open it, and tap on the item inside to pick it up. A “Top Hat” will be added to your inventory.
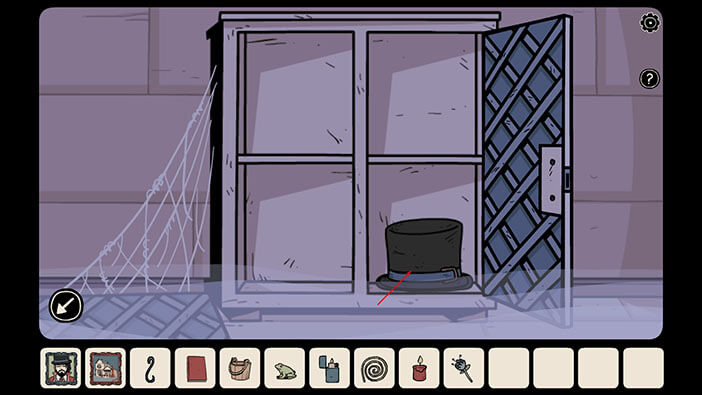
We should return this hat to Delian, so let’s switch to his world.
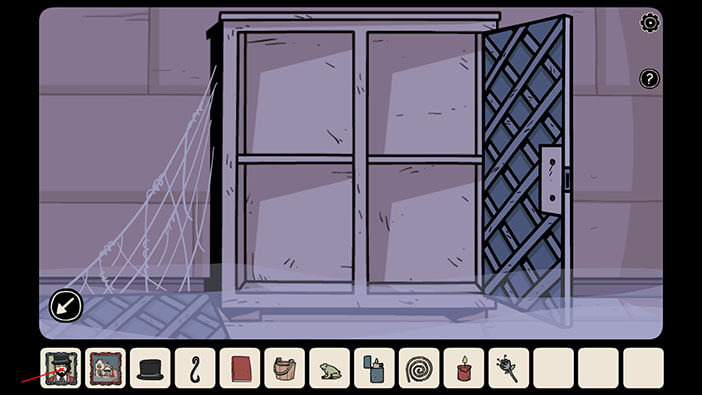
To get to Delian go to the first room on the right and then up the stairs.
Once you get to the attic, go to the first room on the left.
Select the “Top Hat” from the inventory and tap on the Delian to return him the hat.
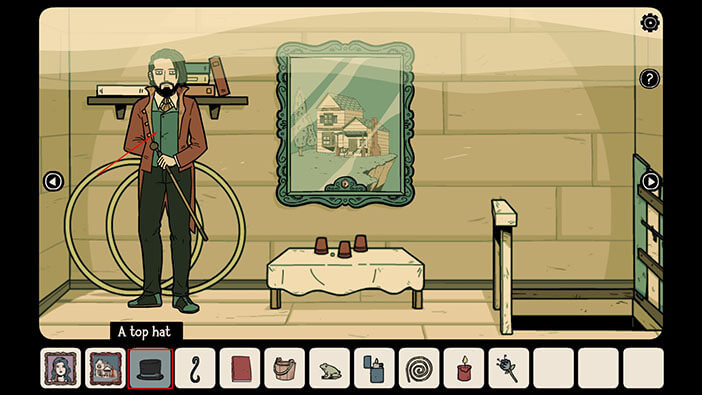
Delian will thank Adria for returning his hat and will instruct her to follow him.
Tap on Delian to close the closet.
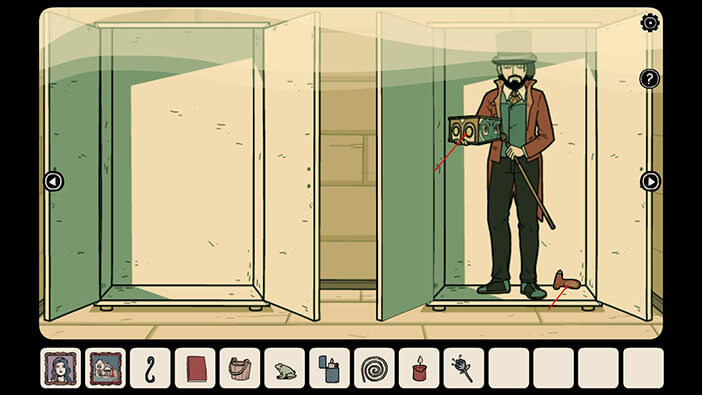
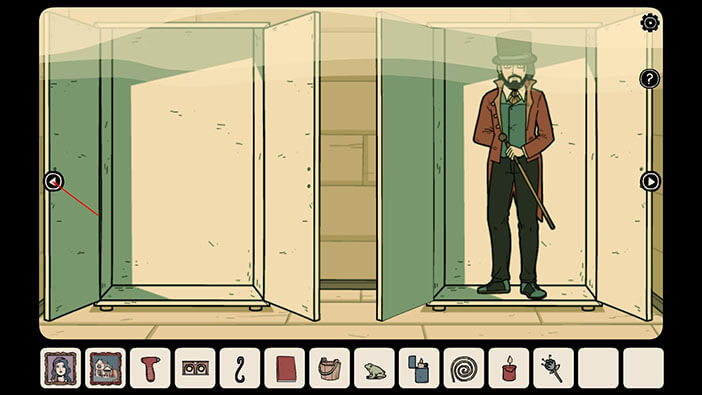
Tap on the closet on the left.
The closet on the left is open, but the closet on the right will start to shake. Tap on the closet on the right.
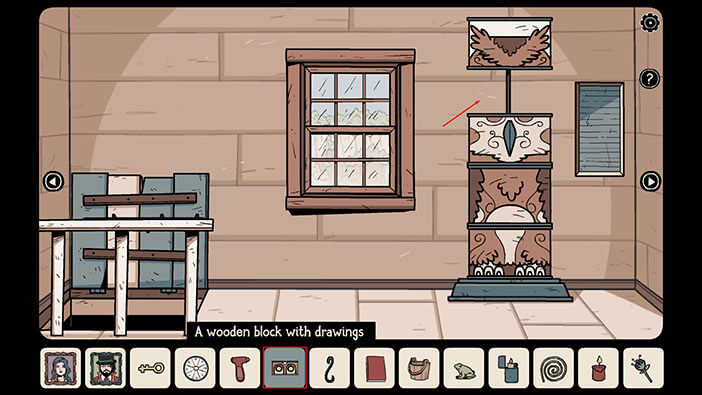
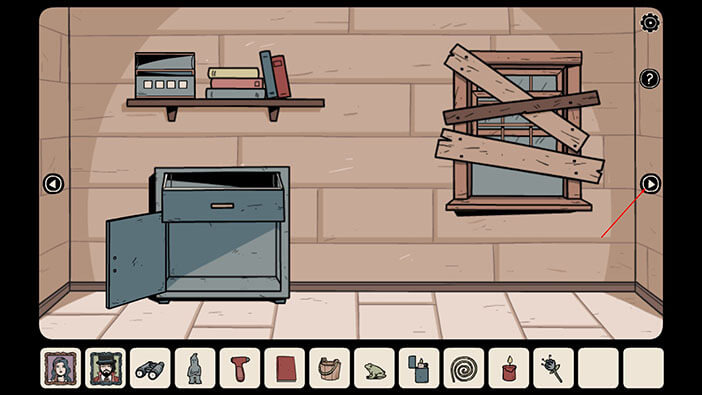
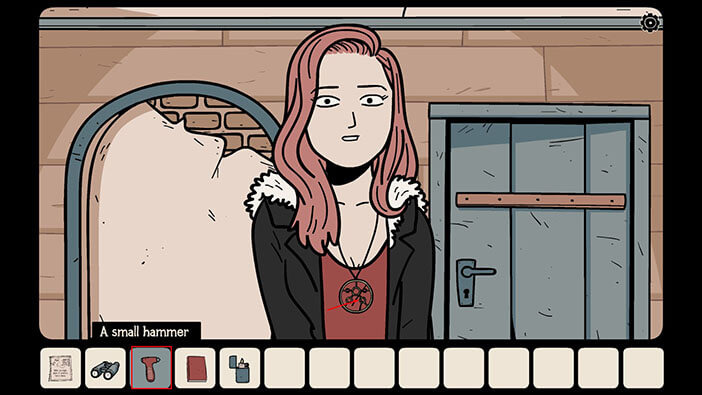
Delian unlocked the closet on the right, so our character was able to open it. We can see that Delian is holding something in his hand, and there’s another item next to his left leg. Tap on both items to pick them up and a “Wooden block with drawings” and a “Small Hammer” will be added to your inventory.
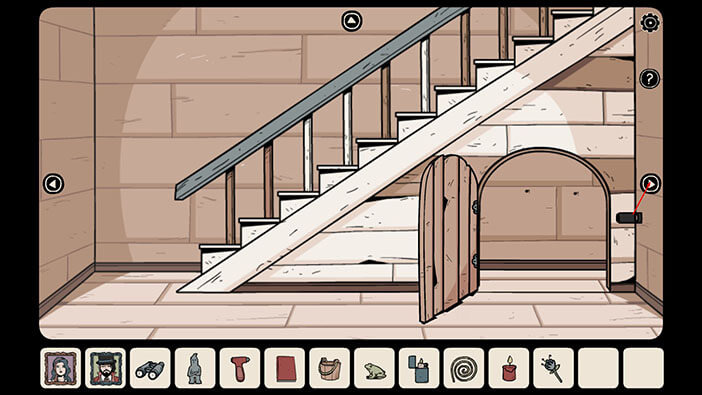
Ok, let’s go to the room with the doll in the display case that we saw earlier. To get there, go to the first room to the left, and then downstairs (through the hatch).
Once you get downstairs, go to the second room on the right, and then through the brown door.
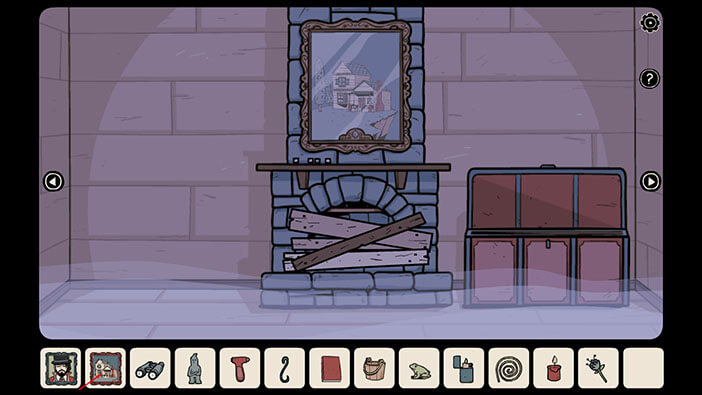
You will get to the room with the fireplace. From there, go to the first room on the right.
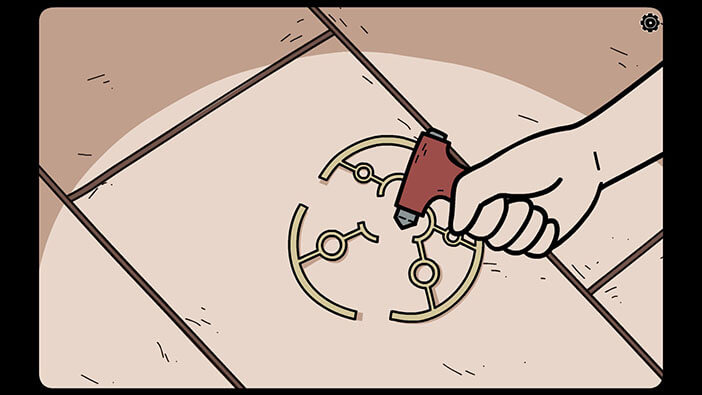
Select the “Small Hammer” from the inventory and tap on the glass several times to break it.
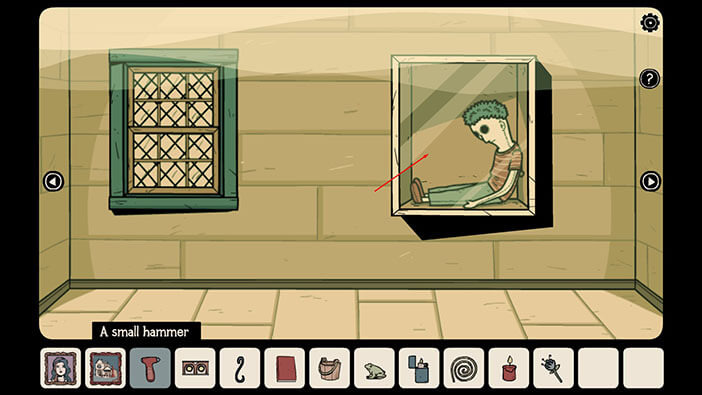
Tap on the doll to take a closer look at it, then tap to wind it up.
After a few moments, the doll will look at you and say “It is time”. This will actually stop the time on the clock in Adria’s world from changing (you might remember the clock that was always showing a different time from the beginning of this walkthrough).

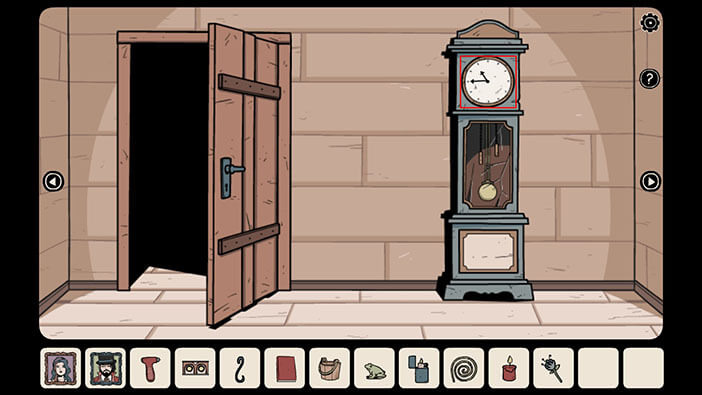
Ok, let’s go to the clock. First, let’s switch to Adria’s world.
Let’s go to the room with a clock. To get there, go to the first room on the right, and then through the brown door.
You will reach the room with the fireplace. From there, go to the second room on the right.

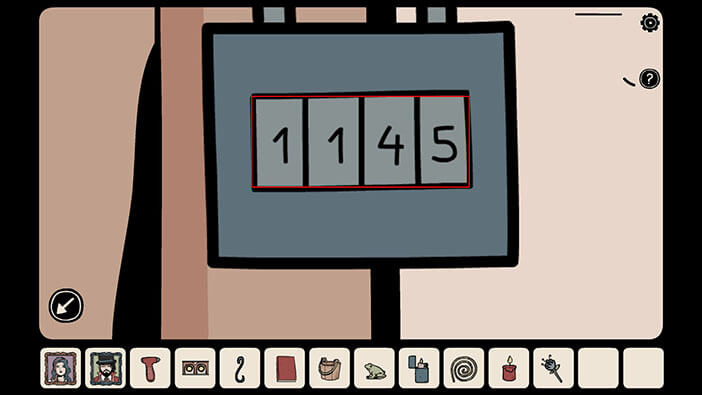
Ok, we are now in the room with the clock. Try exiting and entering the room once or twice, and you will see that the time on the clock no longer changes every time we enter this room (the doll in Delian’s world stopped the time on the clock from changing). So, let’s memorize the time on the clock because it actually represents the code that we will use to open another padlock.
The Time is 11:45, so our code would be “1145”
NOTE: The clock might be showing at different times in your game.
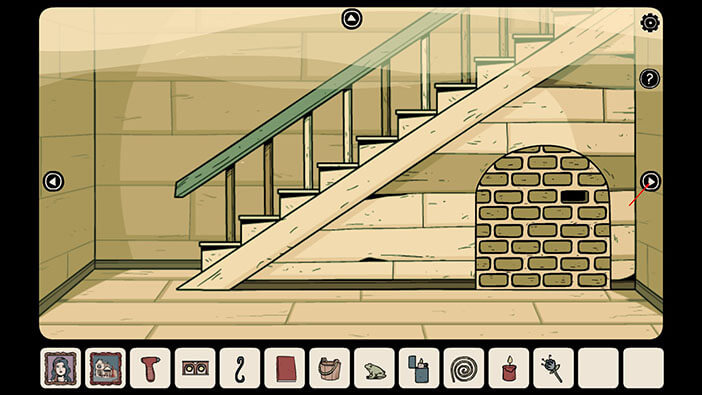
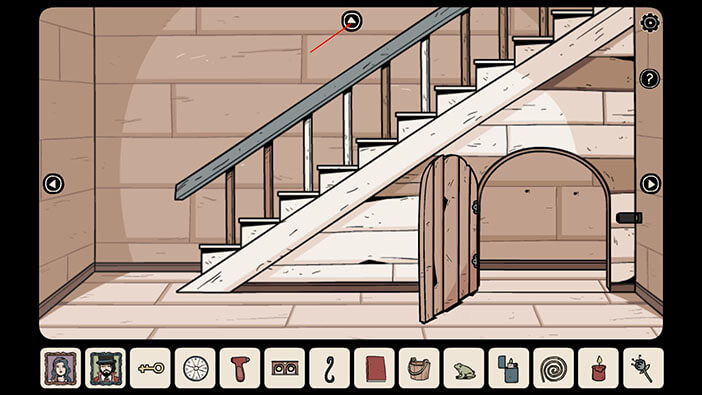
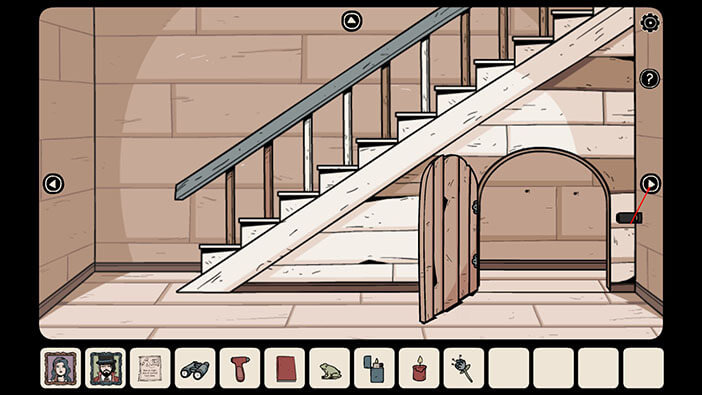
The padlock that we can open with this code is located close to the stairs. To get there, go through the brown door.

Tap on the padlock to examine it.

Enter the code that we discovered by looking at the time on the clock. In our case, it is “1145”. As soon as you enter the correct code, you will hear the clicking sound, and the padlock will drop.
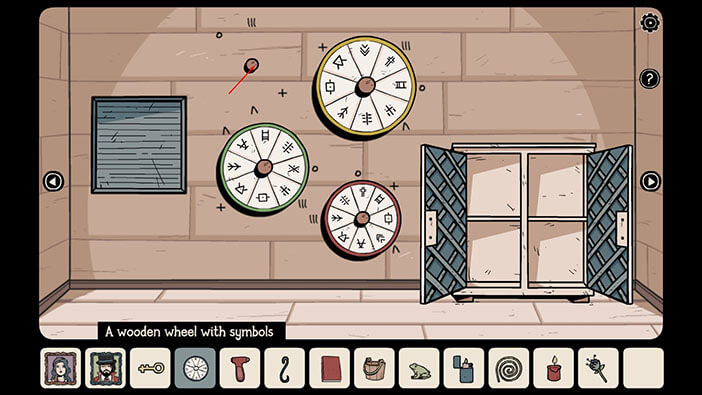
Tap on the small door to open it, and inside you will see two items. Tap on them to pick them up and a “Yellow Key” and a “Wooden Wheel with symbols” will be added to your inventory.

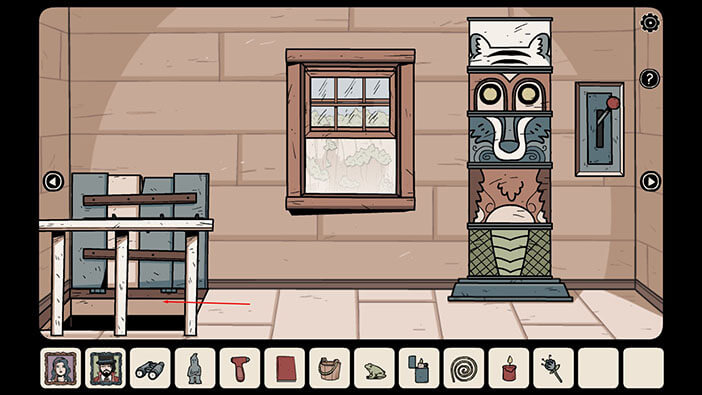
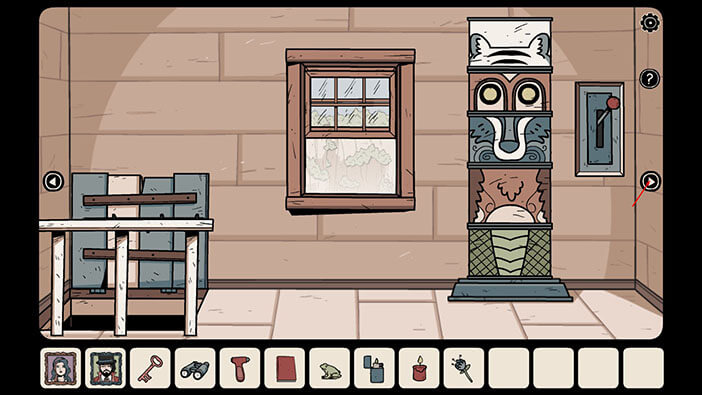
Let’s go to the room upstairs with the wooden wheels on the wall. To get there, tap to go upstairs to the attic.
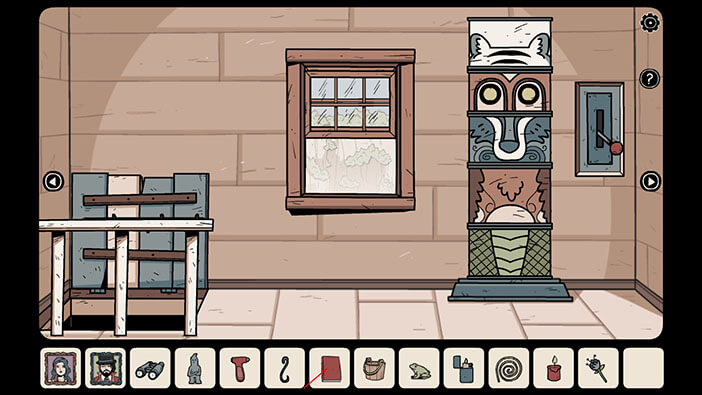
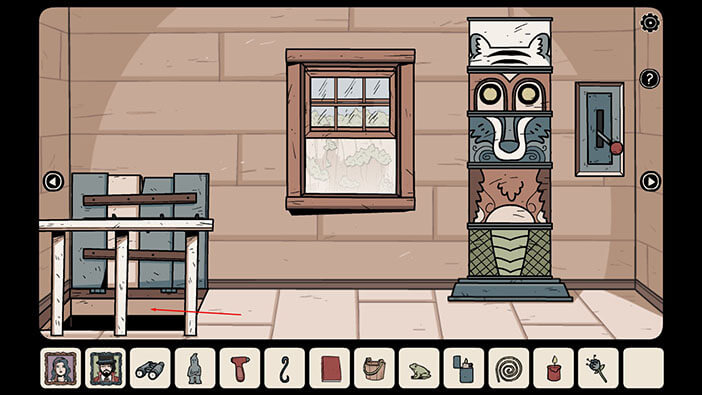
Since we’re here, let’s select the “Wooden block with drawings” and put it on the totem. This totem represents another puzzle that we will solve a bit later.
Ok, now let’s go to the first room on the right.
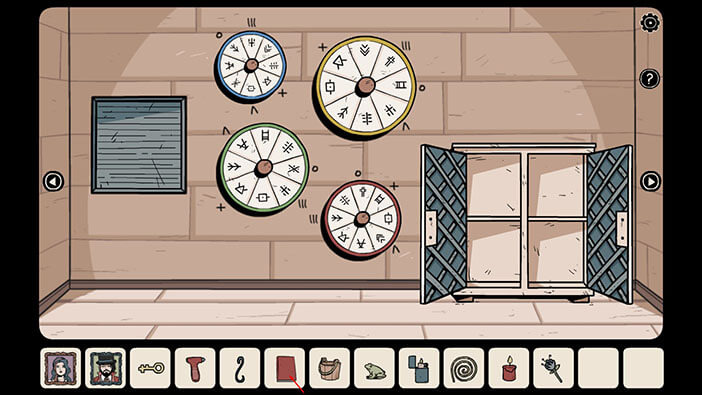
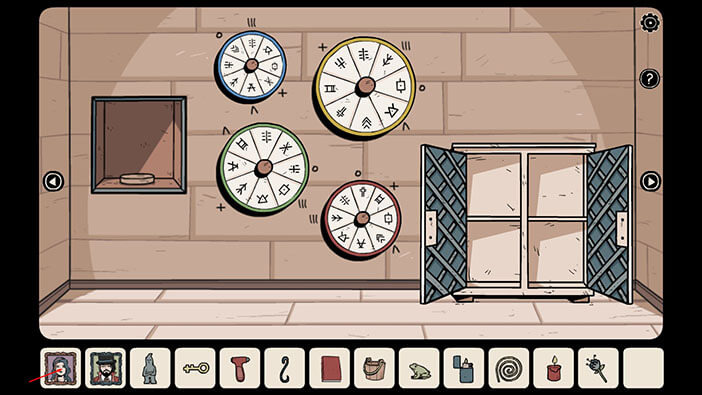
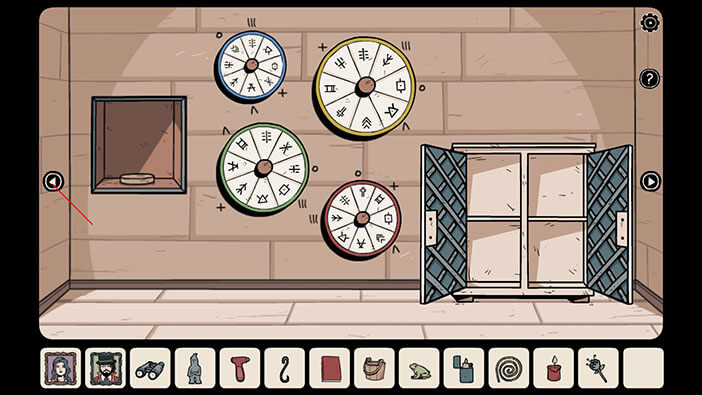
Select the “Wooden Wheel with symbols” from the inventory and tap on the empty space on the wall to attach it.
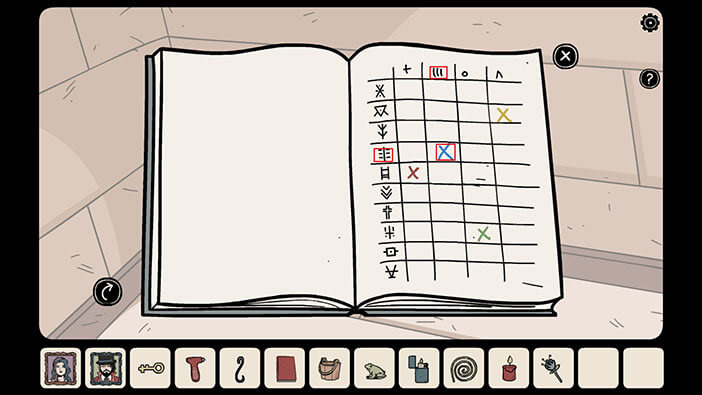
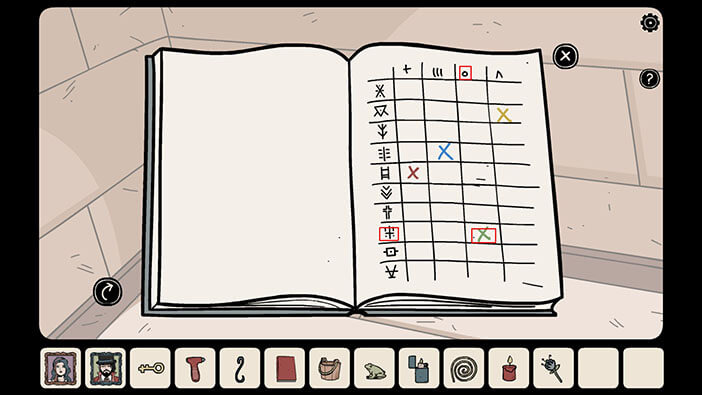
Tap on the “Red Book” in your inventory to open it (flip to the last page).
In this table, we can see four letters “X” and they are all of different colors. The color of the letter “X” represents the color of the wooden wheel on the wall. Also, the letter “X” represents the position of the two signs. Let’s start with the yellow wheel and memorize the signs that it should be pointing at.
NOTE: The table might look different in your game, but you can use the same method to solve this puzzle.
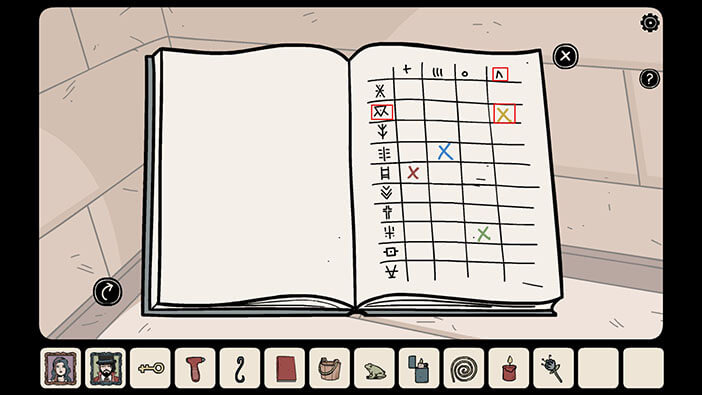
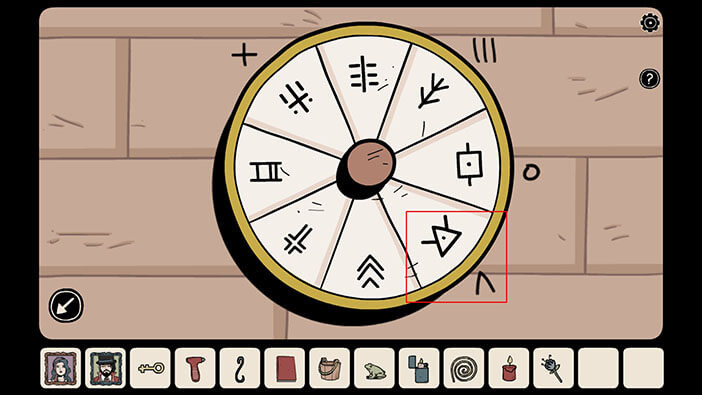
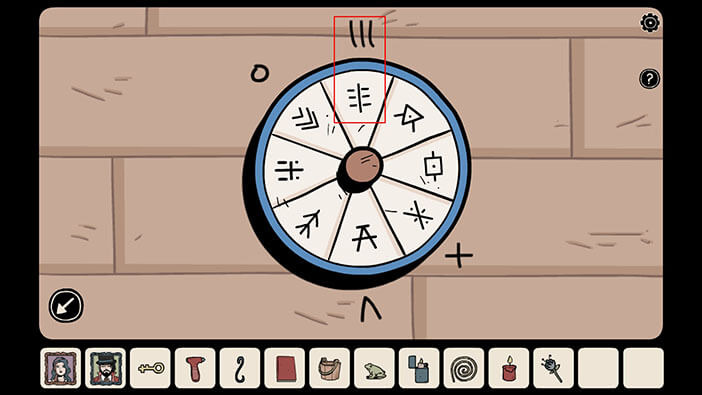
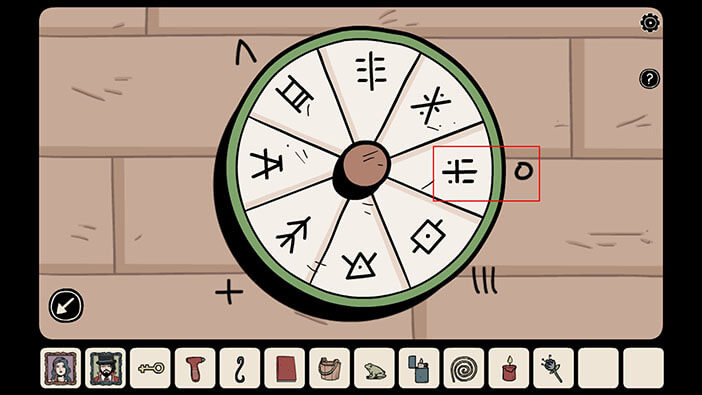
Tap on the yellow wheel to take a closer look at it. Tap on the wheel to rotate until the two signs from the books are next to each other.
Let’s take a look at the book again and memorize the symbols for the blue wheel.
Ok, let’s set the blue wheel.
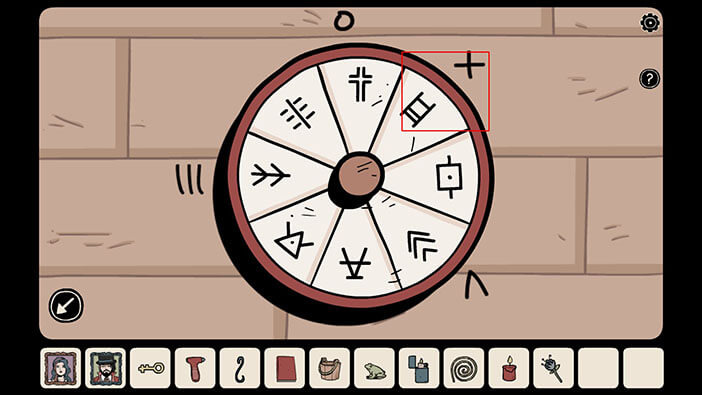
Let’s take a look at the book again and memorize the symbols for the red wheel.
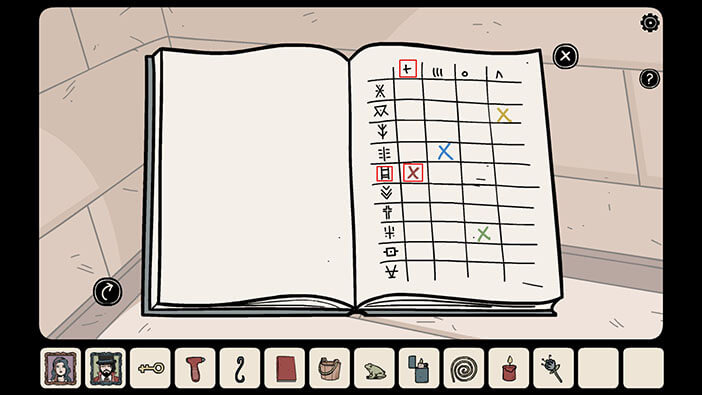
Ok, let’s set the red wheel. Well, it looks like it was already in the correct position.
Let’s take a look at the book again and memorize the symbols for the green wheel.
Finally, let’s set the green wheel.
As soon as we set all four wheels to the correct position, the compartment in the wall on the left will open. Tap on the statue inside of it to pick it up and a small statue will be added to your inventory.

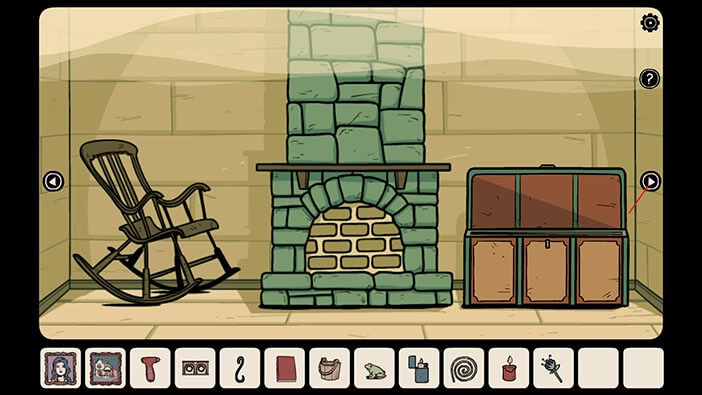
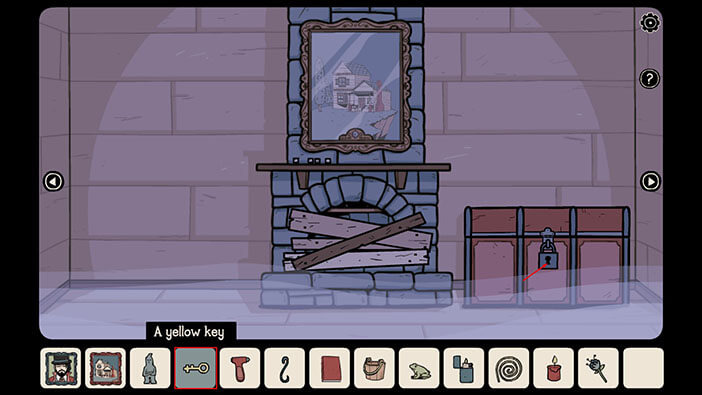
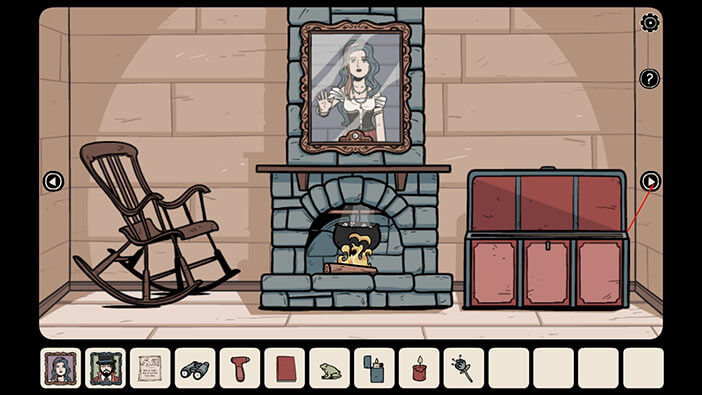
The “Yellow Key” can be used to unlock the chest in the room with the fireplace in Meridia’s world. So, let’s go to Meridia’s world.
To get to the room with the fireplace, tap once on the left arrow, and then on the open window to climb down.
Tap on the white door to go inside.
You will get to the room with the crystal ball. From there, go to the first room on the left, and then through the brown door.
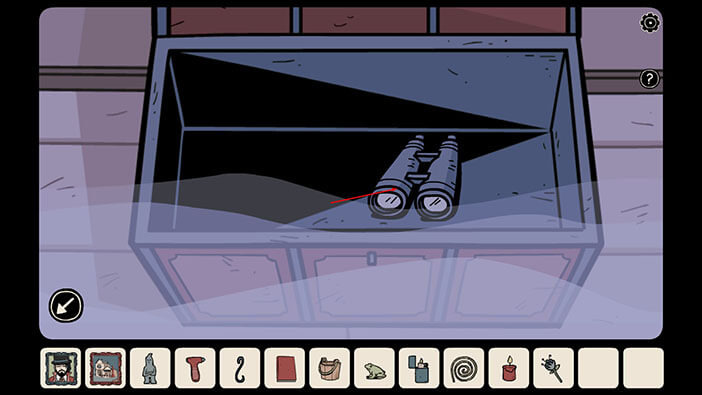
Select the “Yellow Key” from the inventory and tap on the padlock on the chest to unlock it.
Tap on the chest to take a closer look at it. Tap on the item inside the chest to pick it up and a “Pair of Binoculars” will be added to your inventory.
Let’s go back to Adria’s world.
Go to the first room on the left.
Let’s check the first page of the red book with hints.

We can see that the four trees are a part of some hint, and we soon discover the mystery behind this hint.

Tap on the window to take a closer look at it, and tap once more to open it.
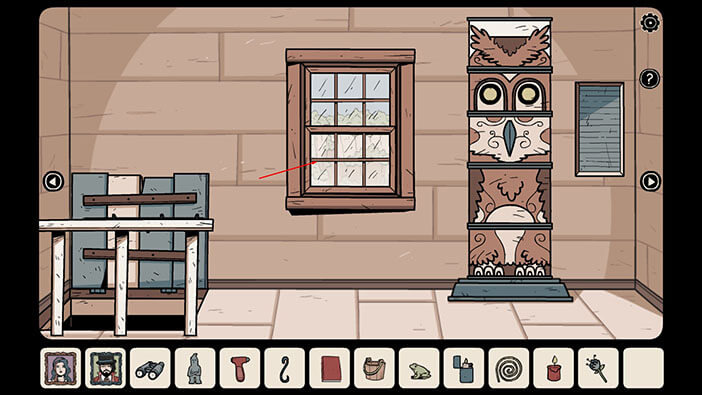
Tap on the window one more time to look outside. Select the “Pair of Binoculars” from the inventory and tap on the cave on your left to look at it.
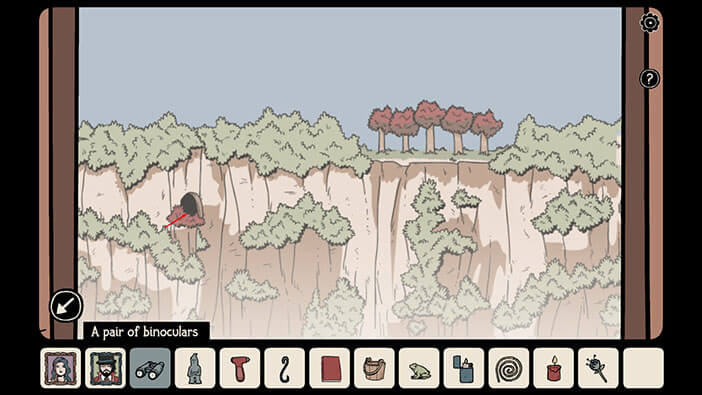
We have discovered another owl.
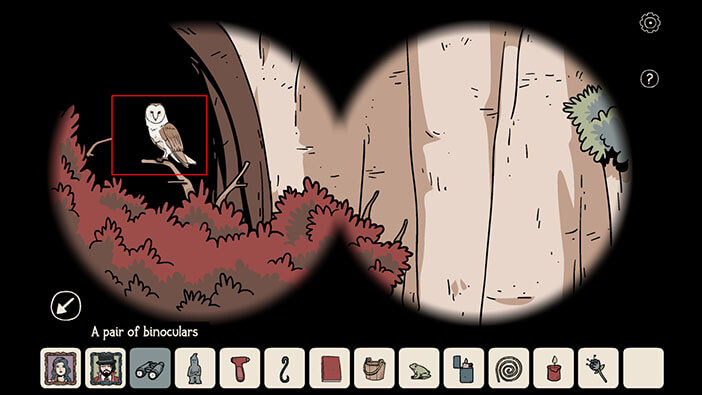
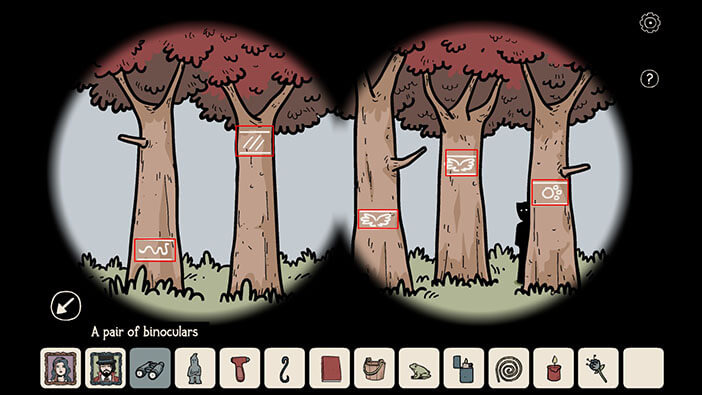
The trees in front of us look similar to the ones in the drawing that we saw earlier. So, with the “Pair of Binoculars” selected, tap on the trees to look at them.
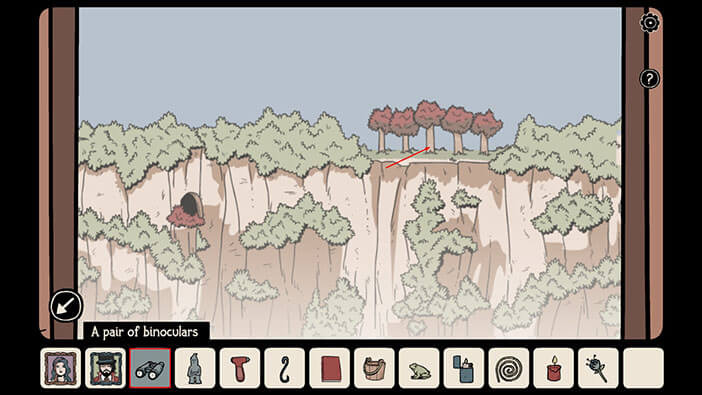
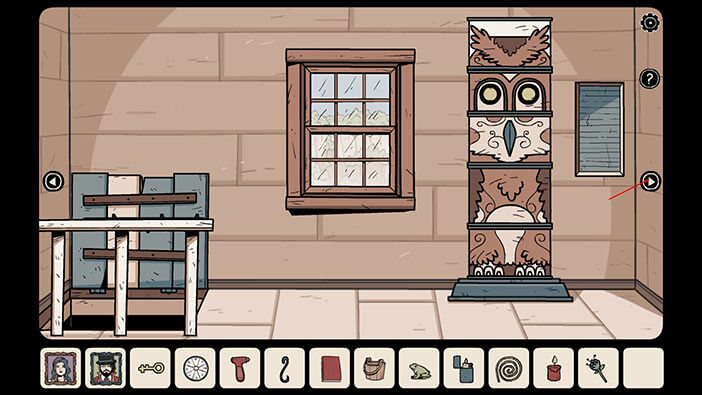
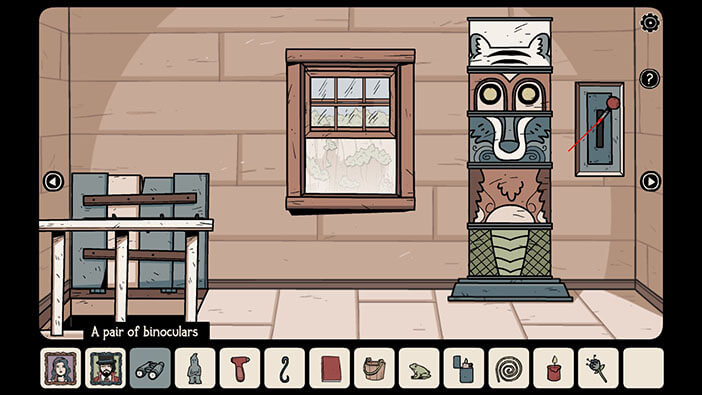
Here we can see a shady figure on the right. More importantly, we can see that there’s a white sign on each tree. The signs on the tree represent the animal piece which we should set on the totem. The three diagonal stripes for the tiger, the paw for the wolf, the bird for the owl, and the snake for, well, snake. The pieces on the totem should be arranged in the same manner as the signs on the tree (the top sign on the tree represents the animal piece that should be at the top of the totem). So, starting from the top we have
First = Tiger
Second = Owl
Third = Wolf
Fourth = Owl
Fifth = Snake
Memorize/Write down this information.
NOTE: You might get a different order of signs on the tree in your game.
Ok, let’s go back to the totem and tap on the pieces to rotate them to the correct animal.
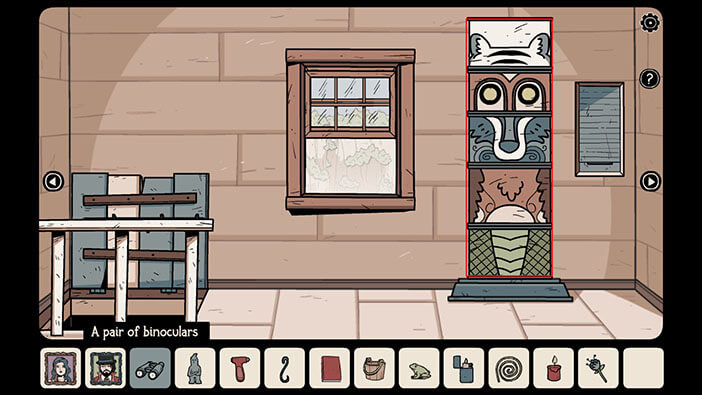
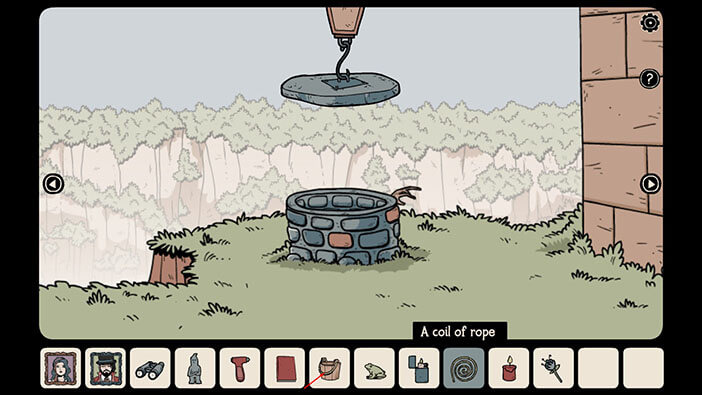
As soon as you set the correct pieces, the compartment on the right will open. Tap on the lever to pull it down, and you will lower the crane outside.
Ok, let’s take another look at the second page in the red book.
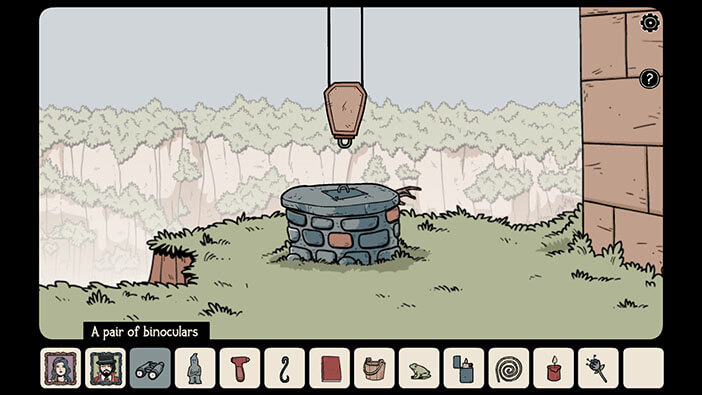
Here we can see that we should lower the small figure (which we already have) into the well, and we will get the key. However, we first have to remove the heavy lid from the well, and we will use the crane to do that.

Let’s go down to the well. To get there, tap on the hatch to go downstairs.
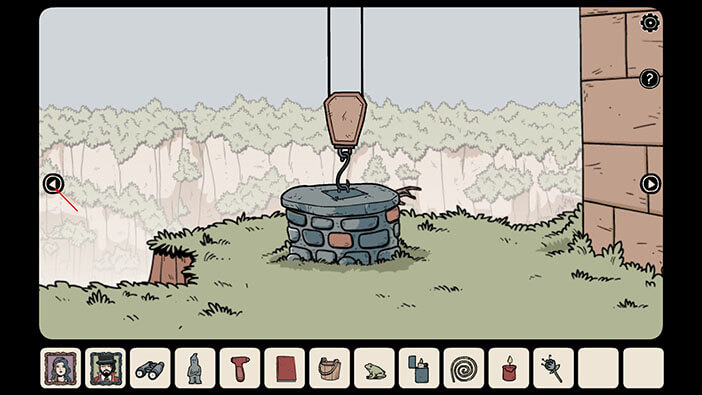
Once there, go to the first room on the right, and then through the white door.

Select the “Hook” from the inventory and tap on the crane to attach the hook.
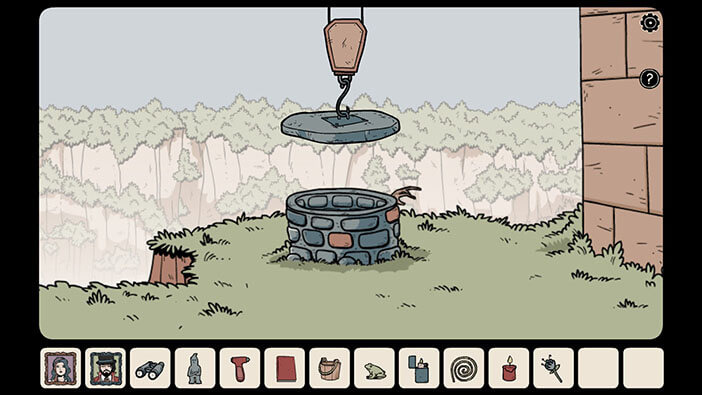
Well, we now just have to pull the lever to remove the heavy lid. So, let’s go back upstairs. To get there, tap twice on the arrow on the left, and then go through the white door.
Go to the first room to the right, and then up the stairs.
Tap on the lever and you will remove the lid from the well.

Ok, let’s go back to the well. To get there, tap on the hatch to go downstairs.
Once there, go to the first room on the right, and then through the white door.
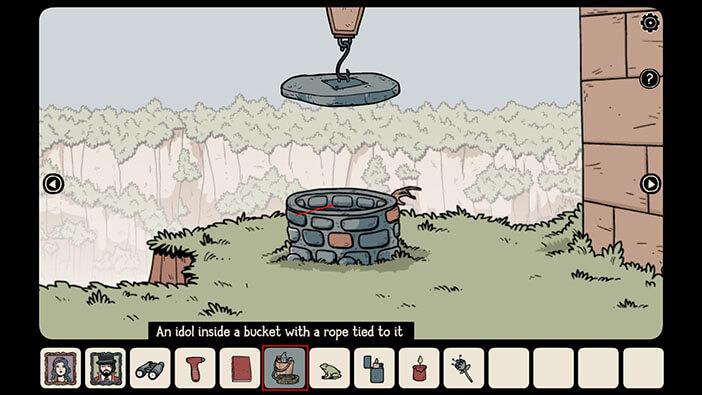
Select the “Coil of Rope” from the inventory and tap on the “Wooden Bucket” to tie it to the one end of the rope. A “Rope Tied to the Bucket” will be added to your inventory.
Select the “Small Statue” and tap on the bucket to put it in. An “Idol inside the bucket with a rope tied to it” will be added to your inventory.
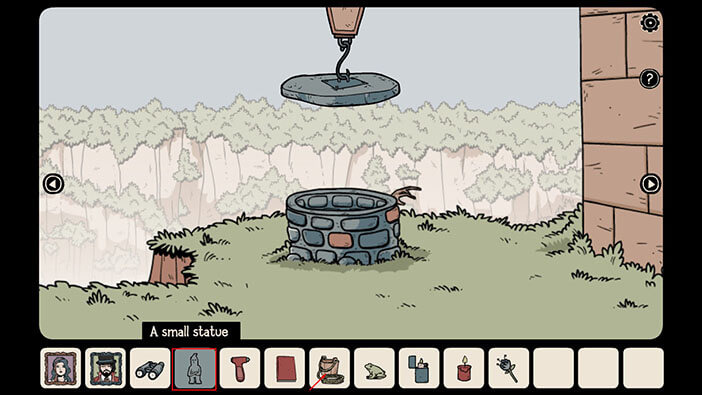
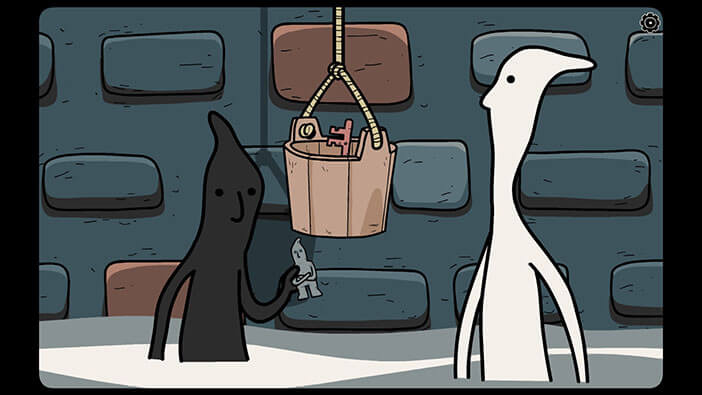
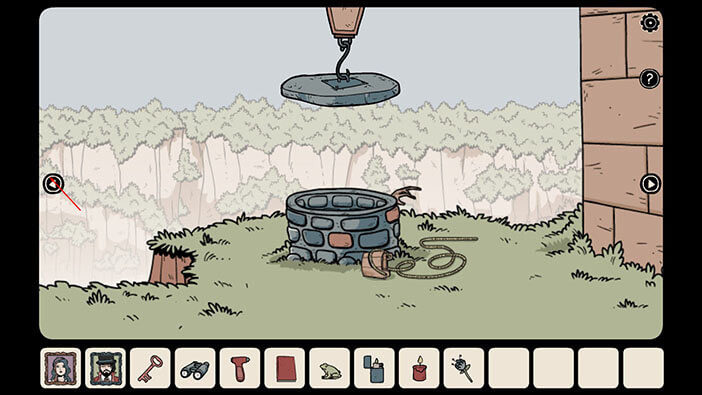
Select the “Idol inside the bucket with a rope tied to it” and tap twice on the well to lower it.
At the bottom of the well, two ghosts will take out the statue from the bucket and put in the key. We will acquire a “Pink Key”.
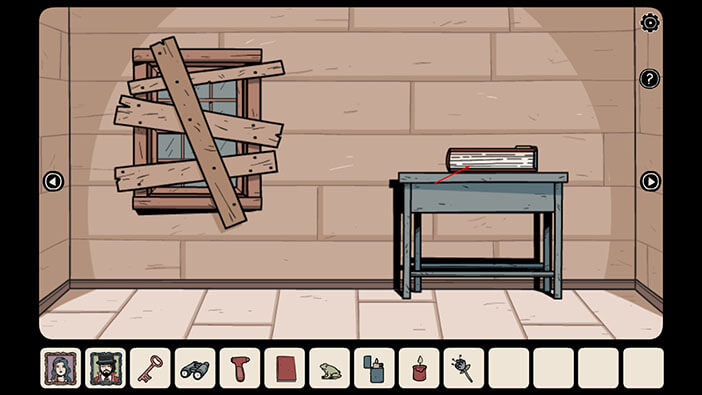
This key can be used to unlock the Red Book that we saw in the room upstairs. So, let’s go there. Tap twice on the arrow on the left, and then go through the white door.
Go to the first room on the right, then up the stairs.
Once you get to the attic, go to the second room on the right.
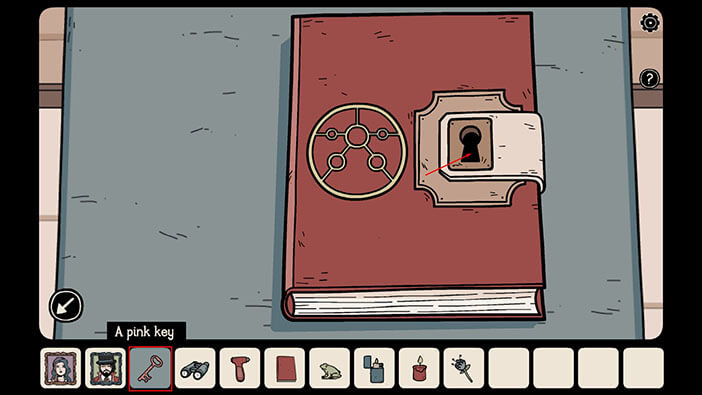
Tap on the Red Book to take a closer look at it.
Select the “Pink Key” from the inventory and tap on the keyhole to unlock the book. Adria will browse through the page looking for some useful information.
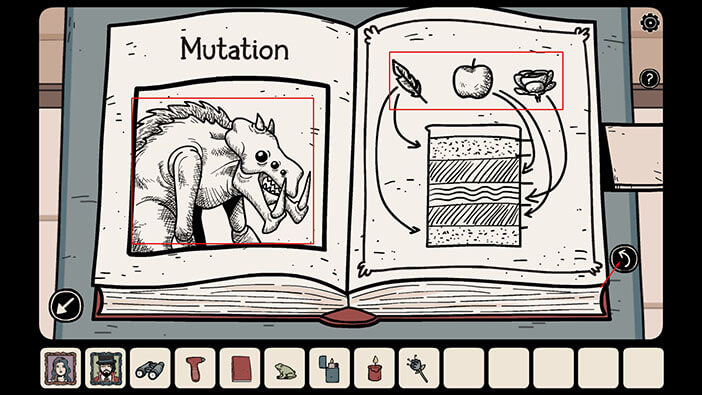
Fun Fact: On the first page of the book, we can see the monster from the first game of this series “The Unwanted Experiment”. We can also see a recipe for curing a mutation, which is the same as the one that we used in the first game (a feather, an apple, and a flower).
Tap on the arrow on the right to go to the next page.
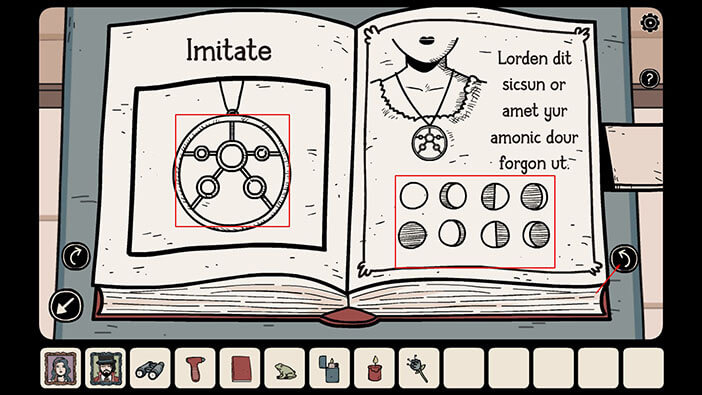
Here we can see that the amulet is somehow connected to the moon. Let’s go to the next page.
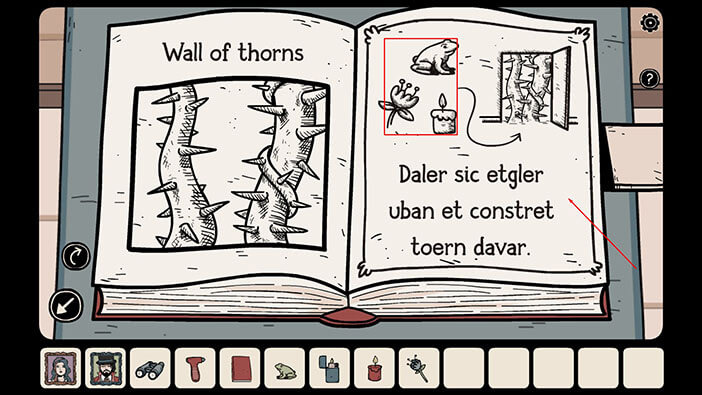
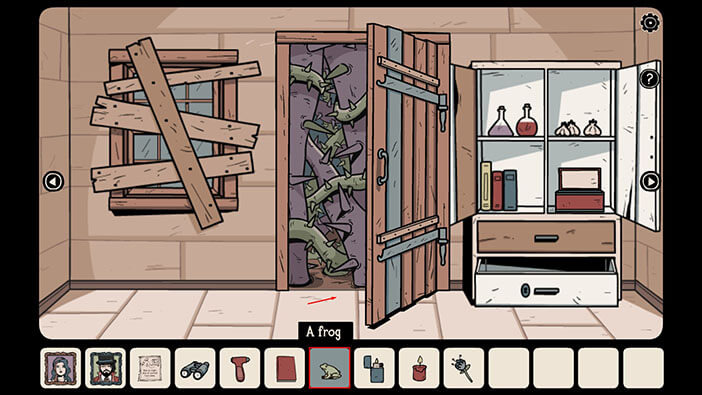
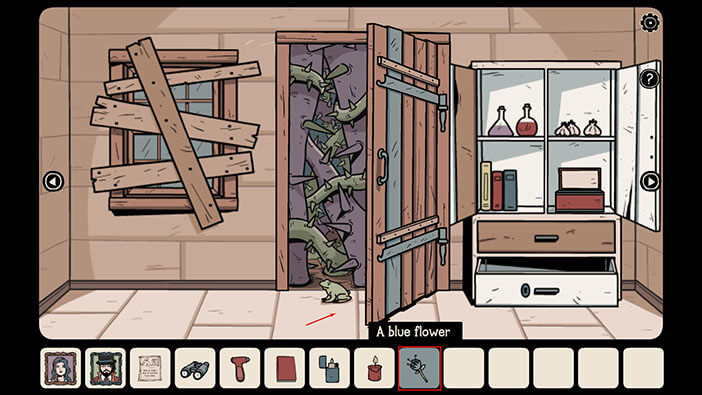
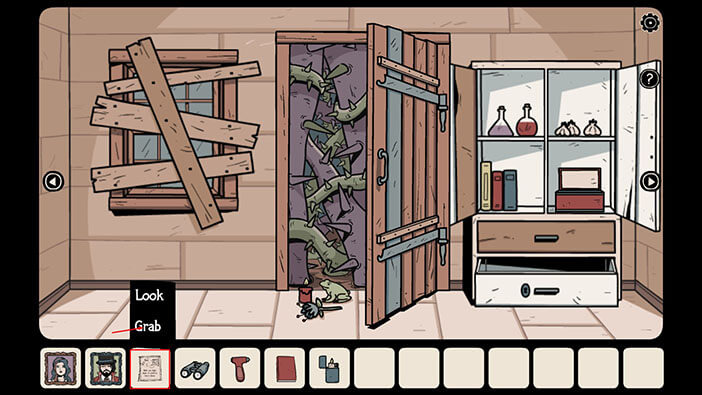
On the last page, we can see the spell that removes the wall of thorns. Great, because a wall of thorns is blocking our way out of the house. In order to cast this spell, we will need three components. A “Frog”, a “Blue flower” and a “Lit Candle”. Luckily, we already have all three components. So, let’s tap on the page to tear it out, and it will be added to our inventory.
Hahaha, I guess our character is tired of having to memorize different kinds of codes and symbols, so I understand why she decided to tear out the page.
Ok, let’s go to the front door, and finally get out of this cursed house. To get to the front door, go to the first room on the right and then downstairs, through the hatch.
Go to the second room on the right, and then through the brown door.
You will reach the room with the fireplace. From there, go to the first room on the right.
First, let’s select the “Frog” from the inventory and tap on the spot in front of the door to place it.
Second, select the “Blue Flower” from the inventory and place it below the frog.
Select the “Lit Candle” from the inventory and place it to the left of the frog.
Ok, now let’s read the words of the spell and finally get out of here. Select the “A Page with the Spell” from the inventory and tap on the “Grab” option.
Tap on the wall of thorns to read the spell.
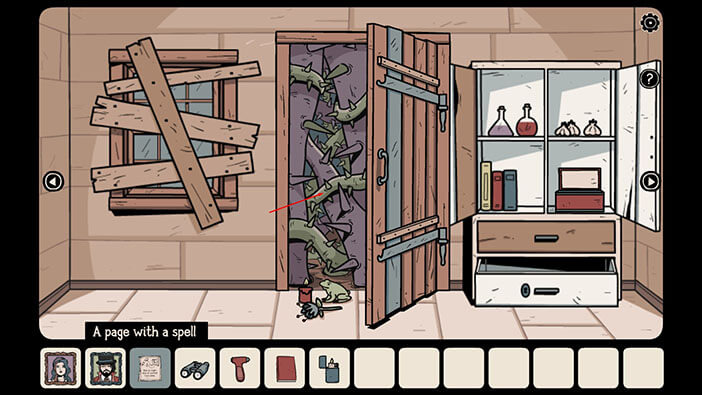
After reading the spell, the strange light appeared around the spell components and, a few moments later, the wall of thorns vanished.
NOTE: The game has two endings, a GOOD ONE, and a BAD ONE. We will show the BAD ONE first.
BAD ENDING
Tap on the door to get out.
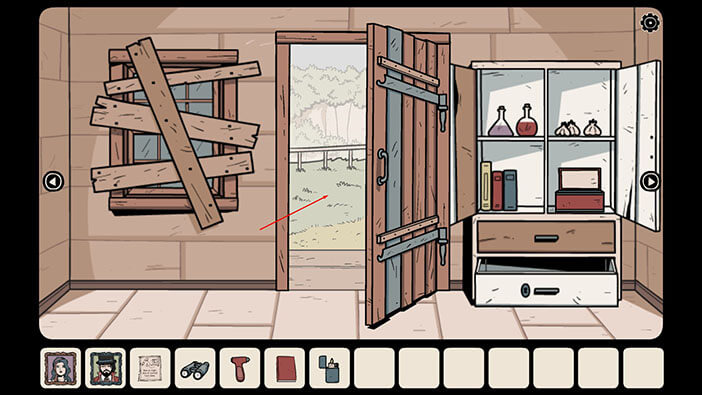
But, it turns out that Adria can’t leave, because the exit was blocked by an invisible force field. She saw her friends outside and yelled, but they couldn’t hear her.
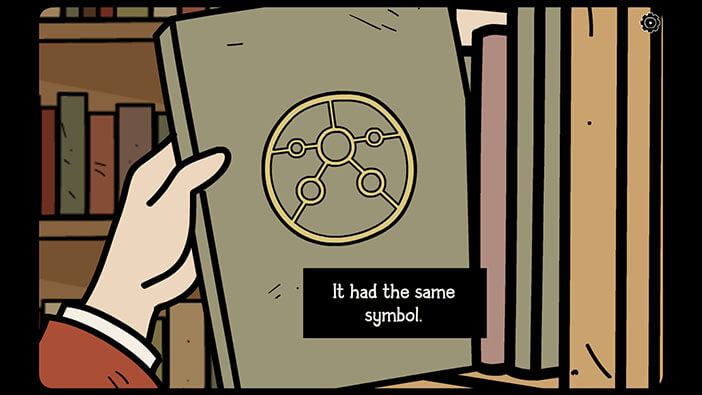
Then, her attention was drawn to the amulet around her neck. She remembered that Meridia gave her this amulet when she saw her in the Hidden Town. She also remembered that the sign on Dealian’s book and the sign on the spellbook looked exactly like the amulet around her neck.
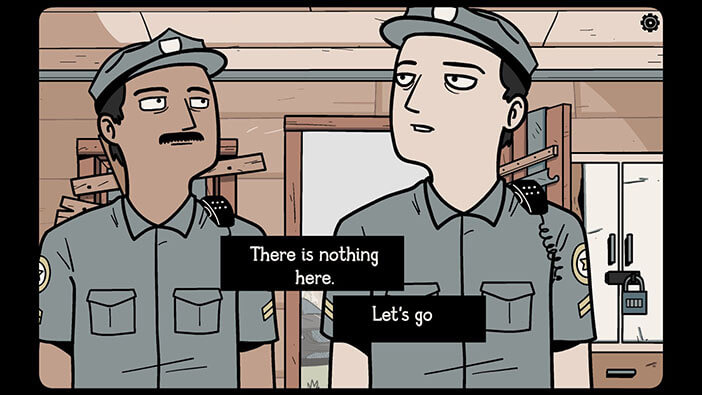
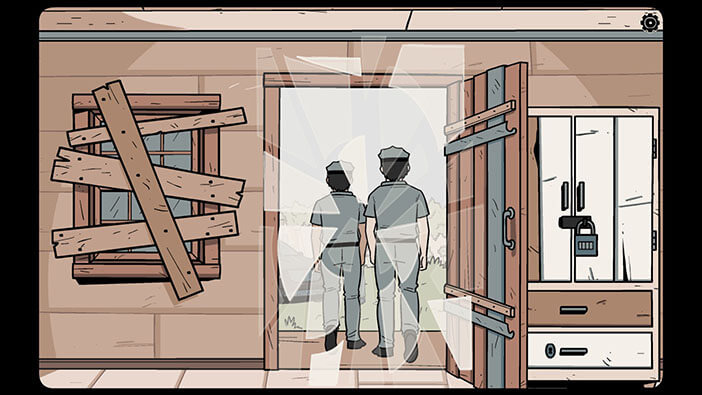
Two policemen will enter the house, looking for Adria. But they couldn’t see her. They just saw the empty house, just like Adria’s friends. So, they left, and Adria was still trapped inside the house.
At this moment, you will have a short window of time to do something. For the bad ending, we will just stand there.
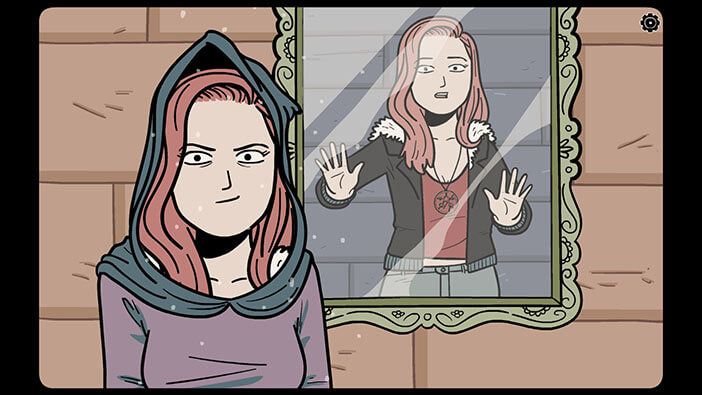
In the next scene, we can see the Witch, picking up another portrait from the ground. Adria was trapped inside the portrait, just like Meridia and Delian before her.
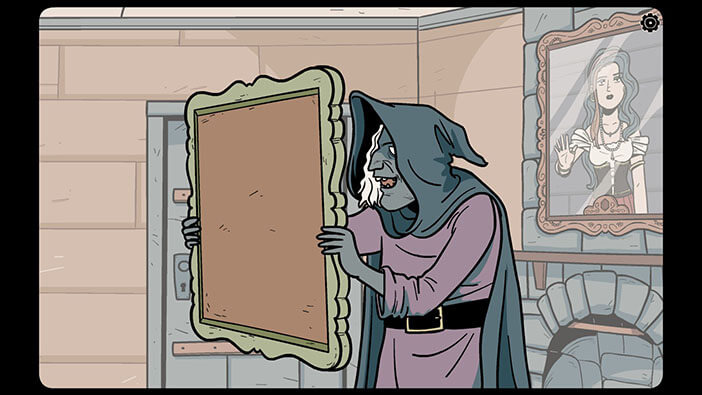
After that, we can see the Witch looking at Adria’s portrait, and after a few moments, shapeshifting into an evil version of Adria…
So, it looks like the Witch can take possession of the body of the people she trapped inside the portrait. So, it was probably the Witch, disguised as Meridia, who gave Adria the amulet. That’s probably the reason Adria could see the old things in the house, while her friends only saw an empty room.
GOOD ENDING
For a good ending, we will continue the story from the moment when the policemen left the house.
Quickly select the “Small Hammer” from the inventory and tap on the amulet. Adria will throw the amulet to the ground and smash it with the hammer, breaking it into several pieces. As soon as she broke the amulet, the invisible magical barrier shattered like glass, and her friends and the policemen were able to see her. She managed to break the spell and escape…
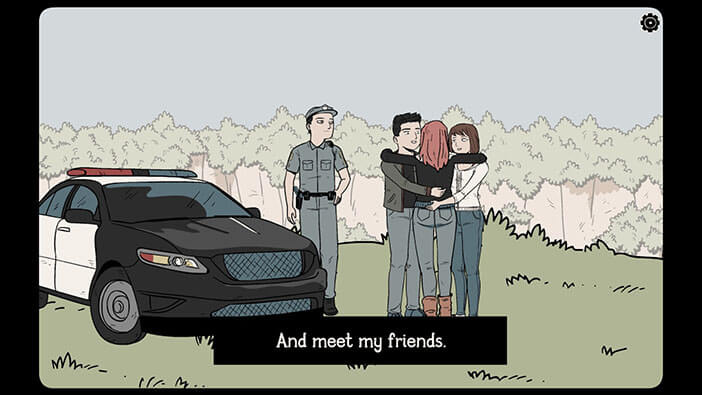
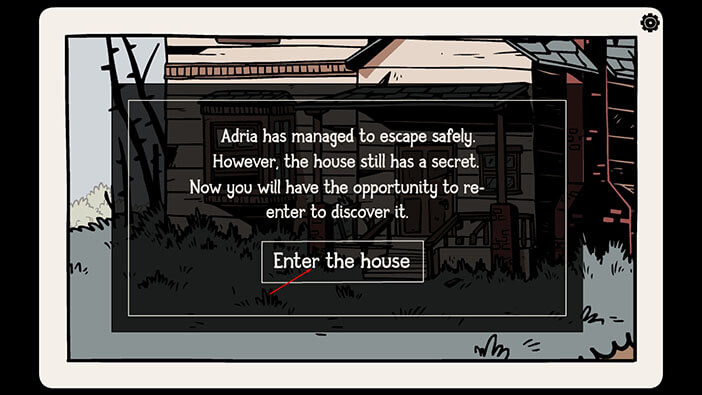
But, Meridia and Delian were still trapped. Adria hopes that one day she will be able to find a way to free them. In the last scene, we saw the Witch picking up one piece of the broken amulet.
But, the game doesn’t end here. Meridia escaped, but we can go back to the house and unravel a few more mysteries. Tap on the “Enter the House” button.
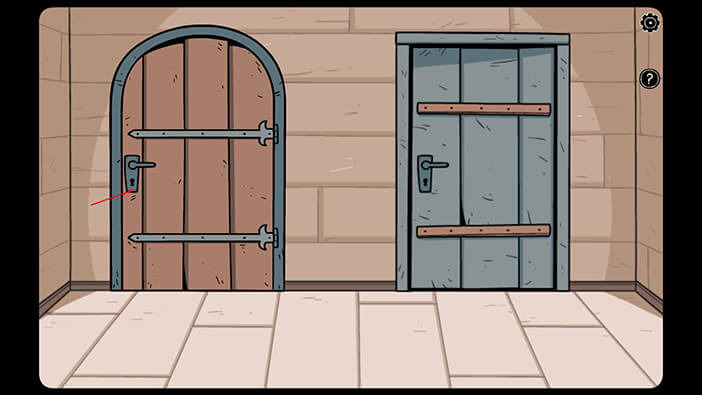
The blue door can’t be opened, so tap on the brown door to open it and tap once more to enter into the next room.
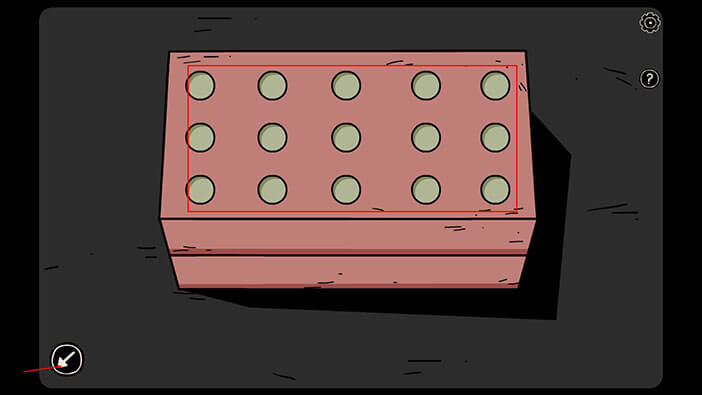
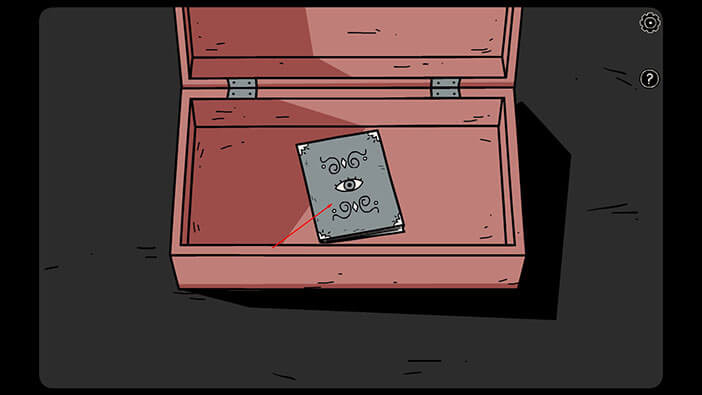
Tap on the box in front of you, to take a closer look at it.
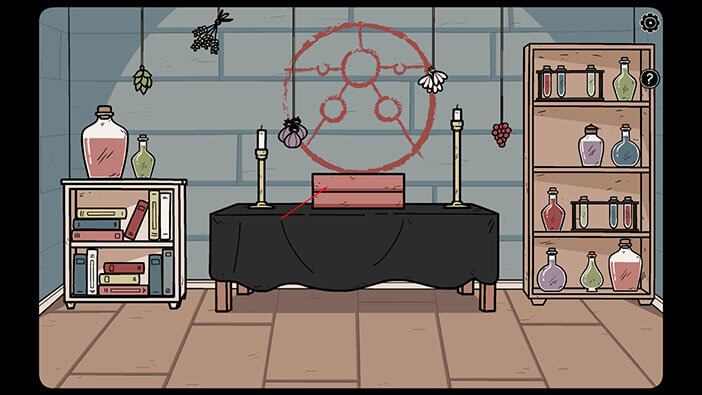
We can see slots, arranged in five columns and three rows. Ok, now tap on the arrow in the lower right corner to step away from the box.
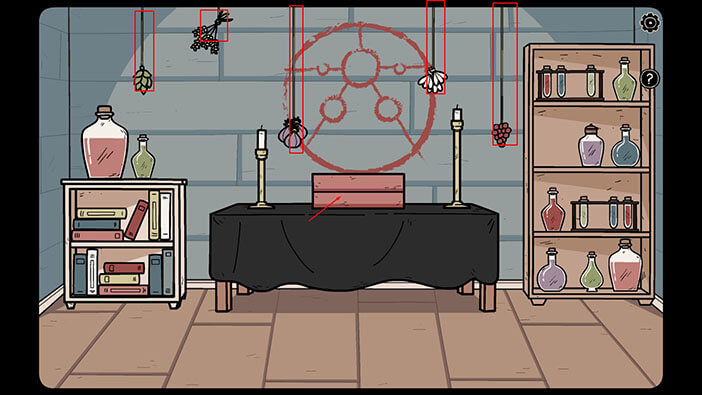
If we take a look at the ingredients that are hanging from the ropes, we can see that there are five ropes (just like the number of columns on the red box), and there are three different lengths of rope (some ingredients are higher, some in the middle, and some lower). So, just like the number of rows on the red box. So, let’s memorize/write down the position of each rope, starting from left to right.
First = middle
Second = top
Third = bottom
Fourth = Middle
Fifth = Bottom
Ok, let’s tap on the box and solve this puzzle.
As soon as you press the correct button, the box will open.

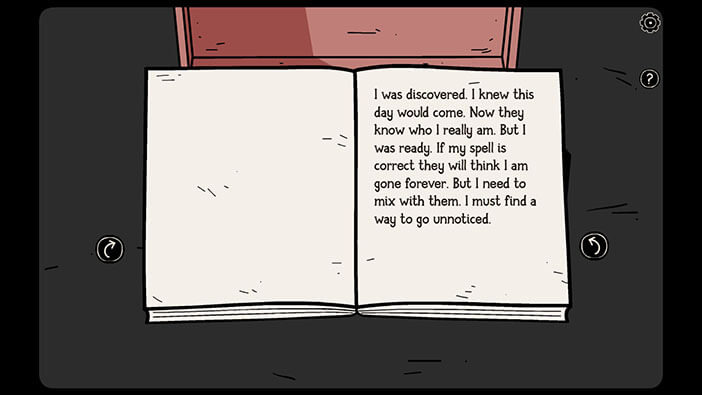
Tap on the book inside to take a look at it, then tap on the arrow on the right to open it.
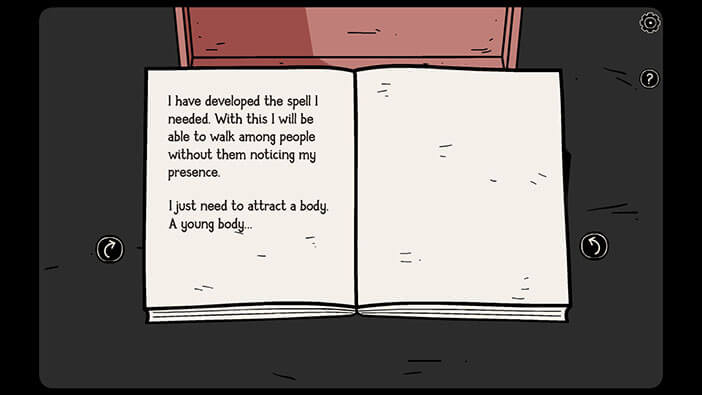
The Witch realized that she was discovered, so she prepared the spell which should enable her to convince the peasants that she is dead, while also enabling her to disguise and walk among them. But she needs the body of the young person in order for this spell to work.
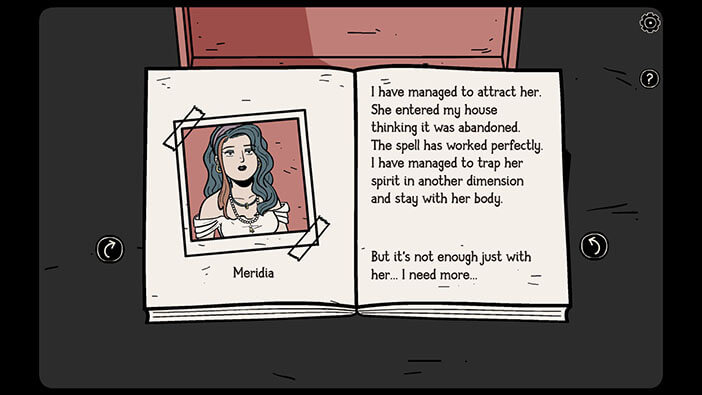
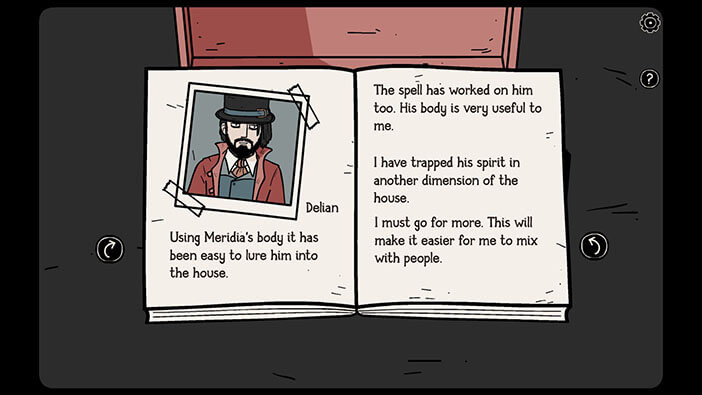
On the next page, we can see that the Witch managed to trap Meridia into the portrait and take hold of her body. So, poor Meridia was the first one. But, the Witch wasn’t satisfied with only one body…
On the next page, we can see that the Witch managed to lure the Delian in because she was using the body of an attractive Meridia. Now, he is also trapped inside the portrait.
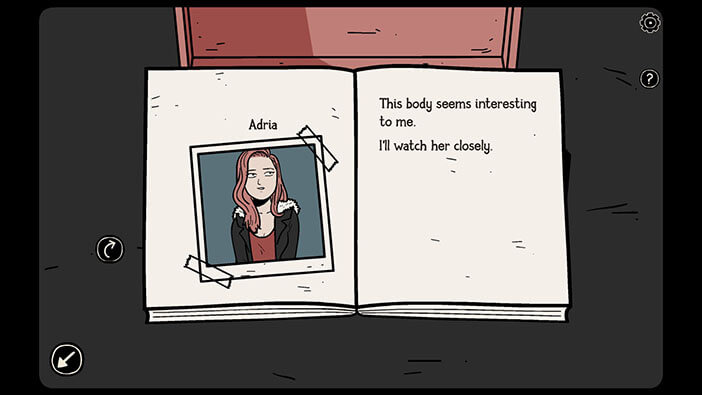
Finally, we can see that the Witch was interested in Adria.
Tap on the arrow in the lower right corner to leave the book.

In the last scene, we can see the Witch shutting the door and locking it…
The End.

Well, that brings us to the end of this adventure. If you’re interested in Escape Room games, check out our guides for the other games of this genre.
Thank you for reading.