Lost Lands 10 – Main Chapter | Part 5
Intro
Welcome to our walkthrough for Part 5 of the Main Chapter of “Lost Lands 10” from “FIVE-BN GAMES”. Susan and Maaron found out that Buldan was manipulating Folnur. Now they need to escape the temple and see if Kiana is alright.
Walkthrough
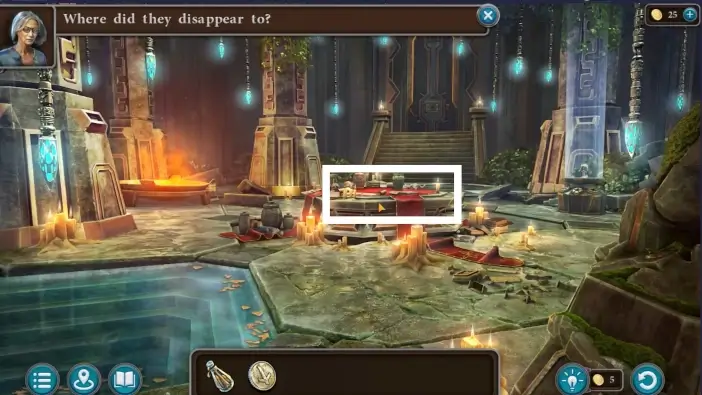
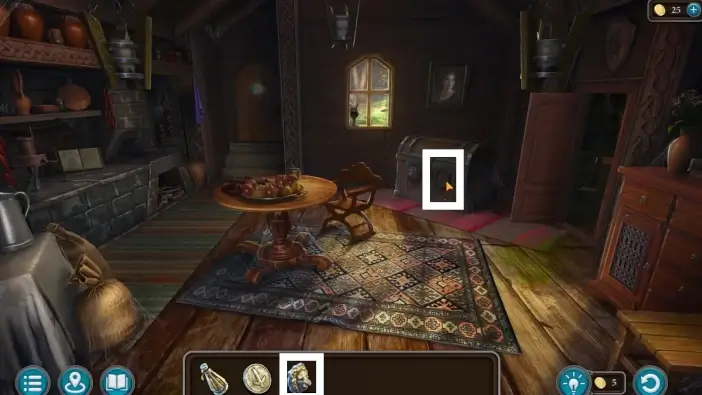
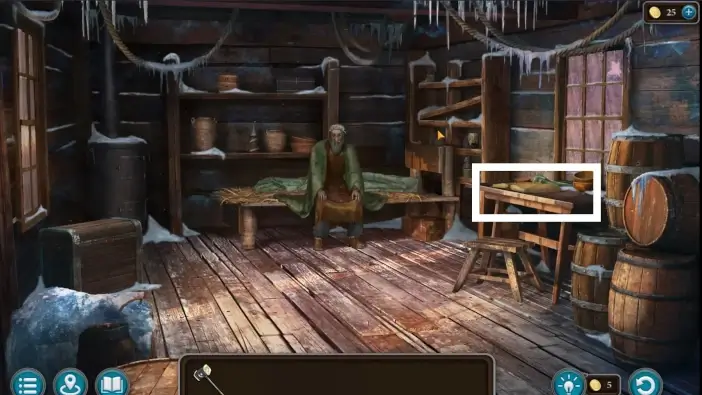
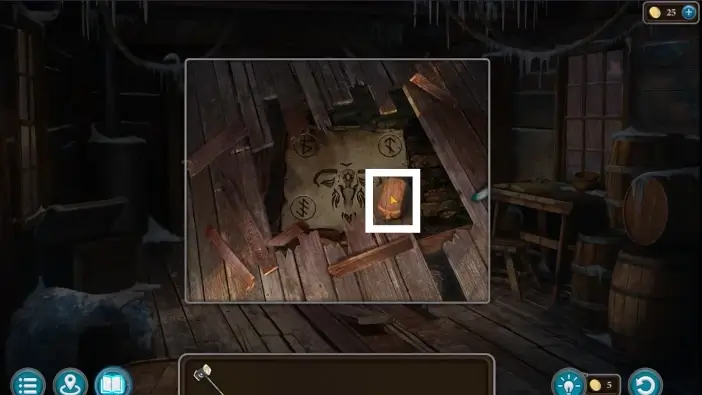
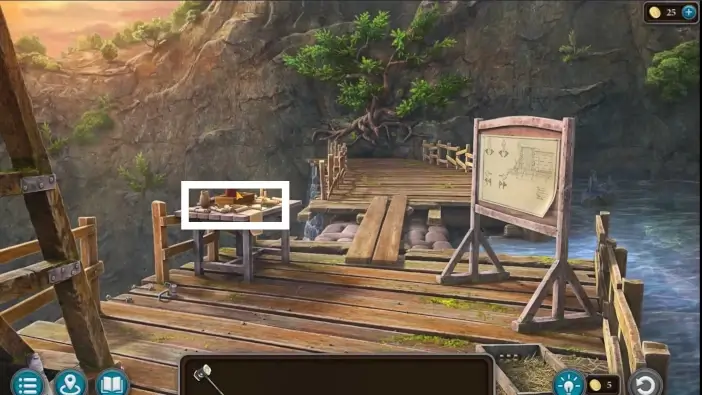
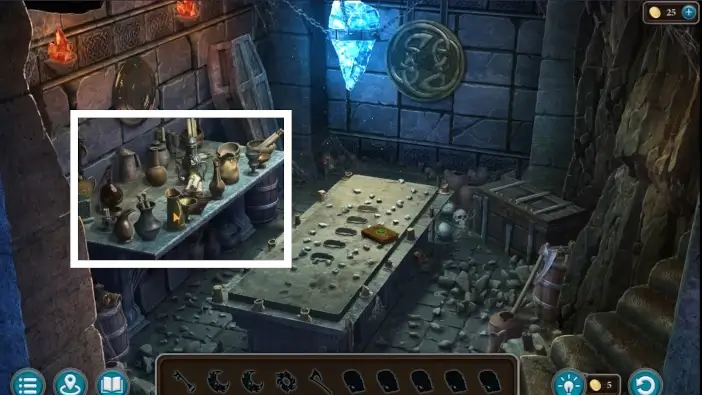
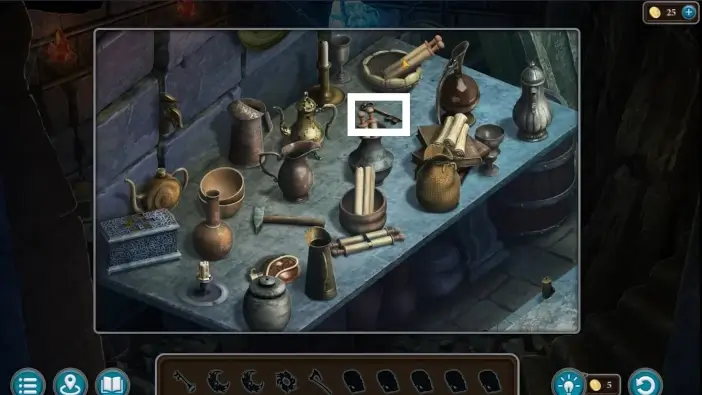
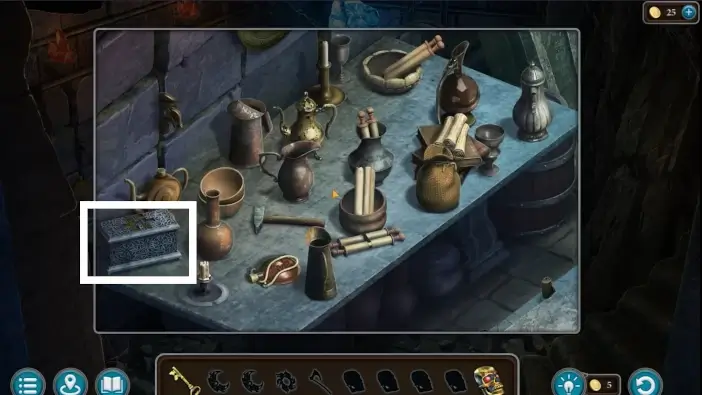
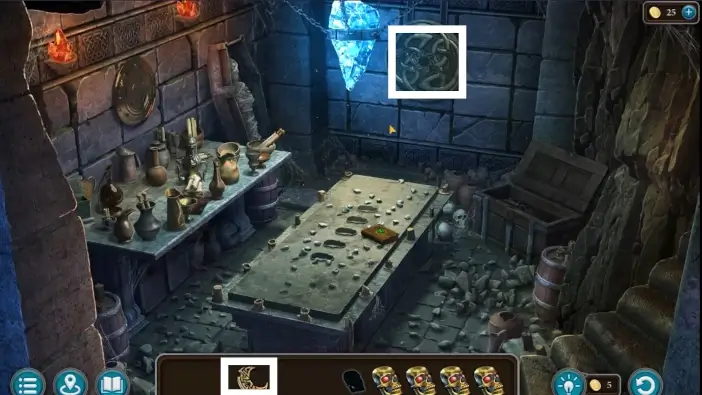
Approach the table.
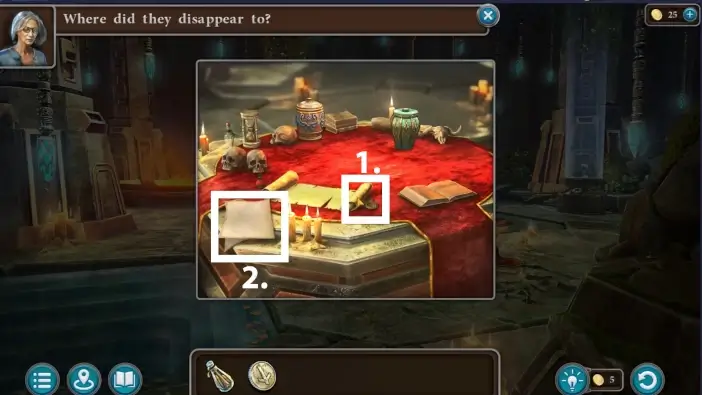
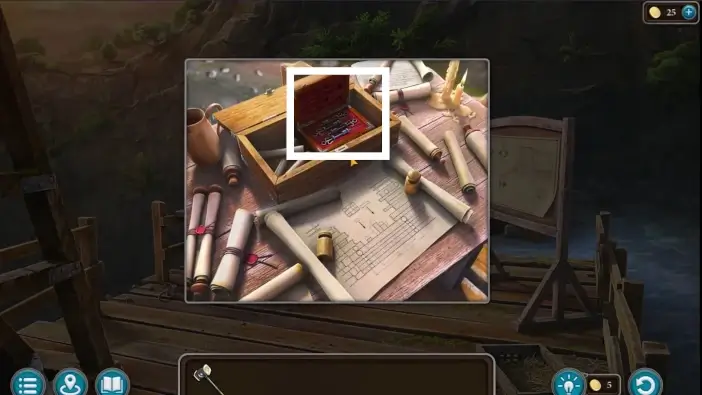
- Take the element of the mechanism. It is behind the scroll. It is used for unlocking the temple door.
- Below the Manuscript collectible is the lion’s head. It can unlock the chest in Folnur’s house.

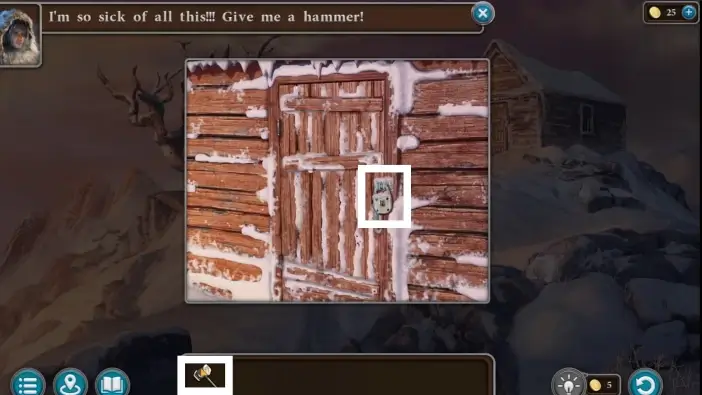
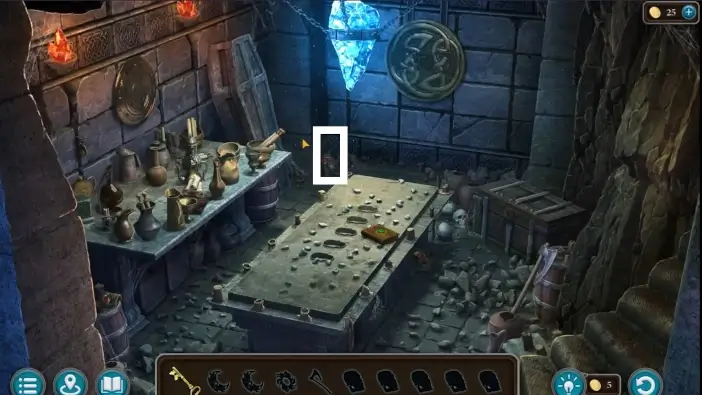
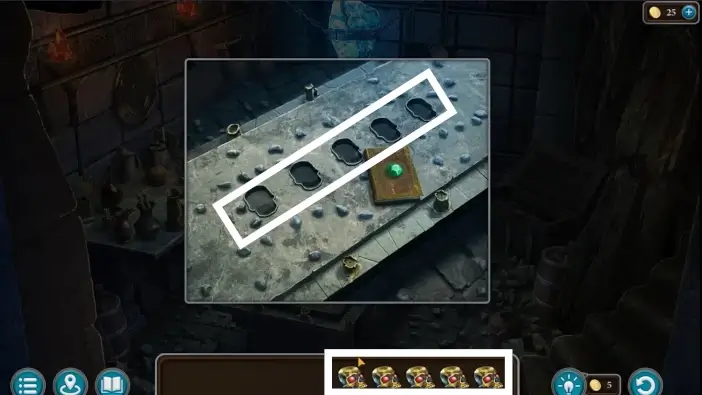
Go to the temple door.
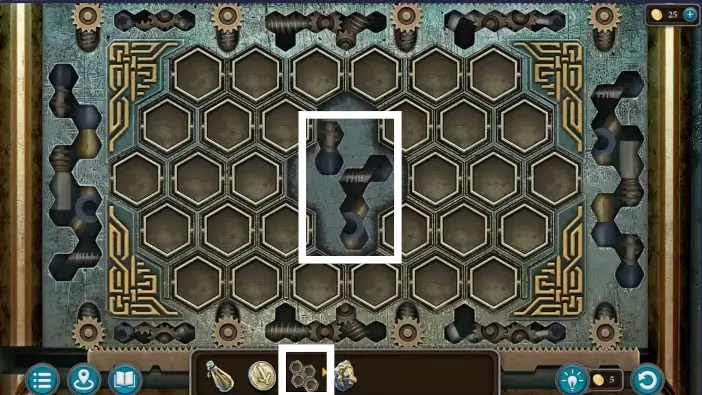
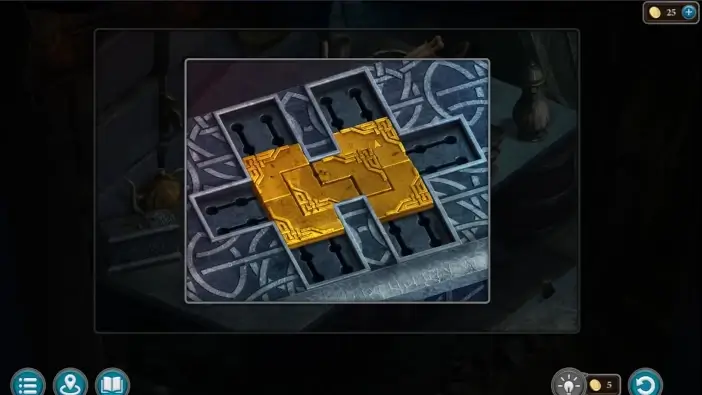
Place the element of the mechanism. A new puzzle challenge will start.
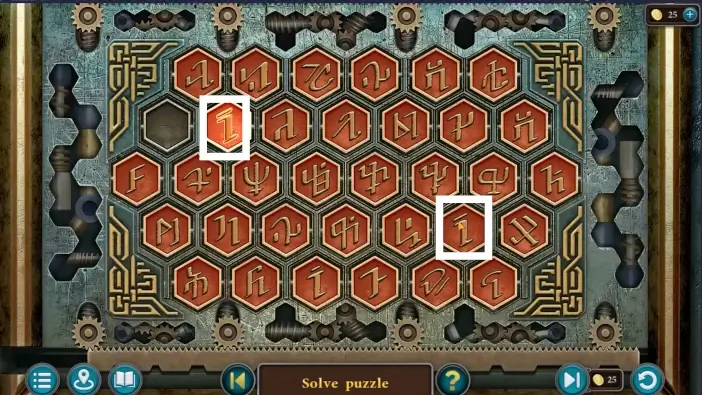
This challenge is very simple. You just need to find two identical symbols and click on both of them. Do that until all symbols disappear. After you unlock the door, Susan and Maaron will reunite with Kiana.
Maaron will notice that Folnur was doing the ritual of body mutation and it was probably Buldan’s idea. The root of the problem is that Folnur is tired of his new body and wants to regain his previous body, which is impossible with the current laws of existence. Susan will accept the only option which is for her to be sacrificed to visit the goddess of creation, Drak Om, to ask her how to help Folnur. You’ll need to climb the top of the Sacred Mountain and perform the ritual.
Return to the Folnur’s house and use the lion’s head to open the chest. Take the fur skins and a box of dynamite from the chest. Susan and Kiana will need fur skins to dress warmer for the summit of the Sacred Mountain, while dynamite will be useful to blow up certain areas on the mountain.
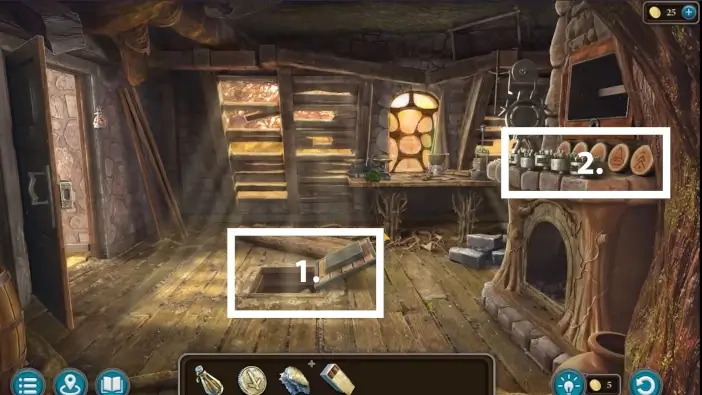
- Go to the Maaron’s house. Pick another blank runestone.
- Approach the cutters.
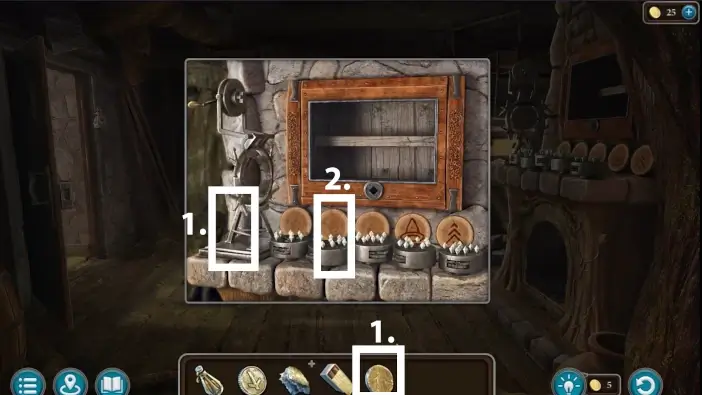
- Place the blank runestone beside the runemaking machine.
- Check the rest of the cutters until you see a cutter that makes the pumpkin rune.
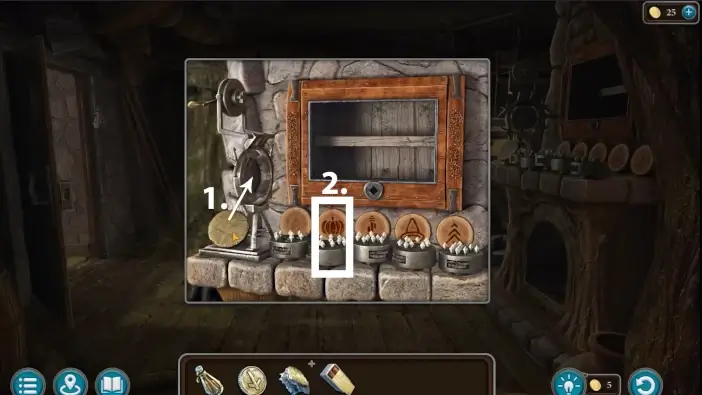
- Put the blank runestone into the runemaking machine.
- Use the cutter that makes the pumpkin rune. Once the process is finished, take the pumpkin runestone.
- Go back to the area outside of the temple. Place the pumpkin runestone on the dolmen.
- Go through the portal.
You will arrive in front of the mine where you’ve previously been. Enter the mine.
Activate the mechanism to drop the counterweight and lift the elevator.
Once the elevator appears, activate the mechanism again to go deeper into the mines.
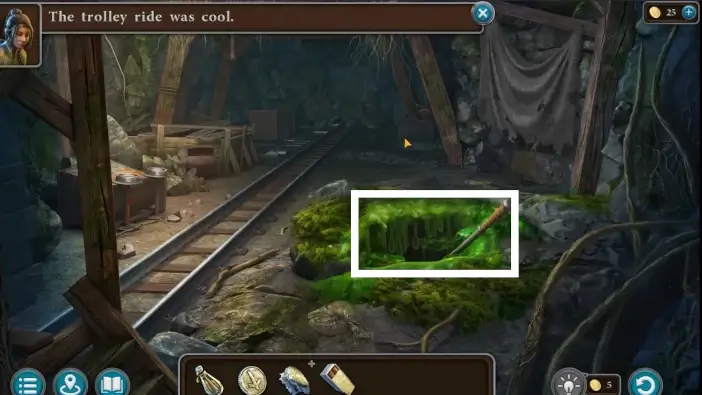
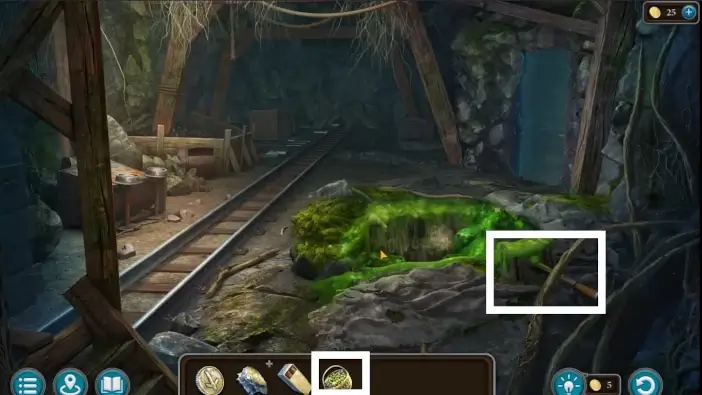
Approach the slimy hole where the Folnur’s hammer fell.
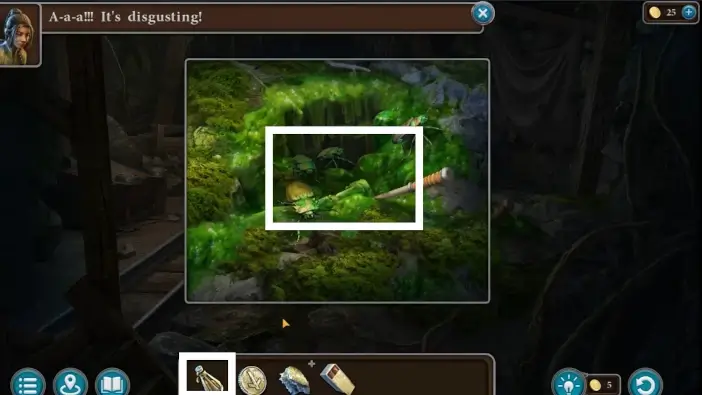
Use the perfume halfling scent that you created near the Lake of Love to scare off the cockroaches.
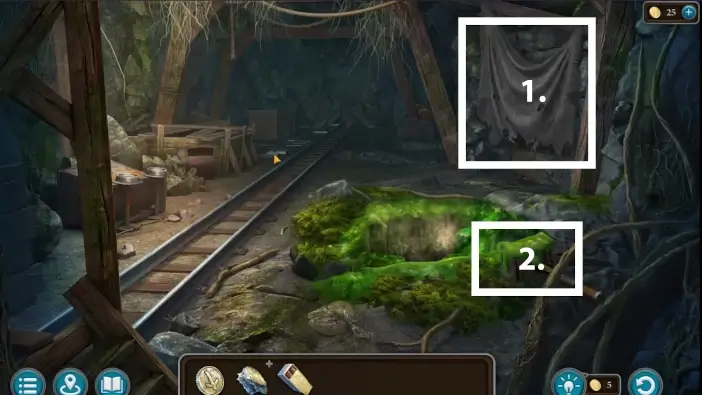
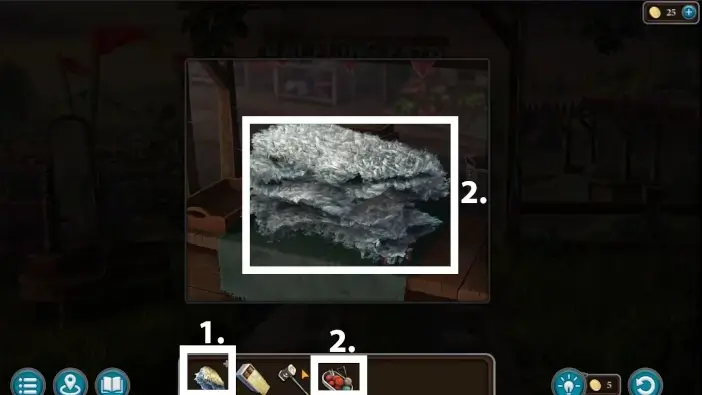
- Remove the old fabric. It will be added to your inventory.
- Use the old fabric to clean the Folnur’s hammer. Unfortunately, it won’t work.
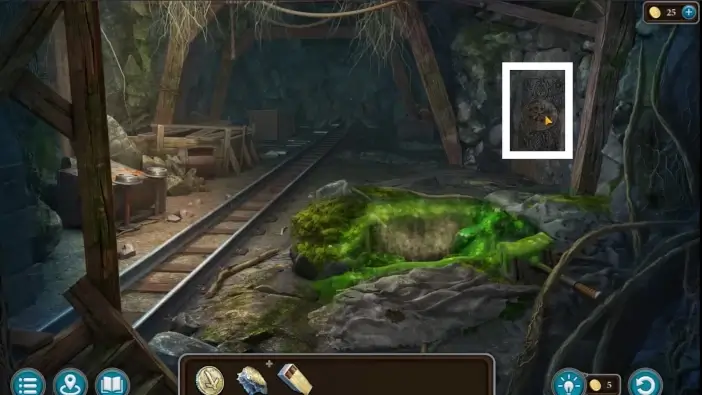
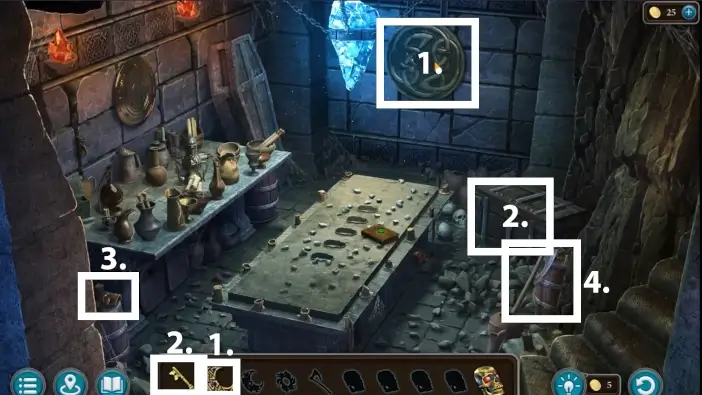
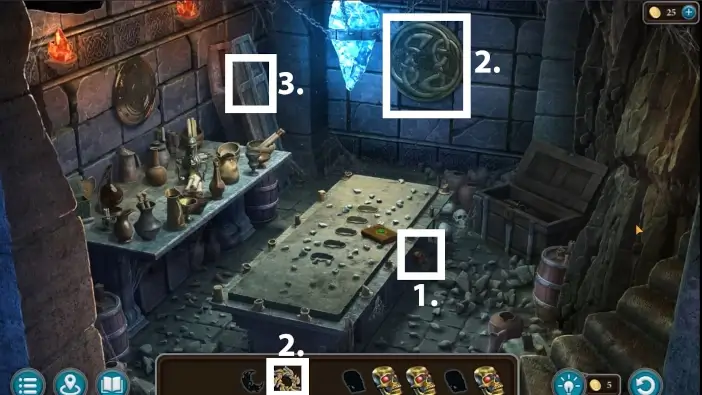
Approach the hidden door.
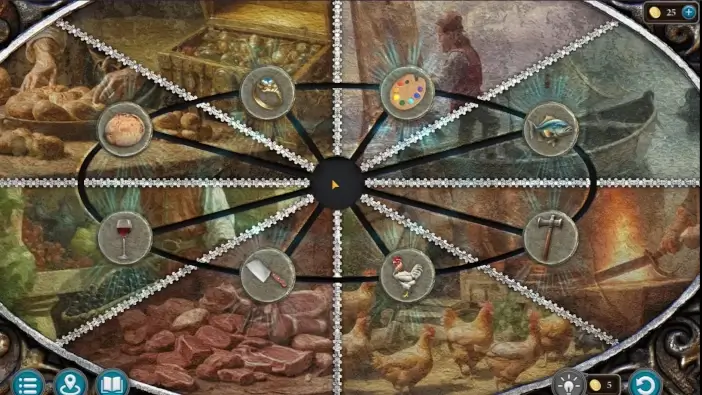
To unlock the door, you need to place the objects on the fields where the objects come from. For example, the hammer comes from the blacksmith workshop. After you unlock the door, the mysterious voice will tell you to go away. This is a late-game area where Folnur and Buldan are hiding. If you complete this puzzle challenge in less than thirty moves, you will get the “Craftsman” achievement.

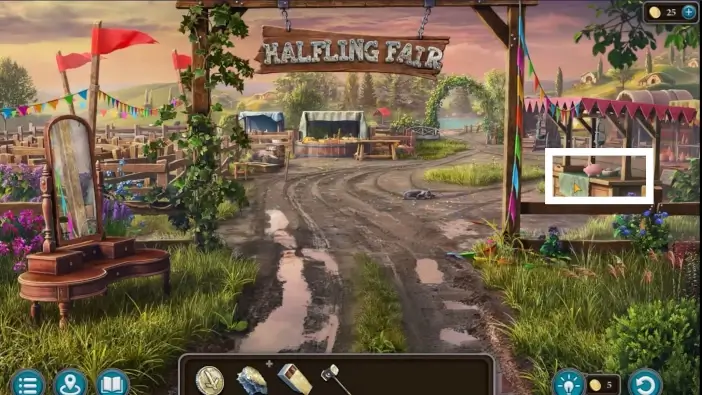
- Go to the fairgrounds and pick the empty basket.
- Go to the lake.
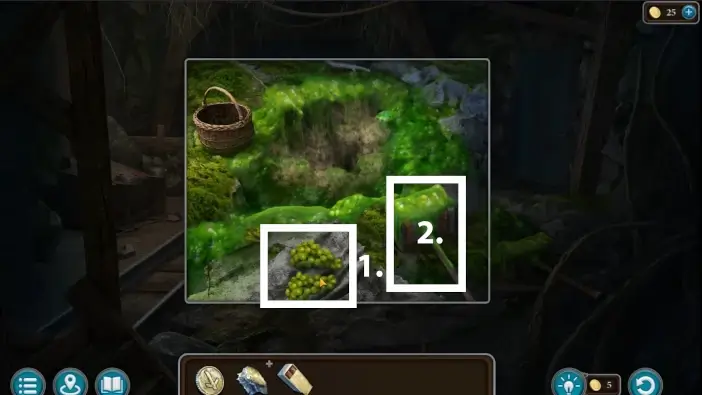
Go to the vineyard and use an empty basket to collect some grapes.
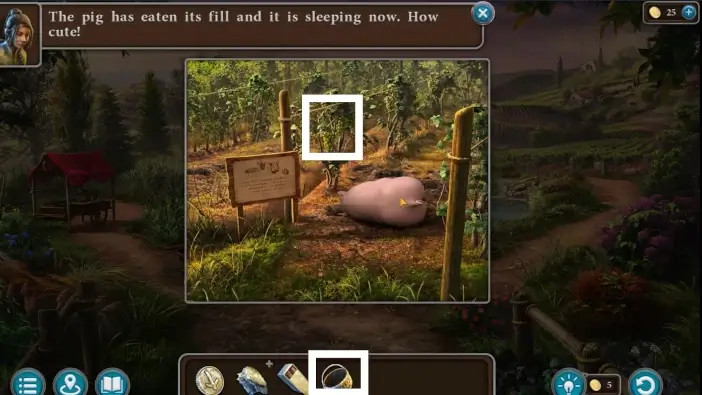
Go back to the depths of the mine and place the basket of grapes near the Folnur’s hammer.
- Click on the grapes to wrap them in the old fabric and then clean the Folnur’s hammer.
- Take the Folnur’s hammer.
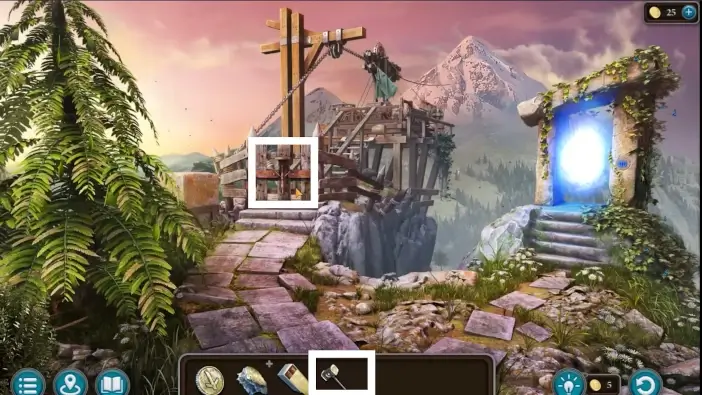
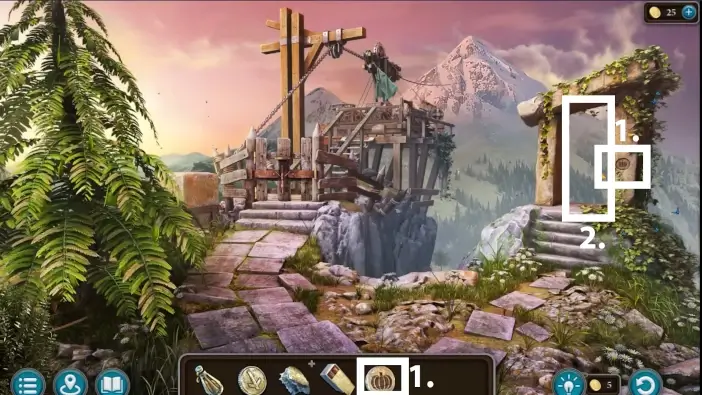
Return to the area outside the temple and use the Folnur’s hammer to open the gate to the ropeway. This ropeway leads to the Sacred Mountain.
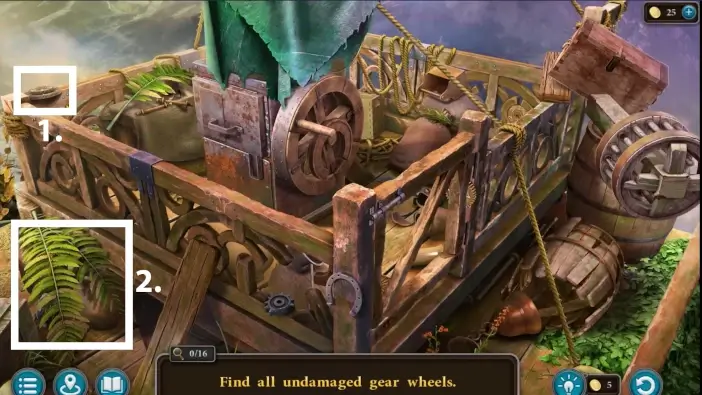
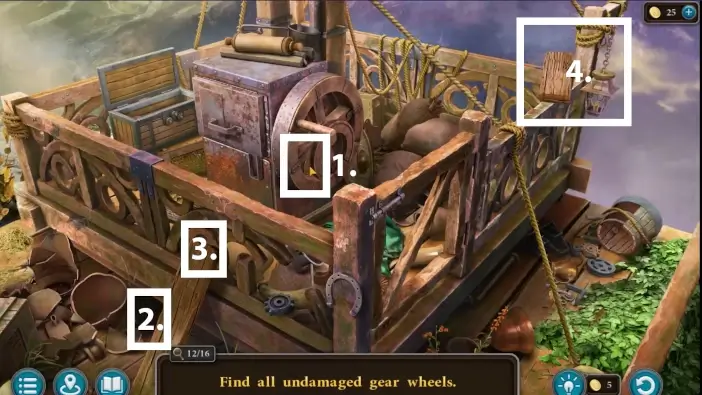
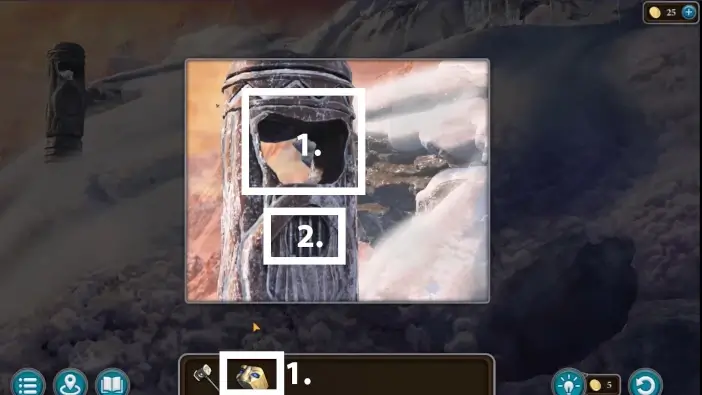
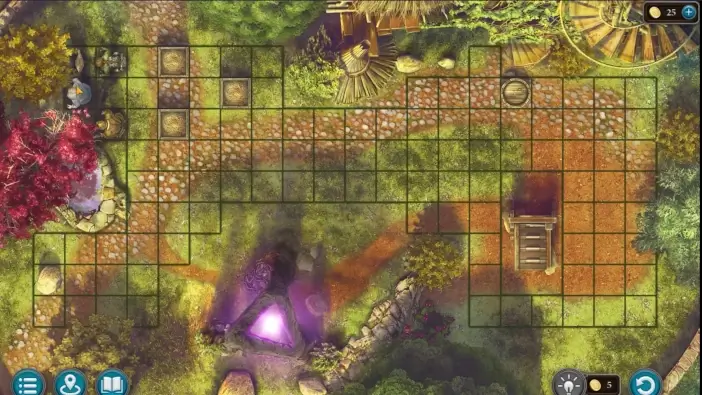
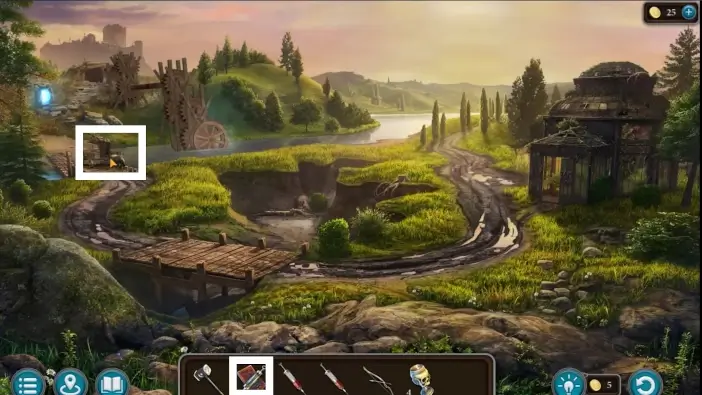
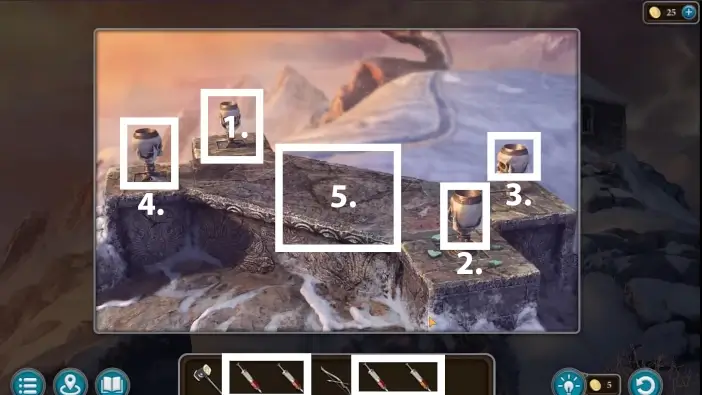
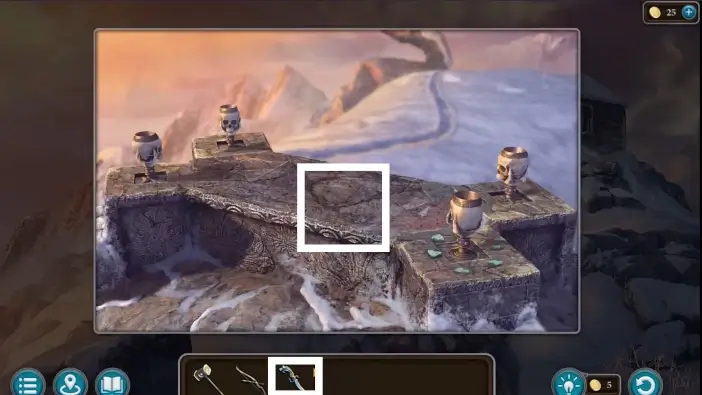
The ropeway will not move because the mechanism is missing gears. A new challenge will start where you need to find all sixteen missing gears. Follow the pictures, marks, and arrows to find them all.
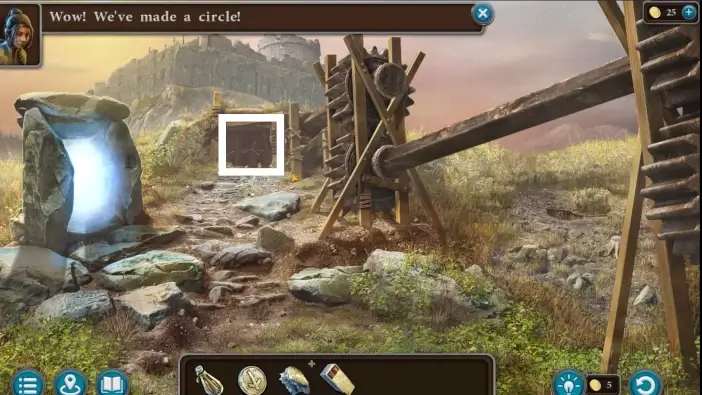
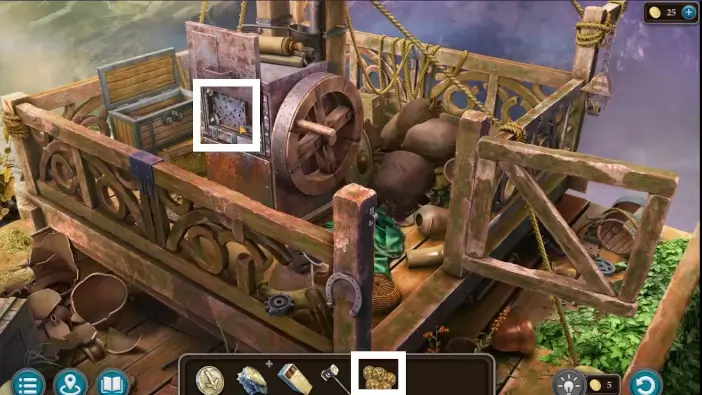
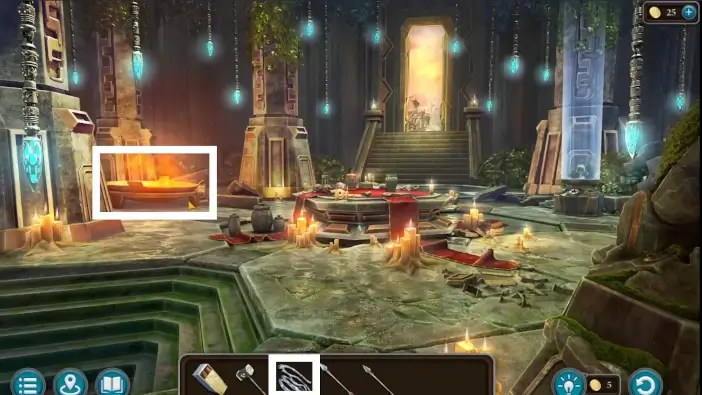
In the second step from the picture above, use the mace to break the vase and pick a gear.

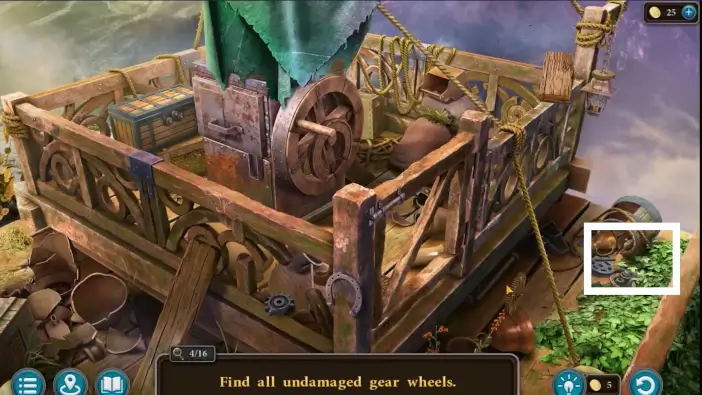
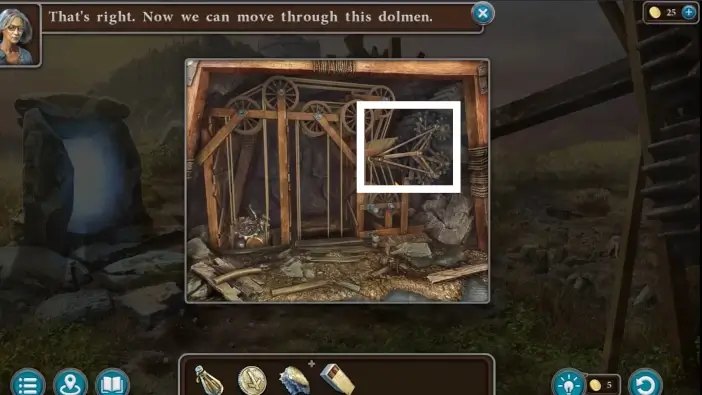
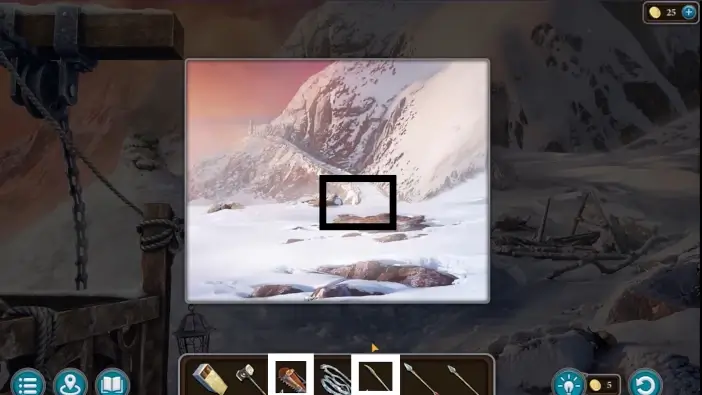
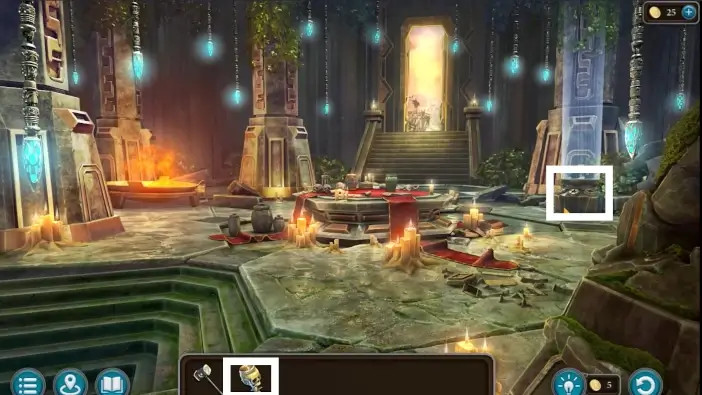
In the picture above, there are two gears at the right corner. One gear near the barrel and one gear inside the barrel.
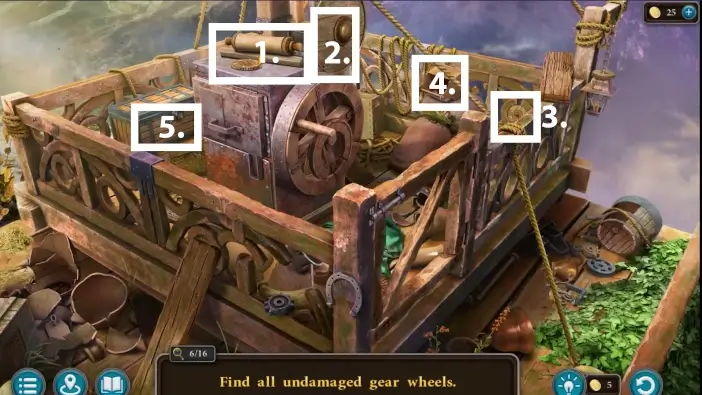
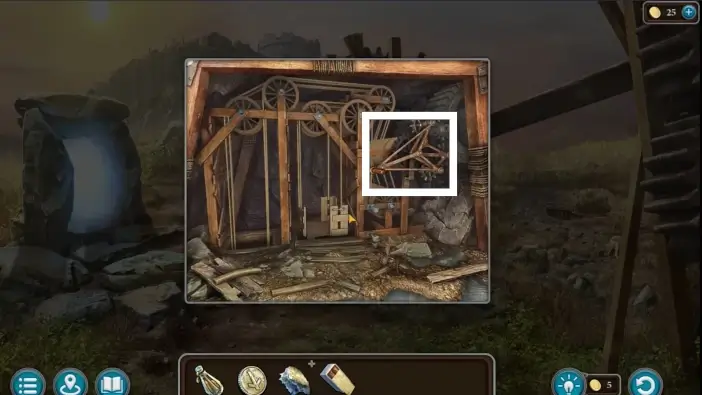
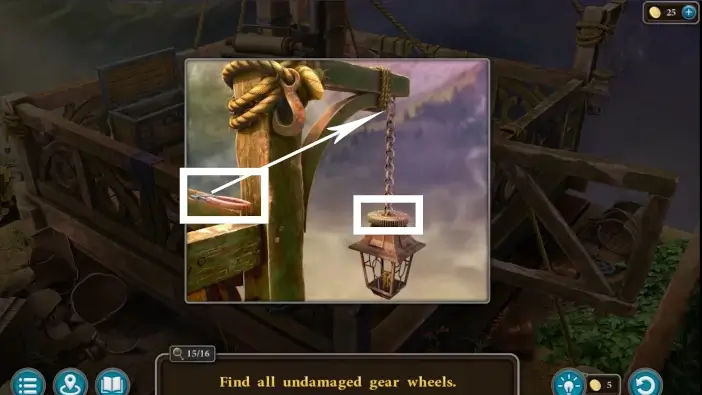
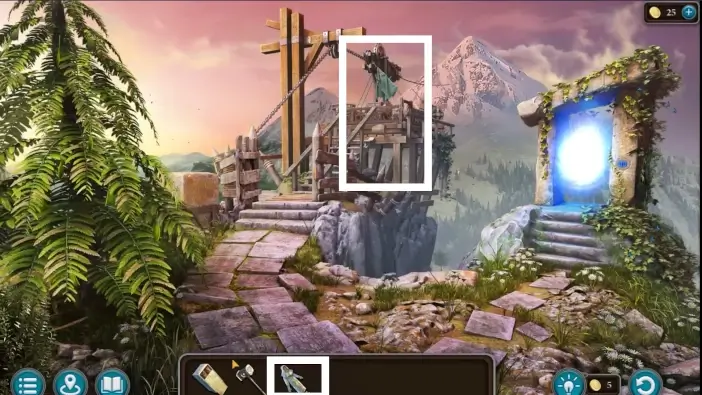
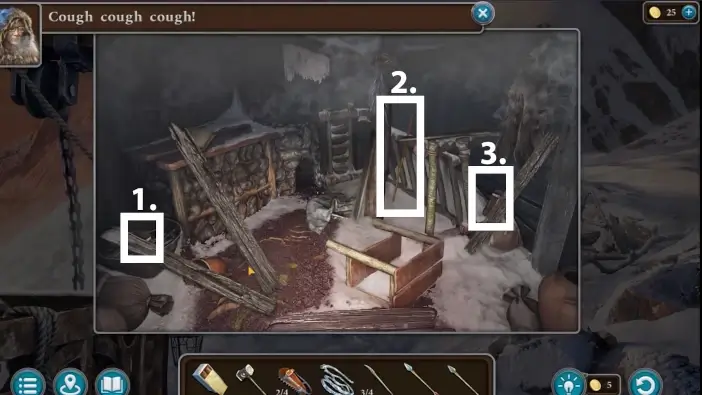
In the picture above, for the first step, pick a gear and read the scroll. In the scroll, you can see the password for the chest. Pick a gear from the scroll’s seal as well.
To unlock the chest, use the password you saw in the scroll, which is 576.
Once you collect all the gears, the “Gears” item will be added to your inventory. Approach the ropeway mechanism and place the gears.
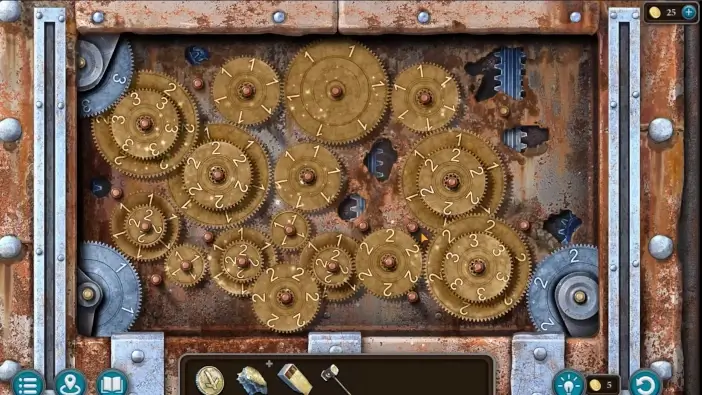
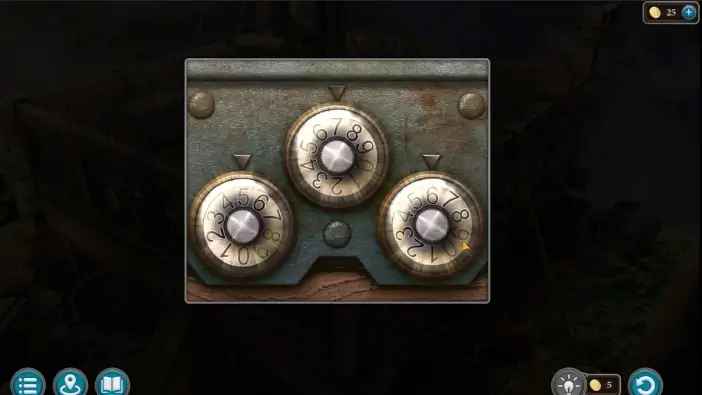
Rearrange the gears so that the numbers on the outer teeth of one gear are connected to the same numbers on the inner teeth of another gear. When you solve this puzzle, the ropeway will function again, but before you go to the Sacred Mountain, Susan and Kiana need warmer clothes.
Go to the fairgrounds and approach the stall on the right.

- Use the iron kyoll and insert it into a piggy bank to pay for the sewing kit.
- Take the sewing kit.
- Click on the fur skins in your inventory to examine them.
- Use a sewing kit to create fur clothing.
Use the fur clothing on the ropeway and a new cutscene will start.
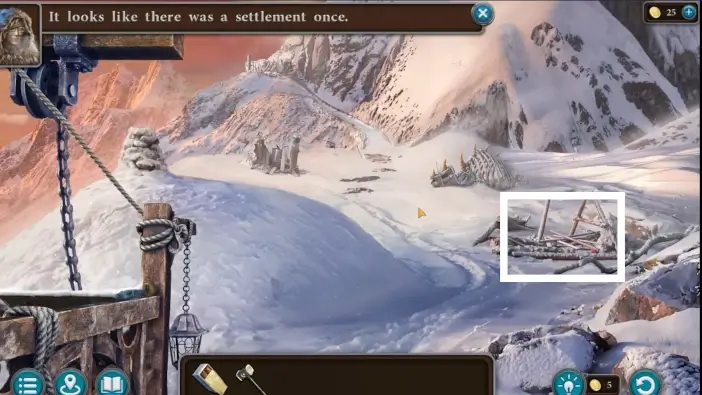
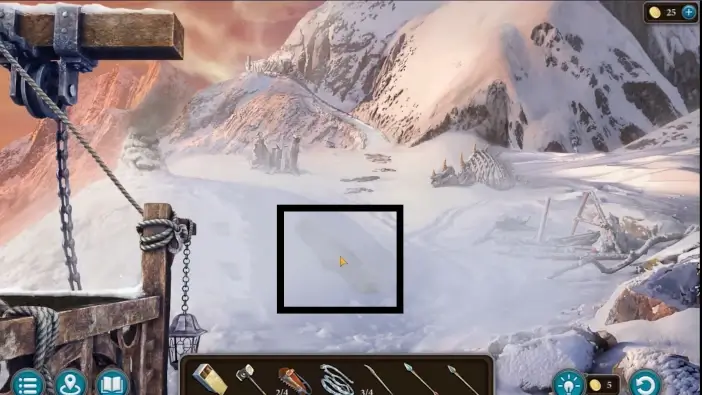
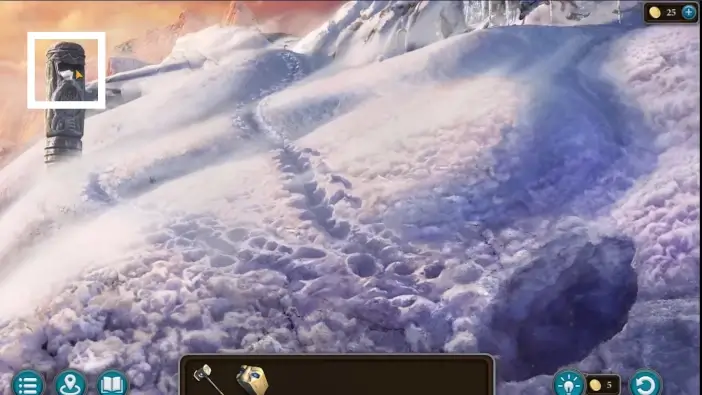
Susan and Kiana will reach the Sacred Mountain, but they need to climb to its summit. They will first arrive at one old settlement buried beneath the snow. Approach the ruins on the right.
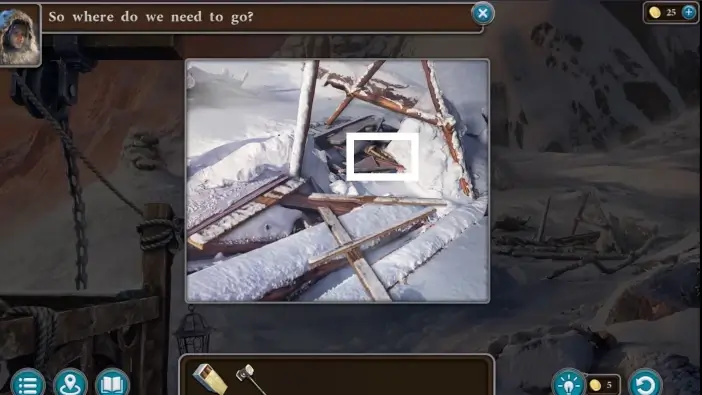
Take the first primitive ice gripper. You’ll need four primitive ice grippers, four stilt canes, and a rope for Susan and Kiana to climb up the mountain.
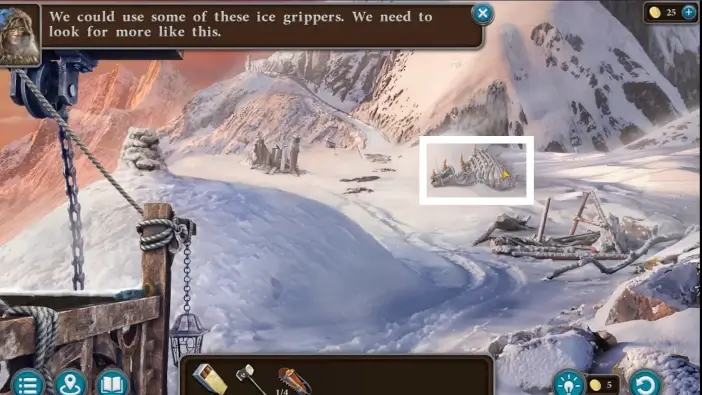
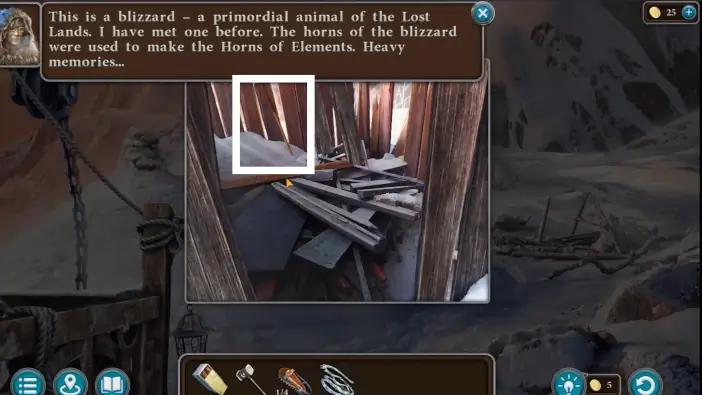
Approach the skeleton of a blizzard (a primordial animal native to Lost Lands).
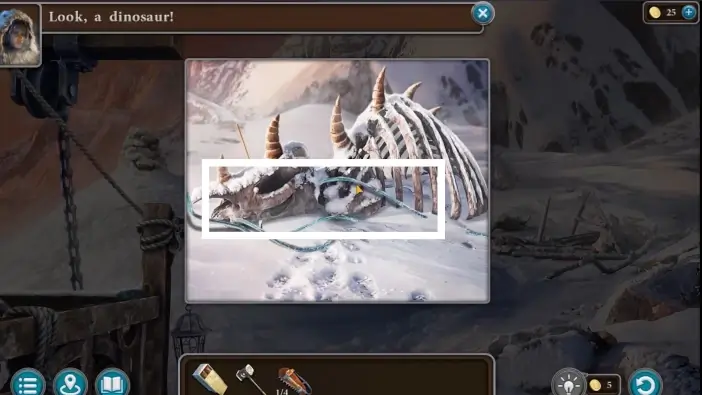
Take the pieces of frozen rope from the skeleton. You’ll need to melt the ice from it.

Approach the ruins on the left.
Pick the first stilt cane.
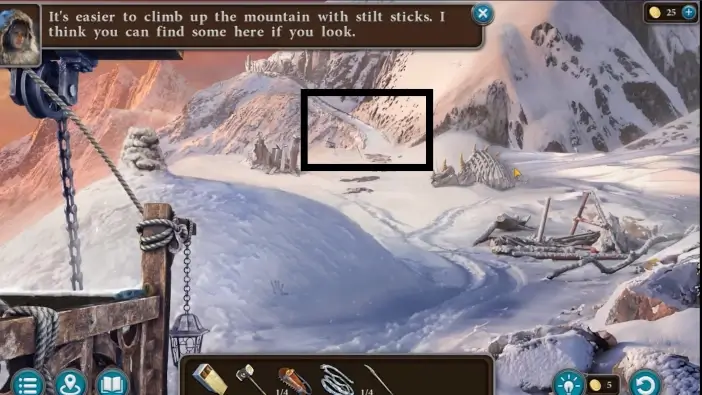
Go forward, closer to the uphill area.
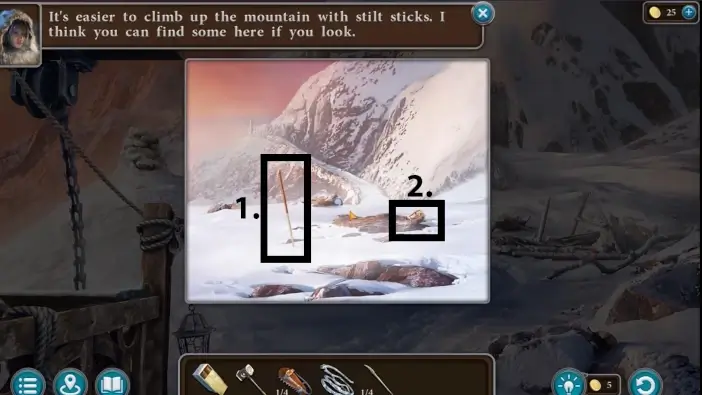
- Pick the second stilt cane.
- Pick the second primitive ice gripper.
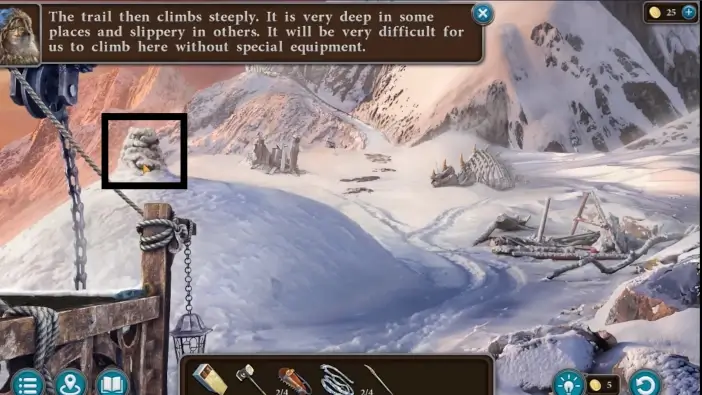
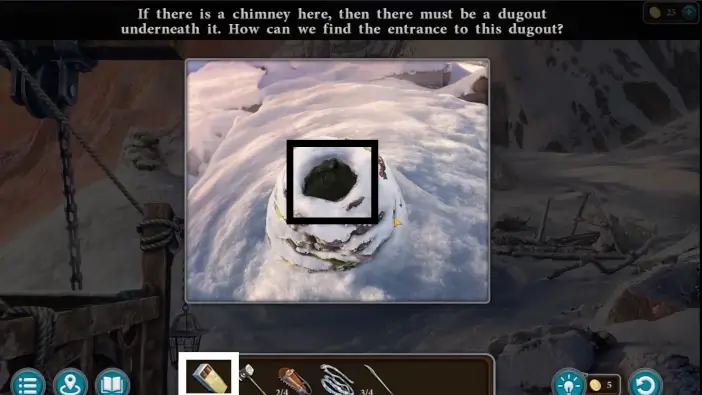
Approach the chimney of a buried house on the left.
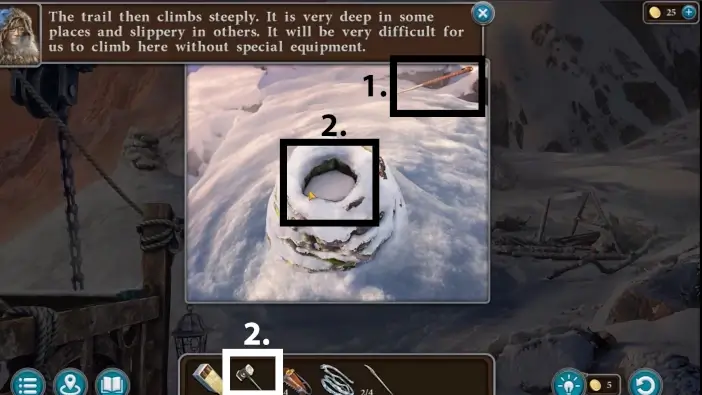
- Pick the third stilt cane.
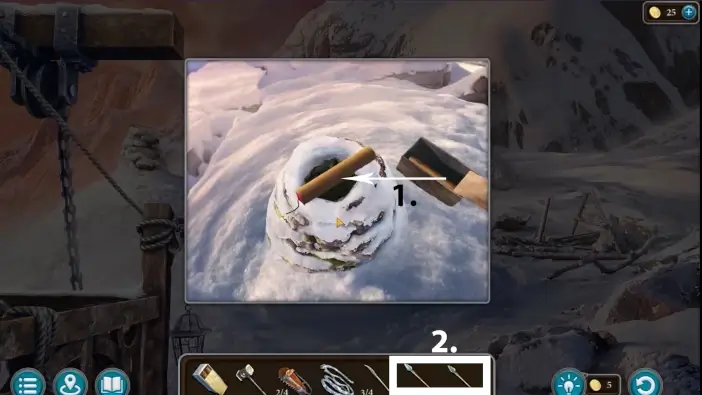
- Use the Folnur’s hammer to break the snow in the chimney.
Place the box of dynamite near the chimney. You need to find a way to create a spark to light the fuse.
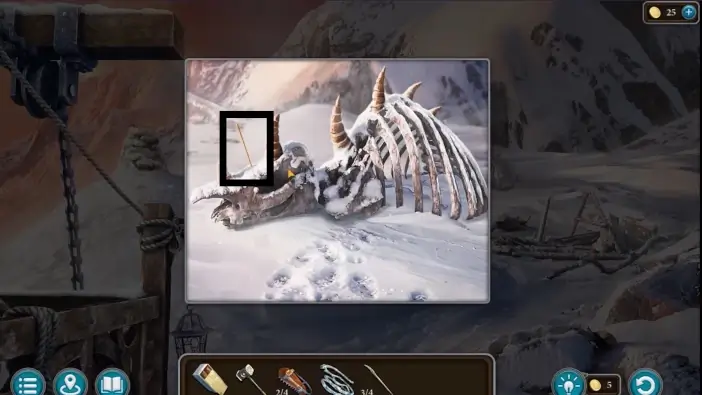
Return to the skeleton and pick the flint arrow. Kiana will give you an iron arrow.
- Go to the chimney and move one dynamite inside the chimney.
- Place iron and flint arrows on the chimney and Susan will light the spark, ignite the fuse, and throw the dynamite inside the chimney.
A dynamite will explode and it will make a hole. You can now access the buried house.
- Inside the house, pick the third primitive ice gripper.
- Pick up the fourth stilt cane.
- Take the fourth primitive ice gripper.
Go to the start of the uphill area and place all four stilt canes and all four primitive ice grippers. Next, you’ll need to prepare the rope.
Go to the temple and warm the pieces of frozen rope with the brazier on the left. The belaying rope will be added to your inventory.

Go back to the mountain and approach the start of the uphill section. Place the belaying rope on the ground and go uphill.
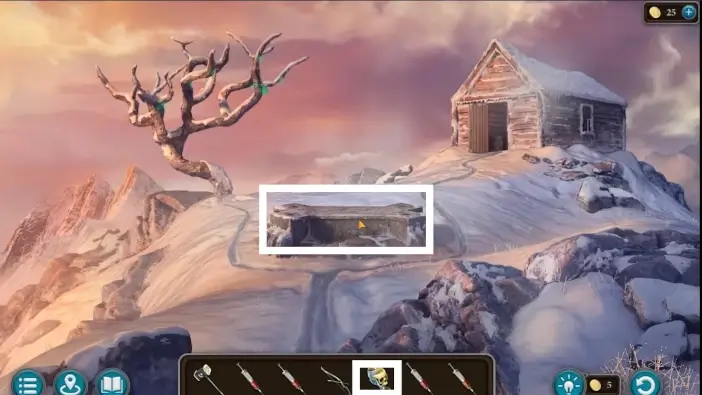
Susan and Kiana will climb further. Near the staircase, open the box of dynamite and place one dynamite between the icy spikes.

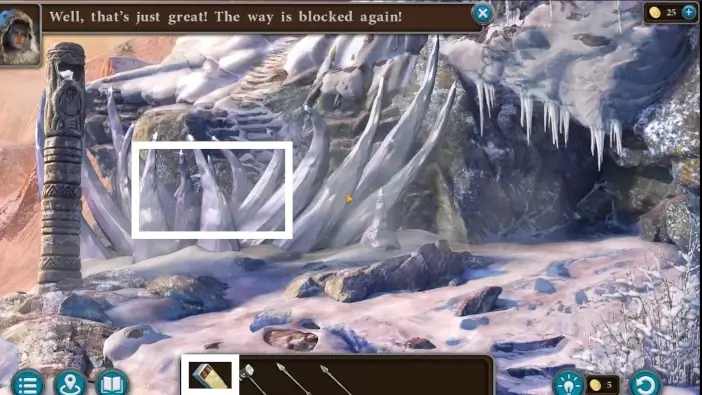
Use an iron arrow and a flint arrow to create a spark and light the fuse. The icy spikes will be destroyed but unfortunately, Susan and Kiana will be blocked by an avalanche.
Pick up the camping shovel.
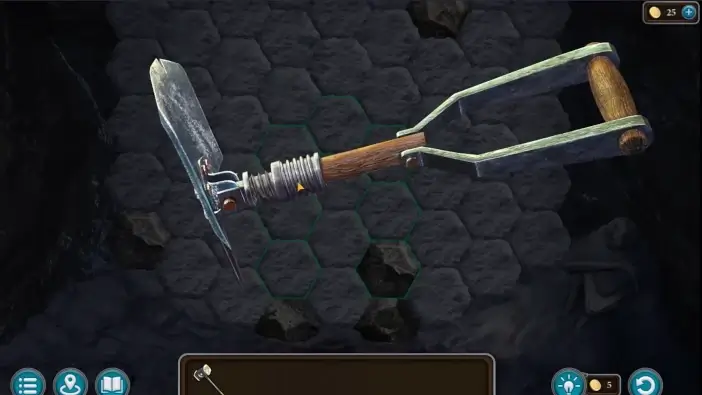
Click on the camping shovel from your inventory then click on the shovel on the screen to assemble it. You will get an ice axe for your inventory.
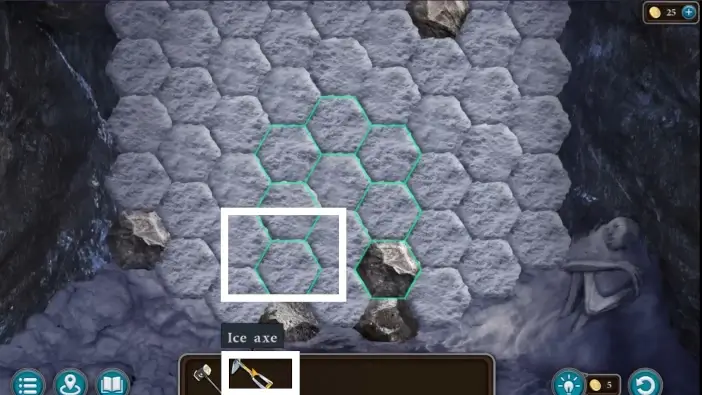
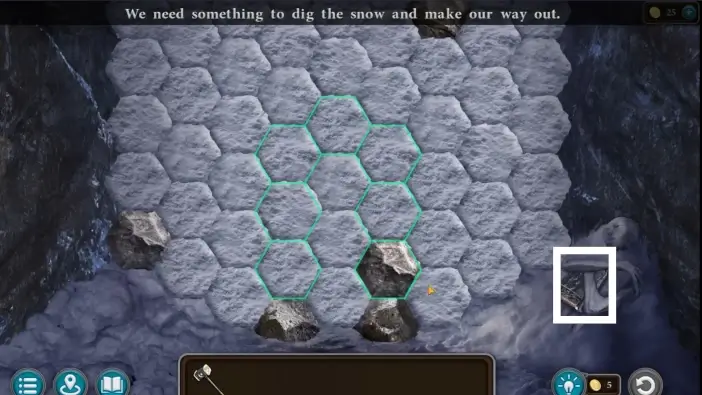
Use the ice axe on the snow to start a new puzzle challenge.
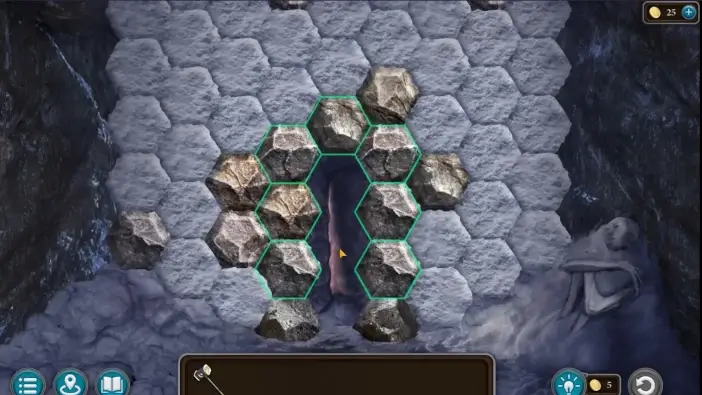
You need to remove the hexagons of snow one by one. While you do that, some of the rocks will fall. Your objective is to make rocks fall to block the snow from reaching the passage at the center.
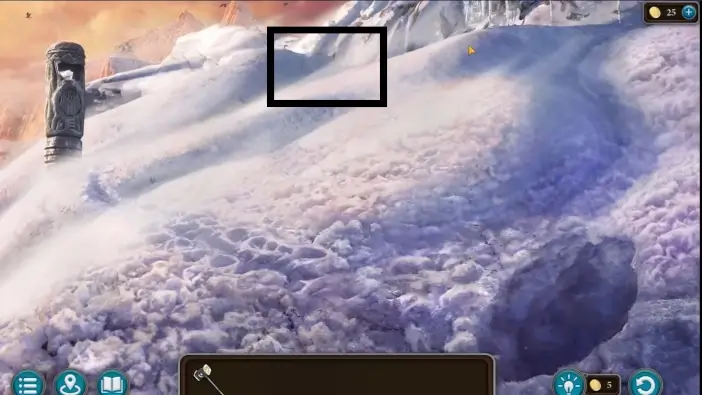
Once you exit to the surface, continue upwards.

Once you reach the summit of the Sacred Mountain, approach the sacrificial table.
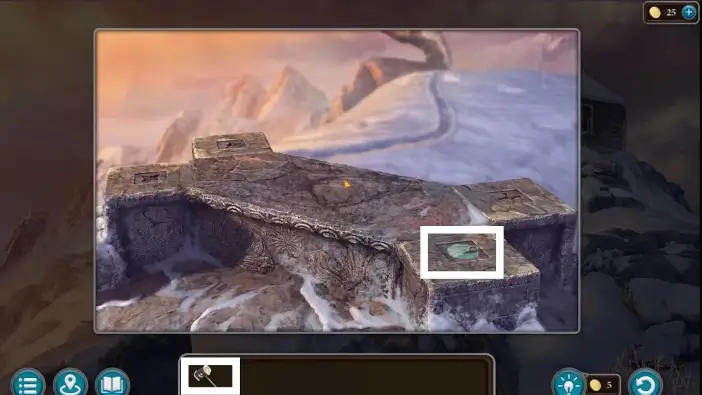
First, remove the snow from the table by clicking on it, then use the Folnur’s hammer to get the key to the wooden house.
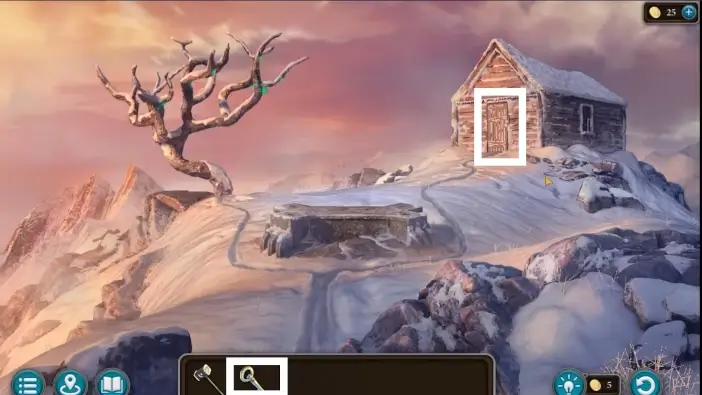
Use the key you just got to unlock the house.
Unfortunately, the lock is frozen. Use a Folnur’s hammer to break the lock.
Maaron is already in the house and he brought a book with instructions on how to do a ritual for communicating with the gods. Approach the table on the right.
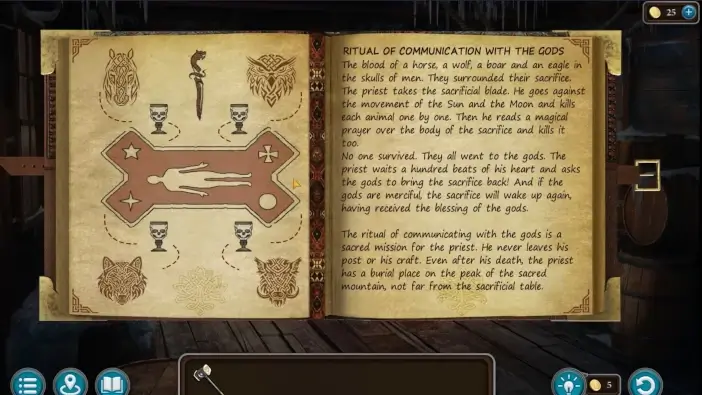
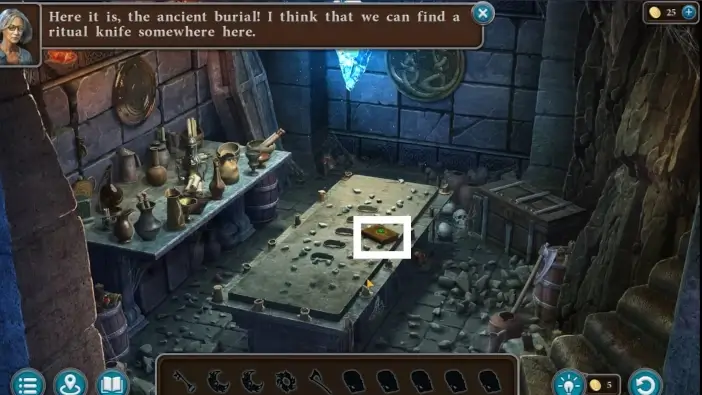
Read the book and memorize the instructions. You’ll need to collect the blood of four different animals, collect four cups, and get the ceremonial knife. Since it will be difficult to find these specific animals from the book, Susan will get the idea to use the blood of animals that are genetically close to them. As for the knife, it is in the burial site buried beneath the wooden house.
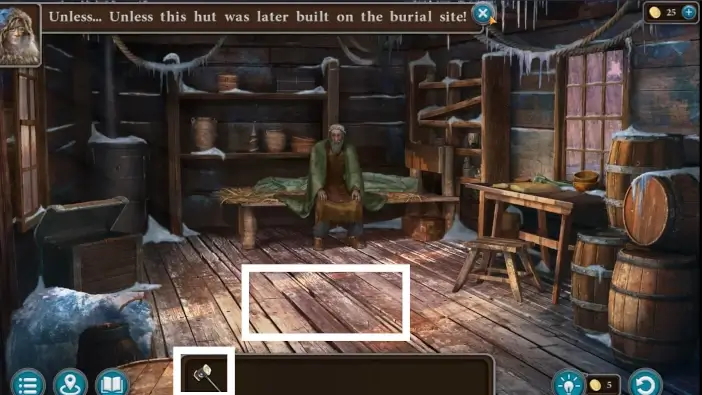
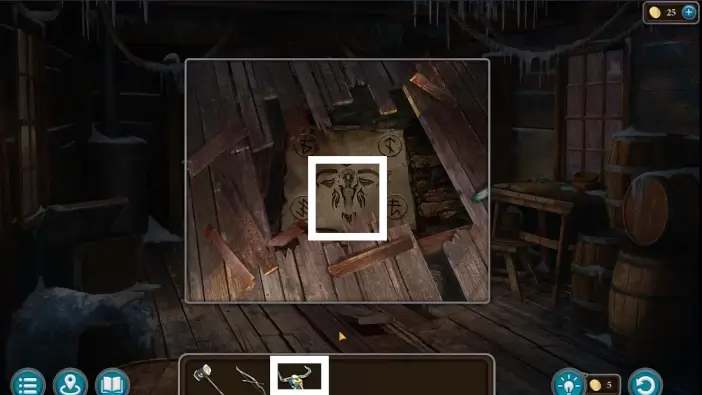
Use the Folnur’s hammer to break the floor.
Inside the hole, pick the wooden block with a face.
Return to the area where you escaped the avalanche and go to the totem.
- Place the wooden block with a face inside the totem.
- The compartment will unlock and you can take the first ritual cup. Three more to go.
Go to the temple and approach the mechanism on the right. Here, you need to place three ritual cups to unlock the fourth one. Place the ritual cup you got.
Go to the dam and approach the desk.
Pick the set of empty syringes that you previously unlocked.
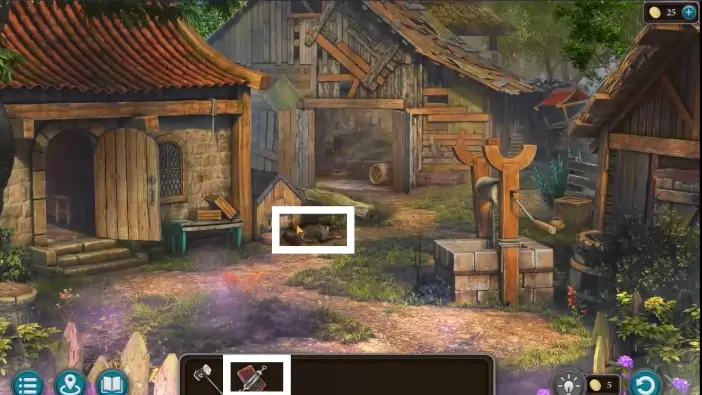
Go to the Folnur’s courtyard. Use a syringe on the Folnur’s dog to get the blood of the “wolf”.
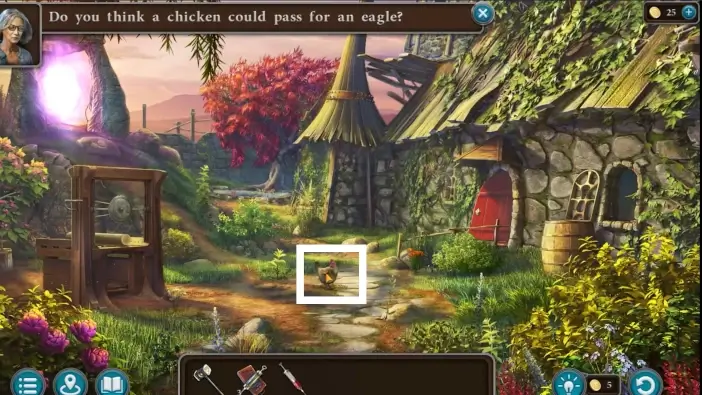
Go to the Maaron’s courtyard and click on the chicken. This will start a new challenge where you need to catch a chicken.
Move the characters so that the chicken is surrounded and it can’t go anywhere next turn. Whenever you move one of the characters, the chicken will move as well.
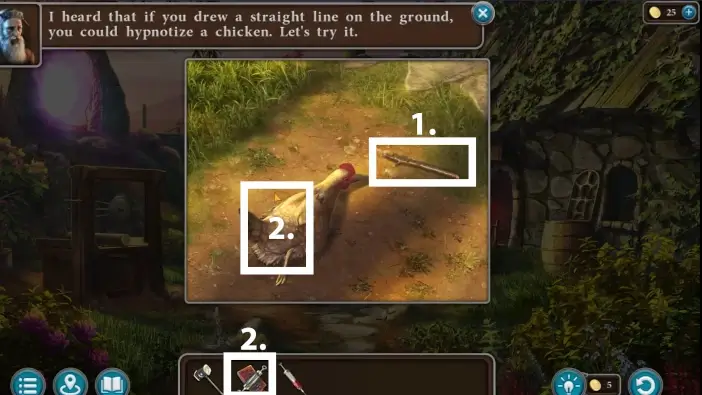
- Use a stick to draw a line on the ground. This will hypnotize the chicken.
- Use a syringe on the chicken to get the blood of the “eagle”.
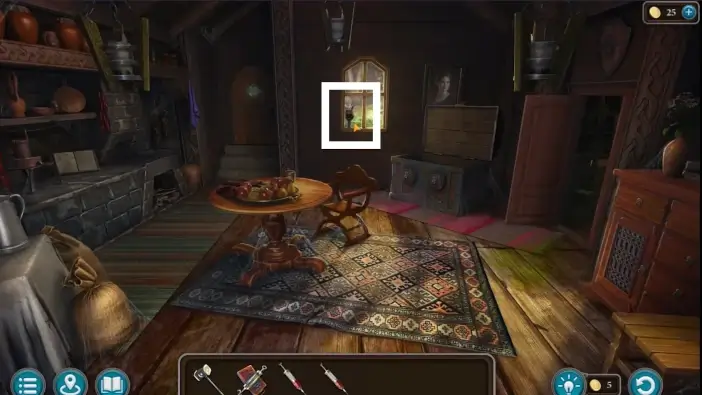
Go to the Folnur’s house and pick the second ritual cup.
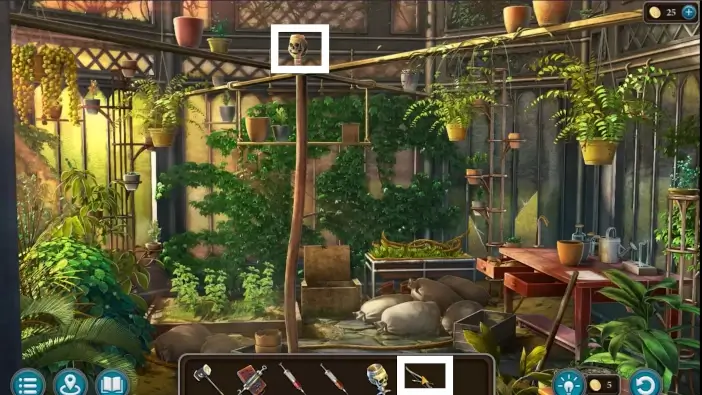
Go to the greenhouse. You will get the bow and arrows in your inventory from Kiana. Shoot an arrow on the third ritual cup to get it.
Return to the temple and place the remaining ritual cups into their designated slots. You will unlock the fourth ritual cup. Once you claim it, you will get all four of them in your inventory.
Go to the area outside of the greenhouse. Use a syringe on the donkey to get the blood of the “horse”.
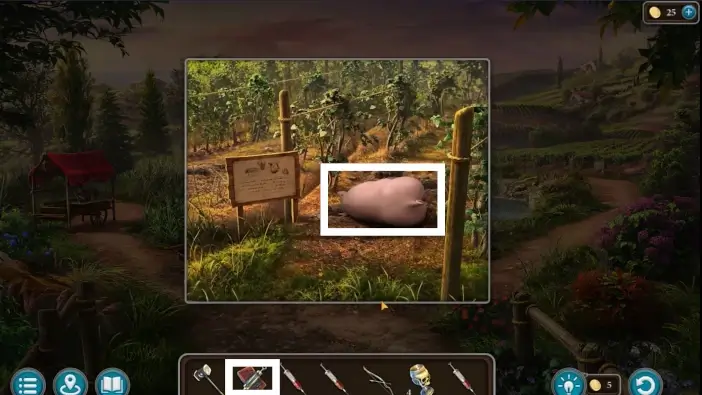
Go to the lake area and approach the vineyard. Use a syringe on the pig to get the blood of the “boar”.
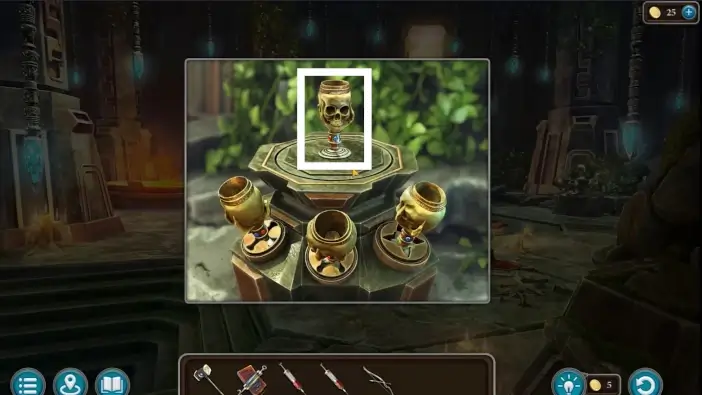
Return to the top of the Sacred Mountain and approach the sacrificial table. Place all the cups on the table’s four corners.
Place the blood of various animals inside the cups. If the certain blood is not going to a specific cup, try another cup. Lastly, click on the central part of the table. A bull skull will be revealed. Pick it up.
Return to the wooden house and approach the hole in the floor. Place the bull skull on the stone slab.
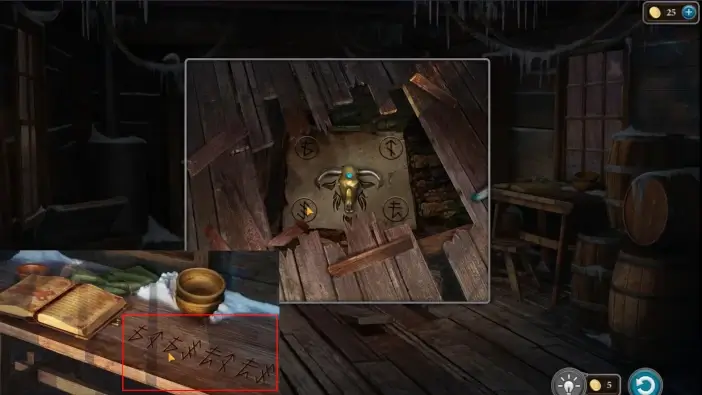
Go to the table on the right side of the room and remember the carved runes. Go back to the stone slab and click on the runes in the same order as the carved runes on the table, from left to right. Once you solve the puzzle, the slab will be removed and you will see a twisted staircase. Descend into the burial site.
Open the book on the table.
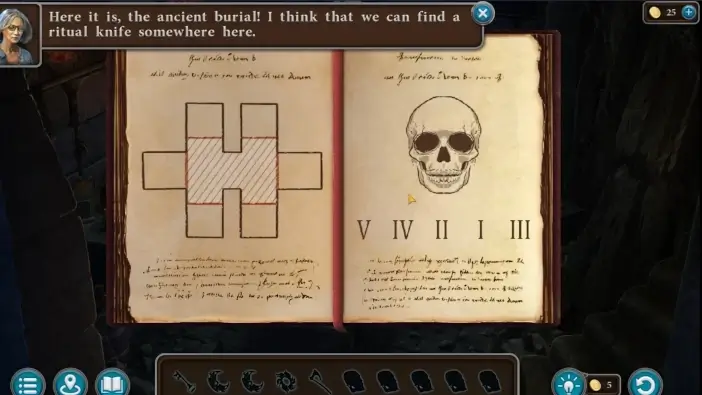
You will see clues on how to solve two puzzles you will encounter at the burial site.
In the burial sites, you need to find temporary items to get to other ones. Approach the table on the left.
Pick the key.
Take the first skull.
Go to the table on the left and approach the box.
Move the golden parts to form a shape like the clue in the book. Then, pick the half-moon pattern from the box.
- Place the half-moon pattern on the shield.
- Use a key to open a chest on the right corner. Pick the second skull from the chest.
- Pick the third skull from the barrel on the left.
- Pick the hatchet from the barrel on the right.

Use a hatchet to get the sun pattern from the wall near the table.
- Pick the fourth skull.
- Place the sun pattern on the shield.
- Open the coffin and take the second half-moon pattern.
Place the second half-moon pattern on the shield. The shield will move and you can pick the fifth skull.
Go to the central table and place all five skulls.
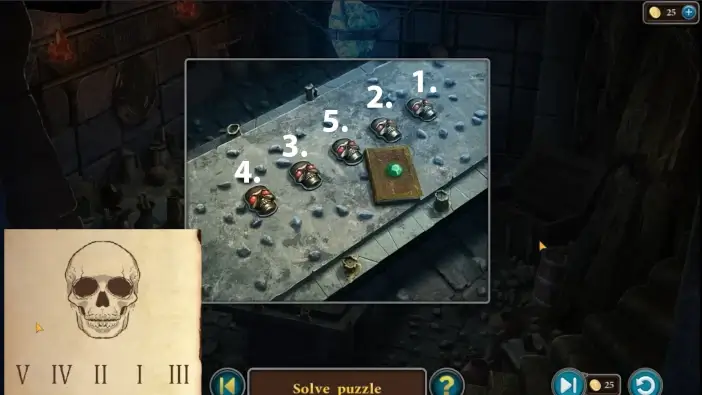
Click on the skulls in the order shown in the picture above (with normal numerals, not Roman numerals). It seems that this puzzle is bugged and does not follow the clues from the book. If the bug is fixed, you may follow the clue from the book instead.
Once you complete this puzzle, take the ritual dagger.
Go outside the wooden house and go to the sacrificial table. Place the ritual dagger on the table.
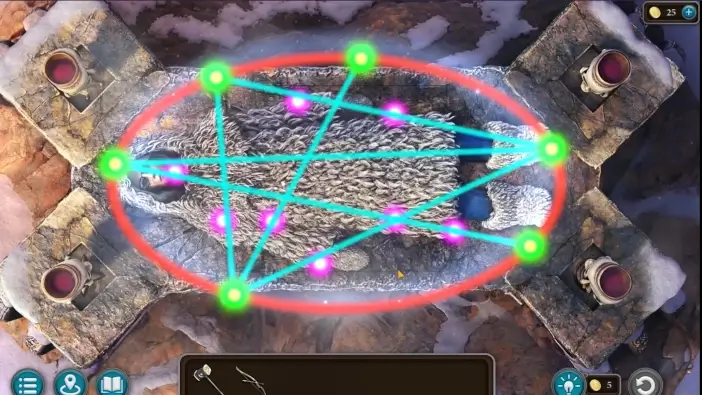
Cast a spell by dragging the lines so all nodes of light are connected.
This will mark the end of part 5 of our guide for the Main Chapter of the Lost Lands 10. Susan will be sacrificed and she will go to the spirit world to meet the Drak Om and ask her for a favor to help Folnur. What will happen next?
Thank you for reading!