Lost Lands 10 – Main Chapter | Part 3
Intro
Welcome to our walkthrough for Part 3 of the Main Chapter of “Lost Lands 10” from “FIVE-BN GAMES”. Susan and Kiana got separated and they lost the Folnur’s hammer. Susan arrived just in front of the Maaron’s walls but now she needs to find a way inside first.
Walkthrough
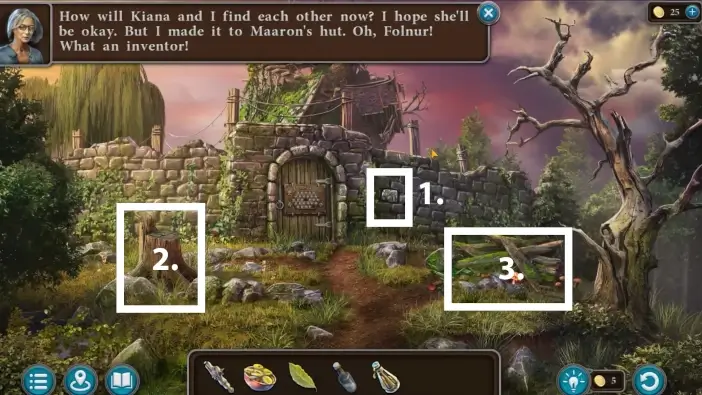
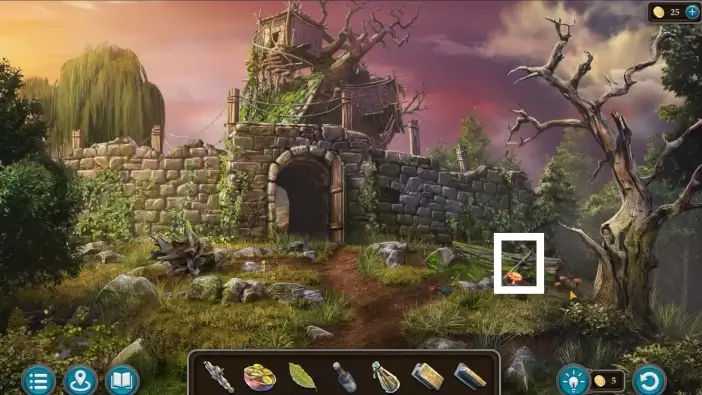
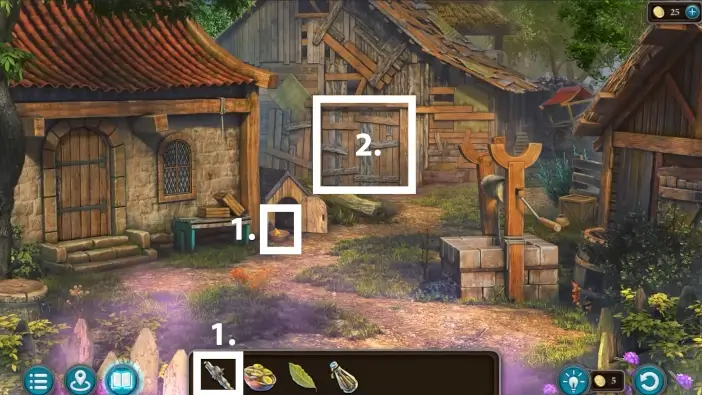
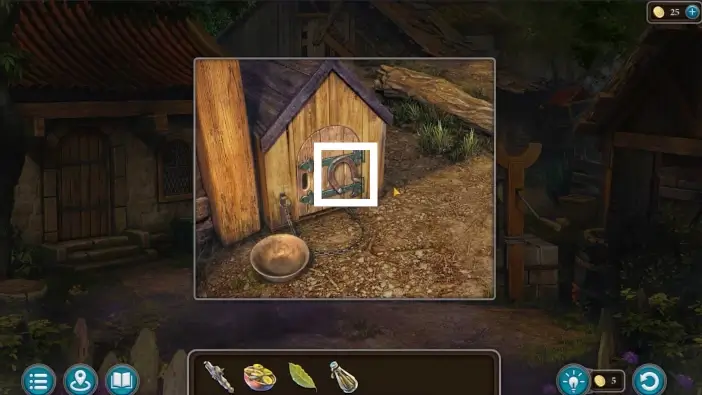
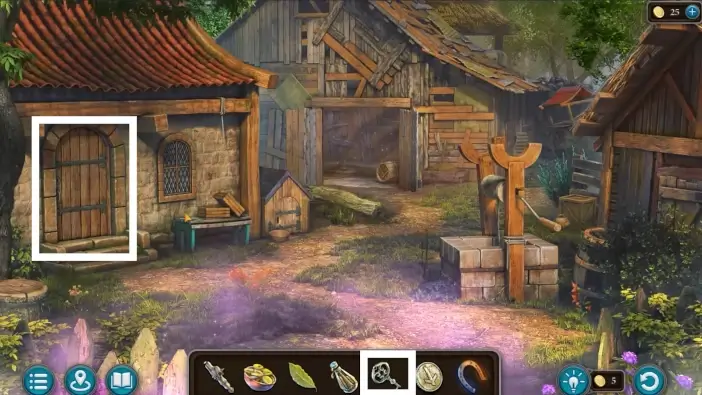
- Pull out the rock from the wall to reveal the hidden compartment. Take the key to the gate.
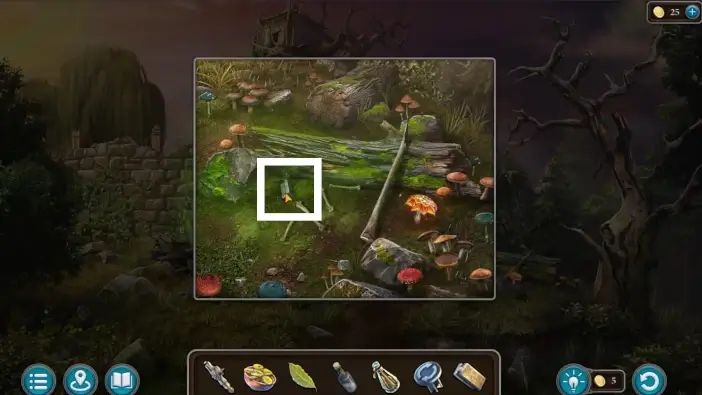
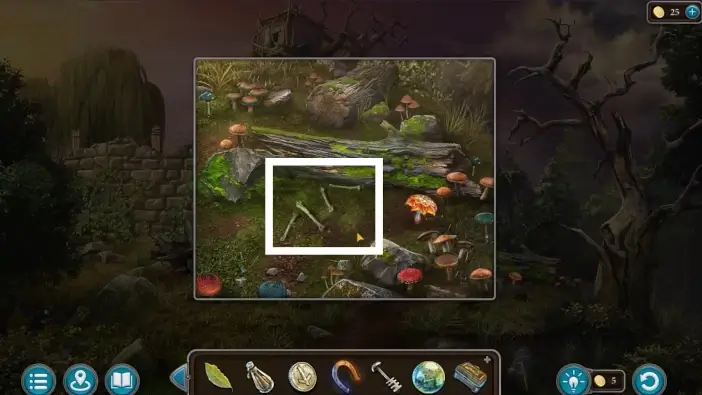
- Remove the stump and take the H-shaped rod from the ground. You’ll need three more rods of different shapes to unlock one trapdoor on the floor in the Maaron’s house.
- Approach the pile of wood.
Remove the pile of wood and bones and take the T-shaped rod.
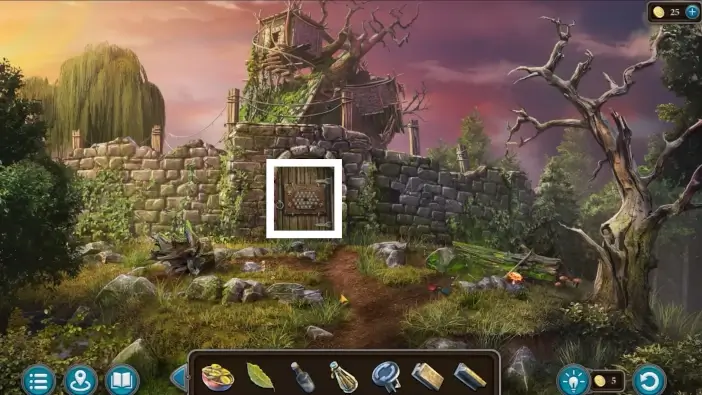
Approach the gate.
Place the key to the gate on the central keyhole.
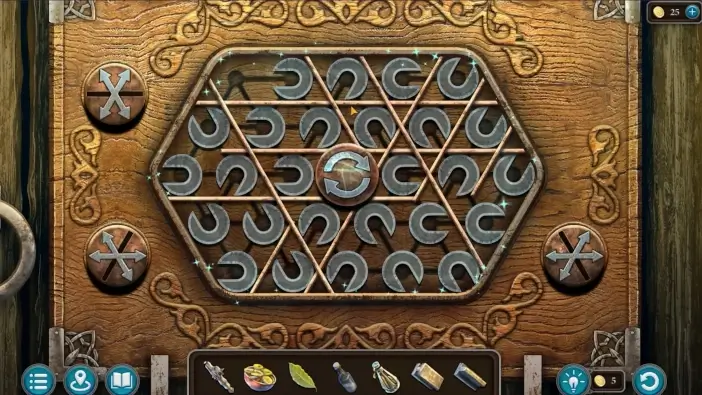
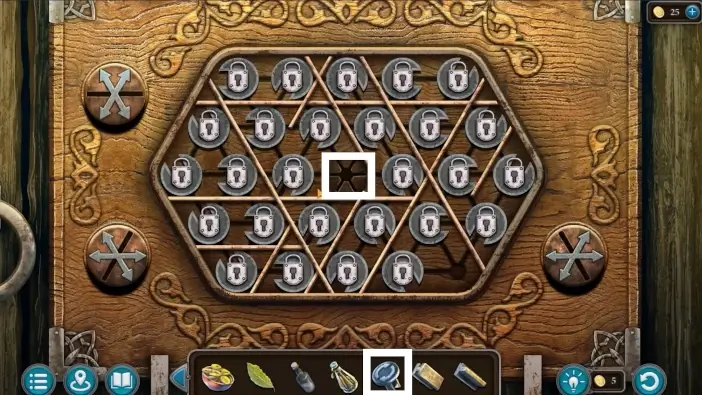
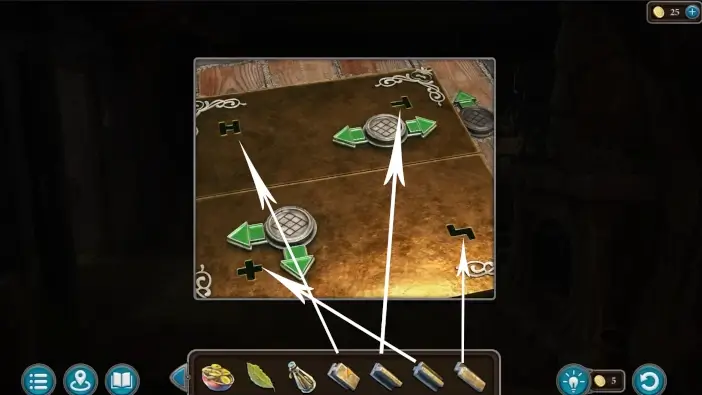
To unlock the gate, you need to remove all the locks from the chips. The lock from the chip will be removed once you move the chip for the first time in any direction. Use the buttons on the sides to change the barriers. Use the central button to rotate the chips.
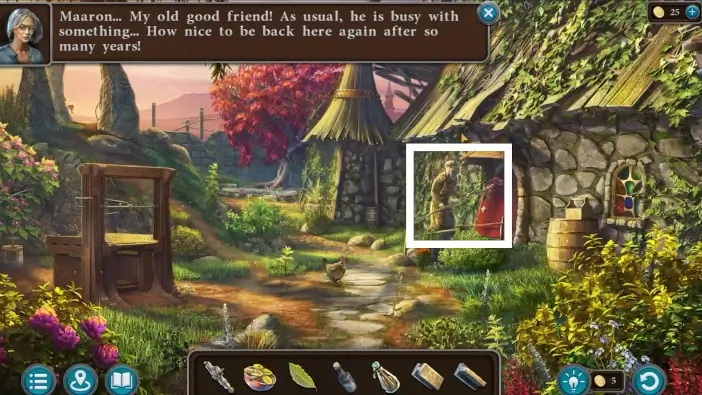
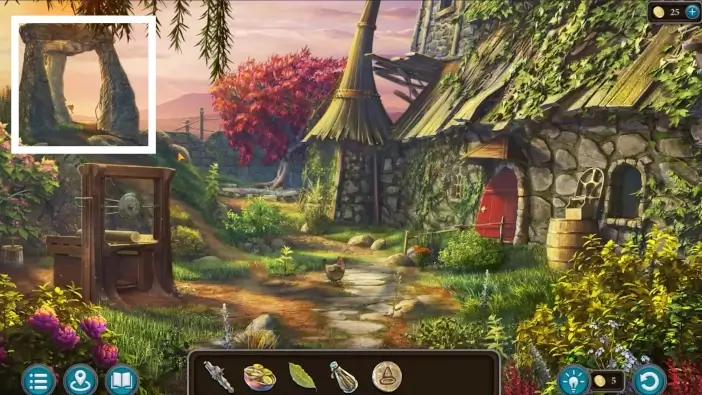
Once you enter the courtyard, speak with Maaron. The new cutscene will start. Susan will explain everything that happened. Maaron will mention that he has a dolmen (portal bridge) that can teleport Susan and him to the Folnur’s house, but first, you need to find a correct runestone.
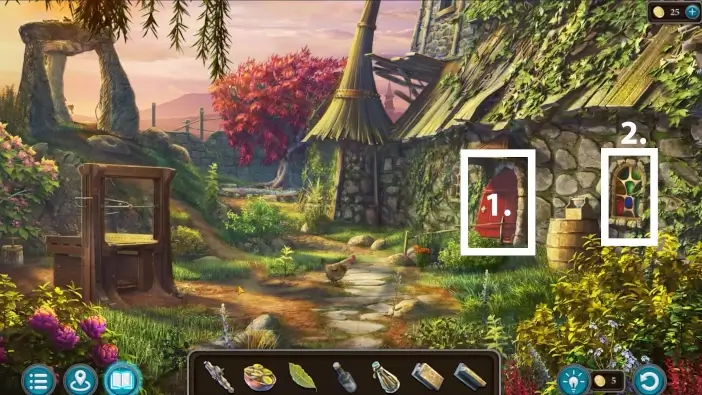
- Approach the door. Maaron will say that you can’t go through the recently painted door and you should try going through the window (you need this conversation so you can interact with the window).
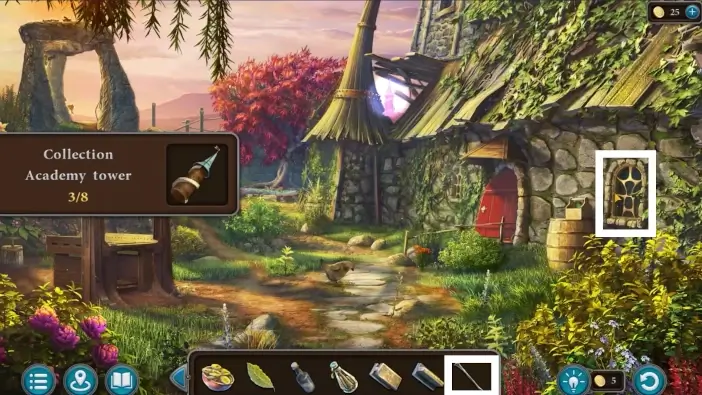
- Approach the window.
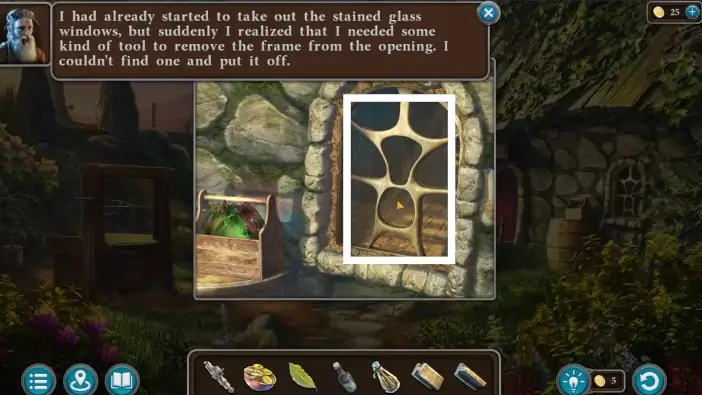
Take out all of the stained glass.
Return to the area outside the walls and approach the pile of wood. Pick the pointed bone.
Return to the courtyard and use the pointed bone to open the window, then enter the house.
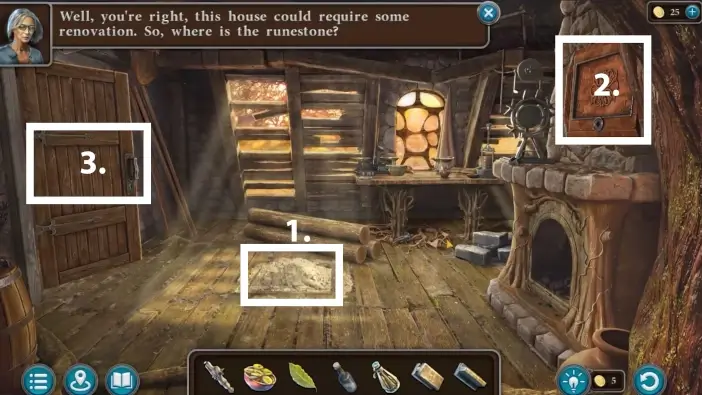
- Remove the sawdust from the trapdoor on the floor. To unlock it, you’ll still need to find two more rods and you’ll need a paintbrush to better clean it.
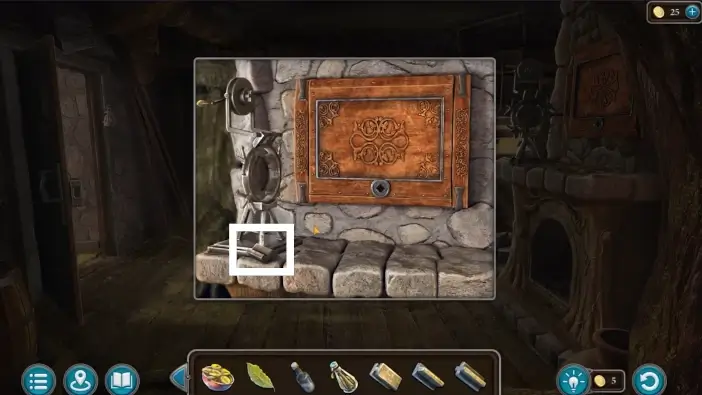
- Approach the safe above the fireplace. Maaron will explain that there is a machine to create magic runes.
- Approach the door on the left.
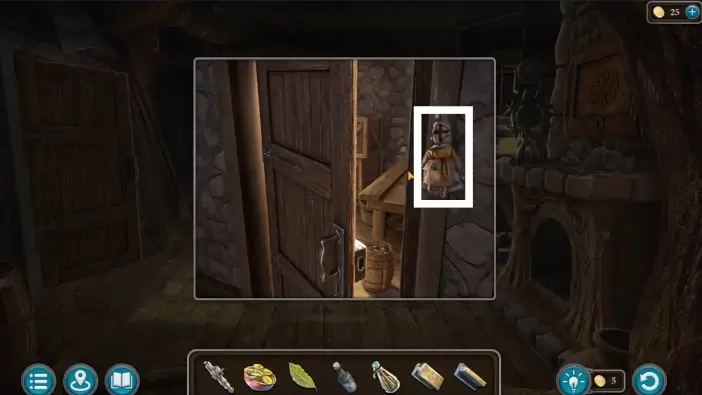
Pick the X-shaped rod from the doll.
Return to the fireplace and take the Z-shaped rod beside the rune-making machine.
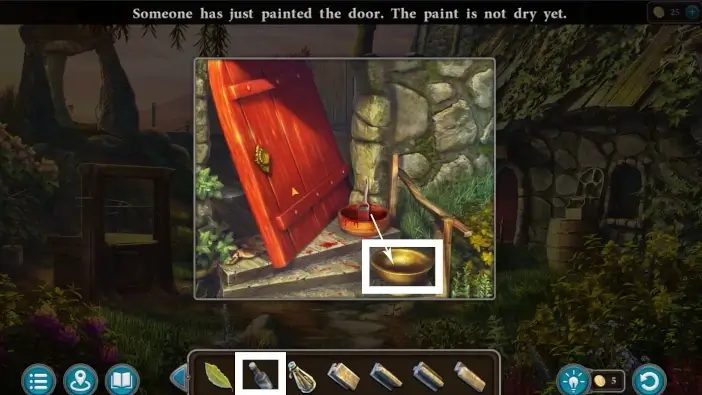
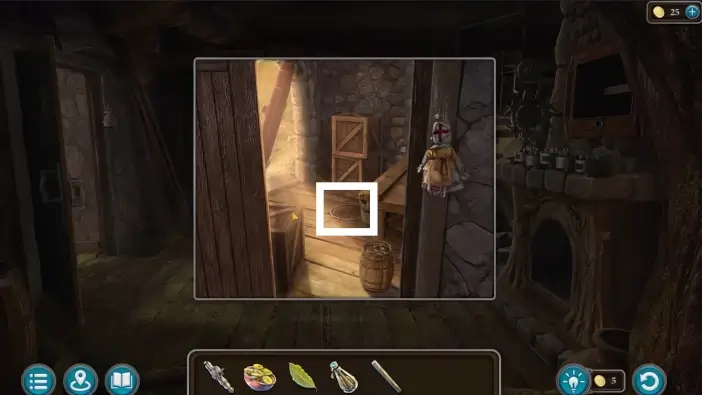
Go to the freshly painted front door. Pour the pure alcohol into the bowl.
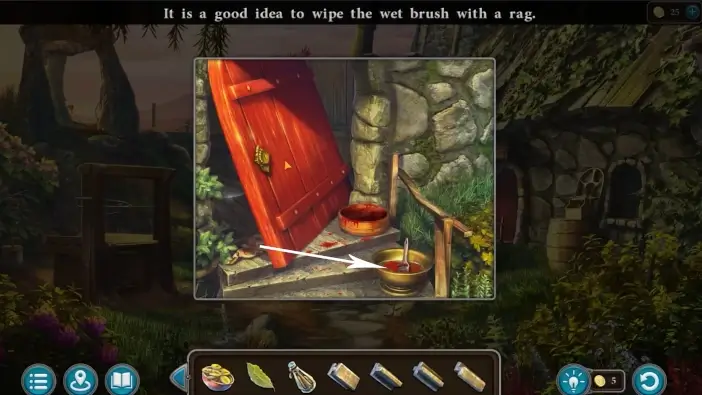
Place the paintbrush inside the alcohol to wash it then use the rag on the left to wipe it. The paintbrush will be added to your inventory.
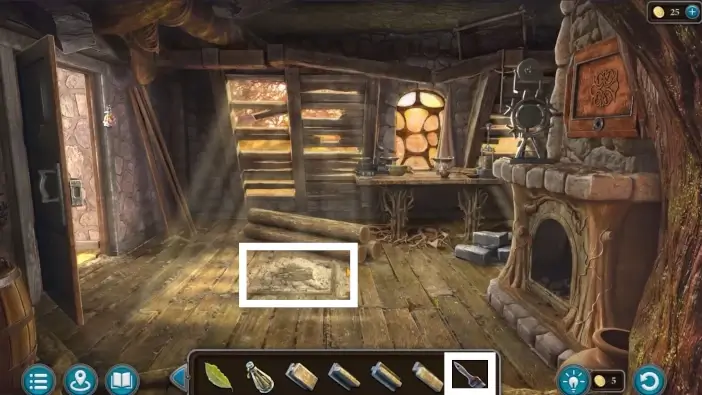
Go back inside the Maaron’s house and clean the trapdoor with a paintbrush.
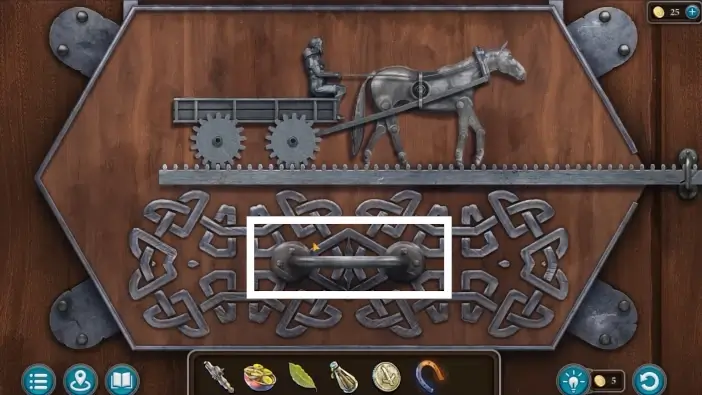
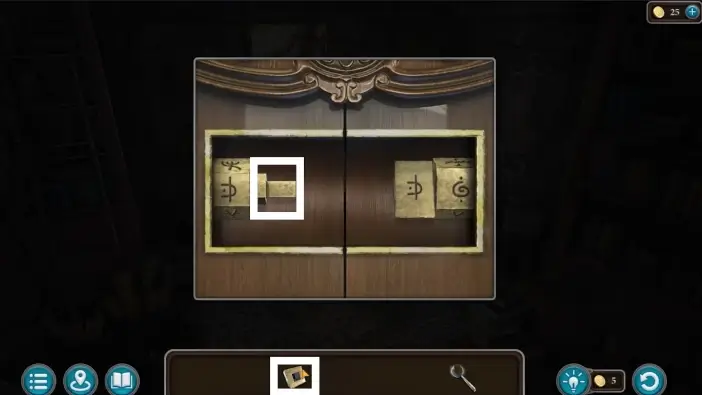
Place all the rods in their designated slots. Click on the trapdoor once again to start a new puzzle challenge.
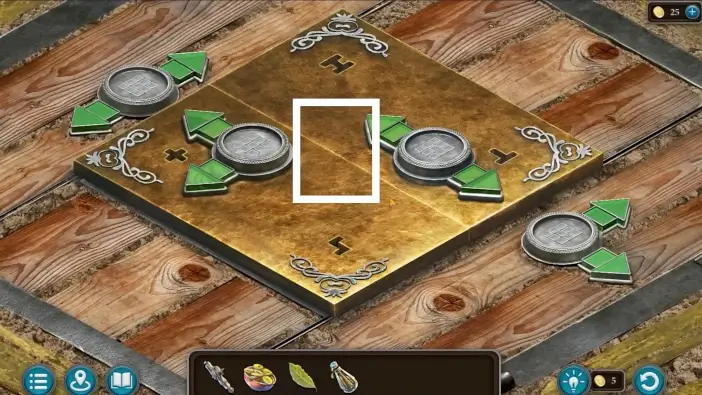
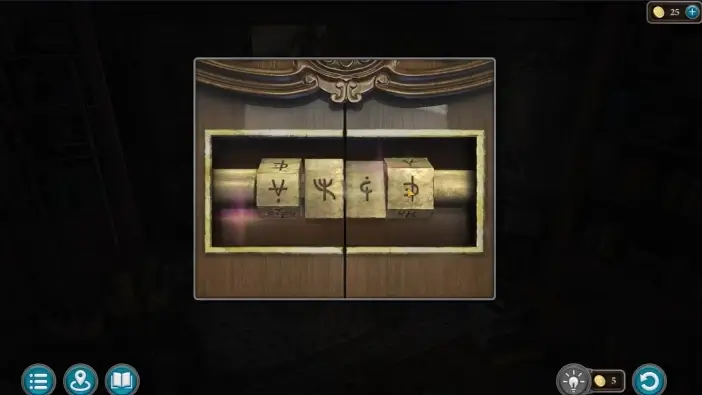
Click on the lid to open it.
Place the symbols on the yellow cubes in the niches with the same symbols. You can move the cubes using arrows on the sides. Every cube has its arrows to control it.

- Once you unlock the trapdoor, pick the key to a cache.
- Pick a blank runestone. This is where you need to place a correct rune for portal traveling.
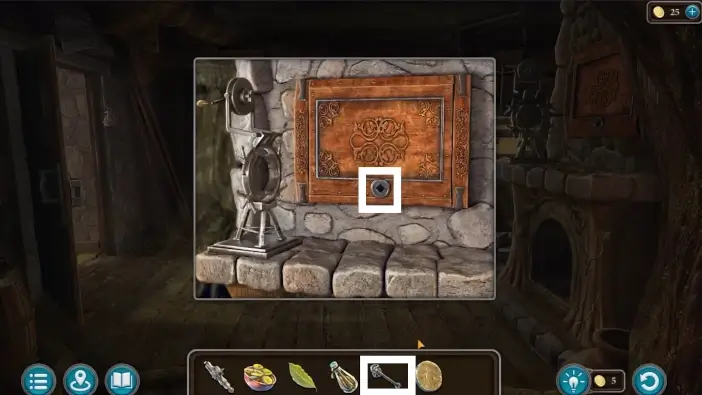
Use a key you just got to unlock a cache above the fireplace. Click on the cutters to place them outside of the cache.
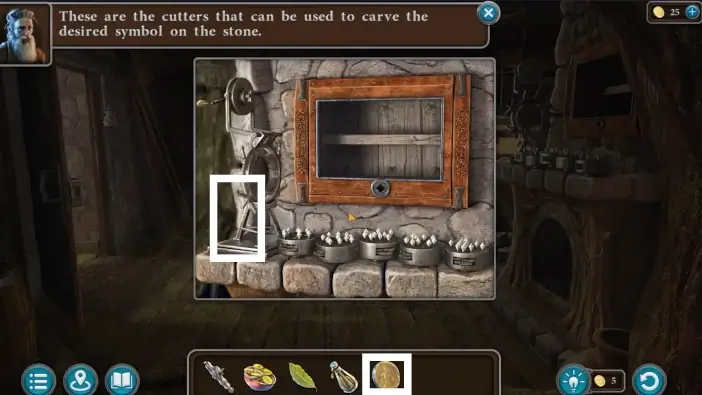
Place the blank runestone near the machine. You will not use it yet. First, you will test which cutter is making the correct symbol, but you’ll need a mockup of runestones first.
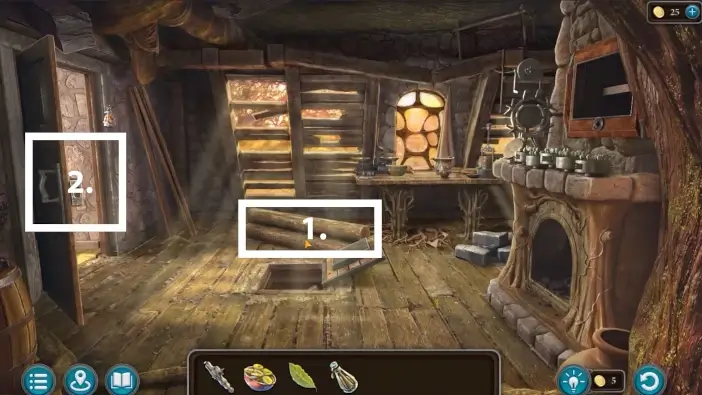
- Take a log from the pile.
- Go to the room on the left.
Take the circular blade for the sawmill.
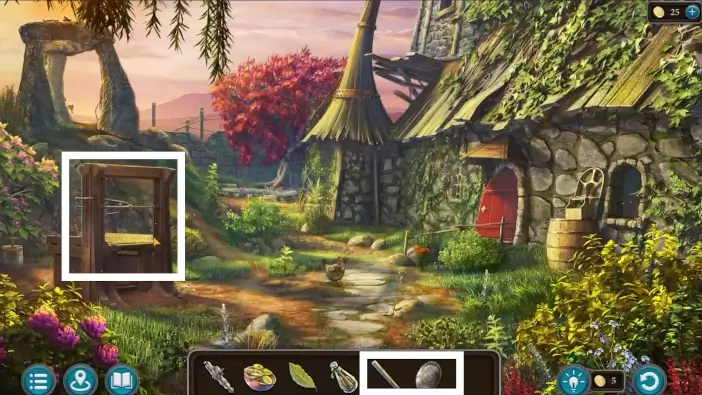
Approach the sawmill, place the log, and attach the circular blade.

Use the screw to secure the canvas.
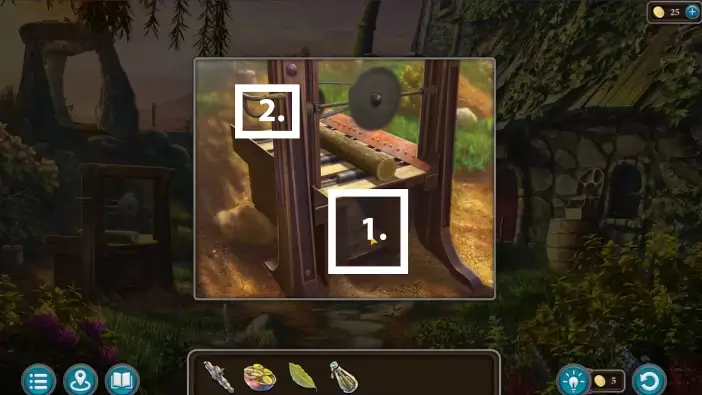
- Press the pedal to activate the circular blade.
- Pull the handle on the left to lower it down and cut the log. Once you finish, pick the wooden blanks.
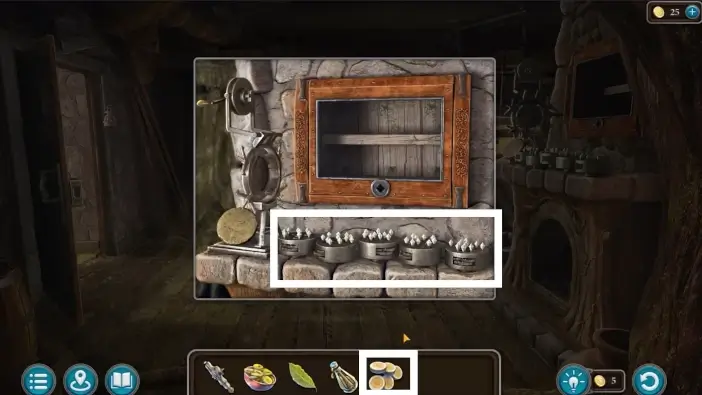
Go to Maaron’s home and place the wooden blanks above the fireplace.
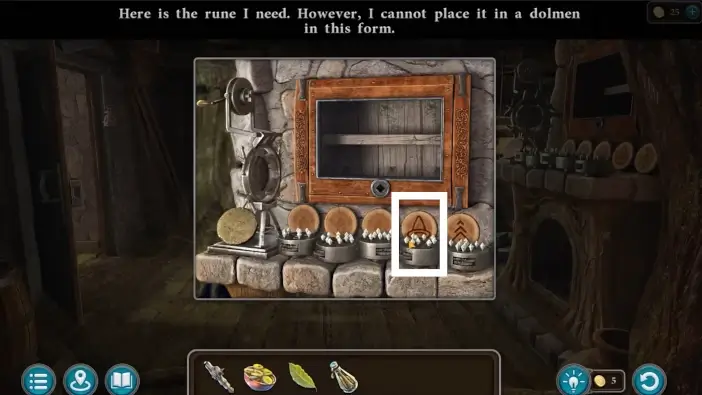
Try the cutters one by one until you see a rune that looks like a wizard’s hat. That is a correct rune because that same symbol is present at the dolmen.
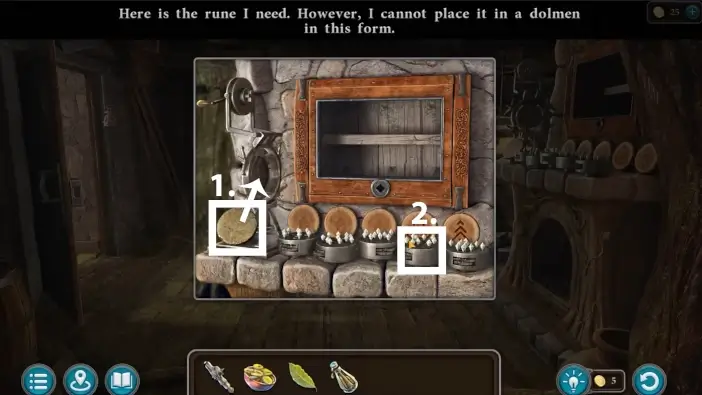
- Place the blank runestone into the machine.
- Use the cutter that is making the wizard’s hat rune. After the processing, take the runestone.
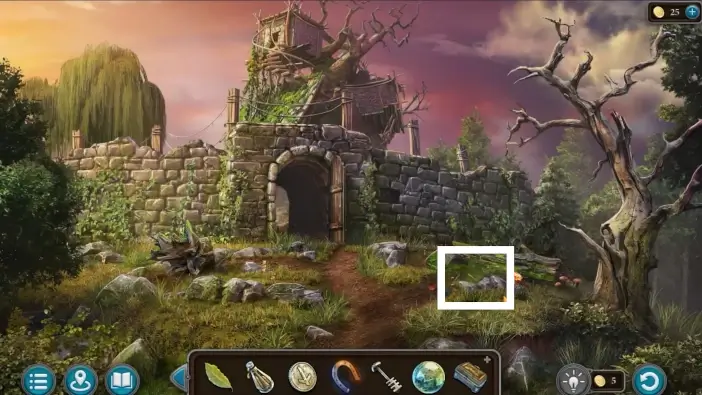
Go to the dolmen.
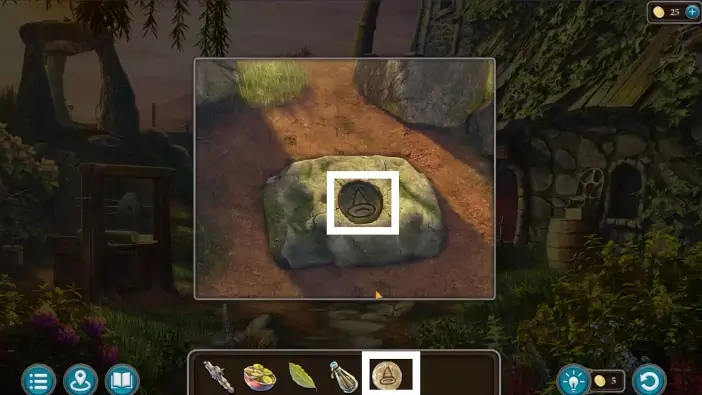
Place the runestone into the hole that has the same rune.
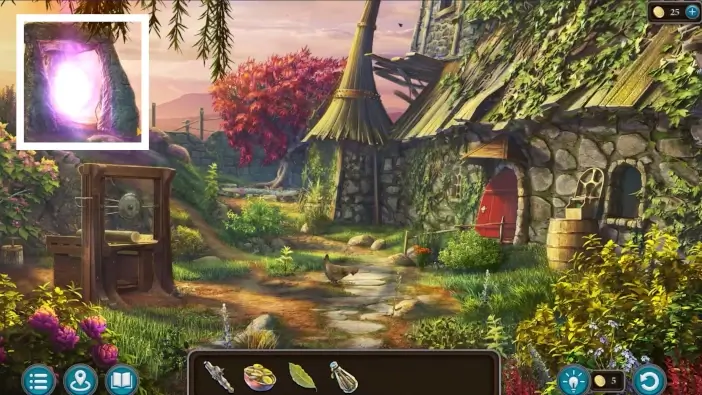
The portal bridge will be activated. Go there to enter the Folnur’s courtyard.
- Use the dog whistle that you got as a reward in the fair to call the Folnur’s dog. Unfortunately, he will immediately run away because his bowl is empty and he is hungry.
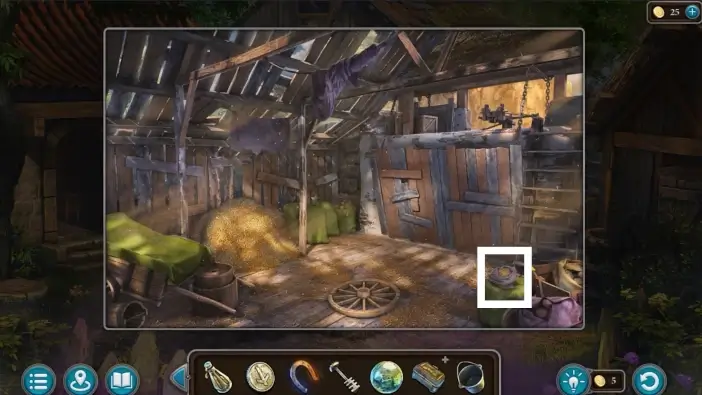
- Go inside the barn. Maaron will mention that Folnur probably hid the key to the house inside the haystack.
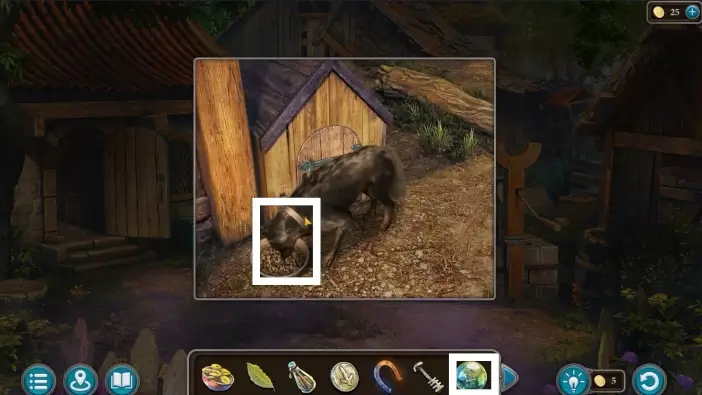
Approach the dog’s house, close the door, and take the magnet.
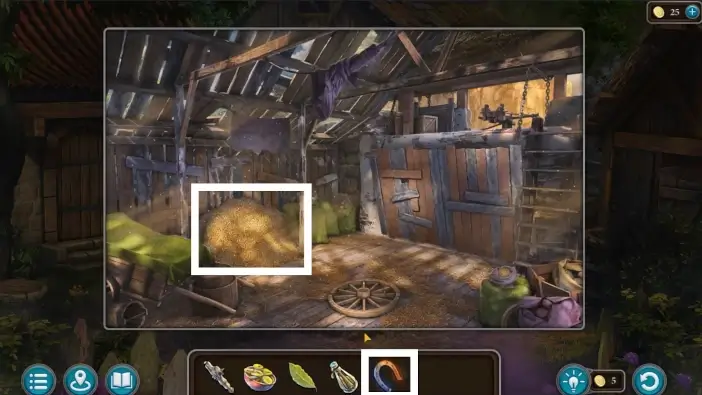
Go to the barn and use a magnet on the haystack to get all the metal objects from it. The magnet will be returned to your inventory.
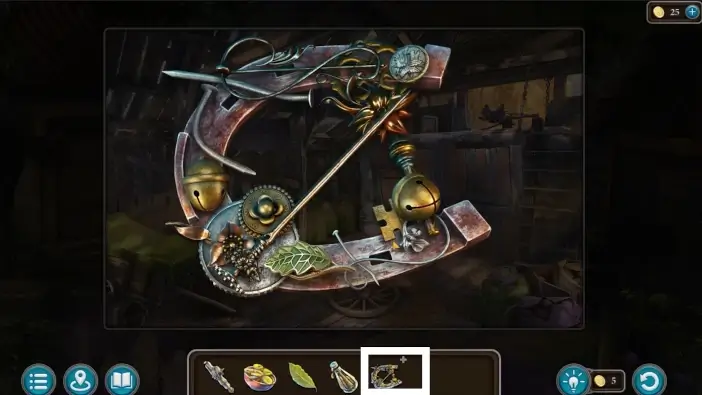
Click on the magnet in your inventory to examine it closely. Click on it on the screen to remove all the non-important metal pieces.
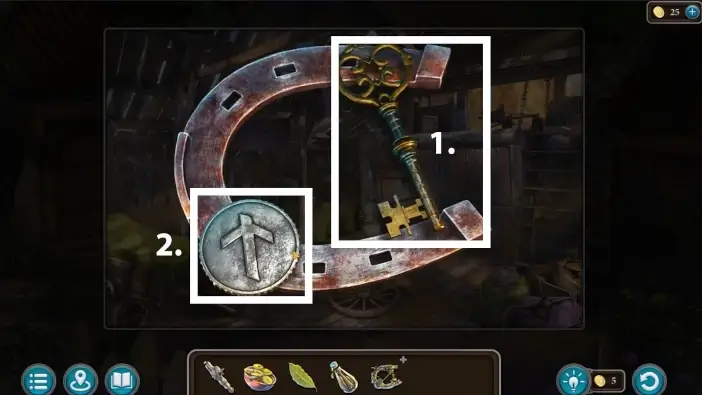
- Take the key to the Folnur’s house.
- Take the iron kyoll. The now empty magnet will be returned to your inventory. You will use the iron kyoll much later to buy a sewing kit on the fairgrounds.
Enter the Folnur’s house with the help of a key you just got.
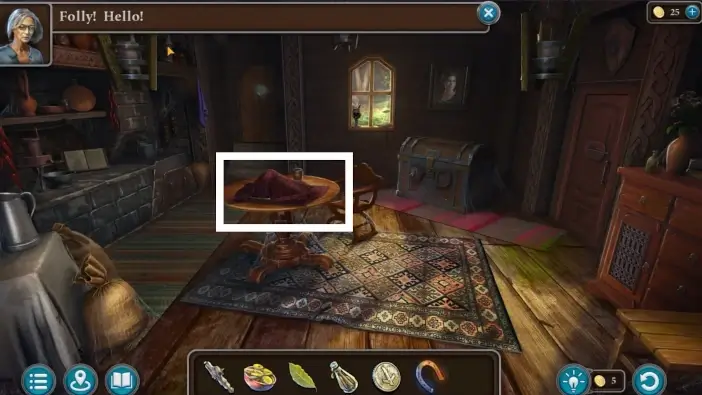
In the Folnur’s house, approach the table and remove the rag.
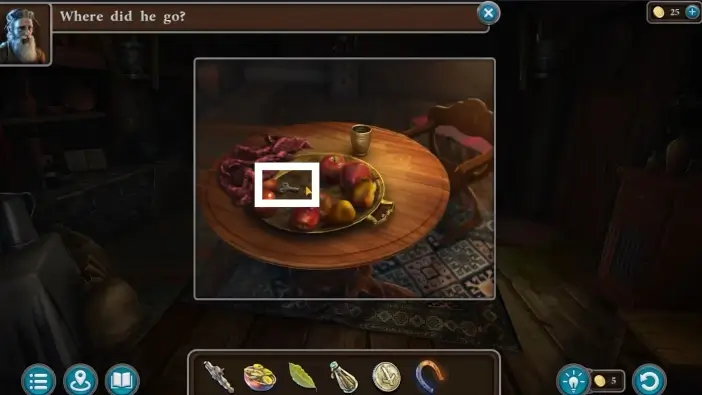
Push away the apples to find the winding key and take it. You will need it to unlock the door on the right.
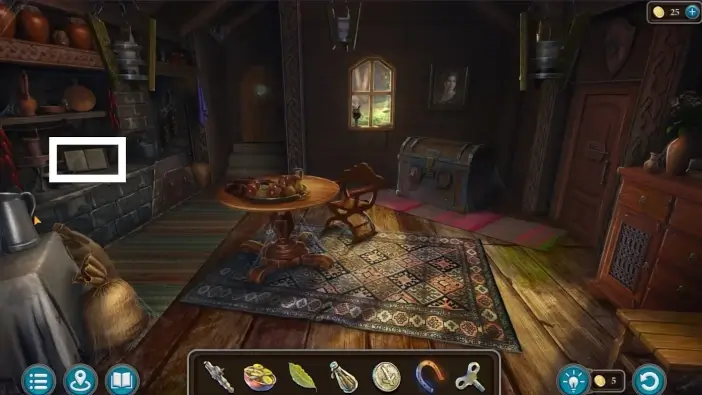
Approach the desk on the left.
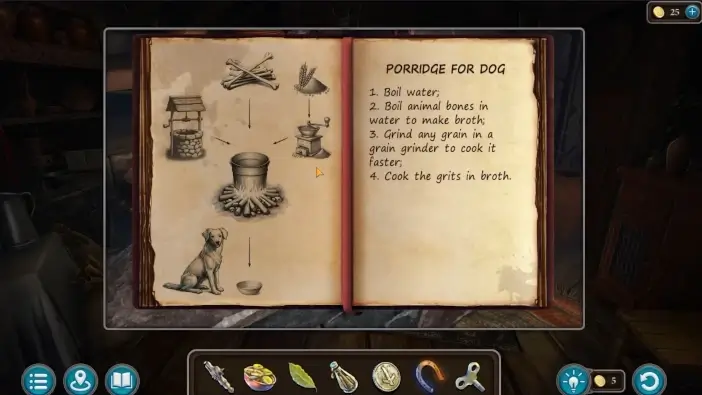
Read the book. There are instructions on how to feed the Folnur’s dog. He can help you find Folnur.
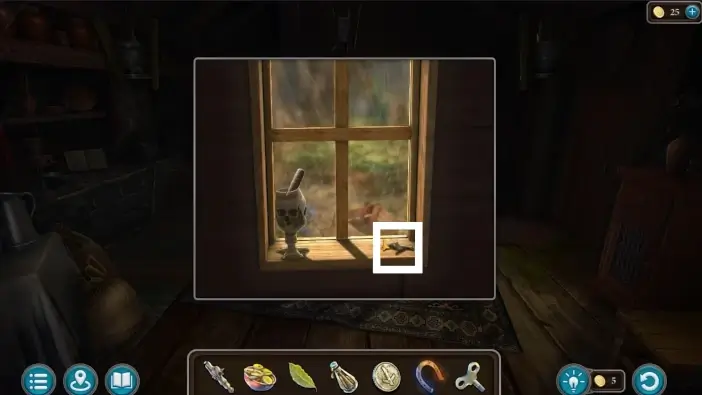
Go to the window and near the skull ashtray, there is a Manuscript collectible. Below the Manuscript is a mechanical horse. Pick it up.
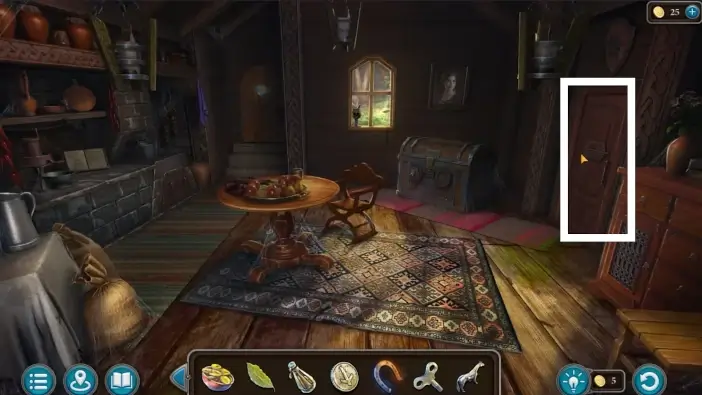
Go to the door on the right.
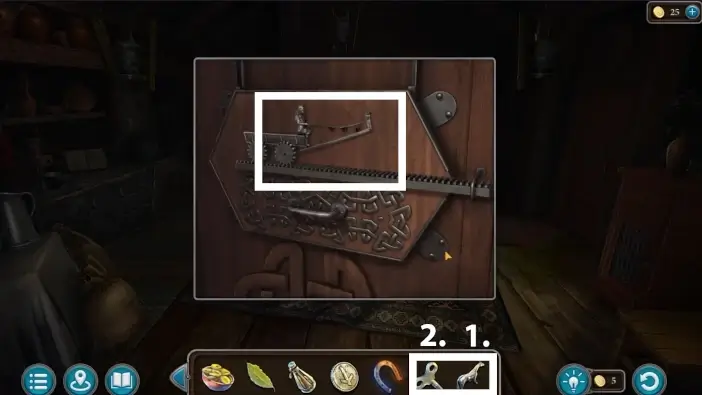
- Place the mechanical horse.
- Place the winding key.
Click on the handle to activate the mechanism. The lid will then open and a new puzzle challenge will begin.
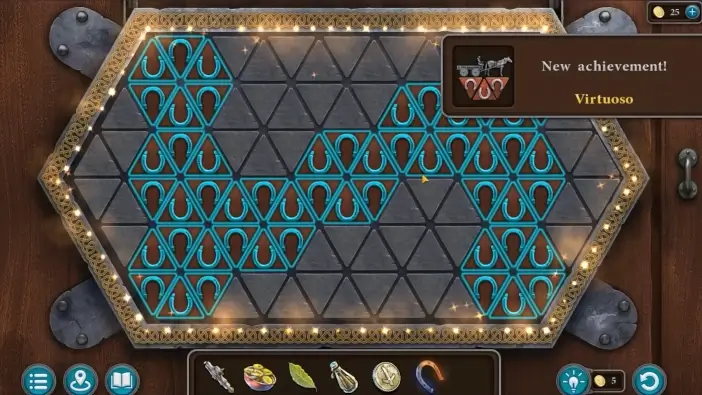
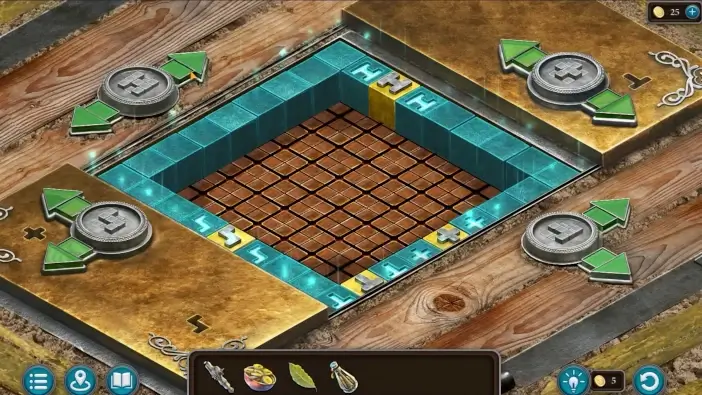
In this puzzle, you need to mark all the horseshoe fields so they glow blue. When you press one horseshoe, all the neighboring horseshoes will change their state, to either active or inactive, depending on their previous state. If you solve the puzzle in less than fifty moves, you will get the “Virtuoso” achievement.
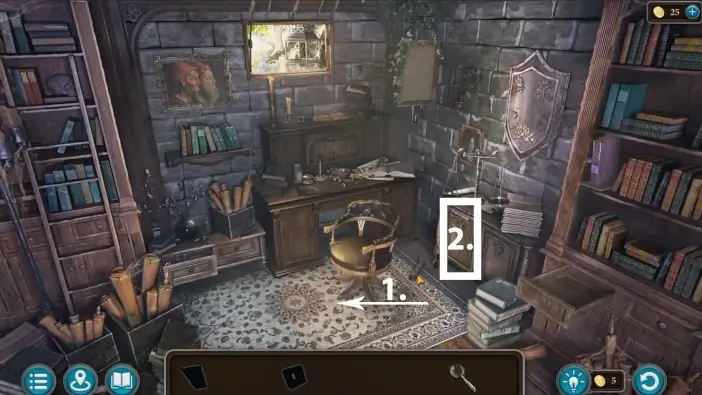
You will find yourself in the Folnur’s office while Maaron will go to his academy. An object-seeking puzzle will start.
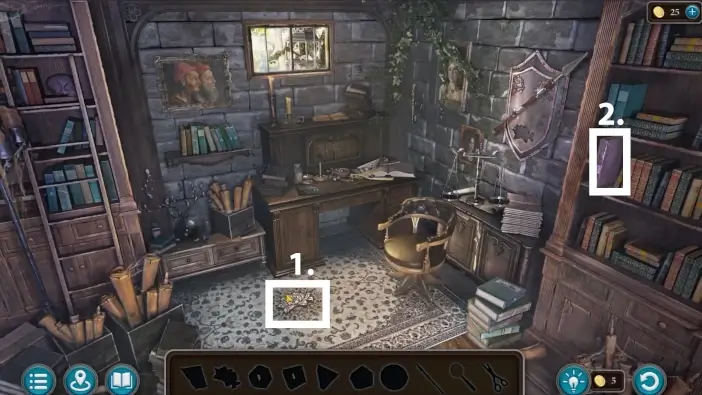
- Pick the heraldic flower.
- Move the book on the shelf to open a drawer.
- Pick the scissors from the drawer.
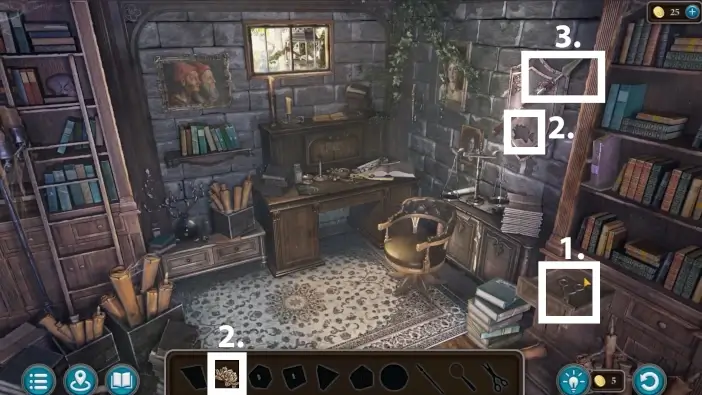
- Place the heraldic flower on the shield to unlock the spear.
- Take the spear.

- Use a spear to pry open the window. Take the magnifier.
- Approach the table on the left.
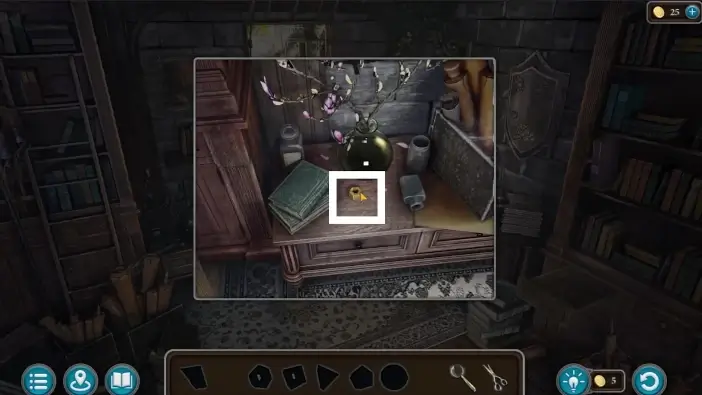
Empty the vase and take the first figured wheel.
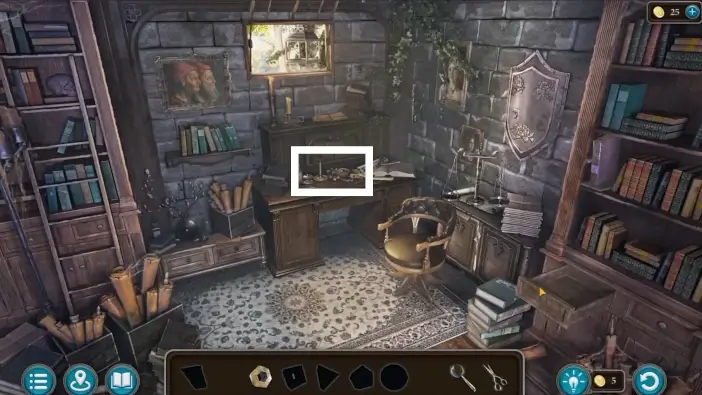
Approach the central largest table.
Pick the second figured wheel.
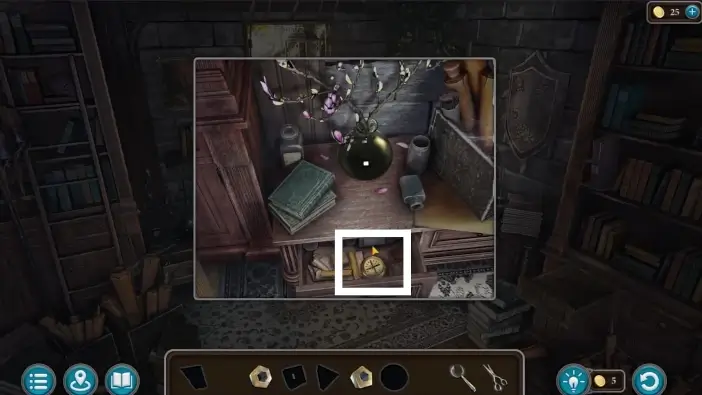
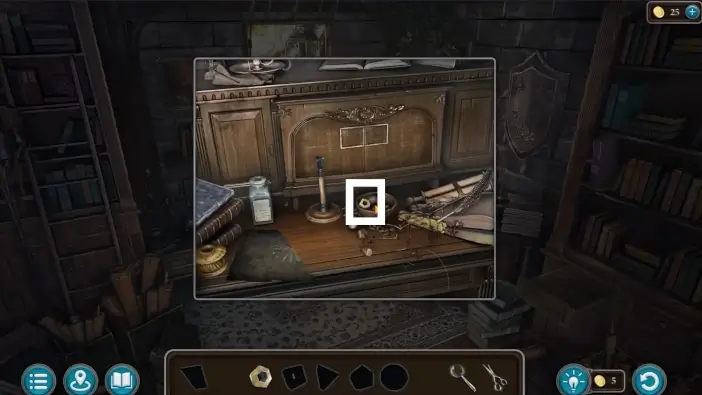
Return to the left table and open a drawer. Take the compass.
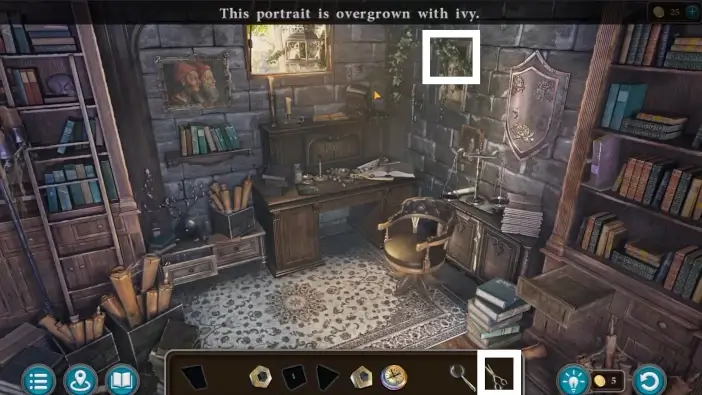
Use the scissors to cut the overgrown ivy then move the painting to reveal a hidden compartment.
- Take the third figured wheel.
- Place the compass on the book’s cover.
Go to the central table and open the lid.
Place the figured wheels you have so far. You will miss one.
- Move the chair to the left.
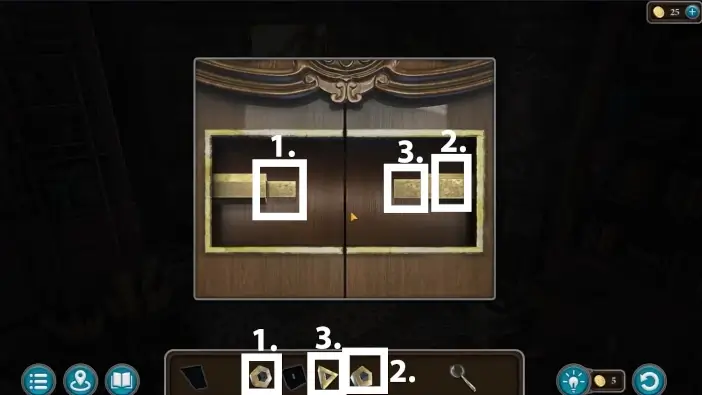
- Open the cabinet.

Take a scrap of paper.

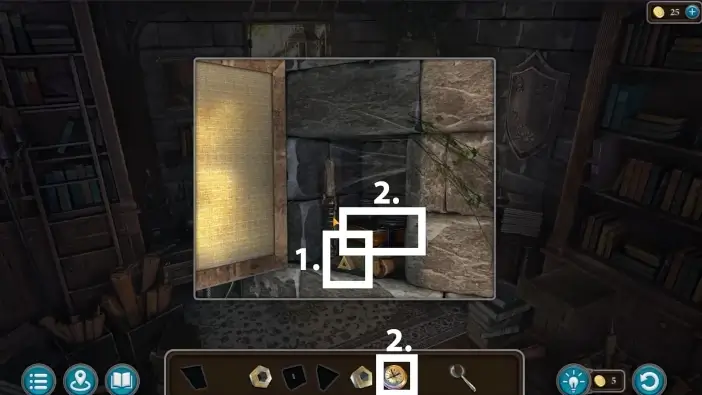
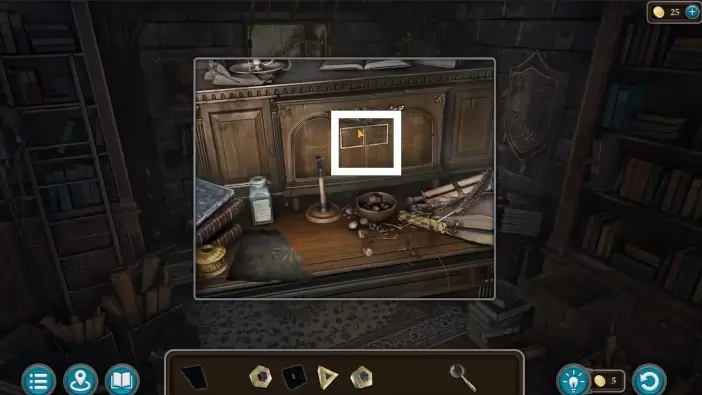
Approach the central desk and place a scrap of paper to get the full paper of a clue for the compass and the book. Memorize the clue.
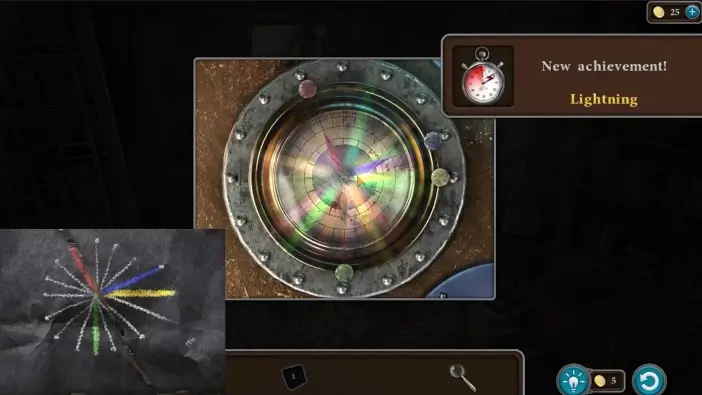
Return to the hidden compartment behind the painting and take the sealed book. Move the arrows on the compass according to the clue from the paper. You will get the “Lightning” achievement if you complete this puzzle fast. The book will open and inside it is a fourth figured wheel.
Place the fourth figured wheel on the central desk where the other wheels are.
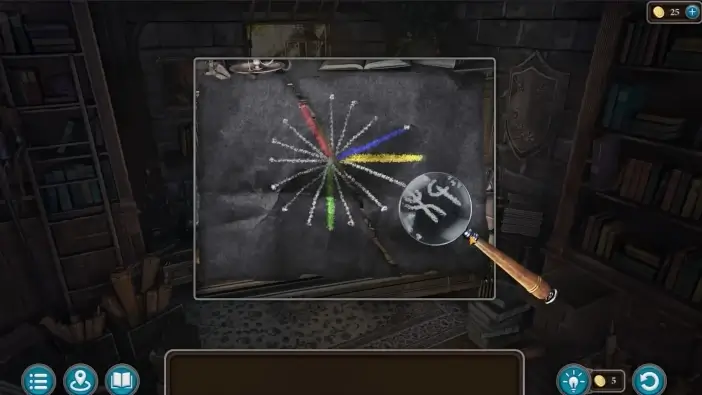
Look at the paper with clues again. Use the magnifier and check the symbols on the right side of the paper. This is the clue on how to rotate the wheels.
Rotate the figured wheels according to the clue. Once you complete the puzzle, the cabinet will open, then pick up the strongbox. To unlock the strongbox, you’ll need to solve the next puzzle.
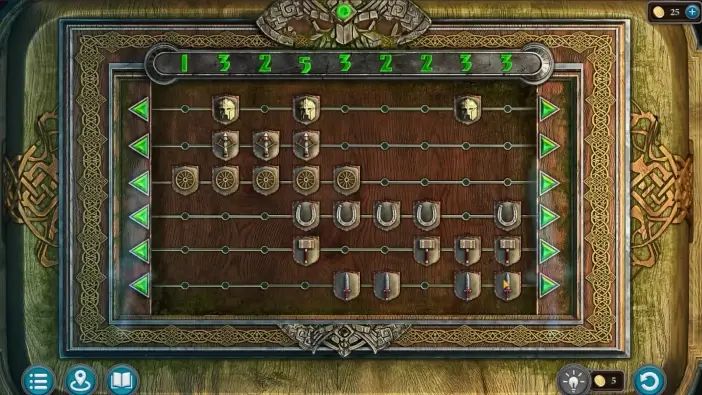
To finish this puzzle, each column needs to have the same number of shields as the number on the top of the column.
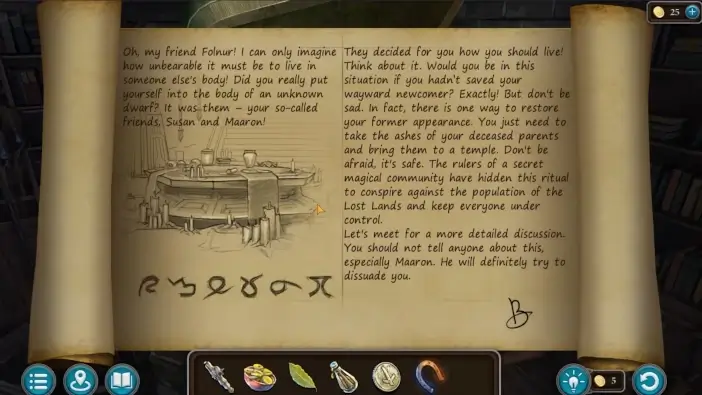
You will find a vital clue of where Folnur went in a scroll inside the strongbox. Memorize the runes on the left. You’ll need them when you need to unlock a hidden passage below the dam later.
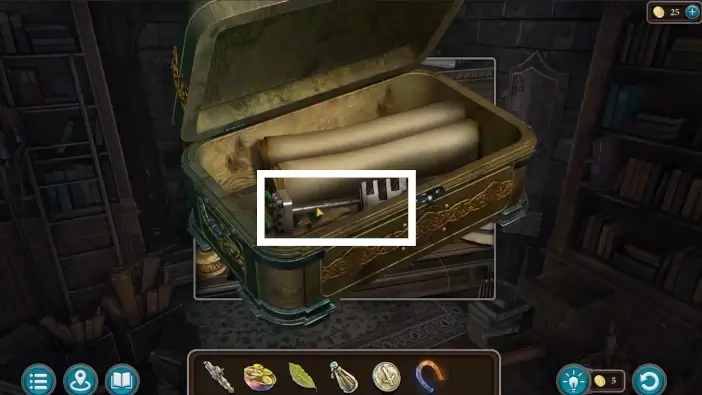
Pick the key from the strongbox., It is a key for the barn’s gate, on the other side. You will need it later to follow the path where Folnur went.
Maaron will return. He will not know who wrote to Folnur nor where the temple mentioned in the scroll is, but he will bring the See-Remember Stone. You can use it on a Folnur’s dog to get visions of the dog’s last memory of Folnur and what Folnur was doing. First, you need to feed the dog. The See-Remember Stone and the Folnur’s box you just opened will be added to your inventory.
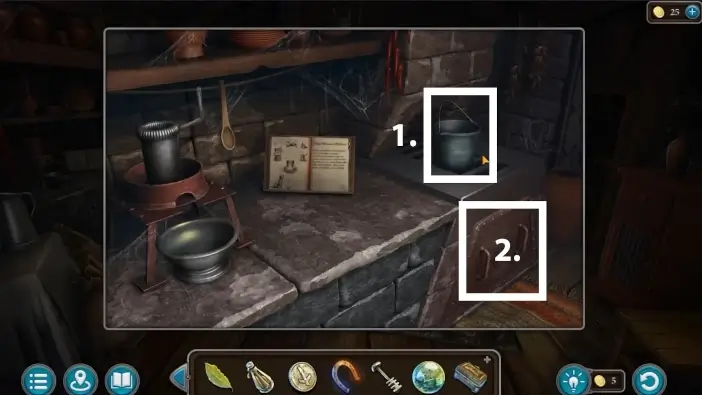
- Go to the desk on the left and take the cauldron.
- Remove the lid.
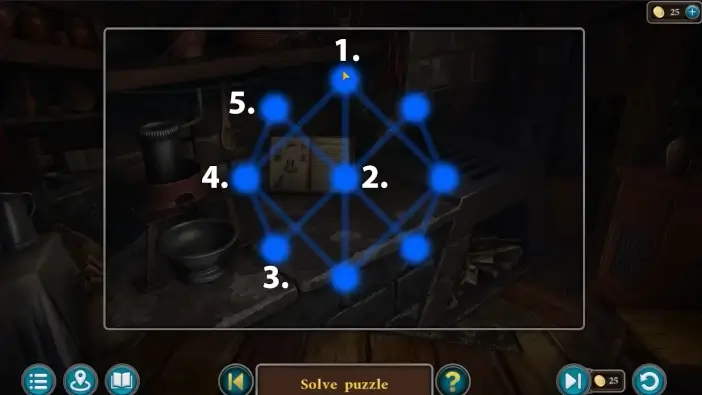
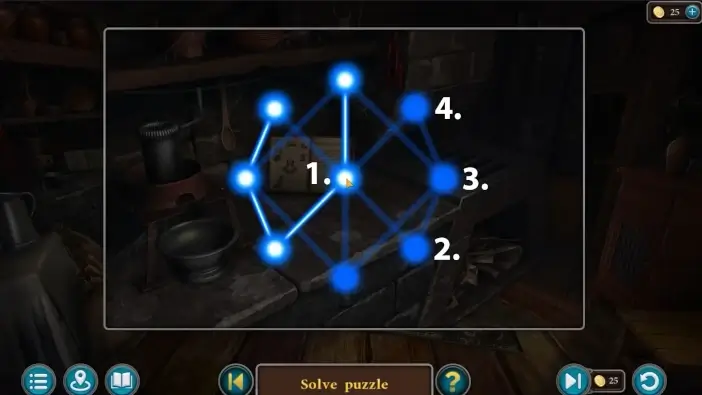
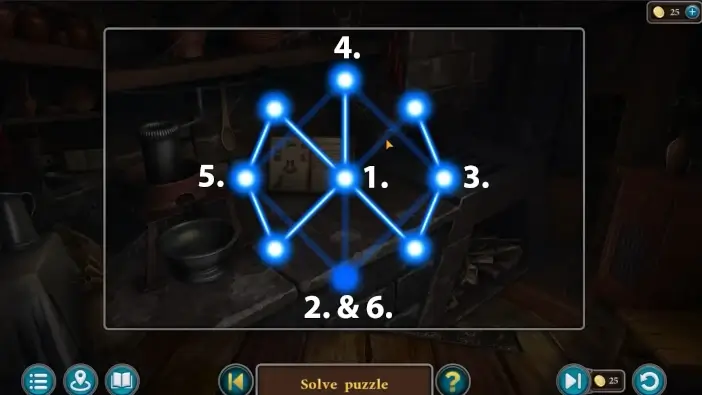
Use the fire spell to burn the firewood. Click on the nodes in the order shown in the pictures.
Go to the barn and pick up the bag of grain. It will serve to make food for the dog.
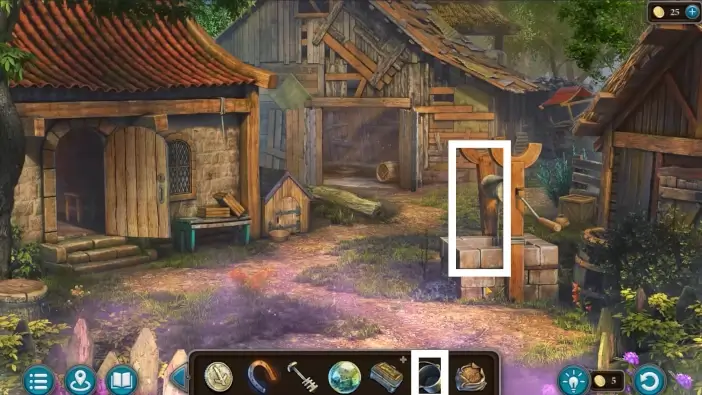
Go to the well and fill the cauldron with water.
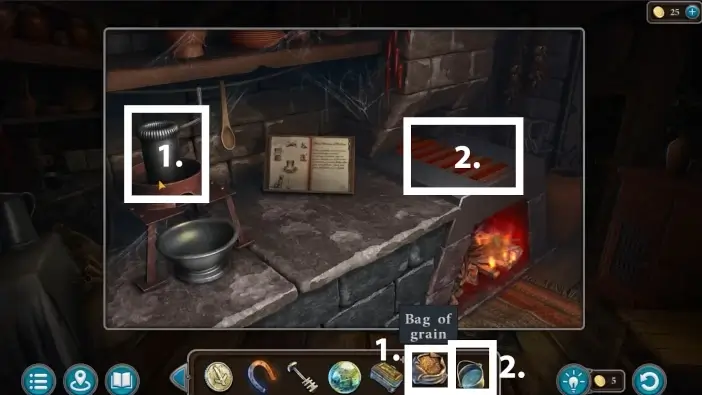
- Put the grain into a grain mill.
- Place the cauldron of water on the stove.
Go to the area in front of the Maaron’s walls and approach the pile of wood.
Pick the animal bones.
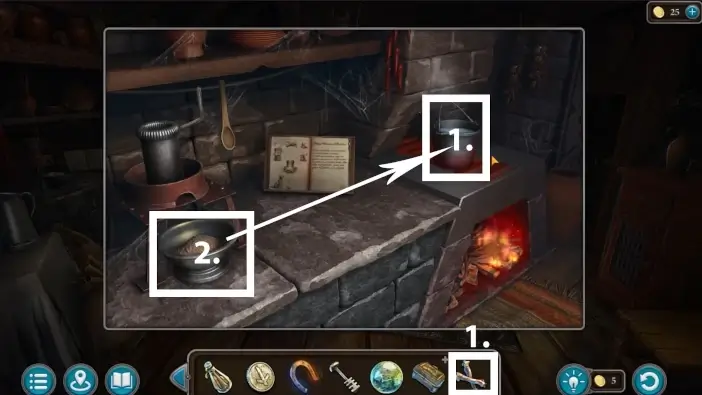
- Go back to Folnur’s house. Place the animal bones into the cauldron.
- Put the ground grain into the cauldron.
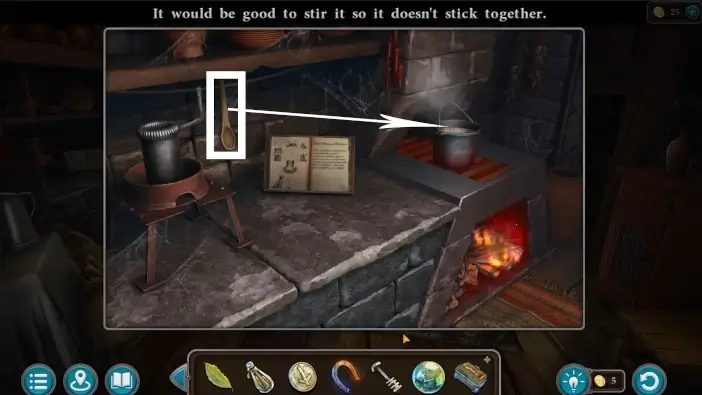
Use the wooden spoon to stir the porridge. The porridge for the dog will be added to your inventory.
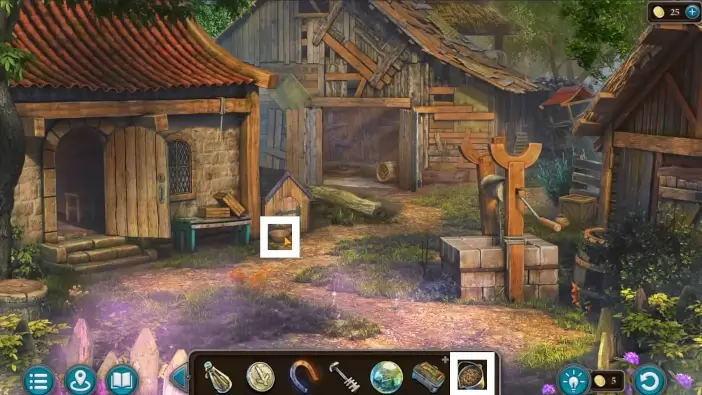
Pour the porridge into the dog’s bowl.
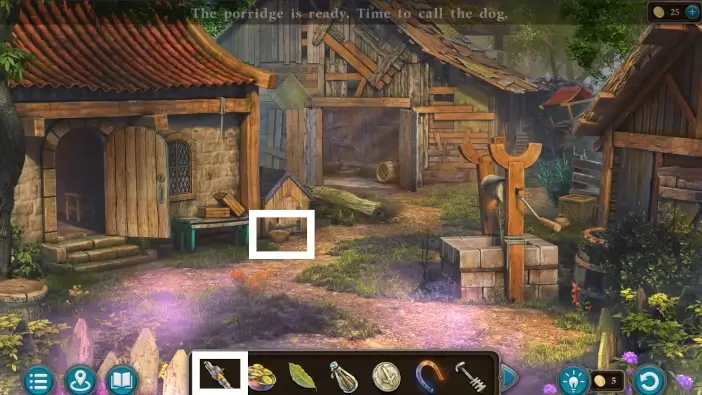
Use the dog’s whistle again to call the dog.
Use the See-Remember Stone on the dog. A cutscene will play out. You will find out that Folnur threw arrows into the well and he went to the road from the other side of the barn, where the barricade is.
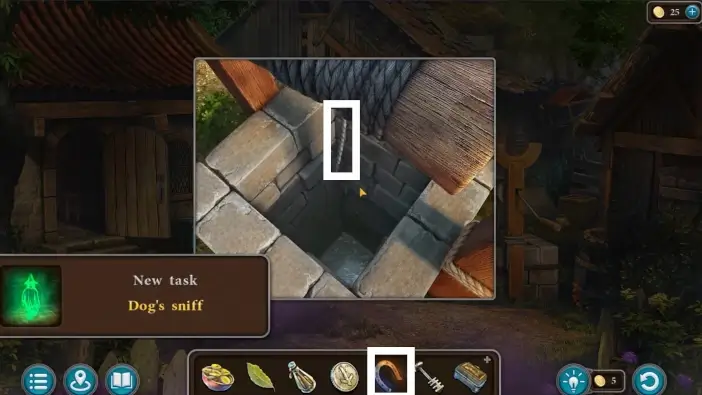
Approach the well and attach the magnet to the rope. Click on the rope to lower down the magnet. Pick up the magnet, take it, and take the three powerful arrows. You will use them to remove the barricade in the barn.
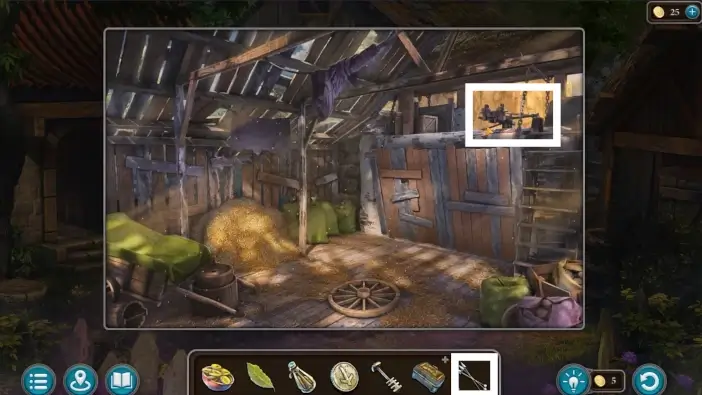
Go to the barn and approach the crossbow. Place the arrows near the crossbow.
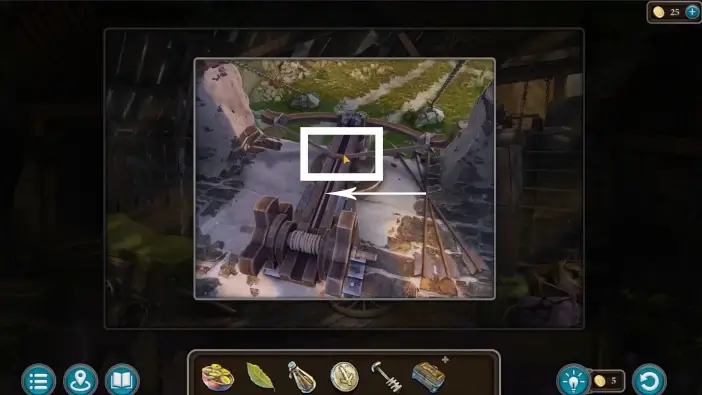
Put one arrow then click on a crossbow to shoot on the ropes that hold the barricade. Use all the arrows, one by one.
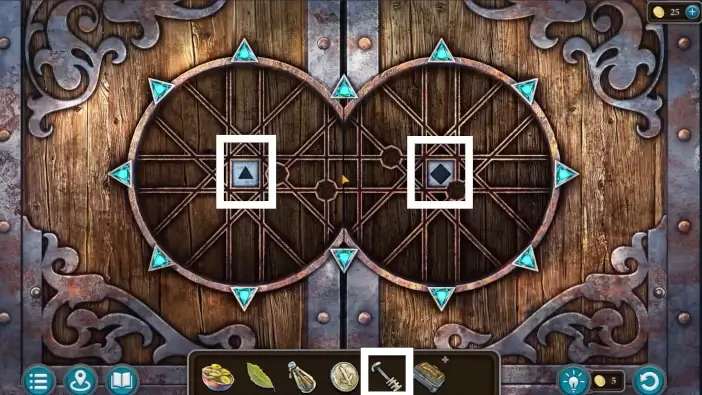
After you remove the barricade, you’ll still need to unlock the gates. Approach the gates and use the key you got from Folnur’s strongbox. A new puzzle challenge will begin.
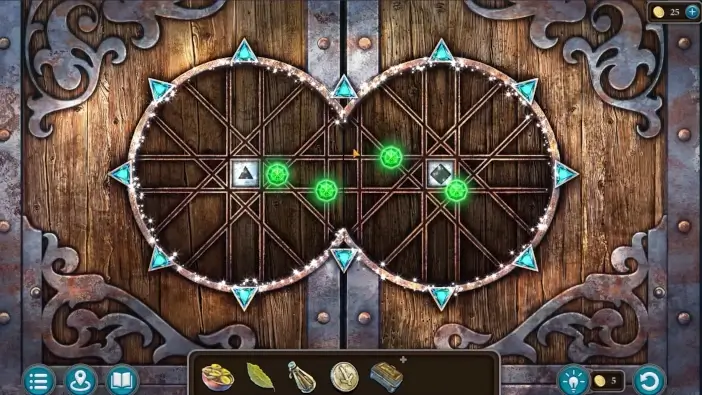
Use arrows on the sides to place the green gems into four empty slots. Once you complete this puzzle, you will unlock the gates.
This will mark the end of part 3 of our guide for the Main Chapter of the Lost Lands 10. When Susan gets some answers only more mysteries appear. Find out in the next part where Susan and Maaron will end up in their quest to find Folnur!
Thank you for reading!