Legendary Tales 5 – Chapter 1: Secret of the Island | Part 2
Intro
Welcome to our walkthrough for Part 2 of Chapter 1 of “Legendary Tales 5” from “FIVE-BN GAMES”. Lucia may have found shelter on the mythical island, but she’s not giving up seeking a way to help her friends.
Walkthrough
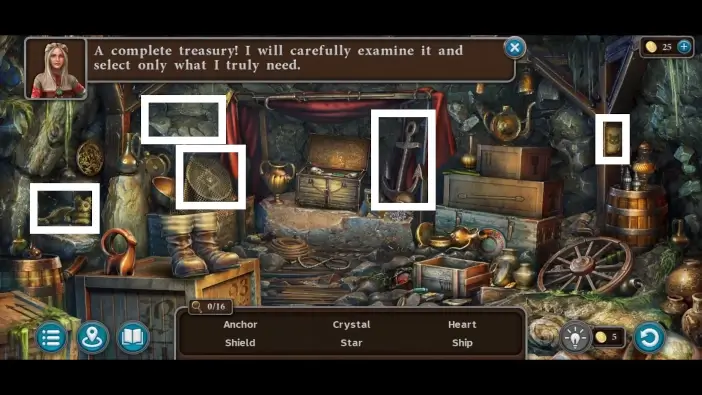
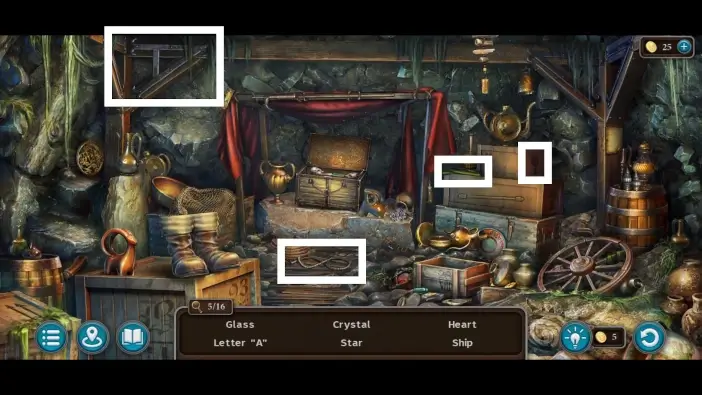
In the previous part, you’ve entered the cave behind the siren statue. In the cave, a new mini-game will start where you’ll need to find the 16 items in the room. Sometimes, you’ll need to get closer to a specific area to find more items, and some items are hidden. Follow the markers in the pictures in this guide to find all 16 items.
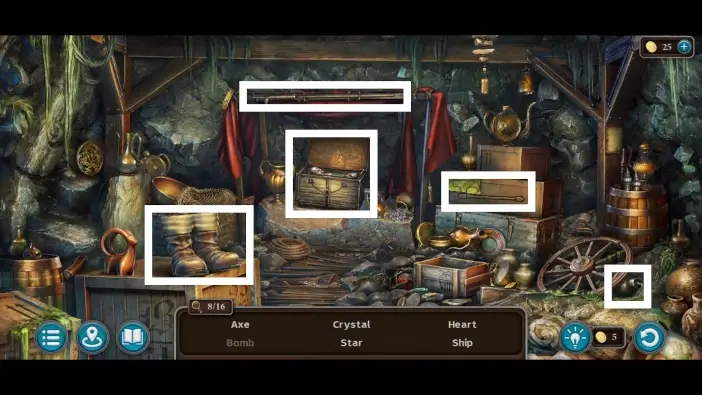
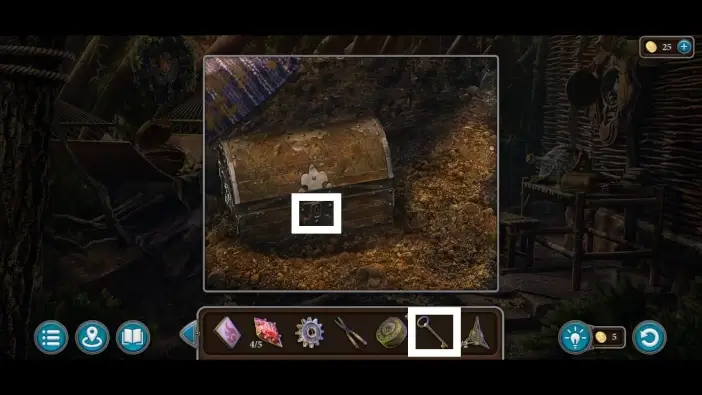
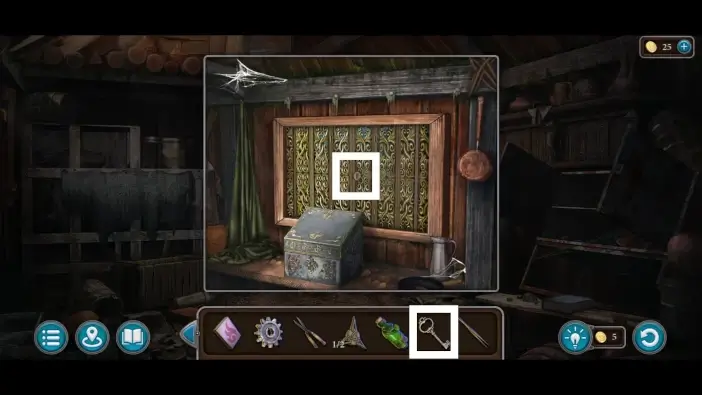
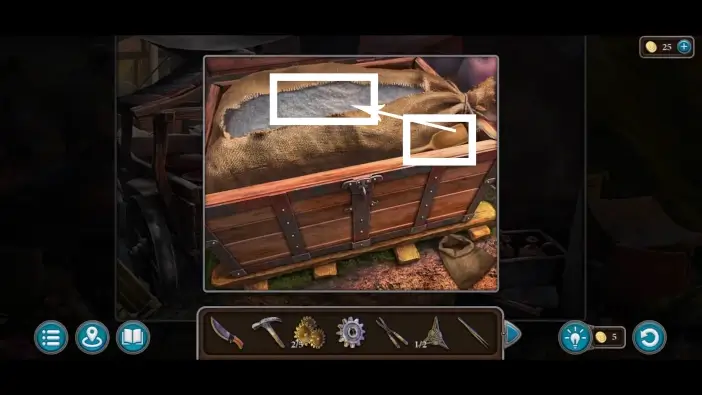
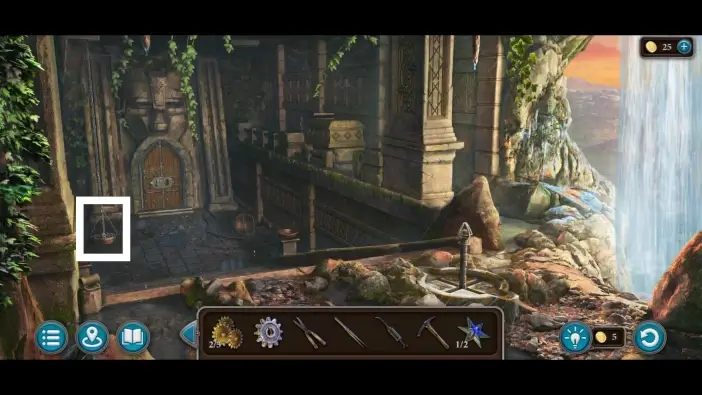
Approach the chest in the middle to find one more item.
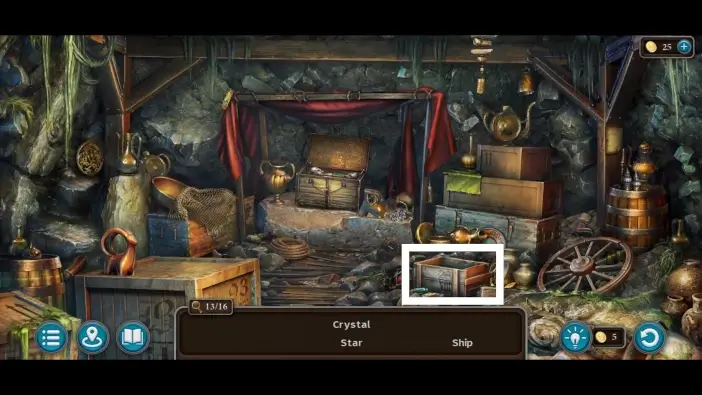
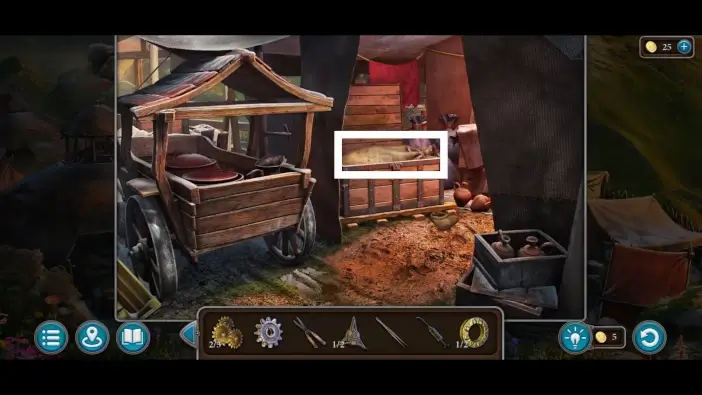
Approach the box on the right to find two more items.
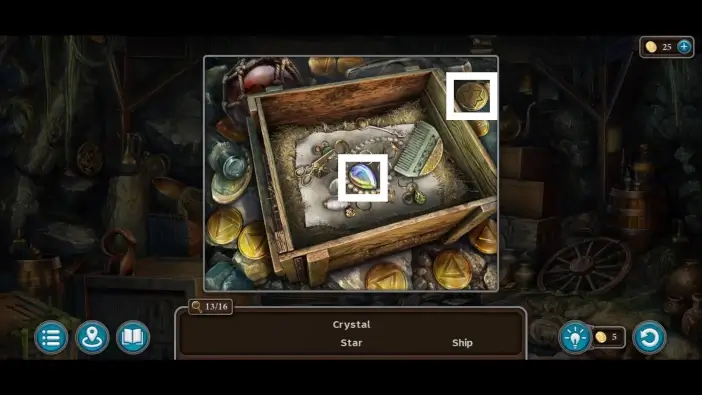
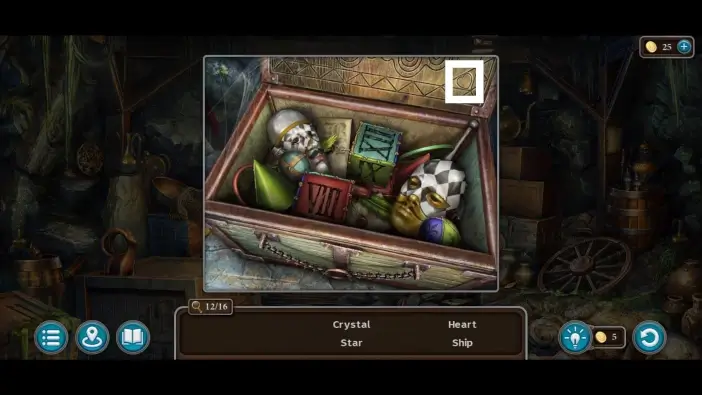
Move some items in the box until you see a crystal.
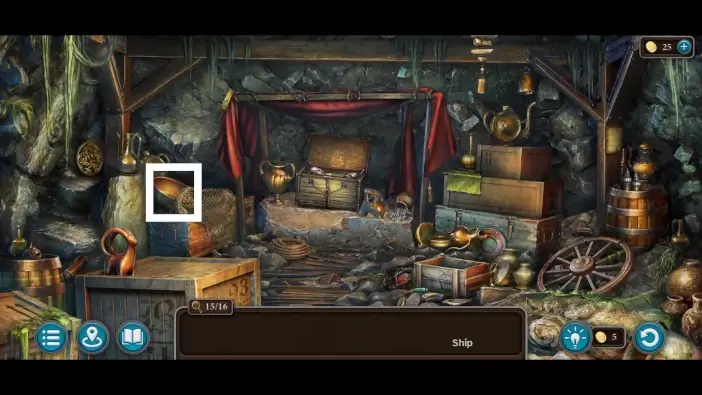
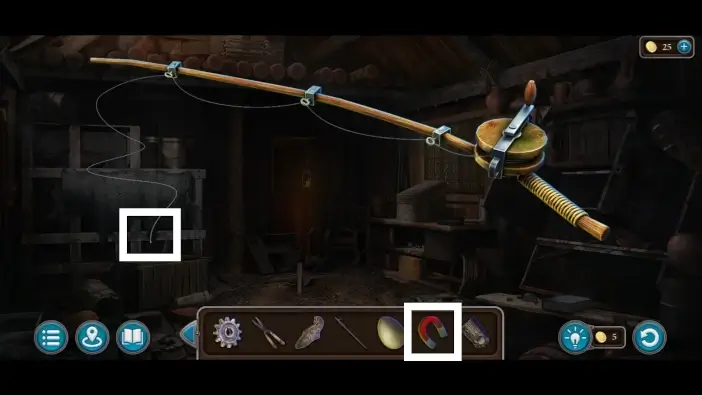
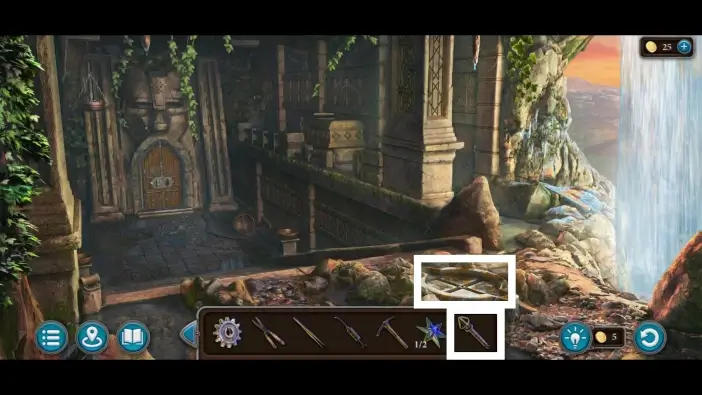
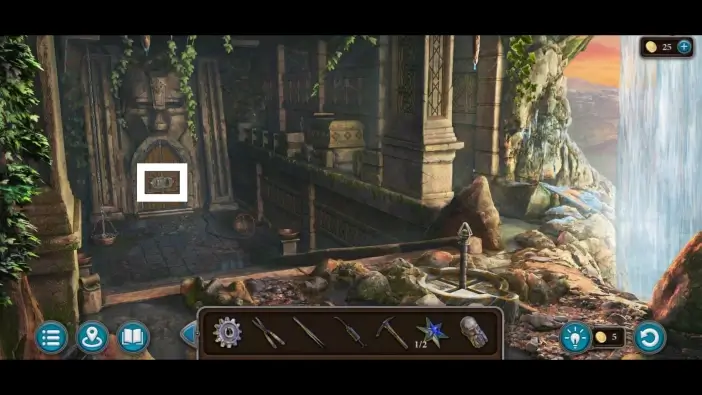
Approach the brazier.
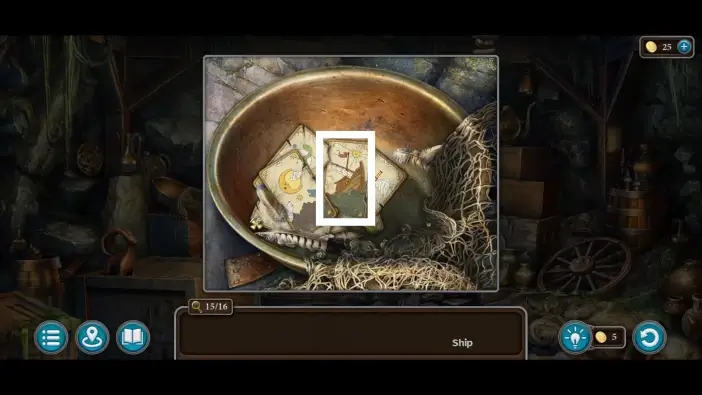
Move some cards in the brazier and click on the card that has a boat in it.
Once you’ve found all 16 items, the pike pole will be added to your inventory.
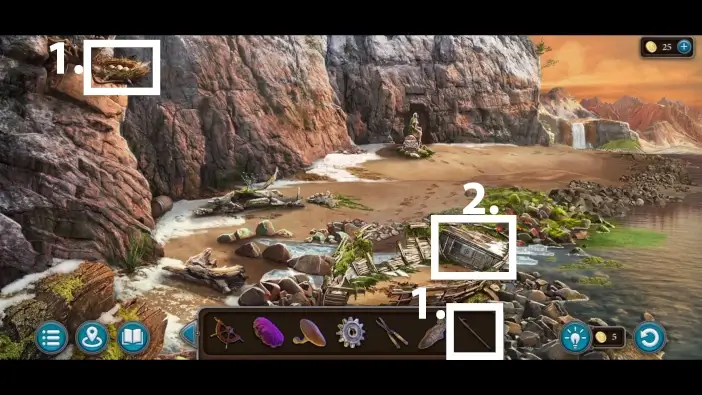
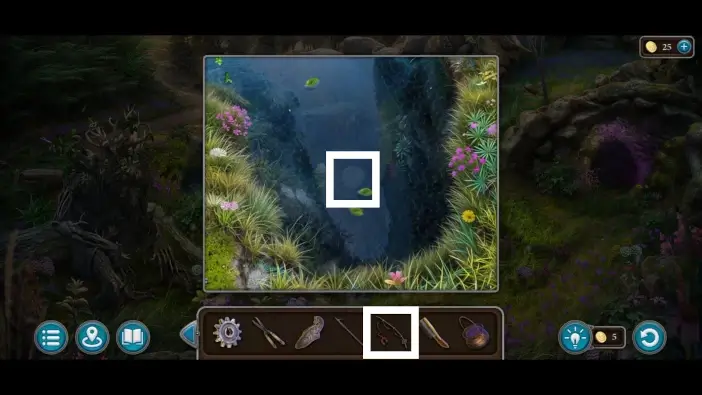
- Go to the beach area, approach the nest on the top-left cliff, and use the pike pole to get the egg. The egg is one of the ingredients for the potion to wake up Drevolets.
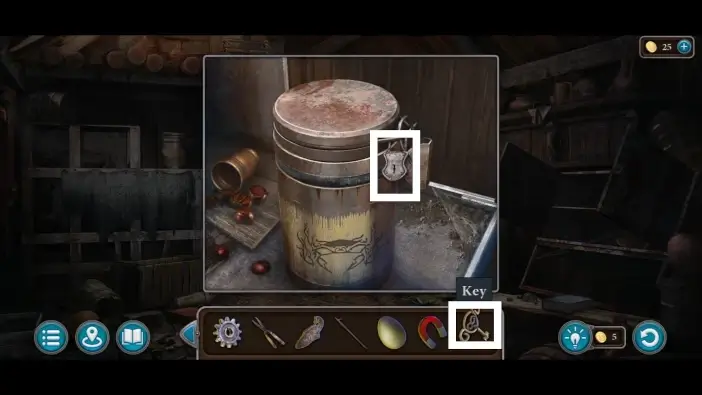
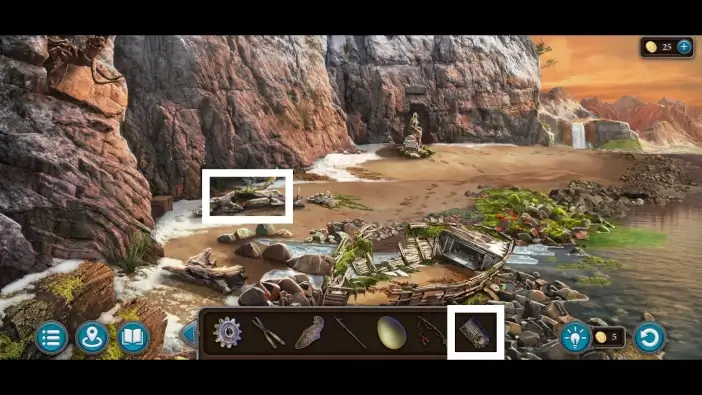
- Approach the chest in the ruined boat.
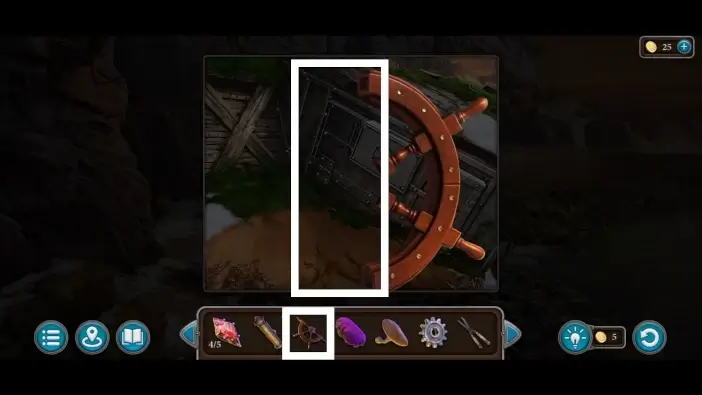
In your inventory, click on the half of the steering wheel that has a plus sign. Once that part is on the main screen, find the second half of the steering wheel in your inventory and attach it to the other half.
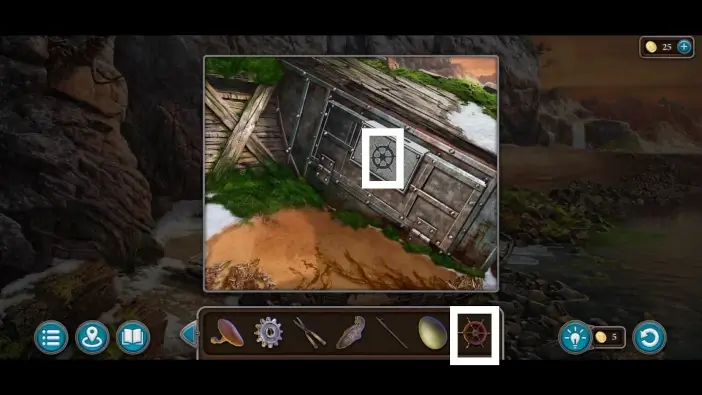
Use the assembled steering wheel to unlock the chest.
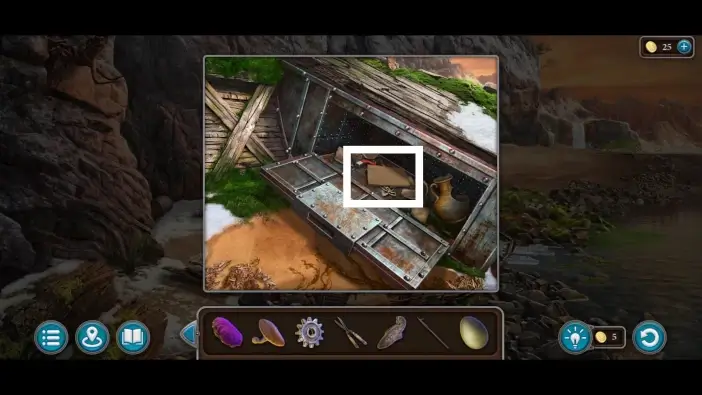
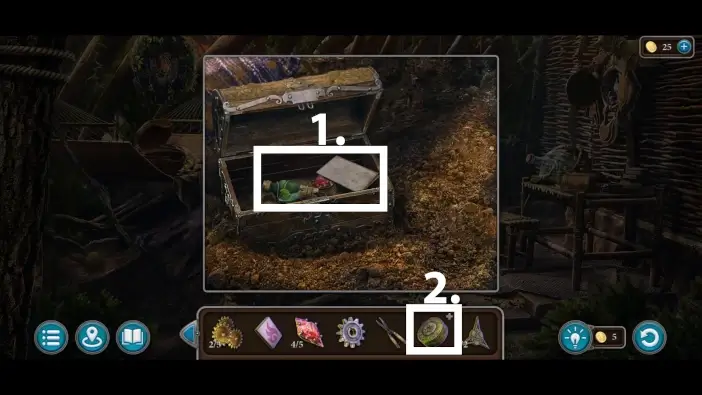
Take the magnet and the key (beneath the manuscript). You’ll attach the magnet to the fishing rod you have, and you’ll use the key to unlock the box in the wooden hut.

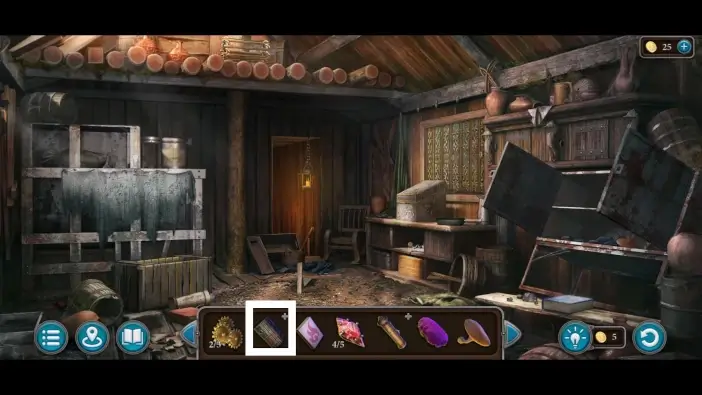
Return to the wooden hut and approach the box on the left.
Use the key you just got from the chest to unlock the padlock on the box. Open the box and take the bait for the crab.
Click on the crab trap in your inventory to examine it.
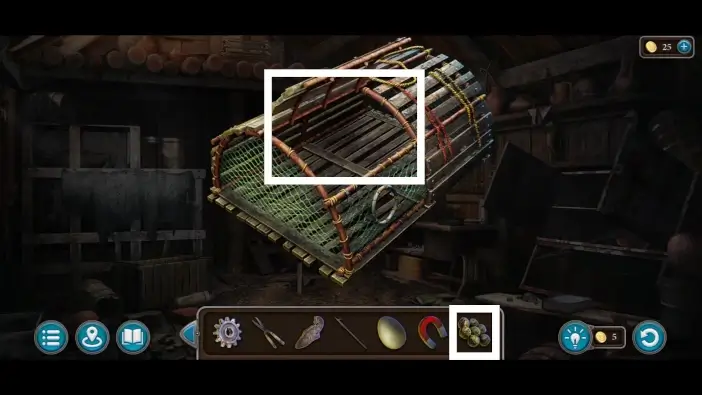
Put the bait into the crab trap. The “Trap with bait” item will be added to your inventory.
Click on the fishing rod in your inventory to inspect it closely.
Attach the magnet to the string. The “Fishing rod with magnet” item will be added to your inventory.
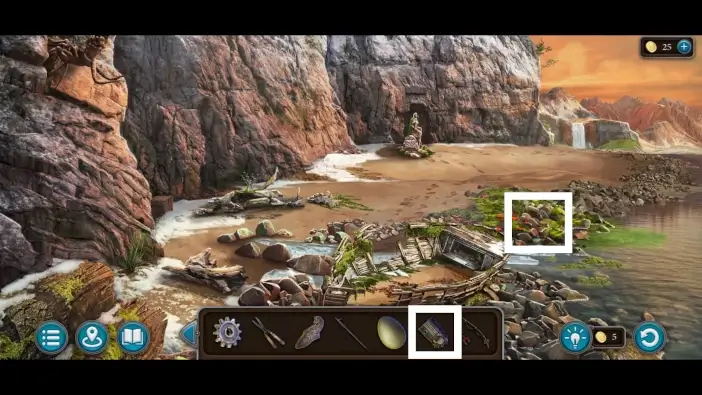
Go to the beach area and approach the rocks near the water. Place the trap with the bait on the rock, and the crab will enter the trap. The crab will be added to your inventory.
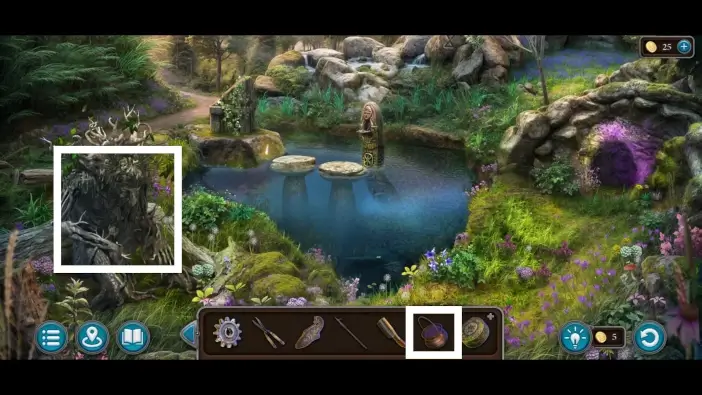
Approach the hollow tree on the left and place the crab. The crab will lure the animal that was sleeping there, and the animal will chase the crab.
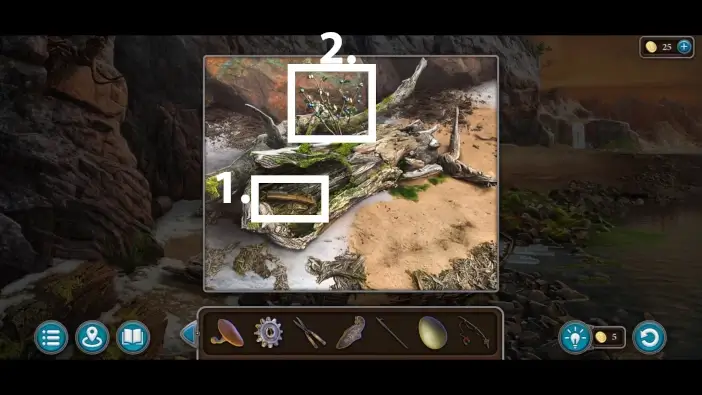
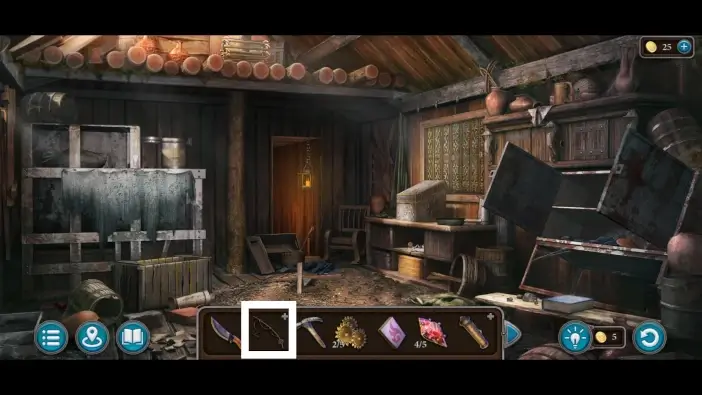
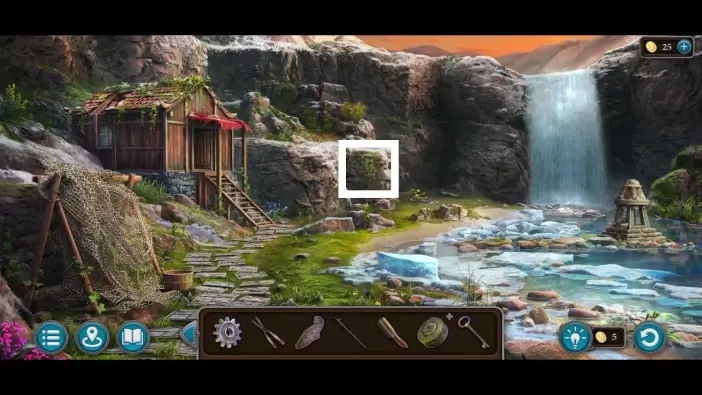
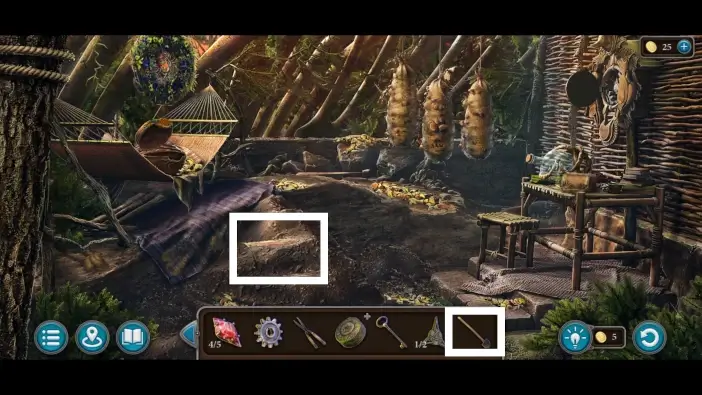
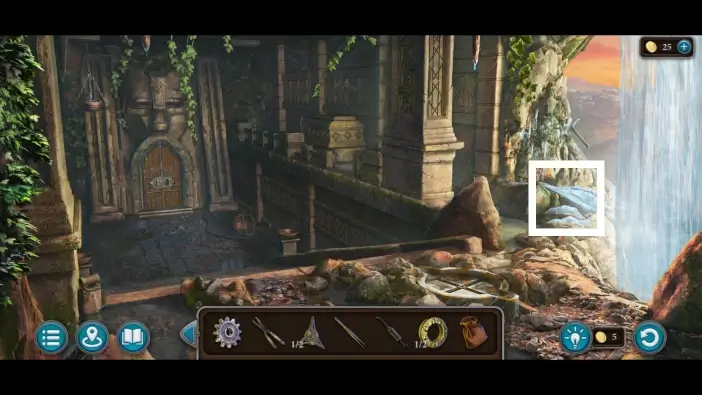
- Take the brush from the tree. You’ll use it to remove some moss from the cliff in the waterfall area, to reveal a clue.
- Take the last ingredient for the potion, which is blueberry.
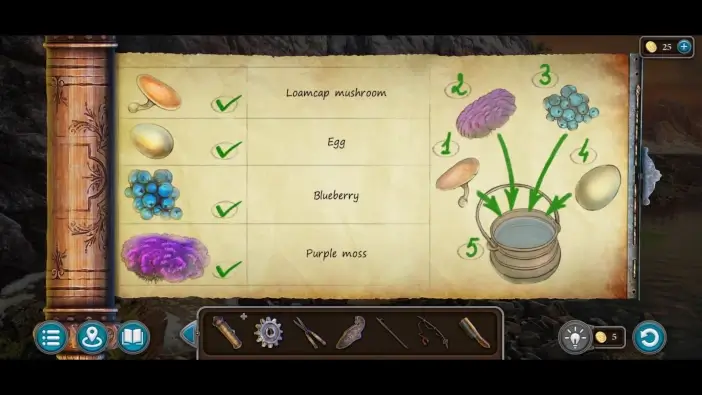
Click on the recipe in your inventory and place the following items you’ve gathered from your inventory into the recipe paper, to tick the entire list: Loamcap mushroom, egg, blueberry, and the purple moss. Once you complete the entire list, the recipe will dissapear and the “Ingredients” item will be added to your inventory (it will be one item).

Go to the camp and approach the cauldron.
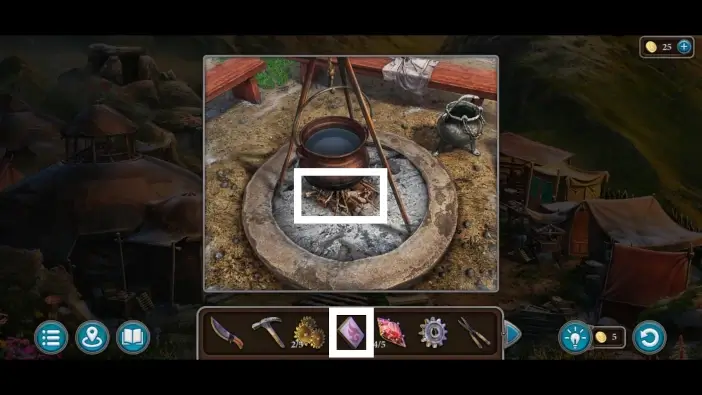
Use matches to light the fire and boil the water in the cauldron.
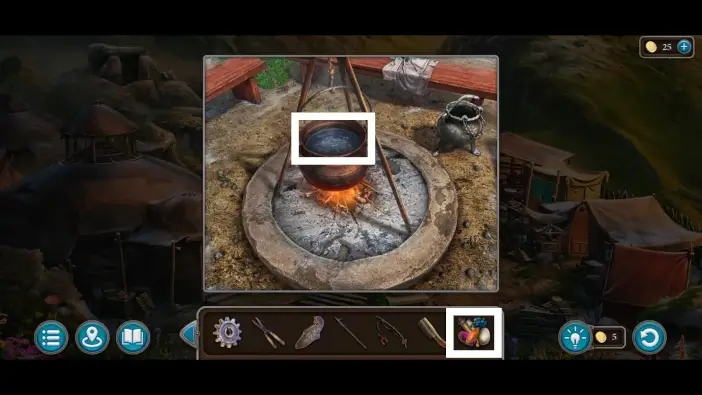
Place ingredients into the cauldron. After a few seconds, take the potion.
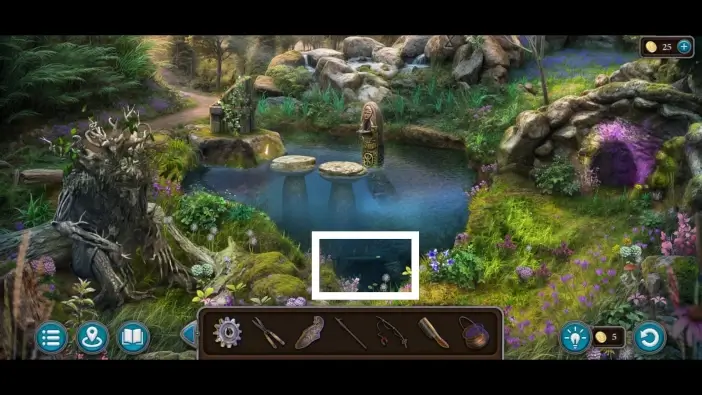
Go to the lake area and approach the lake.
Use the fishing rod with the magnet to get the metal box. You’ll need to unlock the box with five pieces of quartz later.
Give the potion to Drevolets. A new cutscene and conversation will begin. After the conversation, Drevolets will give you a key to the chest in the Radictis’s nook.
Go to the waterfall area and approach the cliff covered in moss.

Remove the moss with the brush. This will uncover a clue for the puzzle in the monument near the waterfall.
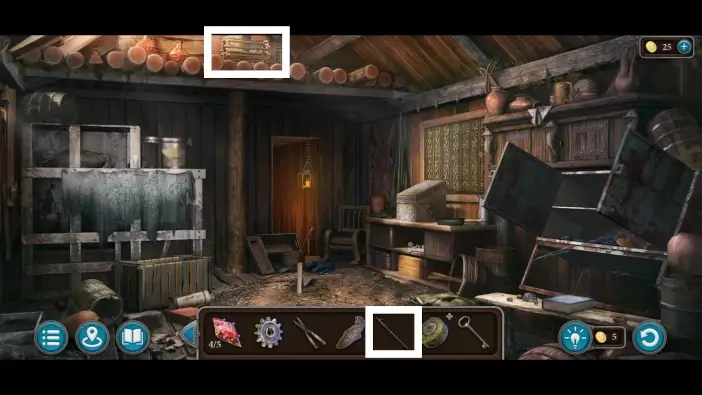
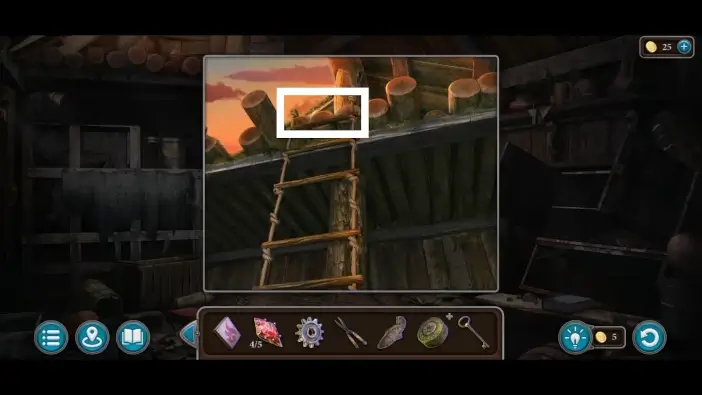
Enter the wooden hut. Get closer to the ladder in the attic and then use the pike pole to lower the ladder.
Go to the attic.
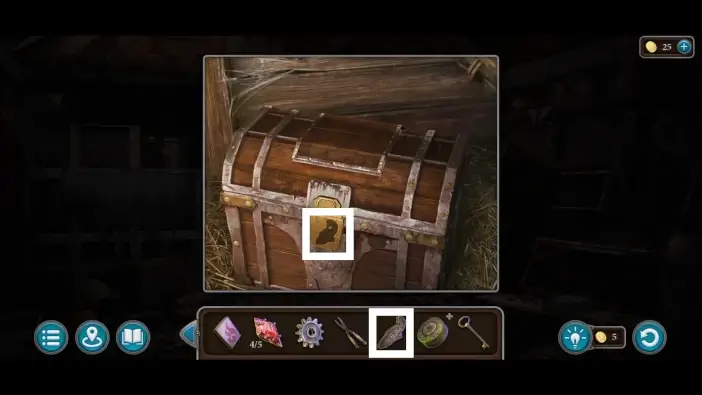
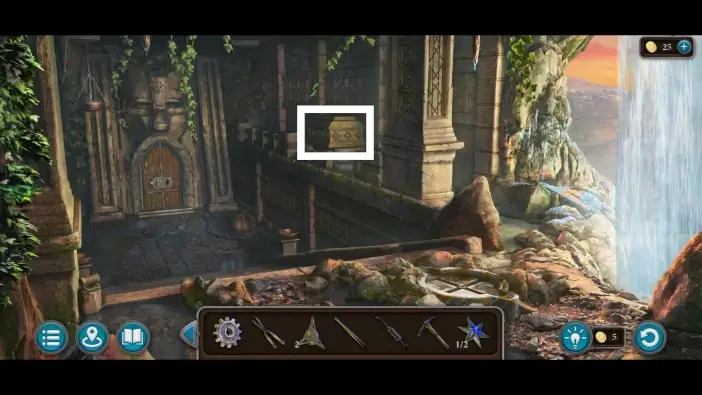
In the attic, there will be a chest. Use the fish-shaped item to unlock it.
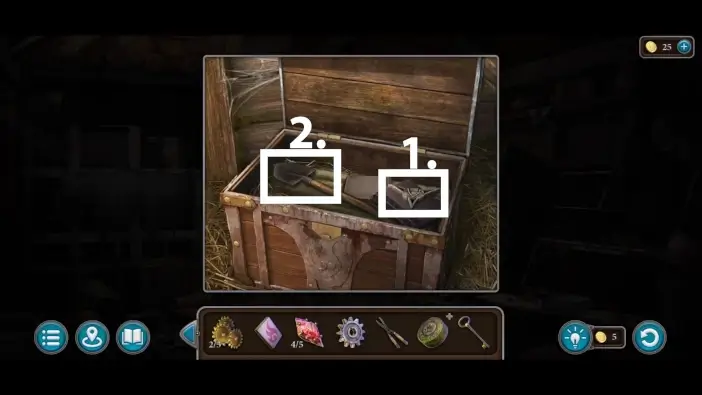
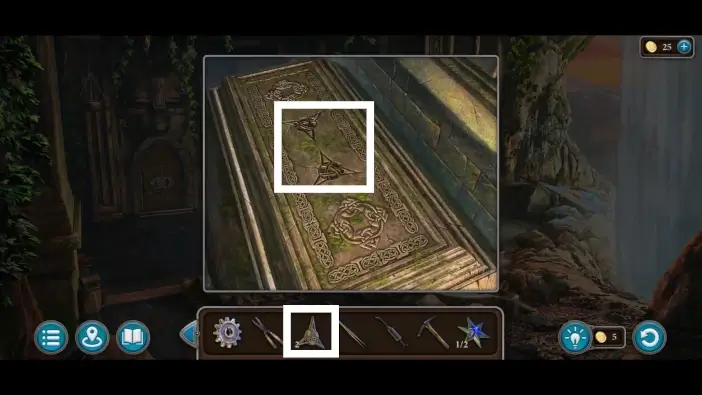
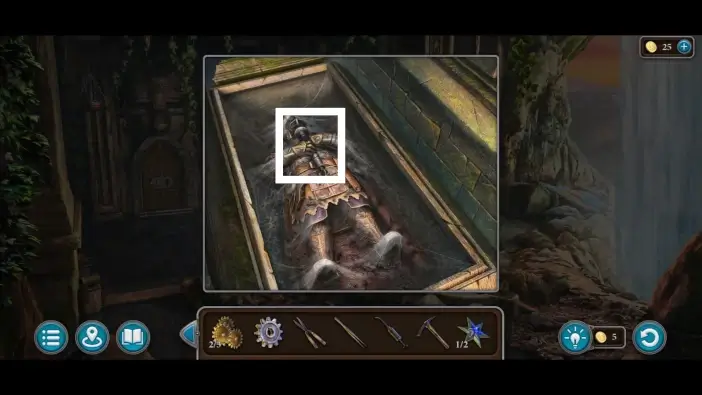
- Take the first stone symbol. You’ll need one more stone symbol to unlock one sarcophagus.
- Don’t forget to pick up the shovel from the chest, too.
Go to the Radictis’s nook in the forest and use the shovel you just acquired to dig out the chest.
Use the key Drevolets gave you before to unlock the chest.
- Read the paper about the tribute to ancestors, then take the bottle of jade dust and the fifth piece of quartz.
- Click on the box in your inventory to examine it.
Use the five quartz pieces to unlock the box. Take the key to the cabinet in the wooden hut and the tweezers from the box. You’ll use tweezers near the end of the chapter.
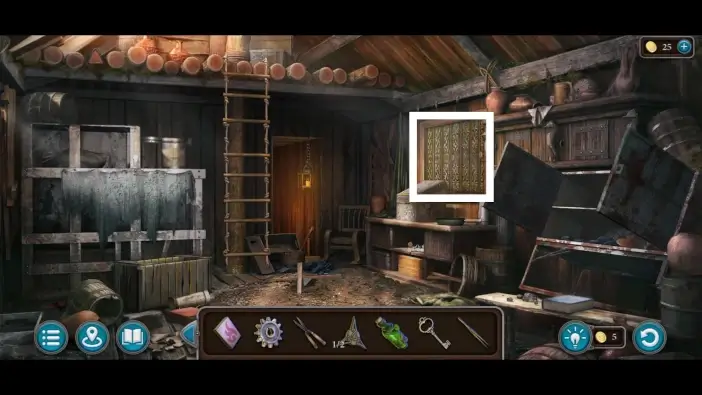
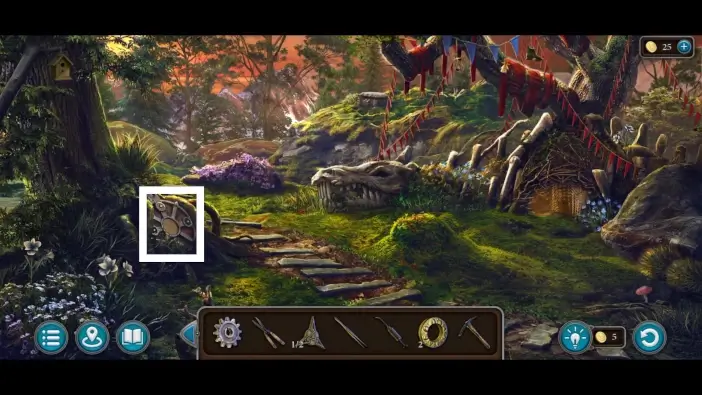
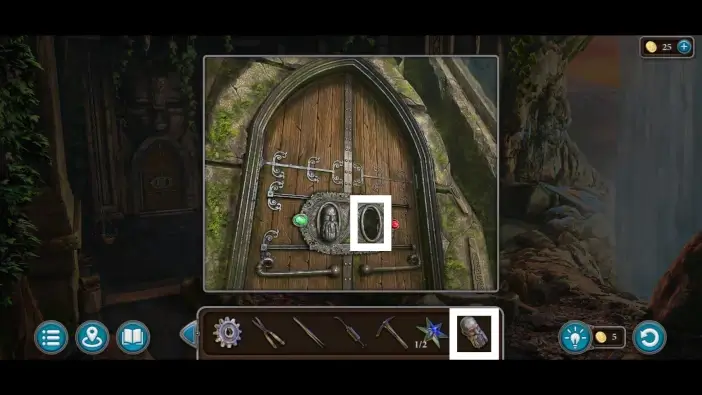
Go inside the wooden hut in the waterfall area and approach the cabinet on the right.
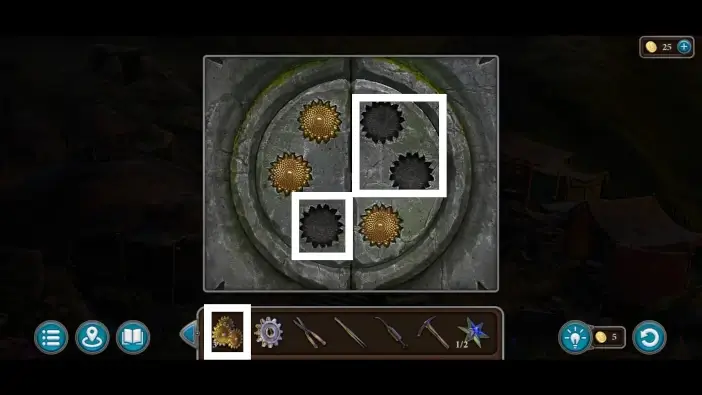
Use the key to unlock the cabinet. A new puzzle challenge will begin.
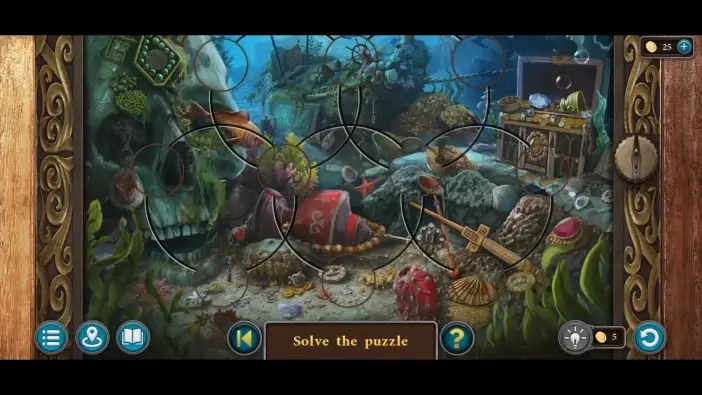
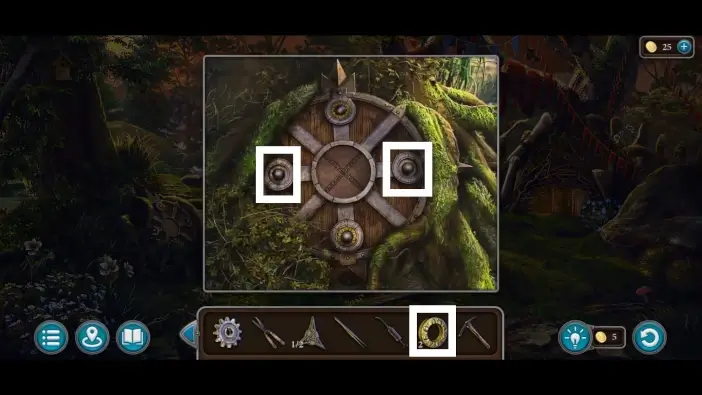
In this puzzle challenge, you’ll need to switch the positions of the small circular parts of the image to their correct spot. You can move them by clicking on the larger circles, and the three parts will rotate clockwise. If the part is in the intersection of multiple circles, you can click on another circle to further move the part.
Once you complete the puzzle, a box will open. Take the empty oiler from the box and the first hoop. You’ll need to find one more hoop before unlocking a new puzzle challenge on the shield in the forest area. You’ll use the oiler to oil the machine gears much later.
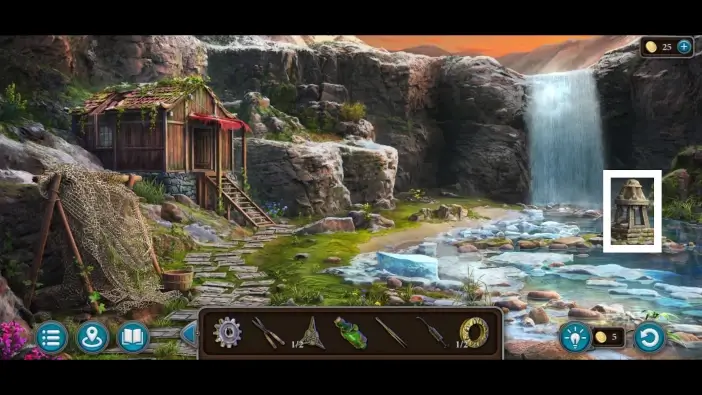
Exit the wooden hut and approach the monument on the right.
Pour the jade dust into the monument.
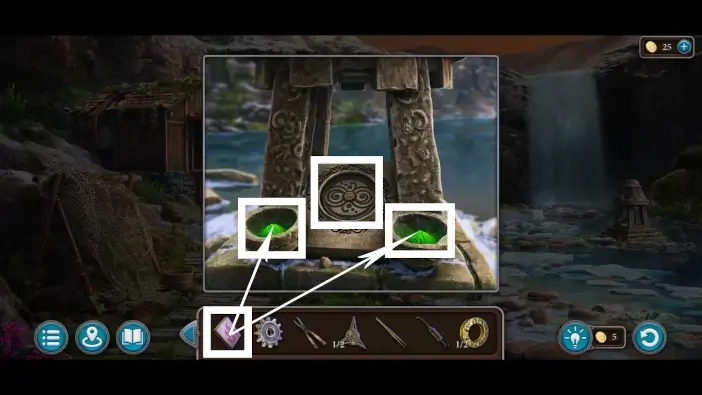
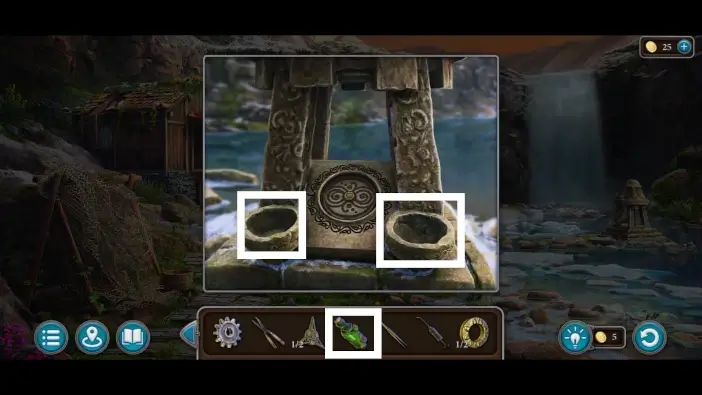
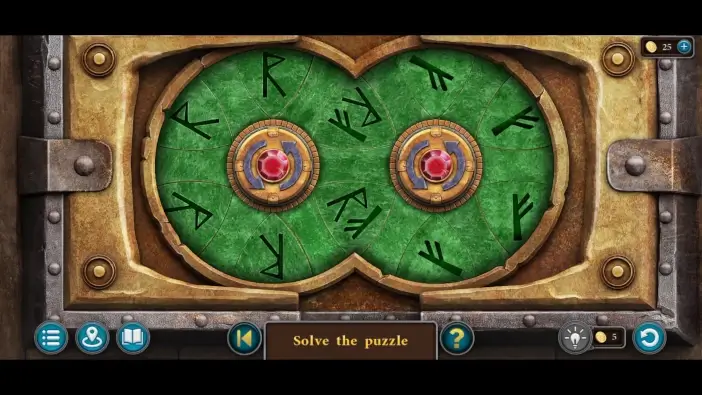
Use matches to burn the jade dust and then approach the puzzle in the center.
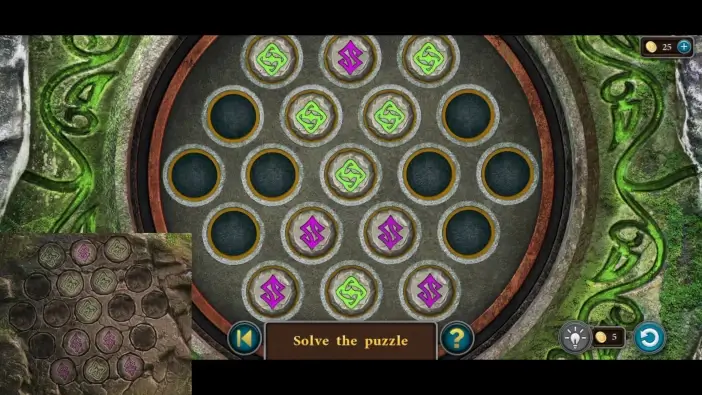
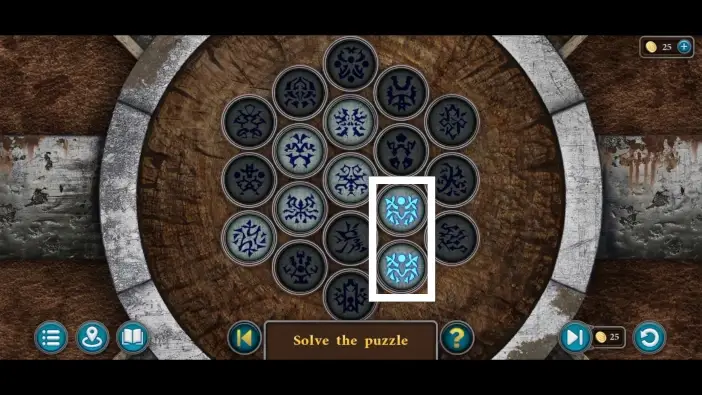
In this puzzle, you’ll need to rearrange the symbols like in the clue from the cliff earlier. The solution and the clue are in the picture above. When you click on a circle, no matter if it has a symbol or if it’s empty, the symbols around that circle will move clockwise.

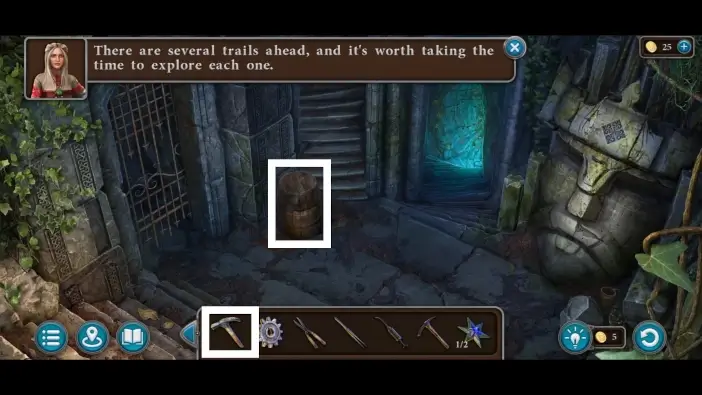
Once you complete the previous puzzle, a new hidden passage will appear. This path will lead to the catacombs, but first, you’ll need to return to the camp.

In the camp, go to the tent on the right.
Approach the chest.
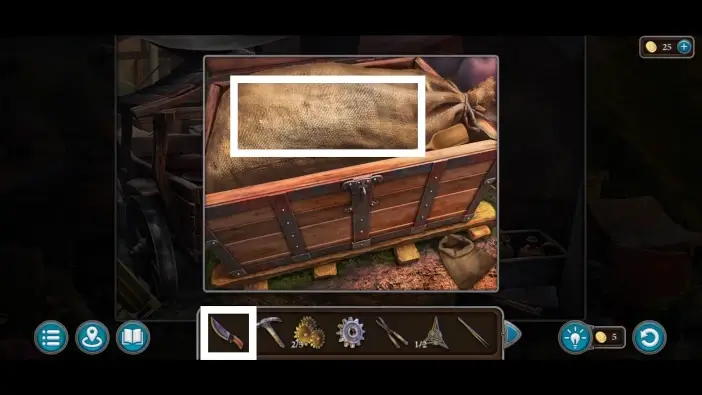
Use a knife to cut the sack inside the chest.
Use a wooden spoon to get some salt, and Lucia will place the salt inside the small sack. This salt will be added to your inventory.
Go to the new location, the catacombs entrance, and approach the ice near the right edge.

- Pour the salt on the ice.
- Take the pickaxe and the second hoop. You’ll use the pickaxe to destroy the ice around one grapple hook later.
Go to the forest area and approach the shield on the left.
Place the two hoops on the shield to start a new puzzle challenge.
In this challenge, all you need to do is to find two same symbols and click on both of them. Over time, there will be fewer and fewer symbols until you solve the puzzle. Afterwards, take the second stone symbol for a sarcophagus and the first star-shaped item. You’ll need two star-shaped items to start a puzzle challenge on the hammer of the statue later.
Go to the catacombs area and approach the sarcophagus.
Place the two symbols you’ve collected to open the sarcophagus.
Take the lever.
Attach the lever to the pedestal and move the lever to lower the chain that holds the brazier.
Approach the brazier.
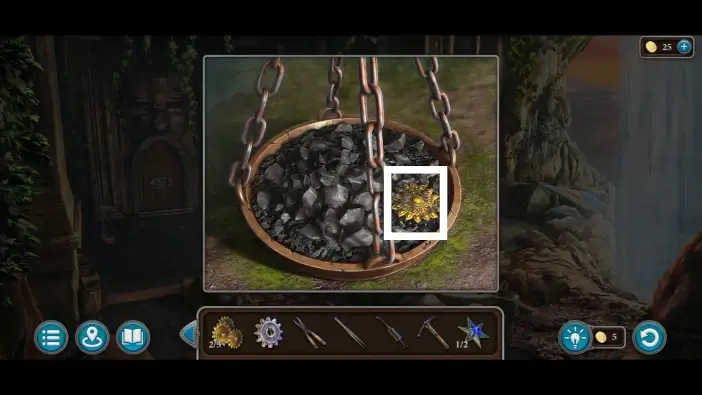
Move some of the charcoal and take the third flower.
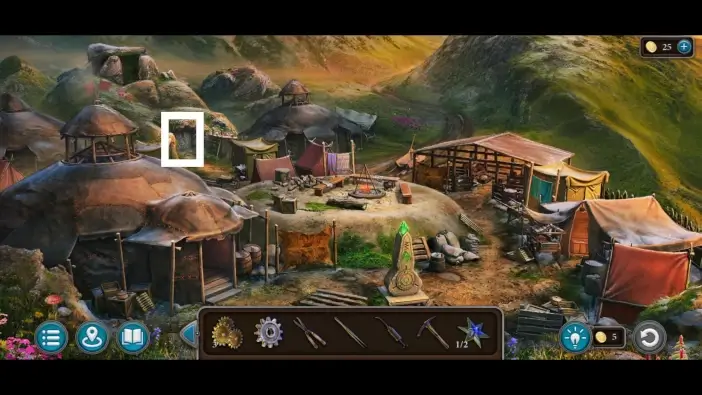
Go to the camp area and approach the stone cave door on the left.
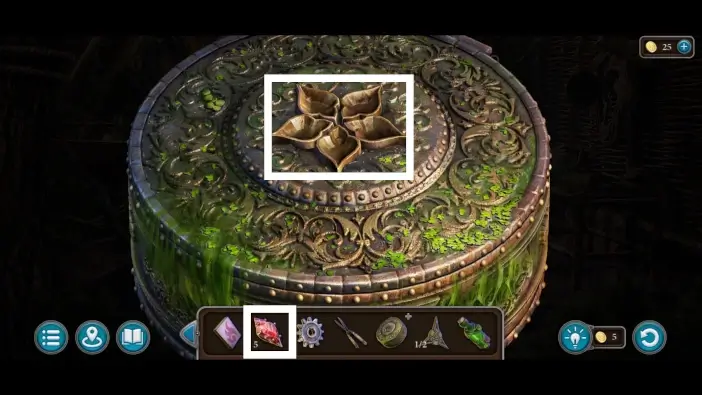
Place the three flowers into their corresponding slots to open the door. A new mini-game in the cave will start.
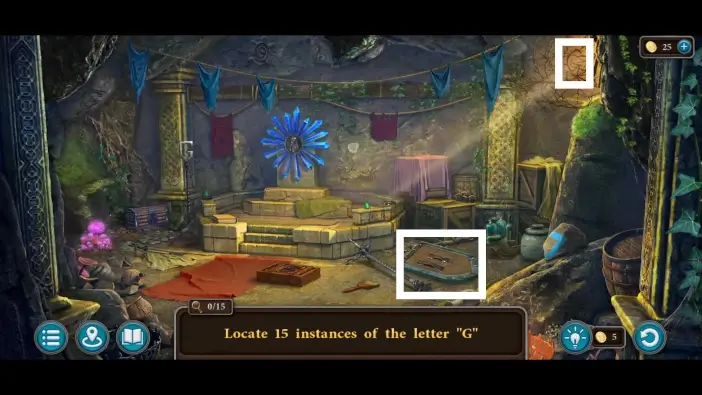
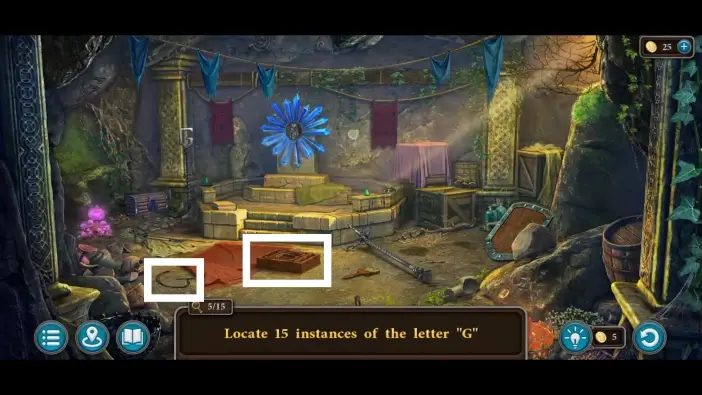
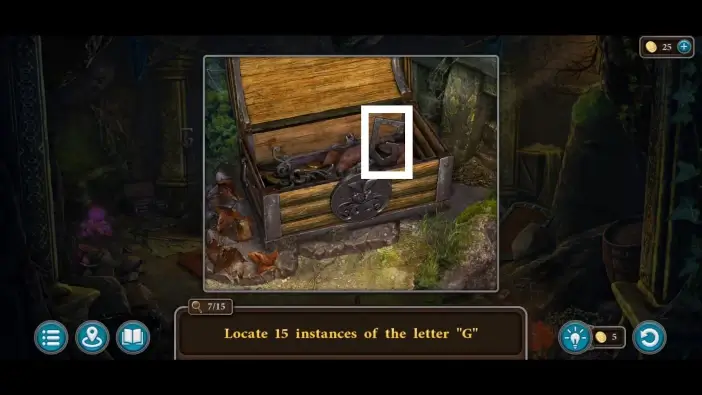
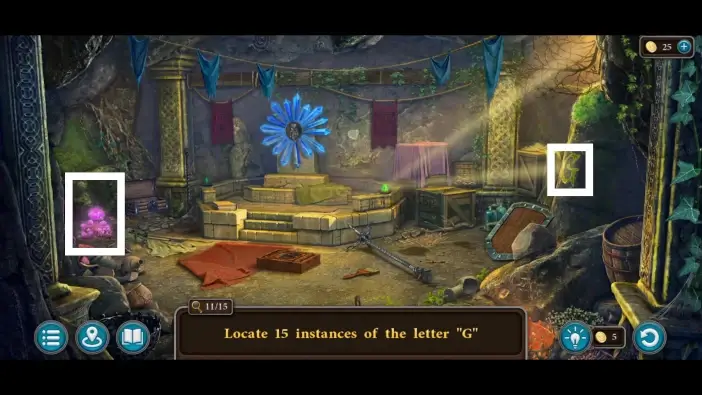
In this mini-game, you’ll need to find 15 instances of the letter “G”. Each time you find a “G” letter, one of the blue crystals will be activated. Click on the items in the pictures in this guide to find them all. Sometimes you’ll need to interact with certain items. For example, in the picture above, you’ll need to tap/click on the shield to move it, because beneath the shield is a “G” letter on the ground.
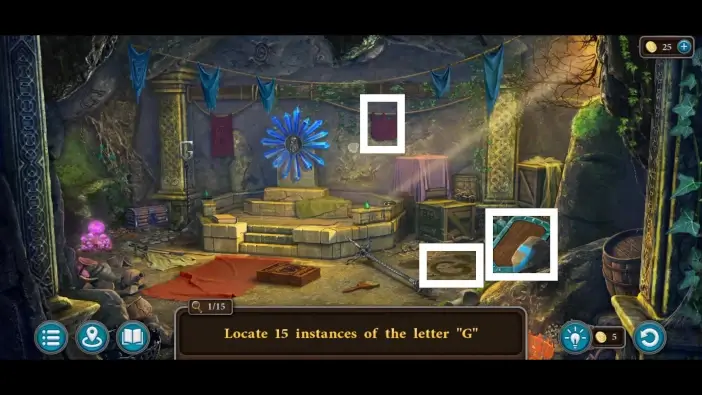
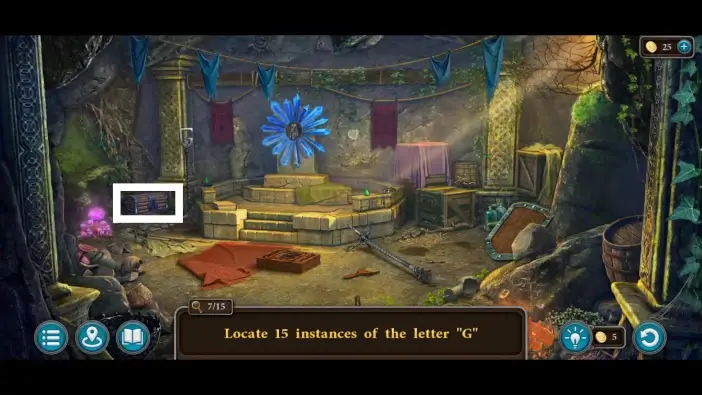
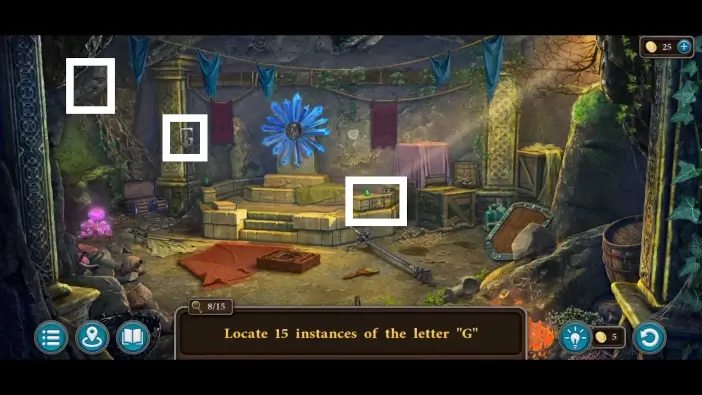
Move the stone next to the shield to form the blue letter “G”, then click on it.
Approach the wooden box to start a new puzzle challenge.
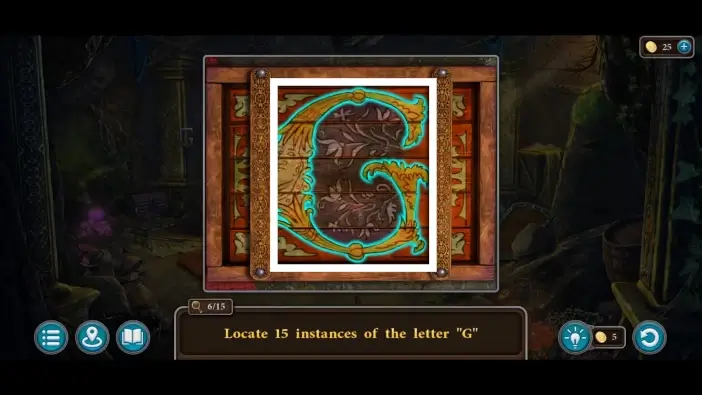
You’ll need to rearrange the boards in the box to form a letter “G”, then click on it.
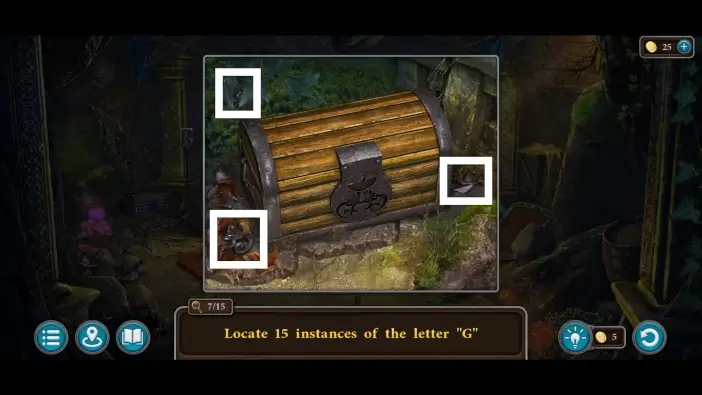
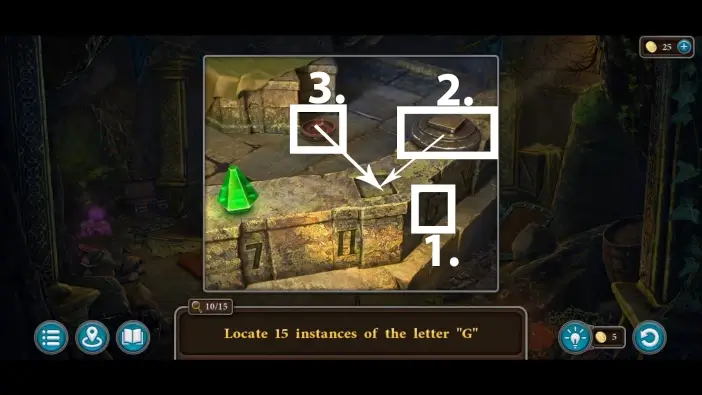
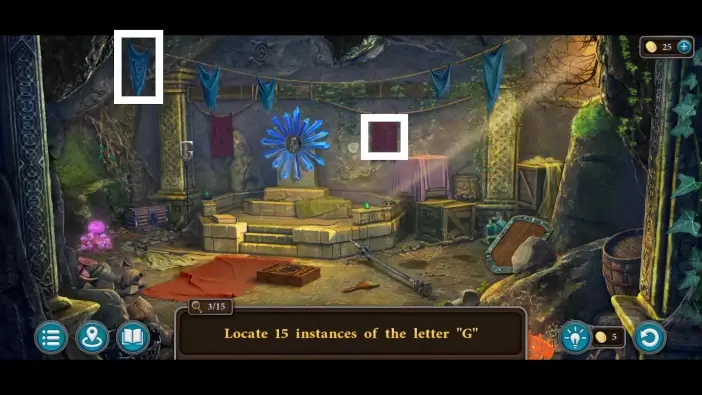
- Click on the G letter on the edge of the stone.
- Place the pedestal in its position.
- Place the second part of the pedestal on the top of the first part.
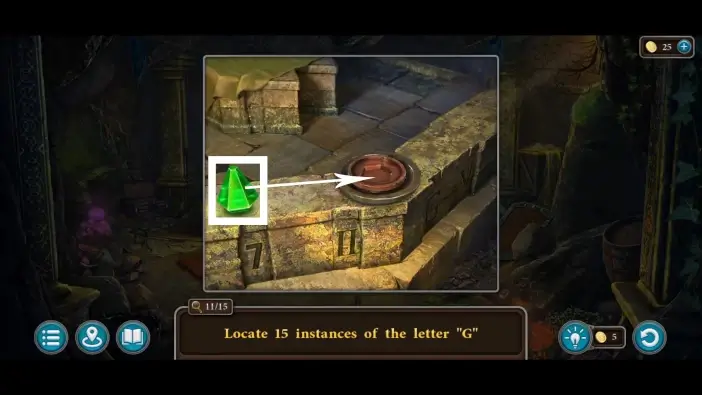
Place the green crystal into the pedestal.
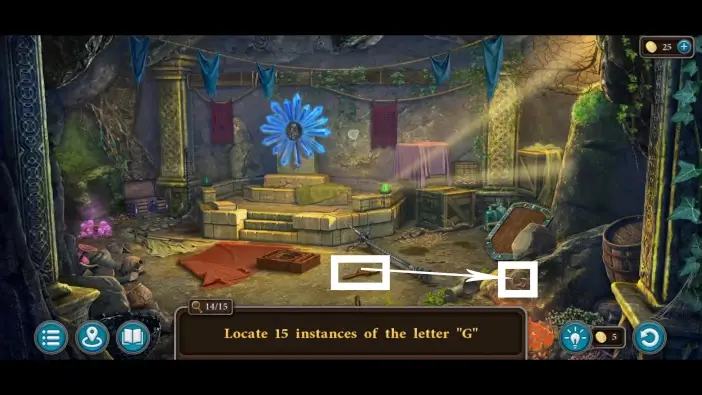
The green crystal will redirect light onto the stone on the right, revealing one more “G” letter.

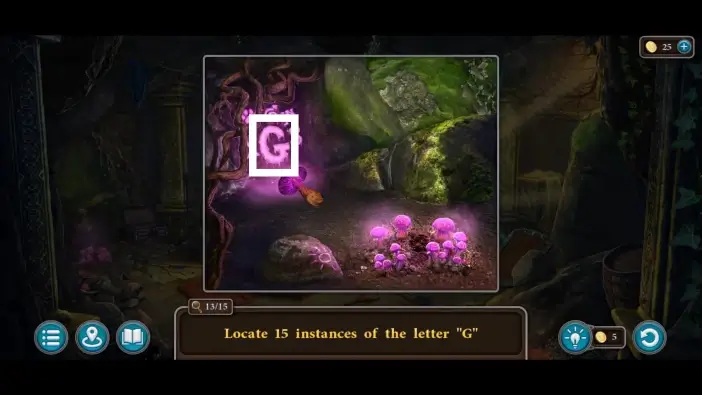
Use the mushroom to reveal another “G” letter on the wall.
Use a brush that is on the ground to clean the stone on the right, revealing one more “G” letter.
Once you find all 15 “G” letters, approach the central crystals and take the bas-relief.
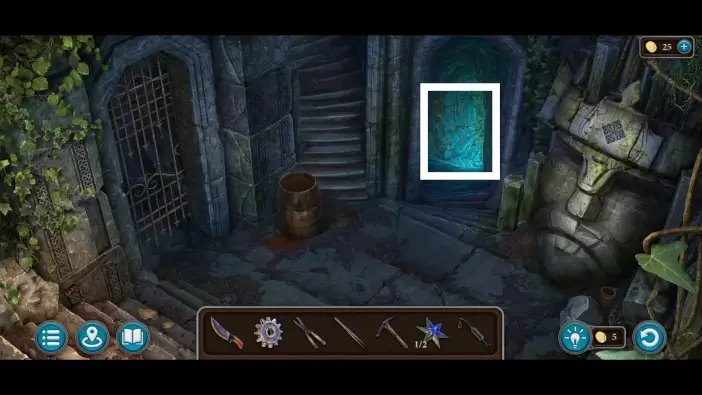
Go to the catacombs entrance and approach the main door.
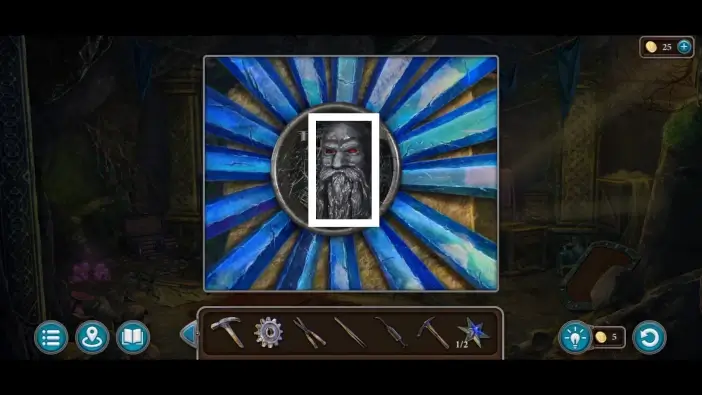
Place the bas-relief into the empty slot on the door. This will start a new puzzle challenge.
Use the two central buttons to rotate two green circles. You’ll need to group runes of one type on the left and runes of the second type on the right. There should be combined runes in the middle. The solution is in the picture above. Once you complete this puzzle, you can enter the catacombs hallway.
In the hallway, use a hammer to open the barrel.
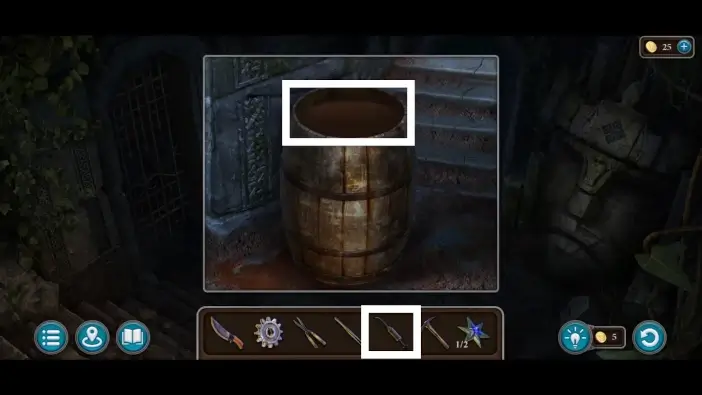
Fill the oiler with the oil from the barrel.
Approach the blocked pathway on the right.
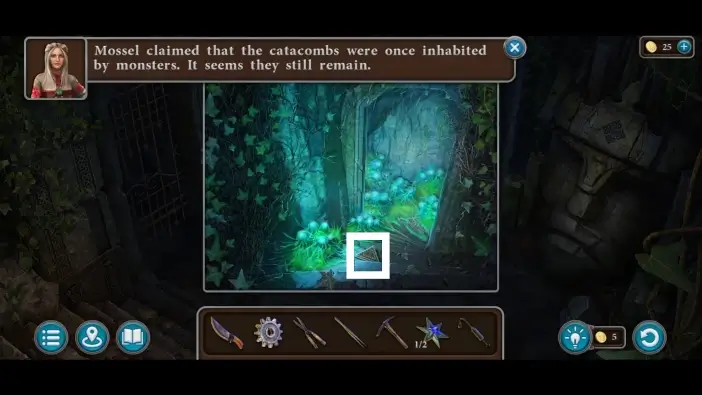
Pick up the first triangle from the stairway. You’ll need three triangles to unlock a chest in the forest area.
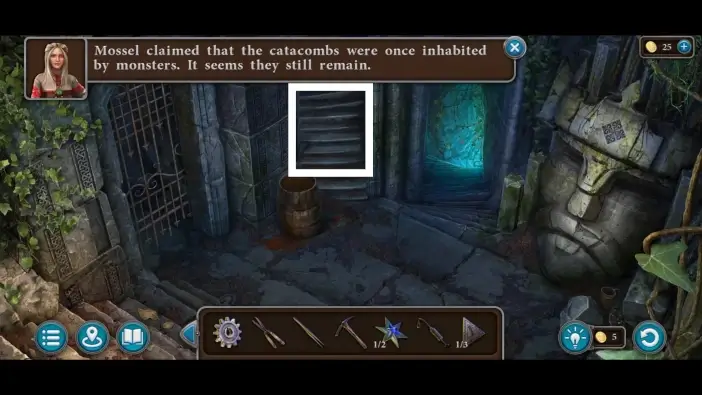
Return to the first section of the hallway and go upstairs.
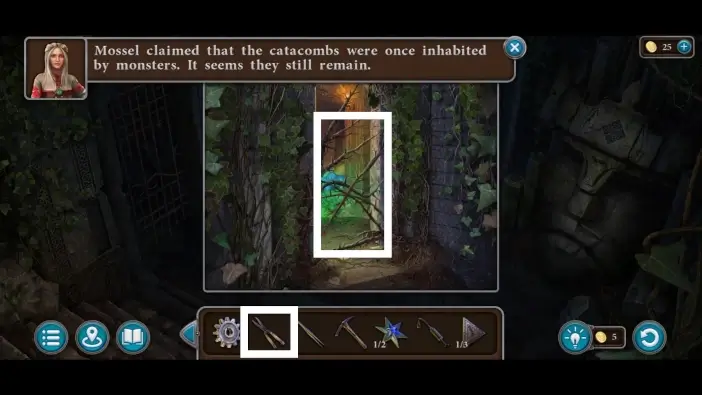
Use the garden scissors to remove the branches from the path. Go further, and a new mini-game will start.
This will mark the end of Part 2 of our guide for Chapter 1 of Legendary Tales 5.
Thank you for reading!