Legendary Tales 4 – Chapter 3: The Map of Hope | Part 2
Intro
Welcome to our walkthrough for Part 2 of Chapter 3 of “Legendary Tales 4” from “FIVE-BN GAMES”. Help Lucia and her brother Ulf reach the werewolf village on the Ultima Lapis island.
Walkthrough
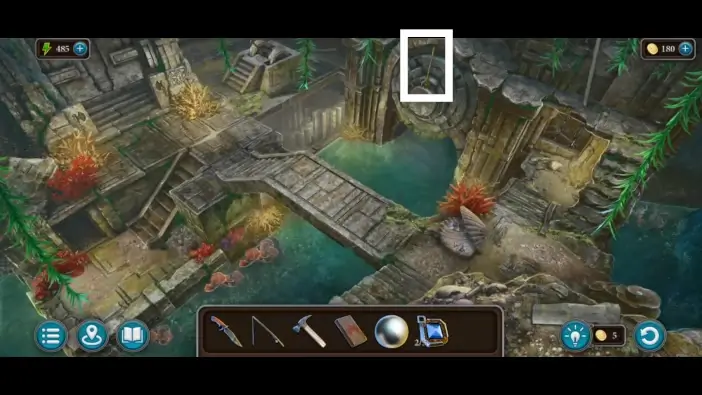
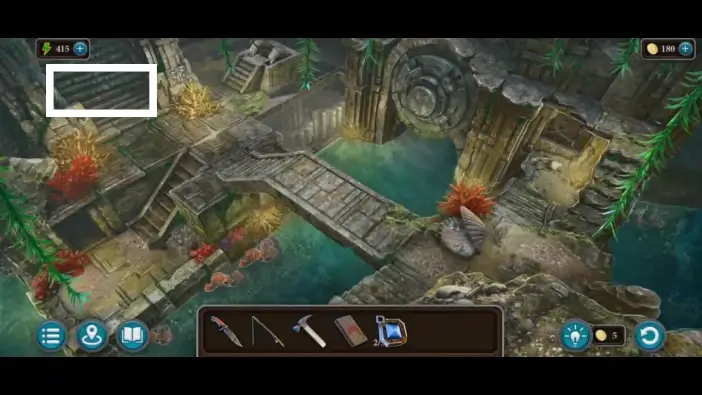
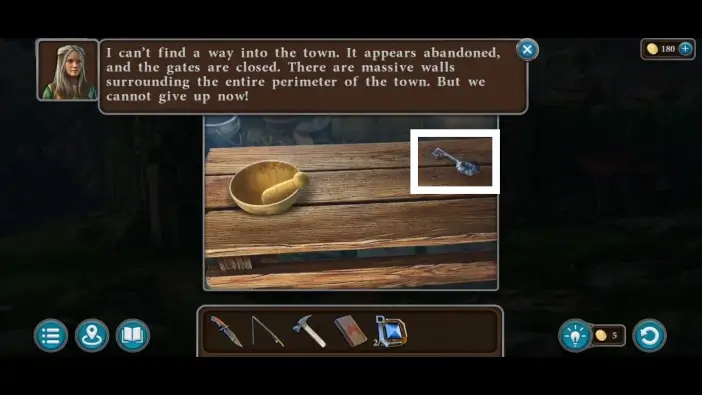
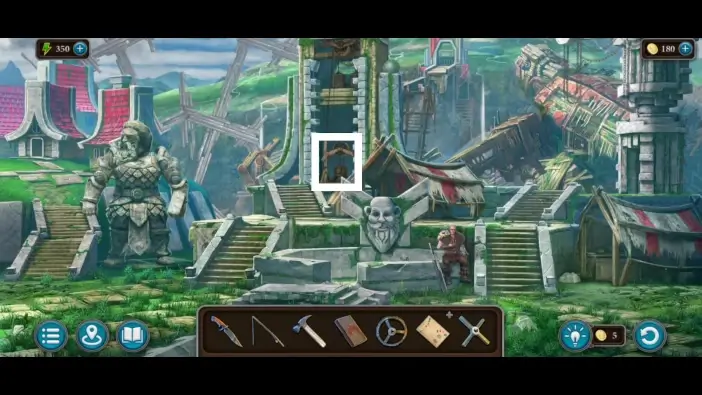
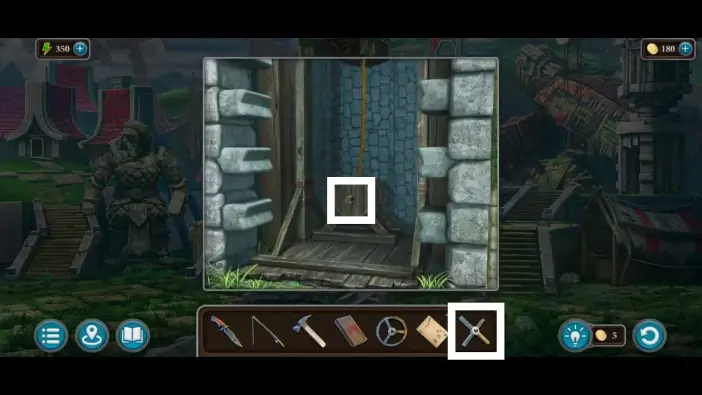
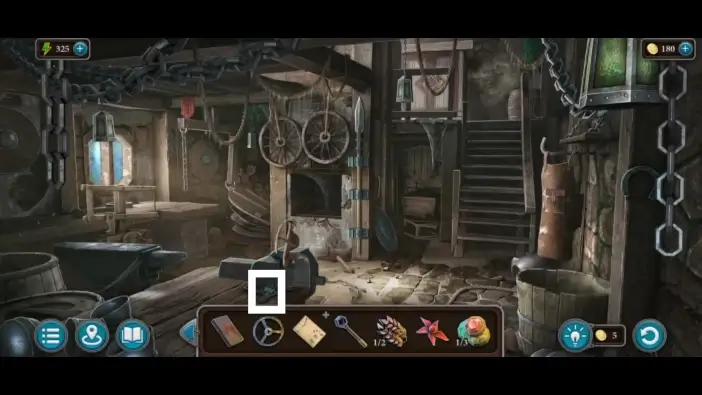
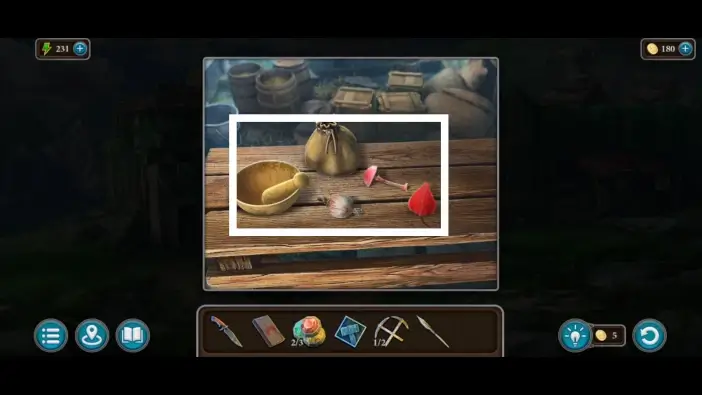
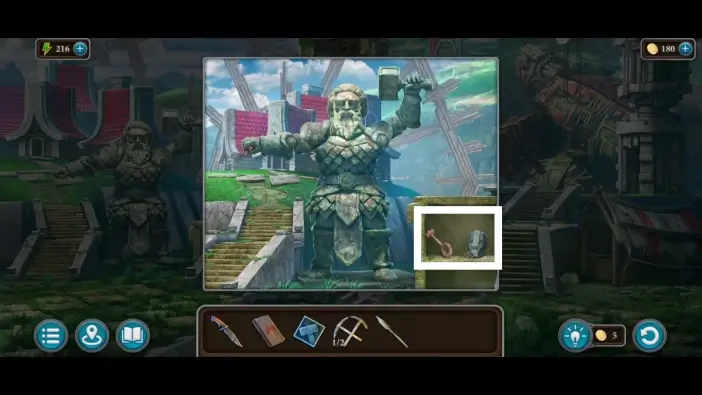
Take the trident above the door to the underwater section.

Return to the statue area and approach the mechanism on the left.
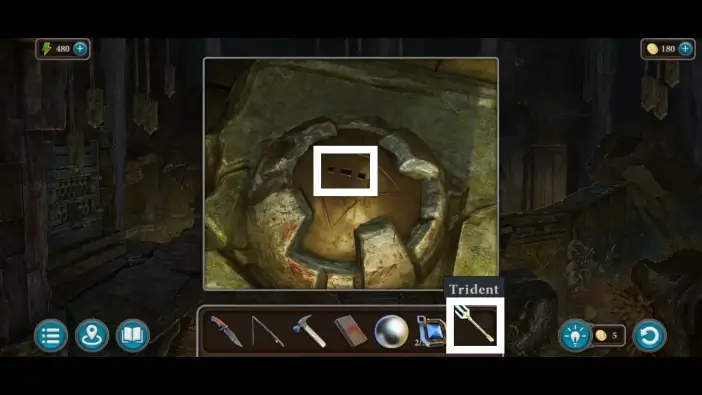
Attach the trident to the mechanism. Use the trident as a lever, and the stone platform will rotate. Position the stone bridge to a position that will help you reach the statue.
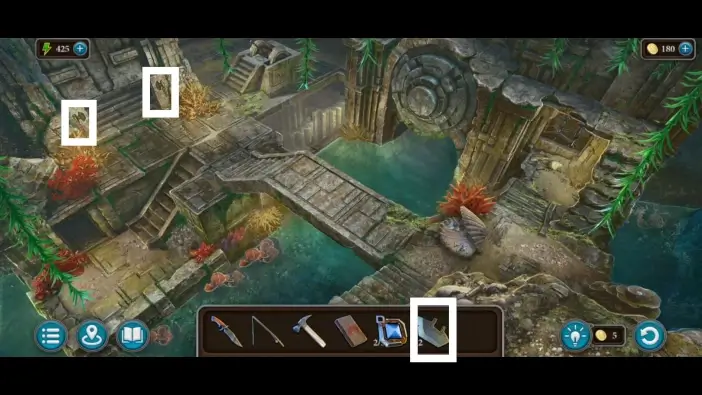
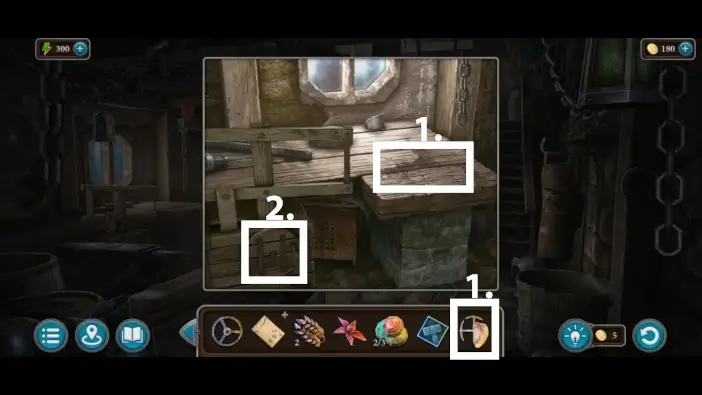
- Take the first board. You’ll need seven boards to extend the stone bridge so you can cross.
- Approach the crack in the stone. There is a second board.
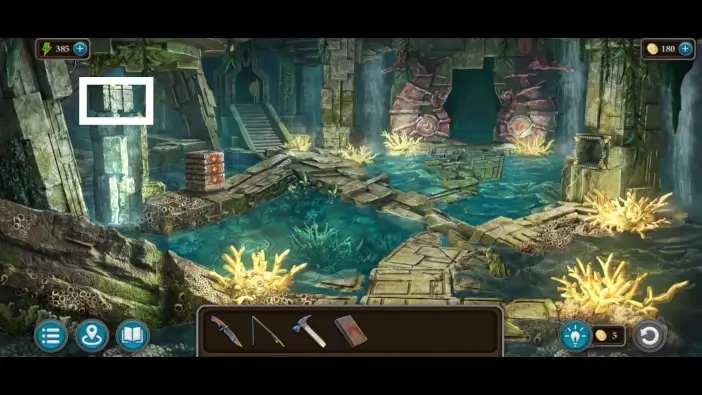
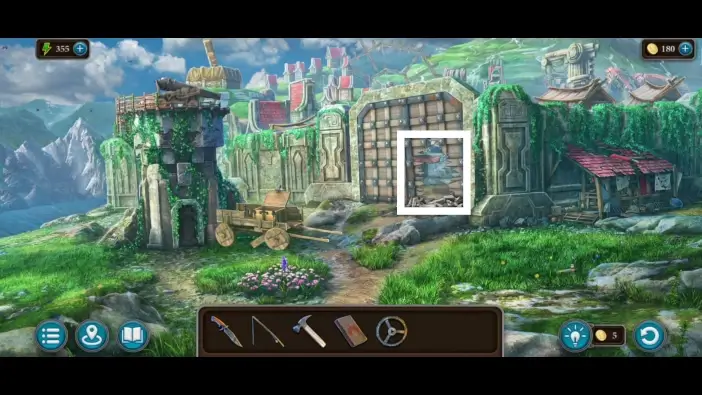
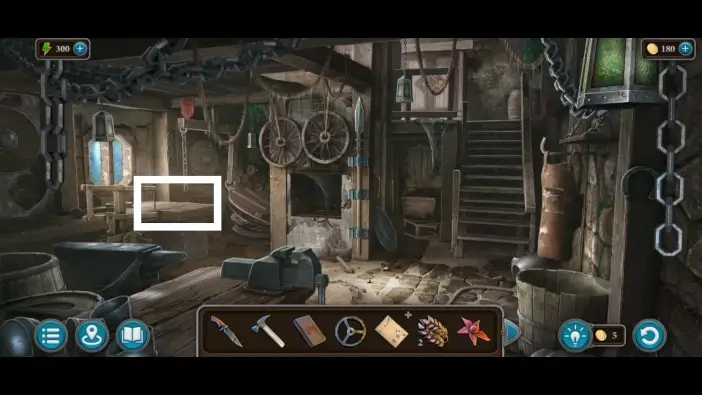
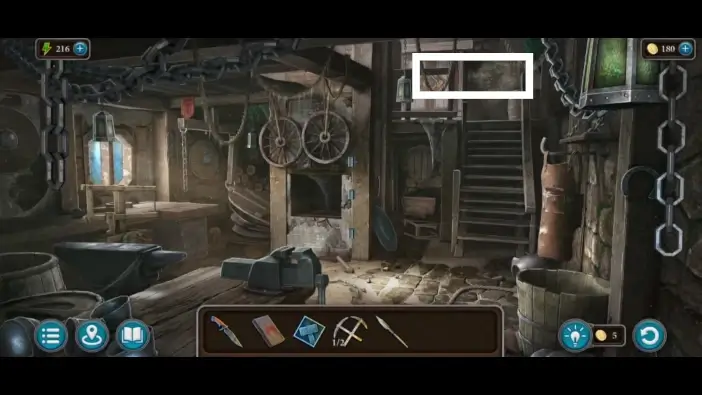
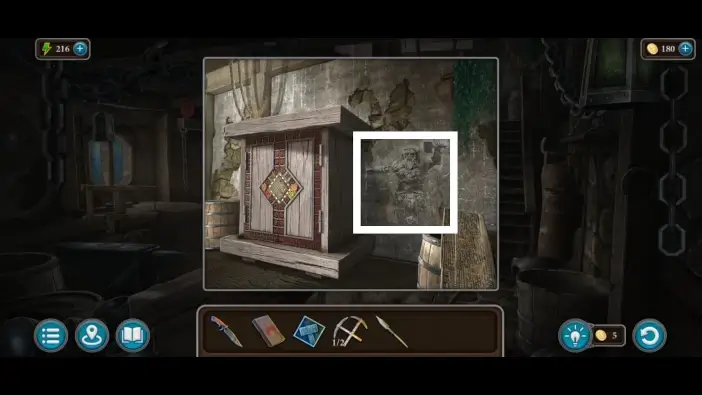
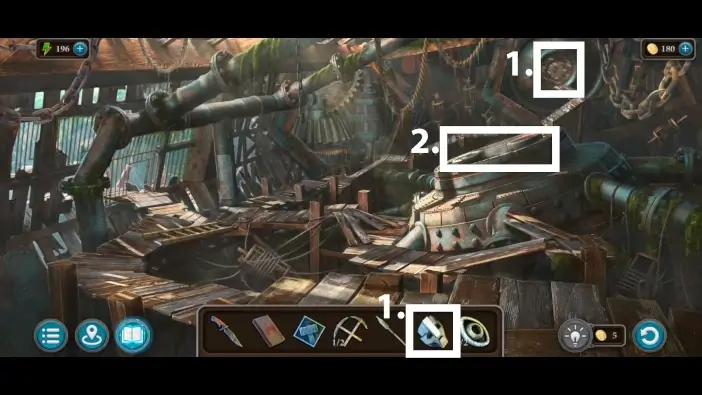
In the flooded area, you can find the third board on the left.
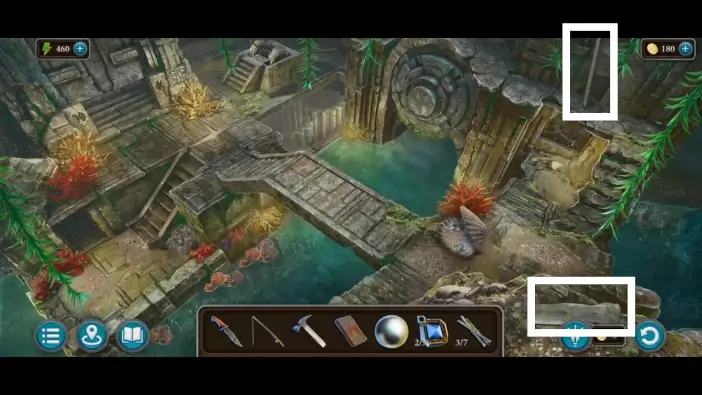
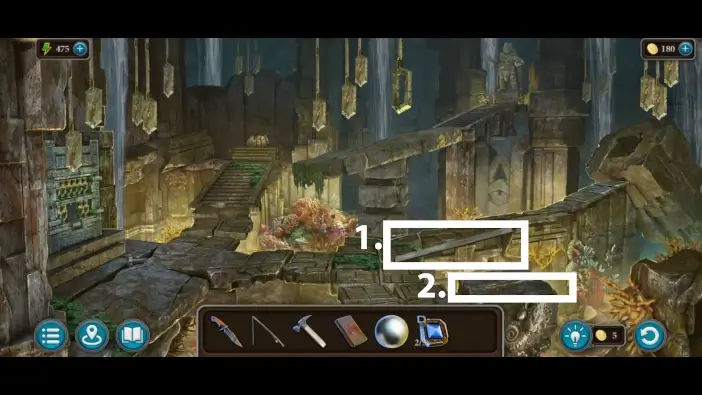
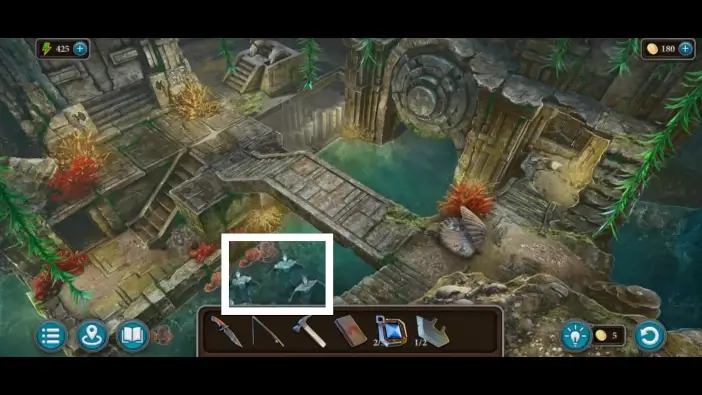
In the hallway, you can find the fourth and fifth boards. Their locations are marked in the picture above.
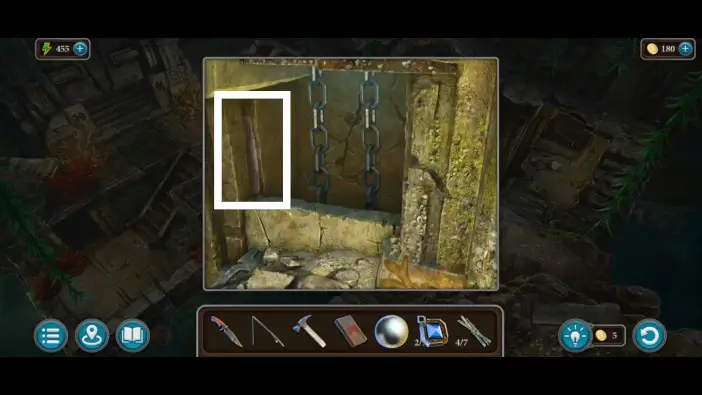
Approach the chains where you picked the brush before, and take the sixth board.

Approach the lever and pick up the seventh board.
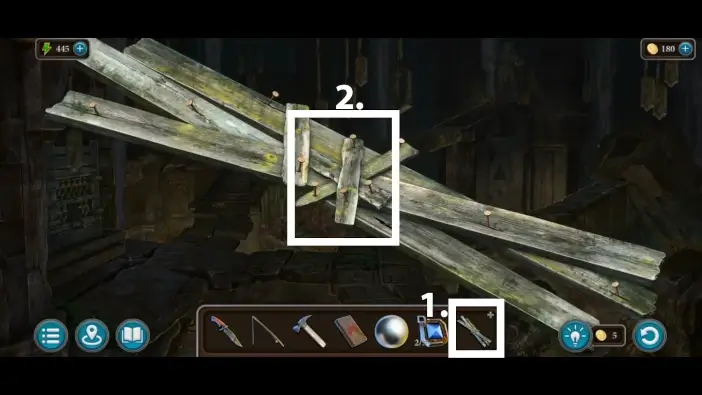
- Tap on the boards in your inventory to examine them.
- Tap on the boards on the screen to rearrange them.
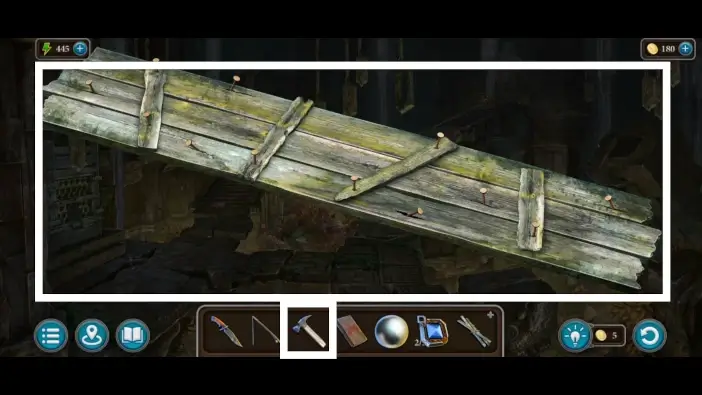
Use a hammer to rearrange and drive the nails. The bridge will be added to your inventory.

- Place the new bridge on the left side of the stone bridge.
- Go to the statue.
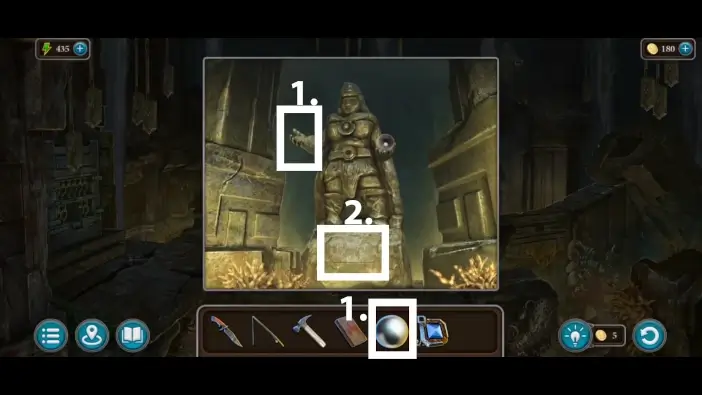
- Place the pearl you found in the seashell on the statue’s hand.
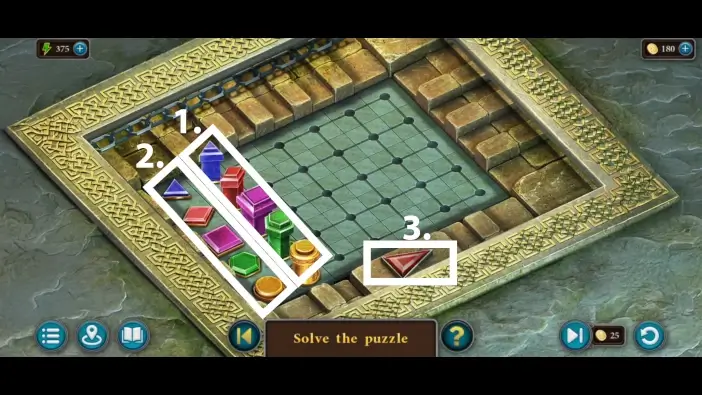
- Approach the puzzle challenge on the lower part of the statue.

Move the fields to their correct rows. For example, the sword and shield row should only have the fields with the same weapons. Once you complete the puzzle, take the first gate key. You’ll need two of these keys to exit the temple.
Go to the temple’s hallway and speak with the Vilas. They will give you the second gate key.
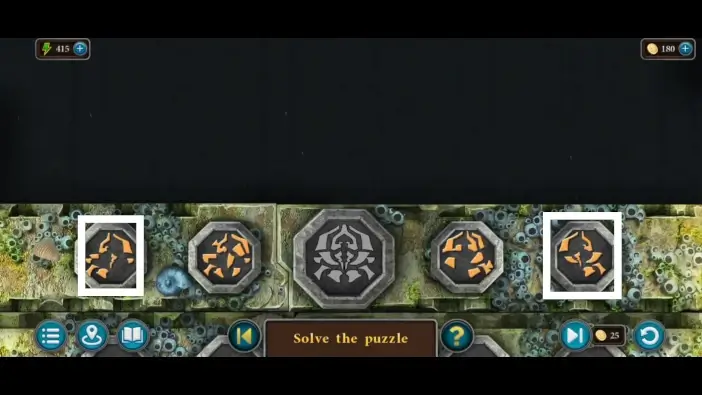
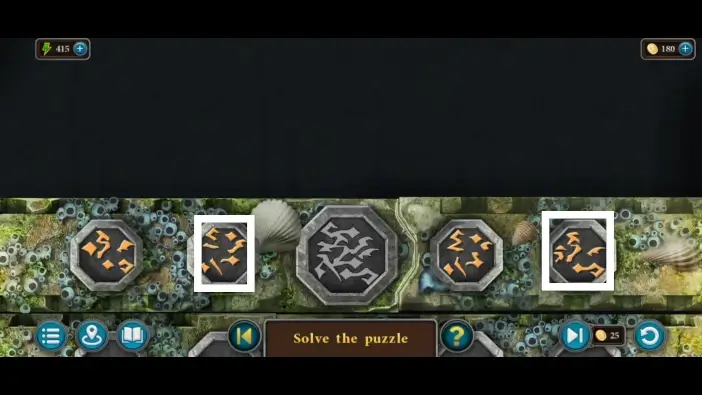
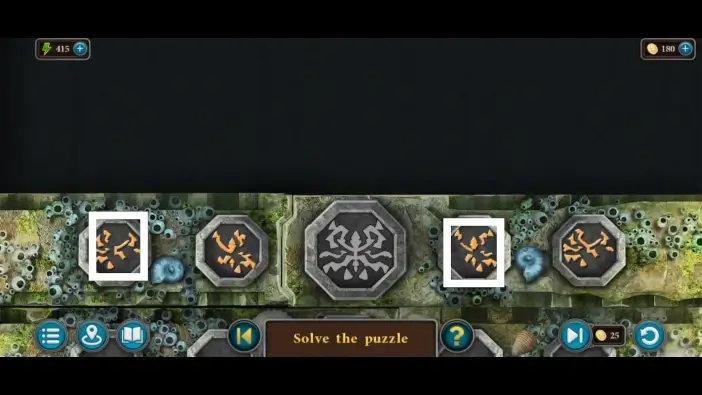
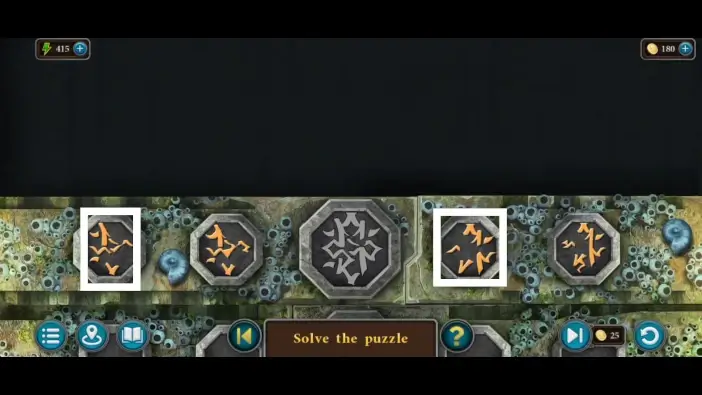
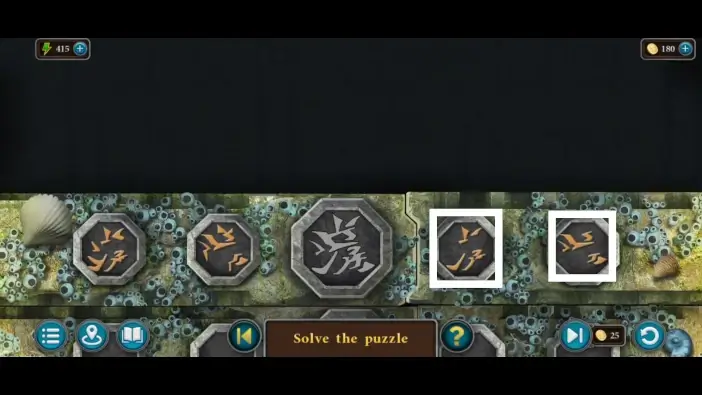
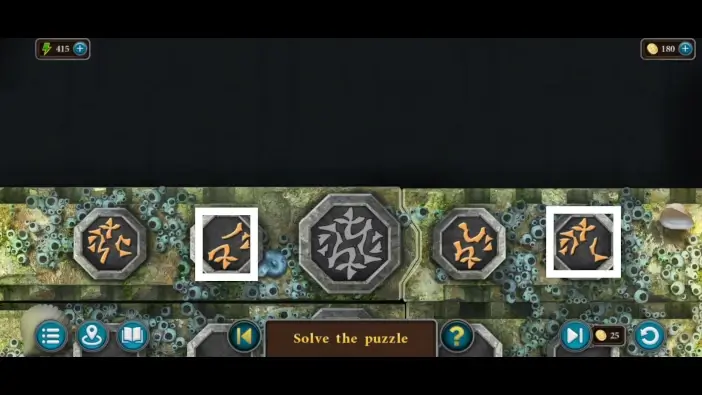
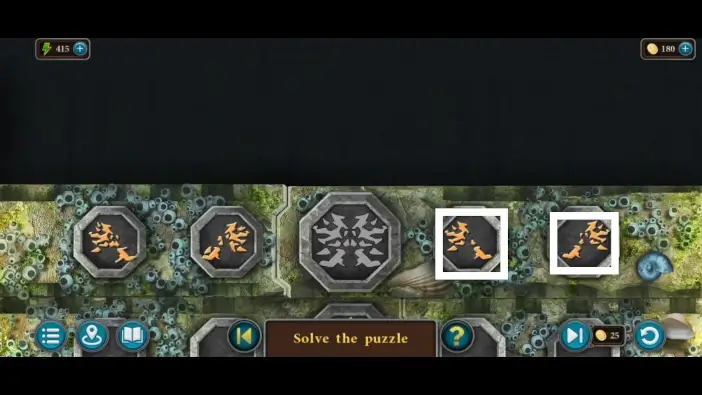
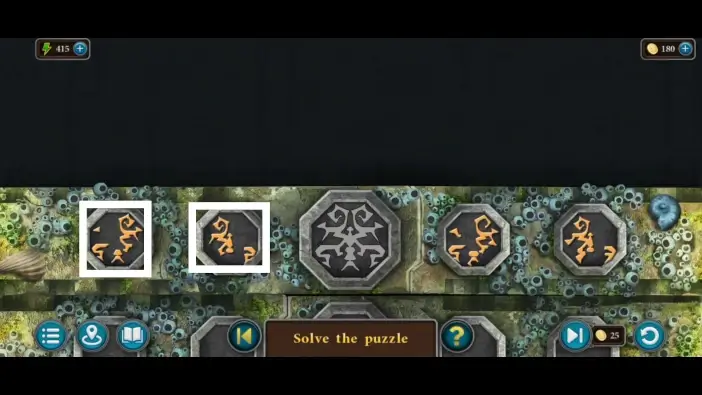
Place the gate keys on both axe-shaped slots near the left exit gate. A new puzzle challenge will begin.
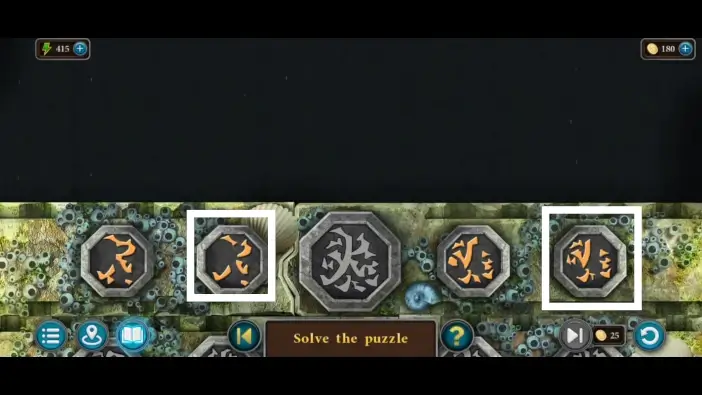
In this puzzle challenge, you need to tap/select the two yellow symbols. These two symbols should be a part of the central symbol, and once they are combined, they should be identical to the symbol in the center. Solve several of these challenges to unlock the exit door.
Once you complete the puzzle challenge, climb the stairs to exit the temple.
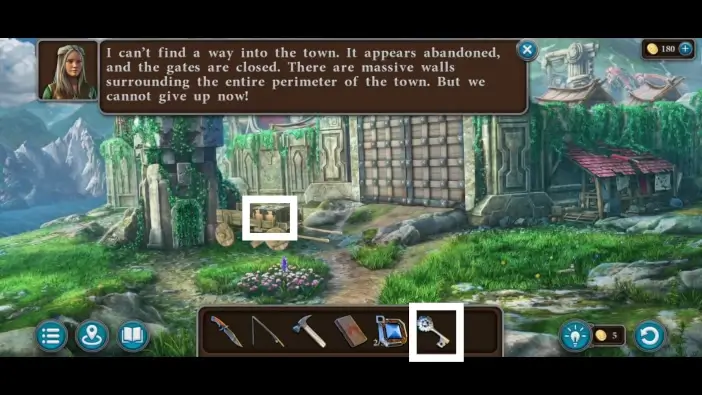
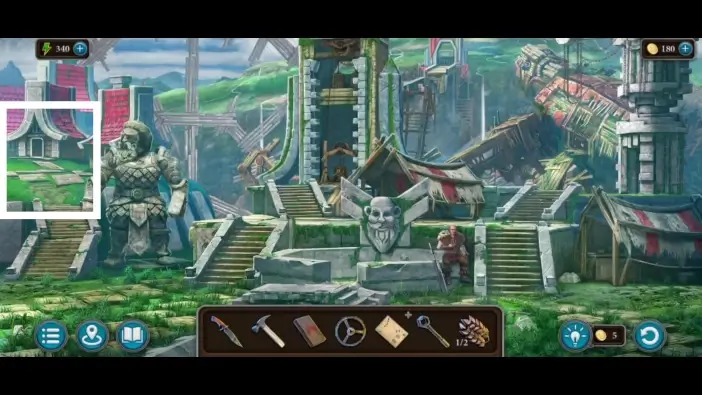
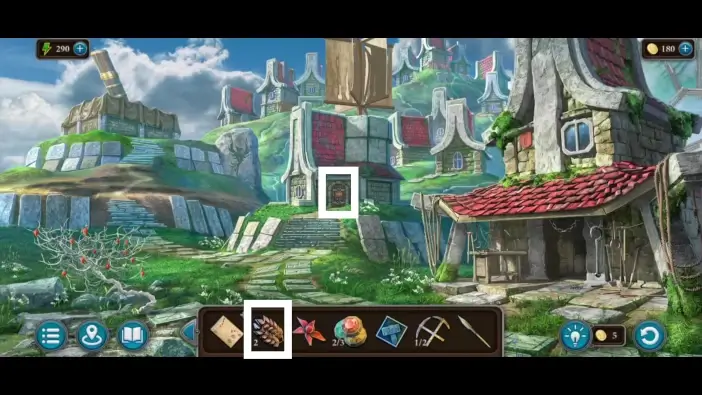
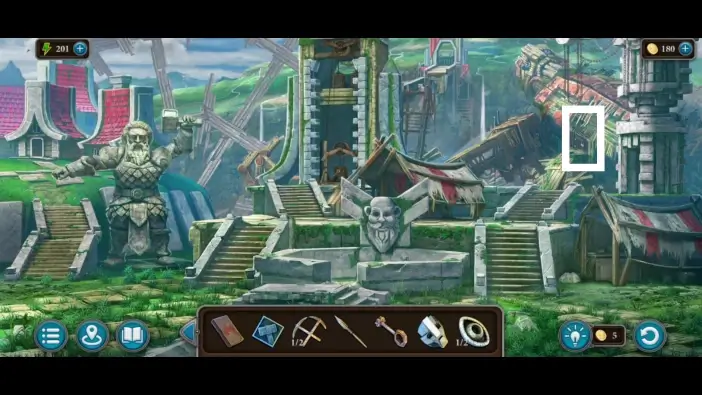
Go towards the town walls.
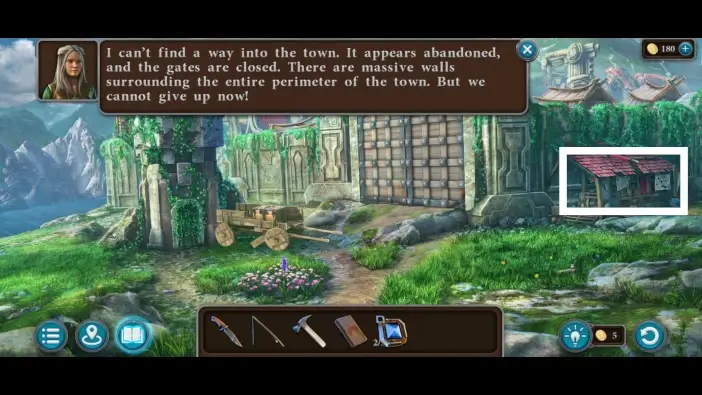
Approach the ruined house on the right.
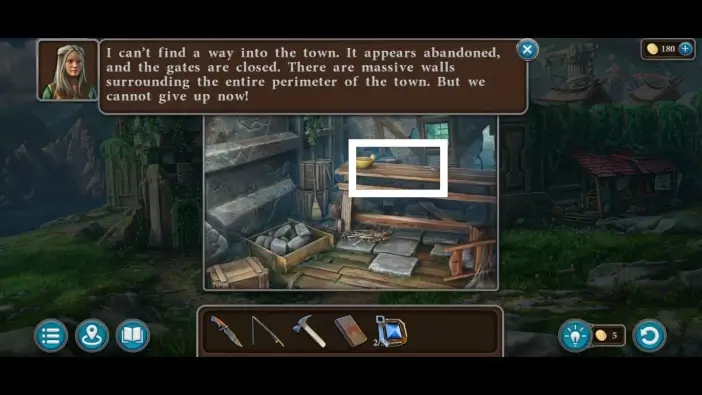
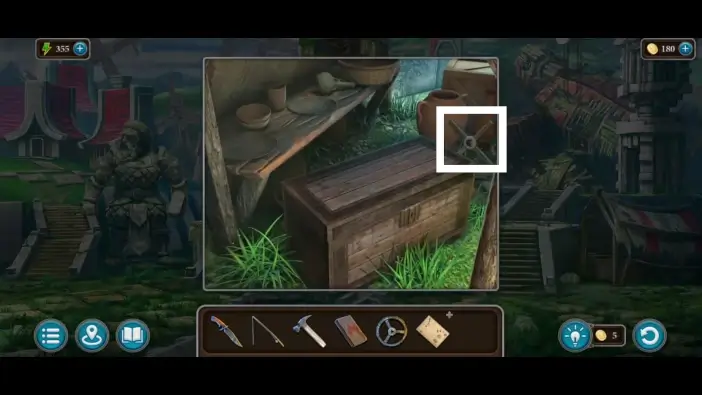
Approach the table.
Take the chest key.
Exit the house and approach the chest on the cart. Use the key you just found to unlock it. Take the third diamond and the glove from the chest.
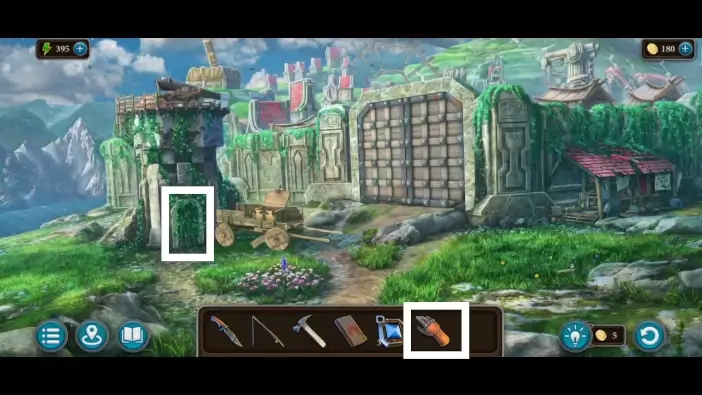
Use the glove to remove the ivy from the tower’s entrance. In the tower, there is a locked compartment on the floor. You’ll need to find the key for it first in the temple.
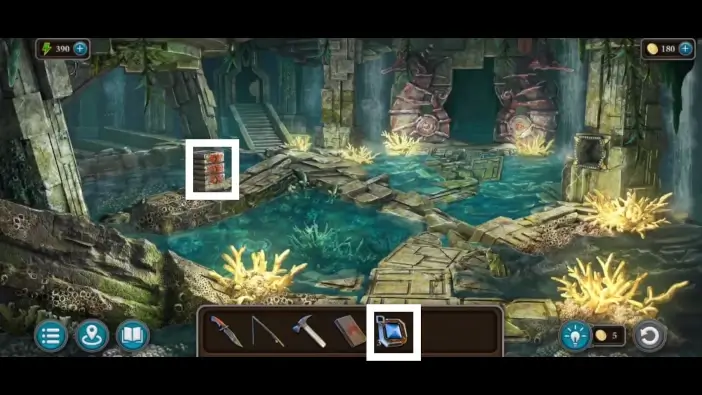
Return to the flooded room of the temple and approach the stone on the left that resembles drawers. Place the three diamonds you collected.
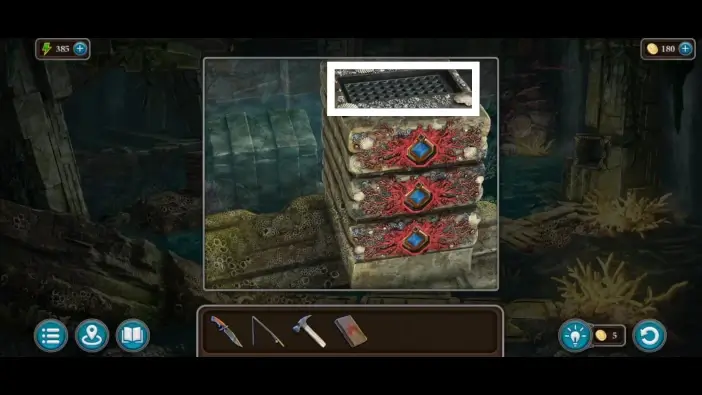
Approach the top of the stone to start a new puzzle challenge.
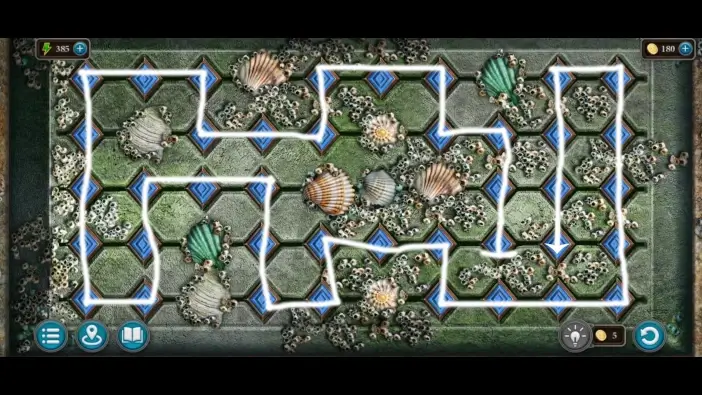
Activate all rhombus fields. When they are activated, they will change their color to blue. You can activate them by following only one path. Follow the path shown with a white line in the picture above.
Once you complete the previous challenge, new columns will rise from the water on the left. Approach the chest from the top of it and take the detail item from the chest.
Return to the town’s walls and enter the left tower. Place the detail on the lid on the floor. A new puzzle challenge will start.
- In this puzzle challenge, you need to move the figurines to the empty slots that have the same shapes as the figurines. For example, the blue triangle figurine must be inserted into the triangle-shaped empty slot.
- On the far left side are the buttons that activate a specific group of nodes and paths between those nodes. For example, if you press the pink rectangle button, the figurines can only move on the highlighted nodes and paths that were activated by the pink button.
- Use the arrow button to move the figurines. Only the figurines that are on the activated path and nodes can move. The rest of them will not move.
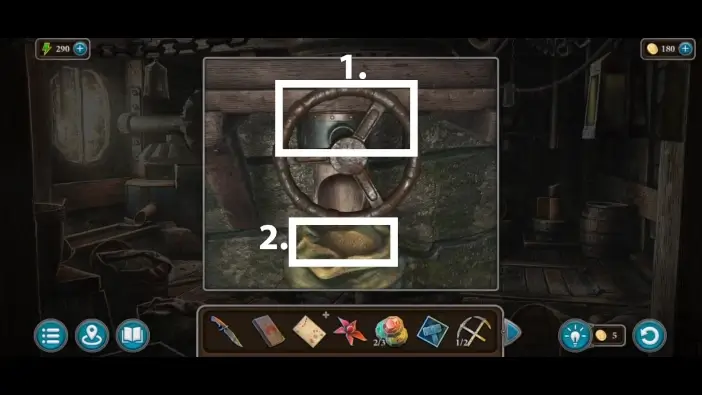
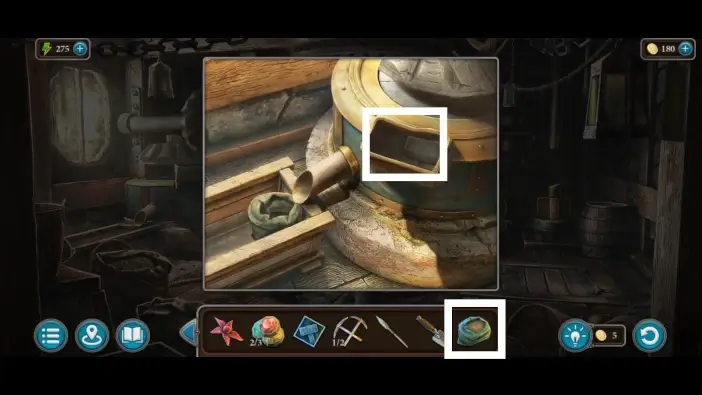
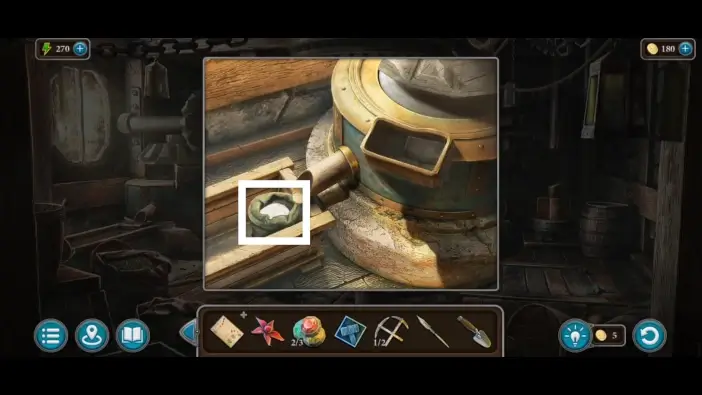
Once you complete this challenge, the compartment on the floor will open. Take the cannonball and gunpowder. They will be as one item in your inventory. Take the valve as well. You will need it later in the mill.
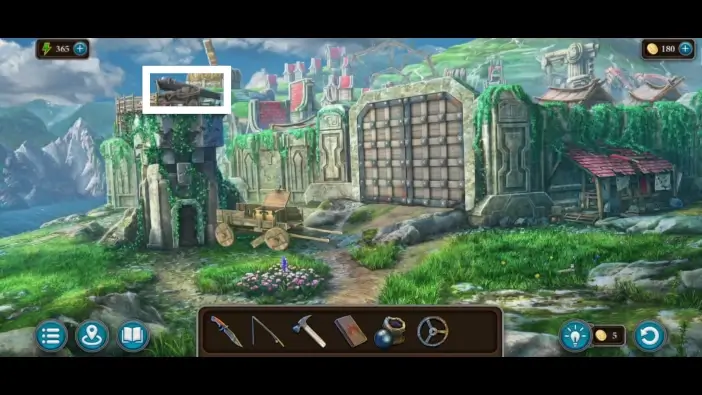
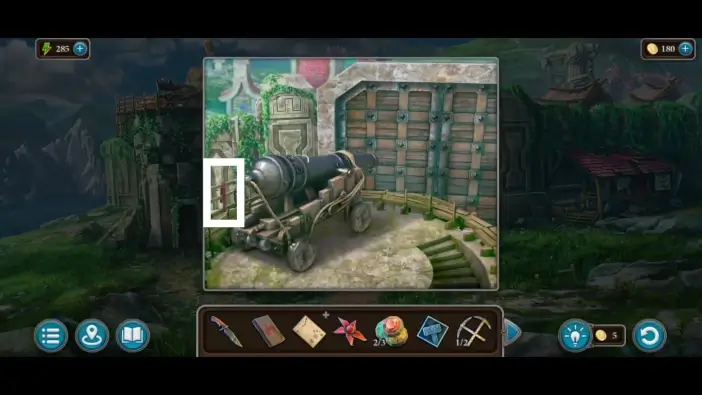
Approach the cannon on the tower.
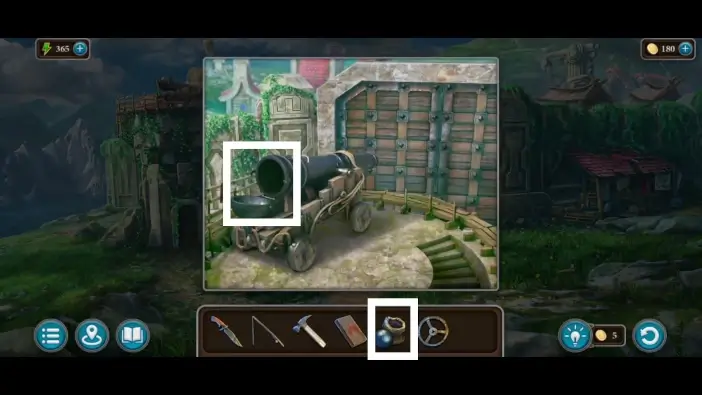
Place the cannonball and gunpowder into the cannon.
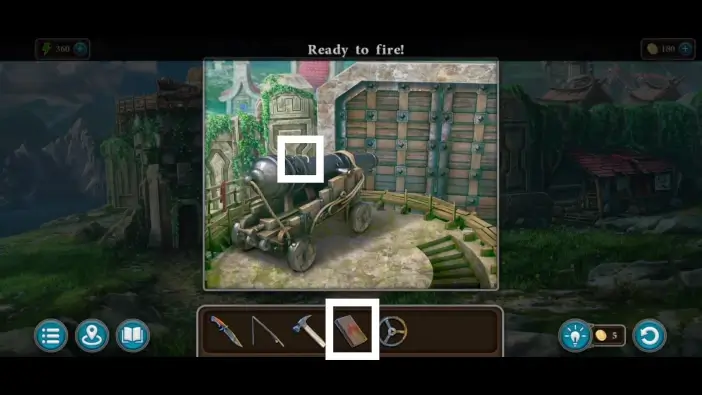
Use matches to light the fuse. The cannon will destroy the gate.
Enter the town through the hole in the gate.
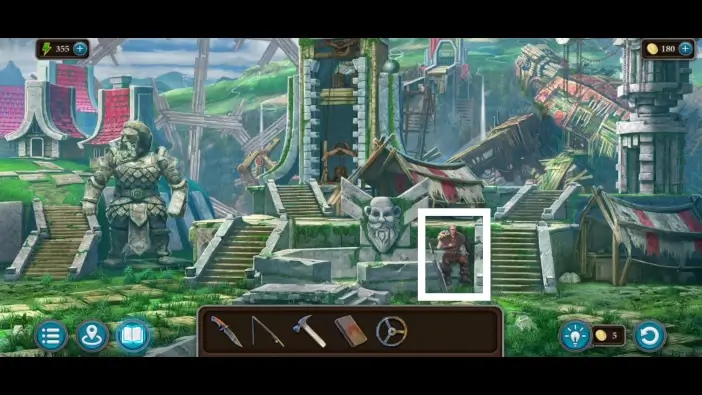
Approach the man at the town square. You will need to heal him before he can help you. He will give you the ointment recipe.
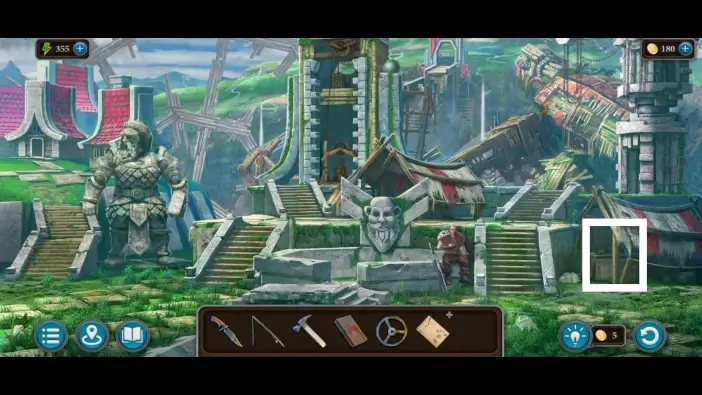
Approach the chest on the right.
Take the handle near the chest.
Approach the elevator mechanism in the central tower.
Attach the handle you just found to the elevator mechanism. The elevator will go up, and you will automatically go to the bridge area.

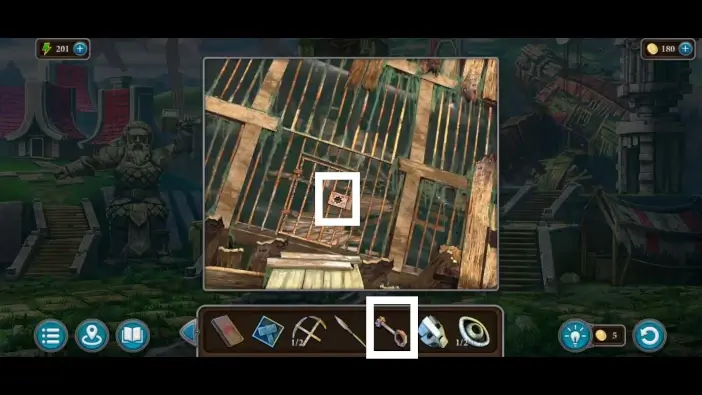
Approach the edge of the broken bridge.
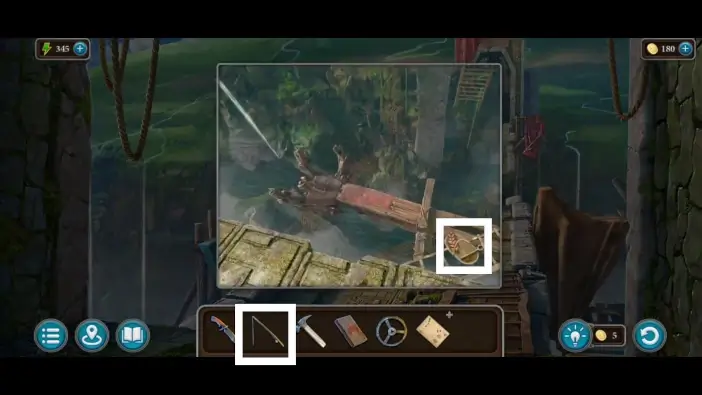
Use a fishing rod to get the basket that contains the items. In your inventory, you will get the handle, which you will use in the workshop, and the first spikelets. You will need two spikelets to unlock the mill building in the town.
Return to the town center and go left.
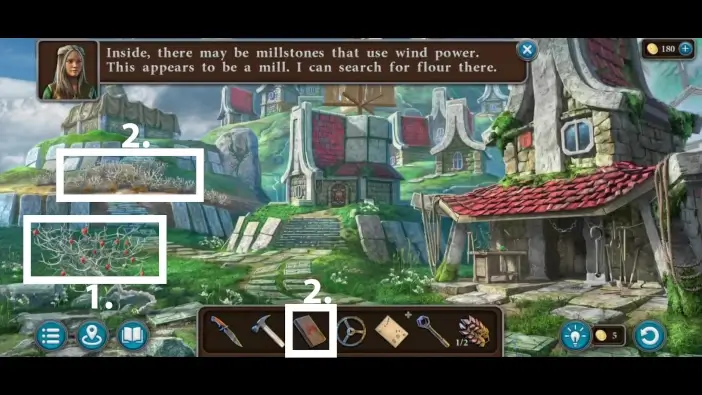
- Take the cape gooseberry. You will need it for the ointment.
- Approach the small trees on the left. Burn them using matches.
Once the trees are burnt, take the first gem. You will use three gems for the puzzle challenge at the monument in the town center.
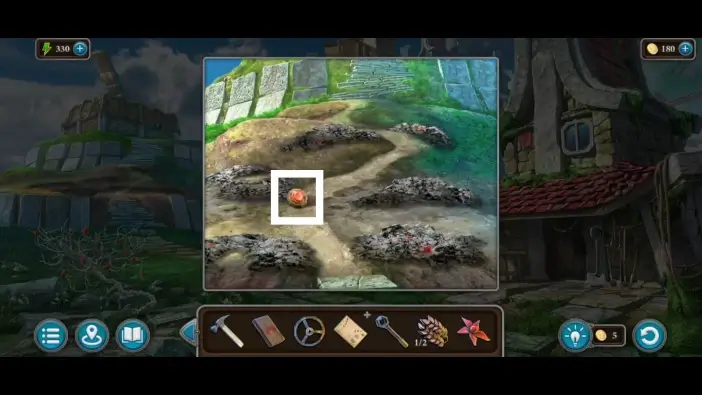
Go to the table near the workshop building.
Take the second gem.
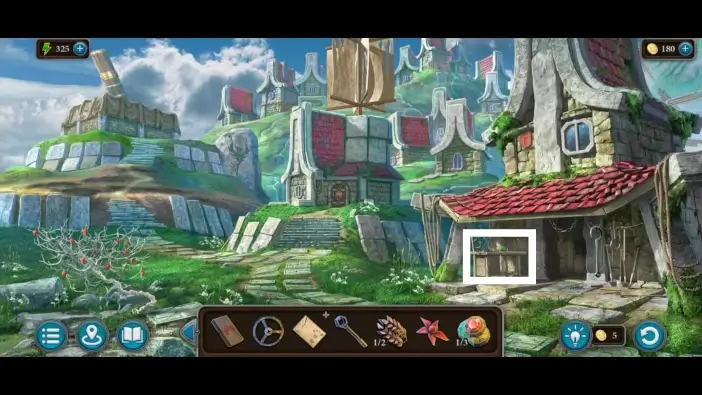
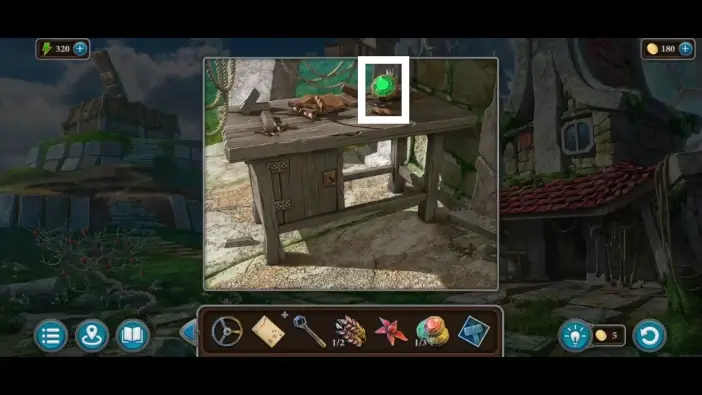
Enter the workshop and take the hammer tile. You will use it together with the anvil tile to unlock a cabinet in the workshop near the end of this chapter.
Place the handle on the machine to release the detail item. The detail item will be added to your inventory.
Approach the leather apron on the right.
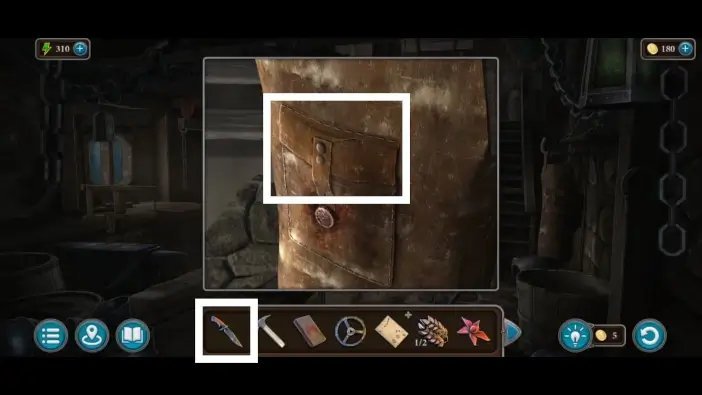
Use a knife to cut the pocket. Take the second spikelets from the pocket.
Approach the desk on the left near the window.
- Place the detail you just found on the table.
- Use the saw mechanism to cut the detail. You will get the properly shaped detail item in your inventory. You will need to find the second one.
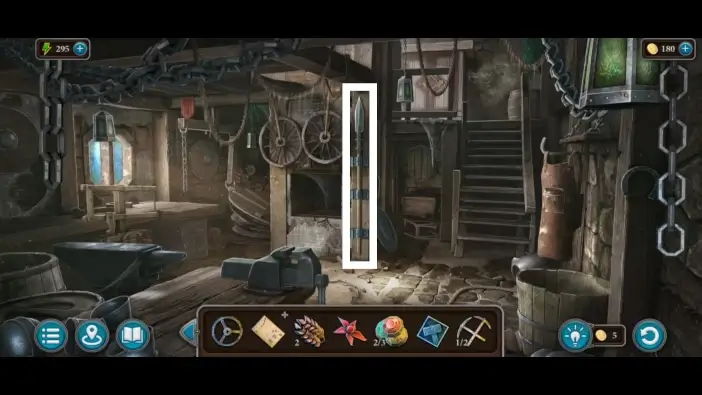
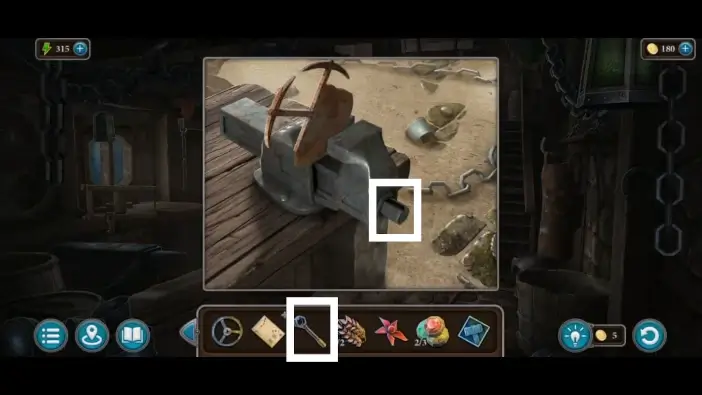
Approach the spear.
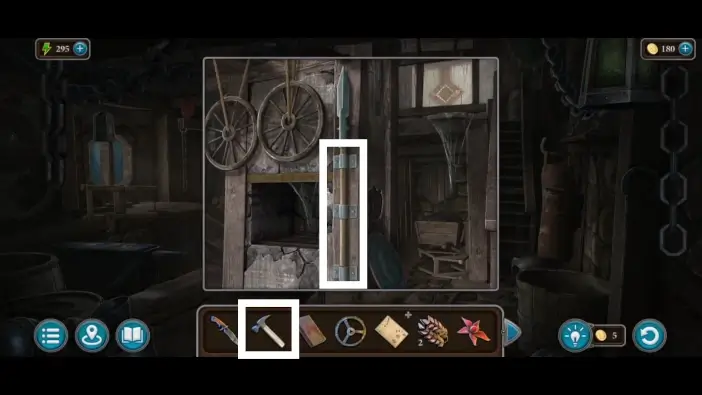
Use a hammer to remove the hinges. The spear will be added to your inventory.
Exit the workshop and unlock the mill using the two spikelets. A new puzzle challenge will begin.
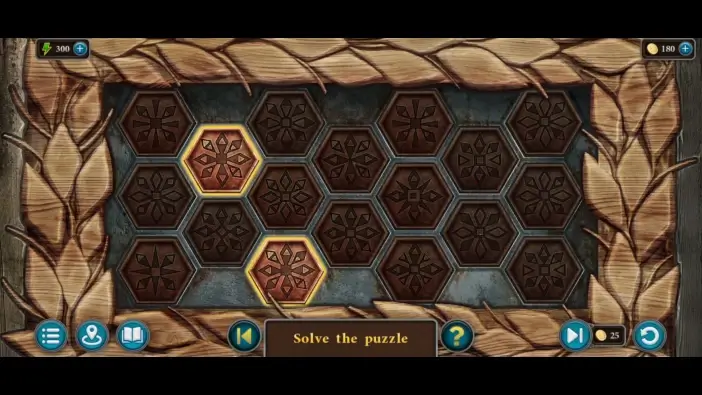
In this puzzle challenge, you need to select two identical hexagons. Over time, the number of active hexagons will decrease until there are none left. Once you solve this puzzle, you will unlock the mill. Enter the mill.
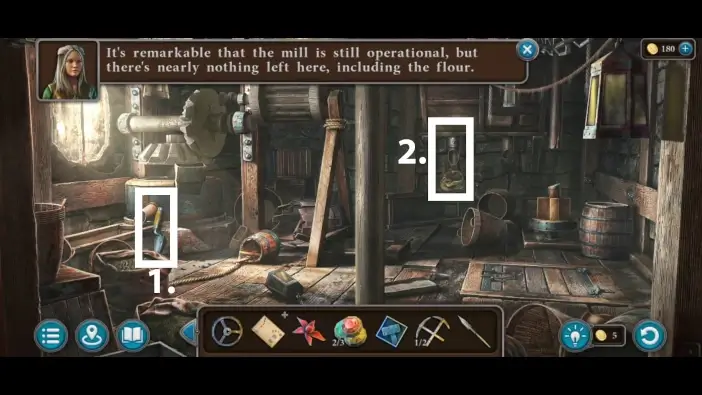
- In the mill, take the garden trowel on the left. You will need it to harvest the bulb of a recinth.
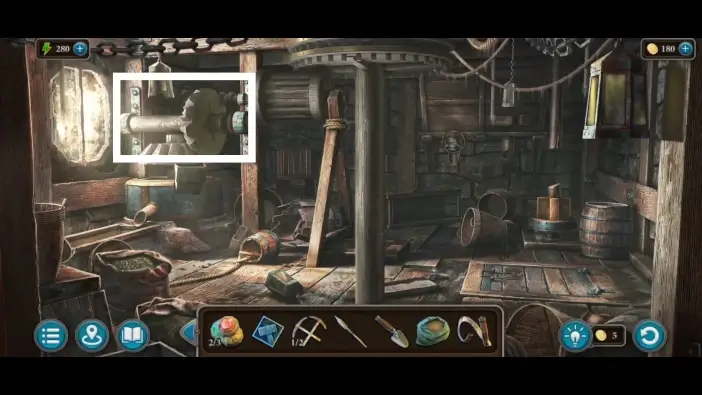
- Approach the pipe.
Attach the valve to the pipe.
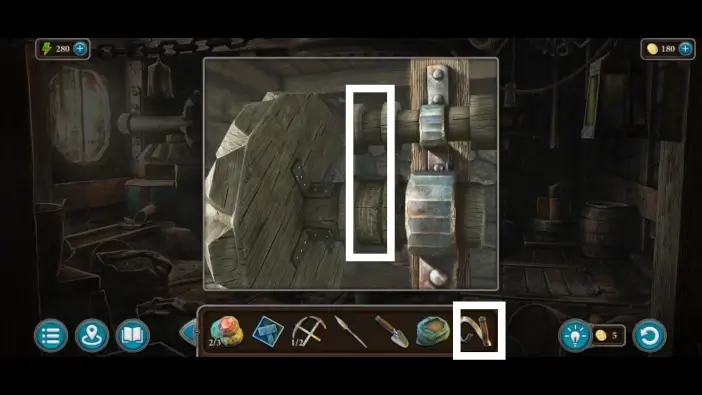
- Turn the valve to pour grain into the sack.
- Take the grain. You’ll need to find a way to make flour.
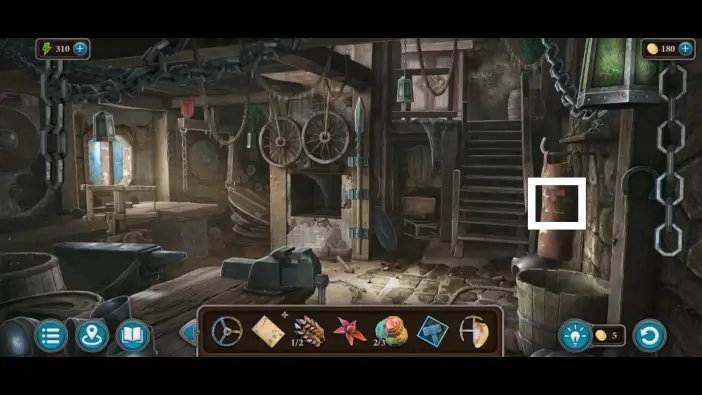
Return to the cannon and take the belt on the edge of the tower.
Go to the mill and approach the mill wheel.
Place the belt on the mill wheel.
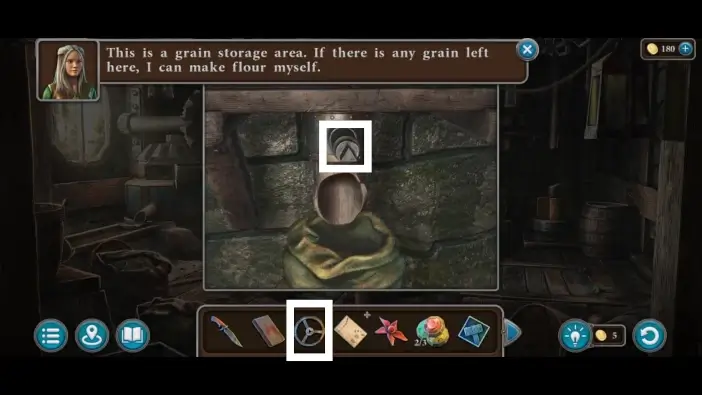
Approach the pipe that is below the mill wheel and pour the grain into the container.
Take the flour. You will need it for the ointment.
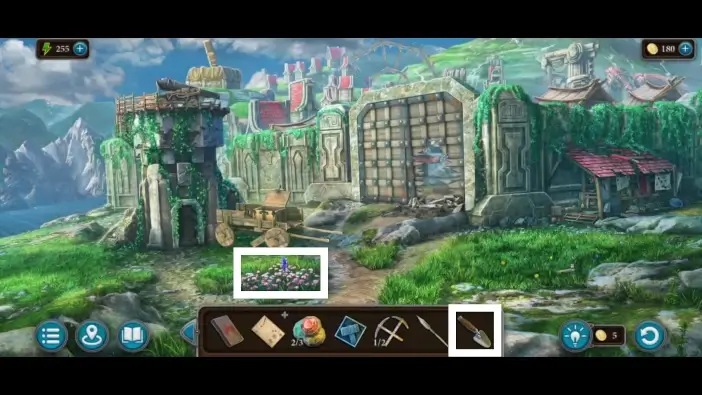
Go to the area outside the town’s walls and use the garden trowel to get the bulb of a recinth. You will need it for the ointment.
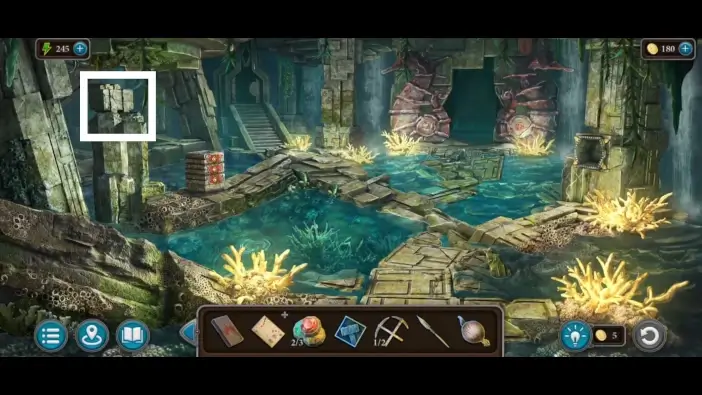
Go to the flooded area of the temple and approach the chest on the column you raised before.
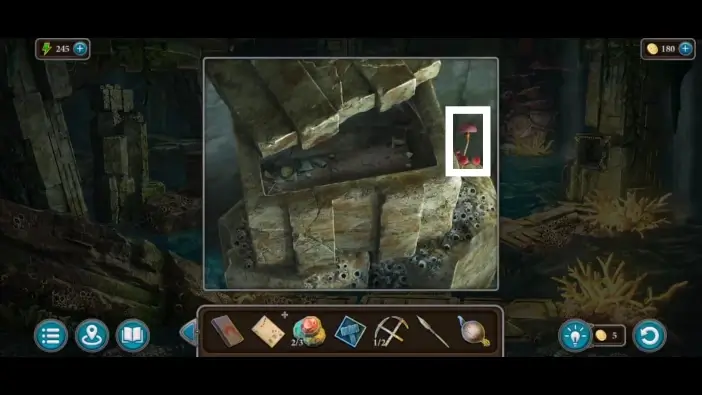
Take the water mushroom near the chest. You will need it for the ointment.
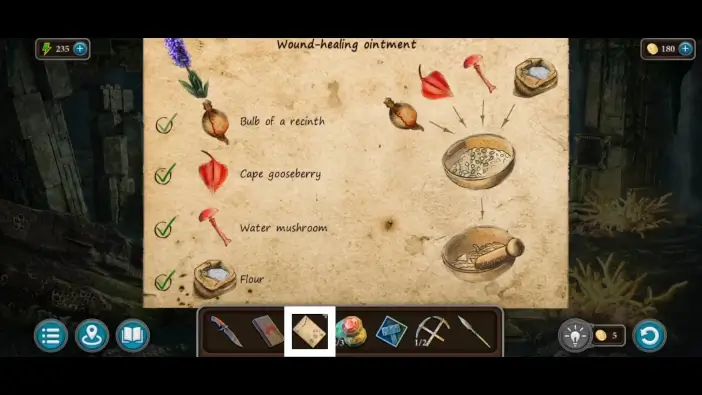
Tap on the recipe for the wound-healing ointment. Tap on the flour in your inventory and then on the paper to check the list item. Repeat the steps for the bulb of a recinth, the cape gooseberry, and the water mushroom. After this, the “ointment ingredients” item will be added to your inventory.
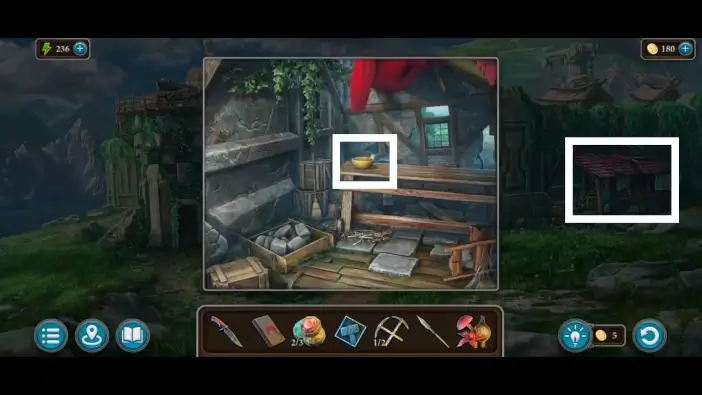
Go to the ruined house on the right, outside the town’s walls, and approach the table.
Place the ointment ingredients on the table.
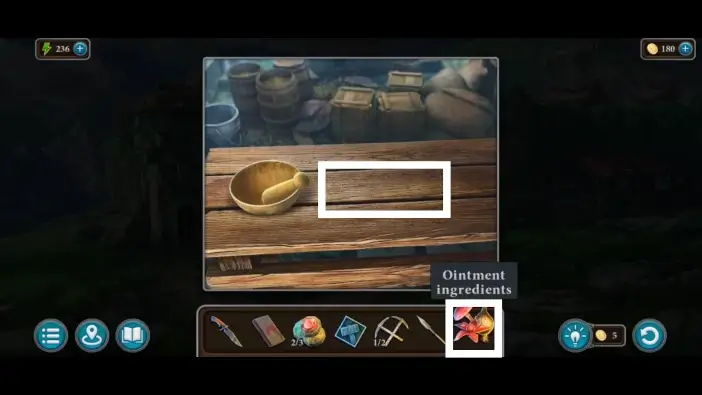
Tap/click on the ingredients to create the ointment. Take the ointment from the table.
Give ointment to the mysterious traveller to heal him. A cutscene will begin. After the conversation, the man will give you the third gem.
Approach the monument on the left.

Place the three gems on the stone next to the monument.
Return to the workshop and climb upstairs to see the clue for the monument puzzle.
Remember the position of the drawn monument on the wall.
Use the gems to move parts of the monument. Change the monument to look like in the picture above to open a hidden compartment. Take the key to the golem, the mask, and the first eye. You will use the mask to unlock an area inside the golem, and you will need two eye-shaped items for the fountain in the town center.
Approach the golem.
Unlock the gate using the key you found near the monument.
- Place the mask on the gate. Before doing the puzzle challenge for unlocking this gate, you should find the Fire Crystal and Ice Crystal for the heart of the golem.
- Approach the heart of the golem.
Take the key.
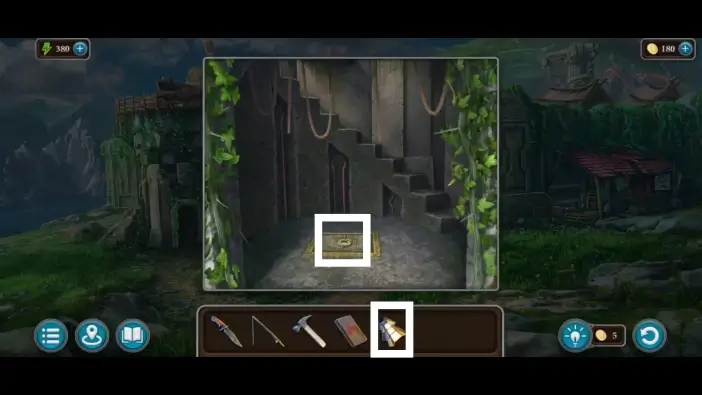
Go to the workshop and approach the trapdoor.
Use the key that you found on the heart of the golem to unlock the trapdoor. Pick up the first amphora. You will need two amphoras to start a puzzle challenge in the temple, in the statue area.
This will mark the end of Part 2 of our guide for Chapter 3 of Legendary Tales 4.
Thank you for reading!