Legendary Tales 4 – Chapter 3: The Map of Hope | Part 1
Intro
Welcome to our walkthrough for Part 1 of Chapter 3 of “Legendary Tales 4” from “FIVE-BN GAMES”. Help Lucia and her brother Ulf reach the werewolf village on the Ultima Lapis island.
Walkthrough
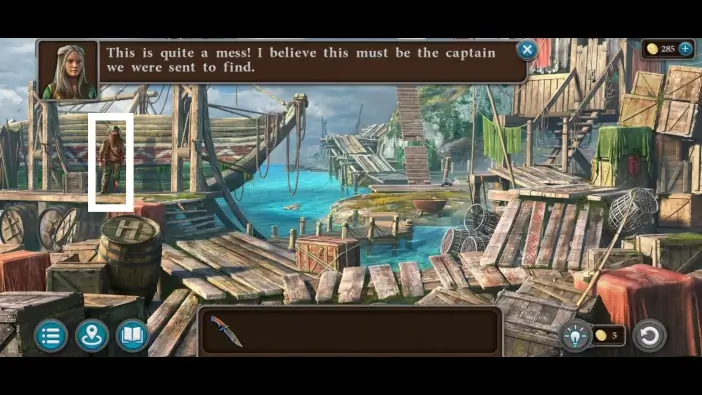
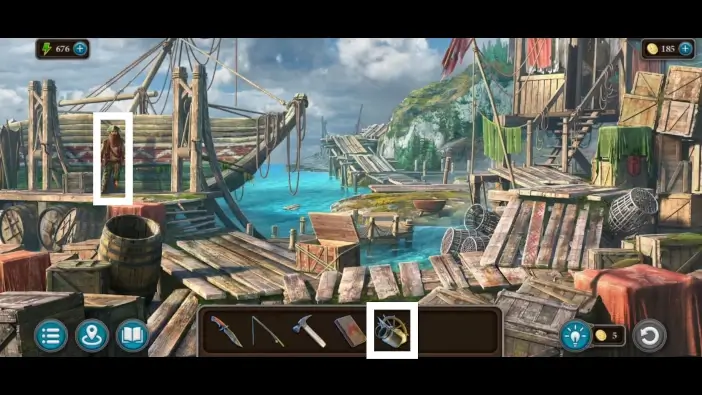
Speak with Captain Brodovitch.

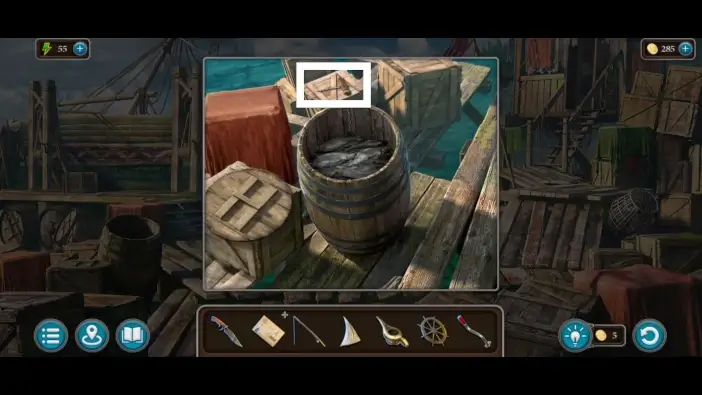
Open the barrel on the left.
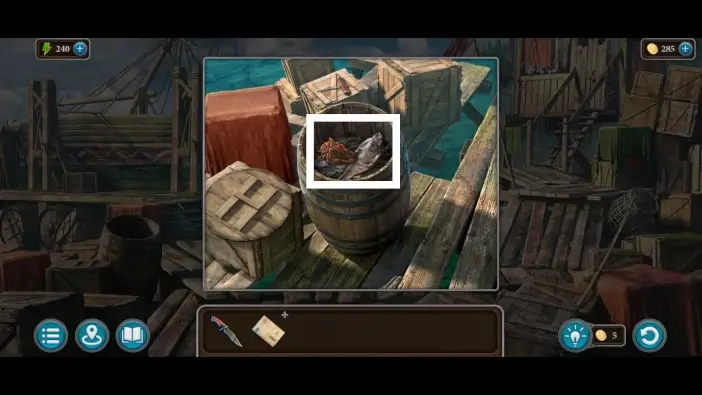
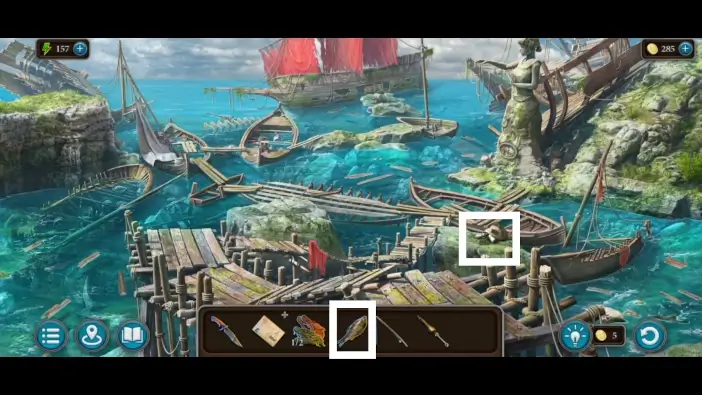
Take the first head. You’ll need two of them to start one puzle challenge later. Take the fish from the barrel as well. You will need it to distract a turtle.
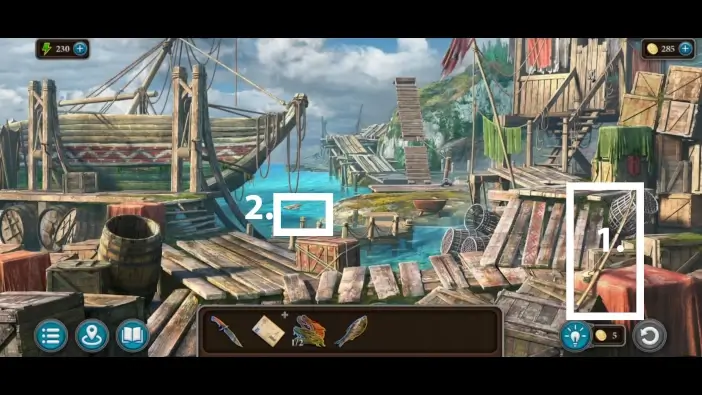
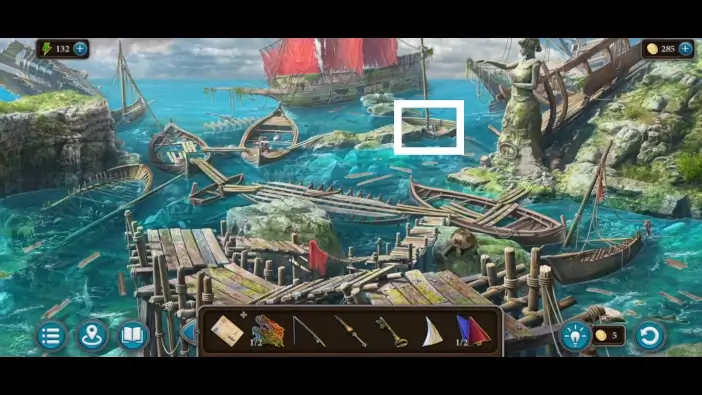
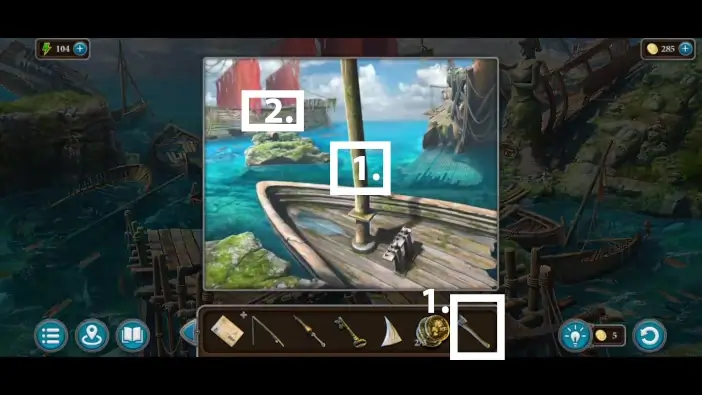
- Take the fishing rod on the right. You will use it multiple times.
- Approach the water.
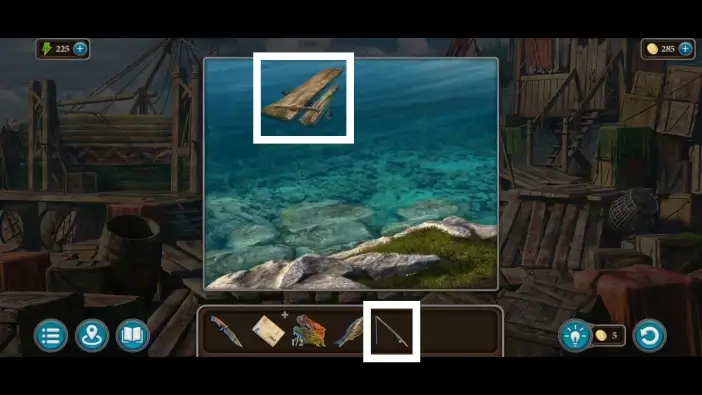
Use the fishing rod you just found to move the planks closer. Take the clapper from the planks. You will need it for a bell in the ruined ship.
Approach the drawbridge.
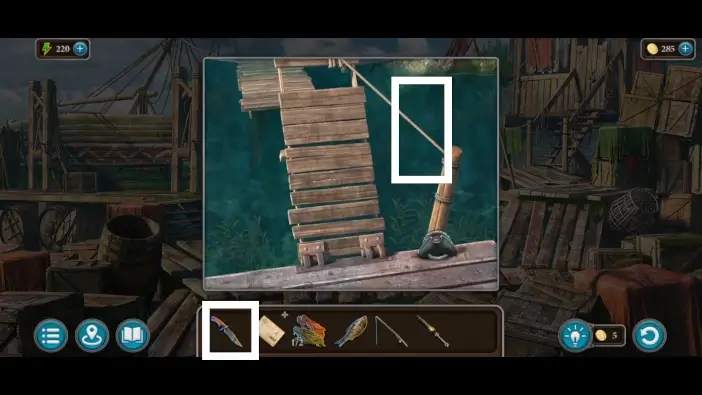
Cut the rope to lower the bridge.
Cross the bridge.
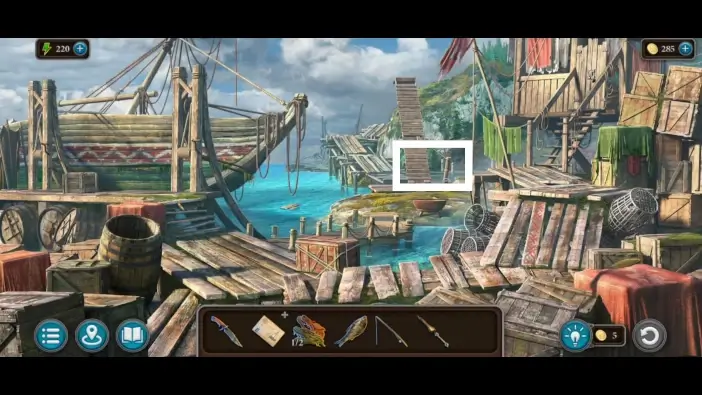
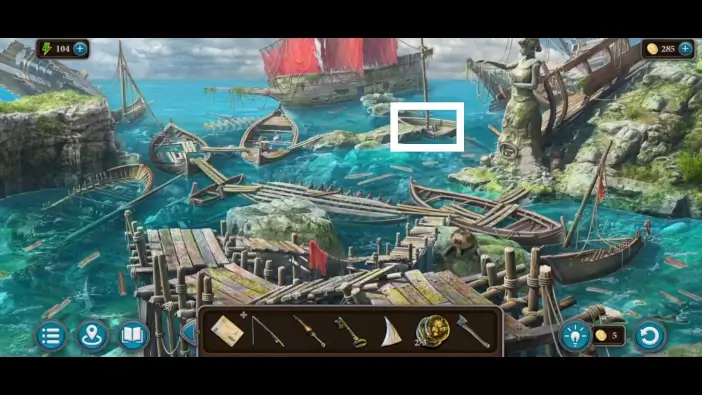
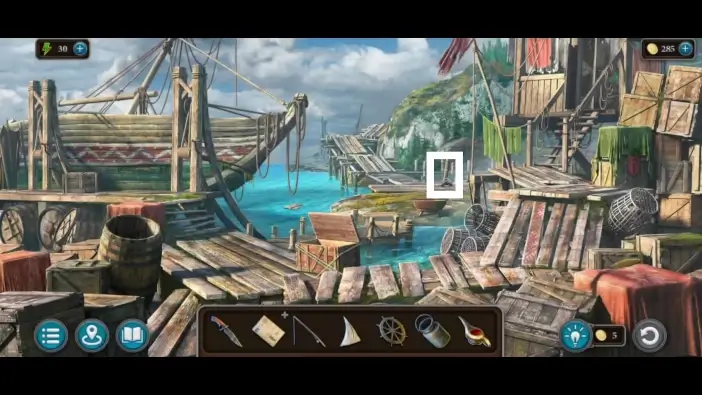
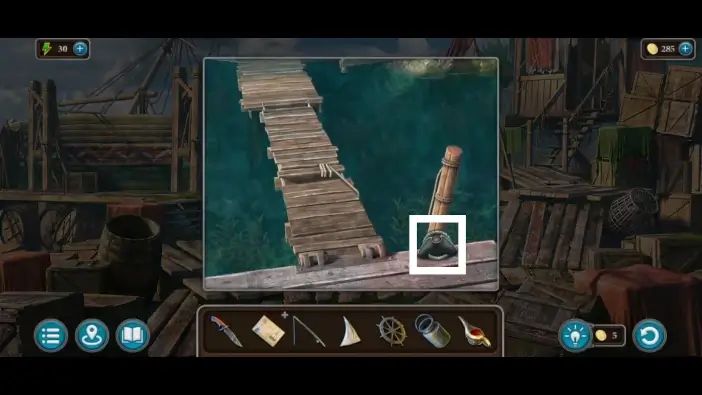
Take a closer look at the part of the pier.
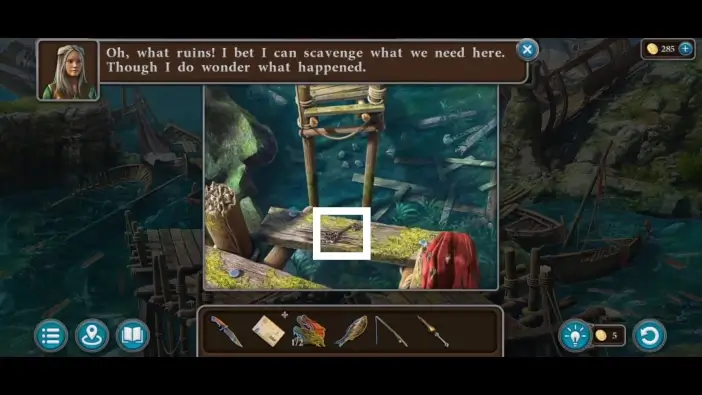
Grab the key.
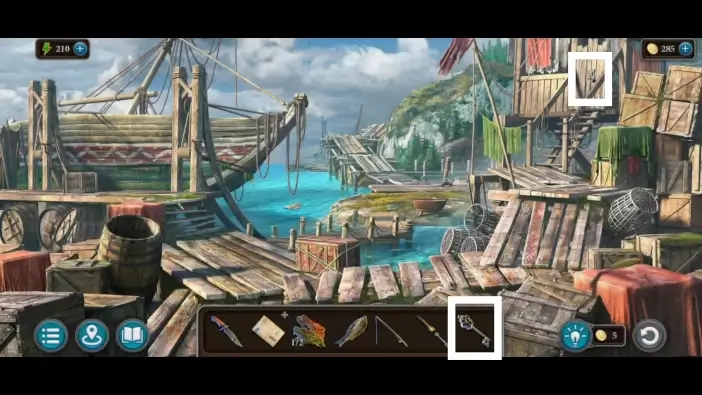
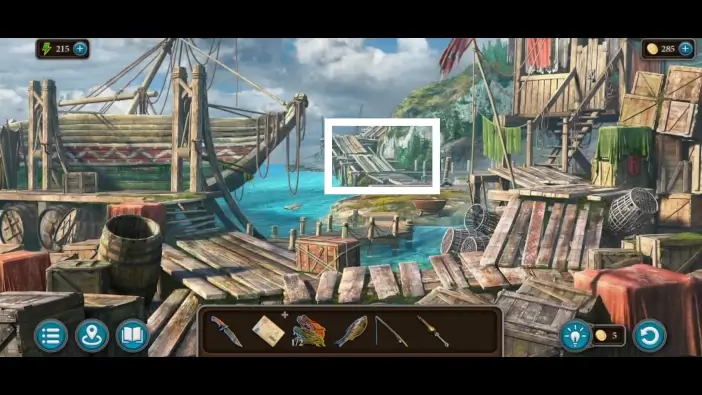
Return to the docks and unlock the door on the right with the key you just found.
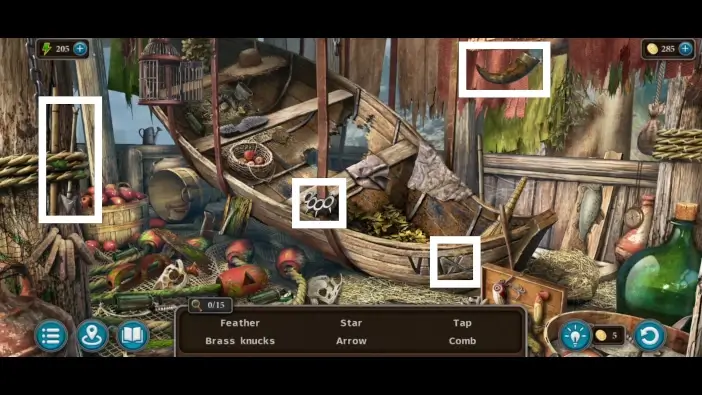
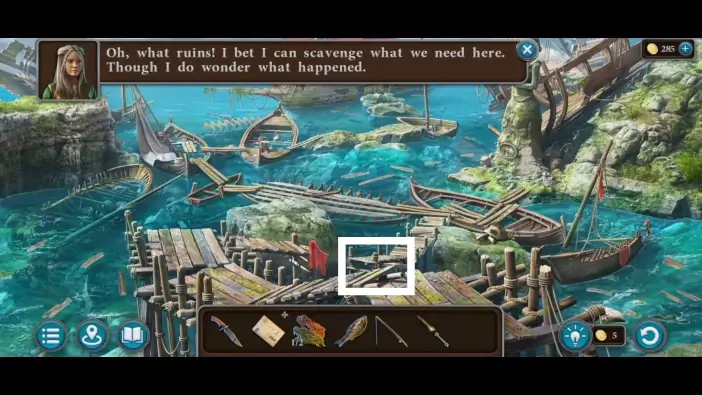
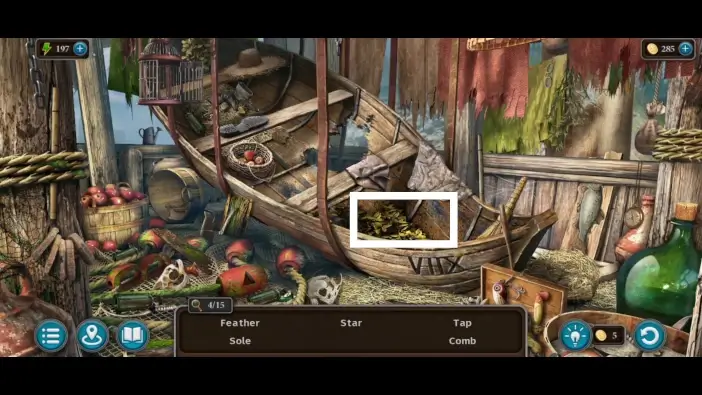
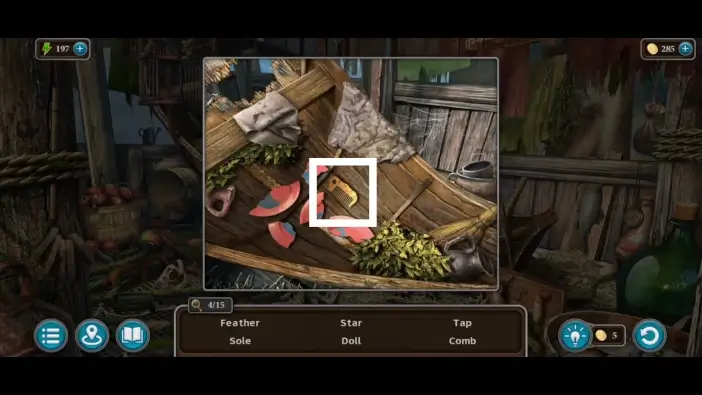
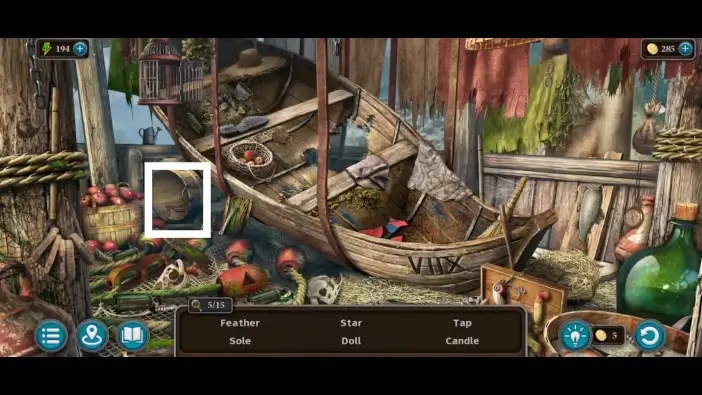
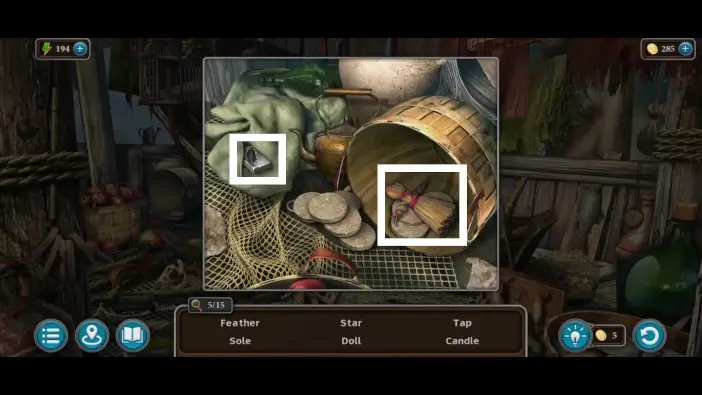
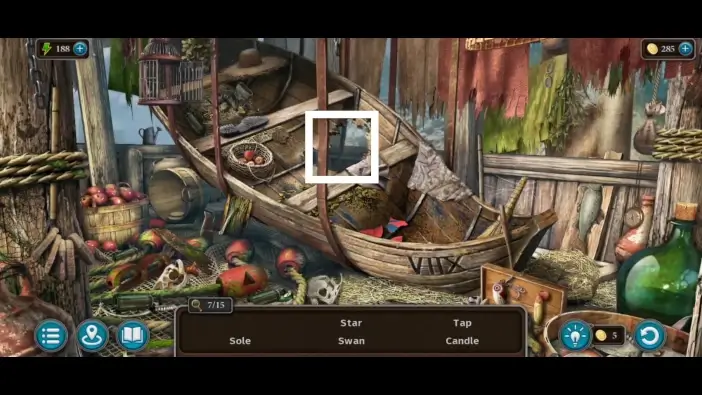
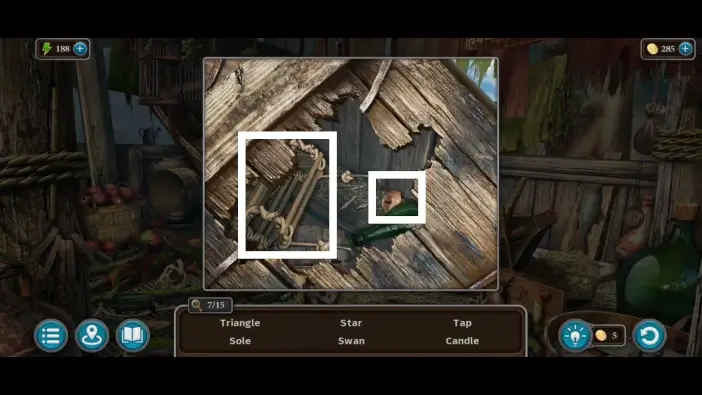
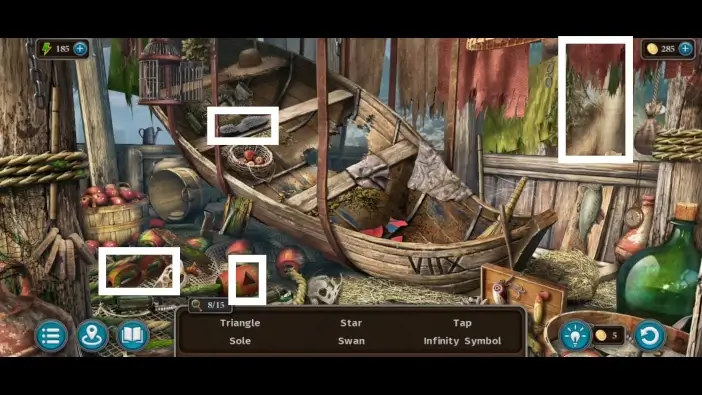
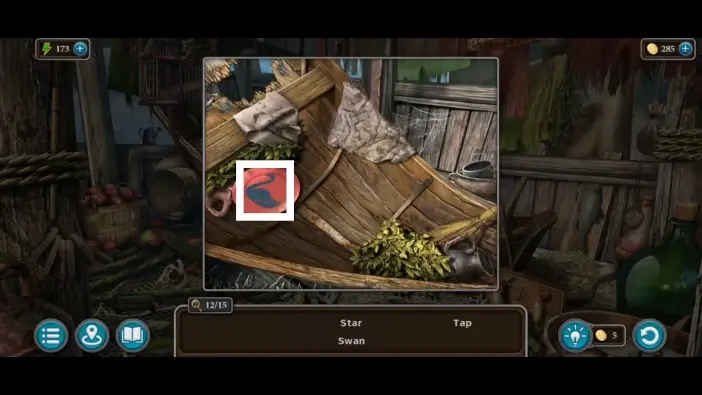
In this challenge, you need to find fifteen objects. The objects are marked in the picture above and the following pictures below. You will not see some of the items immediately. In that case, you usually need to move some other objects, like boxes or curtains, or open a container. Bear in mind that you can only tap on the items that are currently listed at the bottom of the screen, which are random. The remaining items will appear in the list as you progress.
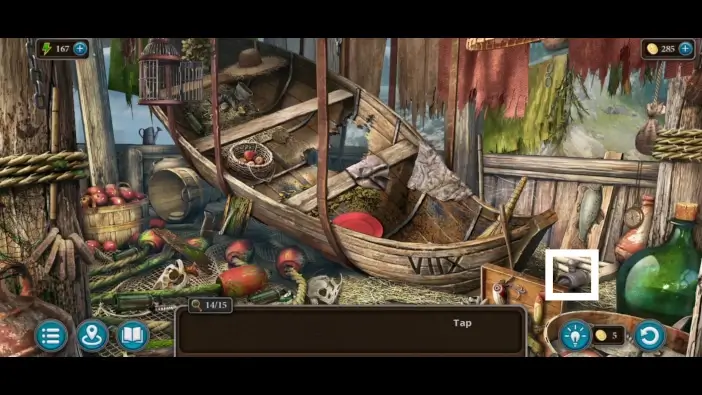
Once you find all fifteen items, the rope ladder will be added to your inventory.

Return to the boat ruins and approach the part of the pier that is broken. Place the rope ladder you just obtained.
After you’ve placed the rope ladder, you can now approach the turtle. Give the turtle a fish you found in the barrel to distract it.
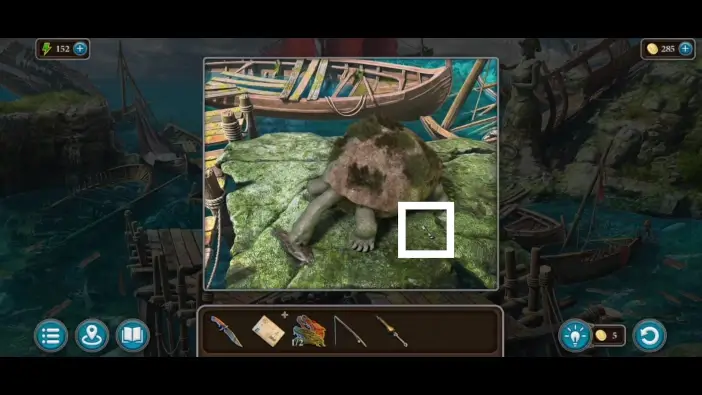
Once the turtle is distracted, take the key. You will use this key to unlock a drawer in the ruined ship.
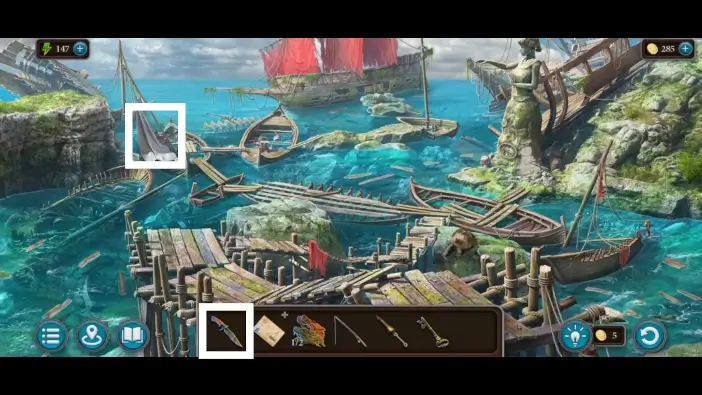
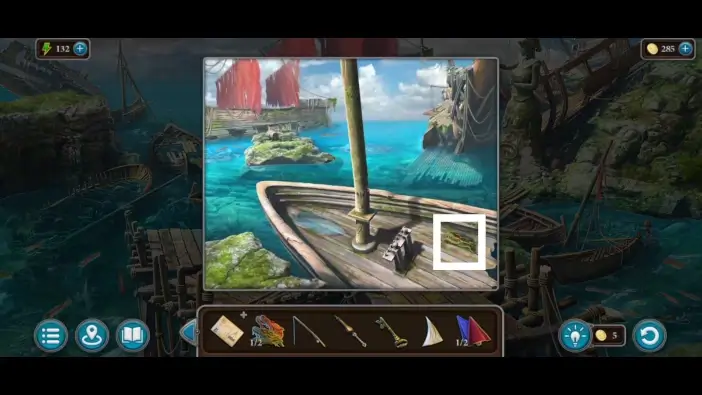
Approach the ruined boat on the left. Use a knife to cut the cloth.
- Take the cloth. You will need it for your boat’s sail.
- Take the first arrow. You will need to collect two of them to start a puzzle challenge in one of the ruined boats.
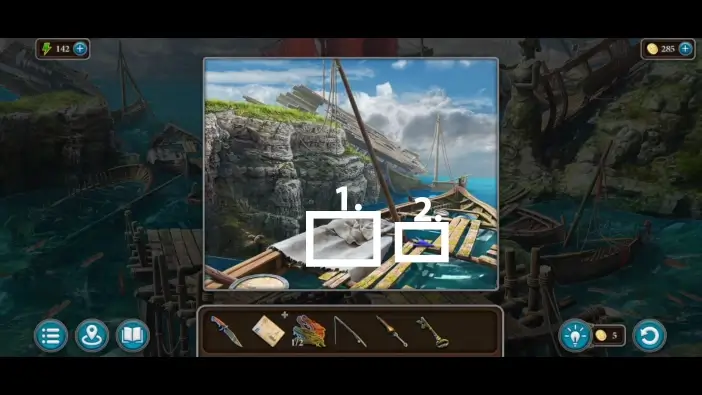
Approach the ruined boat on the right.
Take the second head.
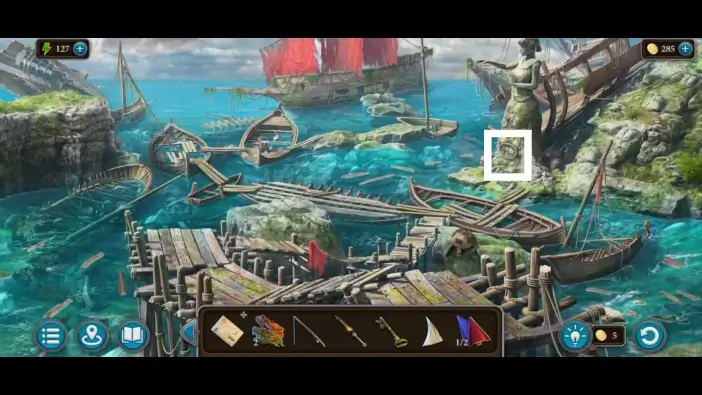
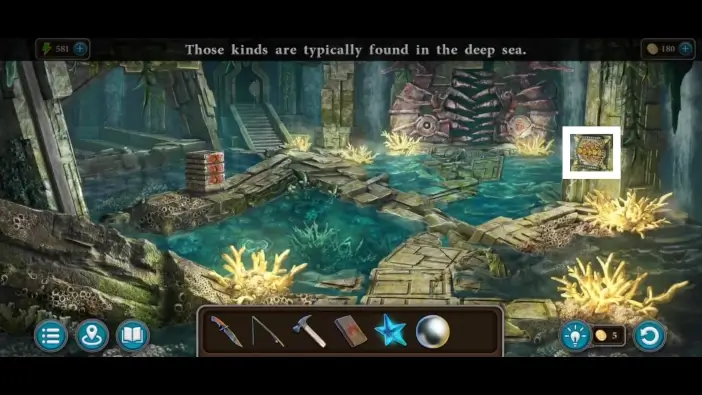
Go to the statue on the right.
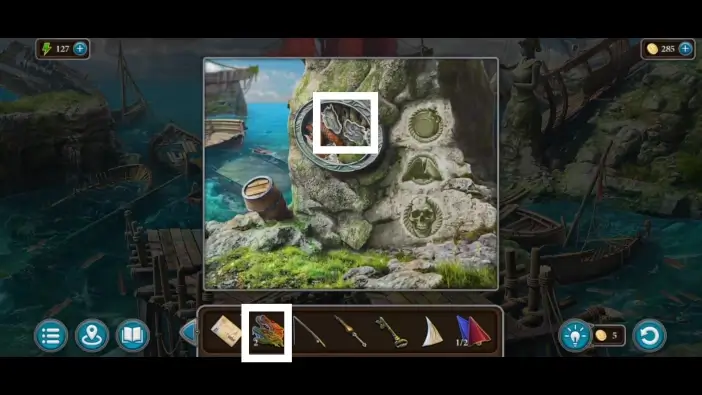
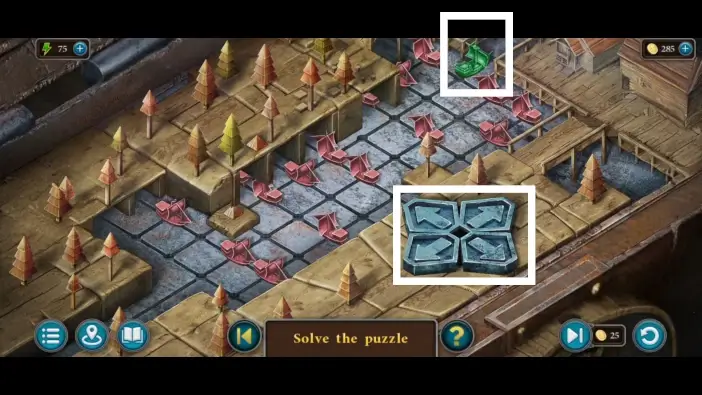
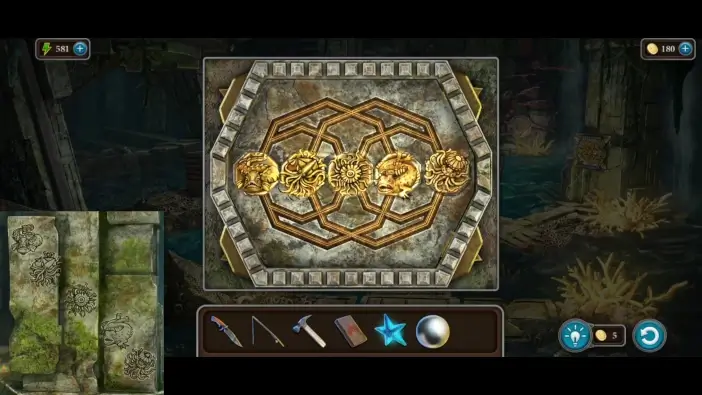
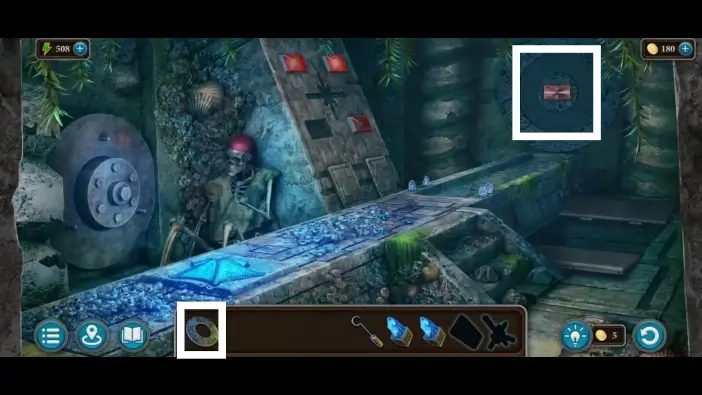
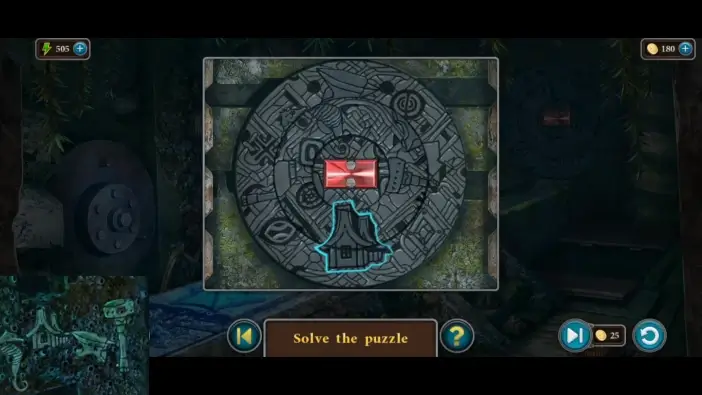
Place the two heads on the wall to start a puzzle challenge.
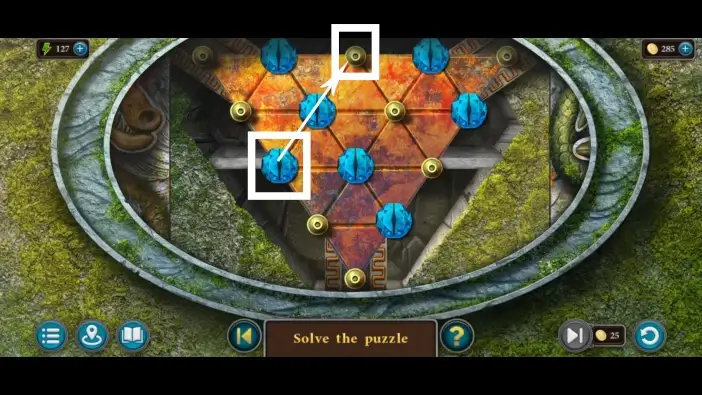
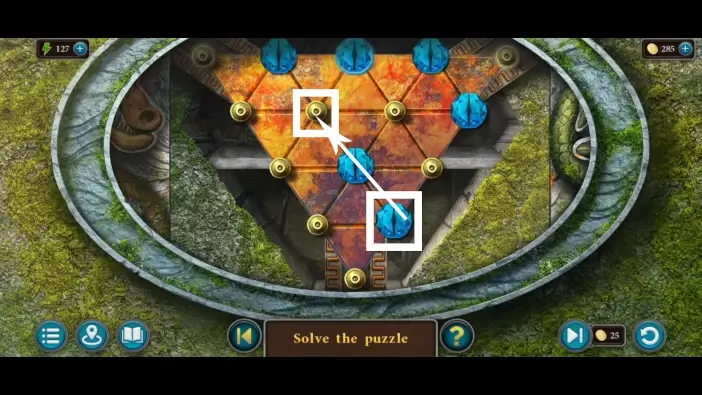
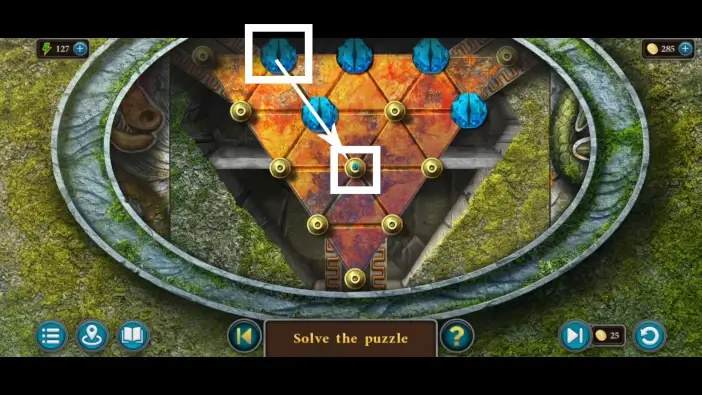
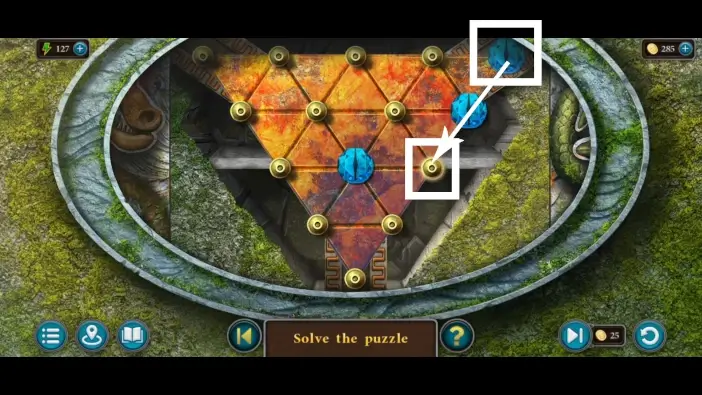
In this puzzle challenge, you need to select one blue token and place it on an empty field. When your blue token goes through another blue token, the other one will disappear. You need to move the blue tokens in such an order to remove them all except the last one.

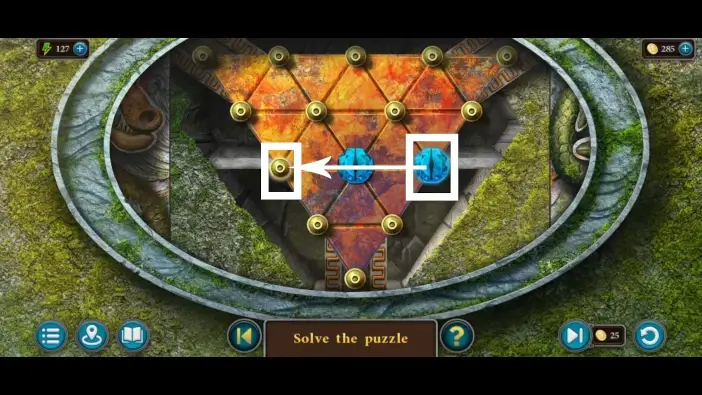
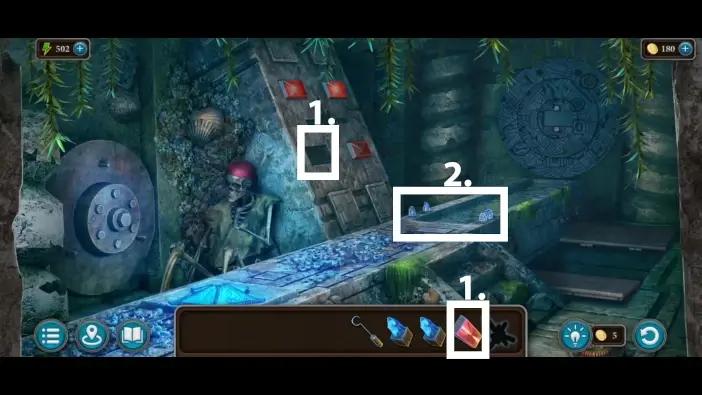
Once you complete the challenge, the hidden compartment will open. Take the second arrow and the first amulet. You will need three amulets to unlock a large chest in the ruined ship.
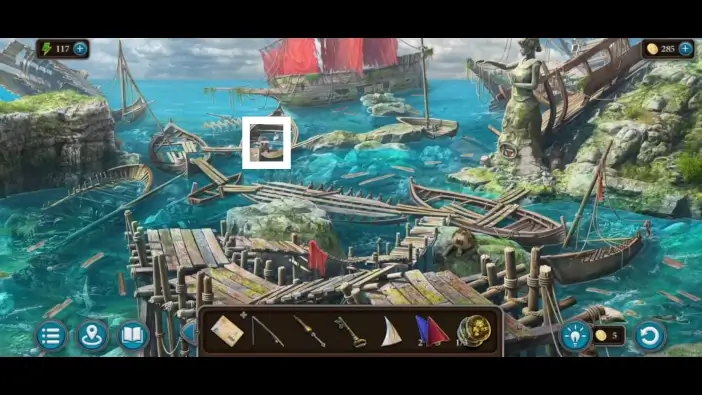
Go to the middle small boat.
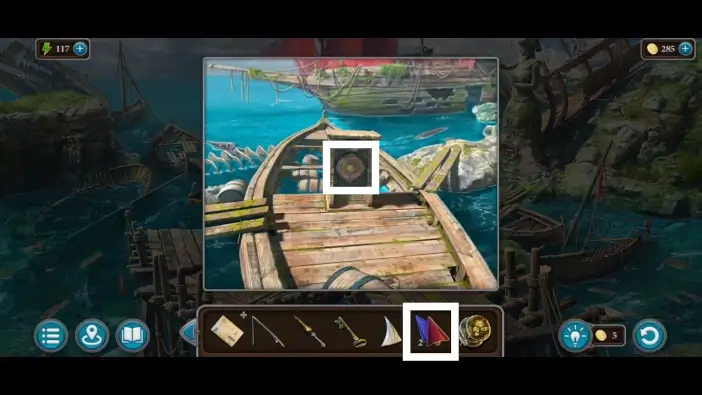
Place the two flags to start a new puzzle challenge.
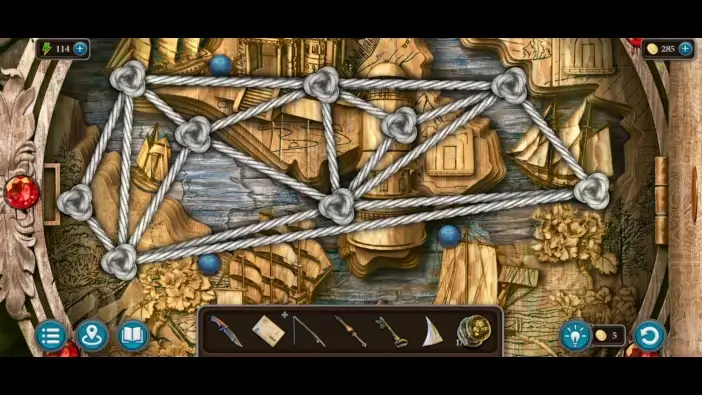
In this puzzle challenge, you’ll need to rearrange the knots. When the knots are not in the correct position, they and the rope will have a red color. Arrange the knots and the rope like in the picture above. Once you finish this challenge, take the second amulet and the axe.
Go to the ruined boat on the right.
- Use an axe you just found and cut the mast. It will fall on the stone close to the abandoned ship. This mast will act as a bridge to the ship.
- Go to the abandoned ship.
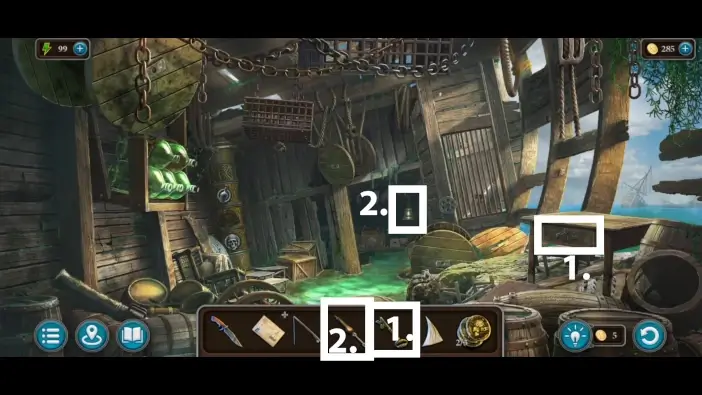
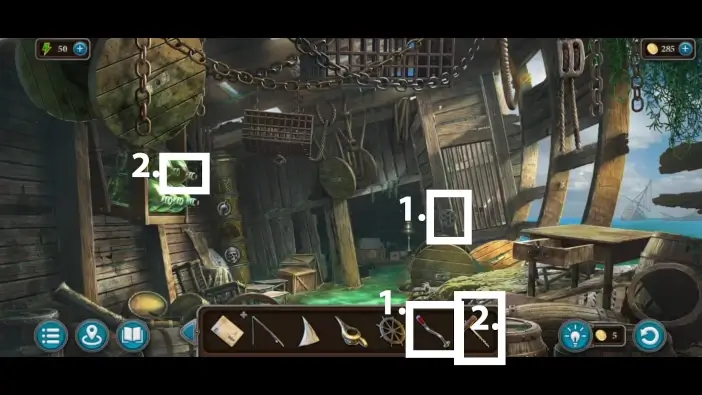
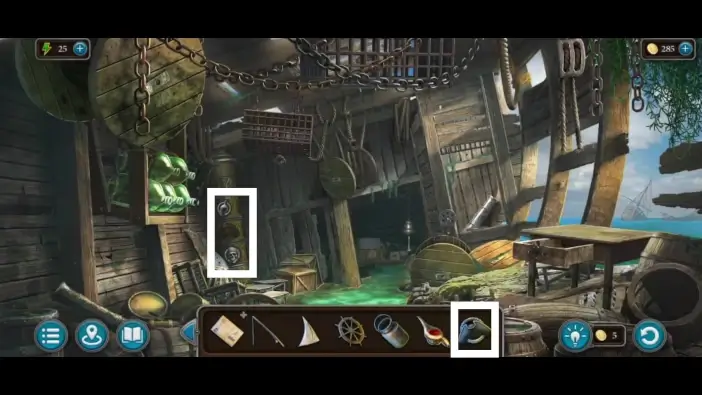
- Use the key you found near the turtle to unlock and open the drawer on the right. Take the third amulet and the lamp from the drawer. You will fill it with rum later.
- Approach the bell.
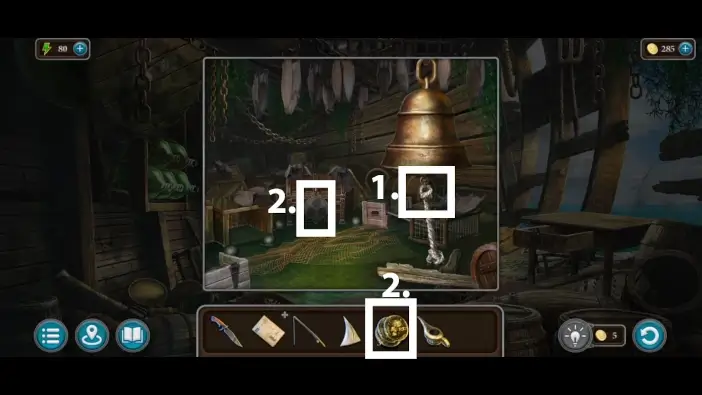
- Attach the clapper to the bell. Ring the bell to scare off the bats.
- Use three amulets to unlock the large chest. But before opening it, you’ll have to solve the next puzzle challenge.
Use the arrows to move the ships on the table. When you press an arrow, all ships are moved, including the green one. You need to bring the green ship to the other side. When you solve the puzzle, take the wire cutters and the steering wheel. You will use the wire cutters to open a box, and you’ll need a steering wheel for your ship.

- Go to the main dock. Use the wire cutters to open a box in the middle. Take the handle from the box. You will need it on the ruined ship.
- Approach the barrel on the left.
Take the corkscrew that is on the box, behind the barrel. You will use it for a rum bottle in the ruined ship.
- Return to the ruined ship. Attach the handle you found in the box to the mechanism to raise the bars. Take the can of resin. You will need liquid resin later for your ship.
- Approach the bottles on the left and place the corkscrew on the top-right bottle that still has rum in it.
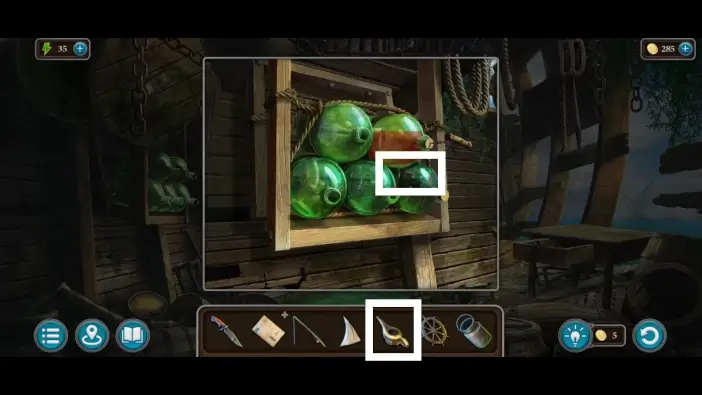
Put the lamp below the bottle. The “lamp with rum” item will be added to your inventory.
Go to the main dock and approach the drawbridge.
Pick up the decorative element.
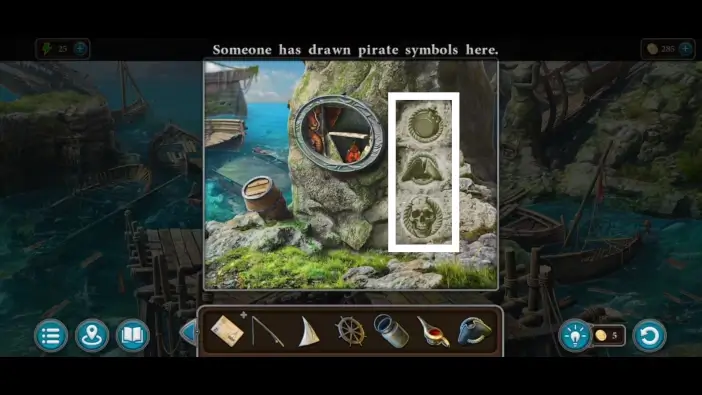
Go to the area where the ruined ships are and approach the monument where you did the puzzle challenge before. Remember the symbols on the wall.
Go to the ruined ship and approach the pillar in the left corner. Place the decorative element on the pillar to start a puzzle challenge.

Change the symbols on the pillar to be the same as the symbols on the stone earlier. Once you complete this challenge, take the hammer and the matches. You will use them multiple times later.

Go to the dock and approach the barbecue grill.
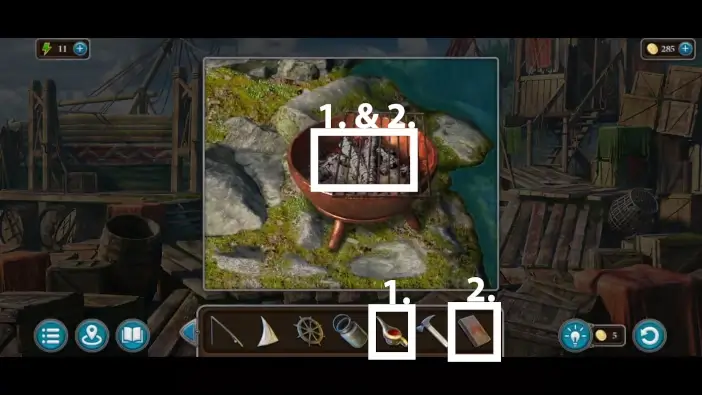
- Pour the rum from the lamp.
- Burn the wood and rum with matches.
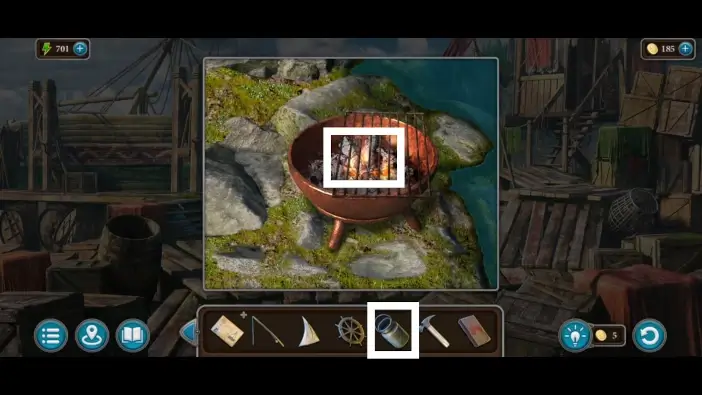
Place the can of resin on the barbecue grill.
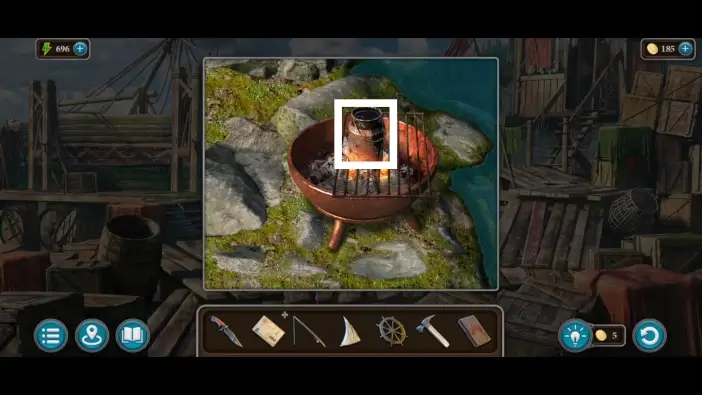
Take the can of now liquid resin.
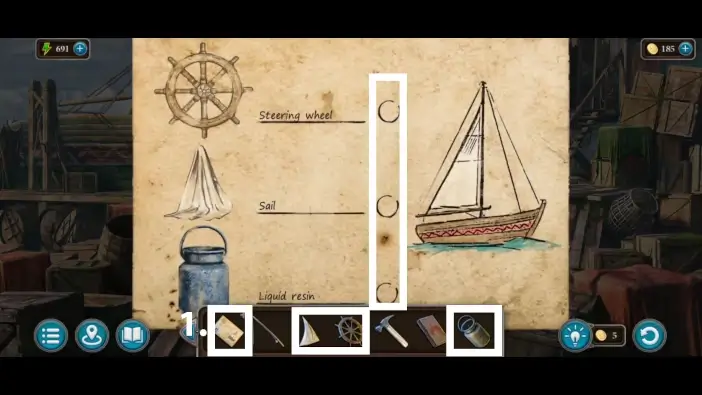
Tap on the paper that has the list of missing components for your ship to read it. Tap on the steering wheel in your inventory and then on the paper to check the list item. Repeat the steps for the “cloth” item and the “can of resin” item. After this, the “components” item will be added to your inventory.
Give the components to Captain Brodovitch. The cutscene will begin, and you will go to the Ultima Lapis island.
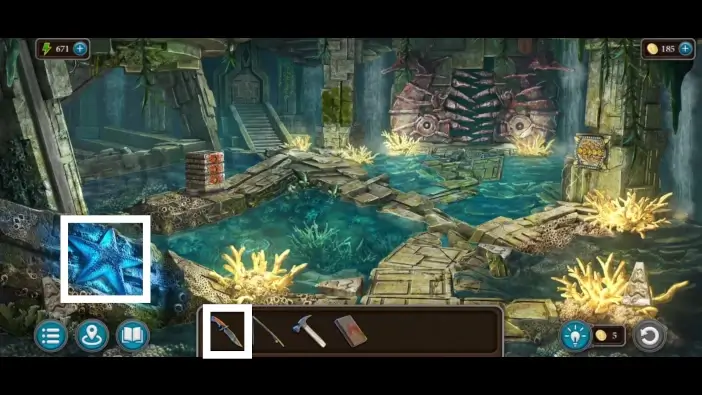
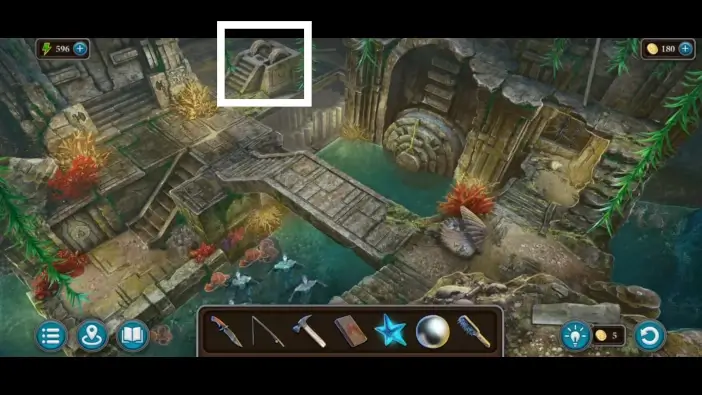
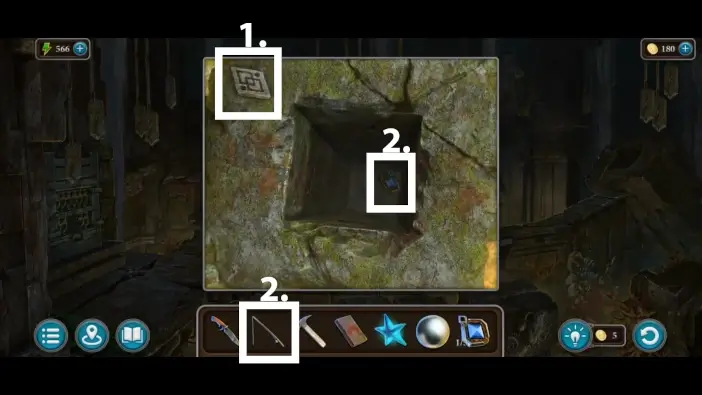
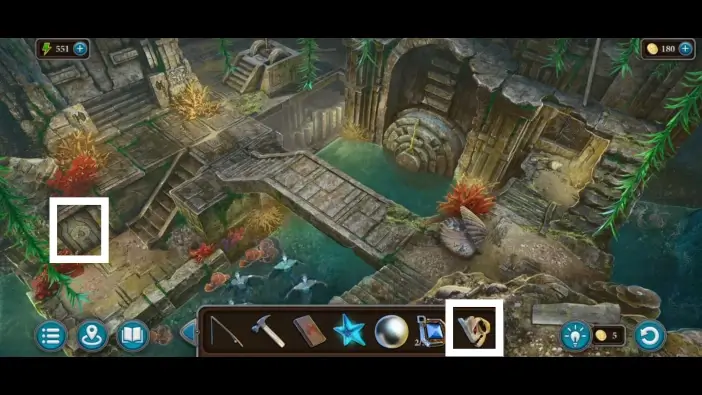
Use a knife to get the luminous starfish. You will need it to illuminate one area.
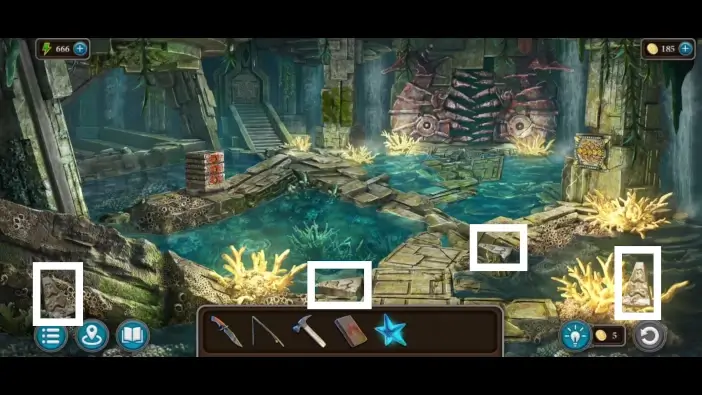
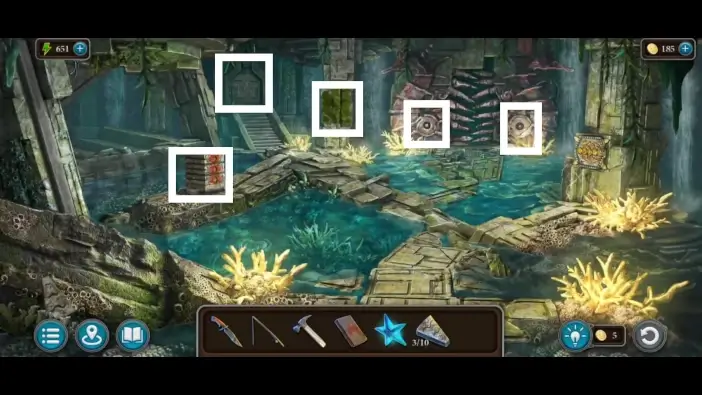
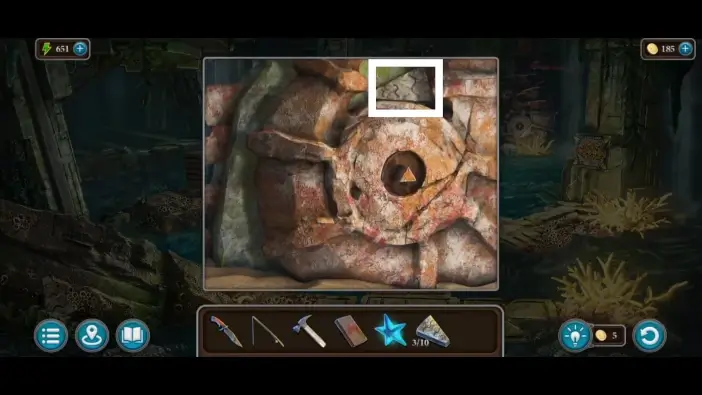
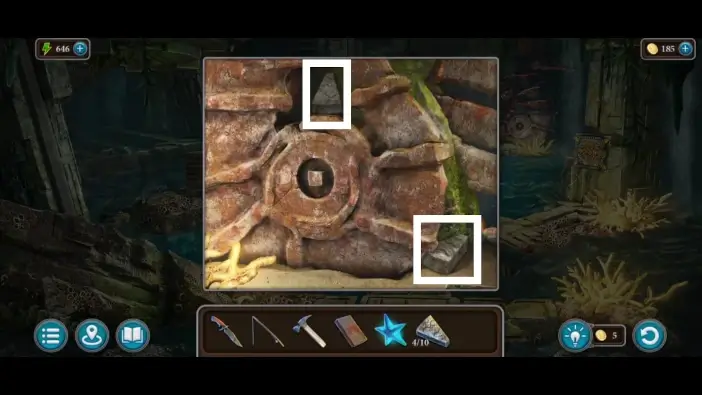
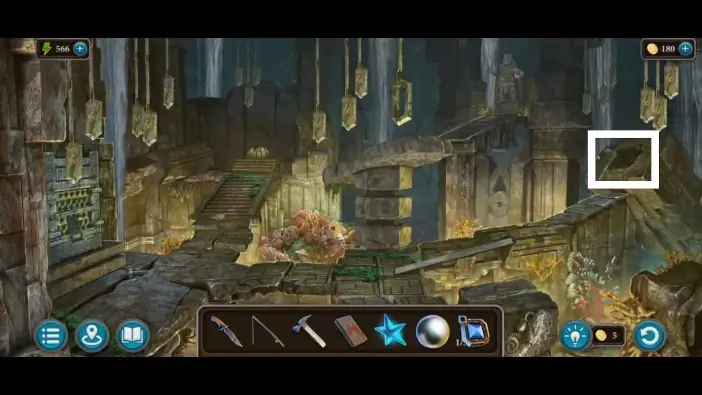
Start collecting stones that have carved waves on them. You will need ten of them to unlock the gate to another section of the temple. Follow the markers in the pictures in this guide to find them all. For some of the stones, you’ll need to approach certain sections of the room first to see them.
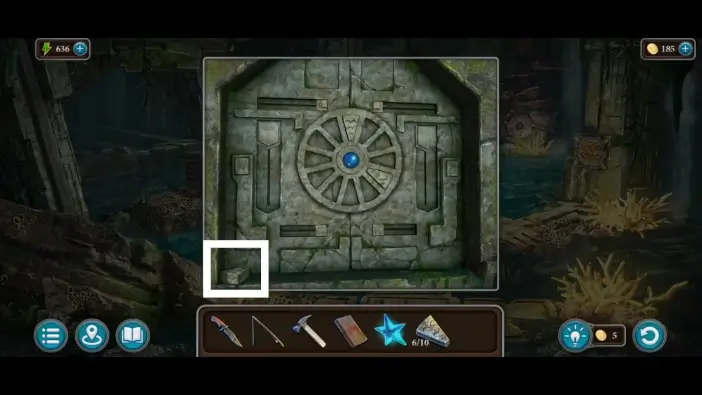
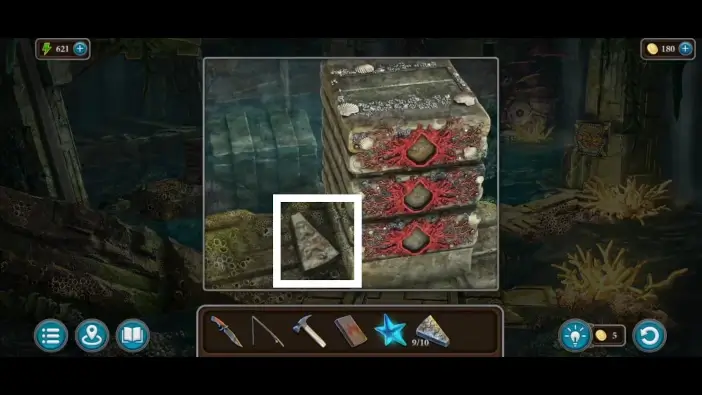
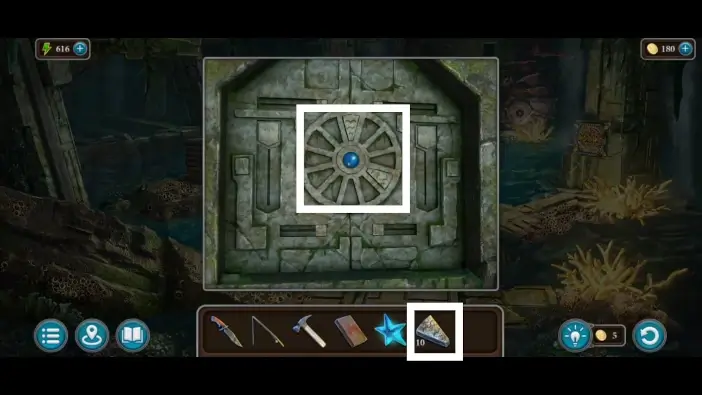
Once you find all ten stones, go to the left gate where you found one of the stones earlier. Place all ten stones on the gate to unlock it. Go to another section of the temple, and a cutscene will begin.
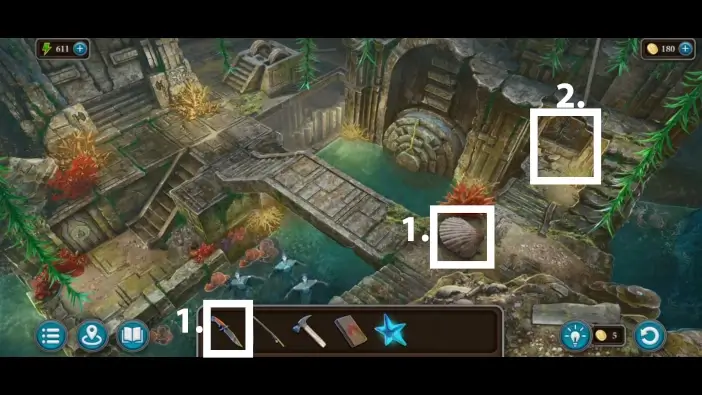
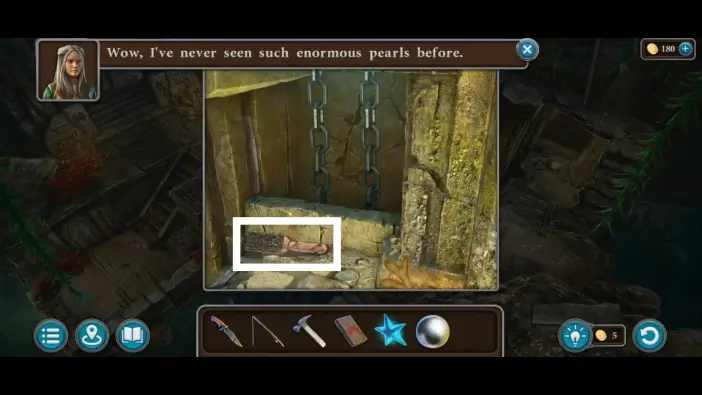
- Open the seashell using the knife from your inventory. Take the pearl from the seashell. You will place this pearl on the statue’s hand later.
- Approach the wall on the right.
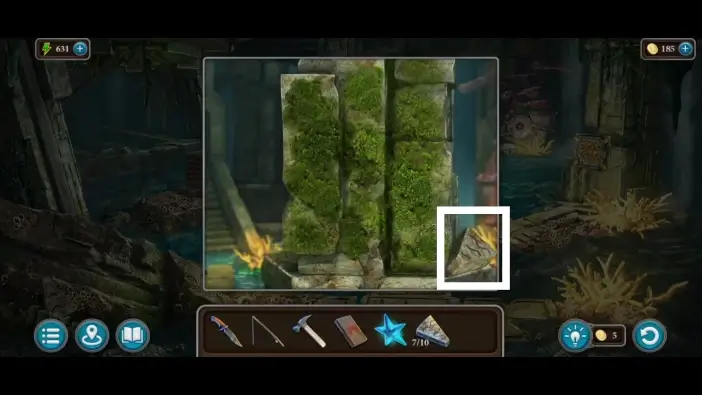
Take the brush near the chains. You will need it to remove the moss on one of the pillars.
Go to the mechanism on the left.
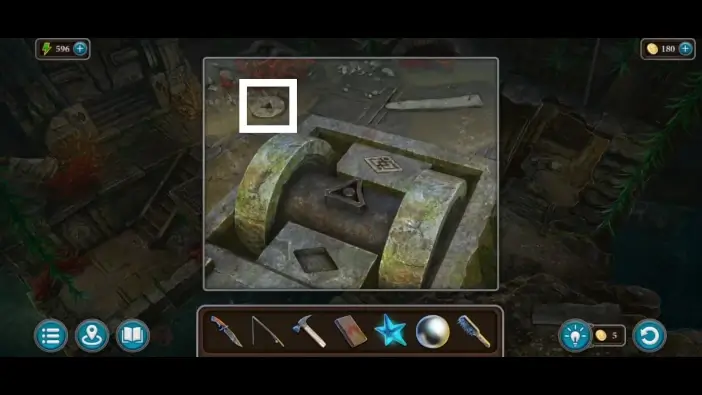
Take the stone.
- Go to the previous flooded section and place the stone you found on the right stone circle.
- Remove the moss on the pillar on the left.
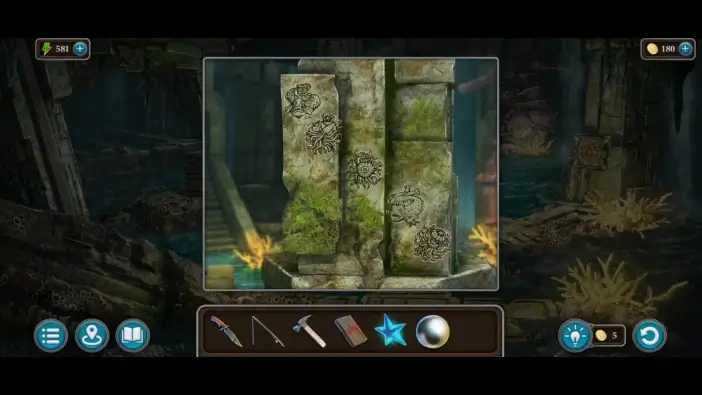
Remember the creatures drawn on the pillar.
Go to the pillar on the right.
Rearrange the animal tokens to be in positions like those on the pillar on the left. When you complete this challenge, take the second stone.

- Place the second stone in the left stone circle.
- The gate on the right will unlock. Go through that passage to access the statue area.
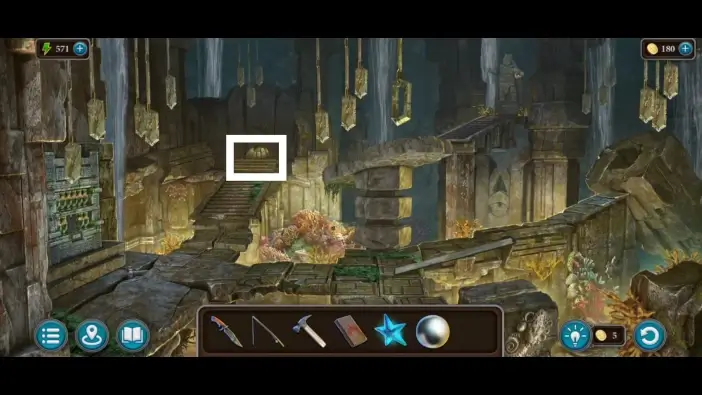
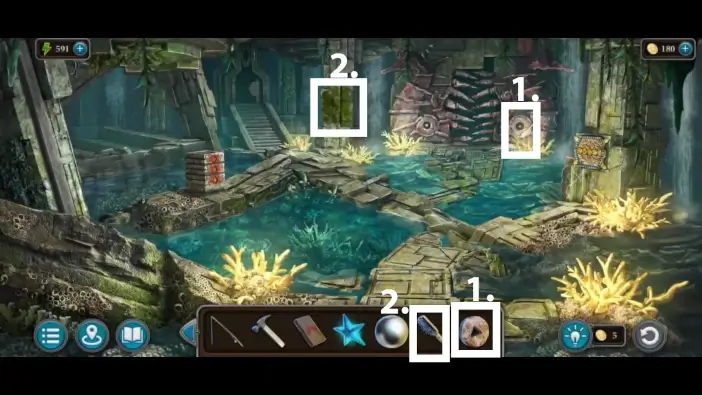
Approach the mechanism on the left.
Pick up the diamond from the floor. You will need three diamonds to unlock something in the flooded room of the temple.
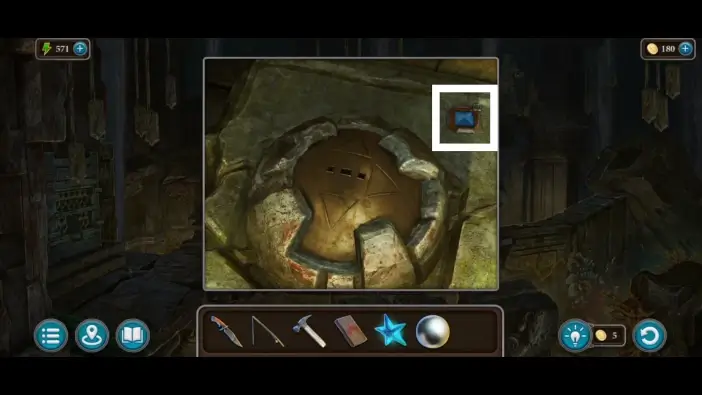
Approach the fallen pillar on the right.
- Take the engraved stone. You will use it soon.
- Use the fishing rod to obtain the second diamond.
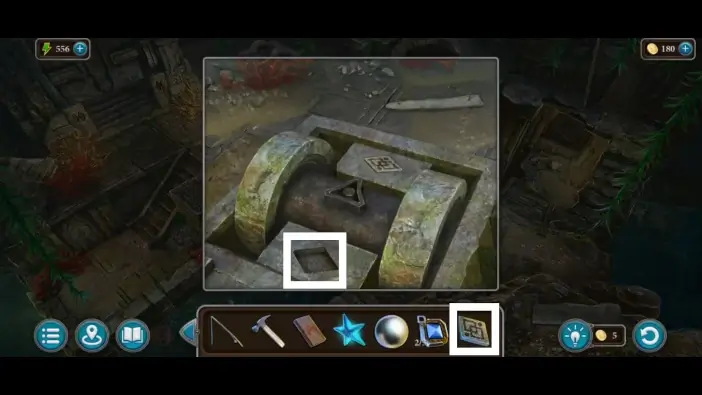
Return to the temple’s hallway and approach the mechanism on the left. Place the engraved stone. The lever will appear.
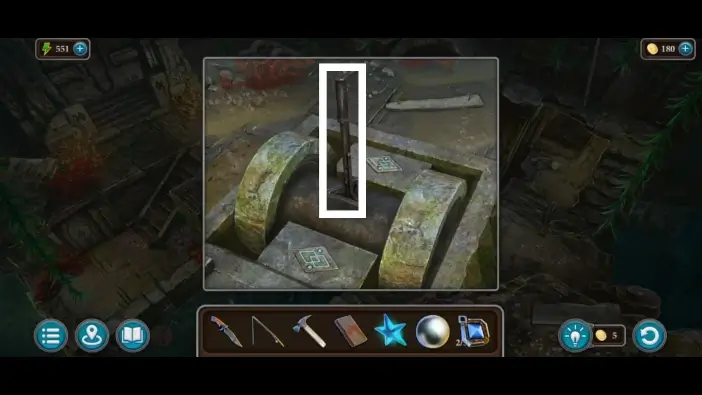
Use the lever. The mechanism for raising the gate will be stuck.
Go to the stone door on the far left, in the lower section. The Vila will give you the magical key. Use this key to unlock the door.
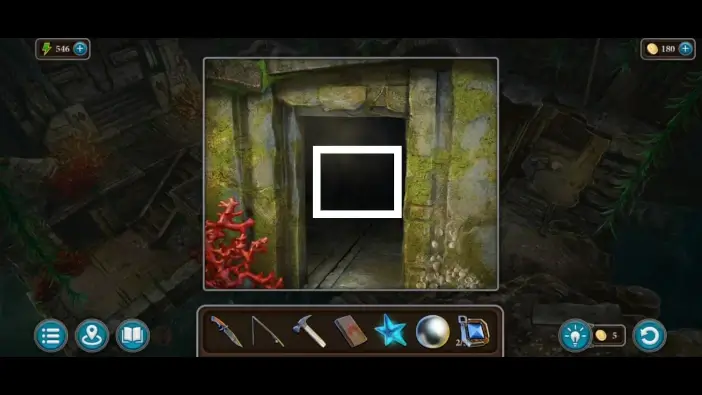
Use luminous starfish to illuminate the room, then enter.
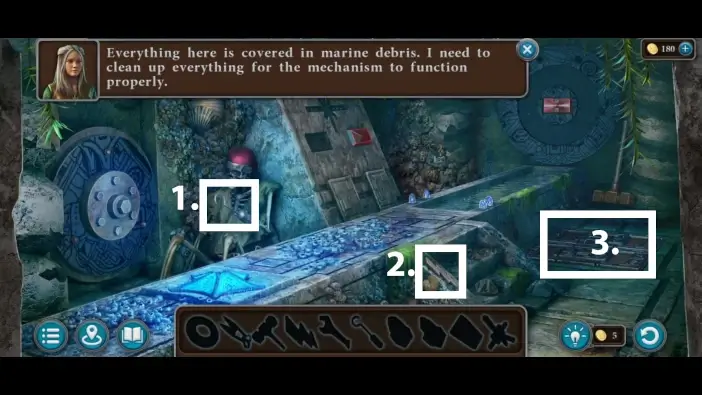
In this type of challenge, you need to find all the items. These items won’t be added to the main inventory. They can only be used to find other items in the same location. Follow the markers in the picture above and in the following pictures below to find all items.
- Take the hook from the skeleton.
- Take the lighting-shaped object.
- Approach the trapdoor on the right.
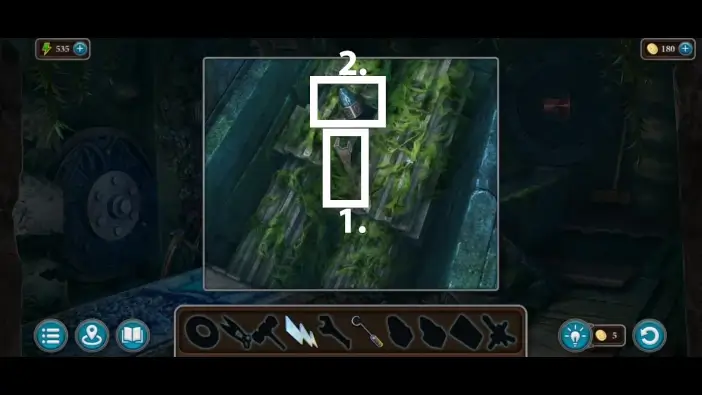
- Open the trapdoor and take the wrench.
- Take the first crystal.
- Use a wrench to unscrew the hoop on the left. The hoop will be added to your inventory.
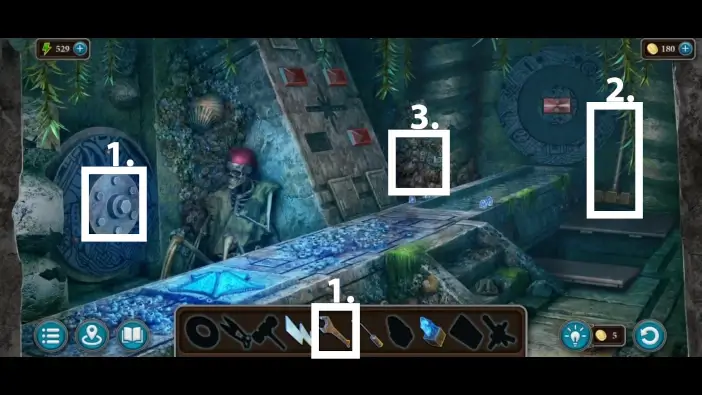
- Take the hammer.
- Approach the wall.
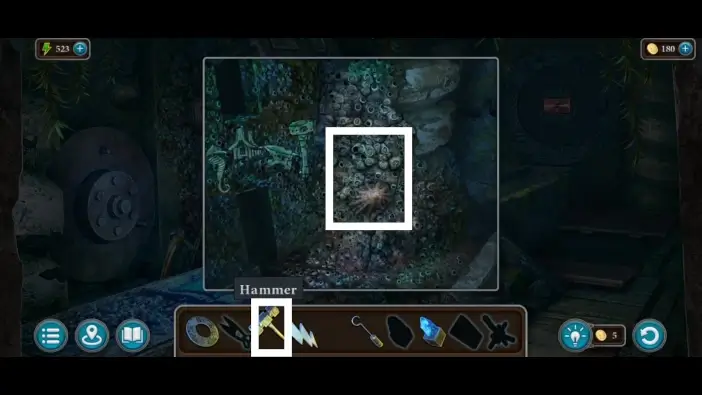
Use a hammer to destroy the obstacles.
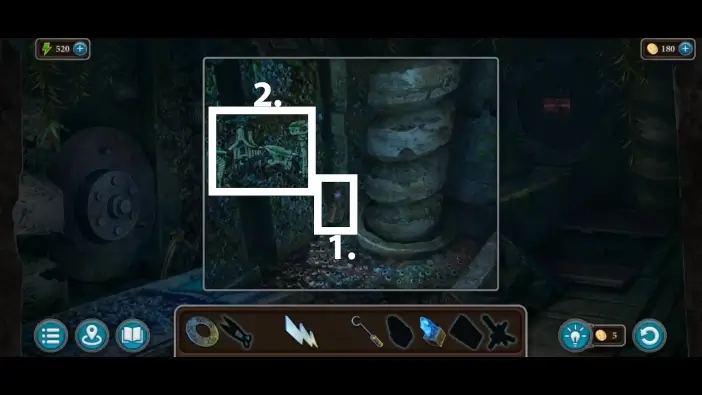
- Take the second crystal.
- Remember the clue on the wall.
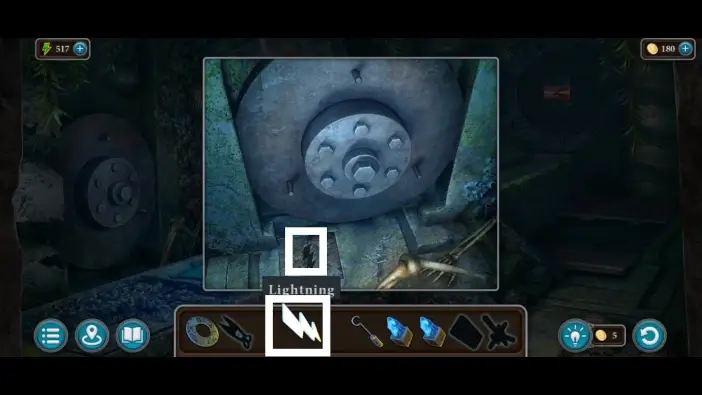
Go to the strange door on the left again, where you obtained the hoop, and place the lighting. A hidden compartment will open where you placed the lighting. Take the scissors from there.
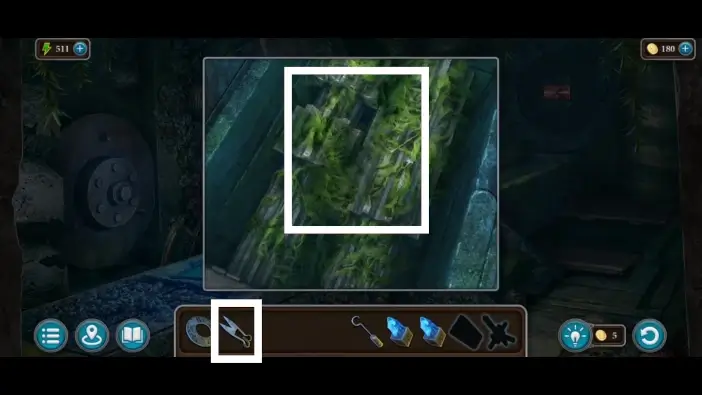
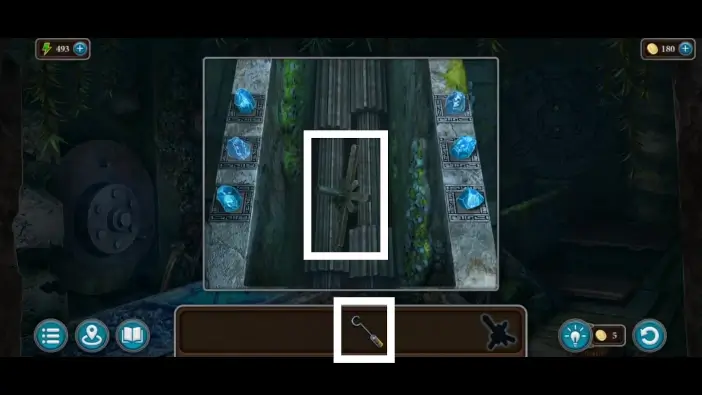
Approach the mechanism that is beneath the trapdoor and use scissors to cut the plants.
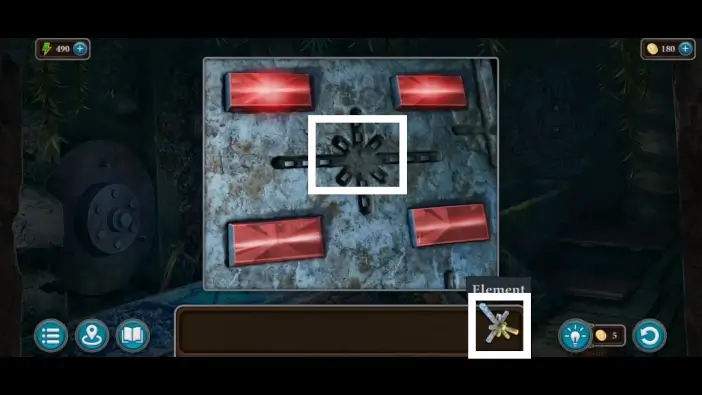
Approach the mechanism on the far side of the room and place the hoop on it.
Rotate the hoops to assemble the shapes you saw on the wall earlier. You need to assemble the following shapes: seahorse, house, anvil, and chalice. Once you find all the shapes, take the red bar in the center.
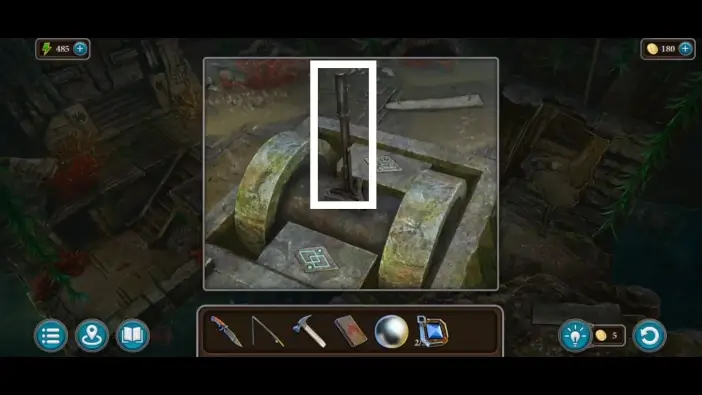
- Place the red bar in its place on the left wall.
- Approach the tables where crystals are.
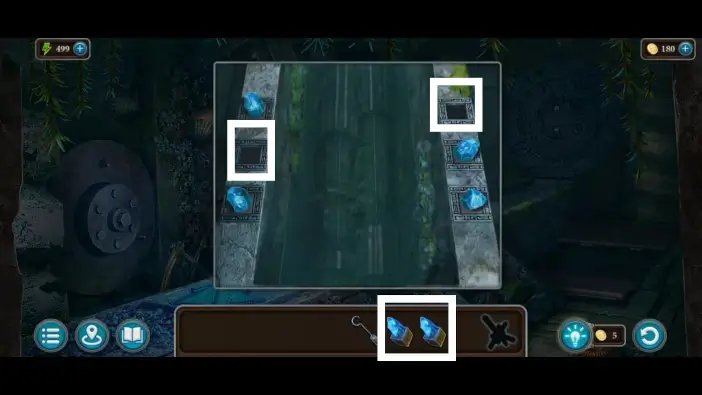
Place the two crystals you got.
Use a hook to get the element between the cylinders.
Place the element between the red bars, on the left wall. The lever will start working.
Return to the lever mechanism in the temple’s hallway and pull down the lever. This will raise the flooded gate, and the Vilas can now search for the key in the underwater area.
This will mark the end of Part 1 of our guide for Chapter 3 of Legendary Tales 4.
Thank you for reading!