Legendary Tales 4 – Chapter 1: On the Road | Part 3
Intro
Welcome to our walkthrough for Part 3 of Chapter 1 of “Legendary Tales 4” from “FIVE-BN GAMES”. Help Lucia and her brother Ulf find the location of the werewolf village.
Walkthrough
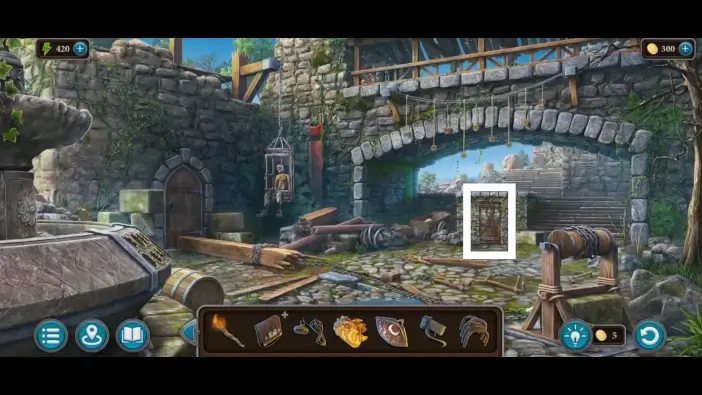
Approach the door in the middle.
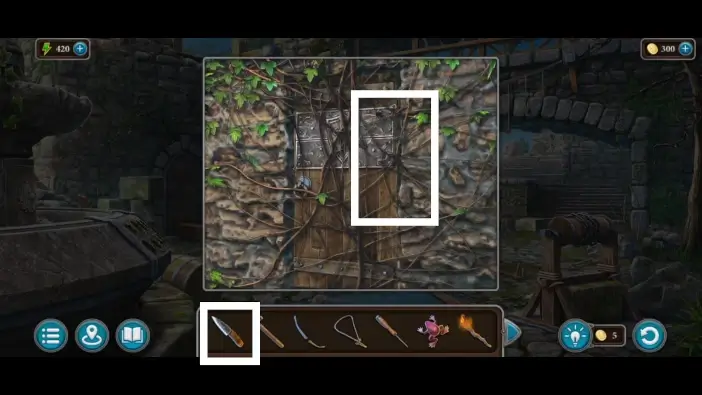
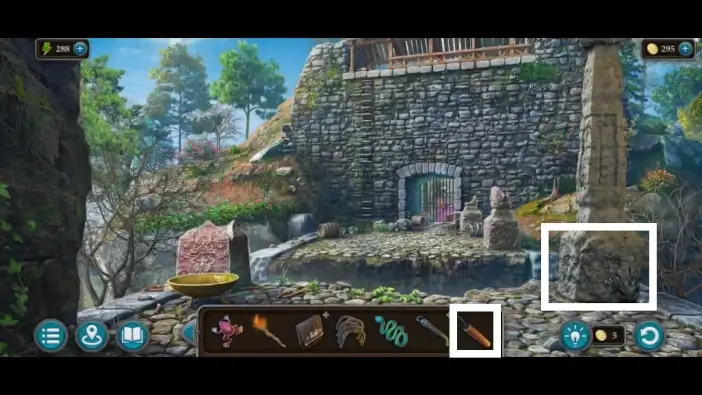
Use a knife to cut the ivy vines. You won’t be able to open the door now; you’ll need a sword-shaped key.
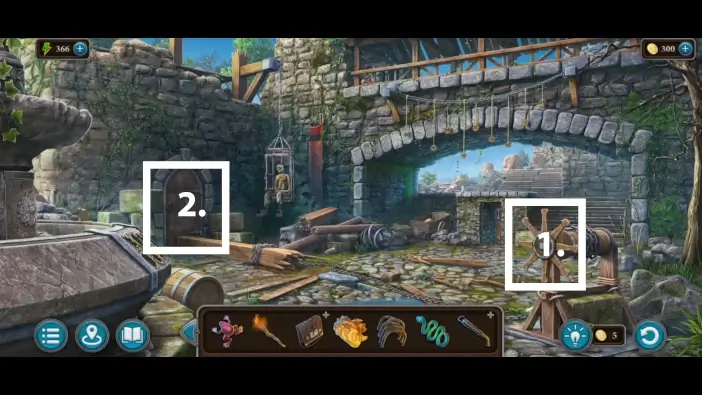
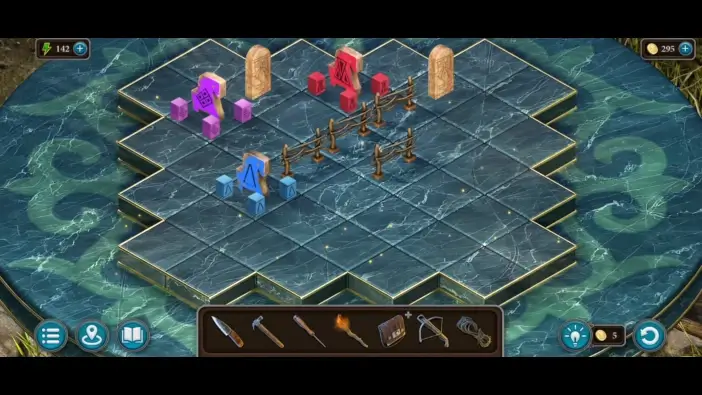
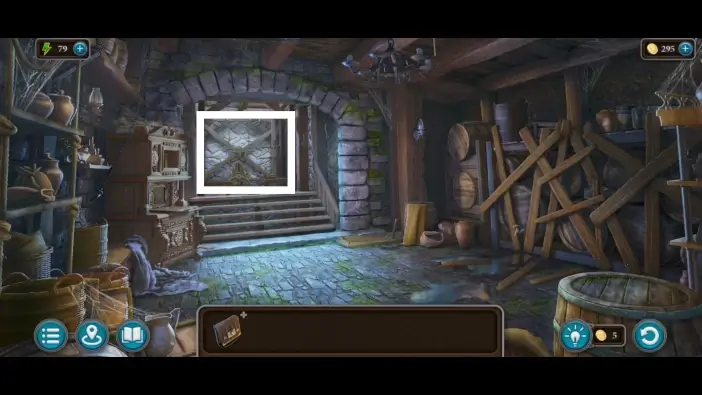
Go towards the stairs to arrive at the stone bridge.
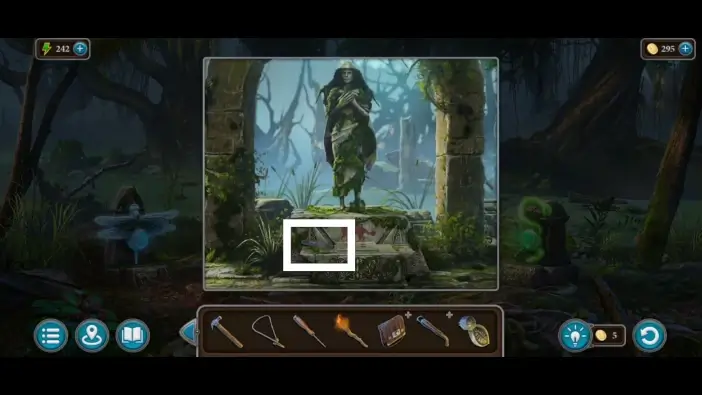
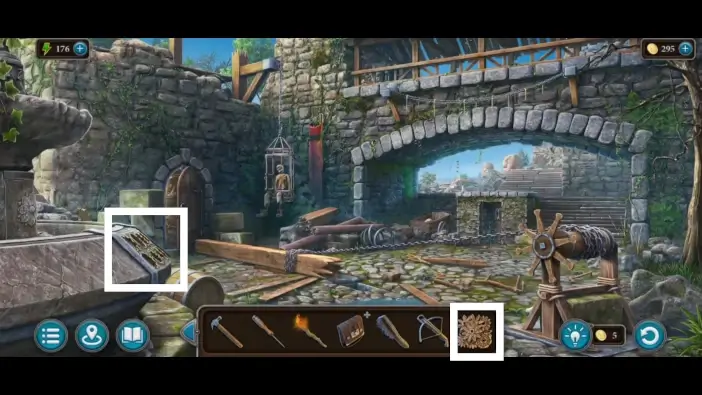
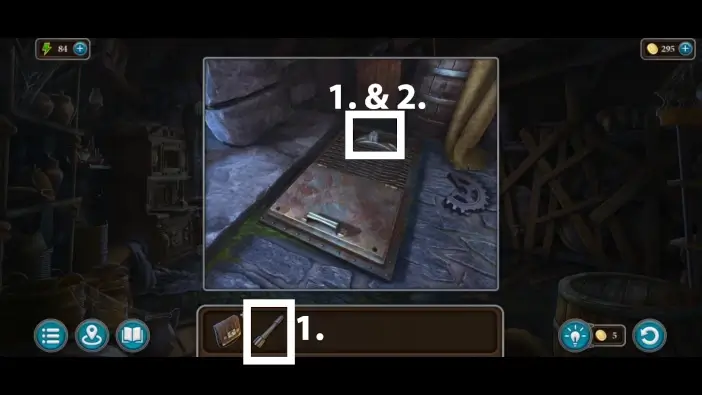
- Approach the brazier on the left. Take the metal snake item from the brazier. You’ll need it for the snake totem in the swamp.
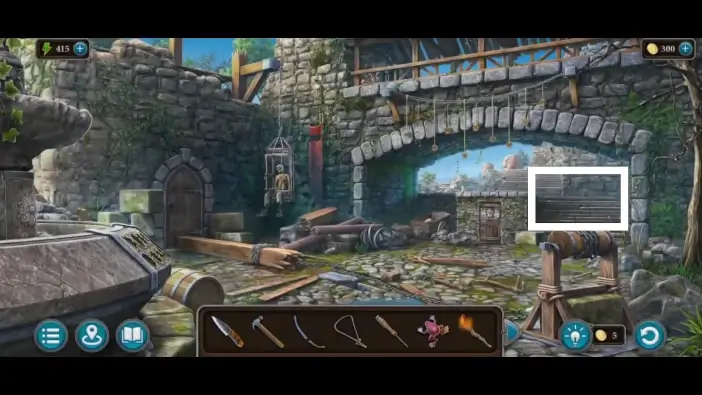
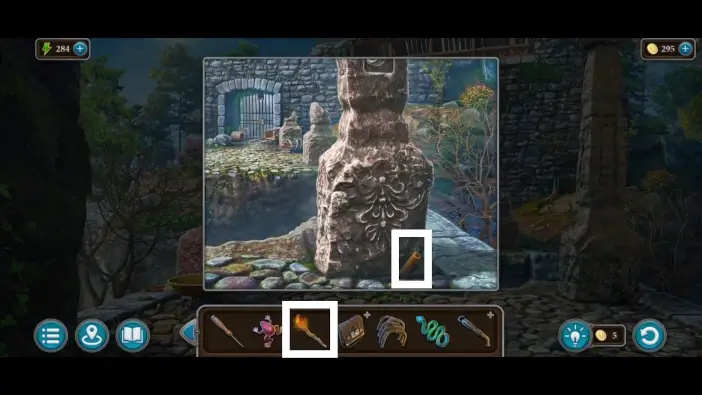
- Get closer to the broken part of the bridge.
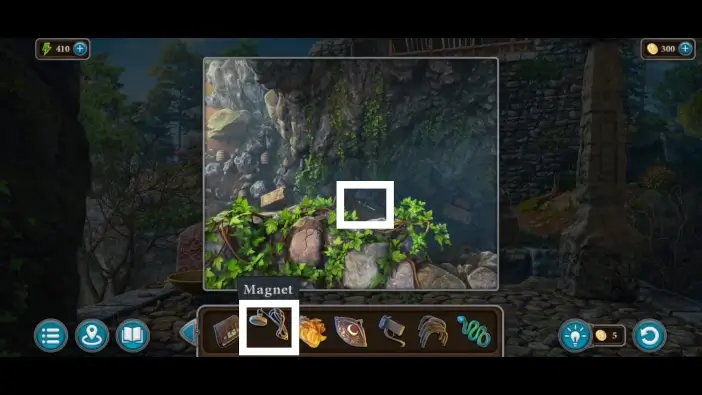
At the bottom of the chasm is a sword. Use a magnet you have to retrieve it.
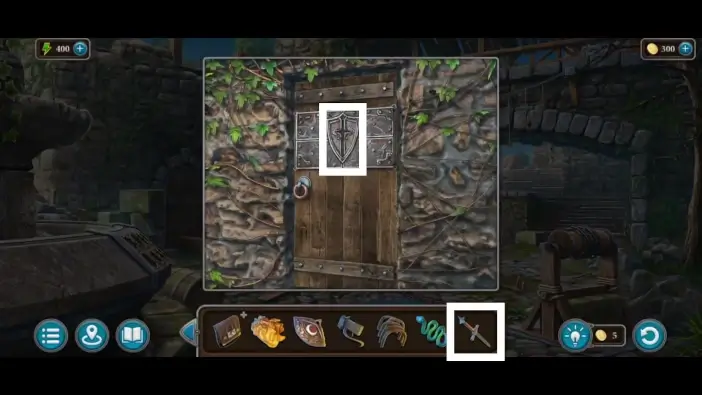
Return to the locked door in the fortress area. Place the sword you just retrieved into the slot on the door. This will start a new puzzle challenge.
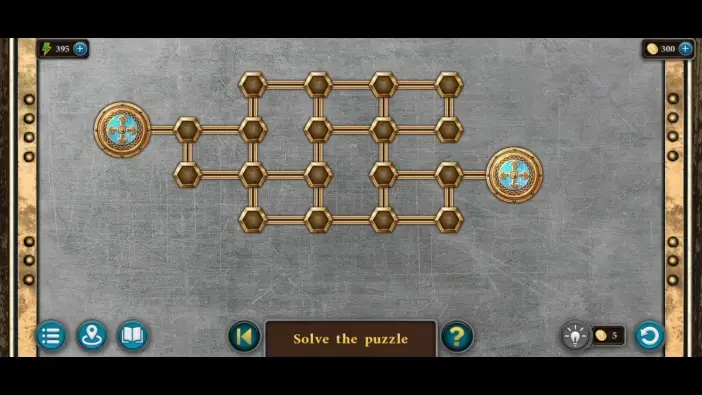
To unlock the door, you need to place the two tokens in their slots. The problem is that you cannot move the token node by node; you only choose a direction, and the token will go until it reaches the end in that direction. You’ll need to use a token to block the other token from going too far.
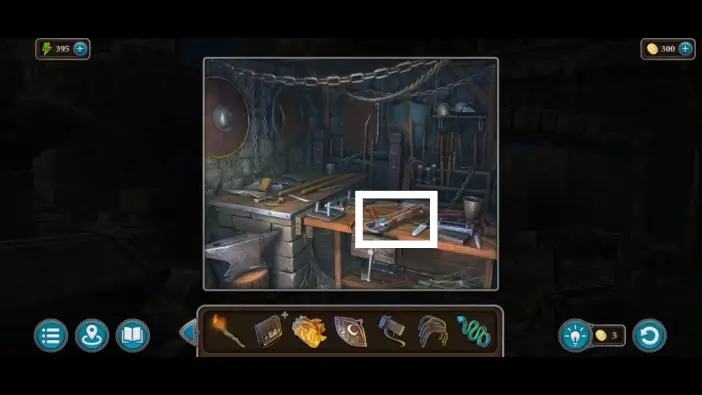
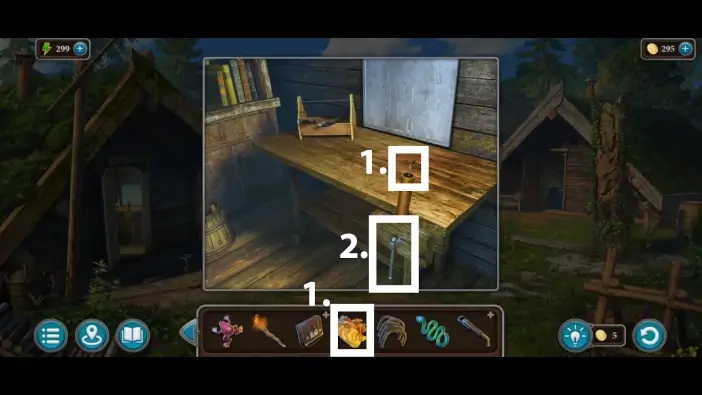
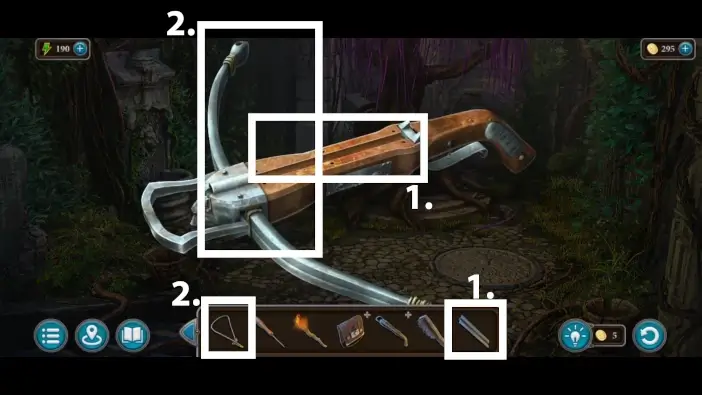
Once you unlock the door, enter the armory and take the crossbow.
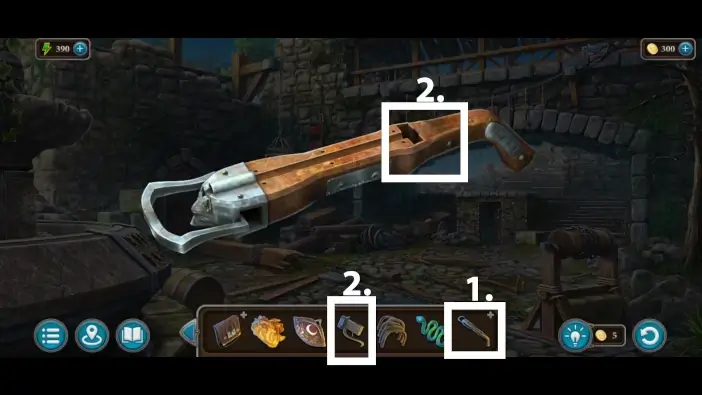
- Tap on the crossbow in your inventory to examine it closely.
- Insert the trigger into the crossbow.
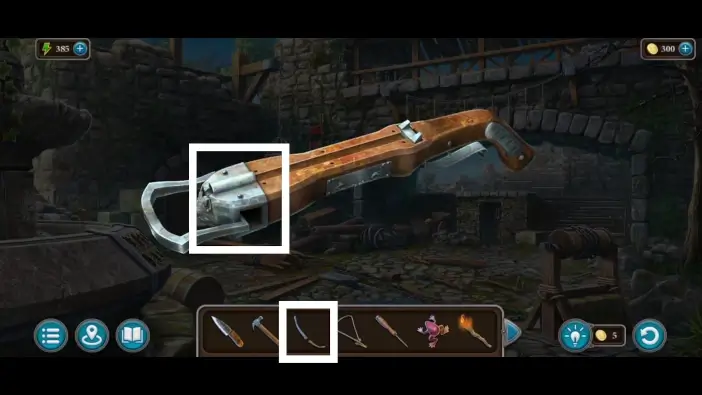
Place the limbs that you got from the stone obelisk into the crossbow.
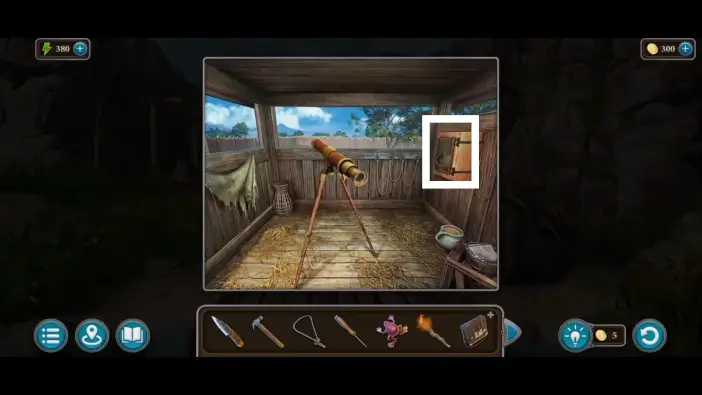
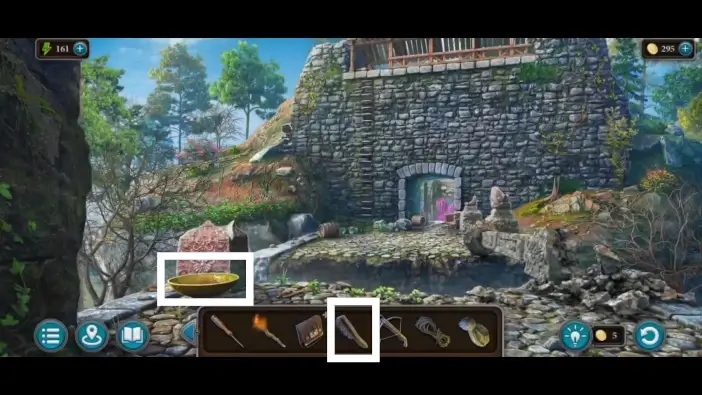
Return to the beach area and climb the watchtower. Approach the cabinet on the right.
Remember the eye-shaped key that you’ve found in the nest. Use it to unlock the cabinet. A new puzzle challenge will start.
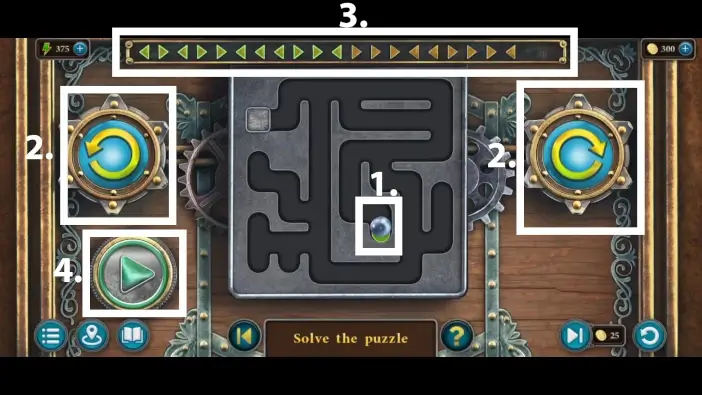
- In this puzzle challenge, you need to move the ball into the hole in the labyrinth.
- To move the ball, you’ll need to rotate the table multiple times using the arrow buttons on the left and right.
- Click multiple times on the buttons on the side to create an order of table rotation. You can see the order you created in the top row.
- Tap on the play button, and the rotations will be executed according to the order in the top row.
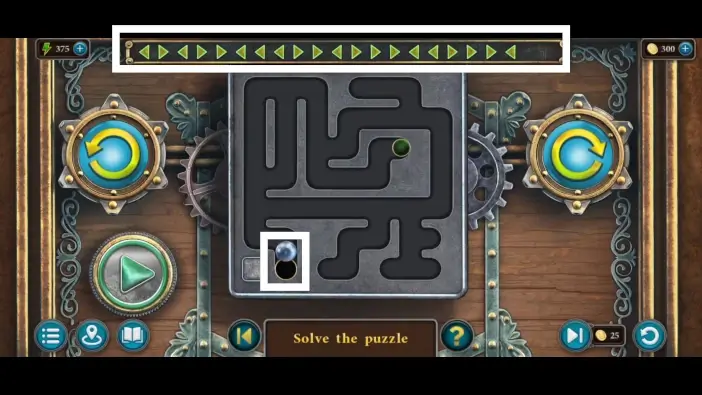
After the ball reaches the hole, you’ll need to bring the ball to the previous location. The order in the queue is for both stages. You’ll need to design the order of the rotation for both destinations only once (not two times for each). The solution is in the picture above. Once you solve this puzzle challenge and open the cabinet, take the handle and the fuse. You’ll need a fuse for the explosive.

Return to the fortress and place the handle on the chain mechanism.
- Use a handle to move the chain and the wooden block away from the door.
- Enter the room.
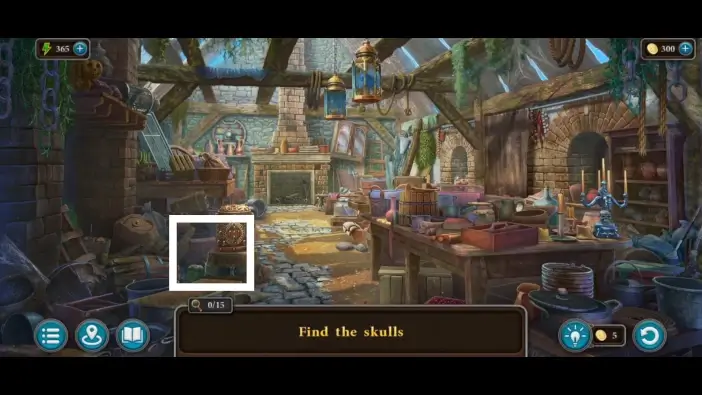
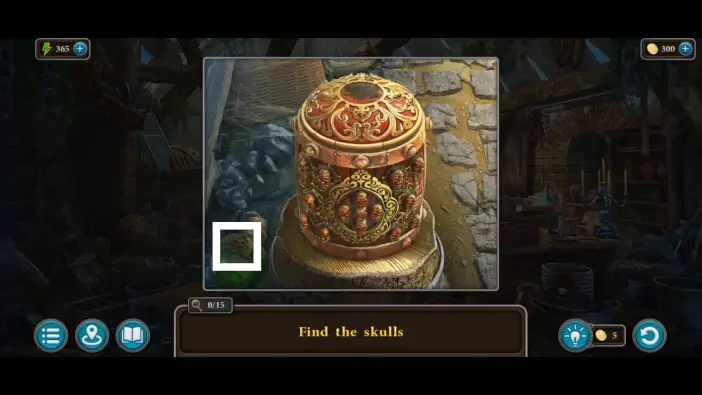
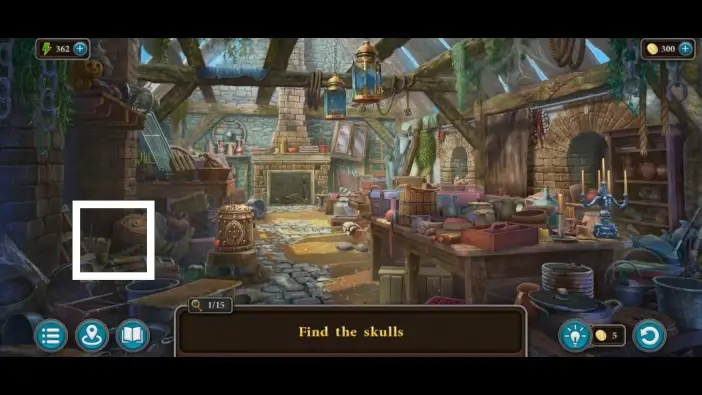
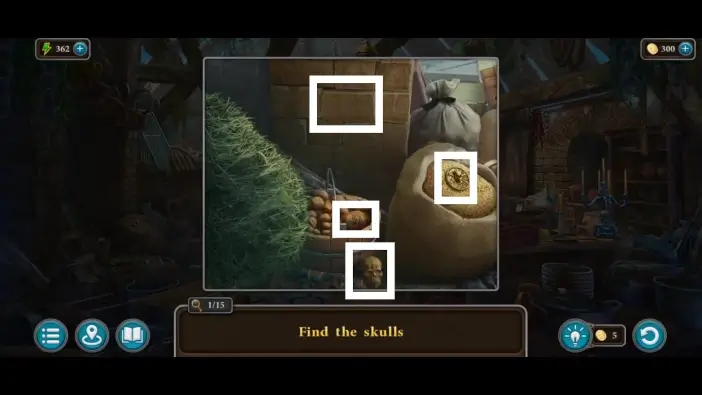
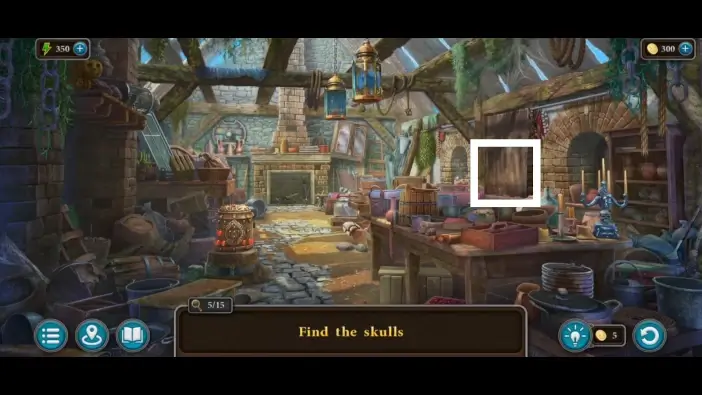
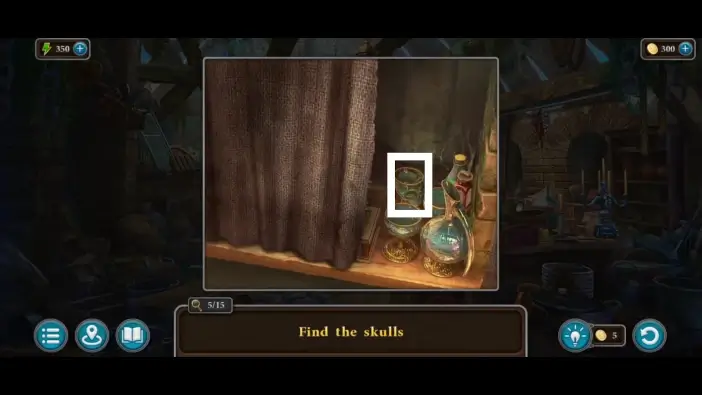
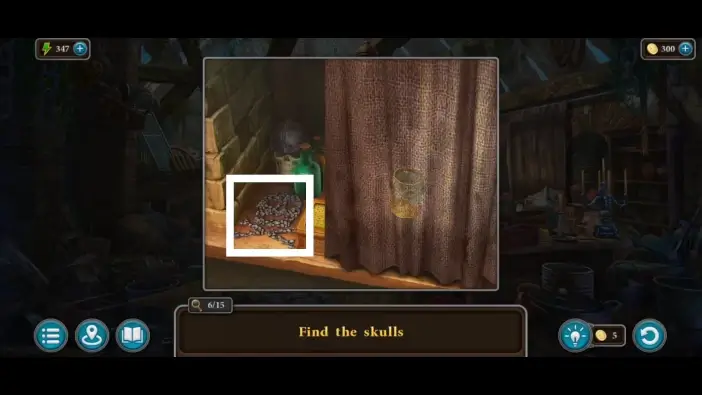
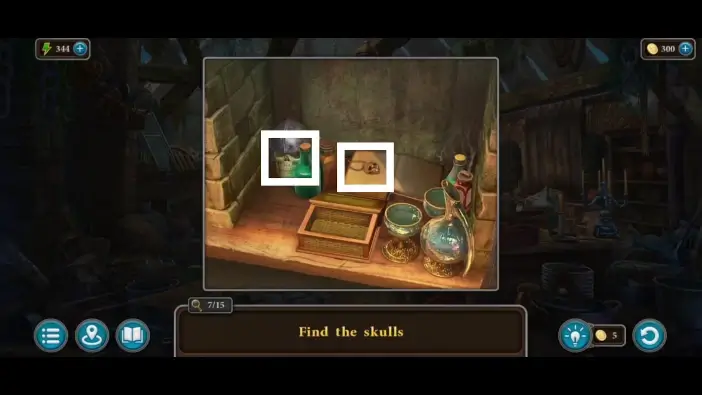
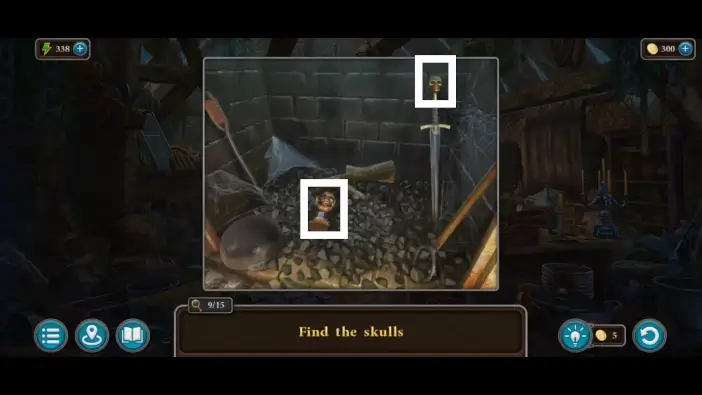
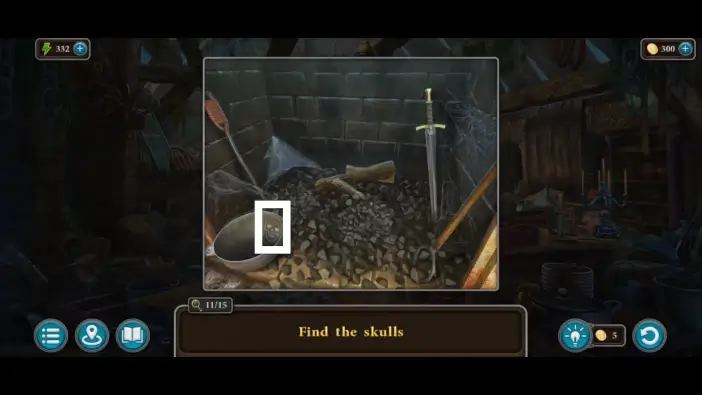
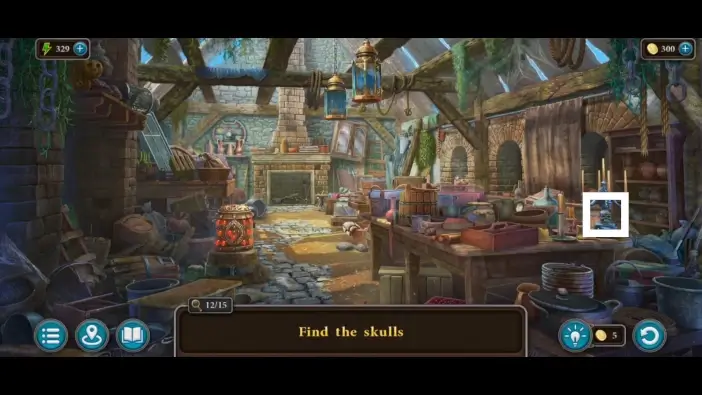
You’ll have a challenge to find fifteen skulls in the hall. Follow the marks in the pictures in this guide to find all the skulls. Some markers show where to approach to find more skulls.
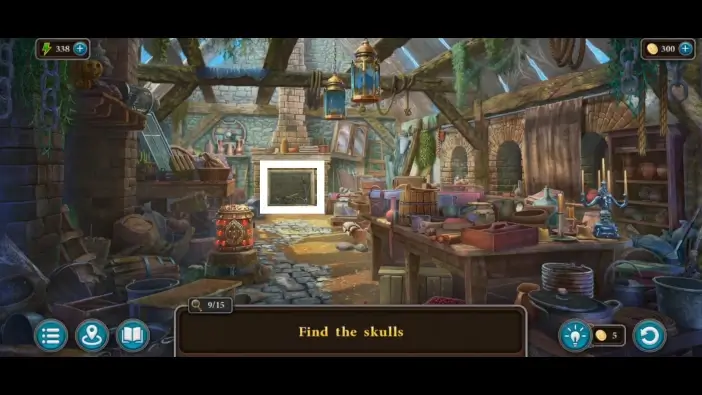

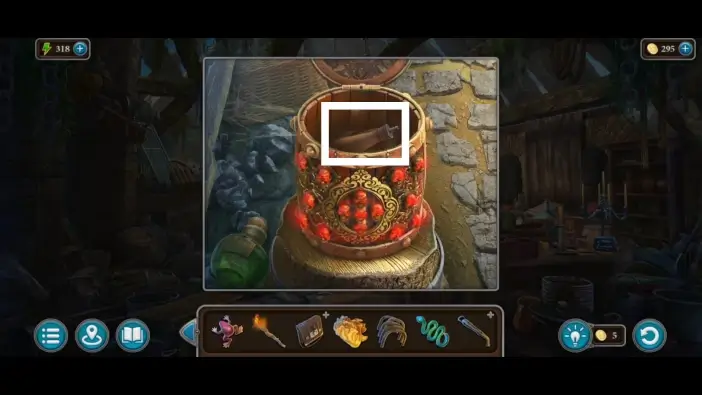
Once you find all the skulls, the decorated box will be unlocked. Take the gunpowder from the box.

Return to the abandoned werewolf camp and go to the house on the left. Place the gunpowder.

Place the fuse.
- Place the resin.
- Use the handle to free the explosive, then take the explosive.
Go to the broken stone bridge and place the explosive near the obelisk on the right.
Light the fuse of the explosive with the torch.
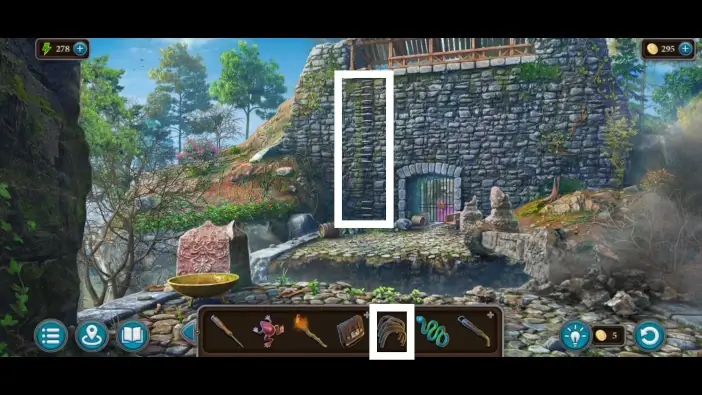
Once the obelisk falls due to the explosion, you can access the other side of the bridge. Go to the ladder on the other side of the bridge and place the staples.
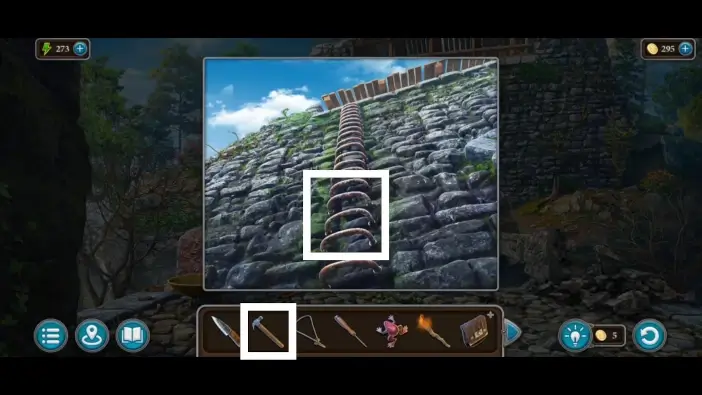
Use a claw hammer to hammer the staples.
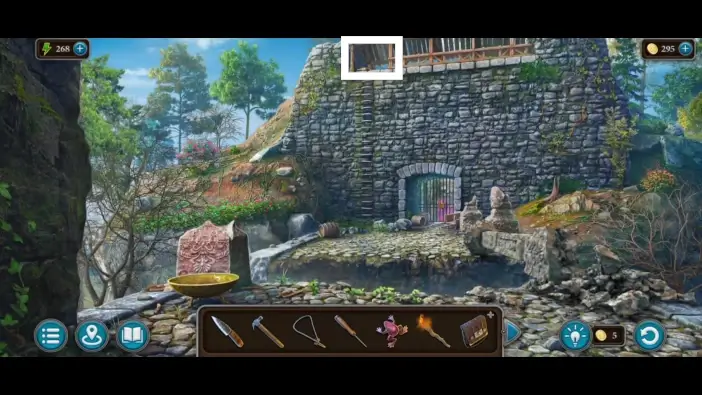
Once you fix the ladder, you can access the room on the top.
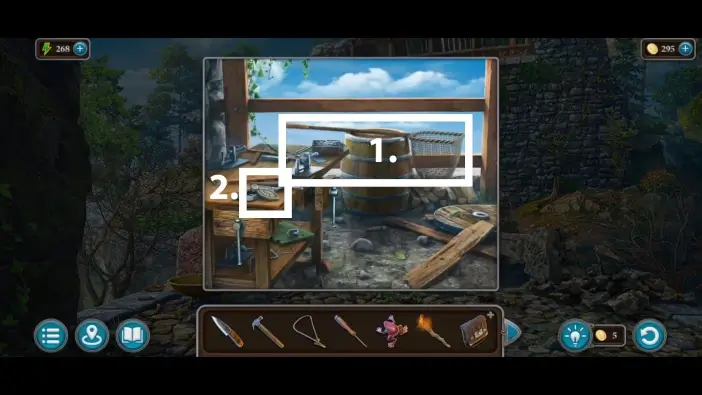
- Take the net from the barrel. You’ll need it in a swamp to catch a dragonfly.
- Take the knob from the table. You’ll need it to start a puzzle challenge at the lion head faucet.
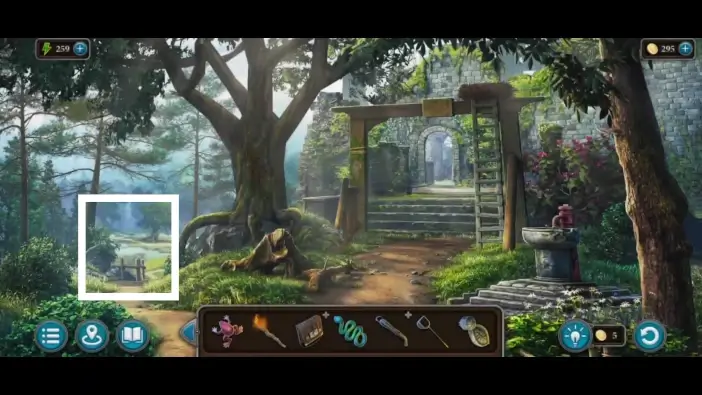
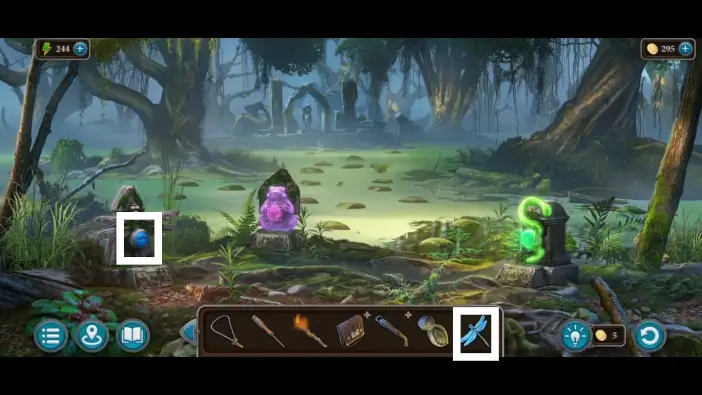
Return to the area where the large tree is and choose the left path towards the swamp.
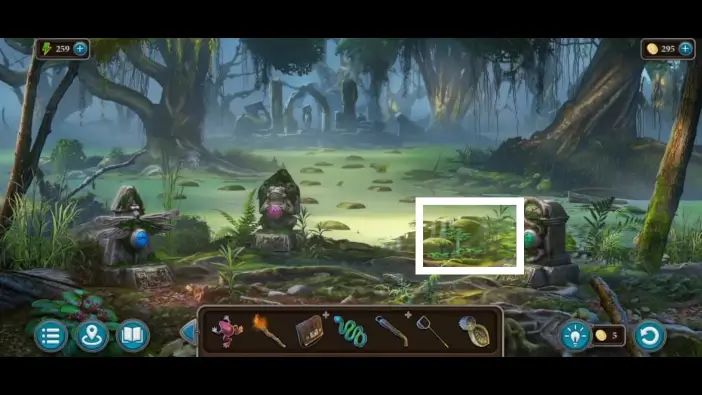
Approach the water.
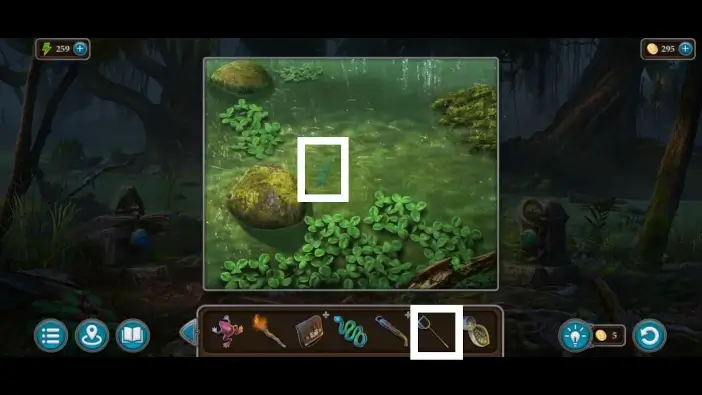
Use the net you found at the stone bridge to catch a dragonfly-shaped key.
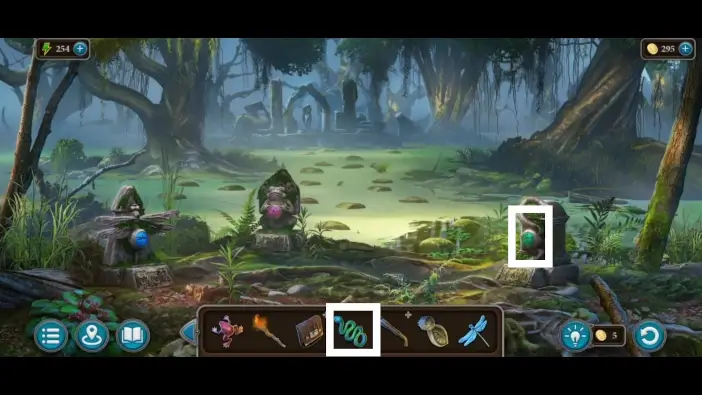
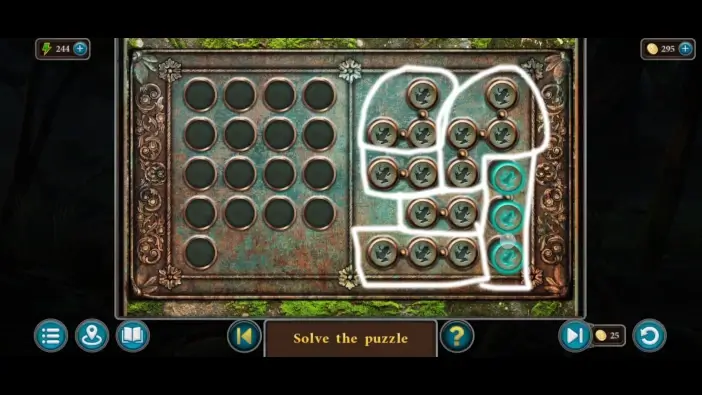
Place the snake key into the snake totem on the right. A new puzzle challenge will start.

You need to place all snakes into the blue tiles to finish this puzzle. Once you solve this puzzle, the snake totem will be activated.
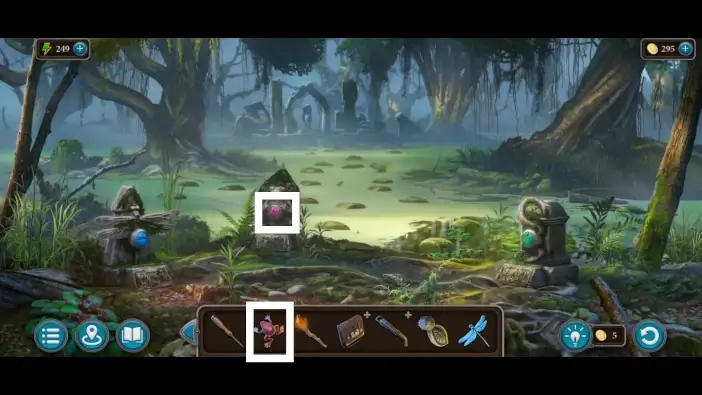
Place the frog key into the frog totem in the center. A new puzzle challenge will start.
You need to place all the blocks in the right slots. They can all fit in only one arrangement. Once you solve this puzzle, the frog totem will be activated.
Place the dragonfly key into the dragonfly totem on the left. A new puzzle challenge will start.
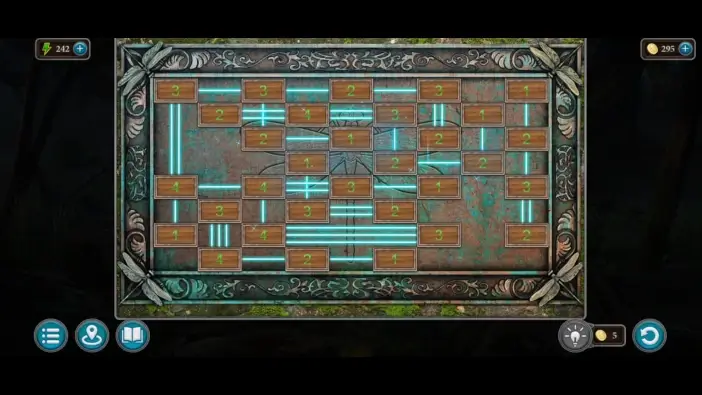
You need to connect the rectangles with lines. Each rectangle has a number that represents how many lines it should have. Once you solve this puzzle, the dragonfly totem will be activated.
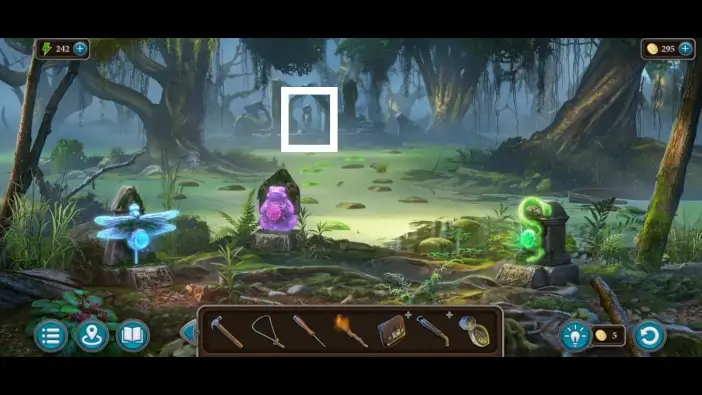
Once all totems are activated, you can access the monument on the other side of the swamp.
Take the handle from the monument.
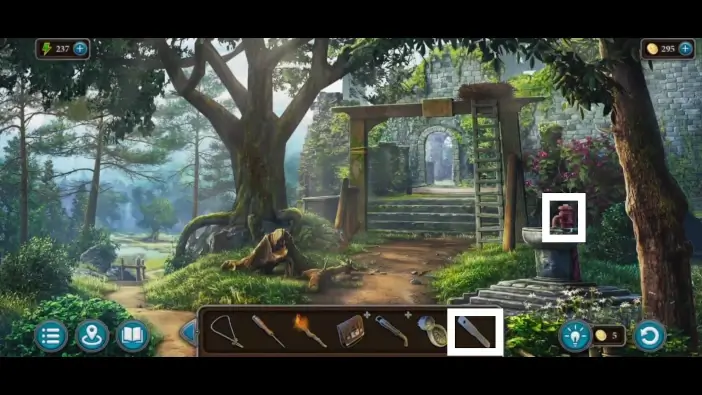
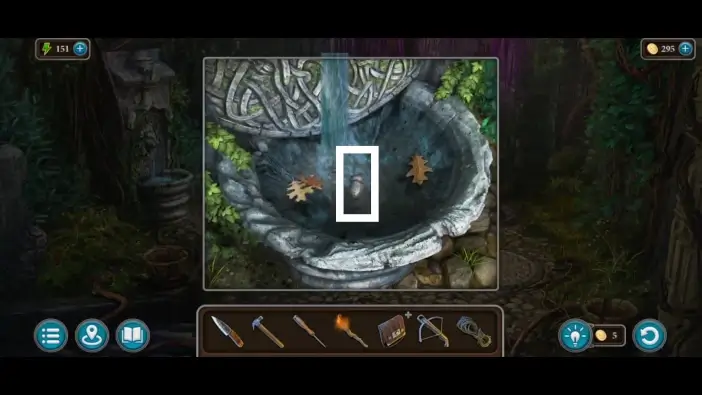
Go to the giant tree area and attach the handle you just found to the faucet.
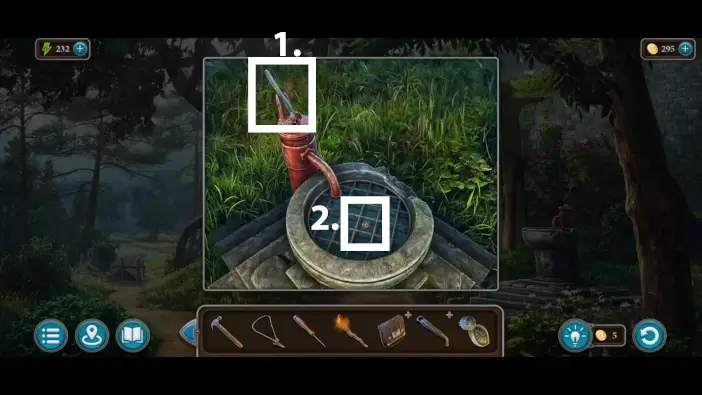
- Use a handle multiple times to fill the space below with water.
- Afterwards, you’ll be able to take the wooden wolf’s eye for the wolf’s totem.
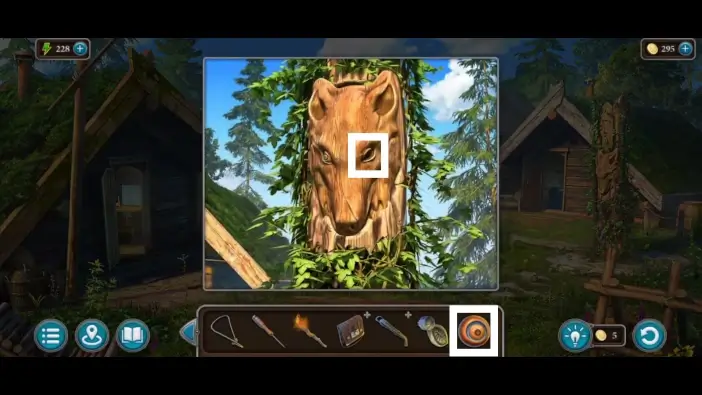
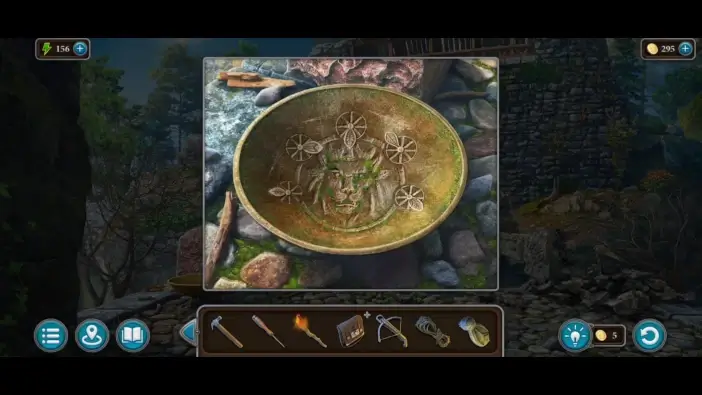
Go to the abandoned werewolf camp and approach the wolf totem. Place the eye into the empty wolf’s eye socket. A new puzzle challenge will begin.
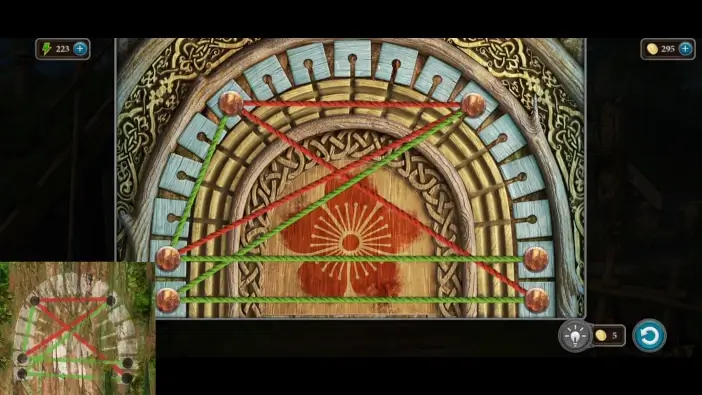
Remember that in the giant tree area, on the left wooden column, there was a clue covered in moss. This clue will help you solve the puzzle. You need to arrange the strings like in the picture above. When you solve the puzzle, take the horsey figurine.
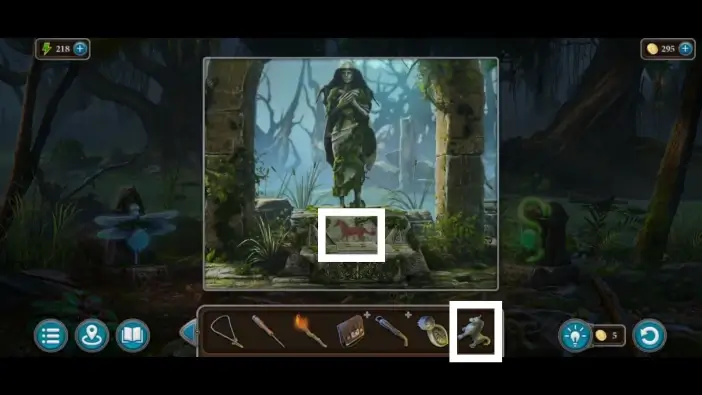
Return to the monument in the swamp and place the horsey figurine into its slot on the monument. Tap on the monument one more time to start a new puzzle challenge.
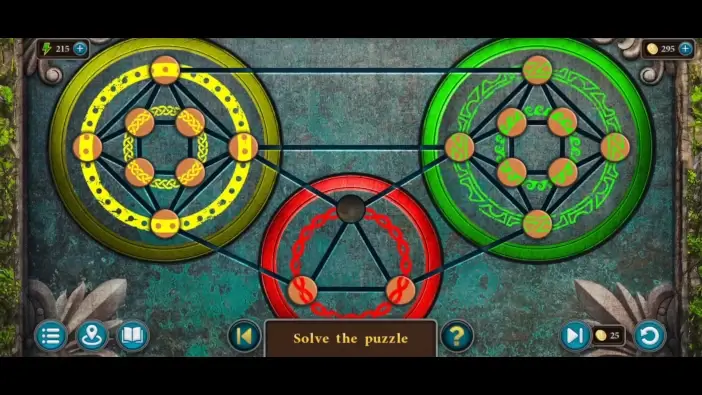
You need to move all the circles to their correct slots, like in the picture above. You’ll have only one empty slot. Once you finish the puzzle, a compartment will open at the bottom of the monument. Take the sun-shaped key from it.
Go to the broken bridge area and go towards the gate.
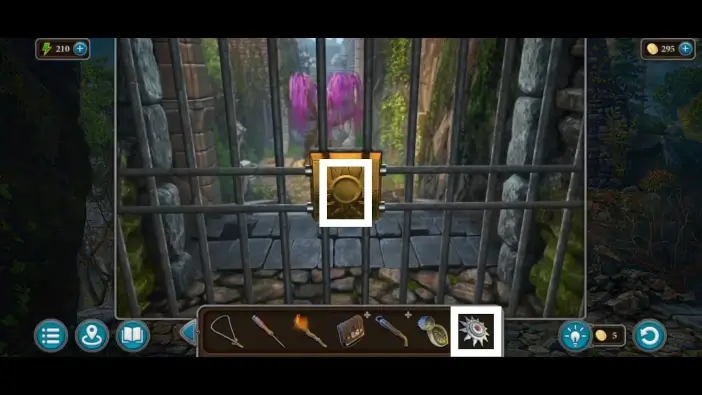
Place the sun-shaped key to unlock the gate. Enter the new area.
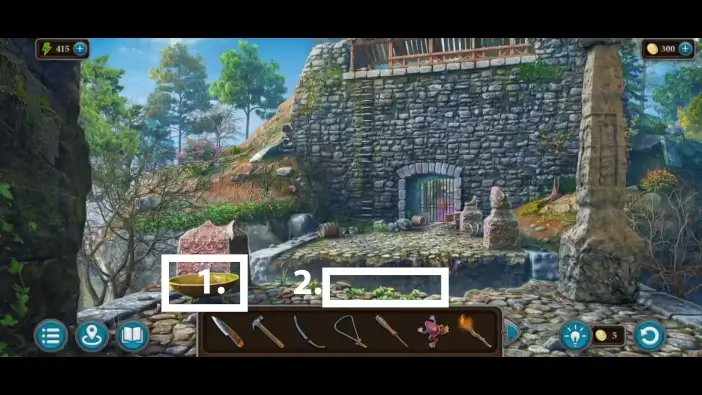
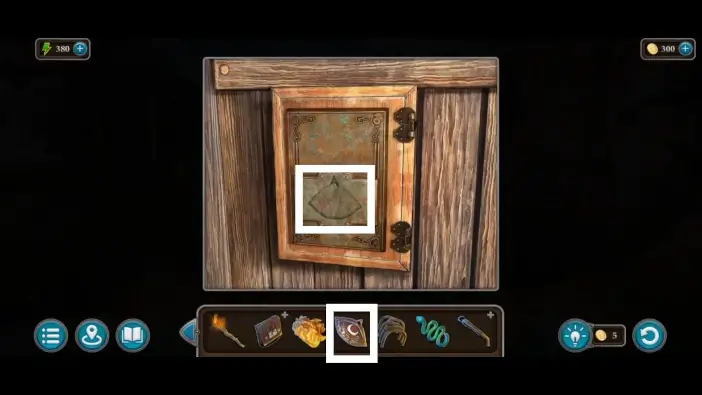
Approach the slab covered in leaves.
Remove the leaves and take the brush. You’ll need it for the brazier.
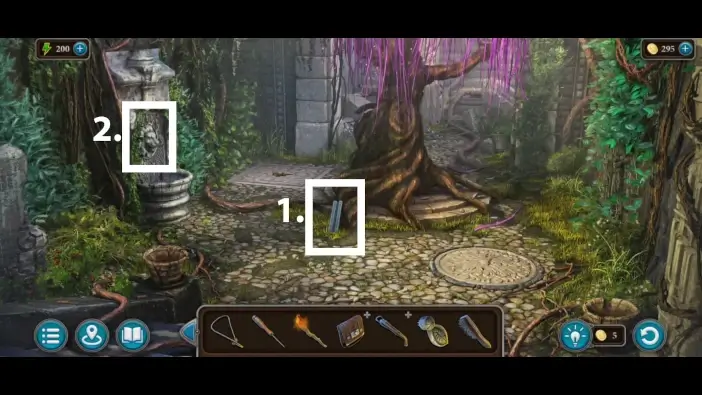
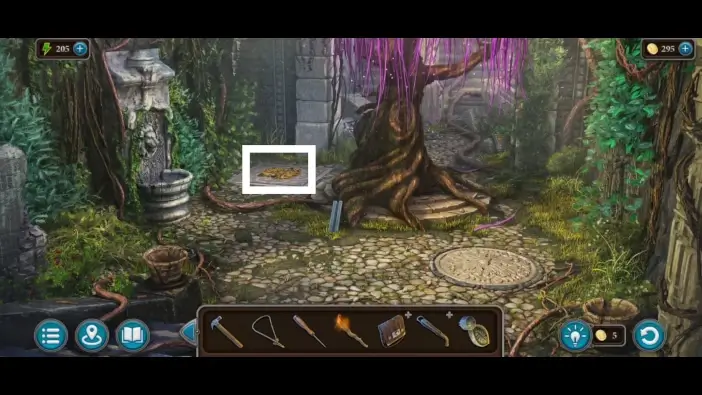
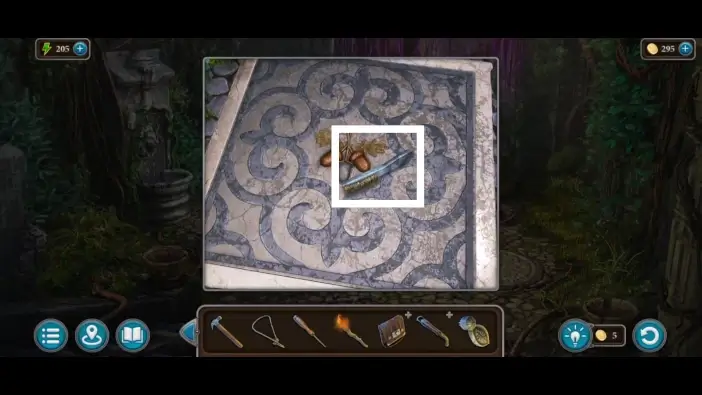
- Take the bar near the tree. You’ll need it to repair the crossbow.
- Approach the lion head faucet.

Place the knob in the slot marked in the picture above. You will need to find one more knob.
- Tap on the crossbow in your inventory to examine it closely. Place the bar on the crossbow.
- Place the string you got from the flagpole on the crossbow.
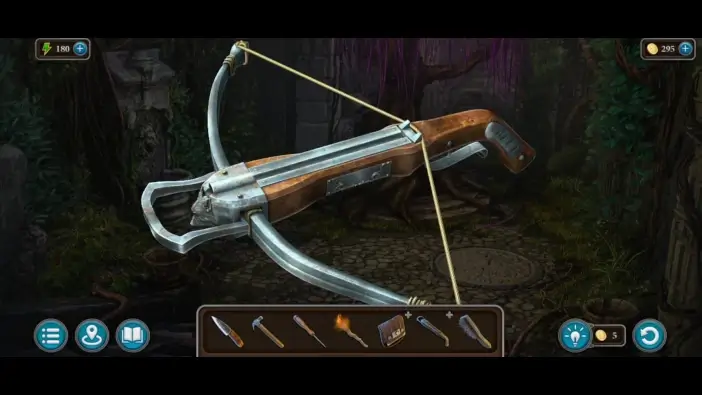
Tap on a crossbow once again to move the string. The functional crossbow will be added to your inventory.
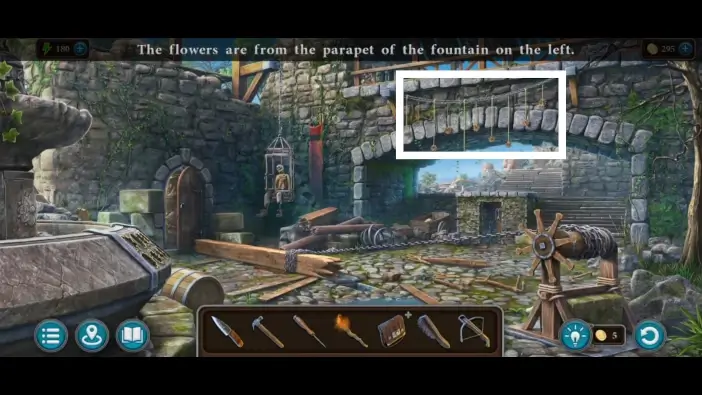
Return to the fortress and use the repaired crossbow to shoot at the hanging objects.
Shoot at each rope section to get the flowers.
Place the flowers on the fountain on the left to open a hidden compartment inside the fountain. Pick up the rope. You’ll need it to descend to a secret location later. Don’t forget to pick up the second knob from the compartment.
Go to the stone bridge area and approach the brazier. Use a brush to clean the brazier.
Once you clean the brazier, you will see a clue for the lion head faucet puzzle. Remember how to position knobs.
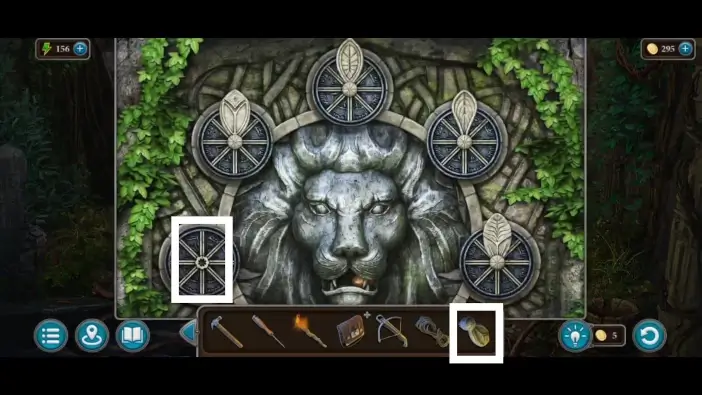
Place the second knob in its place, and a new puzzle challenge will begin.
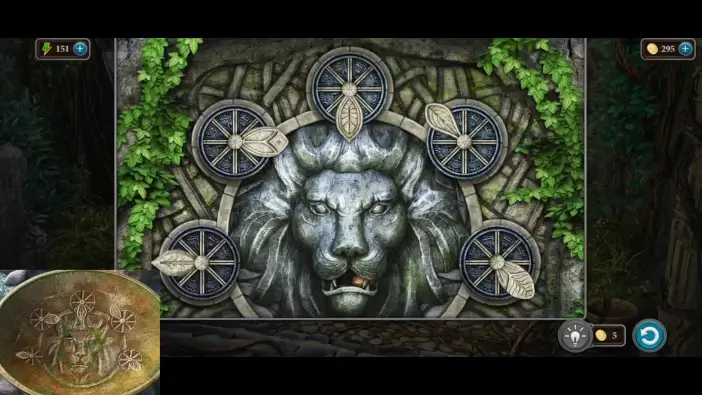
Rotate the knobes like in the clue in the brazier. When you solve the puzzle, the faucet will activate.
Take the acorn that came out of the faucet.
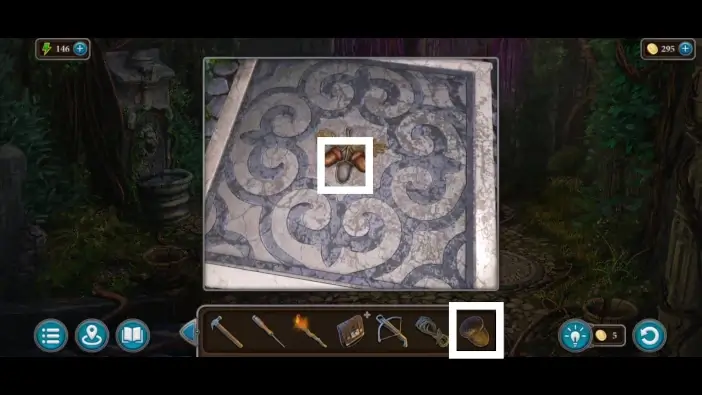
Return to the slab where you found the brush and place the acorn in its place. This will activate a hidden mechanism.
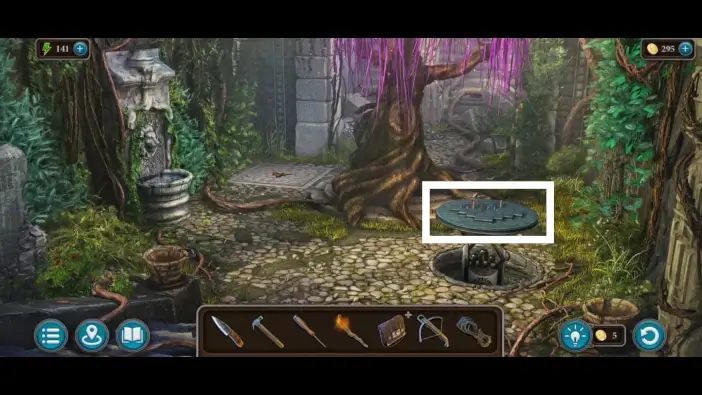
Go towards the mechanism.
You’ll need to solve a new puzzle. You’ll need to place each block in its corresponding place between the smaller blocks of the same color. When you move blocks, you’ll move all the blocks at the same time unless there is an obstacle to a specific block. The solution is in the picture above. Once you solve the puzzle, the passage to the tunnel will be unlocked.
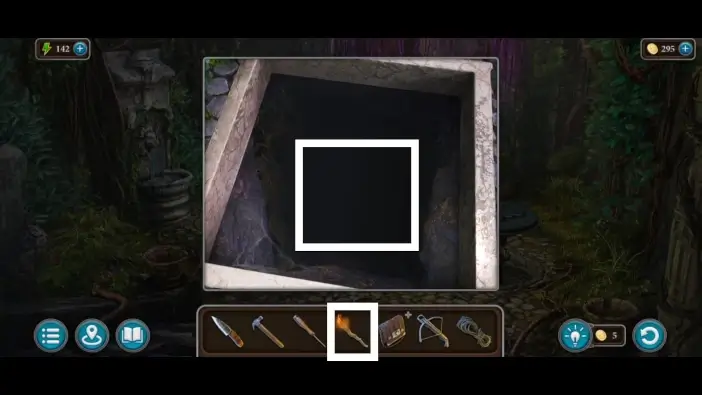
Throw the torch to illuminate the tunnel.
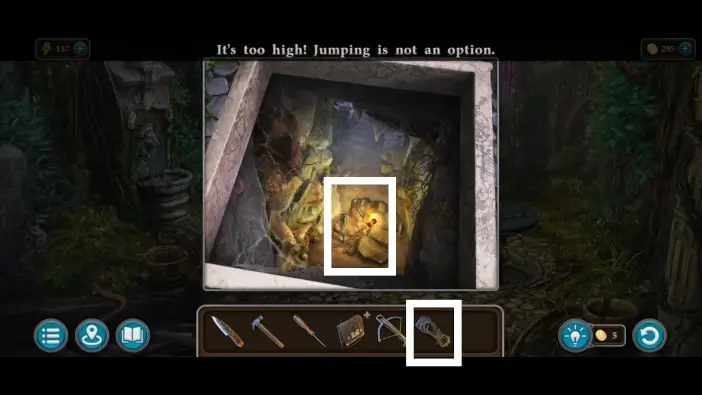
Use a rope that you got from the fountain to descend into the tunnel. Go through the tunnel.
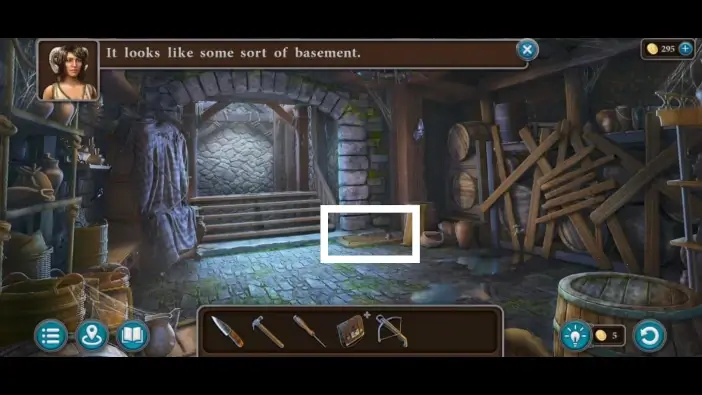
After the tunnel, you’ll reach the basement. Approach the lid on the ground.
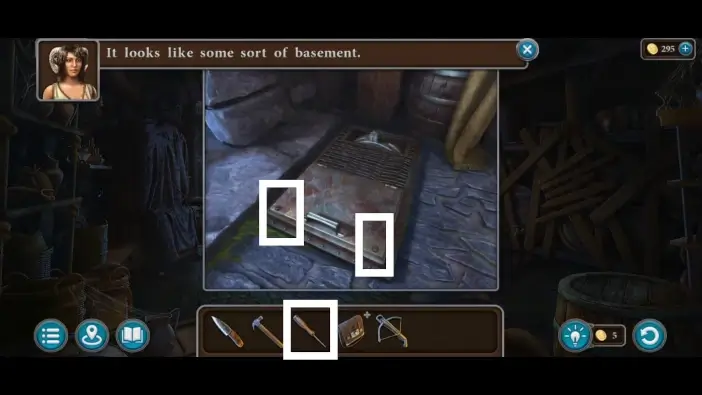
Unscrew the lid using the screwdriver.
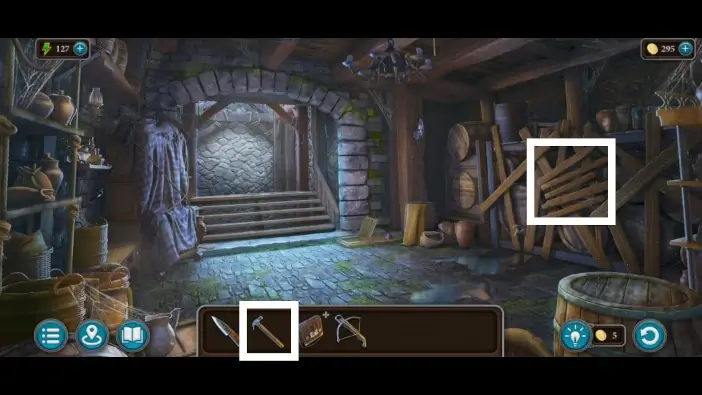
Approach the boards on the right and use a claw hammer to remove them.
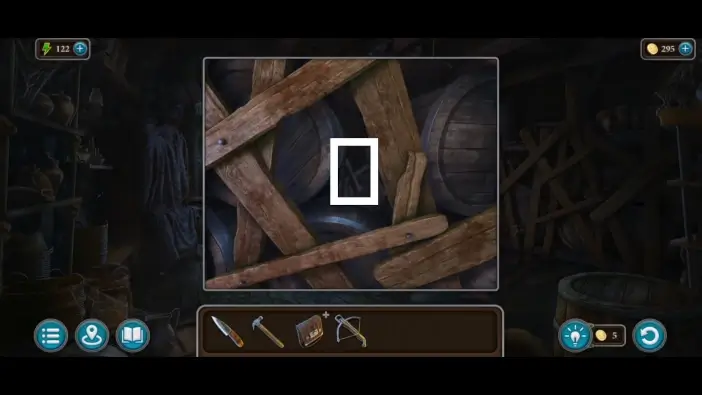
Take the handle that is hidden between the barrels. It will serve as a lever for the elevator.
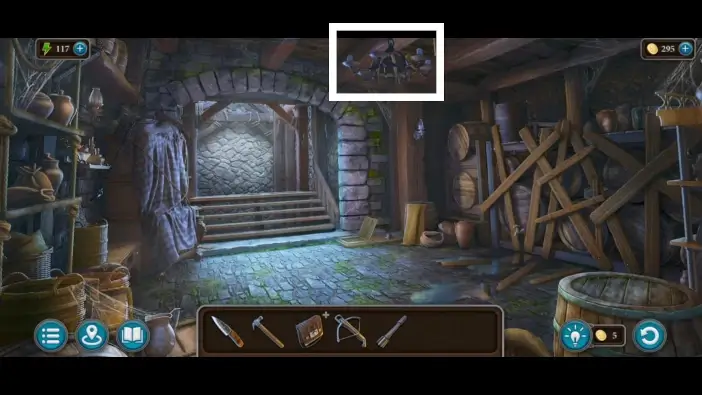
Approach the chandelier.
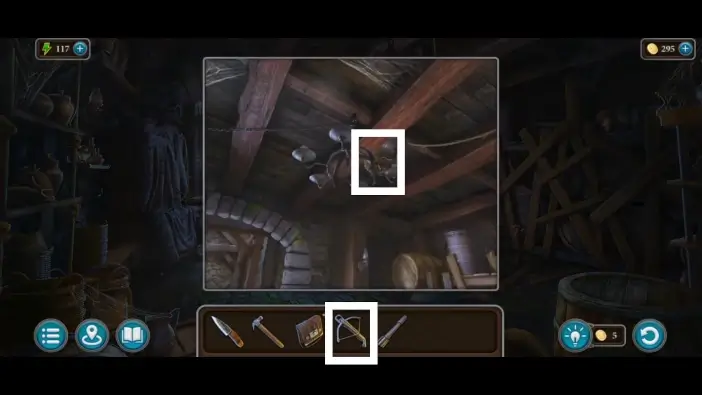
There is a tree-shaped item on the chandelier. Shoot it using the crossbow. The tree-shaped item will be added to your inventory.
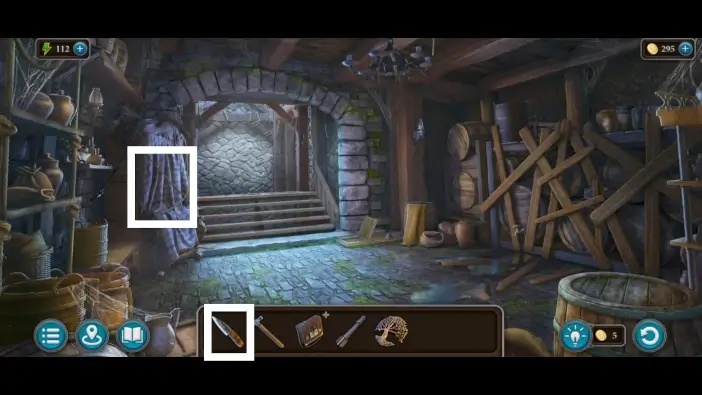
Approach the cloth on the left and use a knife to remove it.
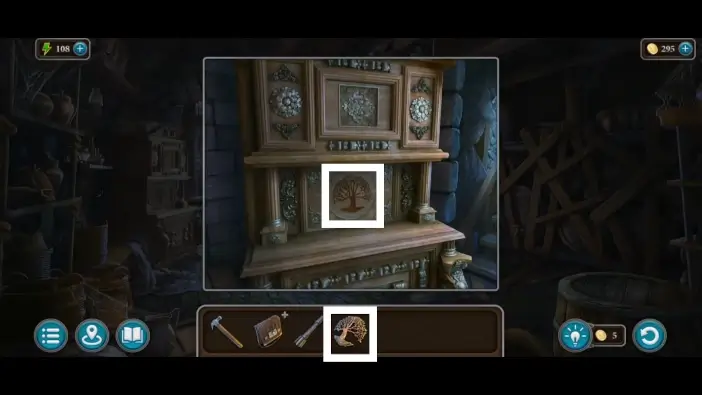
Place the tree-shaped item in its place to start a new puzzle challenge.
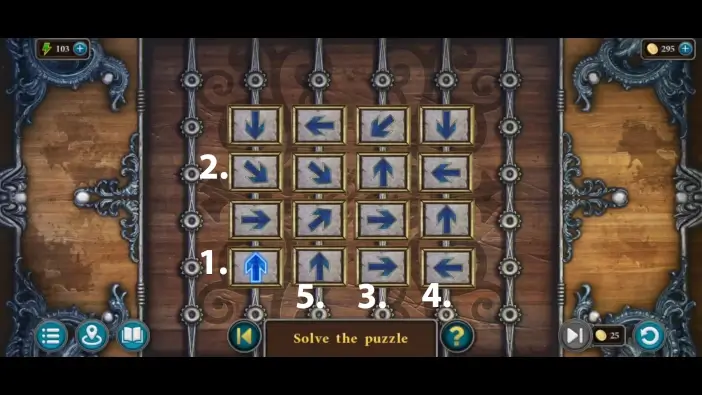
Press the arrows in the order marked in the pictures in this guide.
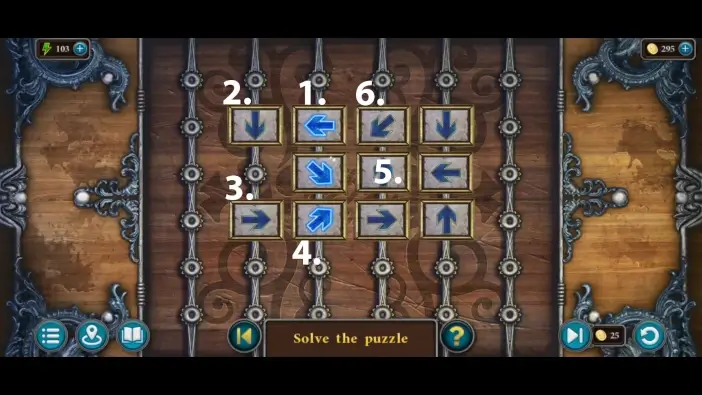
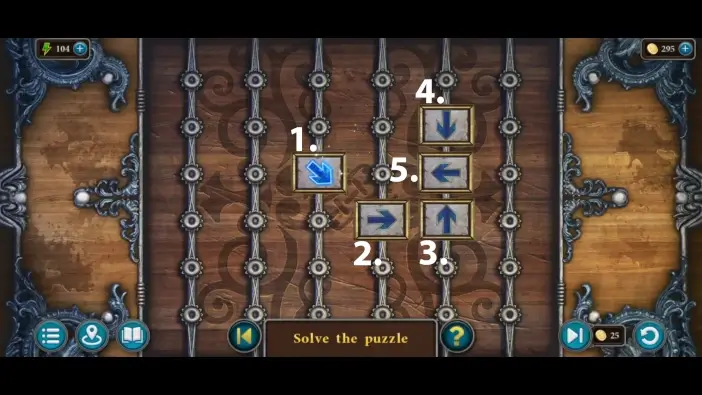
Once you solve this puzzle challenge the cabinet will open. Take the gear from the cabinet.
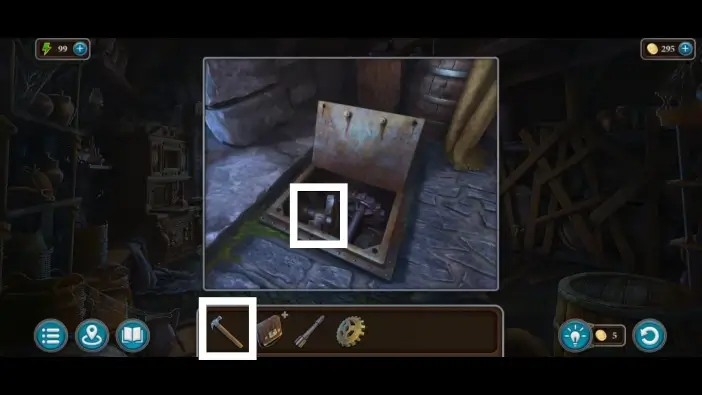
Return to the elevator mechanism on the floor and use the claw hammer to remove the broken gear.
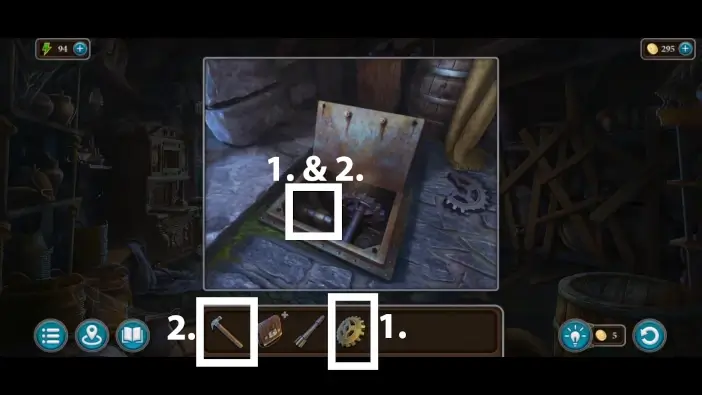
- Place the new gear you found in the cabinet.
- Use the claw hammer to hammer the new gear.
- Close the lid to see the lever section. Attach the handle you found between the barrels to the lever mechanism.
- Activate the lever to lower the elevator.
Go to the elevator. A new cutscene will begin, and the first chapter of the story will be completed.
This will mark the end of Chapter 1 of Legendary Tales 4.
Thank you for reading!