Horror House Escape
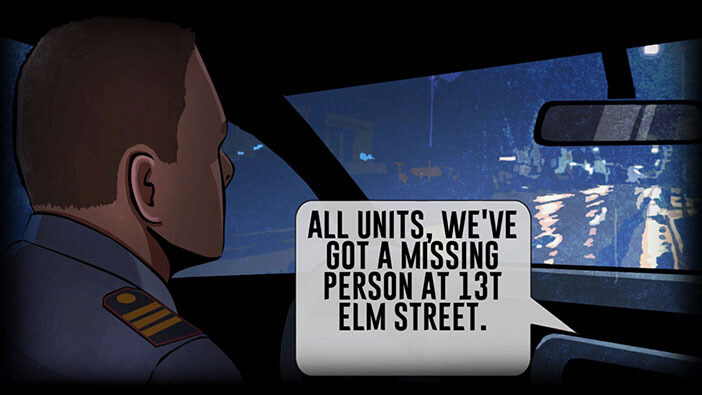
Hello everyone and welcome to our walkthrough for “Horror House Escape”. At the start of the game, we can see a dispatcher from a pizza delivery company calling the police and reporting that one of their employees has been kidnapped. Their employee was delivering pizza when he was kidnapped, so the dispatcher was able to provide the exact address. Our character is a police officer, and he immediately went to this address to investigate.
Ok, let’s start the investigation. Tap on the “Rope” in the lower-left corner of the screen to pick it up.
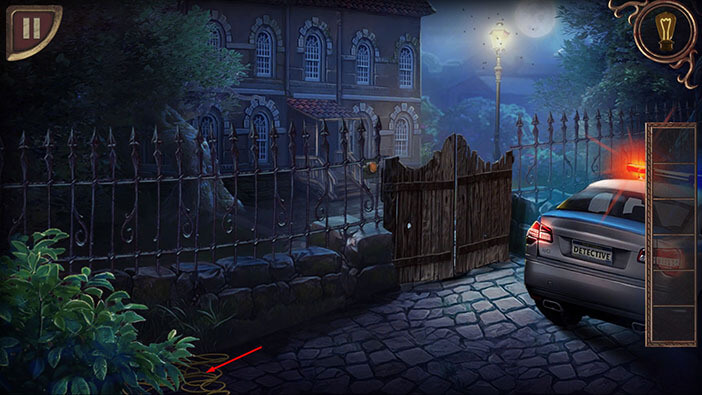
Next, tap on the trunk of your patrol car to open it, and tap again to look inside.

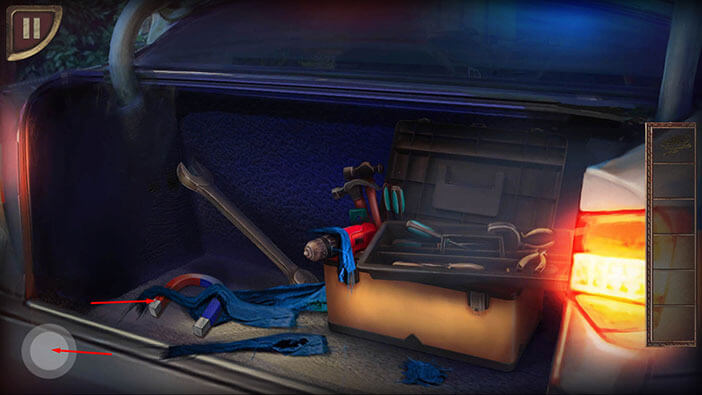
On the left side of the trunk, you will see a magnet. Tap on it to pick it up and it will be added to your inventory.
After that, tap on the button in the lower left corner to go back.
Drag the “Magnet” from the inventory slot and combine it with the “Rope”.

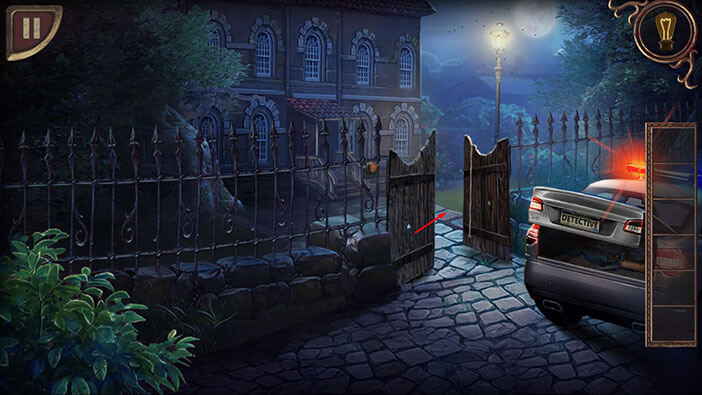
Next, select the “Rope with Magnet” from the inventory and drag it onto the wooden gate. Our character will use the magnet to “grab” the bar on the other side of the gate.

Tap on the rope to pull the bar and you will unlock and open the gate.

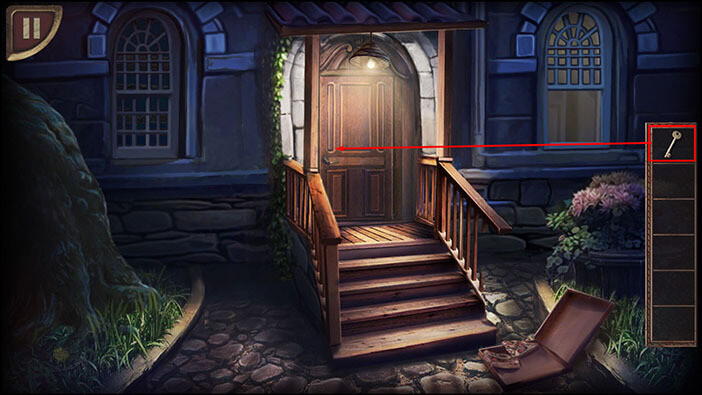
Tap on the gate to go to the front yard.
A part of the wooden fence on the right is loose so tap on it to break it off.
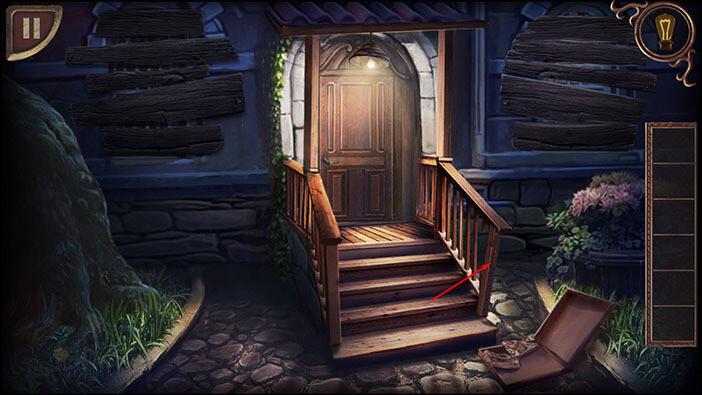
Tap on the piece of wood to pick it up.
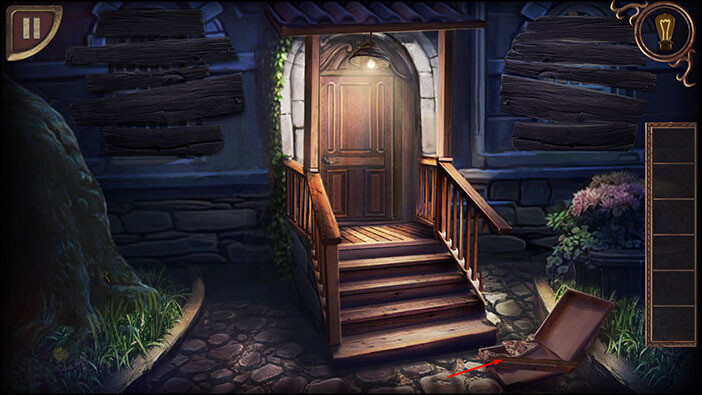
If you closely examine the base of the tree on the left, you will notice a shiny item. Tap on it to pick it up and a “Key” will be added to your inventory.

Also, if you more closely examine the “Piece of wood” in your inventory, you will notice a keyhole. So, select the “Key” from the inventory and combine it with the “Piece of wood”.
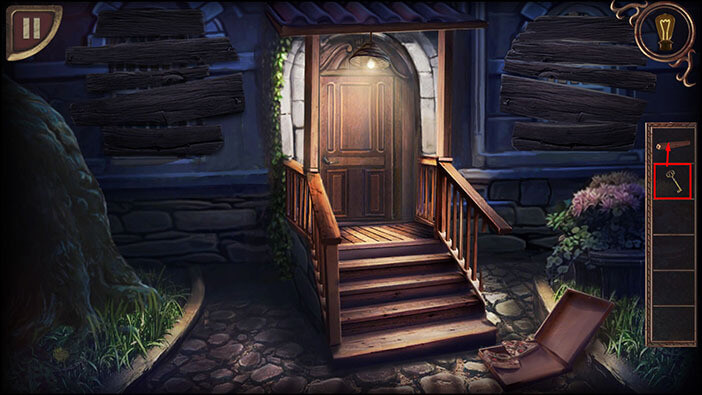
“Piece of wood with hook” will be added to your inventory.
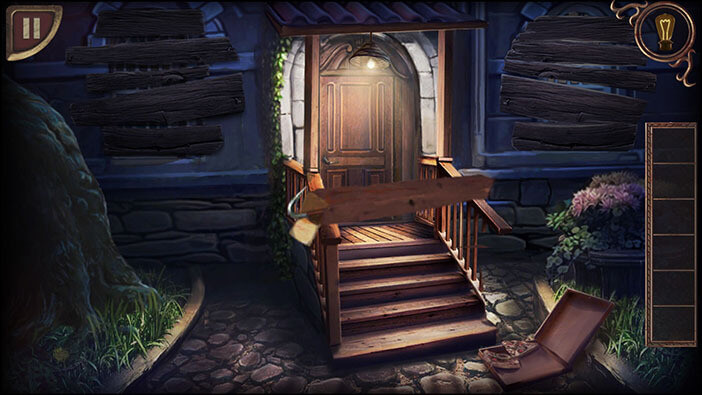
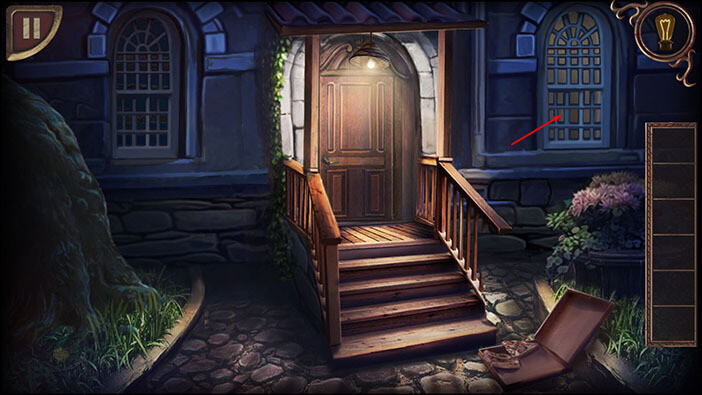
The “Piece of wood with hook” can be used like an improvised crowbar. So, select the “Piece of wood with hook” from the inventory and use it to remove the boards on the windows.
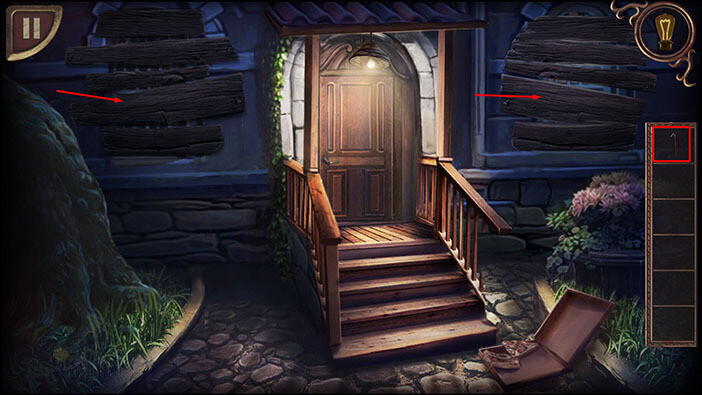
Ok, we can now use the window to get inside the house. Tap on the window on the right to open it, and tap again to climb into the house.
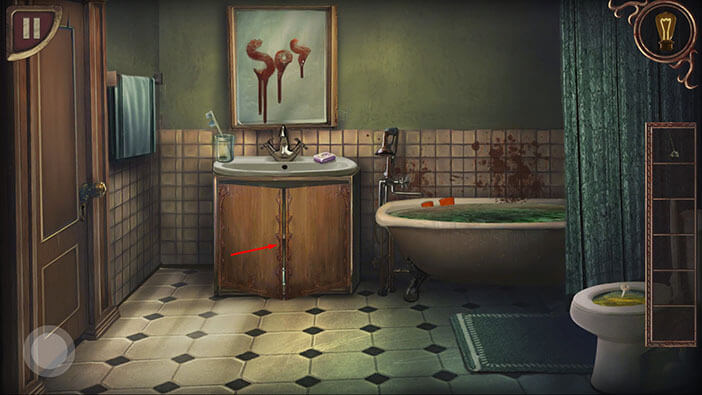
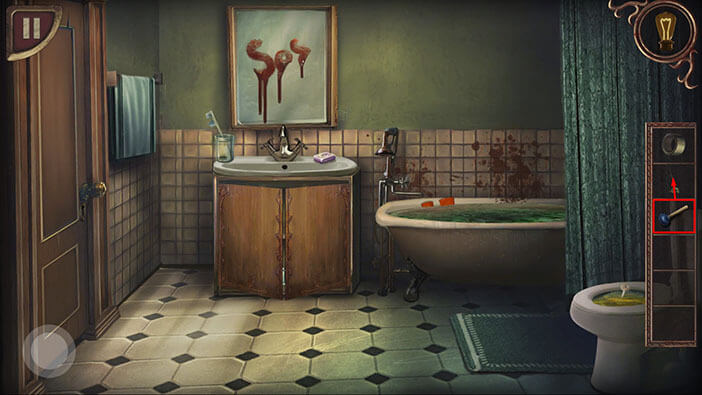
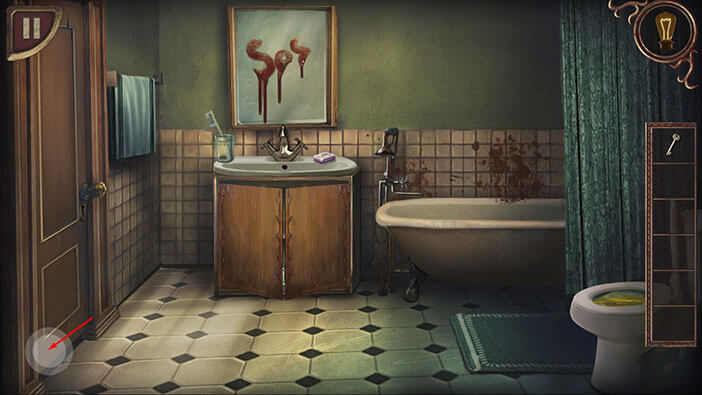
The door on the left is locked, so we’re stuck in the bathroom, for now, and we will have to find a key in order to get to the other parts of the house. Let’s take a look around the bathroom and see what we can find.
Tap on the “Mop” on the left to pick it up.

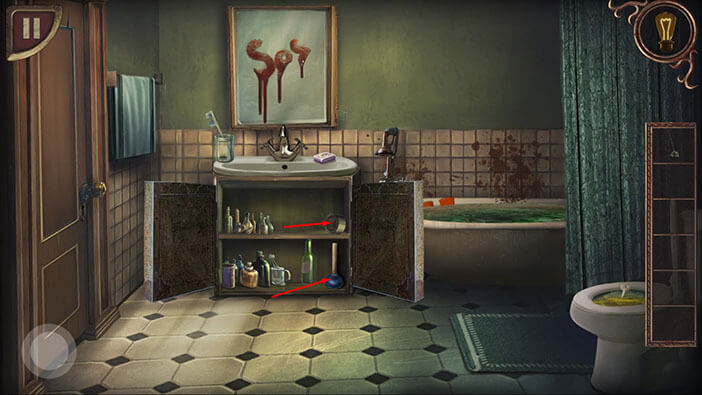
Next, tap on the cabinet below the sink to open it, and take a look inside.
Here, we can find two useful items, “Tape” and a “Plunger”, both on the right side of the cabinet. Tap on them to pick them up.
After that, tap on the cabinet door to close it.
Ok, we should now combine the items in our inventory. First, drag the “Plunger” from its slot and combine it with the “Mop”.
Next, drag the “Tape” from the inventory slot and use it to tape the plunger and the mop. “Pole with mop and plunger” will be added to your inventory.
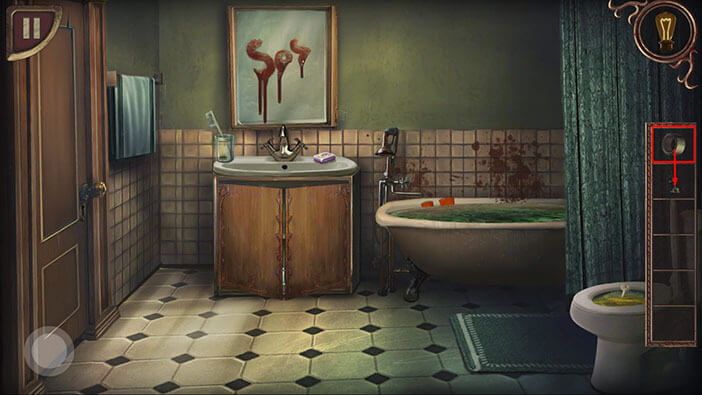
Ok, now take the item that we just created, the “Pole with mop and plunger”, and use it to unplug the bathtub.
Inside the bathtub, our character will find “Rubber gloves” and they will be added to your inventory.
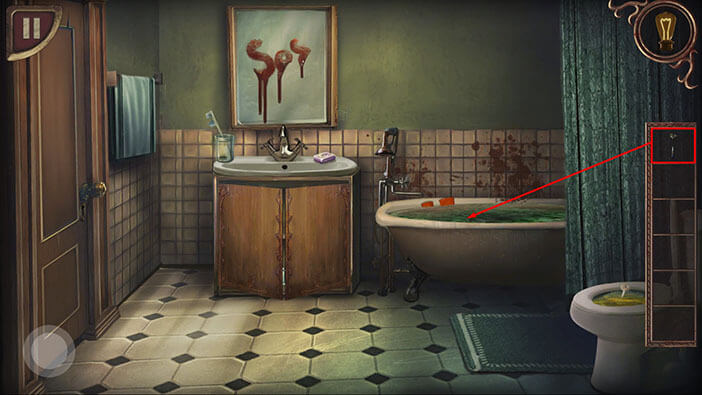
Next, drag the “Rubber gloves” from the inventory and use them to pick up the “Key” from the toilet.
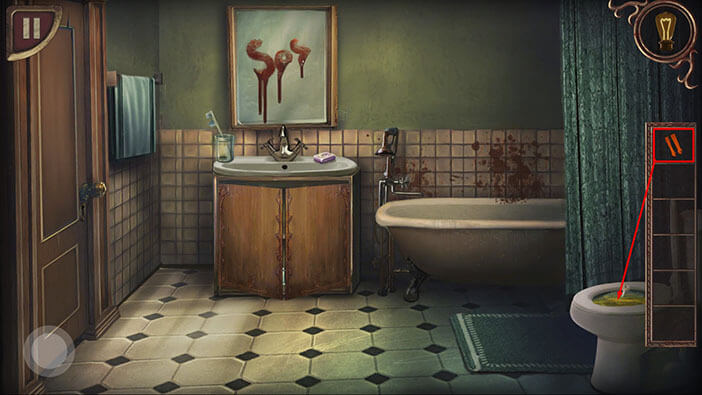
The “Key” that we found can be used to unlock the front door. So, tap on the button in the lower left corner to go back.
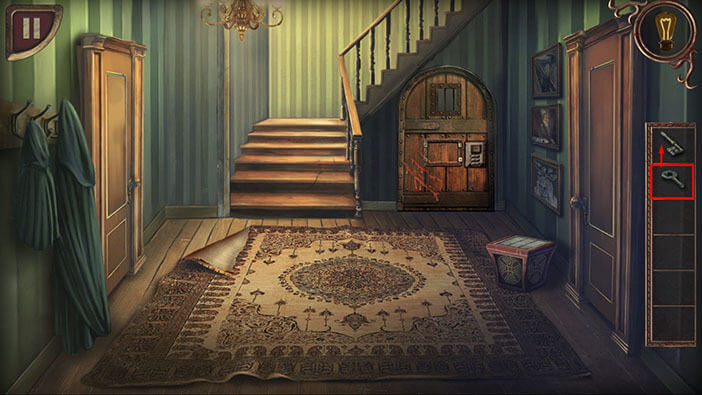
Drag the “Key” from the inventory and use it to unlock the front door. After that, tap on the door to proceed inside.
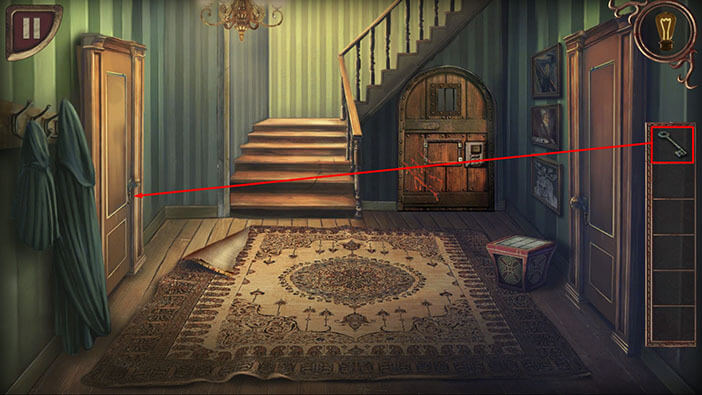
Ok, we will need another key in order to get into the room on the left. So, tap on the cloak.

“Part of a key” will fall to the ground so tap on it to pick it up.
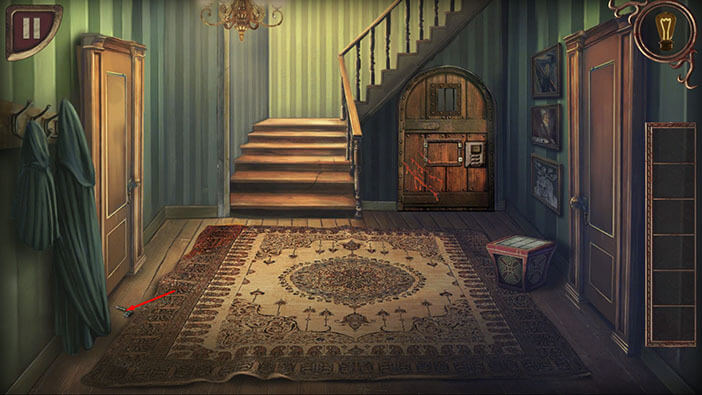
Let’s find the other part. Tap on the upper left corner of the carpet to look under it.
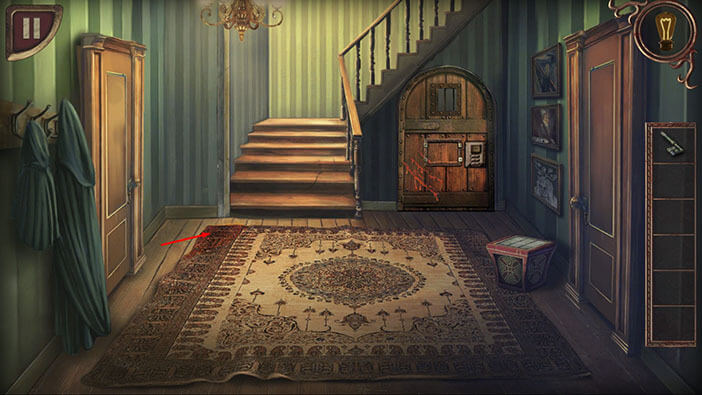
Under the carpet, you will find the other “Part of a key”. Tap on it to pick it up.

Next, combine the two “Parts of a key” in our inventory, and we will get the key for the room on the left.
Drag the “Key” from the inventory and use it to unlock the door on the left.
After that, tap on the door to proceed into the next room.
This room looks like some kind of laboratory, and there is a skeleton on the table. It’s too dark in this room, so let’s turn on the lights by tapping on the lamp on the right.
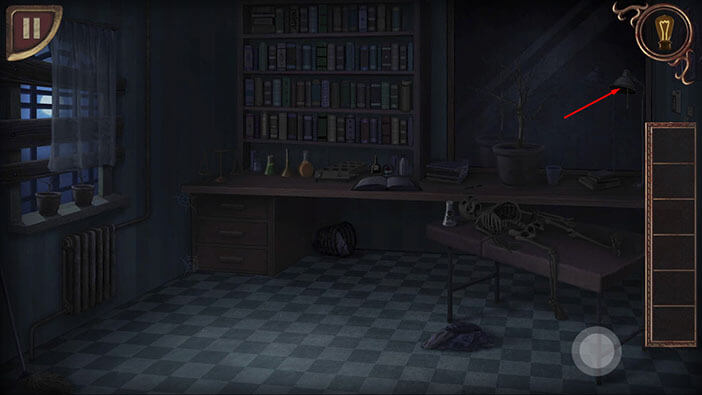
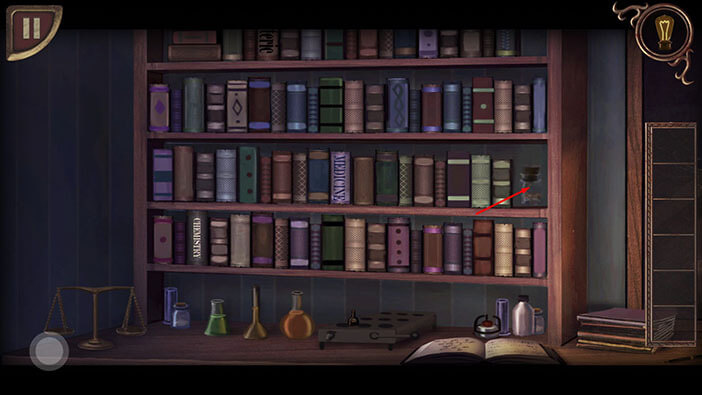
Ok, the light is now on, and we can explore the room. Tap on the bookshelf to take a closer look at it.

Tap on the thick brown book on the right side of the second shelf (top to bottom).
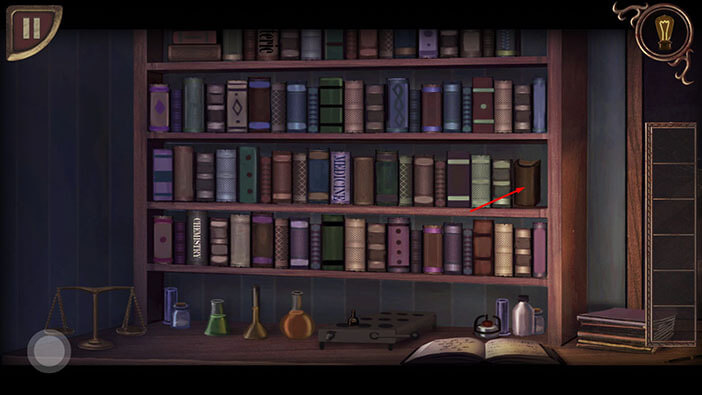
The book will fall down, and you will discover a broken glass container that was hidden behind it. Tap on it to pick it up and “Scorpion” will be added to your inventory.
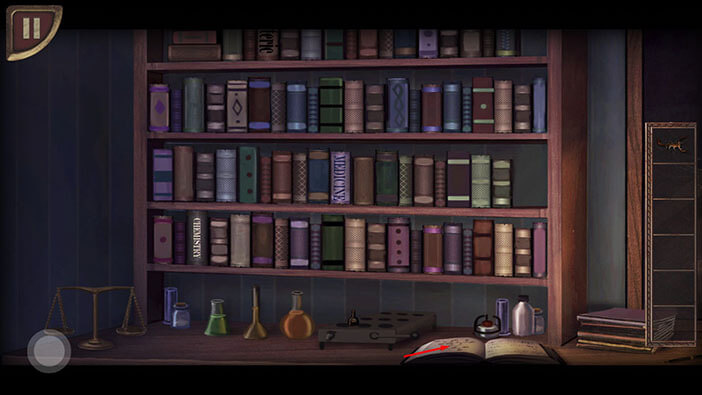
Next, let’s examine the open book which is located on the table.
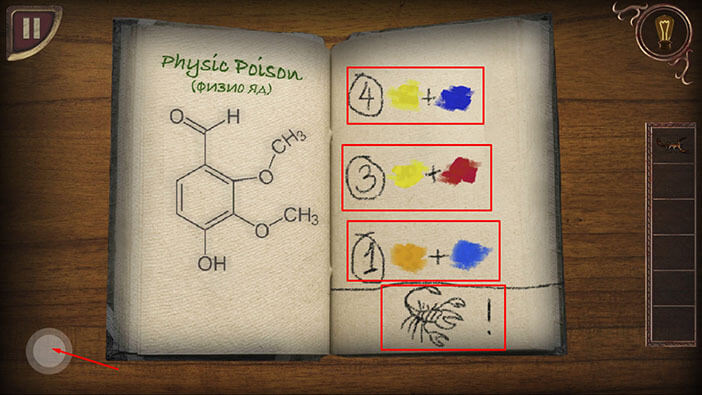
If you take a look at the page on left, you will realize that this is a formula for some kind of a very potent poison. So, let’s examine the page on the right and figure out the recipe. The scorpion is the final ingredient, and we already have it in our inventory. With that said, let’s focus on the colors. Starting from the top of the page, we can see
4 blue + yellow
The combination of blue and yellow will produce a green color. So, 4x green is the first part of the recipe.
Next, we have 3 yellow + red
The combination of yellow and red will produce the orange color. So, 3x orange is the second part of the recipe.
Lastly, we have 1 orange + blue
The combination of orange and blue will produce a brown color. So, 1x brown is the third part of the recipe.
Memorize/write down this information because we will need it for the next puzzle. Once you’re done tap on the button in the lower left corner to go back.
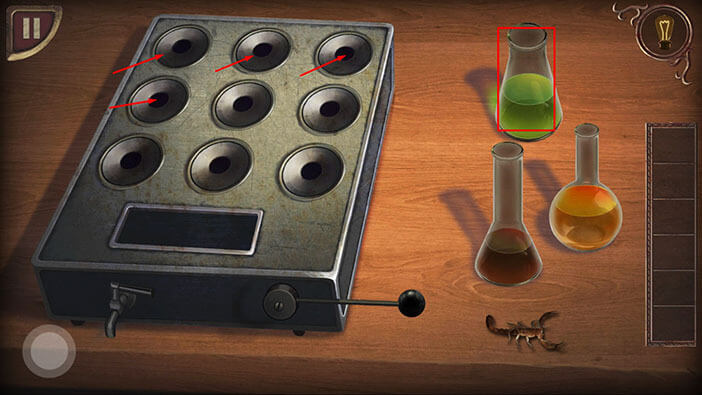
Next, tap on the board with round slots, located to the left of the book, to start the interaction.
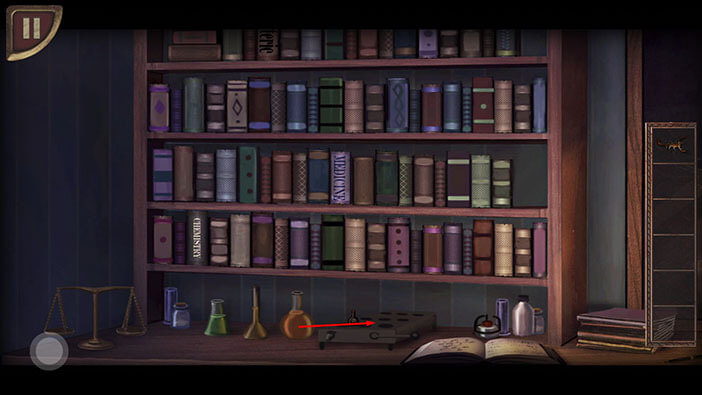
Here, we can see 9 slots, and on the right, we can see three vials, with green, orange, and brown liquids. We already looked at the recipe, so crafting a poison should go smoothly. We will craft the poison in several steps. Let’s begin.
Step 1
Fill the first four slots (starting from the top left) with the green liquid.
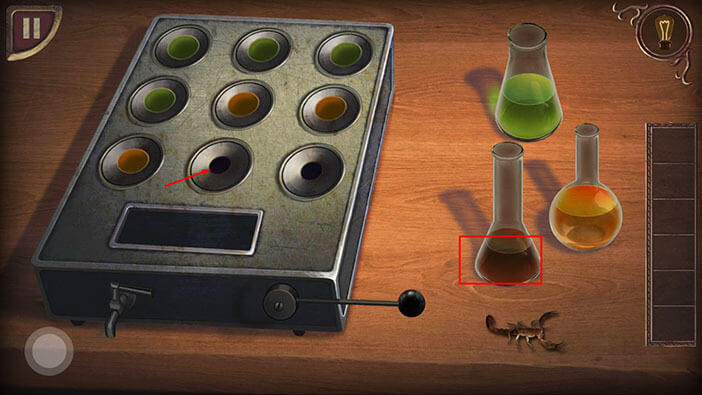
Step 2
Fill the next two slots with the orange liquid.

Step 3
Fill the next slot with the brown liquid.
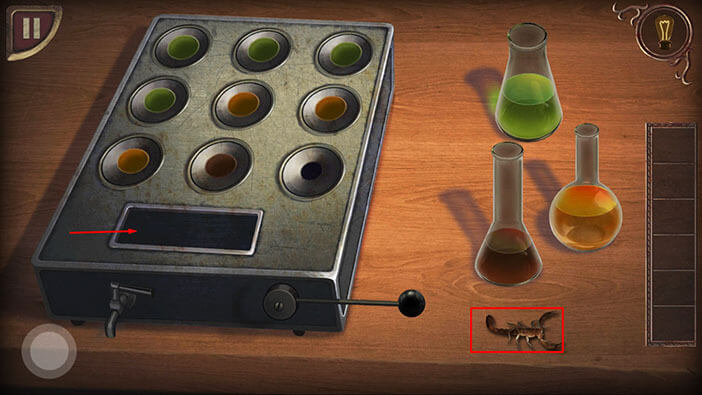
Step 4
Drag the scorpion and place it in the rectangular slot, located below the circular slots.
Ok, the formula is now ready, so tap on the lever on the right to pull it and begin the crafting process.
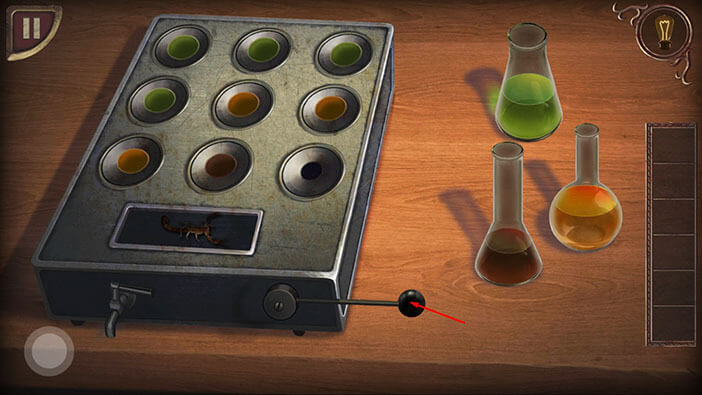
You will successfully craft the “Poison” and it will be added to your inventory. Ok, let’s go back to the hallway. Tap on the button in the lower right corner of the screen.

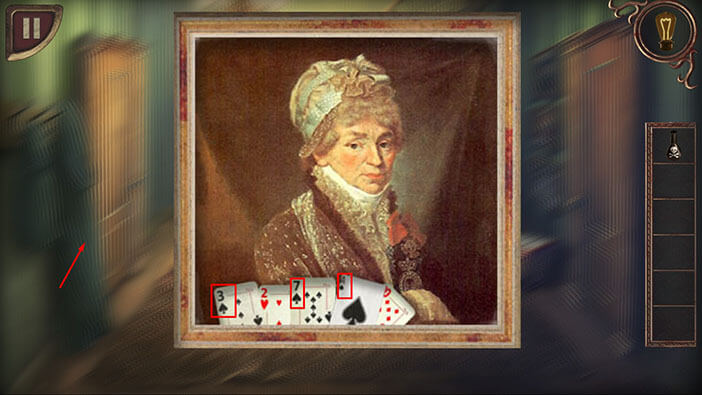
Tap on the middle picture on the wall on the right to take a closer look at it.

Here, we can see 5 cards. Let’s memorize/write down the three cards that are pulled up (a bit higher) than the other two. Starting from left to right, these cards are
Three of spades
Seven of spades
And the Ace of spades.
These three cards represent the solution for the next puzzle. Once you’re done, tap anywhere on the screen to go back.
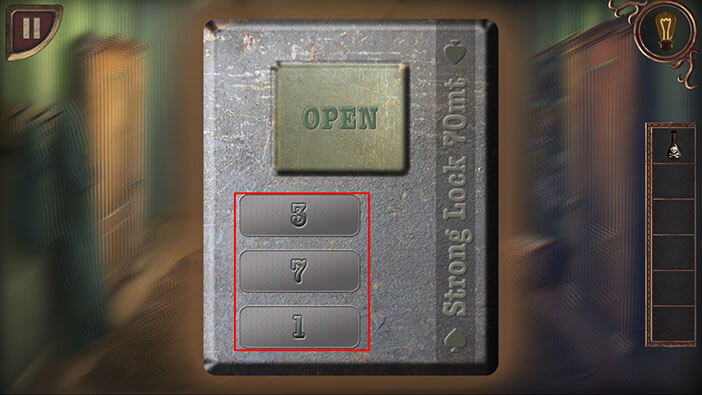
Next, let’s tap on the locked door, next to the stairs, to take a closer look at it.

The combination of three numbers is needed in order to open this door. We already know the combination, because we examined the picture in this room, and so did the three cards. So, enter the combination “371” (top to bottom) and you will unlock this door.
NOTE: Tap on the number to stop it from cycling.
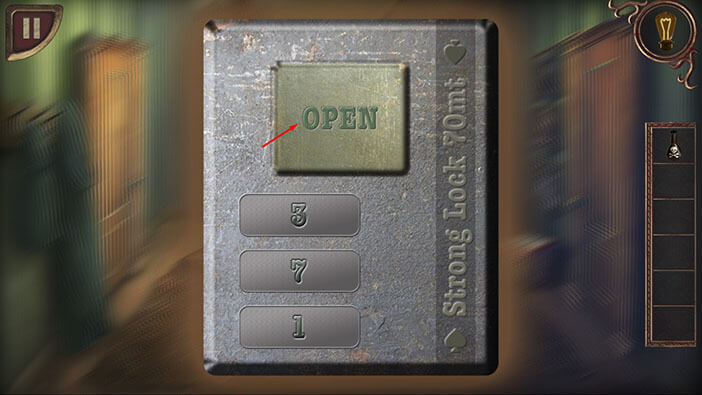
Ok, next, tap on the “Open” button to open the door and proceed into the next area.
Ok, the big, burly man with the hammer is preparing to charge at us, and our character forgot to bring his gun (well, it’s a very incompetent move for a cop). Quickly drag the “Poison” from the inventory and throw it at the crazed man with a hammer.
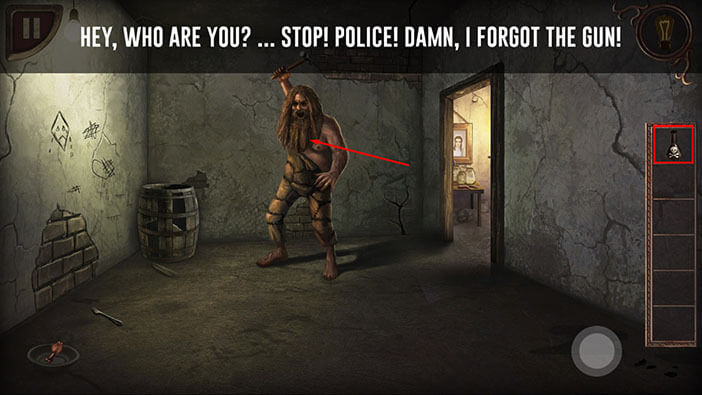
This poison was almost like some kind of acid or disintegration spell, and it turned the man into a smoking pile of bones. Tap on the “Hammer”, next to the bone pile, to pick it up.
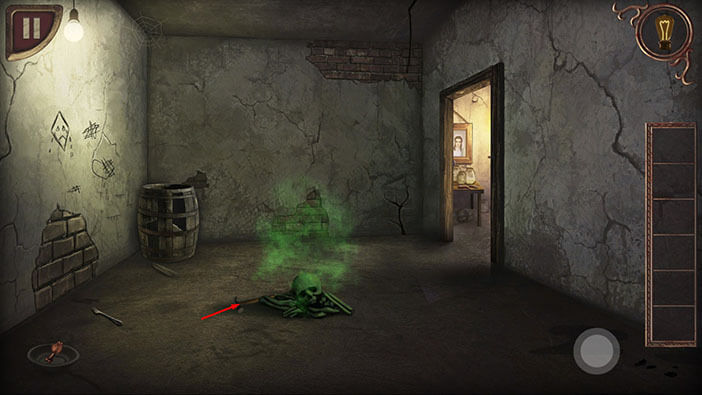
Next, tap on the “Meat” and “Fork” on the left to pick them up.

Ok, let’s proceed into the next room. Tap on the door on the right.
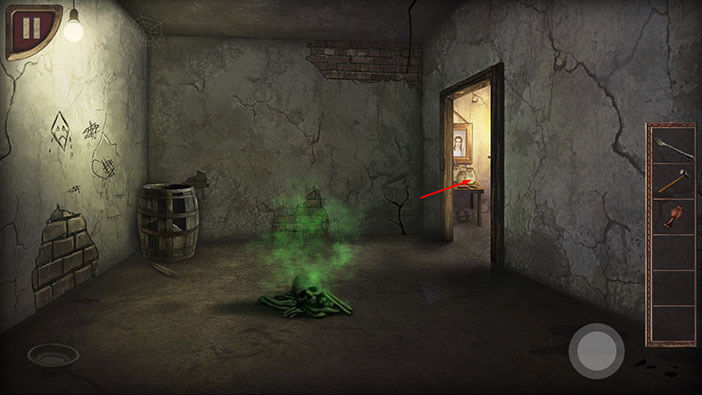
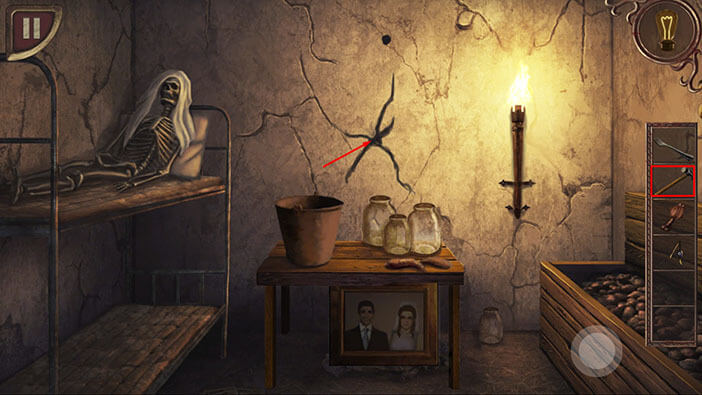
On the top bed, we can see a female skeleton, so walking into this house without a gun was definitely a bad idea. Let’s explore. Tap on the picture on the wall to take a closer look at the other part of the room.
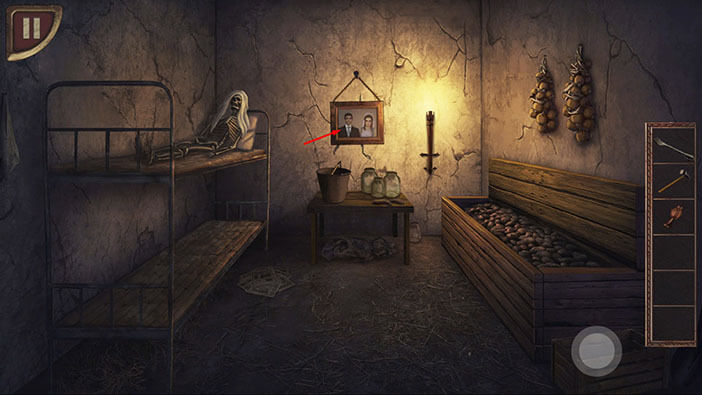
There is something inside the bucket, so tap on it to see what it is. Our character will pick up the “Amulet”.
Next, select the “Hammer” from the inventory and use it to pull out the nail which is holding the photo.

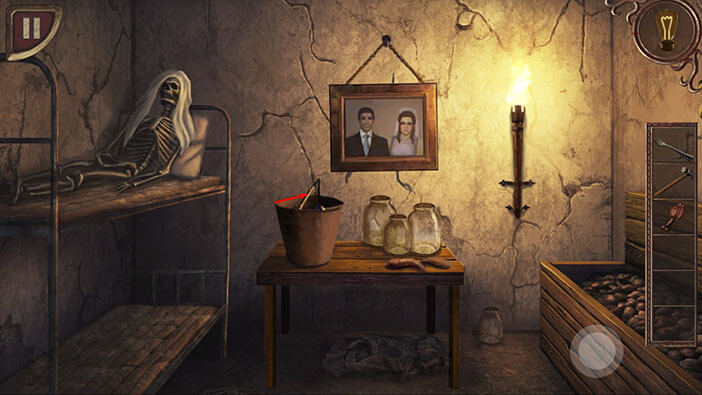
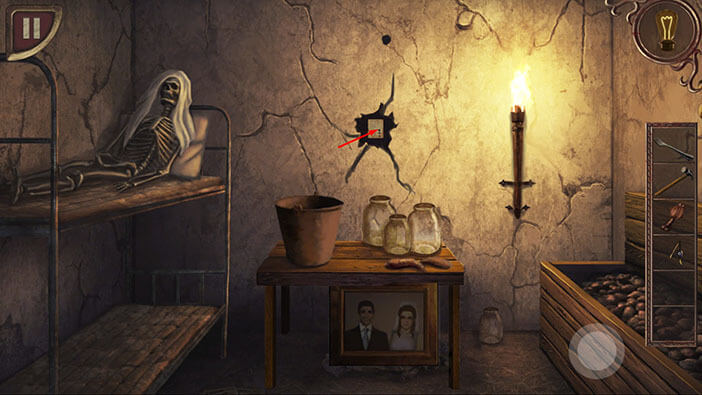
After that, select “Hammer” once more and use it to smash the already cracked piece of wall which was previously hidden behind the photo.
Our character will smash a hole in the wall, and inside you will discover a note. Tap on the note to pick it up, and it will automatically stick on the upper right side of the screen.
It’s time to go back to the hallway, so tap three times on the button in the lower left corner.
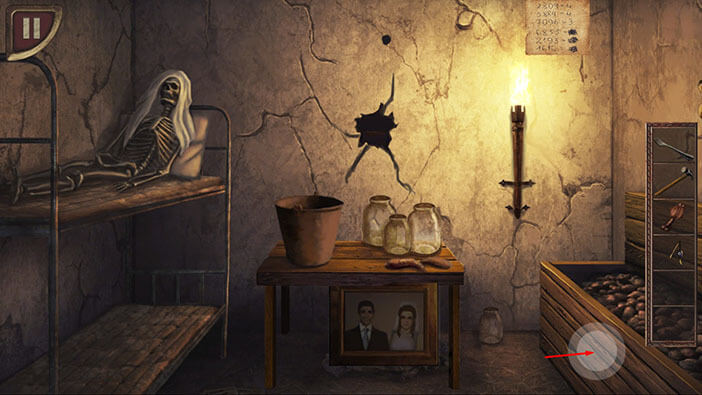
Ok, let’s take a closer look at our note in the top right corner.
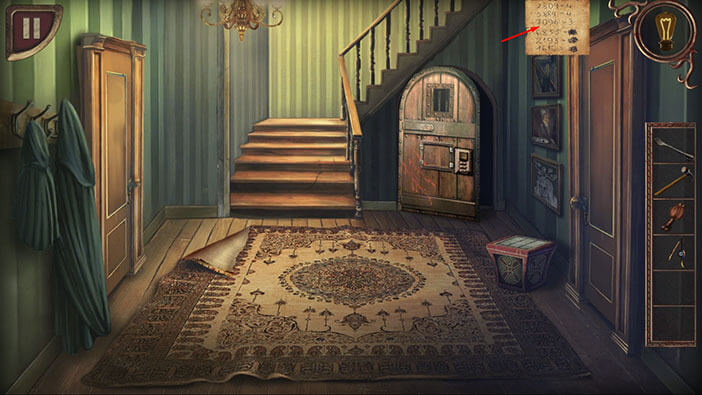
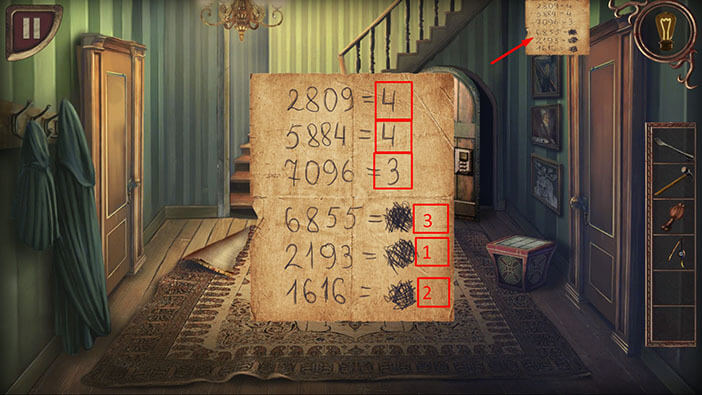
Here, we can see the first three numbers, and our task is to discover the other three numbers because that is the solution for the next puzzle. The next three numbers are 3,1,2. So, when we put it all together, we have “443312”. Memorize/write down this number because it represents the solution for the next puzzle.
Once you’re done, tap on the note in the upper right corner to go back.
Tap on the box on the right to start the interaction.

Enter the code “443312” and you will unlock the box.
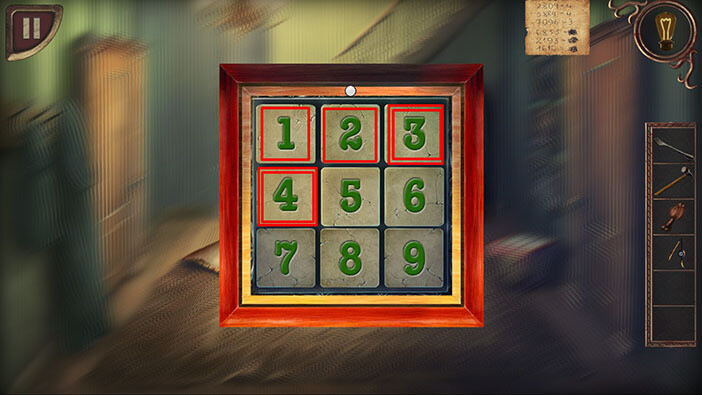
The slot below the number 5 will open, and inside you will see a “Magic matches”. Tap on the “Magic matches” to pick it them up.
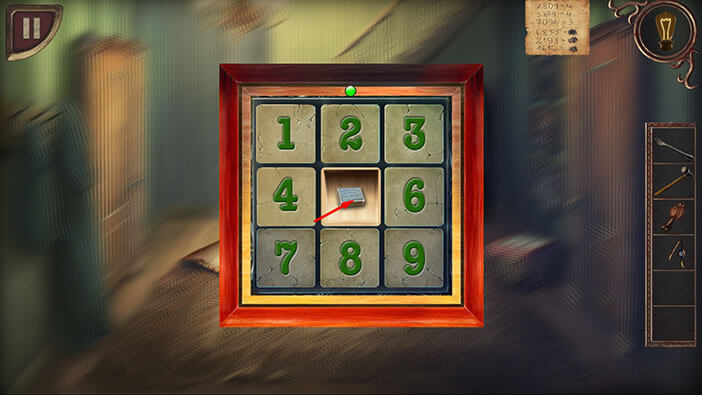
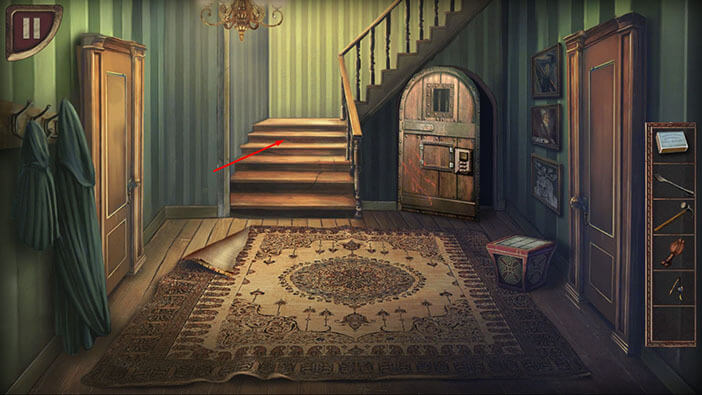
Ok, that’s it for the first floor. Tap on the stairs to proceed to the second floor.
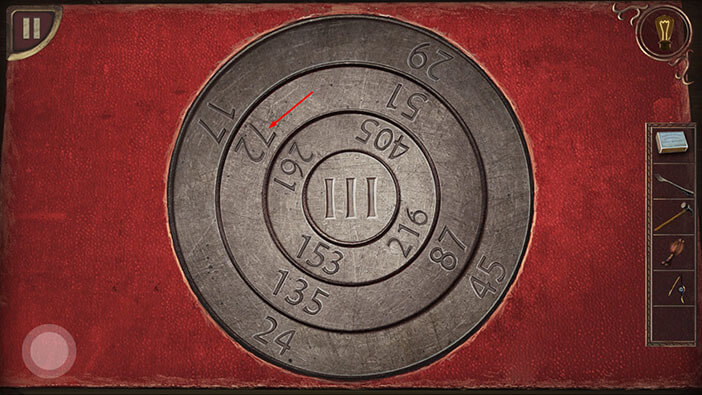
Tap on the book on the left to take a closer look at them.
Here we have another puzzle. The numbers in the outer circle are the lowest. The number in the middle circle should be three times higher than the number in the outer circle. Lastly, the number in the inner circle should be three times higher than the number in the middle circle. We can rotate the middle and inner circles by tapping on them. Ok, let’s solve this puzzle.
Tap once on the middle circle to rotate it. We will get
17 x 3 = 51
24 x 3 = 72
45 x 3 = 135
29 x 3 = 87
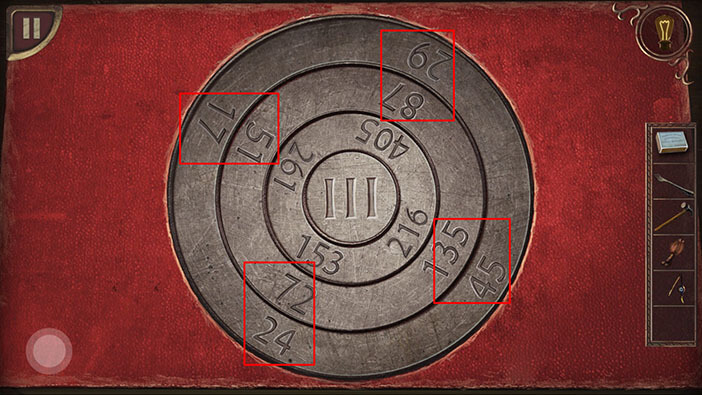
Next, let’s set the inner circle by tapping on it three times. We will get
51 x 3 = 153
72 x 3 = 216
135 x 3 = 405
87 x 3 = 261
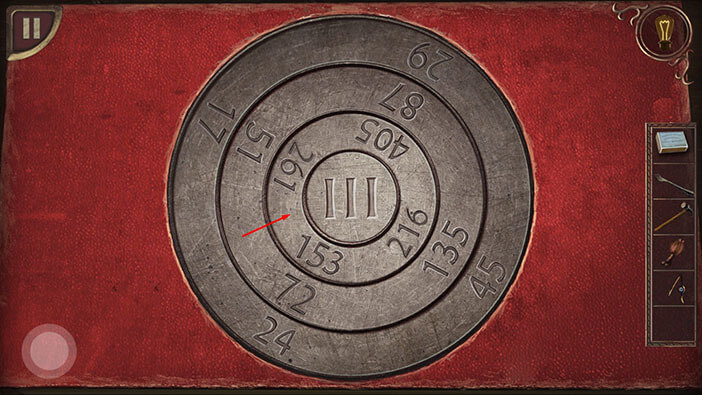
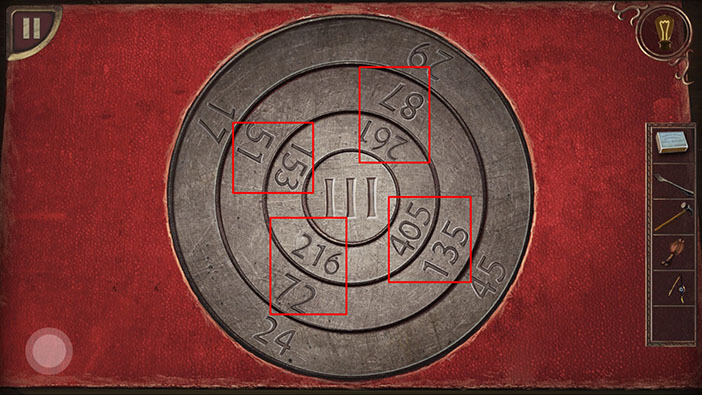
Ok, we correctly arranged the circles, so tap on the inner disk with the Roman numeral “III” to solve this puzzle.
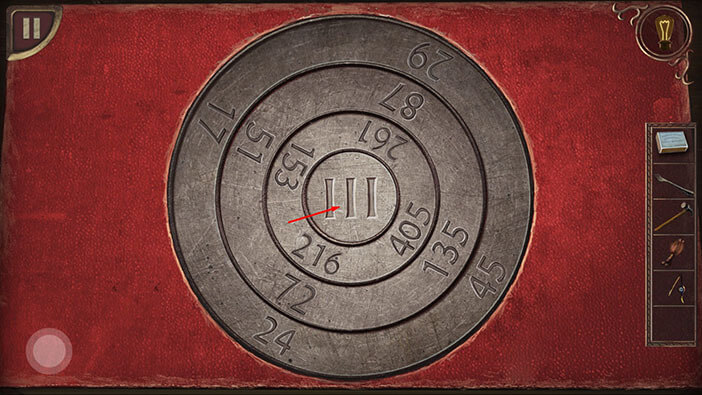
As soon as you solve the previous puzzle, the red book on the left will open and you will see a key inside it. Tap on the key to pick it up.
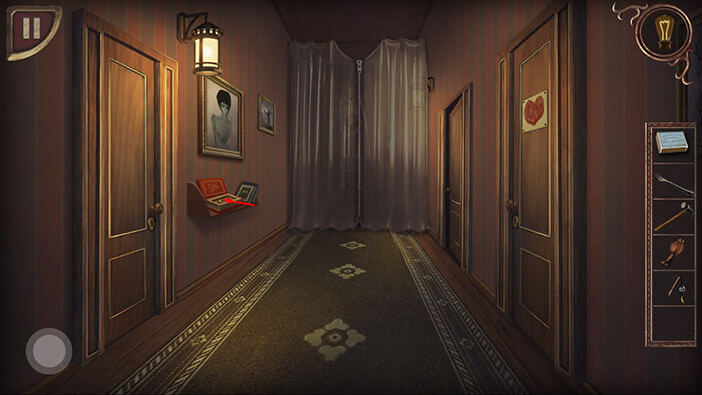
Next, tap on the second door on the right to go to the next room.

Select the “Key” from the inventory and use it to unlock the drawer on the right.
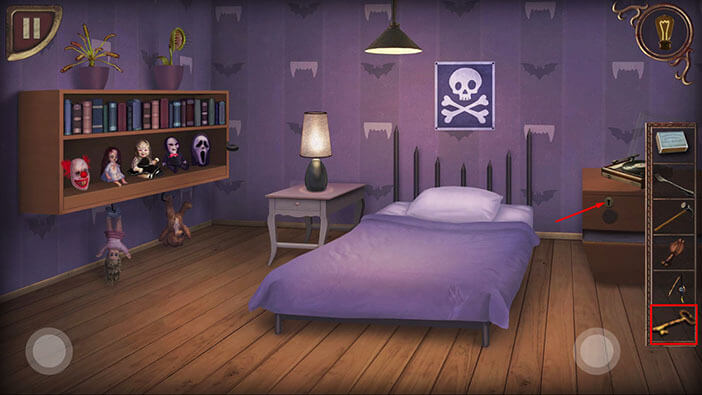
Next, tap on the note in the drawer to pick it up, and it will automatically stick in the top right corner of the screen.

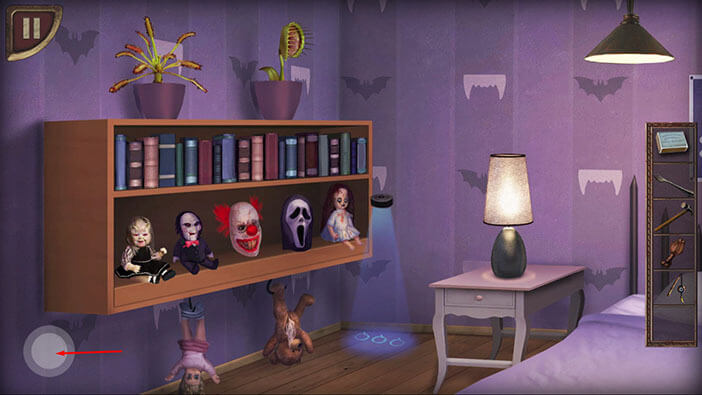
Next, tap on the dolls on the left to take a closer look at them.
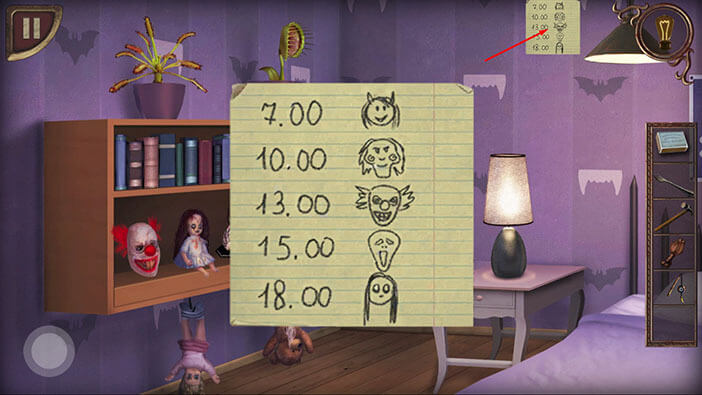
Ok, here we have 5 dolls, and our task is to rearrange them in a certain order. We can determine the correct order of the dolls by examining the note in the top right corner, so let’s do that.

Ok, here we can see a certain value next to each doll. We should arrange the dolls starting from the lowest value on the left side, and progressing to the highest value on the right. So, let’s memorize/write down these values.
A girl doll with horns = 7.00
A “Saw movie” doll = 10.00
A clown doll = 13.00
A “Scary movie” doll = 15.00
The other girl doll = 18.00
Ok, let’s go back to the shelf and rearrange the dolls. Tap on the note in the upper right corner to go back.
We will rearrange the dolls in several steps. Let’s begin.
Step 1
Drag the “Girl doll with horns” to the first slot (looking from left to right).

Step 2
Drag the “Saw movie doll” to the second slot.
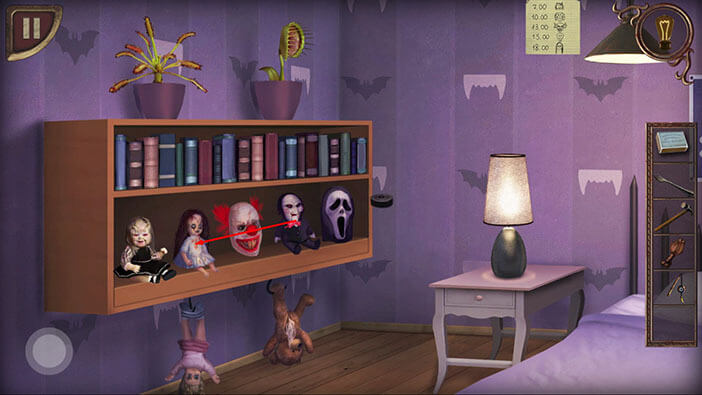
Step 3
The “Clown doll” is already in the third slot, where it should be.
So, let’s just change the places of the “Scary movie doll” with the “Other girl doll”. With this last step completed, you will solve this puzzle.
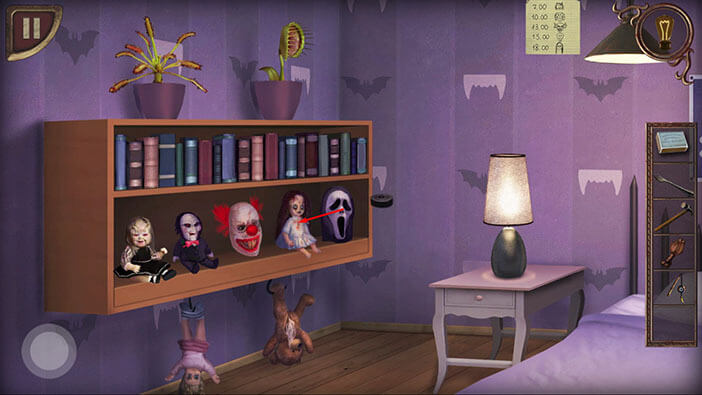
As soon as you solve the puzzle, the blue light at end of the shelf will be turned on, and we can see three circles (or letters “Q”) on the floor.
Tap on the button in the lower left corner to go back.
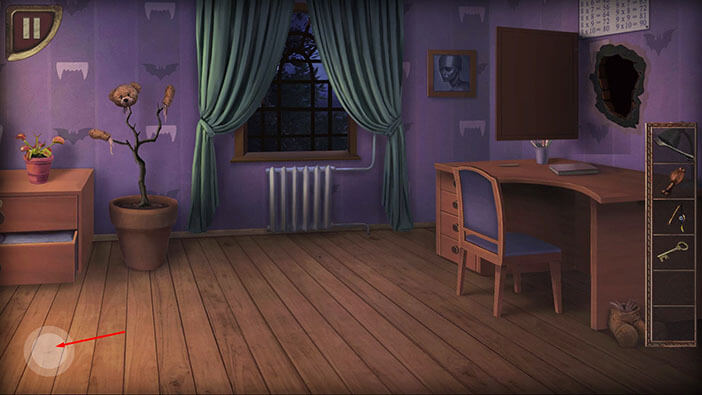
Tap on the button in the lower right corner to take a look at the other part of the room.

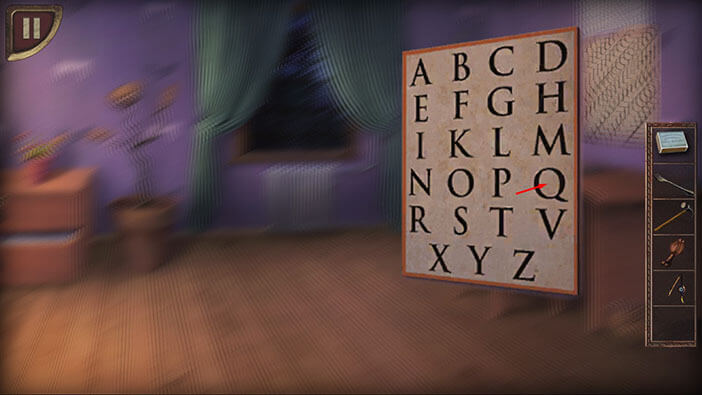
Tap on the board with letters on the right wall to take a closer look at it.
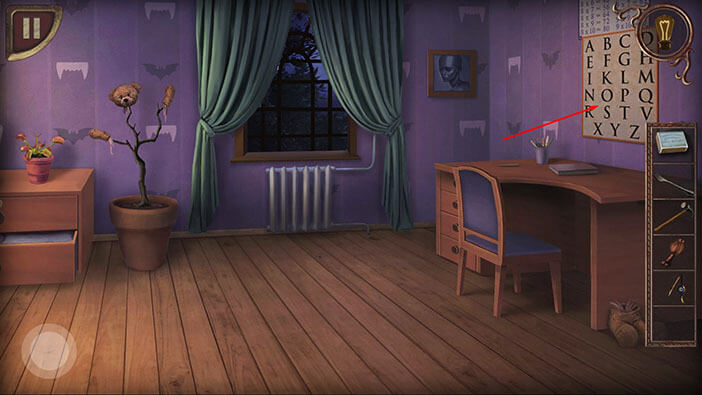
Tap on the letter “Q” three times and the board will open, revealing a cracked brick wall behind it.
Drag the “Hammer” from the inventory and use it to smash through the cracked brick wall.
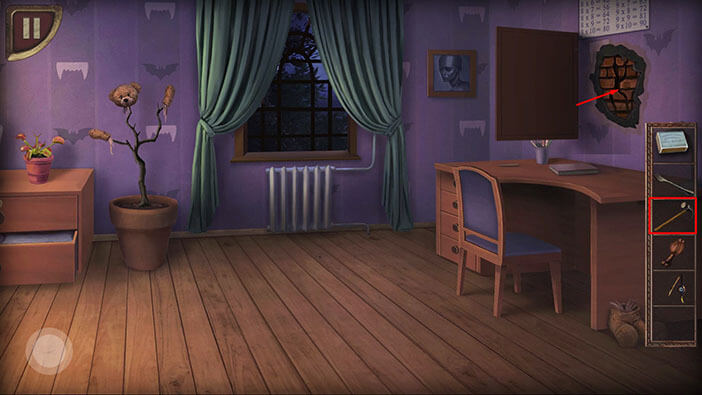
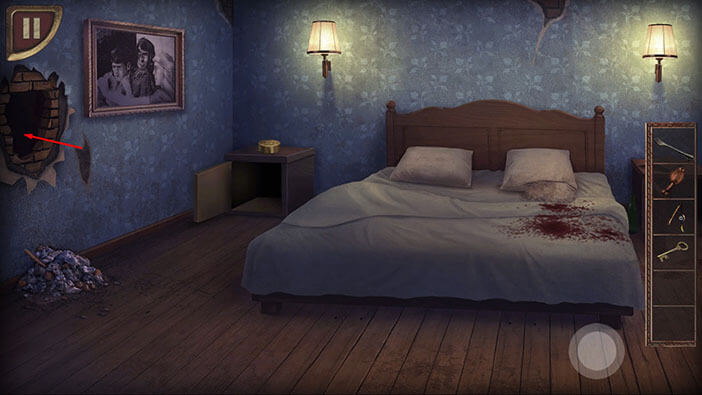
Ok, let’s take see what’s on the other side of the wall. Tap on the hole to squeeze through it and you will get into the next room.
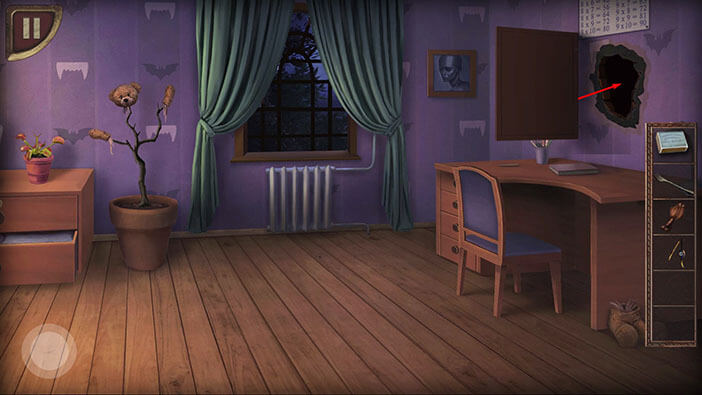
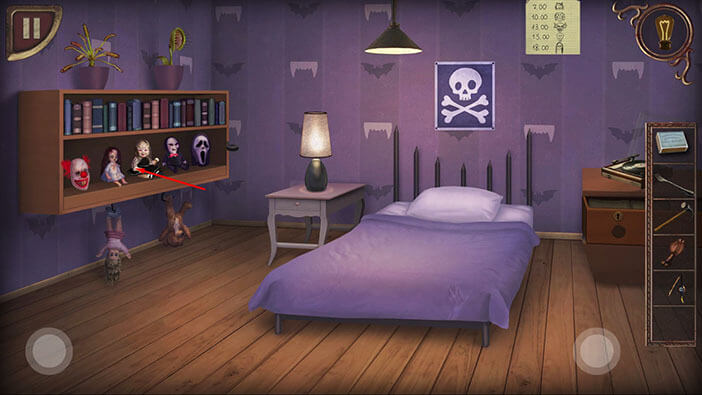
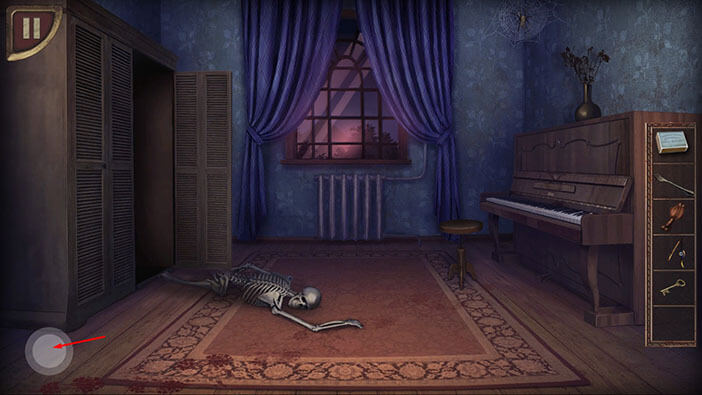
Here, we can see the blood splatters all over the right side of the bed, and our character concluded that we found another crime scene. Let’s investigate.
Tap on the button in the lower right corner to proceed into the other part of the room.

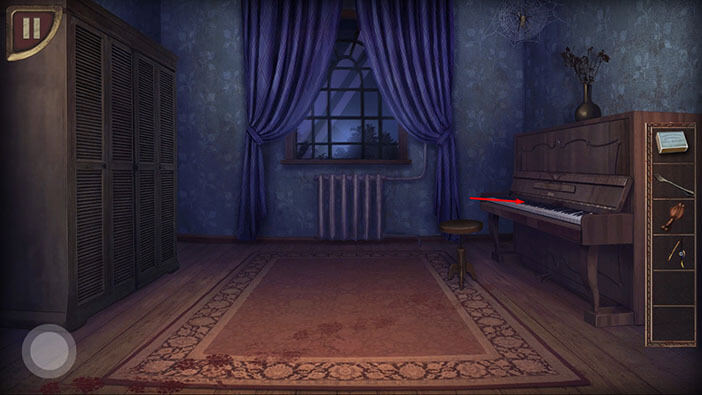
Tap on the piano to take a closer look at it.
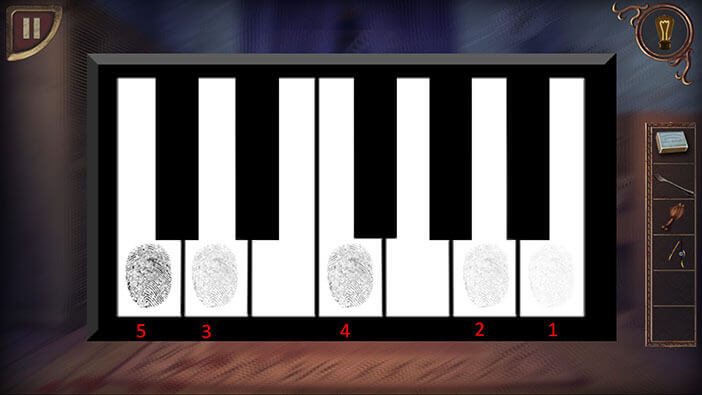
You will probably notice the fingerprints on 5 piano keys. Some fingerprints are more visible than others, and our task is to figure out in which order we should tap on the fingerprints. So, we will start with the key that has the least visible fingerprint (because this one was probably pressed before the keys with the more visible fingerprints), and work our way up toward the most visible fingerprints. Let’s begin.
First, tap on the sixth key (looking from left to right).
Second, tap on the fifth key.
Third, tap on the second key.
Fourth, tap on the fourth key.
Lastly, tap on the first key.
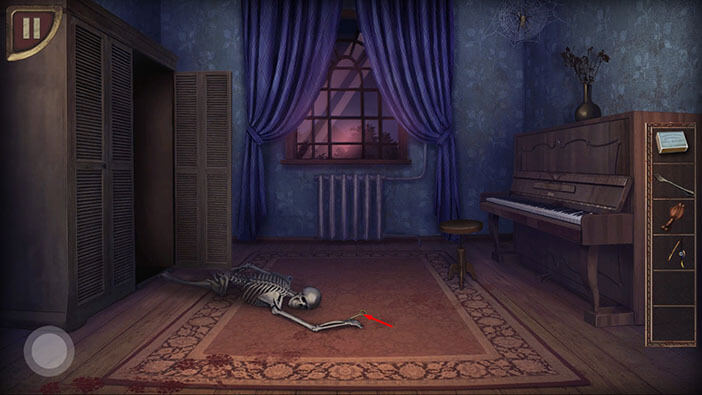
As soon as you tap on the correct keys, the skeleton will fall out of the closet on the left. When it falls to the ground, the skeleton will drop a key. Let’s tap on the “Key” to pick it up.
Ok, let’s go back to the other part of the room. Tap on the button in the lower left corner.
Drag the key from the inventory and use it to unlock the nightstand on the left side of the bed.

Tap on the yellow item inside the cabinet to pick it up.
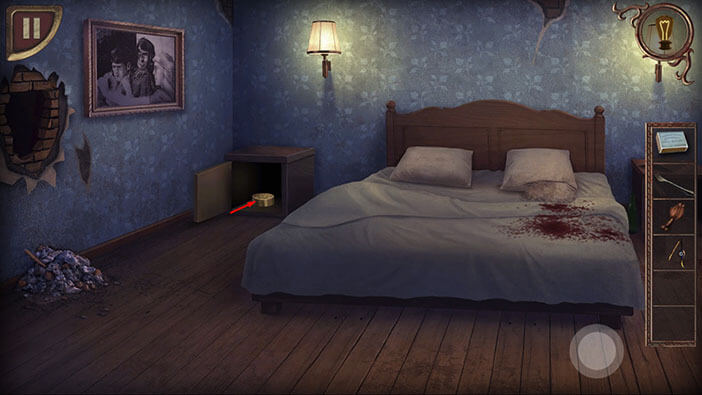
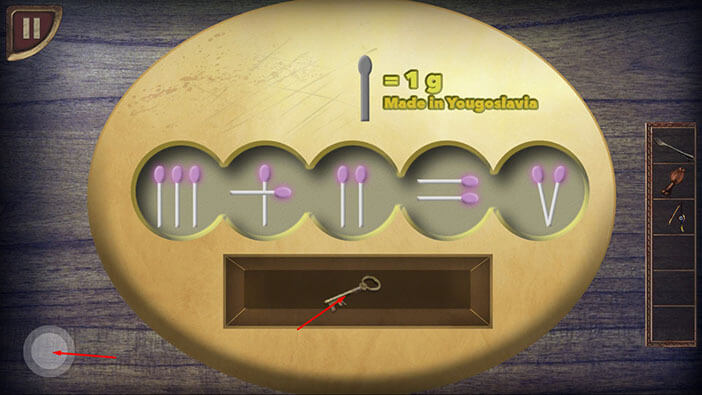
Our character will put the yellow item on the nightstand, so tap on it again to take a closer look.

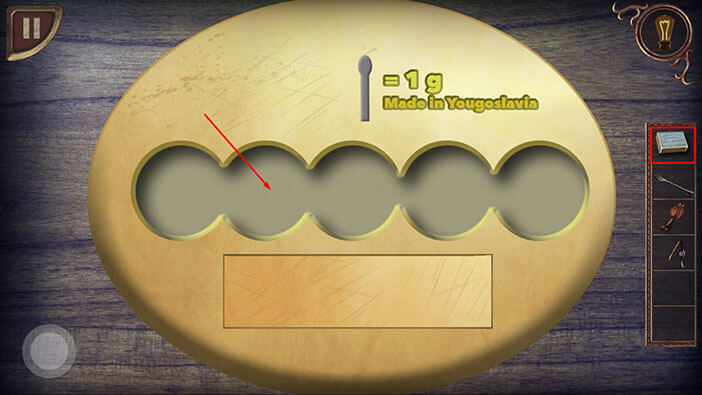
Here we can see five round slots. In the top right corner, we can see a match and the inscription “Made in Yougslavia” (either a fictional country or “Yugoslavia” was misspelled on purpose).
So, select the “Matches” in your inventory and put them into empty slots.
If you examine the matches, you will notice that they form an equation “3 – 2 = 4”. Obviously, this isn’t correct, so let’s fix it.
If we drag the first match in the last slot and use it to form a “plus” sign, we will get the correct equation “3 + 2 = 5”.
NOTE: At the time of writing this guide, there is a bug with this puzzle. If you place the matches into the slots and close the app before solving the puzzle, once you reload you will see empty slots (no matches) but you won’t be able to place the matches into the slots because you won’t have the matches in your inventory.
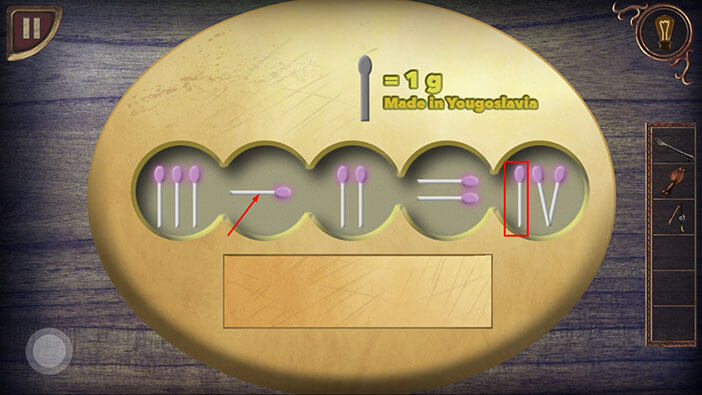
As soon as you solve the puzzle, the small container below the matches will open and you will find another key. Tap on the key to pick it up. After that, tap on the button in the lower left corner to go back.
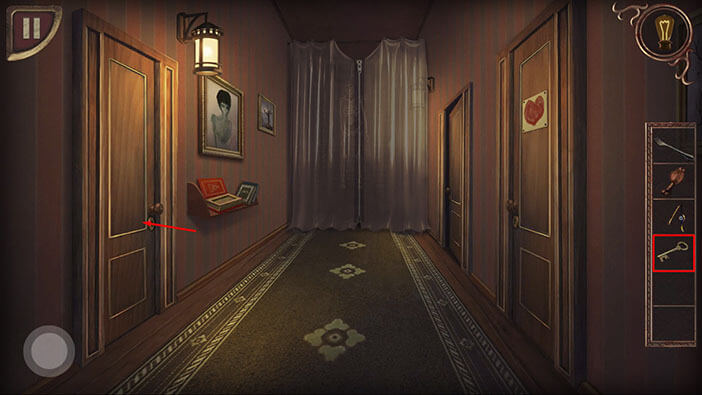
Ok, let’s go back to the hallway and unlock the last room. Tap on the hole in the wall to squeeze through it, and you will reach the previous room.
Next, tap two times on the button in the lower left corner to go back to the hallway.
Drag the “Key” from the inventory and use it to unlock the last room. After that, tap on the door to open it and enter the next room.
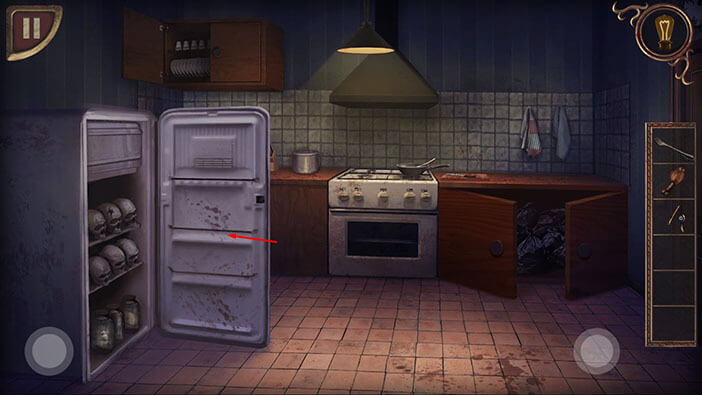
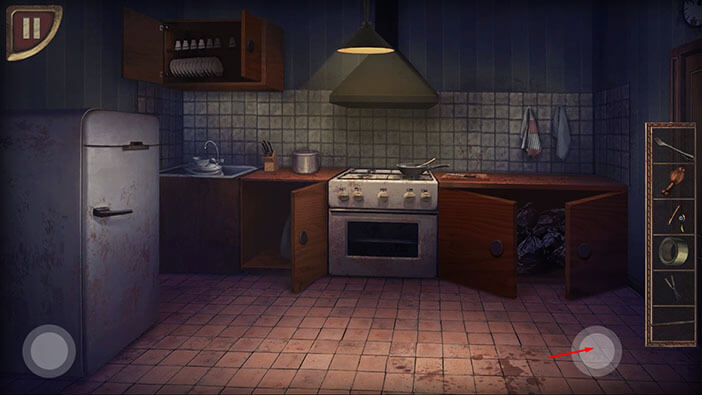
Ok, we found the kitchen. Tap on the fridge door to open it.
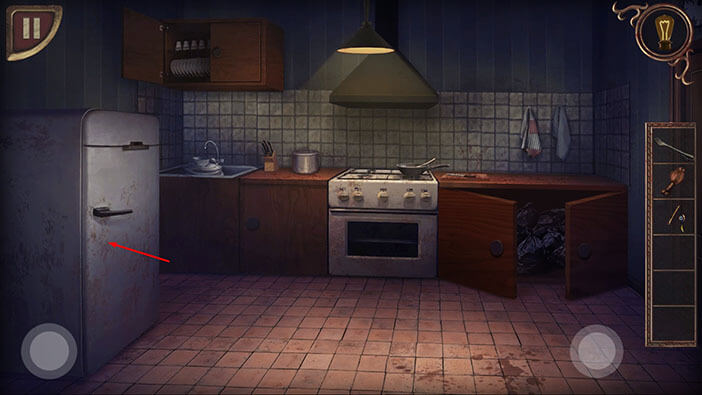
You will see a pile of skulls and organs in the glass jars in the fridge. We don’t have to look at this grotesque sight, so let’s close the fridge.
Let’s see what’s inside the cabinet on the left side of the stove.

Here we can see the “Garden scissors” so tap on them to pick them up.

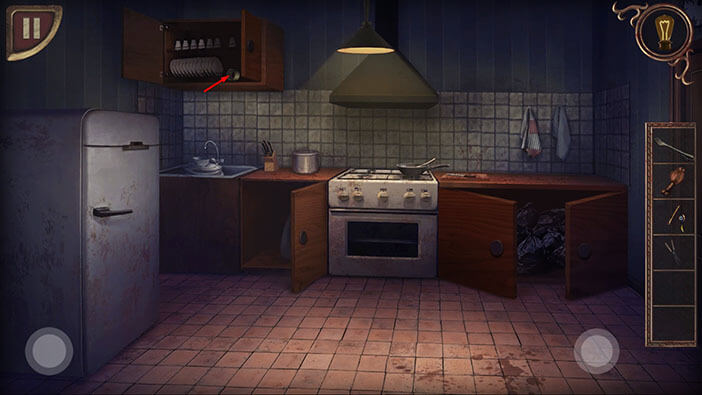
Next, tap on the cabinet in the top left corner to open it.

You will notice a “Duct tape” in this cabinet so tap on it to pick it up.
Let’s continue the exploration. Tap on the button in the lower left corner to go to the adjacent room.

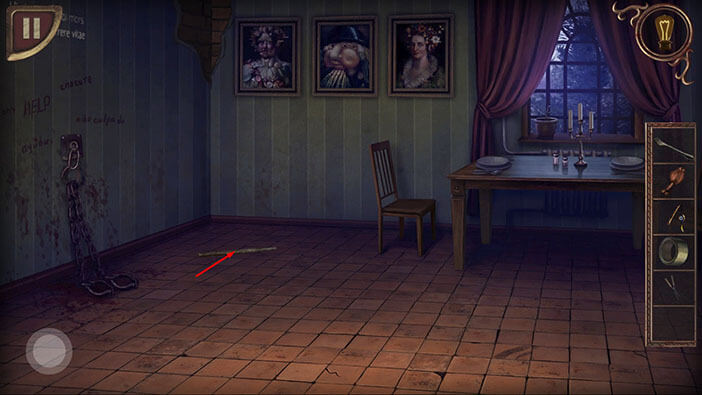
We are now in the torture room. On the wall on the left we can see the shackles, and next to them is a pile of clothes. Tap on the clothes to move them aside.
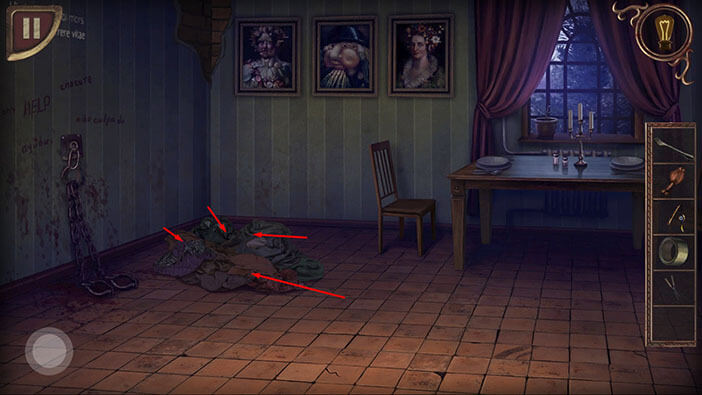
Below the clothes, you will find a “Metal stick”. Tap on it to pick it up and it will be added to your inventory.
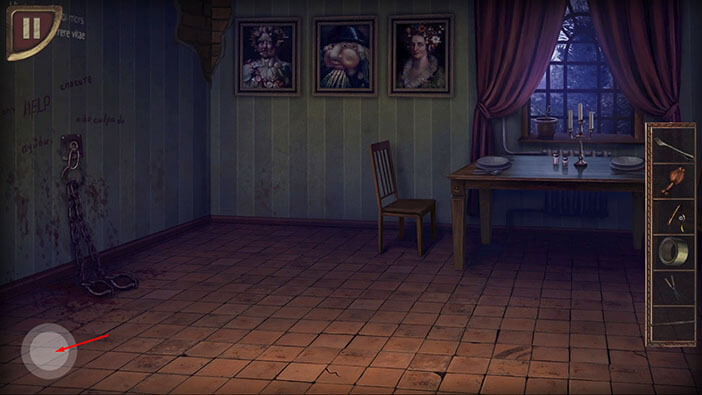
Ok, let’s go back to the hallway. Tap on the button in the lower left corner to go back to the kitchen.
Next, tap on the button in the lower right corner to go back to the hallway.
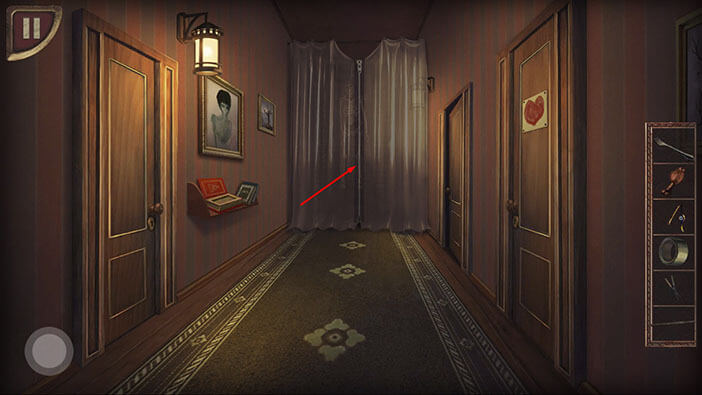
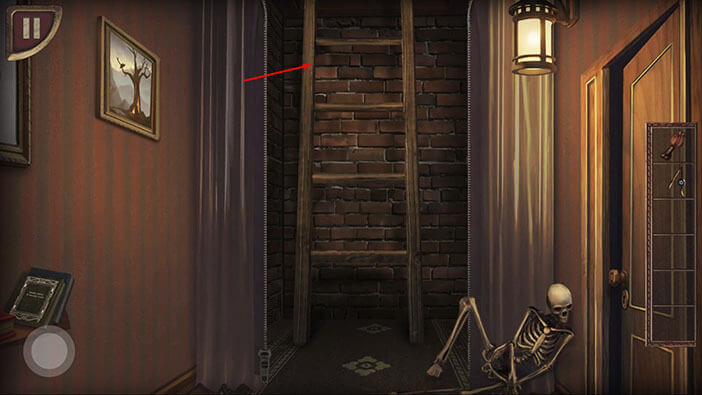
Tap on the plastic curtain in front of you to approach it.
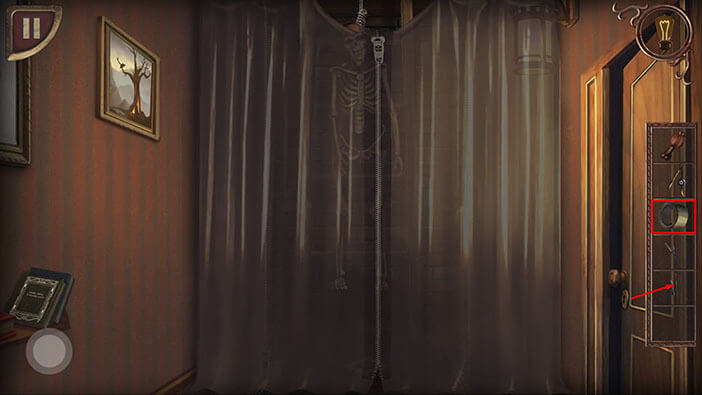
Drag the “Fork” from the inventory and combine it with the “Metal stick”. Our character will create a “Metal stick and a fork”.
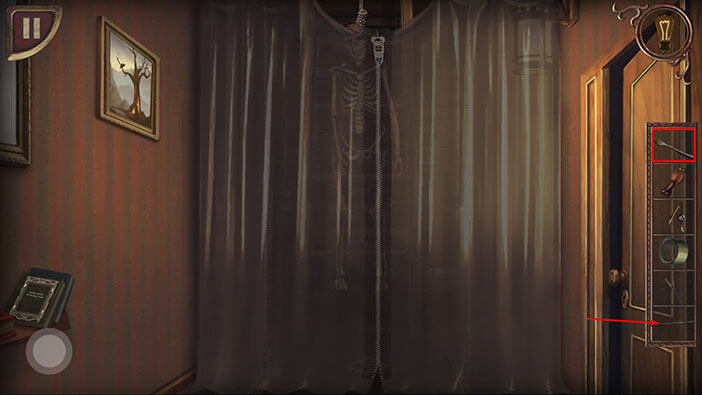
Next, drag the “Duct tape” from the inventory and use it to attach the “Fork” to the “Metal stick”. “Stick with the fork” will be added to your inventory.
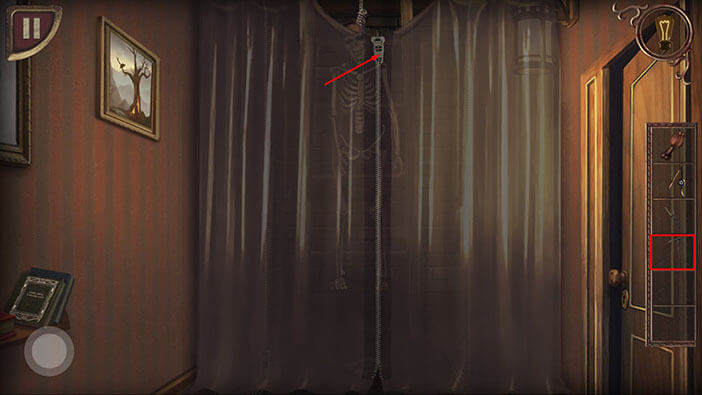
Select the “Stick with the fork” from the inventory and use it to unzip the plastic curtain.
Ok, we can now see a skeleton hanging from the ladder. Select the “Garden scissors” from the inventory and use them to cut the rope.
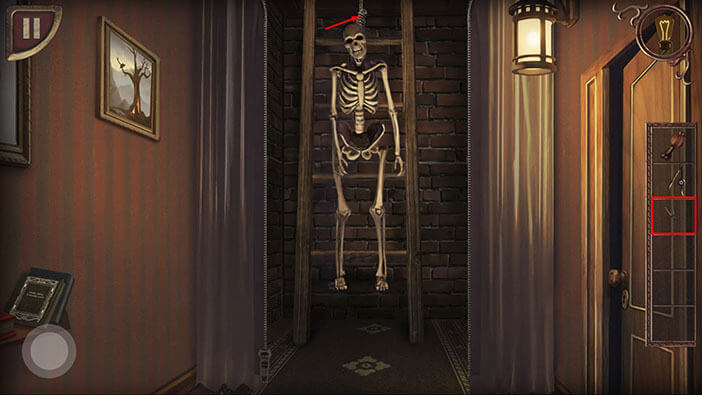
We have unblocked the ladder, so tap on it to climb up to the attic.
Well, as soon as we climbed to the attic, the Doberman started barking at us. The dog is blocking our path so we will have to find a way to neutralize it.
Select the “Meat” from the inventory and combine it with the “Fishing rod”.
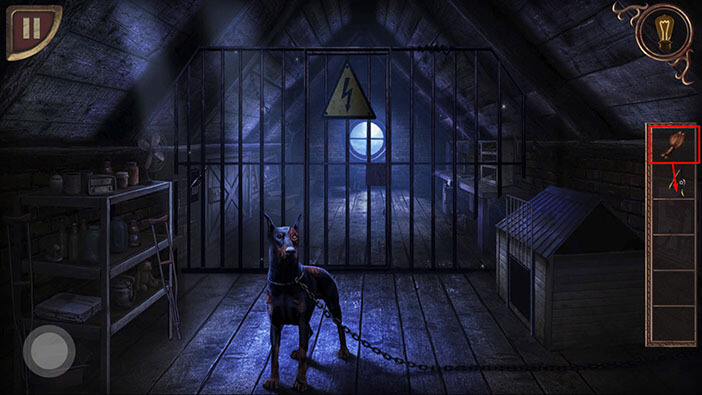
Next, drag the “Fishing rod with meat” from the inventory and use it to bait the dog by putting the meat into the doghouse.
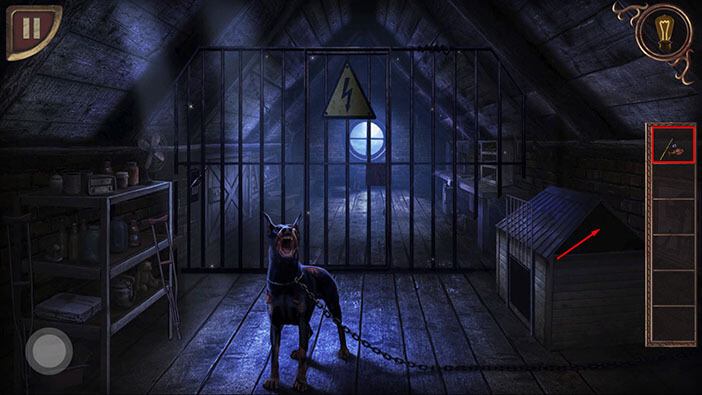
As soon as you put the meat into the doghouse the dog will run in. Tap on the bars at the entrance of the doghouse to capture the dog.
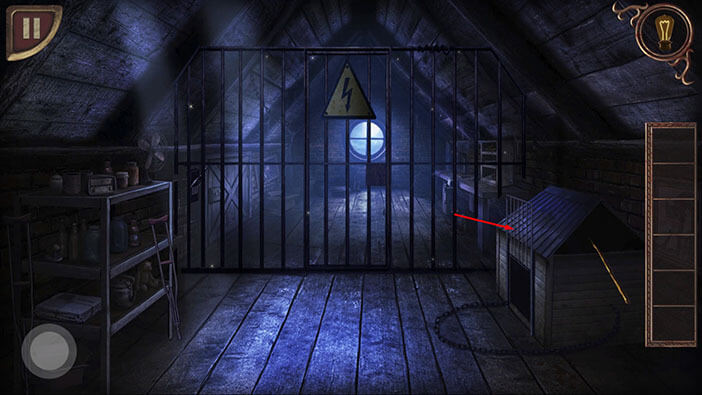
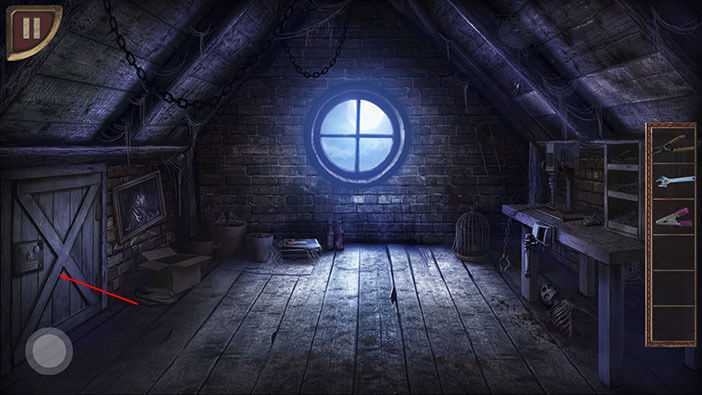
Ok, with the dog taken care of, we can now focus on exploring the attic. Tap on the “Walking crutch” located next to the shelf on the left to pick it up.
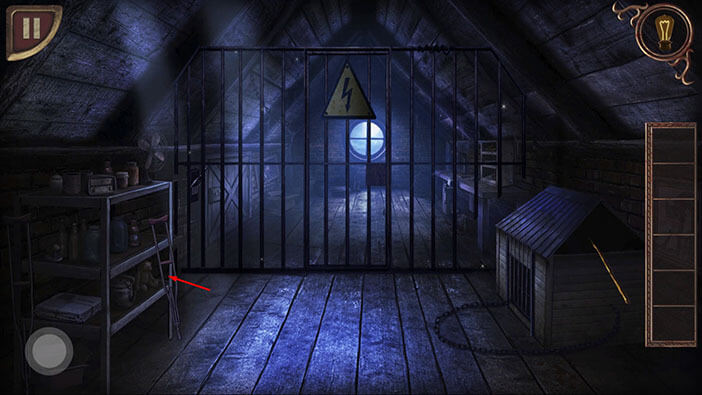
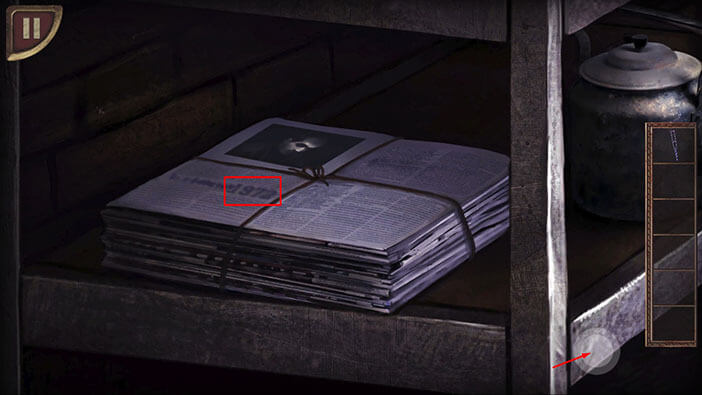
Next, tap on the shelf to take a closer look at it.

Here, you will see a pile of newspapers. If you examine the front page of the newspaper on the top, you will notice the number “1972”. Memorize/write down this number because it represents the solution for the next puzzle.
After that, tap on the button in the lower right corner to go back.
Next, tap on the lever located on the wall on the left on the other side of the fence to take a closer look at it.

Our character can’t reach the lever because of the electric fence. So, select the “Walking crutch” from the inventory and use it to push the buttons on the other side of the fence.
We already saw the code in the newspaper, so enter the number “1972”.
After that, tap on the “Enter” button to confirm.
The previous action will shut down the electricity. So, tap on the gate to open it, and tap again to proceed to the next part of the attic.

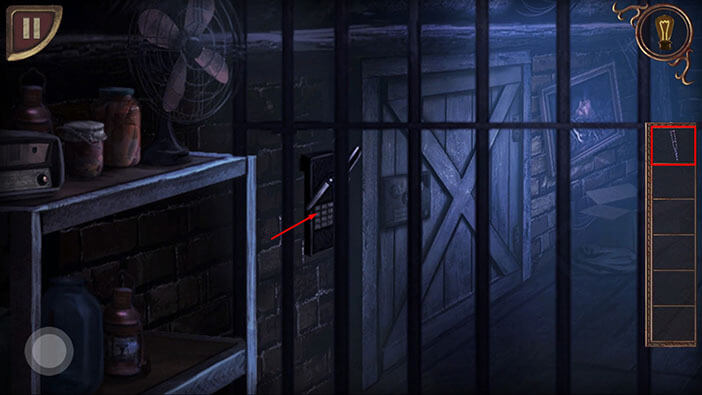
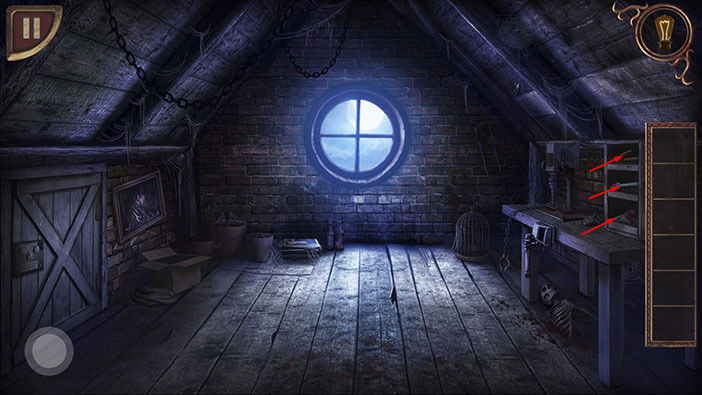
Tap on the three tools on the shelf on the right to pick them up. A “Clamp”, a “Wrench”, and a “Stripper” will be added to your inventory.
Next, tap on the device on the wooden door on the left to take a closer look at it.
Select the “Stripper” from the inventory and use it to prepare the wires on the right.

Next, select the “Clamp” from the inventory and use it to connect the wires.
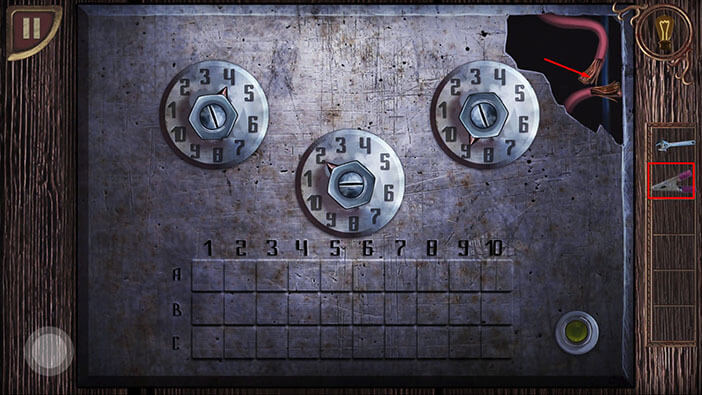
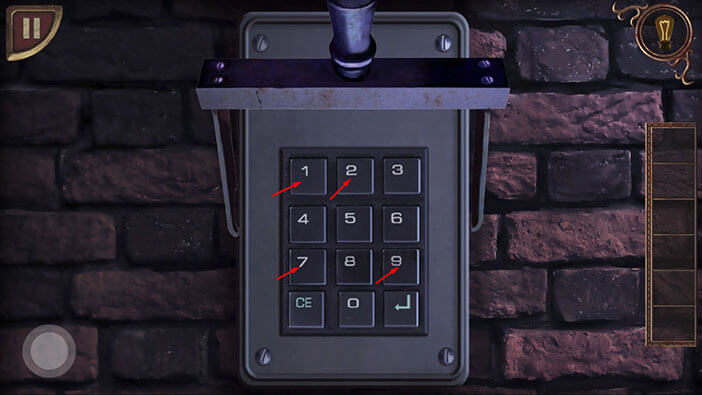
Our next task is to set the three dials to the correct positions. To do this, select the “Wrench” from the inventory and use it to interact with the dials.
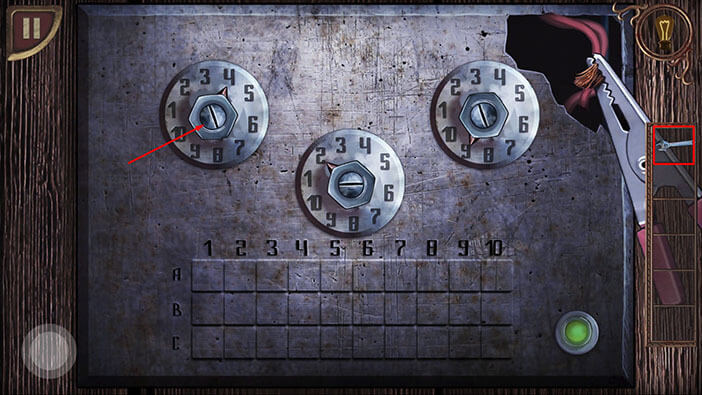
If you tap on the fields A6, B3, and C9 you will hear a grinding noise. So, use the wrench to turn the dials to the matching positions
The dial on the left should be pointing at the number 6
The dial in the middle should be pointing at the number 3
The dial on the right should be pointing at the number 9
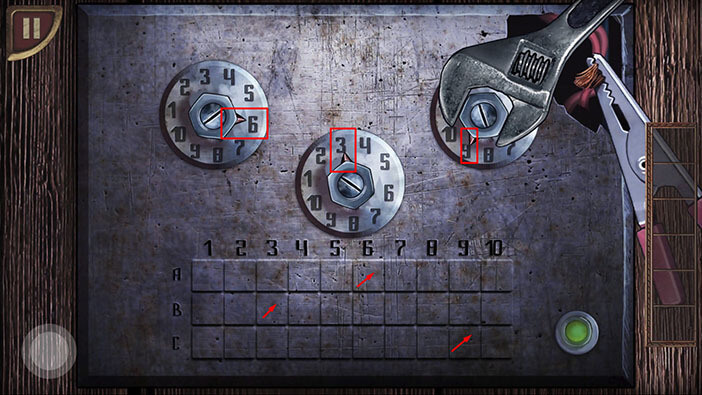
As soon as you enter the correct combination, the green light will flash, indicating that the door is now unlocked. Tap on the door to proceed.
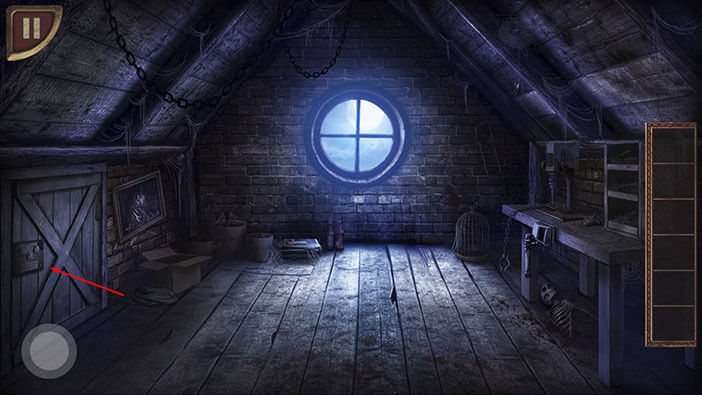
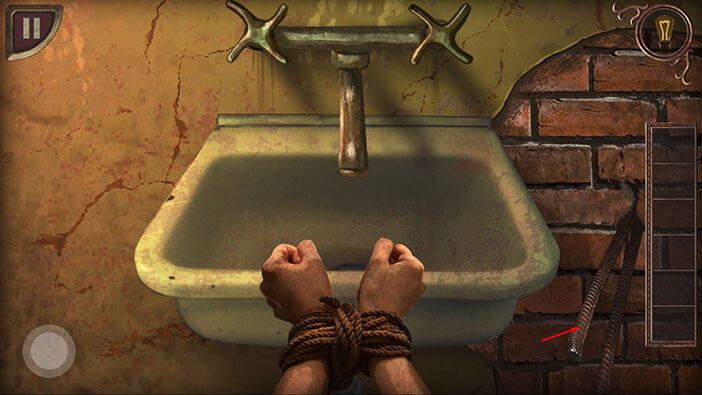
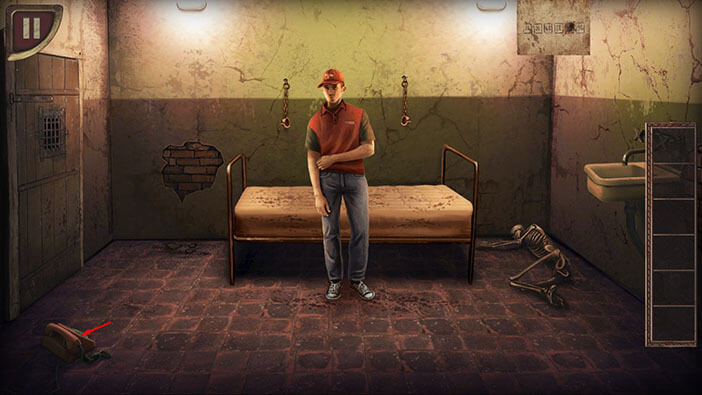
The small door was actually an elevator shaft and our character will fall through it. When he regained consciousness, his hands were tied, and he was in a cell with a pizza delivery guy.
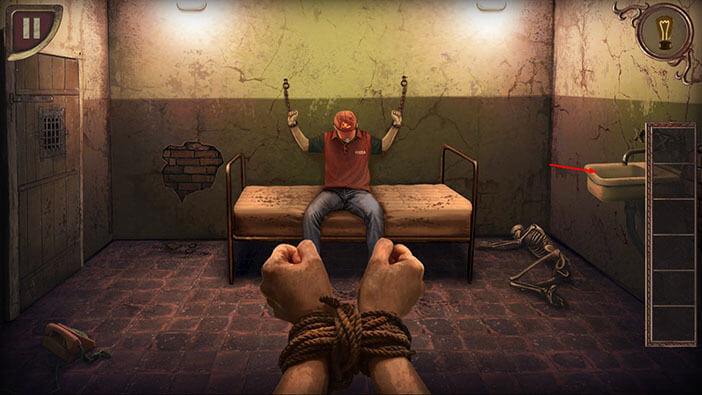
You will notice two metal bars to the right of the sink. Tap on the bars to take a closer look. After that, swipe left and right to cut the ropes.
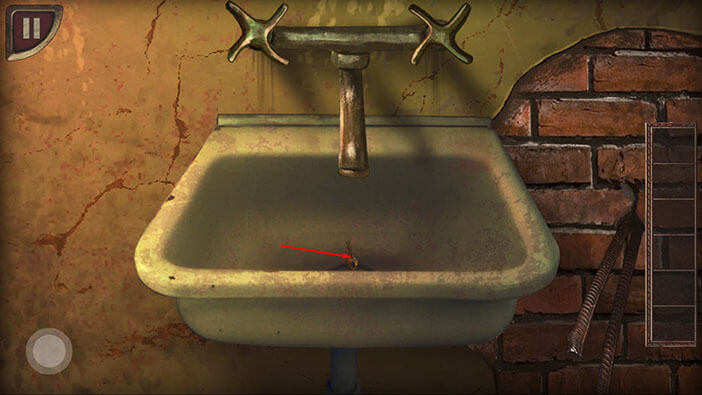
Next, look at the sink. Tap on the right handle to turn it slightly, until it stops rotating to the starting position. After that, do the same with the left handle. Lastly. Turn the right handle all the way, and the key will drop into the sink.
Tap on the key to pick it up.
After that, tap on the button in the lower left corner to go back.
Select the key from the inventory and use it to unlock the shackles on the other prisoner.
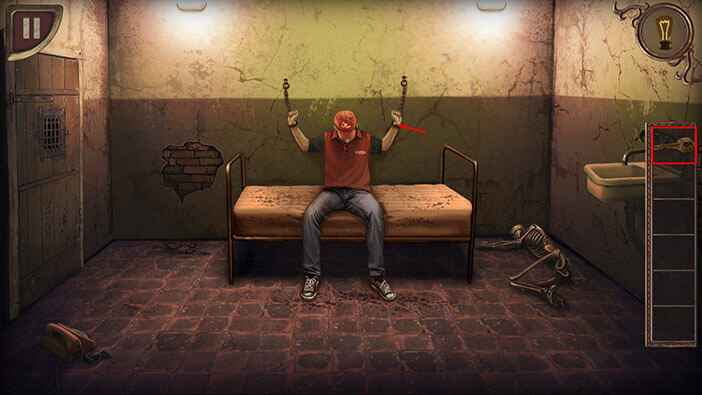
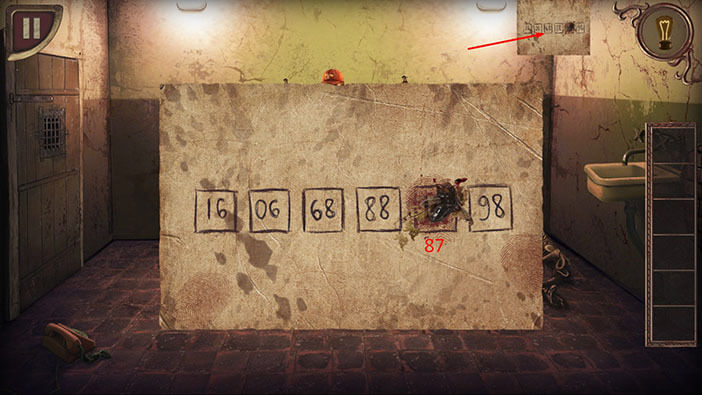
The pizza delivery guy will thank you for freeing him, and he will give you a note that he stole from his captor. Let’s take a closer look at the note.
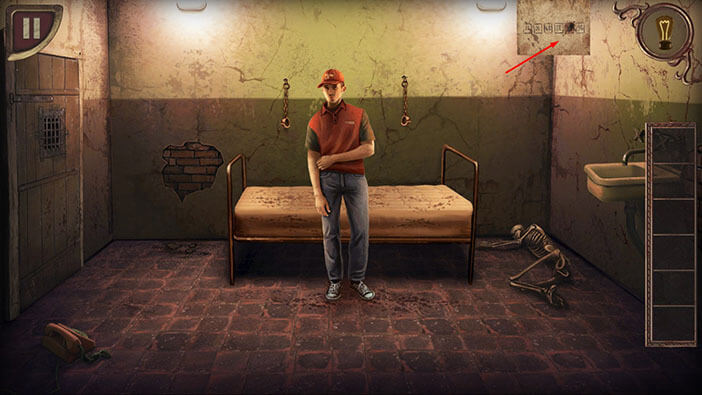
Our task here is to discover the next number, and that number is “87”. Memorize/write down this number because it’s the solution for the next puzzle. After that, tap on the note in the upper right corner to put down the note.
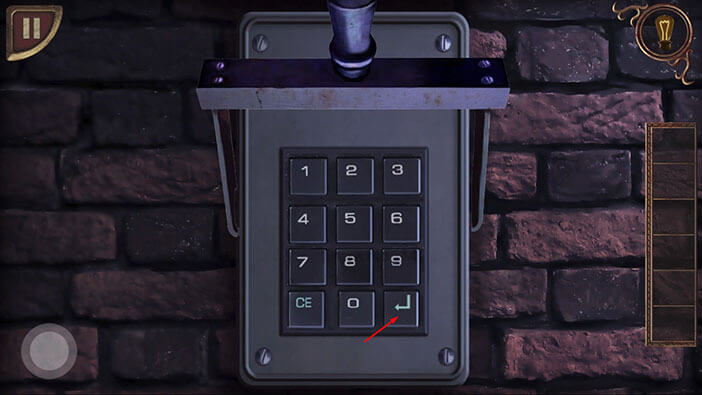
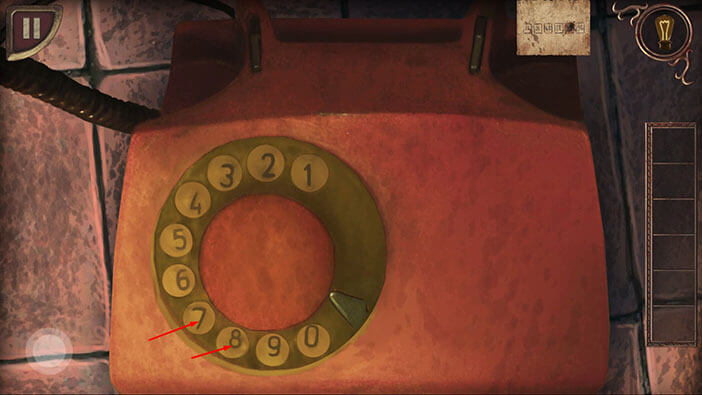
Tap on the red phone located on the ground in the lower left corner to take a closer look at it.
Dial the number “87”.
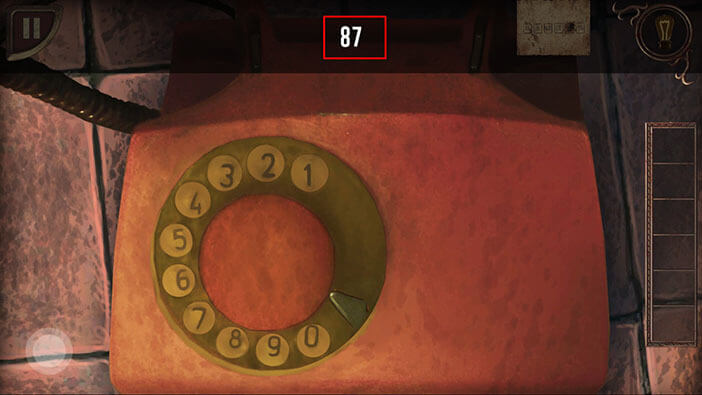
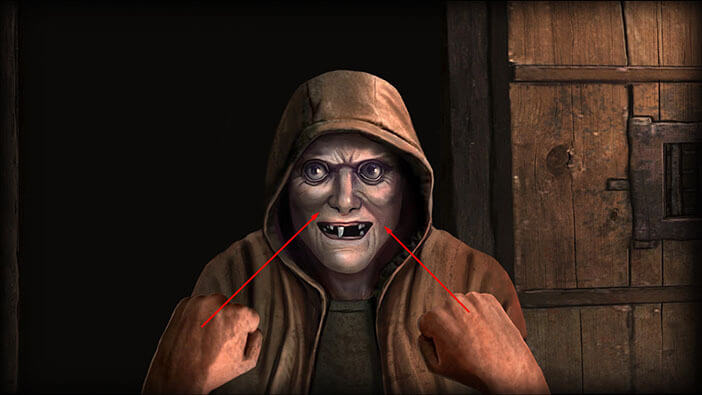
As soon as you do that, the door will open and the murderer will charge in armed with the double-barrel shotgun. However, your character will quickly disarm him. Tap on the fists to beat him up.
After our character knocked out the maniac, he and the pizza delivery guy tied him up. The rest of the police force soon arrived at the crime scene, and they took the maniac into custody.

Well, with that, we came to the end of this walkthrough. If you’re interested in Escape Room games, check out our guides for the other games of this genre.
Thank you for reading.