Hidden Memories – Part 4 | Laboratory
Intro
Welcome to our walkthrough for Part 4 of Hidden Memories from Dark Dome. Help our protagonist recall how he arrived at a strange, unknown place and identify the mysterious girl he keeps seeing in his memories.
Walkthrough
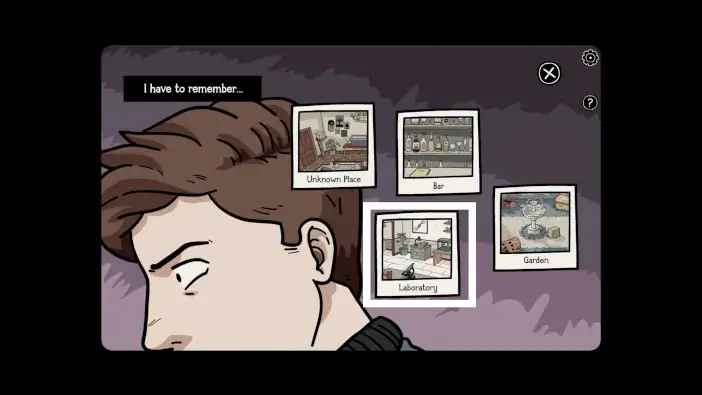
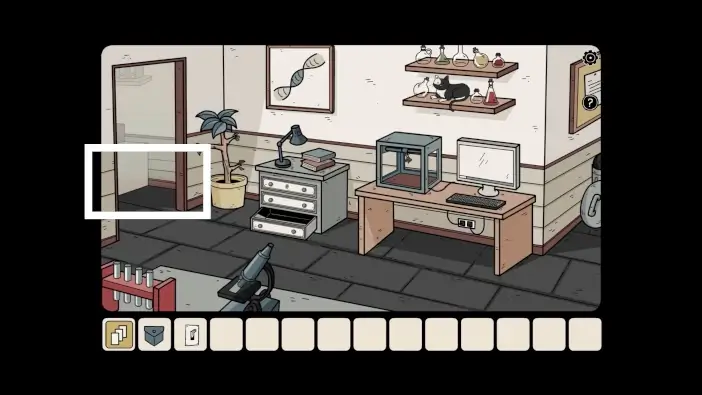
In the memory menu, access the laboratory.
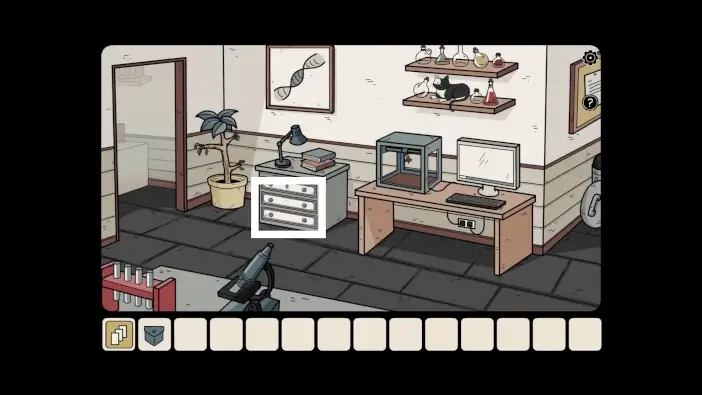
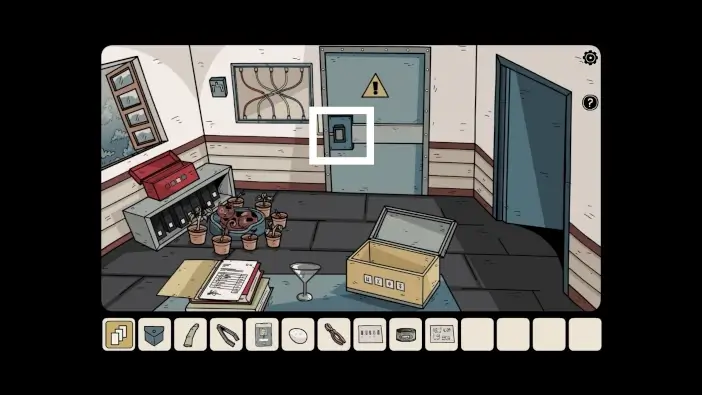
In the laboratory, approach the drawers.
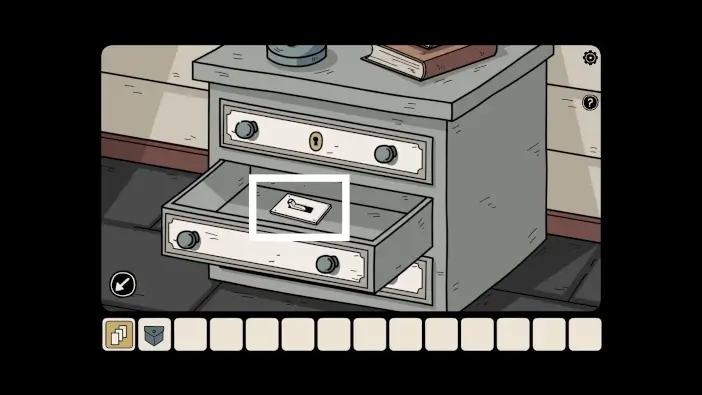
Open the middle drawer and take the light switch. You will need to place it in one room so you can turn off the lights there.
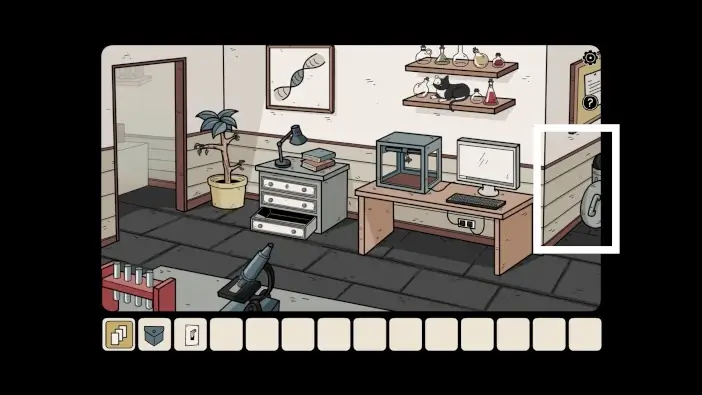
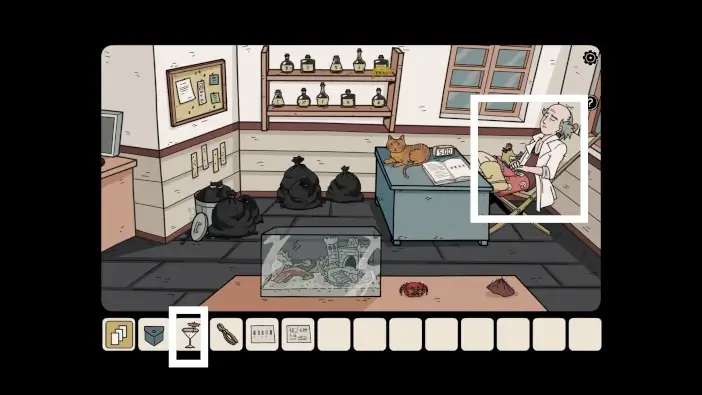
Go right into the office.
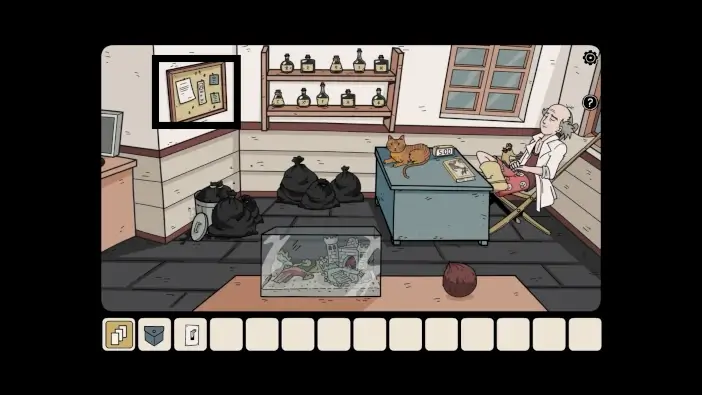
Check the notice board on the left. On the left paper is a clue about the flies and where the flypaper is.
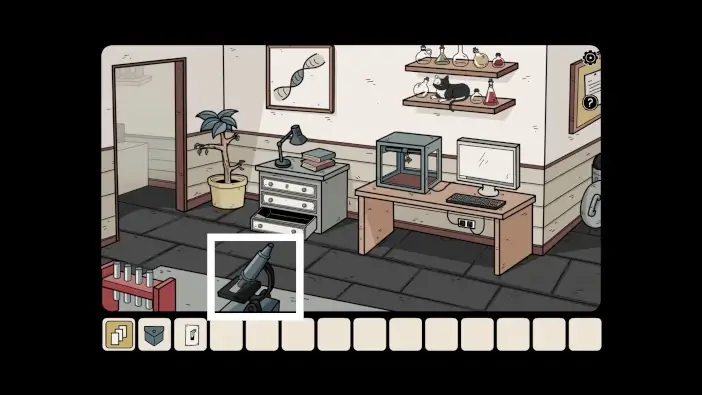
Go left to return to the PC area and approach the microscope.
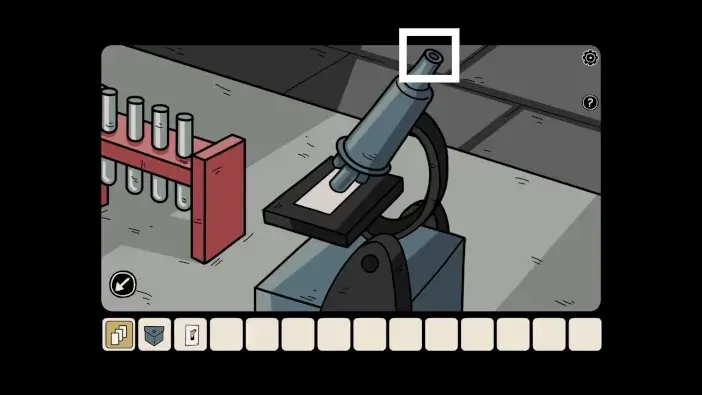
Use the microscope.
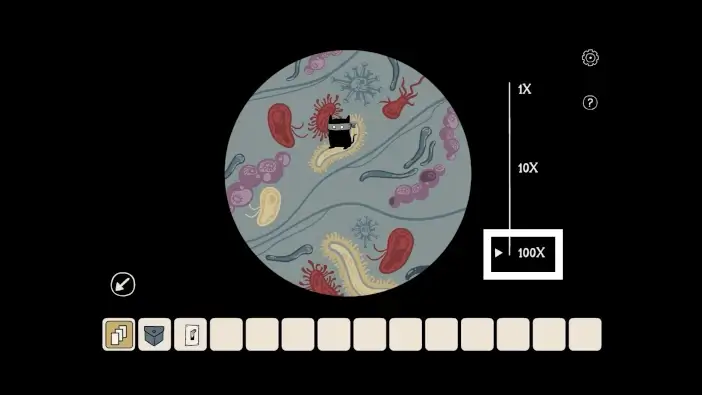
Choose 100X to see a new shadow.
Go left.
Place the light switch. You will turn off the lights later to spot something on camera.
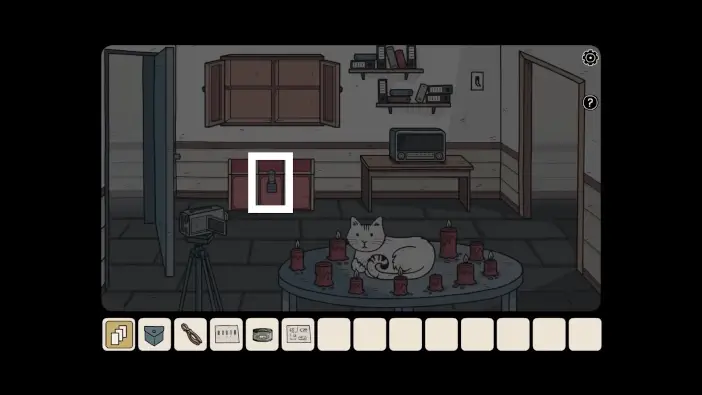
Approach the cabinet and open the right side.
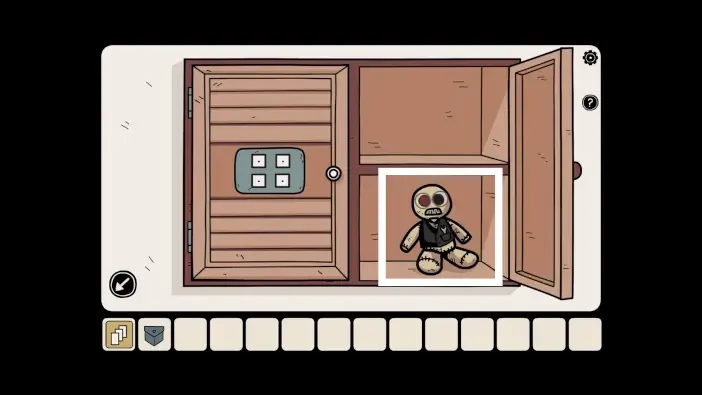
Take the lost soul.
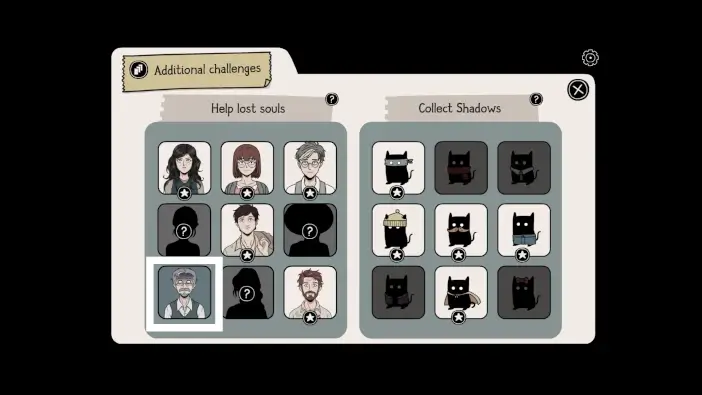
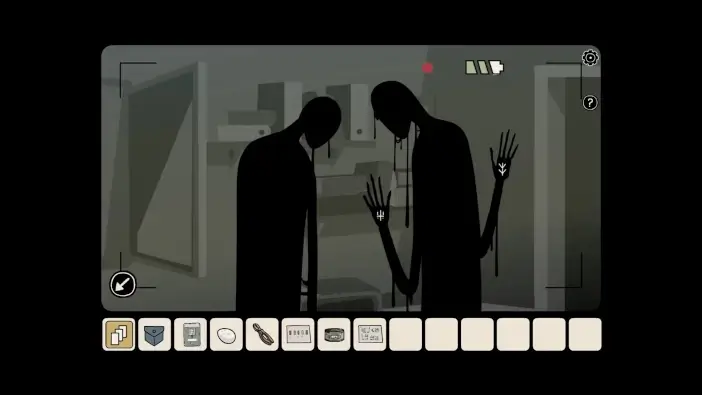
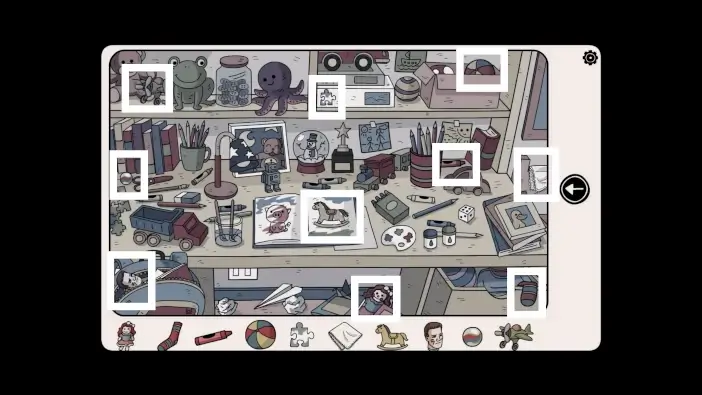
Go to the collectibles menu and find Daniel among the lost souls. Tap on his portrait and the Play button.
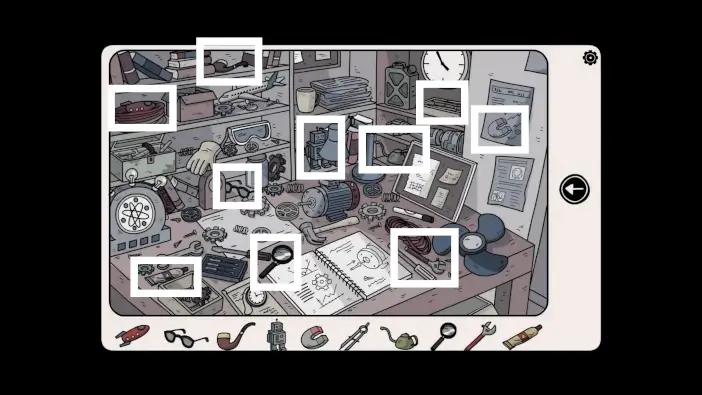
Find all ten items that are listed to help Daniel.
Open the door on the left and go to the next room.
Approach the folders on the table.
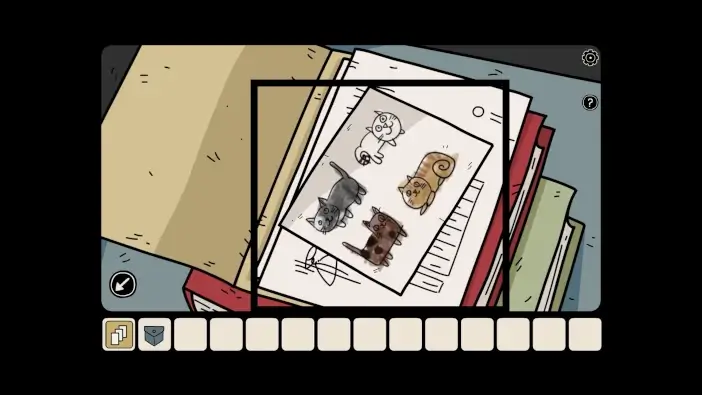
Take the note about the cats. You need to check all four cats. Remember their positions on the paper.

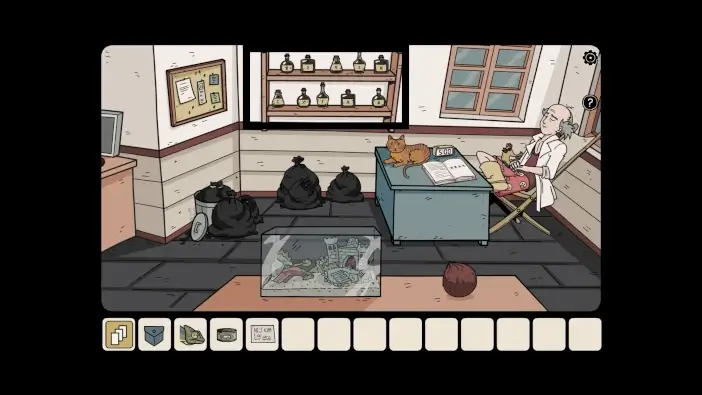
Go to the room where the white cat is and approach the cabinet where you found the lost soul previously. The left part of the cabinet is locked. Check the cats in various rooms you’ve been in previously and pay attention to the items around them. The black-and-white cat has four filled vials around her. The white cat has seven lit candles around her, the brown cat has three grown plants with leaves around her, and the orange cat has an alarm clock that shows the digit 5. Associate these numbers with cats and check the note to see the position of the cats on the paper. The solution is in the picture above.
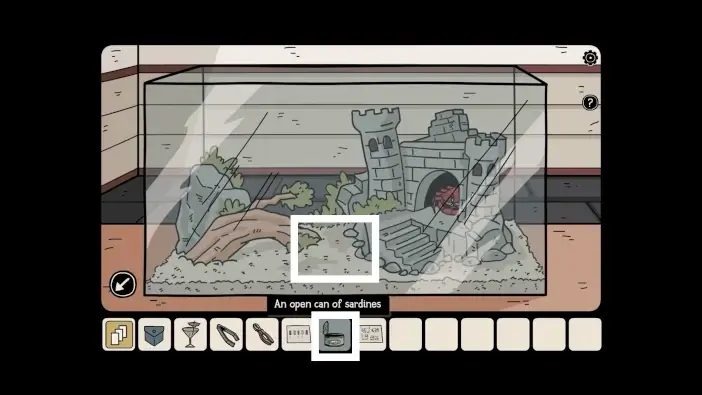
Once you unlock the cabinet, take the can of sardines and the video recorder. You’ll need sardines to lure the crab, but first, you need an item to open the can.
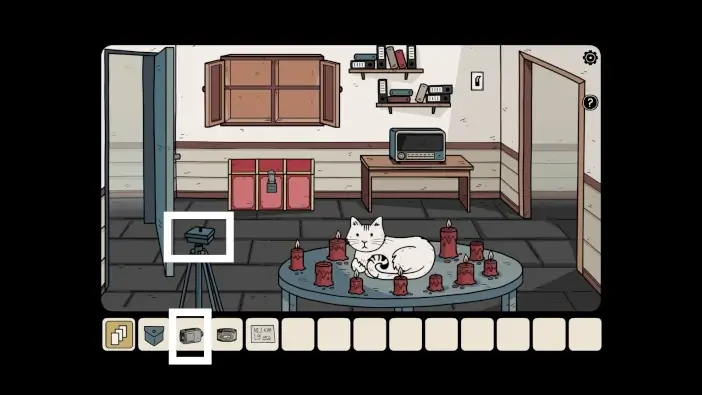
Place the video recorder on the tripod. You’ll need to find the night vision lens first to use the recorder.
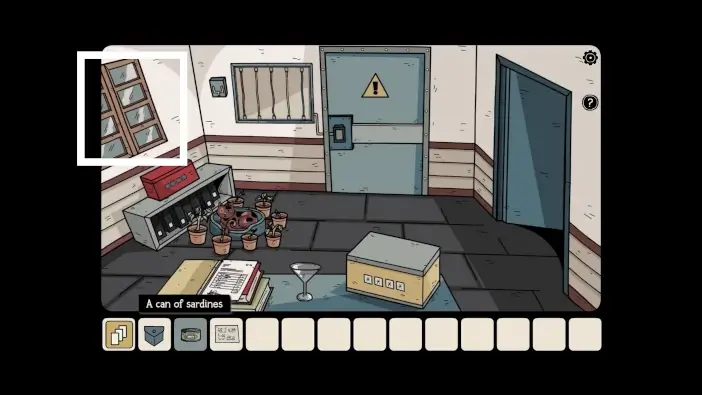
Go to the location where the brown cat is. Open the window on the left.
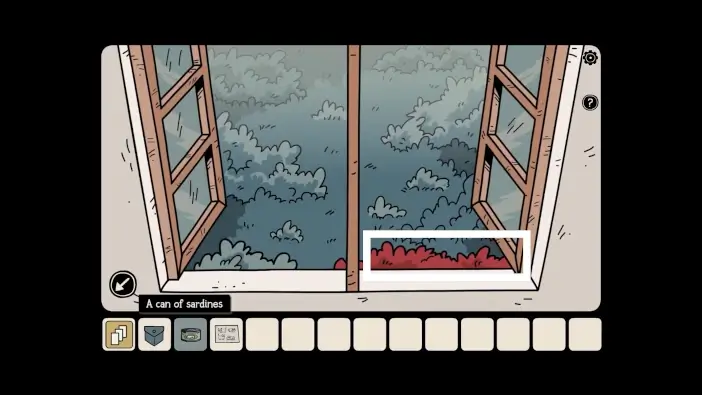
Check the red bush.
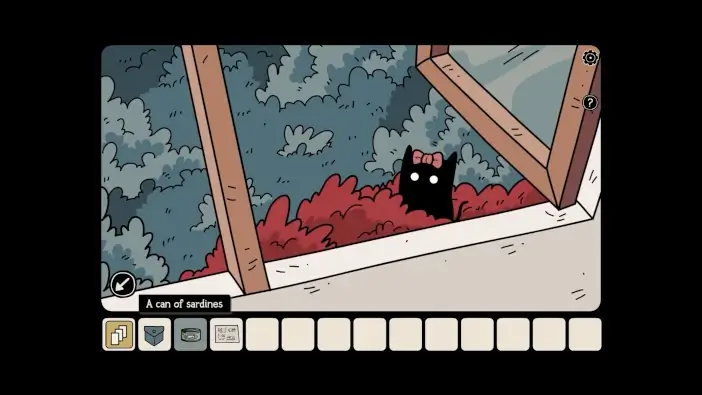
You will find another shadow.
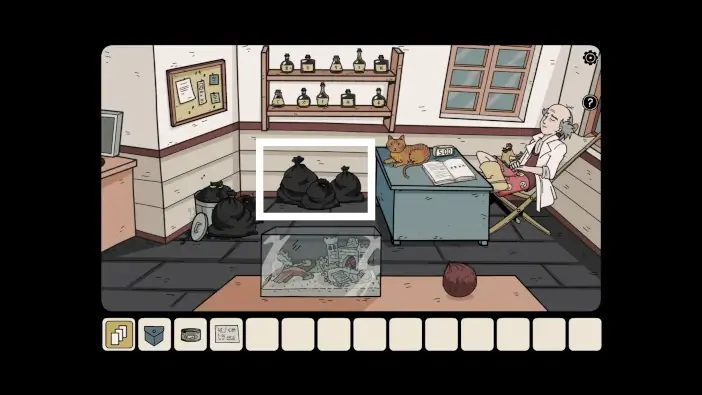
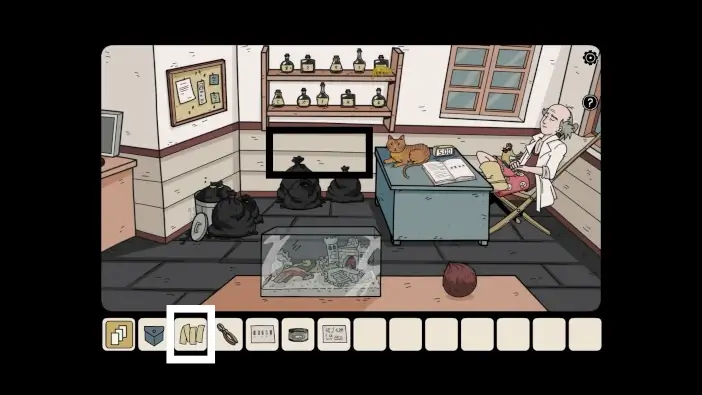
Go to the office and approach the garbage bags.

Pick up the caterpillar.
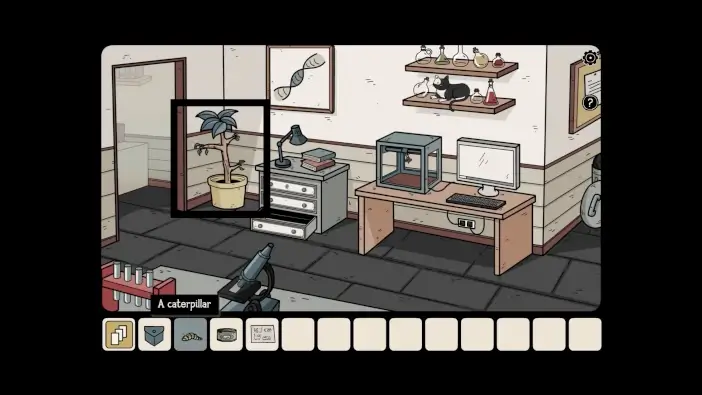
Go to the PC area and approach the plant in the left corner.
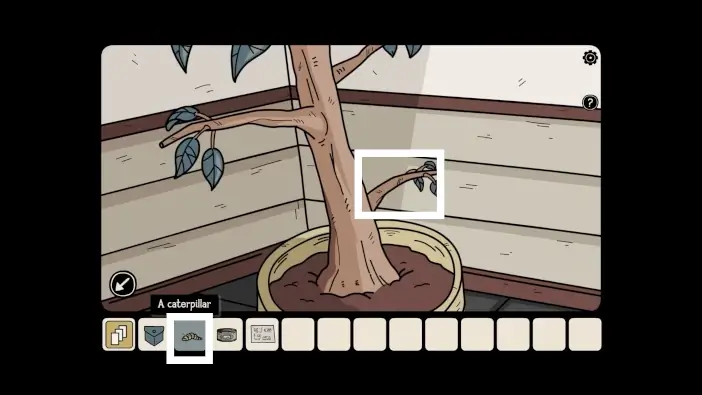
Place the caterpillar on the lower branch.
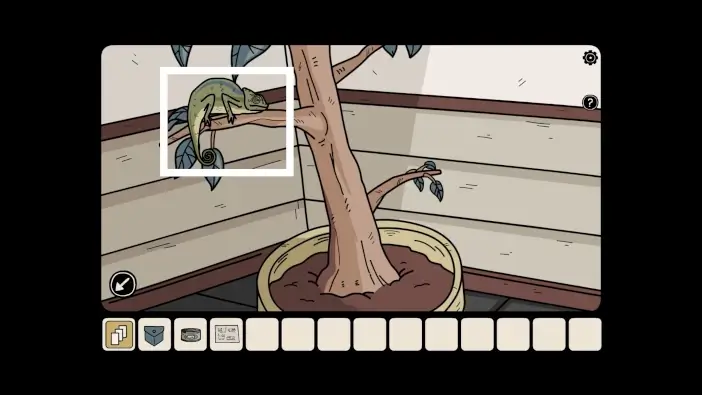
The chameleon will appear, and it will eat the caterpillar. Take the chameleon. You’ll need it for a clue.
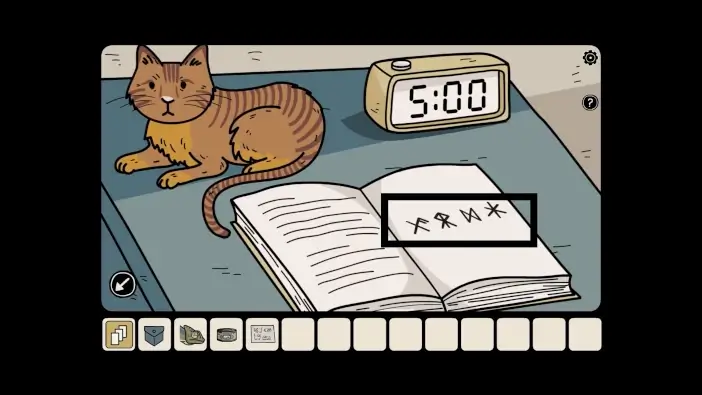
Go to the office, and next to the orange cat, there is a book. Open it and remember the runes.
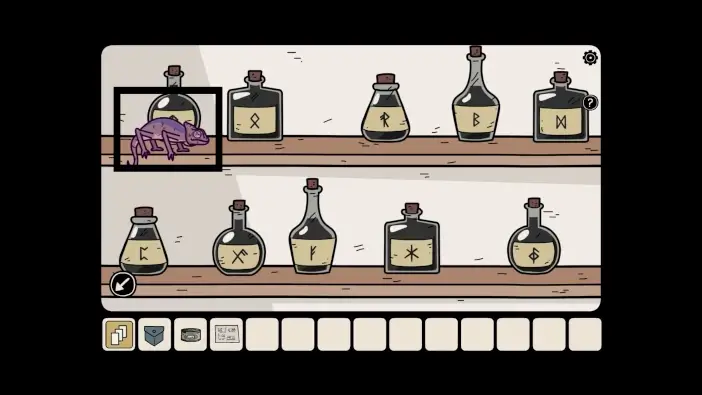
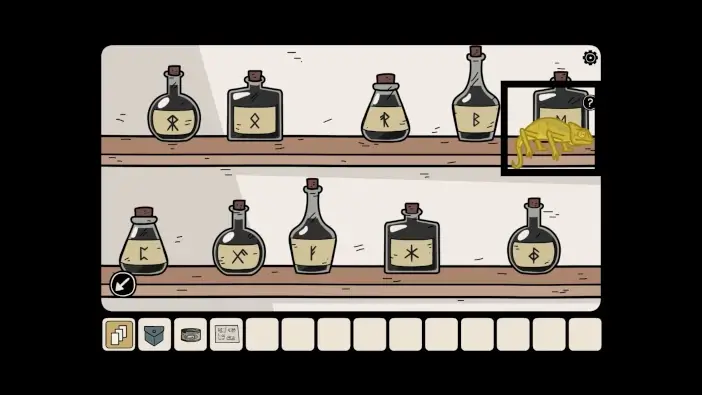
In the office, approach the bottles on the shelves.
Place the chameleon in front of the bottles that have the runes from the book. The chameleon will change its color every time. Remember the colors and which color is associated with which rune.
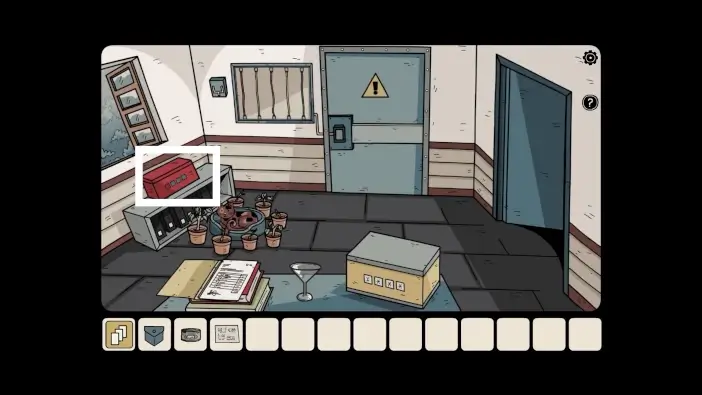
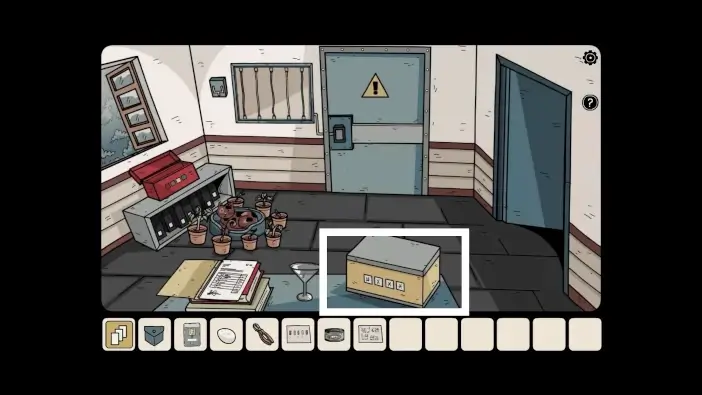
Go to the room where the brown cat is and approach the red box.
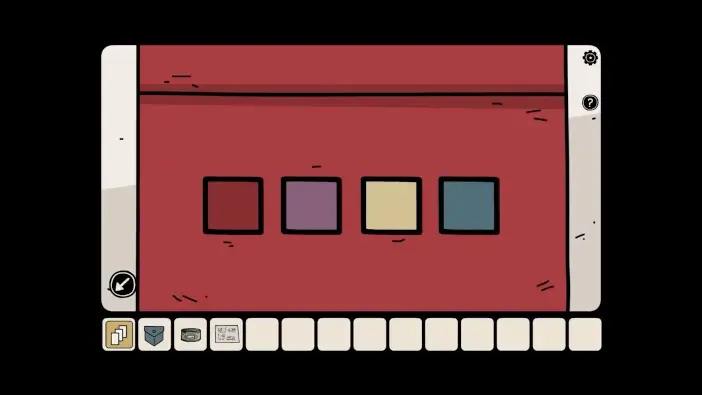
Remember the order of the runes in the book and the colors associated with them. Place the colors like in the picture above to unlock the box. Take the radio knob, the key, and the note from the box.
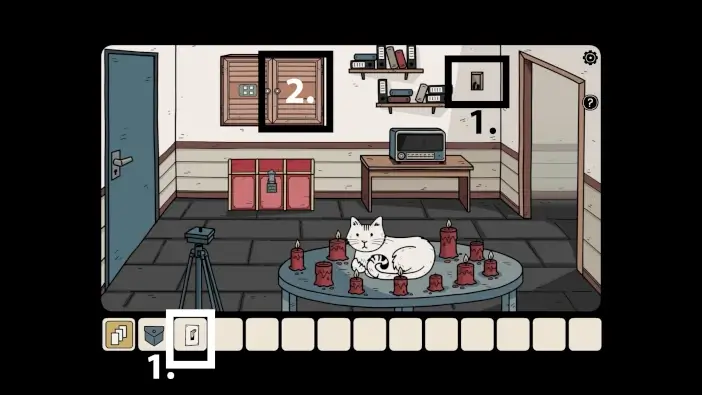
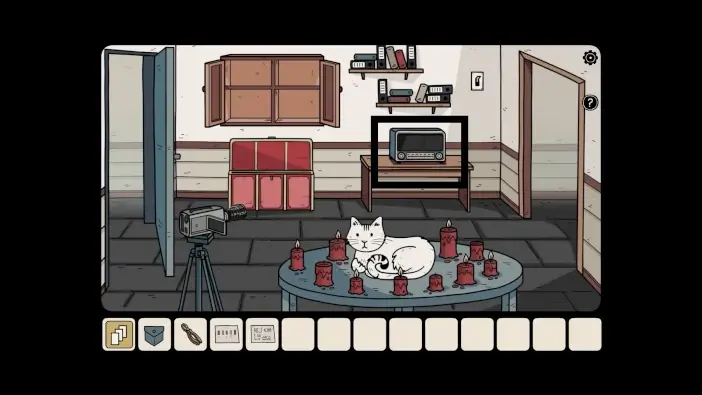
- Go to the room where the white cat is and turn off the lights (you’ll need the lights off for the video recorder).
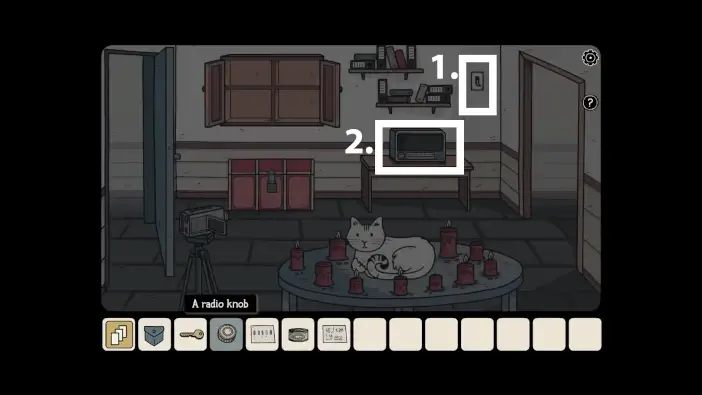
- Approach the radio.
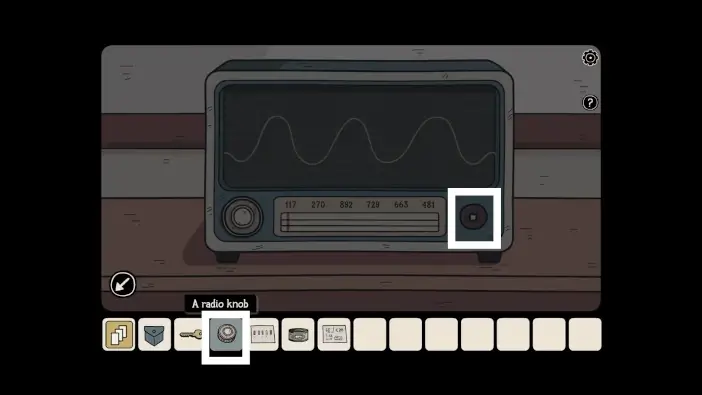
Attach the radio knob to the radio.

Go to the PC area and approach the nightstand.
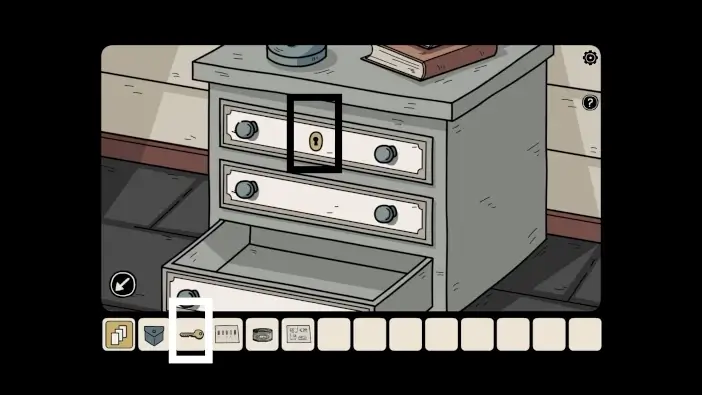
Unlock the top drawer with the key you found in the red box. Take a pair of pliers and fly tapes. You’ll need pliers to cut wires.
Go to the office and approach the area below the shelves. Place the fly tapes on the wall.
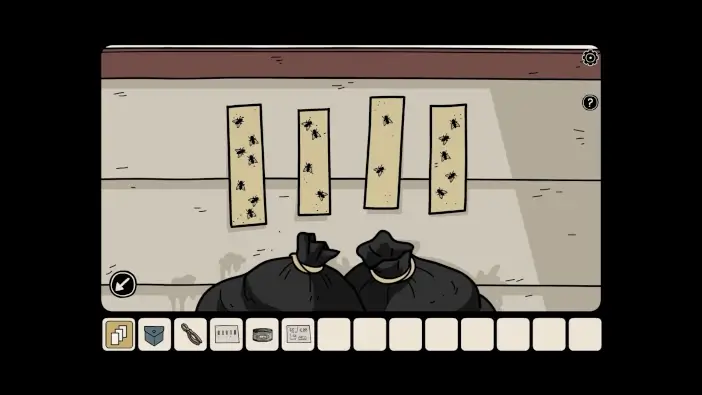
Remember the number of flies on each paper. This is a clue for unlocking a padlock.
Go to the area where the white cat is. Approach the chest.
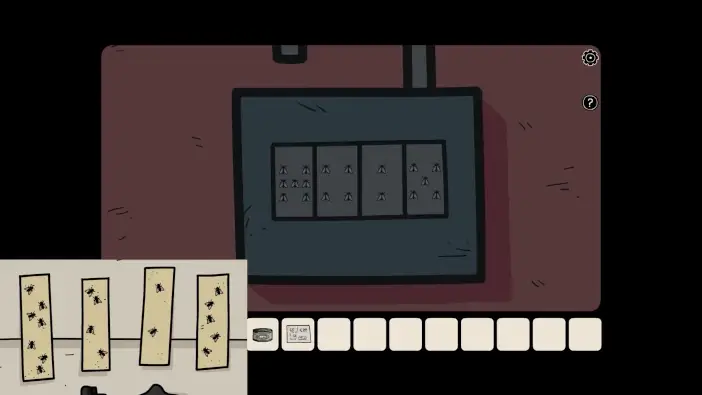
Change the fields so each field has the same number of flies, like on the fly tape and padlock will be unlocked. Take the egg, the scientist’s access card, and the night vision lens.
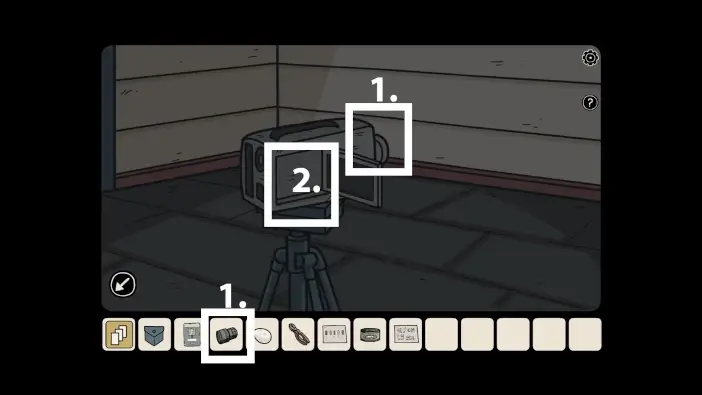
- Approach the video recorder. Attach the night vision lens.
- Use the video recorder.
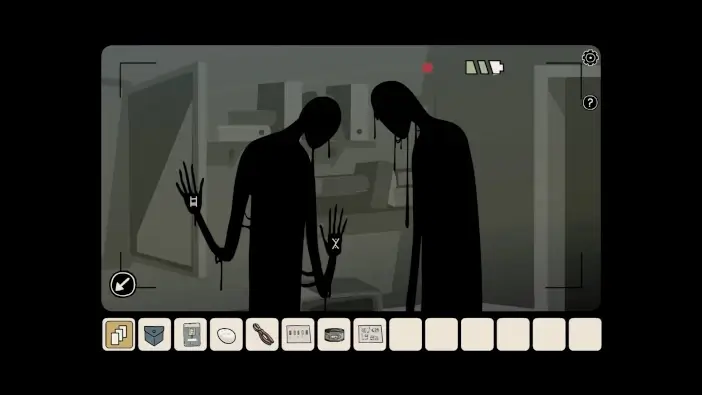
Tap on the left shadow, and it will show you two runes.
Tap on the right shadow, and it will show you two runes. Remember all the runes and their order from left to right.
Go to the area where the brown cat is and approach the box on the table.
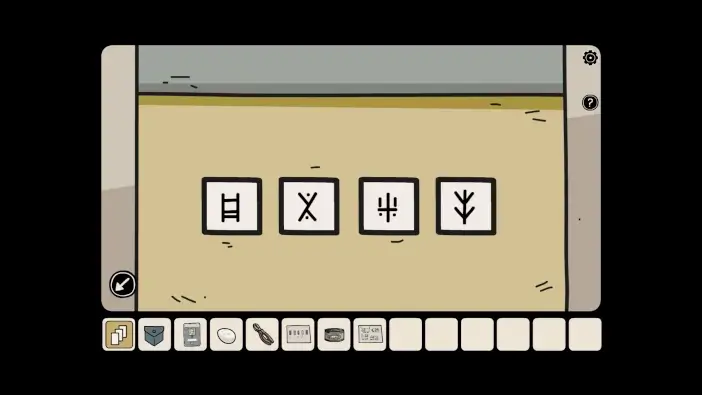
Remember the runes that shadows showed you and their positions from left to right, and place the same runes in the same order to unlock the box. Pick up the USB drive and the pair of tweezers. You will use a USB drive on the PC, and a pair of tweezers will be useful to catch the crab from the tank.
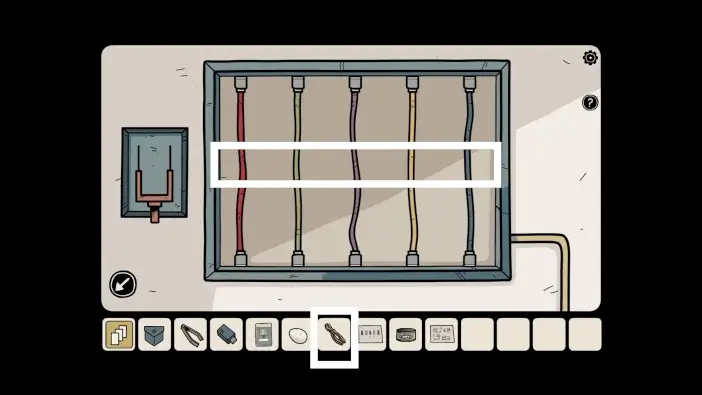
In the same room, approach the cables on the wall.

Take a look at the note you found in the red box. Remember which color is connected to the other color. For example, below the yellow rectangle is a red X sign, which means that the yellow cable should be connected to the red cable.
Use a pair of pliers to cut all the cables.
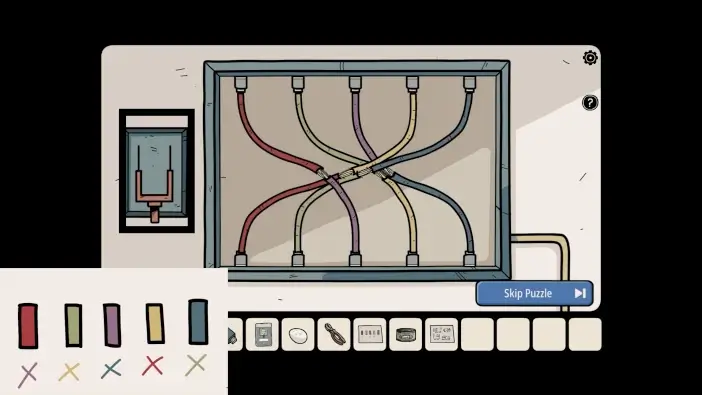
Connect all cables using the note in your inventory. Once you complete the puzzle challenge, activate the switch on the left. This will cause power to return to the door’s control panel (locked door next to the cables).
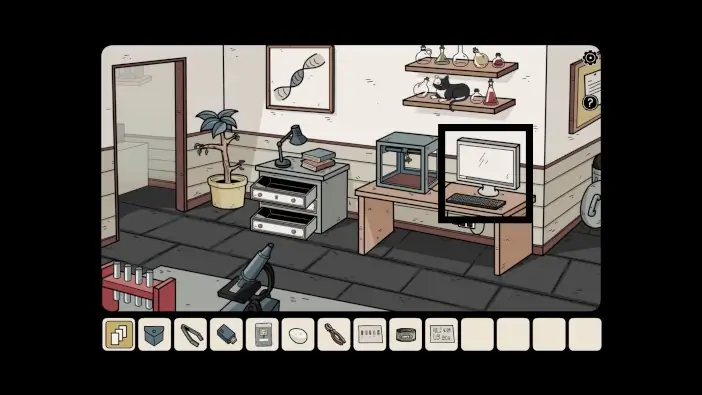
Go to the PC area and approach the PC.
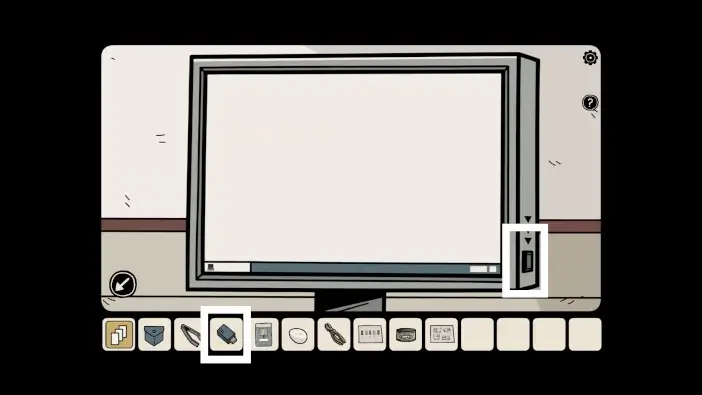
Plug the USB drive. Enter the Cloning folder.
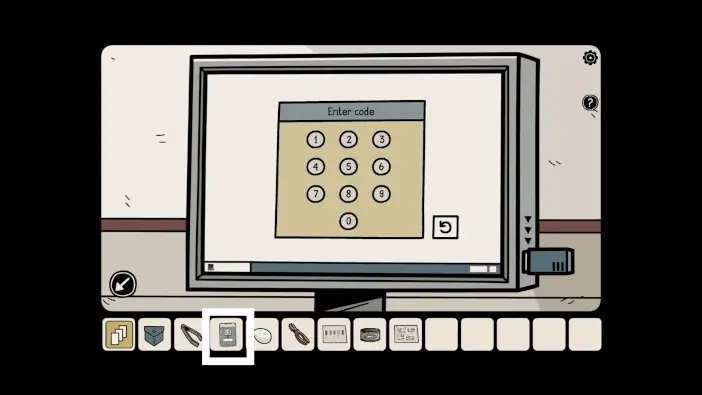
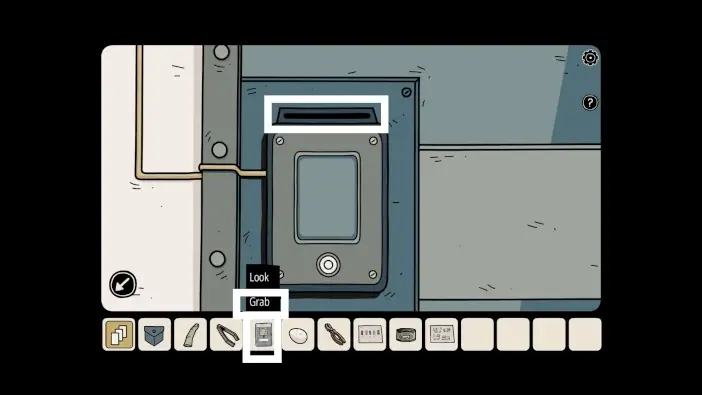
Tap on the access card in your inventory and choose the Look option.
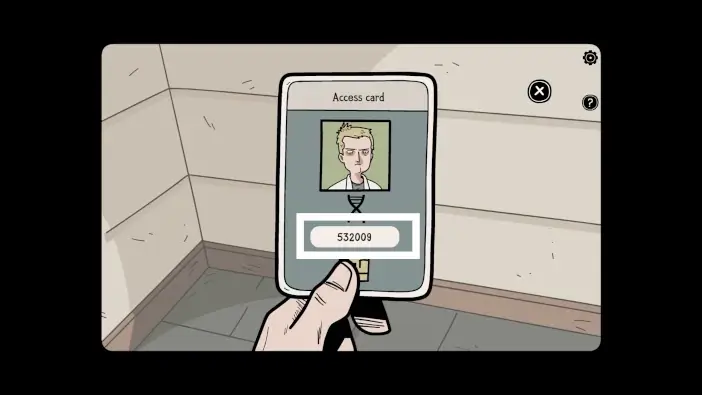
Remember the password on the access card. Type the password (by tapping on the in-game computer’s on-screen keyboard).
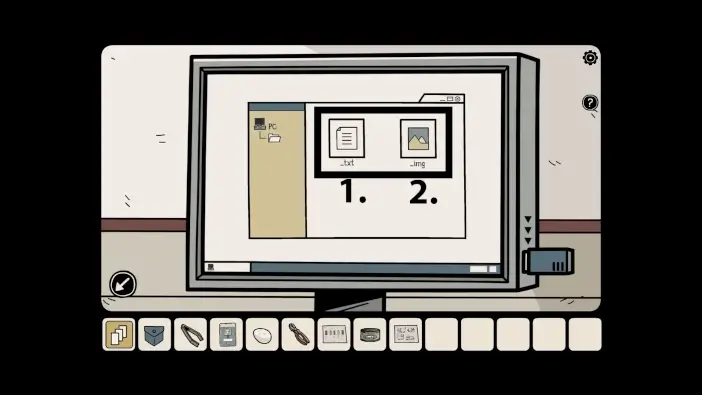
- Tap on the text file and read it.
- Tap on the image file.

Tap on the Print button.
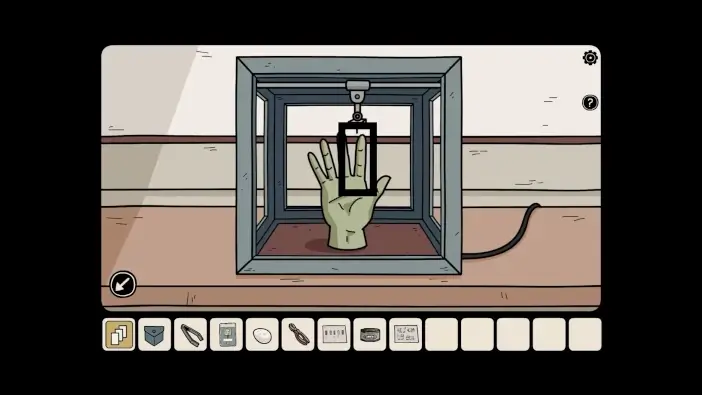
Approach the 3D printer and take a replica of the scientist’s finger.
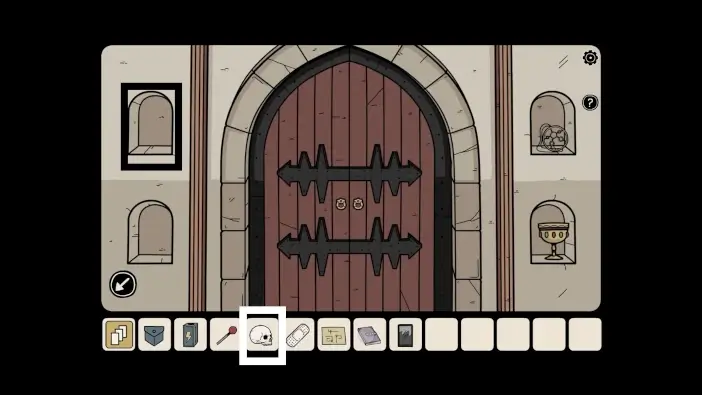
Return to the locked door and approach the control panel.
Tap on the access card in your inventory and choose the Grab option. Place the access cart into the control panel’s mechanism.
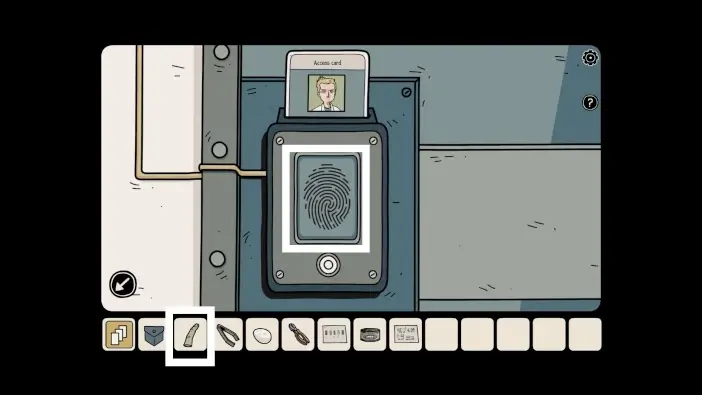
Use the replica of a scientist’s finger to unlock the door. Enter the room.
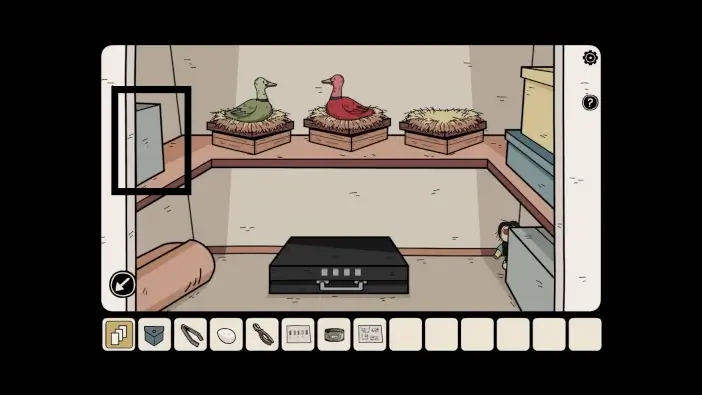
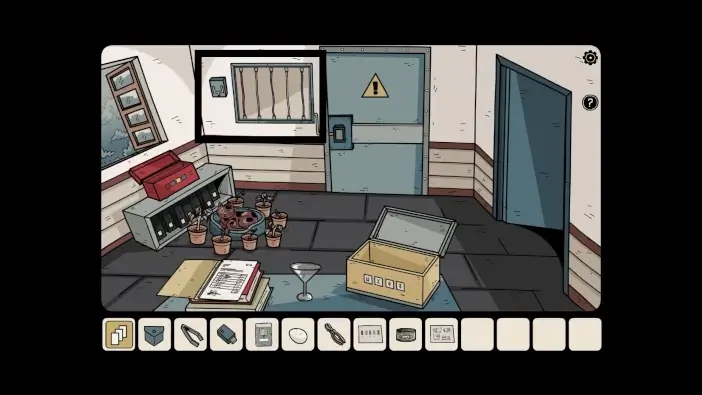
Check the box on the left and open it.
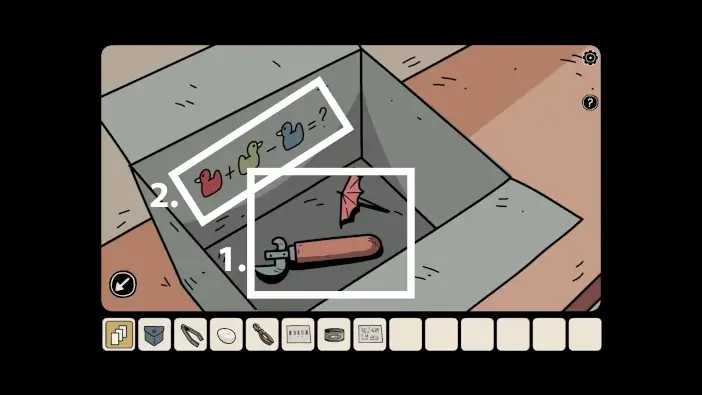
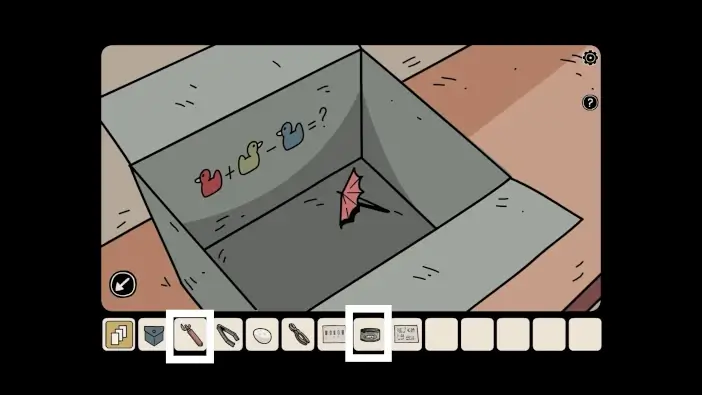
- Take the can opener and the small umbrella.
- Look at the clue about ducks. You need to find numbers that are associated with ducks.
In your inventory, use the can opener to open the can.
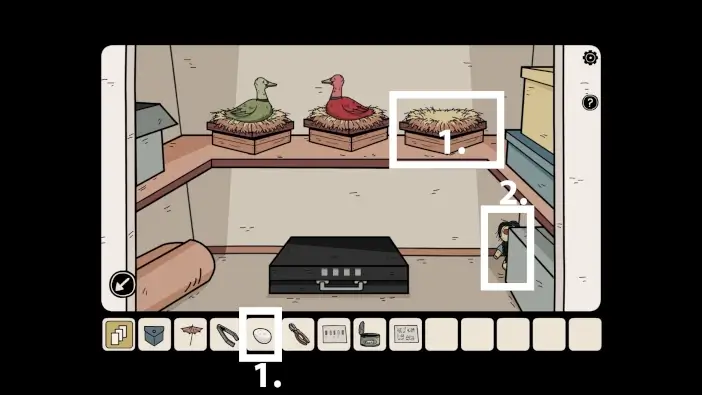
- Place the egg into the nest on the right.
- Pick up the lost soul behind the box on the lower right.
Open the collectibles menu and find Elena in the lost souls list.
Find all ten items that are listed to help Elena.
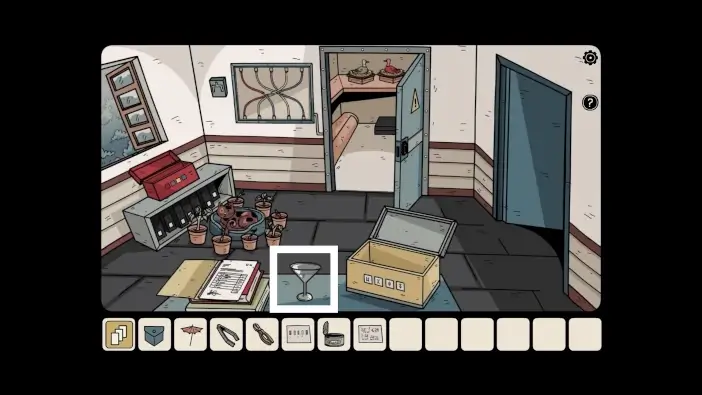
In the room where the brown cat is, take the glass from the table.
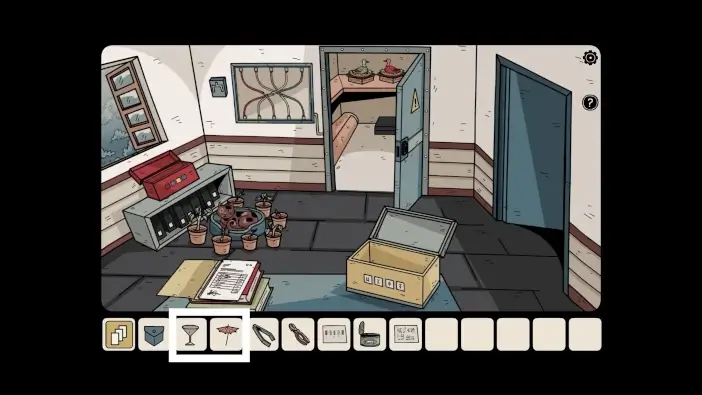
Place the small umbrella into the glass.
Go to the office and approach the tank.
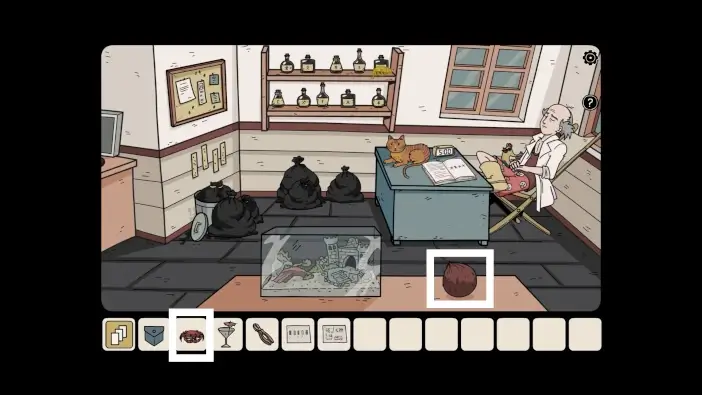
Place sardines into the tank to lure the crab.

Use tweezers to pick up the crab.
Approach the coconut. Place the crab on the coconut.
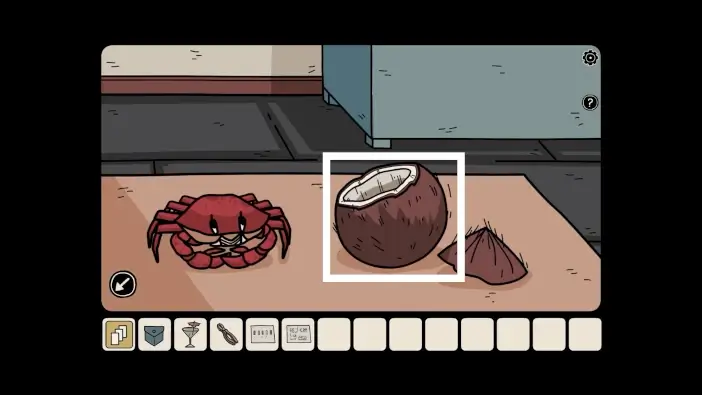
The crab will cut the coconut (with a cool move). Take the coconut.
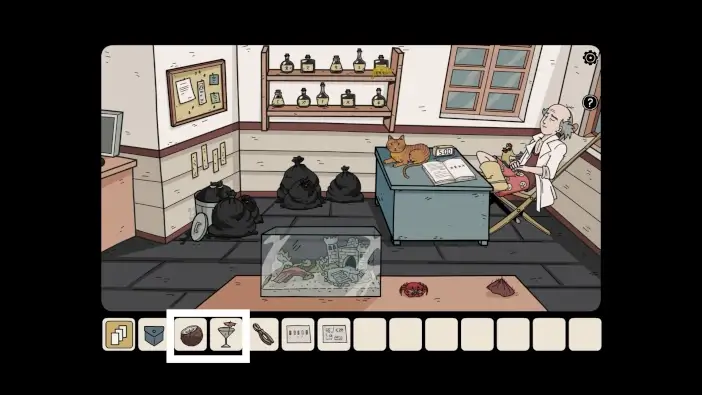
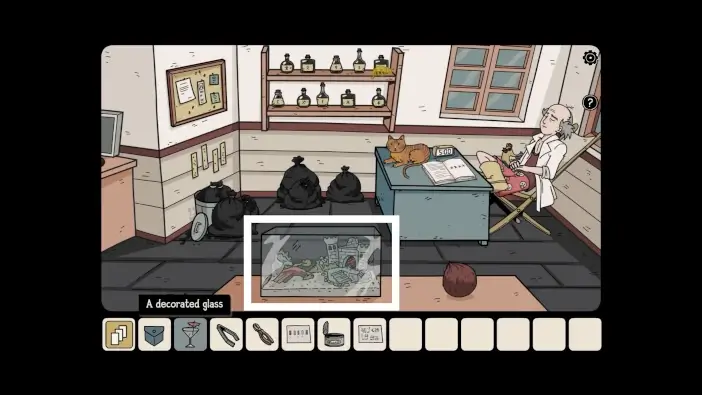
Put the liquid from the coconut into the glass.
Give the refreshing decorated drink to the scientist.
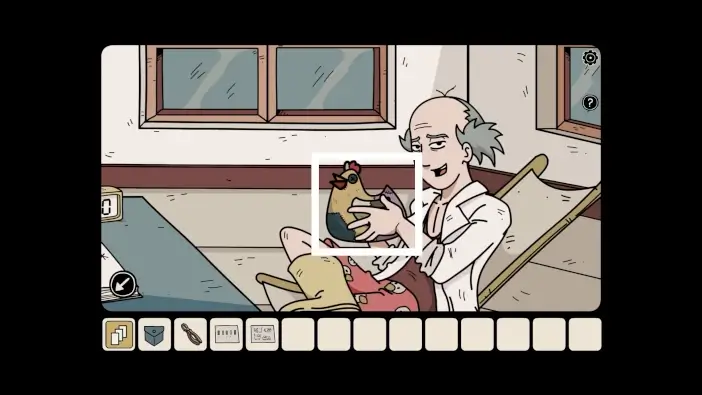
Take the cloth chicken from the scientist.
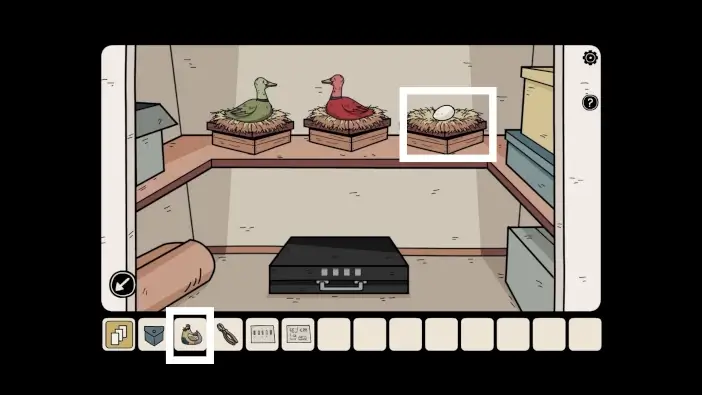
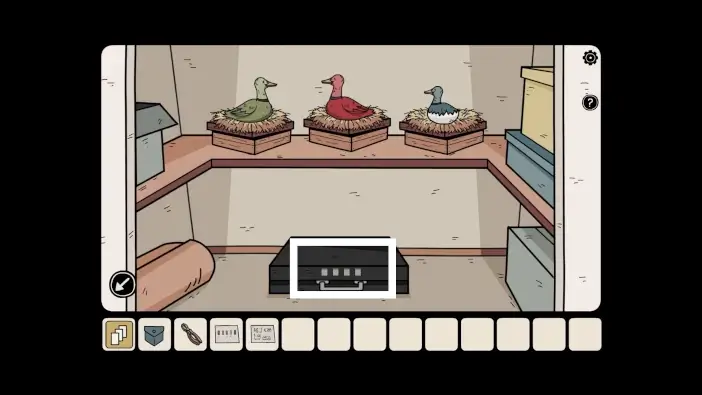
Return to the room with the ducks and place the cloth chicken on the egg. A new duck will be hatched from the egg. Tap on each duck and remember the frequencies of their quacks.
Go to the room where the white cat is and approach the radio.
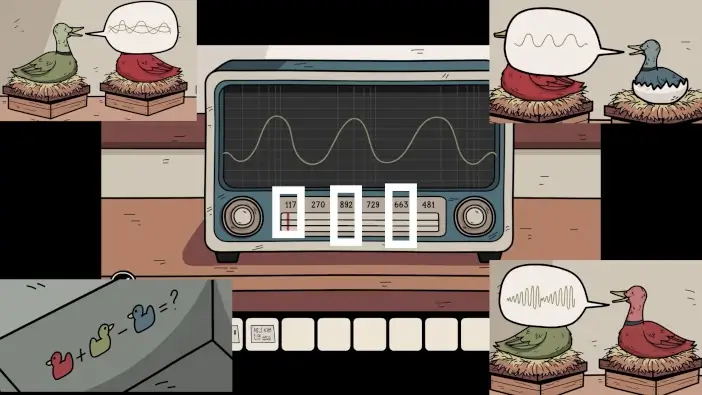
Try to find frequencies that the ducks were showing and remember the frequency numbers. Remember the formula in the box and replace the images of ducks with the frequency numbers. The solution is: 882 + 663 – 117 = 1438. The 1438 is the code for unlocking the briefcase.
Return to the duck area and approach the briefcase below the ducks.
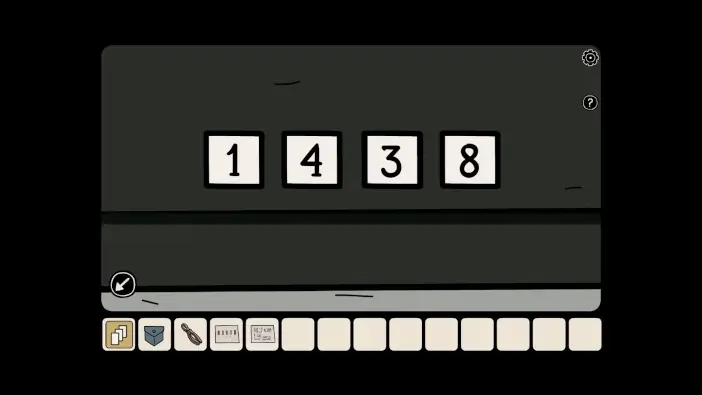
Enter the 1438. Take the note from the briefcase.

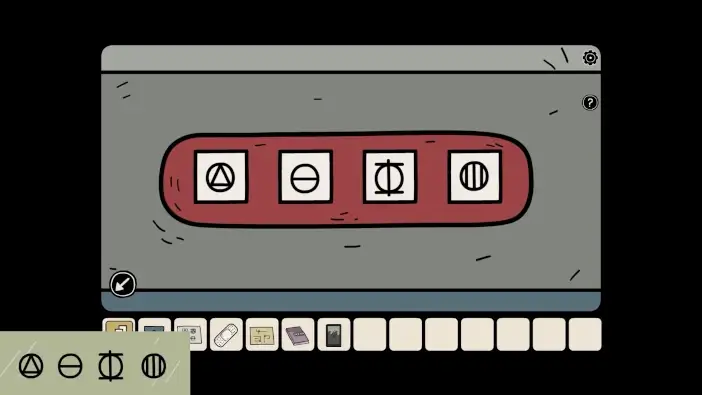
In the memory menu, choose the unknown place. Find the chest next to the phonograph.
Remember the note you found in the laboratory, in the briefcase, and unlock the padlock of the chest. The solution is in the picture above.
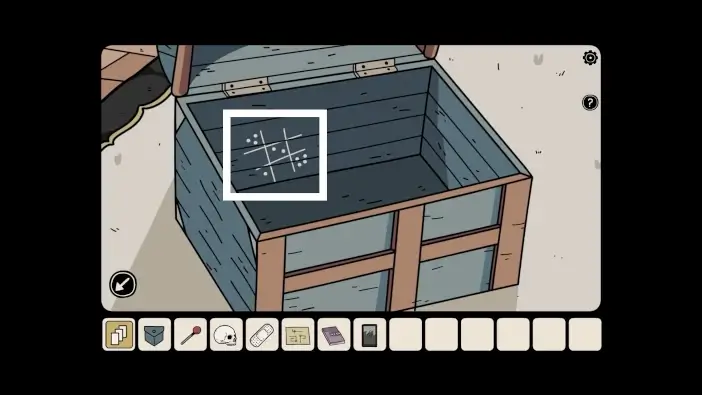
Remember the clue in the chest.
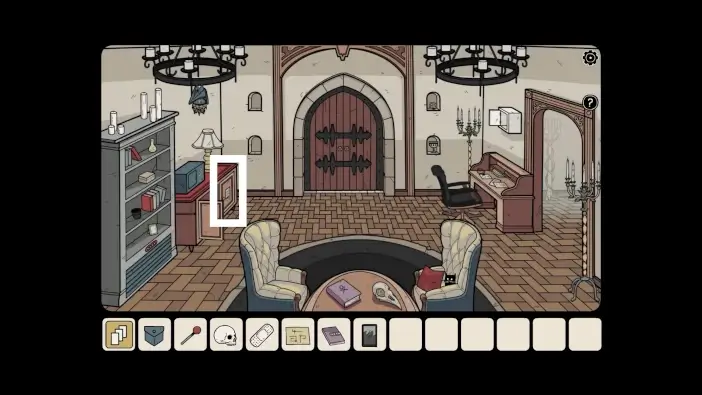
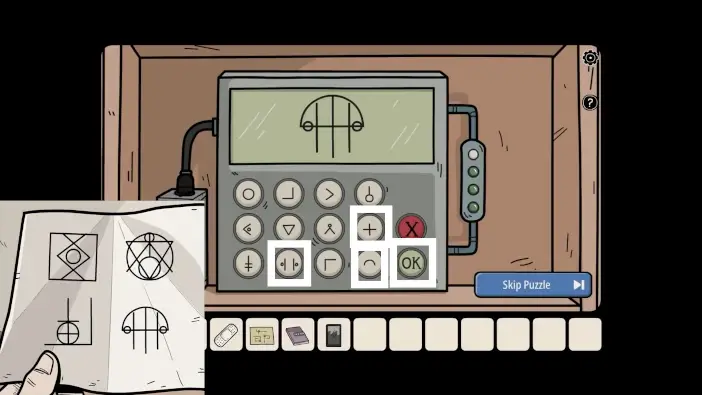
Go to the exit area and approach the cabinet on the left. Approach the locked right side of the cabinet.
Remember the clue from the chest. Tap on the buttons in order as shown in the picture above, then tap on the OK button. Once you unlock the cabinet, take the battery.
Go to the exit door and place the skull on the upper left spot.
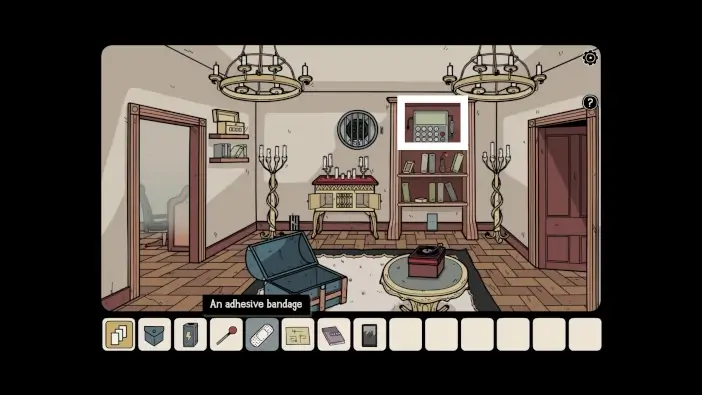
Go to the phonograph area and approach the machine above the bookshelves.
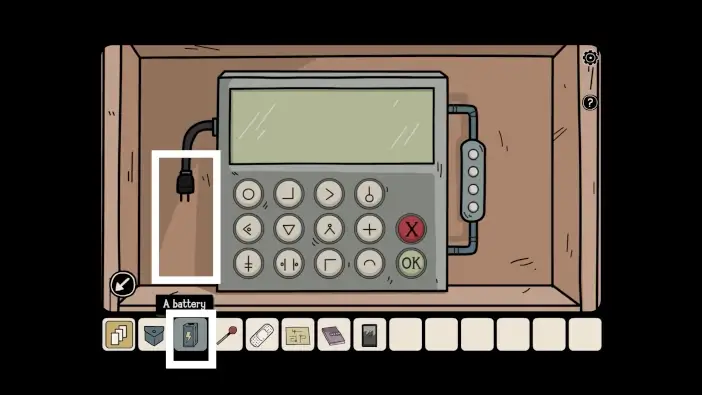
Place the battery near the machine’s cable.
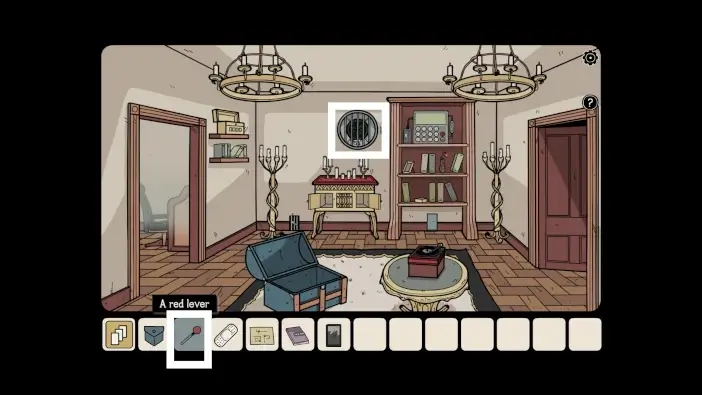
Approach the fan on the wall.
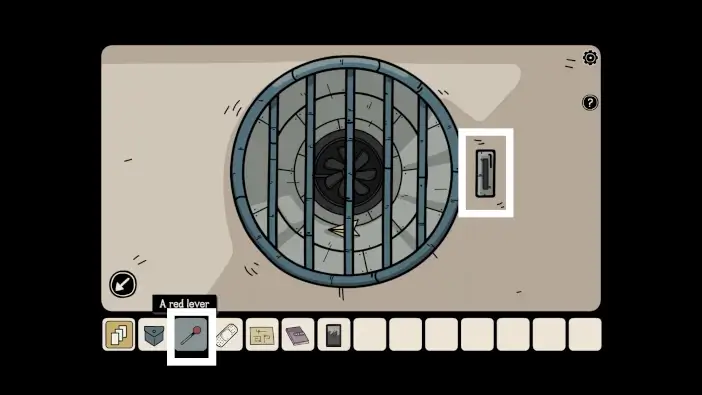
Attach the red lever, then use the lever to activate the fan. The paper will fall to the ground.
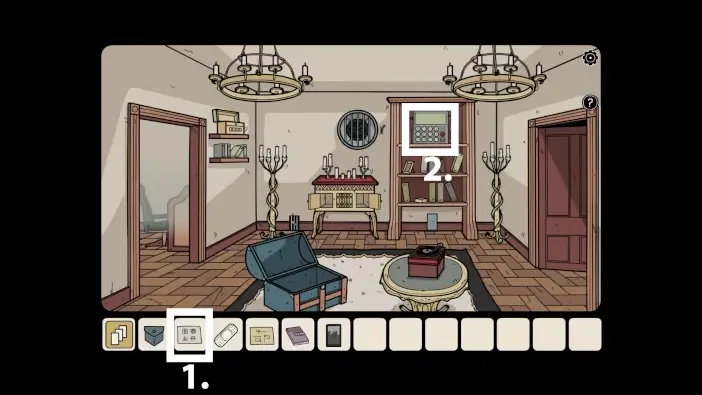
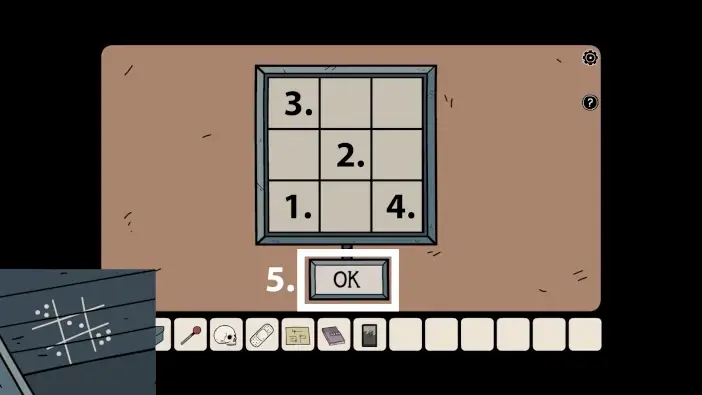
- On the paper, you can see the shapes you need to create using the machine.
- Approach the machine.
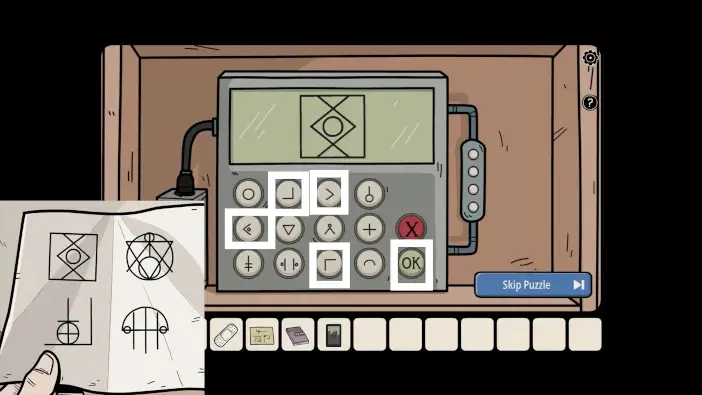
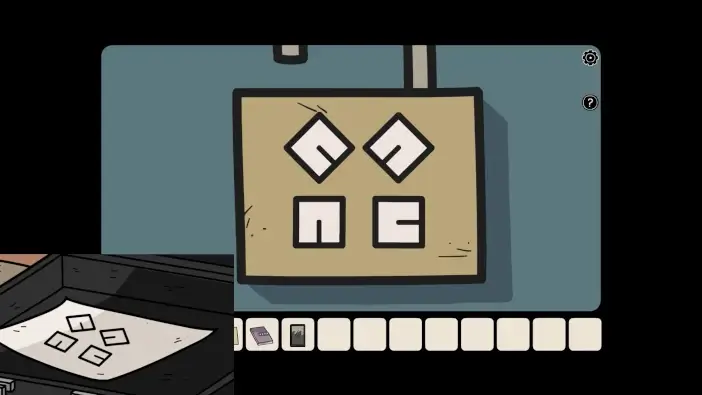
Create all four symbols, one by one, using the components of the symbols. To create one specific symbol, tap on the buttons shown in a picture in this guide and then tap the OK button to submit the symbol. Only then will the machine recognize your correct answer.
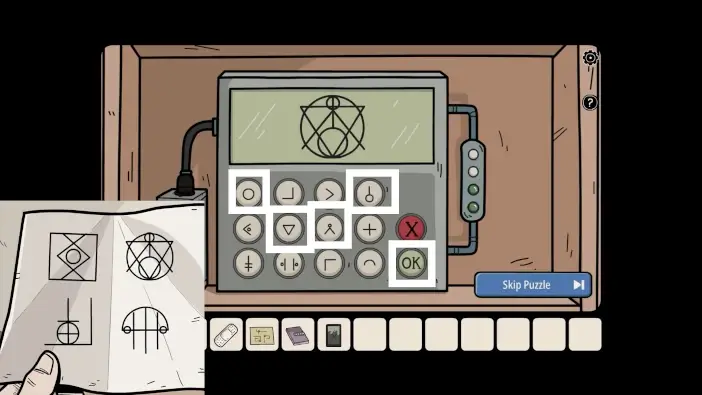
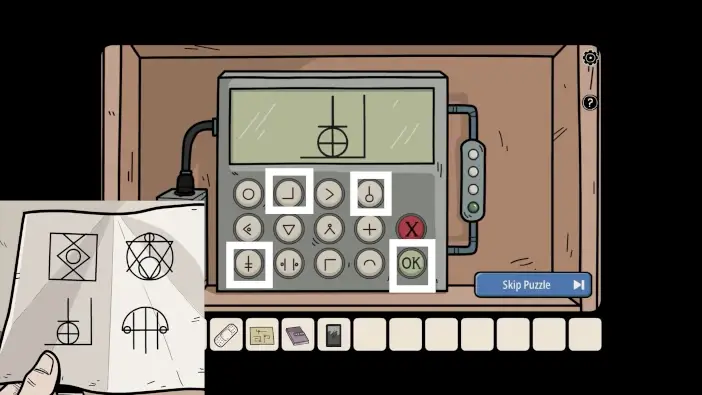
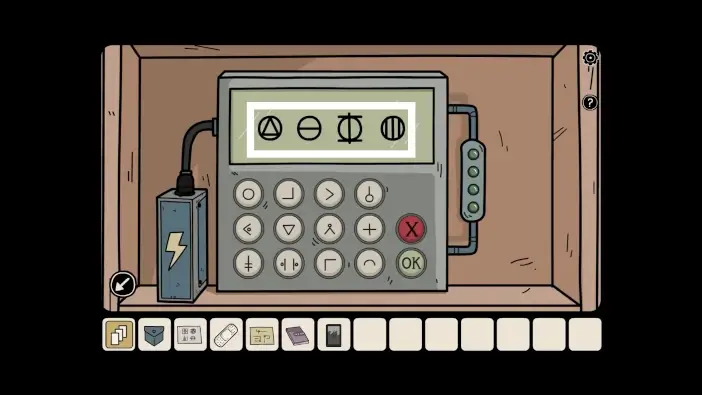
Once you create and submit all the symbols, the machine will show you four new symbols. Remember them.
Go to the exit area and approach the compartment on the left, below the bookshelves.
Enter the symbols that the machine showed you. Once you unlock the compartment, open the book and take the photo. This will unlock a new memory for our protagonist.
This will mark the end of Part 4 of our guide for Hidden Memories.
Thank you for reading!