Ghost Case | Part I
Hello everyone and welcome to Part 1 of our walkthrough for the “Ghost Case” a room escape game created by the Dark Dome. The Ghost Case is the fourth game in the series and, just like the previous games, the story is set in Hidden Town, which is filled with all kinds of mysteries. In this walkthrough, we will show you how to solve all the puzzles and finish the game. The story of the Ghost Case is a continuation of the story of the second game “The Girl in the Window” so I would strongly suggest you play “The Girl in the Window” before starting this story. I don’t want to reveal too much, but it might be a good idea to also play the third game in the series “Nowhere House” before jumping into the “Ghost Case” because there’s also a connection between these two stories.
NOTE: The first part of the walkthrough follows the story up to the point when you solve the “Pawn” puzzle and find the “Projector slides” and letter to the “Lian” (Murder House puzzles mostly cleared). The next step is to go back to the Police Station and take a look at the slides, and that’s where Part II begins.
NOTE: Some puzzles will CHANGE with each playthrough, but the logic behind solving the puzzles will always remain the SAME. For example, in one playthrough a code to open a safe could be 1234, and in another playthrough, the code could be 4321. However, you will always discover the numbers for the code at the same location and by using the same hints.
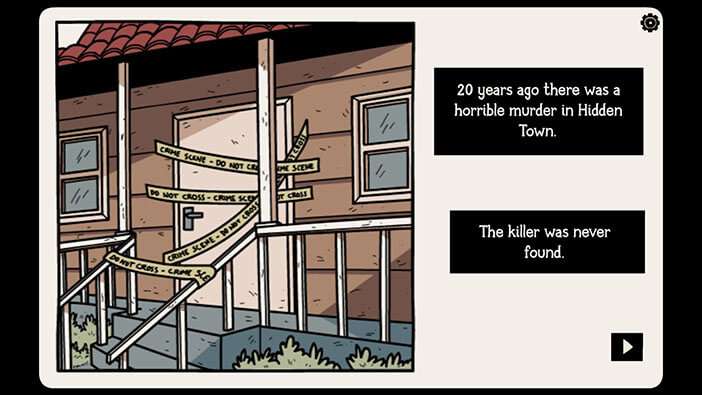
In the intro, we are reminded of murders that happened 20 years ago. In the second game “The Girl in the Window” we explored this event.
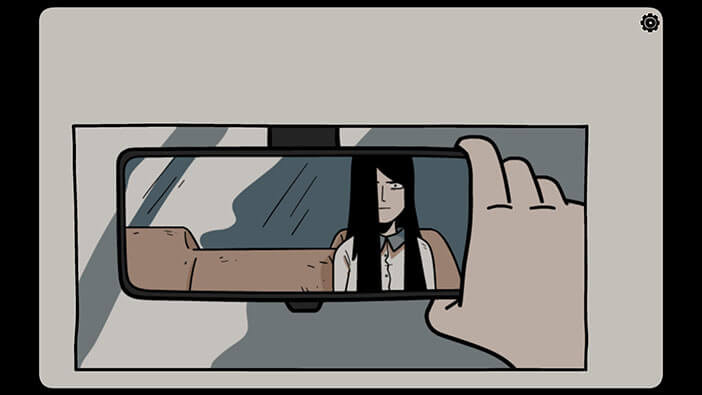
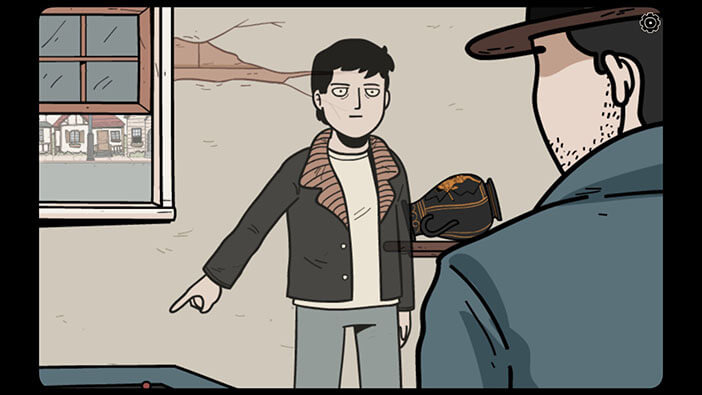
During this story, will be playing detective Ren Larsen who, while he was driving, looked in his rearview mirror, and saw a ghost of the murderer girl, calmly sitting in the backseat of his car. However, when he turned around to take a look, the backseat was empty.
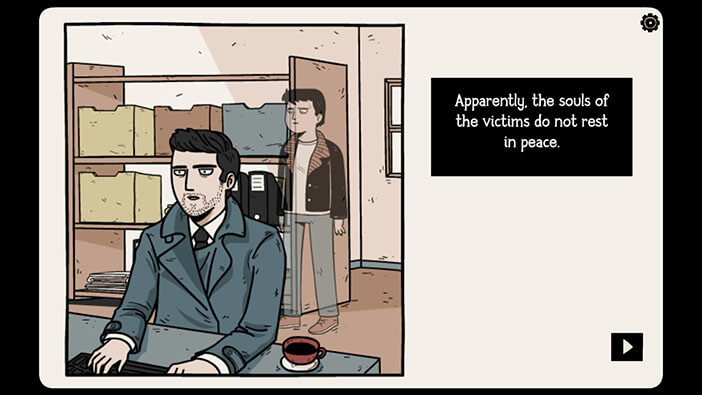
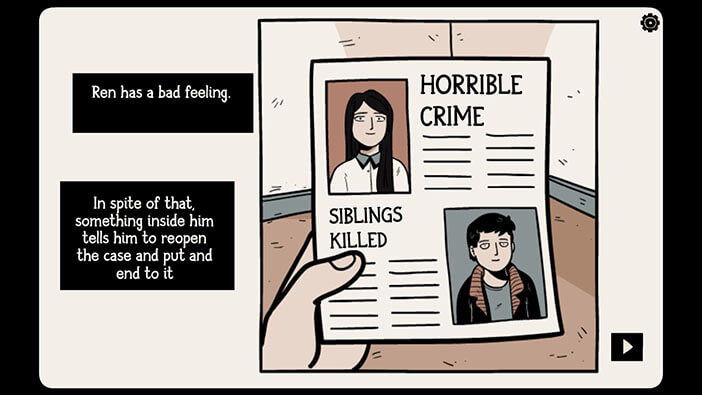
Later that day, when he was in the office, the ghost of the murdered boy (our character from the second game) appeared behind him and threw down the box with crime files. One of the files dropped out of the box, and when the detective took a look at it, he saw that this is the file about the murders that happened 20 years ago. Ren felt that something was wrong because earlier he saw the ghost of the girl, and now the box with case files fell from the shelf, almost as if someone had pushed it down. But there was no one else in the room… The detective decided to reopen this old case and finally catch the person responsible for the murders.
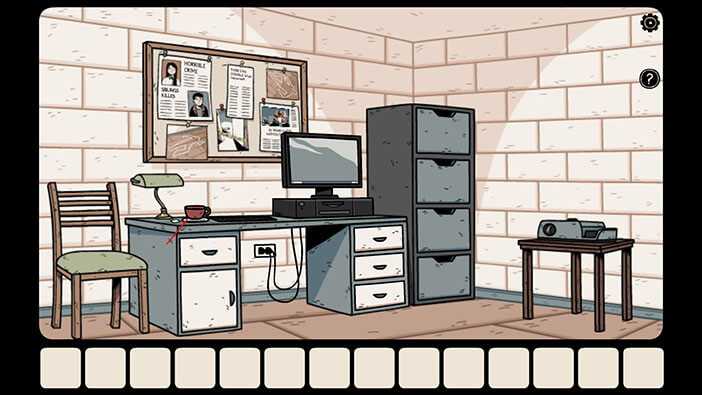
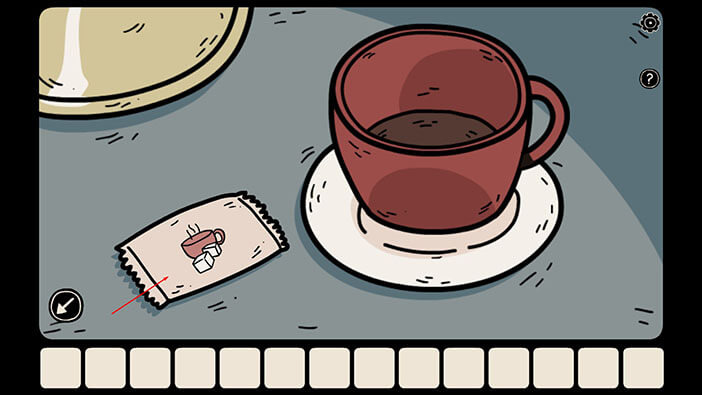
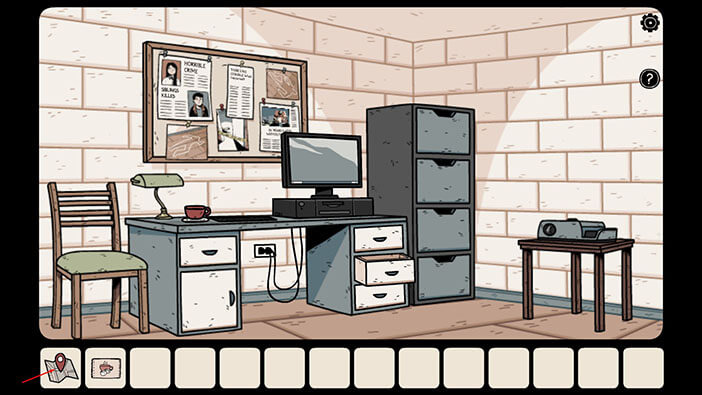
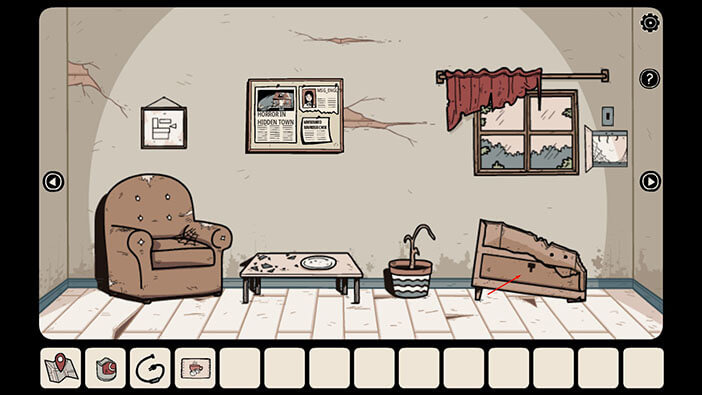
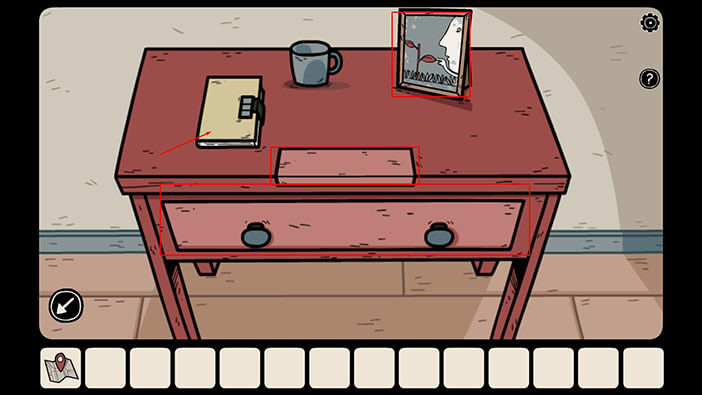
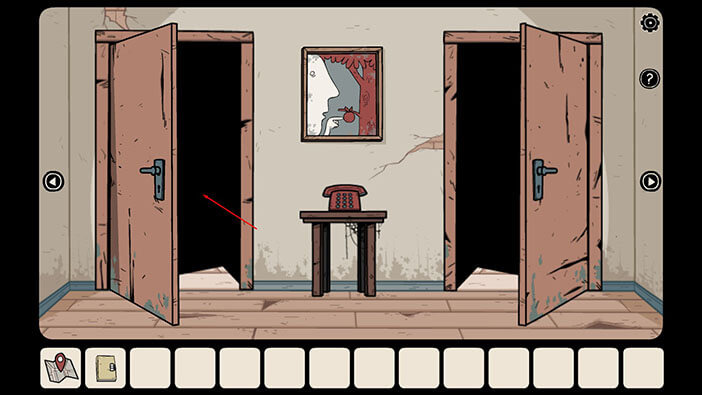
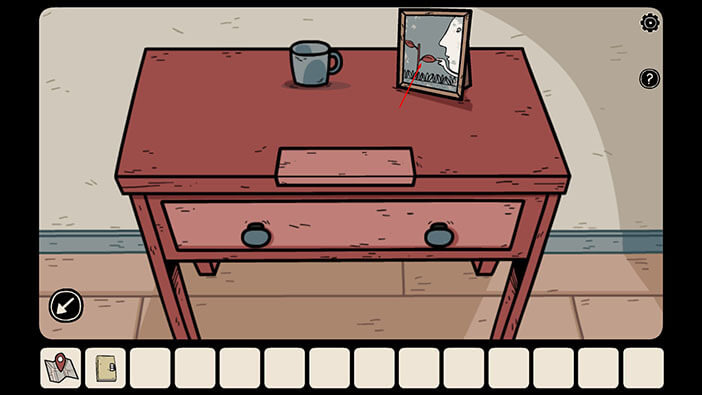
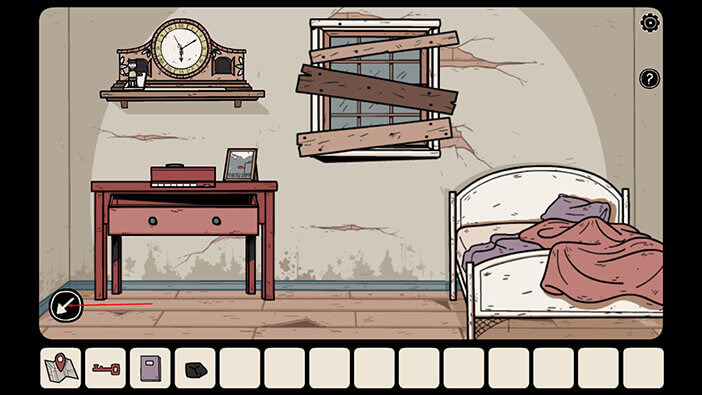
Our story starts in the police station, and we’re in detective Ren’s office. Let’s see what we can find here. First, tap on the coffee cup to take a closer look at it, and you will see a sugar packet. Tap on it to pick it up, and “A sachet of sugar” will be added to your inventory.
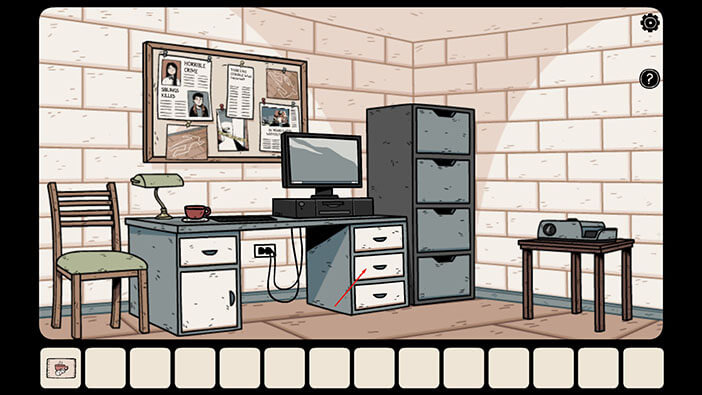
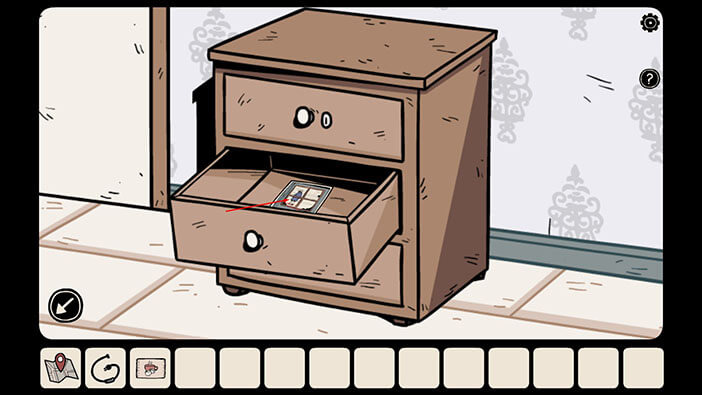
Next, tap on the middle drawer on the right to take a closer look at it, and tap once more to open it. Inside you will find a map. Tap on it to pick it up.
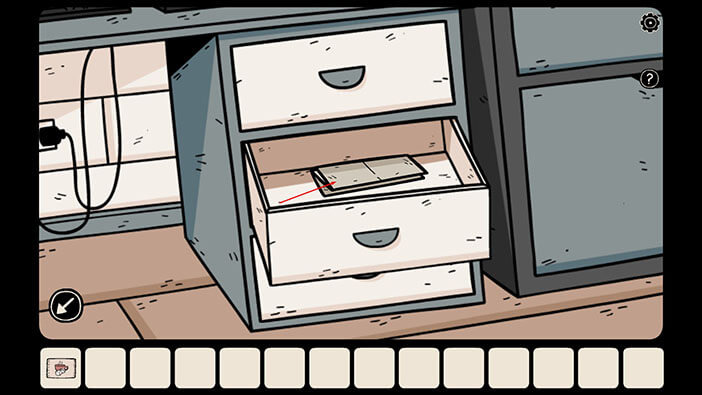
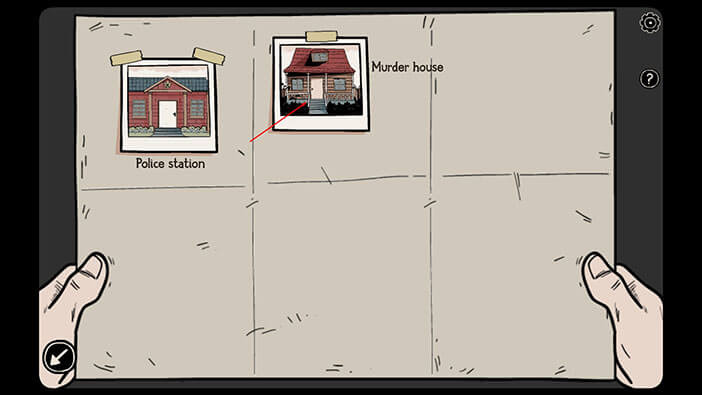
Tap on the map in your inventory to select it.
This will bring up the map with two locations. One is the “Police Station” and the other one is “Murder House”. Well, it’s time to start our investigation. Tap on the “Murder House” on the map to travel to this location.
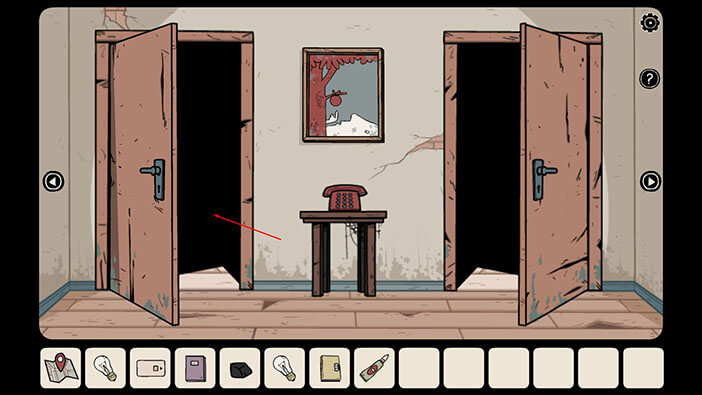
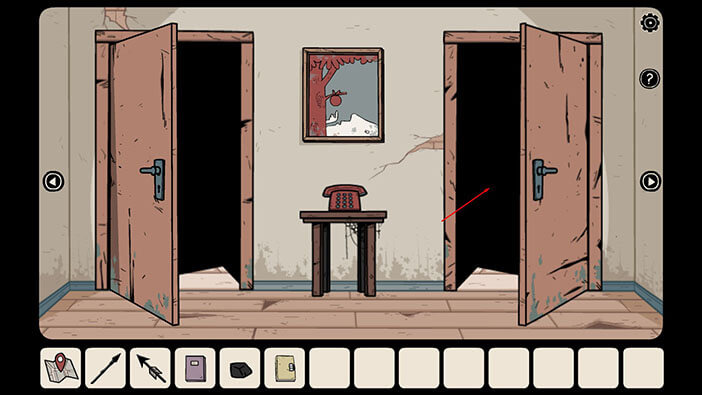
We are now inside the “Murderer House” and we have already been here during the second game “The Girl in the Window”. So, let’s start by going into the first room on the left.
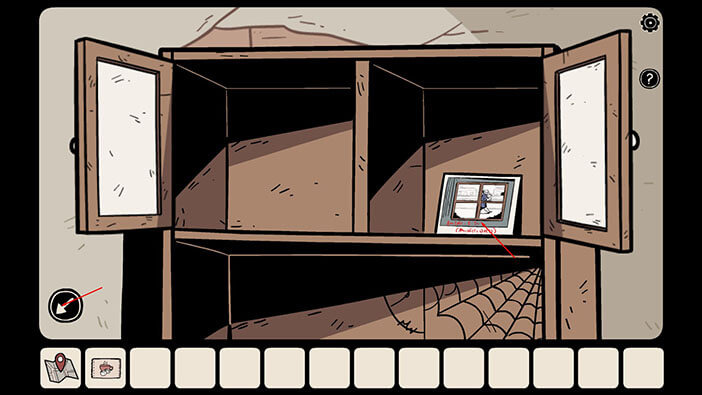
Tap on the upper part of the cabinet to take a closer look, and tap again to open both cabinet doors.
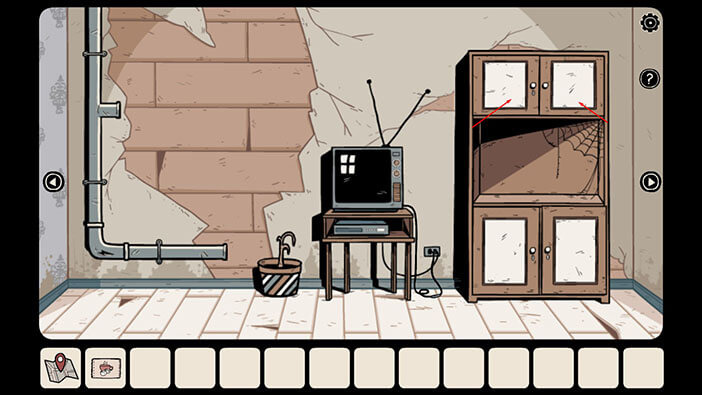
Inside, we can find one of the photos that we also found while playing “The Girl in the Window”. Tap on the photo if you want to take a closer look at it. After that, tap on the arrow in the lower-left corner to go back.
Ok, let’s take a closer look at the cables below the TV. In the previous game, we repaired the cables and played a videotape here.
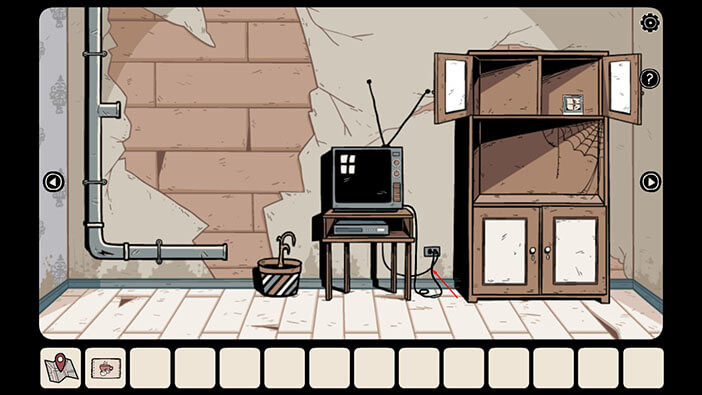
Tap on the repaired cable to pick it up and “A Plug” will be added to your inventory.

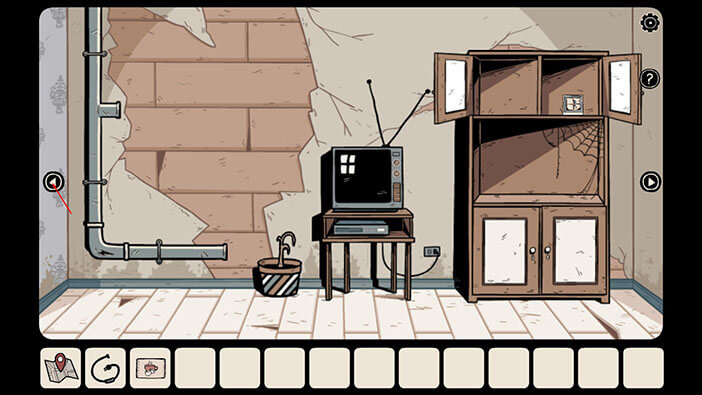
Ok, tap on the arrow on the left to proceed into the next room.
In the middle drawer of the cabinet, you can find another photo. These photos are not relevant for solving the puzzles, they are just there to remind us of our playthrough of the previous game.
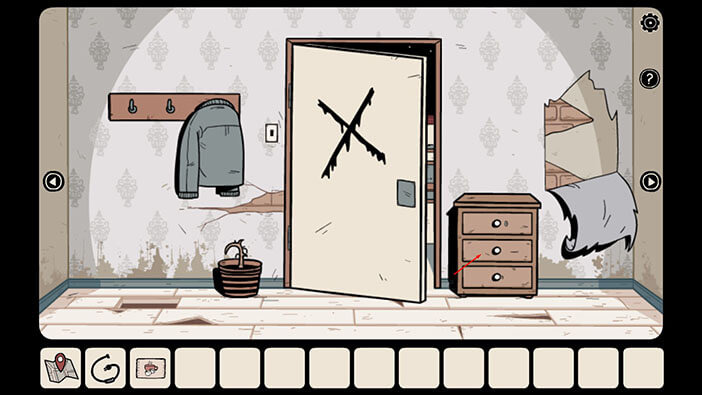
Well, that’s it for this room. Tap on the arrow on the left to proceed into the next room.
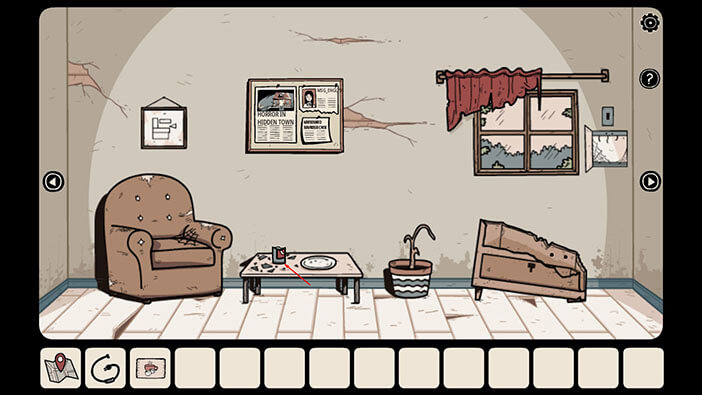
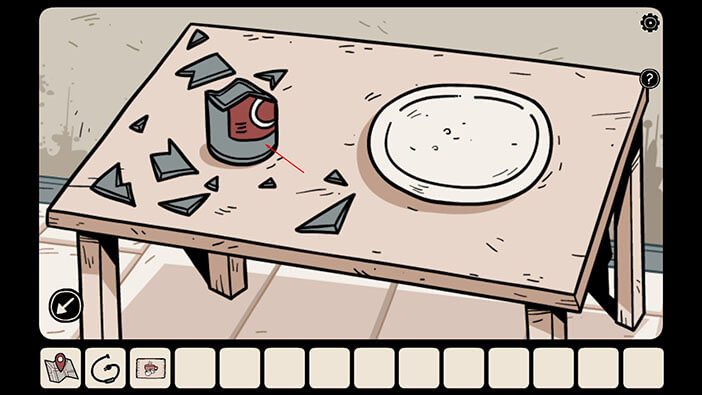
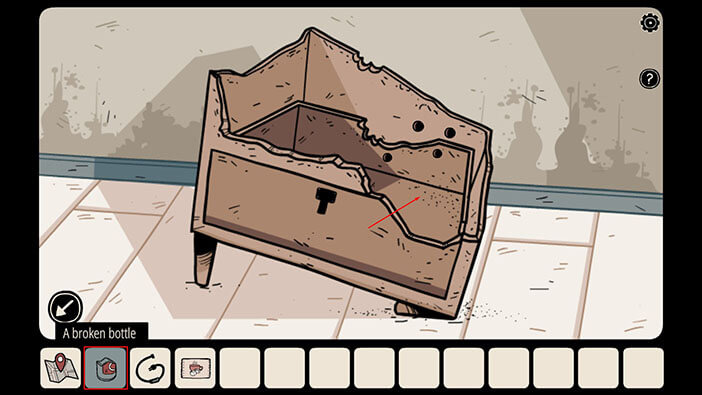
First, let’s tap on the table to take a closer look at it, and then tap on “A Broken bottle” to pick it up.
Ok, now let’s tap on the piece of broken furniture on our right to take a closer look at it.
Now, select “A Broken bottle” from the inventory and tap on the broken furniture to place it inside.
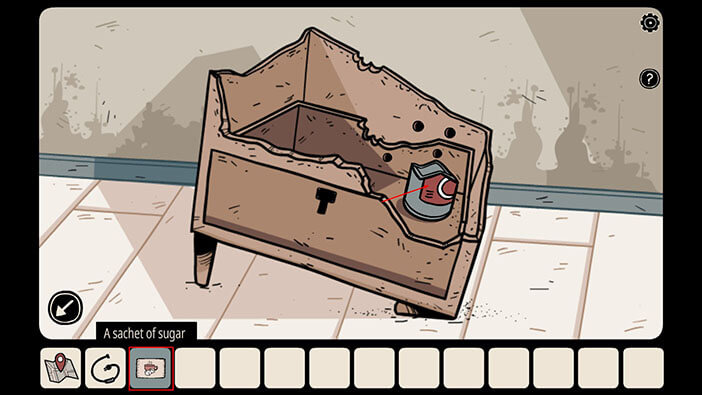
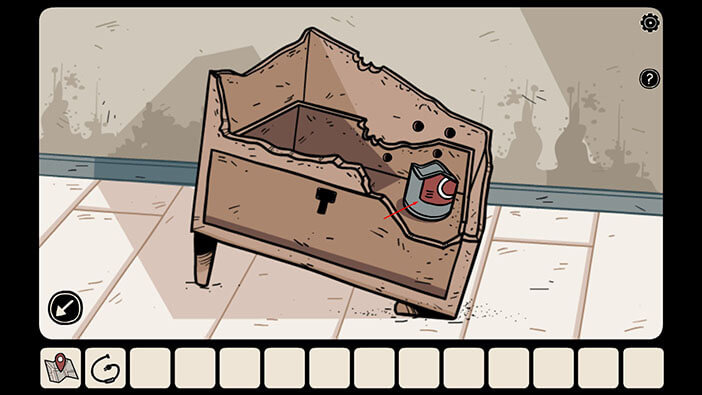
We can see that there are many holes inside the furniture, and these were made by the termites. We can use the sugar to lure the termites inside the bottle. So, tap on “A sachet of sugar” in your inventory to select it, then tap on the bottle to pour the sugar inside.
Ok, we know that our plan succeeded because we saw termites running into the bottle. Tap on the bottle to pick it up and a “broken bottle with termites inside” will be added to your inventory.

That’s it for this room. Tap on the arrow on the left to proceed into the next room.
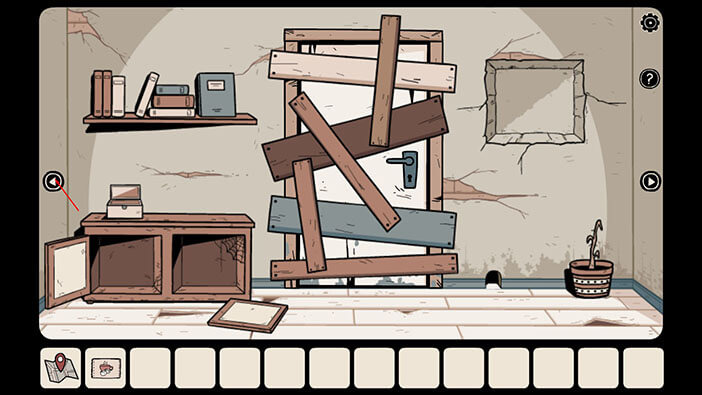
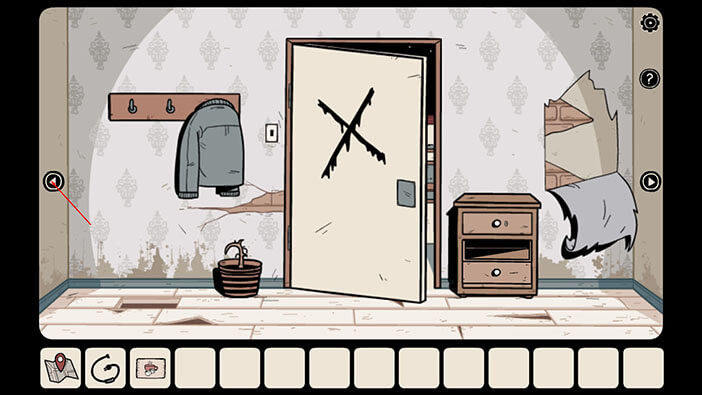
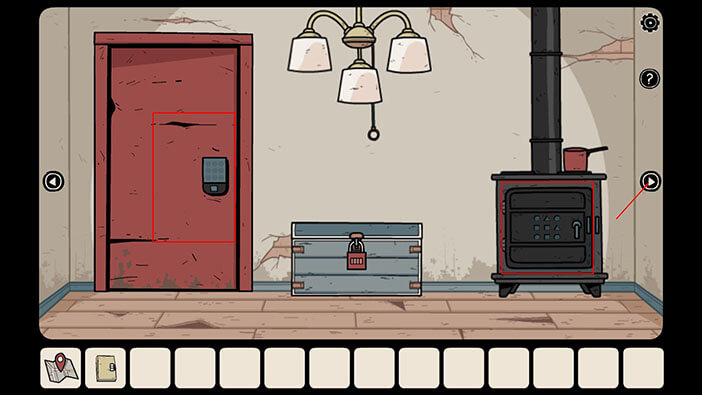
Well, we are now inside the first room. The door in front of us is boarded up, and we could probably use the termites to unblock the door. Let’s try to do that. Select the “broken bottle with termites inside” from the inventory and then tap on the door.
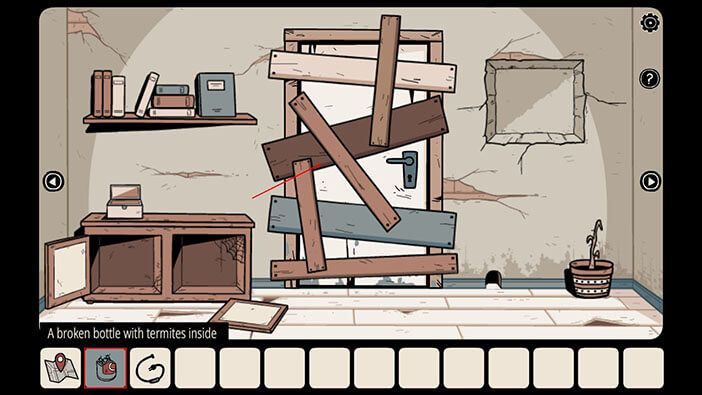
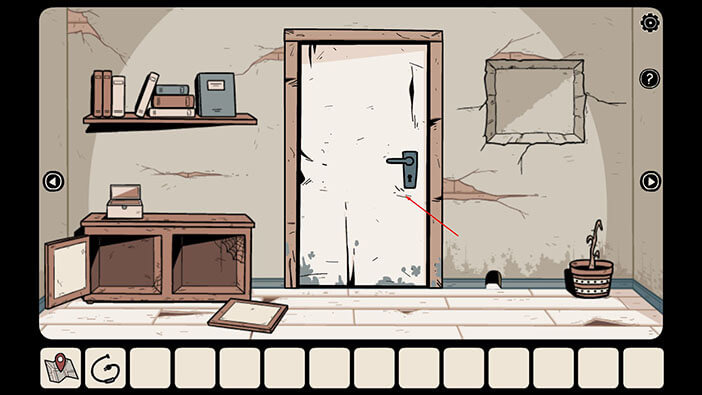
The termites ate the boards, so we now have access to the door. Let’s see what’s on the other side. Tap on the door to open it, then tap again to proceed into the next room.
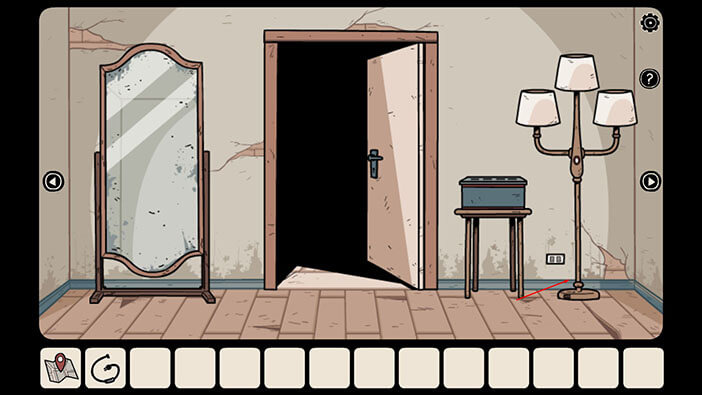
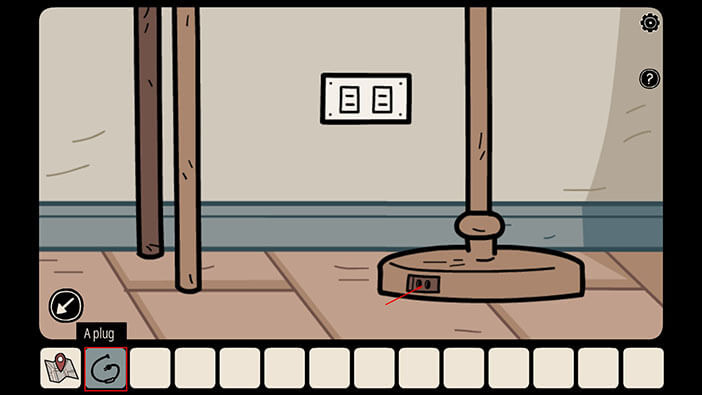
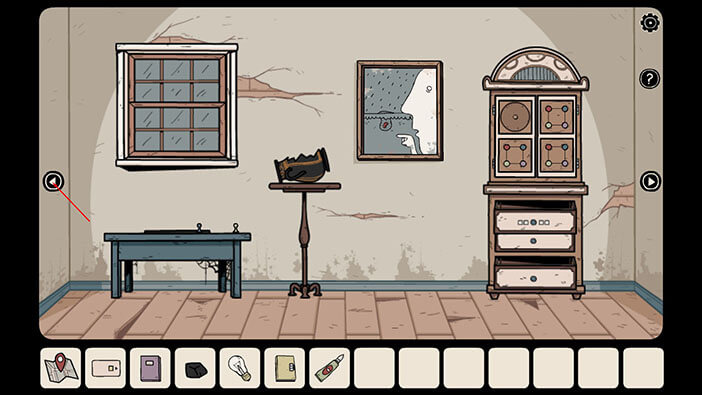
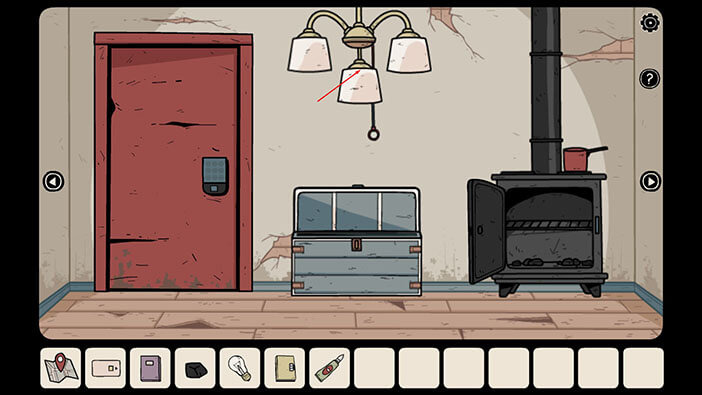
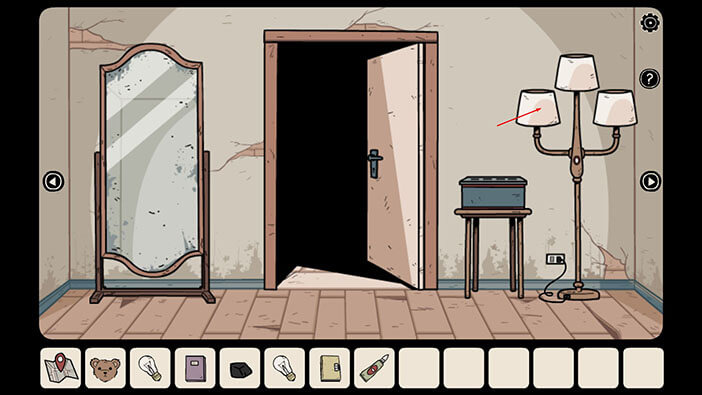
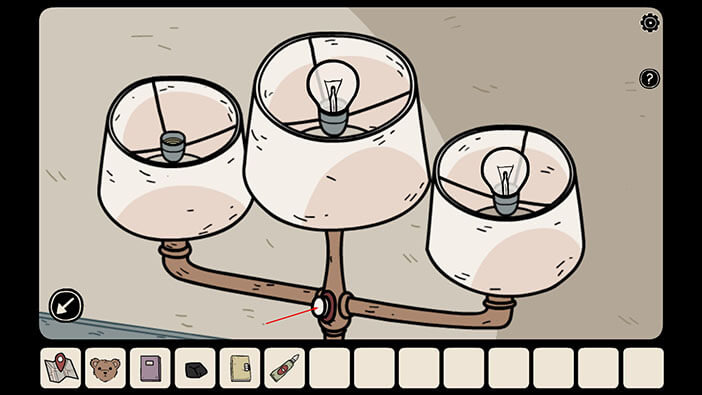
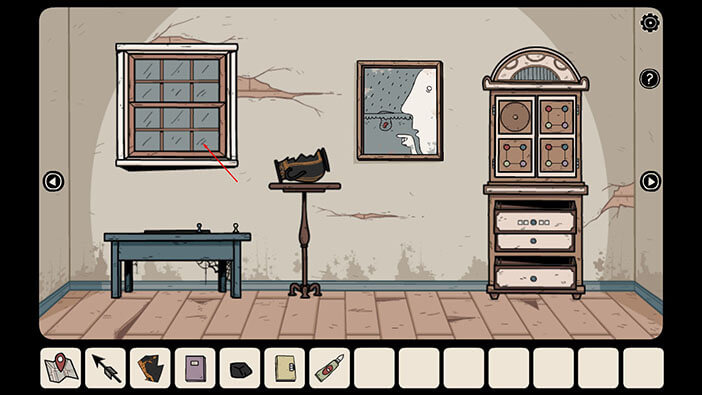
First, let’s tap on the base of the lamp to take a closer look.
We can see that the lamp is not plugged into the electrical outlet. So, select the “Plug” from the inventory and tap on the slot in the base of the lamp to plug it in.
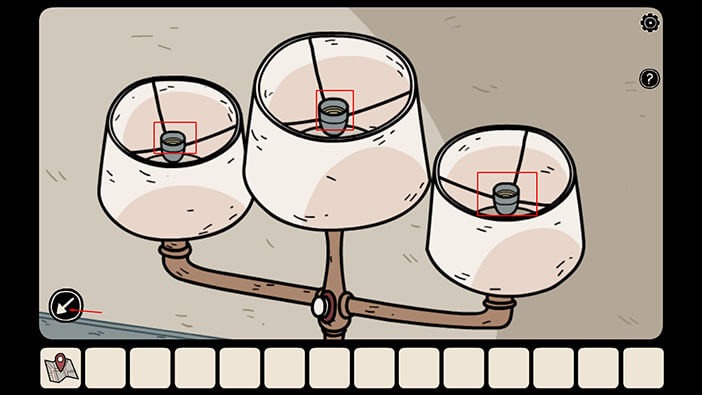
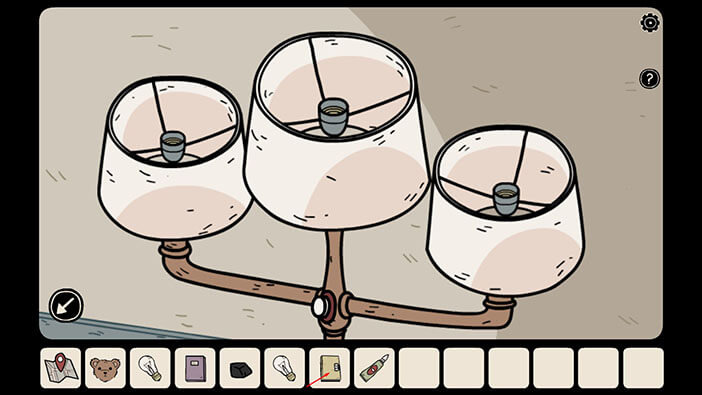
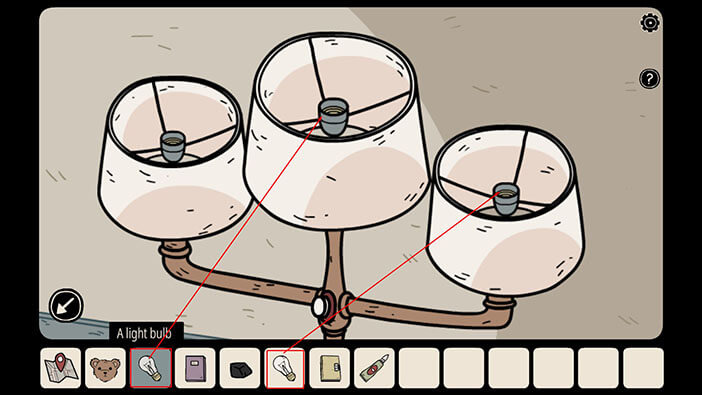
Ok, now let’s tap on the lampshade to take a closer look at it.
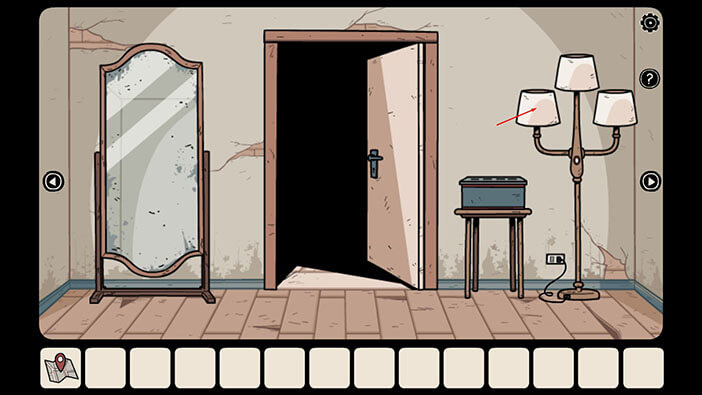
We can see that all three light bulbs are missing, and we will need to find them in order to complete one of the puzzles, a bit further down the line. For now, just make a mental note of this, and let’s go back to the exploration.
Let’s continue. Tap on the arrow on the right to proceed into the next room.
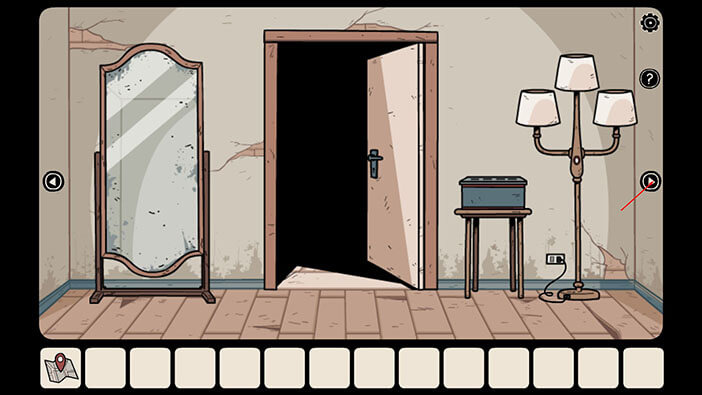
Tap on the door on the left to open it, and you will see a ghostly figure. Tap on the door again to proceed into the next room.
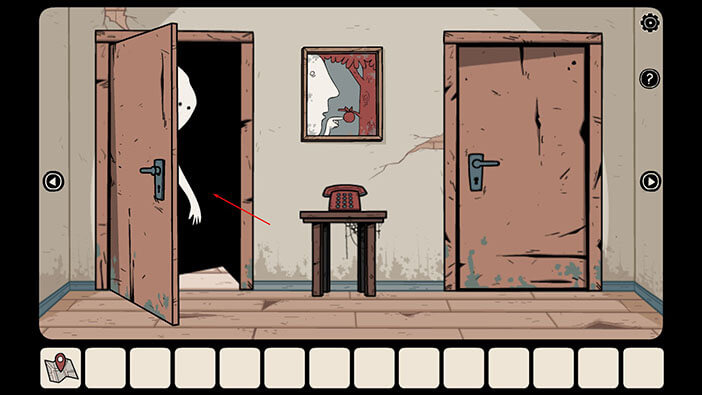
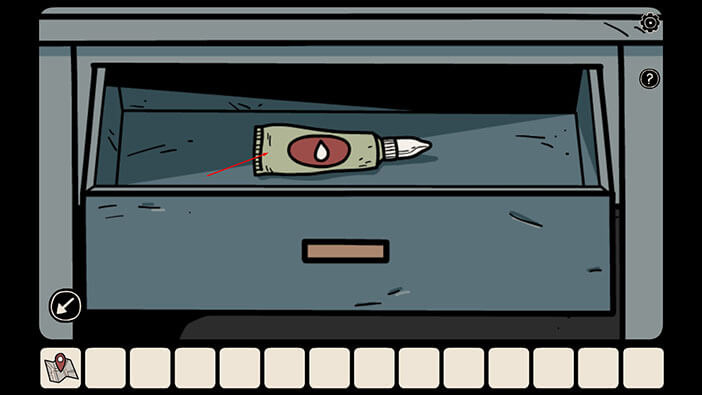
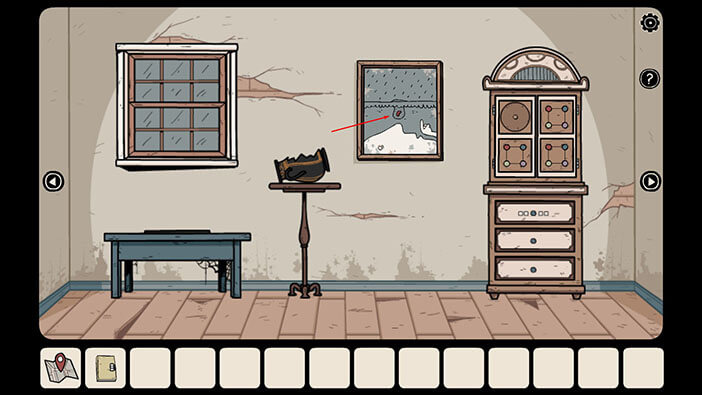
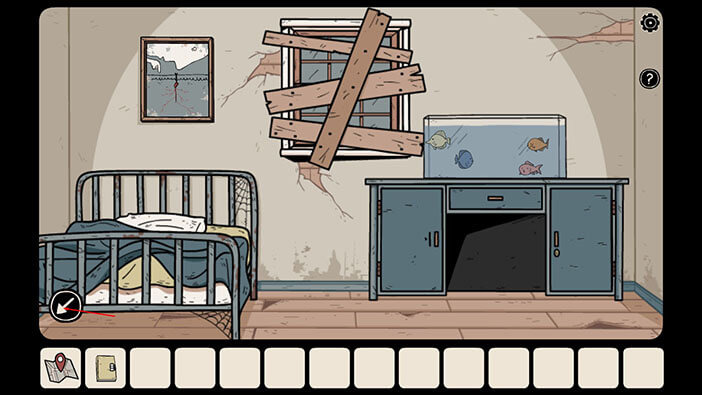
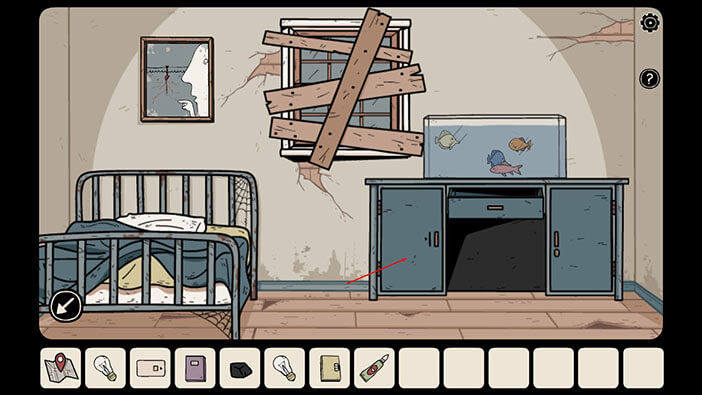
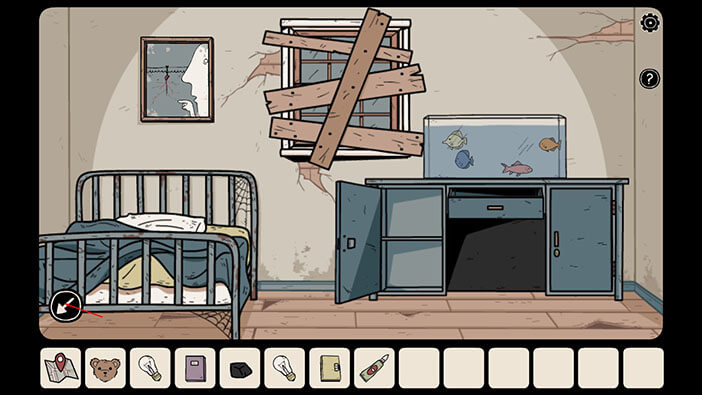
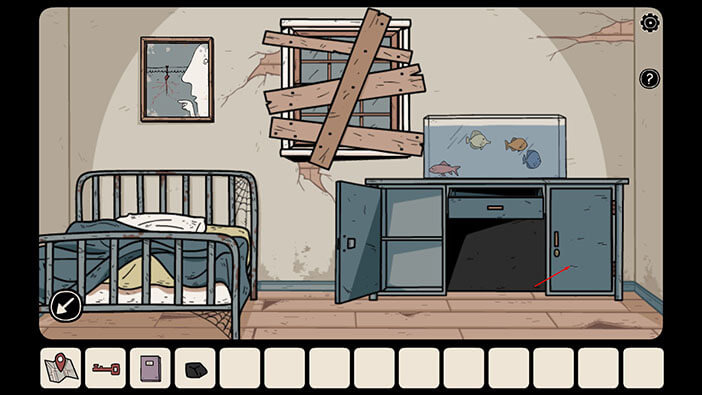
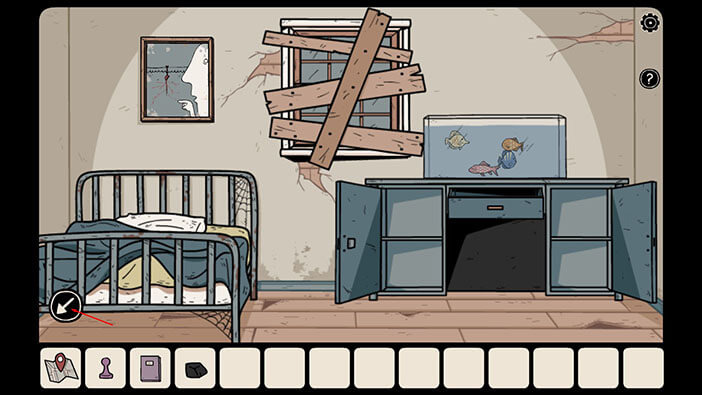
In this room, we see a desk with two cabinets and a drawer. Both cabinets are locked, and we will find a way to unlock them, later. For now, tap on the drawer to open it, then tap on the items inside to pick it up. A “Glue” will be added to your inventory.
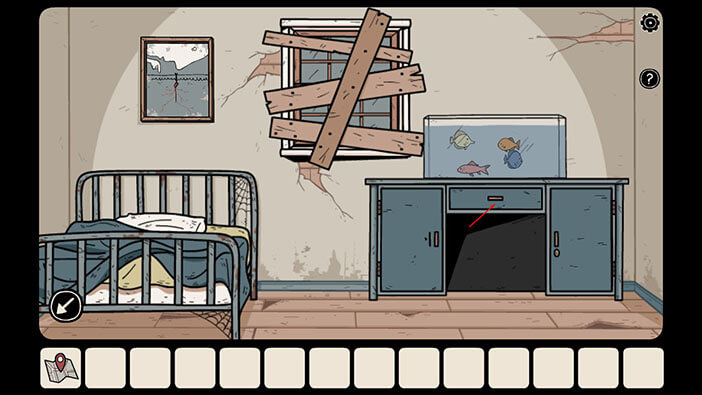
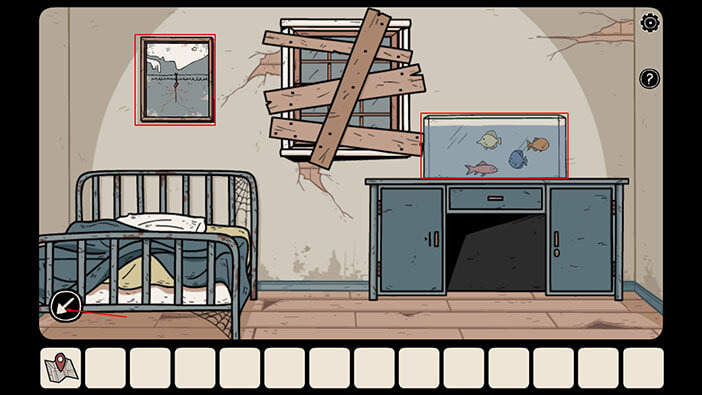
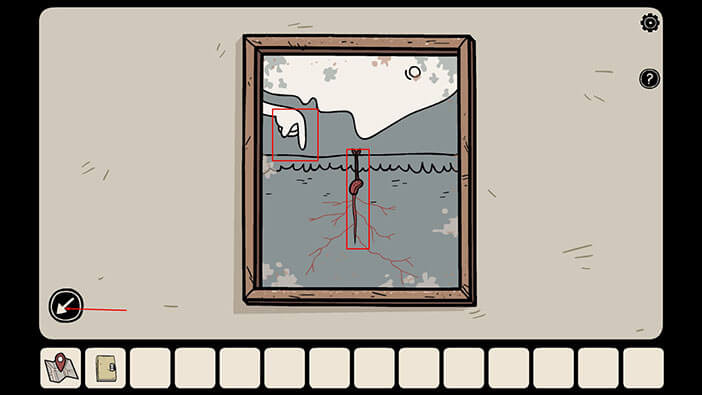
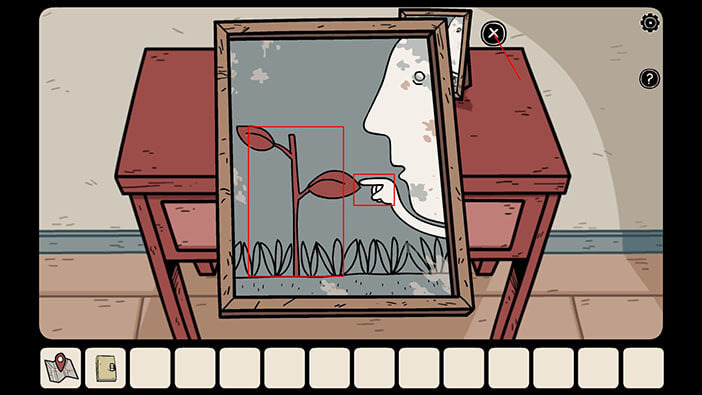
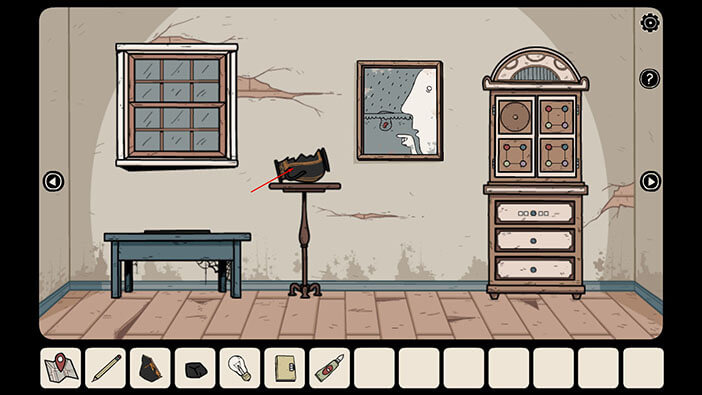
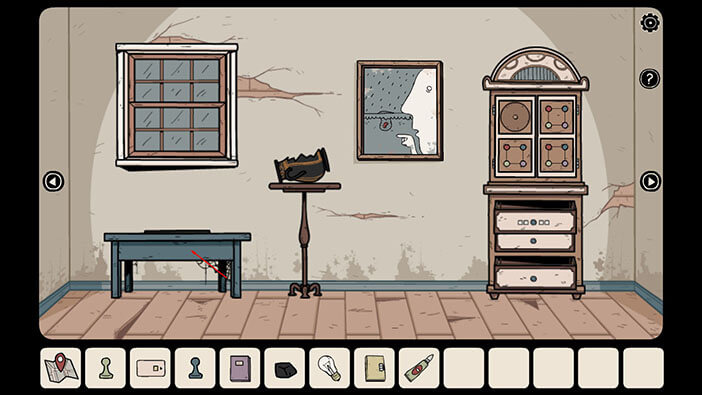
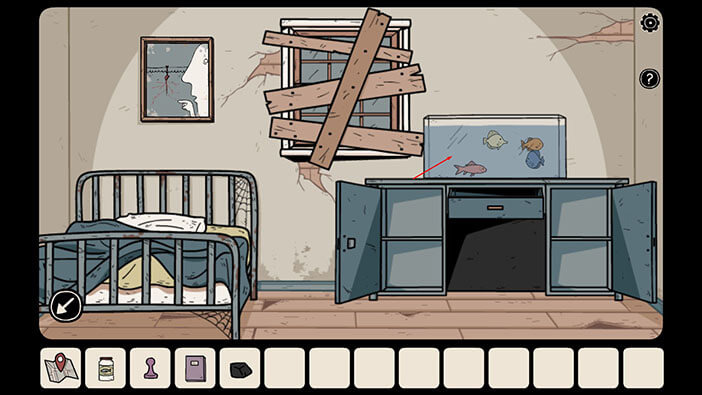
Before we leave this room, we should take note of two more important items because these will be important for the puzzles, later. The first one is the aquarium. The second one is the picture on the wall on the left, and here we can see a seed with roots and a man pointing to the down. These pictures (seed/plant and a man more specifically) will be important for one of the puzzles that we will have to solve, very soon. So, just keep in mind that one of the pictures is inside this room.
NOTE: The direction in which the man is pointing will vary from game to game because this is one of the randomized puzzles.
Ok, now let’s tap on the arrow in the lower-left corner of the screen to go back to the previous room.
In this room, we can see another one of the pictures that I mention, and here we have an apple tree, an apple, and a man is pointing to the right. Just memorize that there’s another picture inside this room before we continue. Tap on the door on the right to open it and tap again to proceed into the next room.
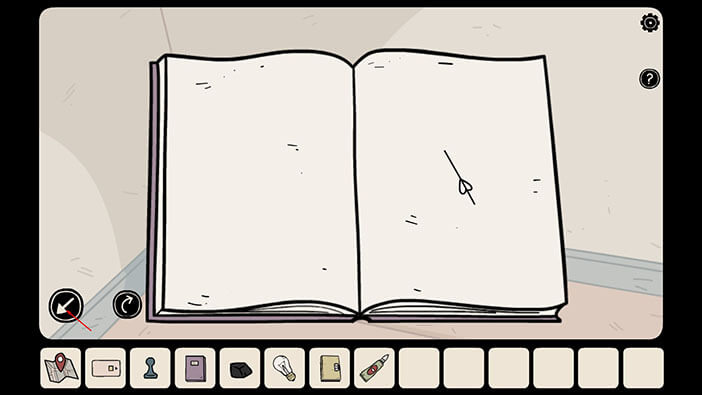
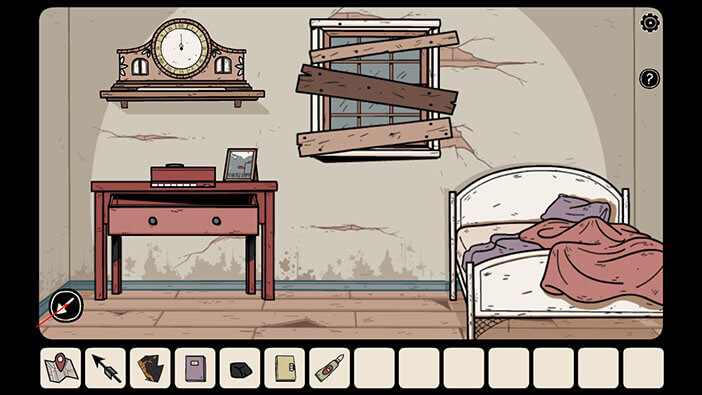
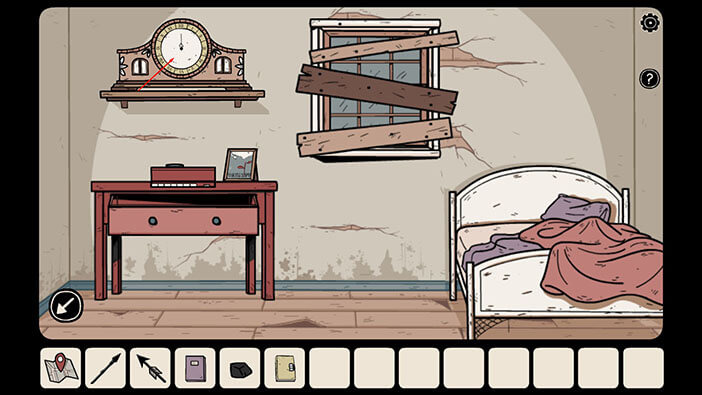
Tap on the desk to take a closer look at it, then tap on the book to pick it up. Also, on the desk, we have another picture, and here we can see a small plant, and a man is pointing to the left. Besides that, there’s also a locked drawer here, but solving the puzzle to open it will come much later.

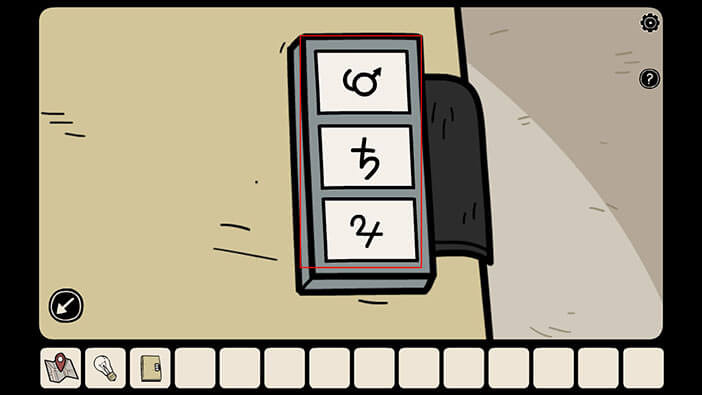
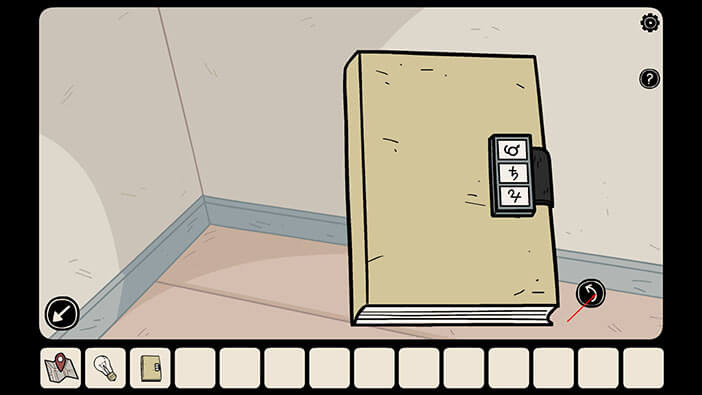
Tap on the book that we just picked up to examine it. We can see that the book is locked by the combination of three symbols, and we will have to solve some puzzles in order to open it. Tap on the arrow in the lower-left corner to go back.
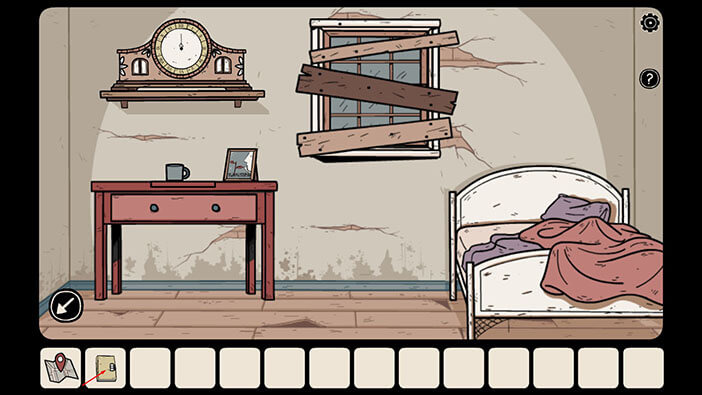

Take note of the clock before we leave, because it will be important later on. Ok, that’s it for this room, at least for now. Tap on the arrow in the lower-left corner to go back to the previous room.

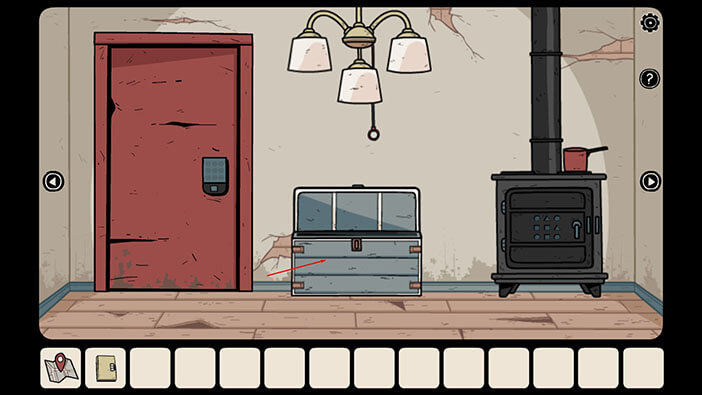
Let’s continue. Tap on the arrow on the right to go into the next room.

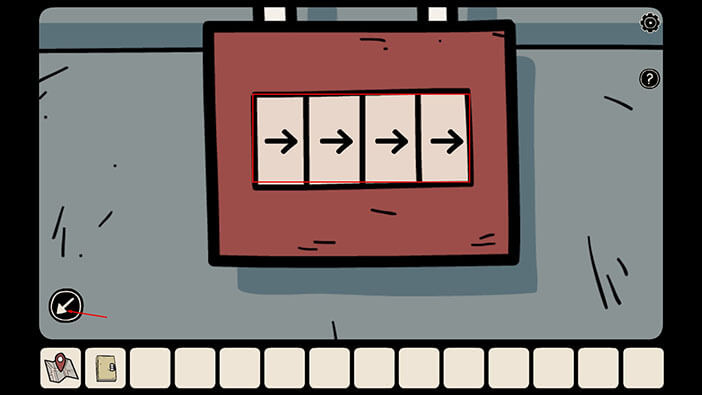
Tap on the chest to take a closer look at it.
We can see that padlock is locked by a combination of four arrows. We can solve this puzzle by paying attention to the pictures that I mentioned earlier. To solve the puzzle, we have to memorize the directions in which the man on the picture is pointing and rotate the arrows on this puzzle to match them. The order of the pictures is determined (and thus the arrows) by the stages of the plant growth. So far, we have found three pictures, so that means that we still have to find one more picture in order to solve this puzzle, so let’s do that.
Ok, tap on the arrow in the lower-left corner to go back.
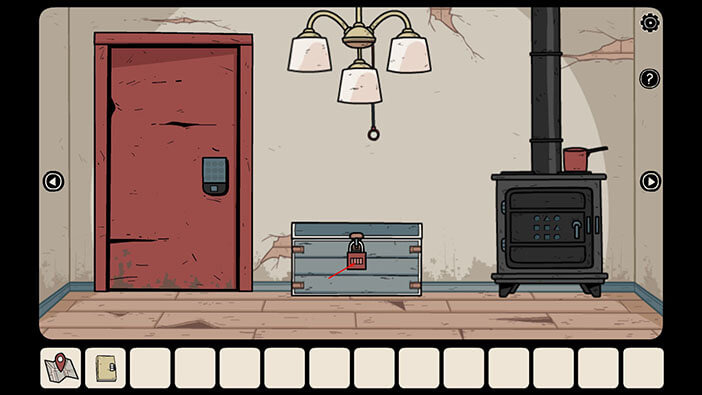
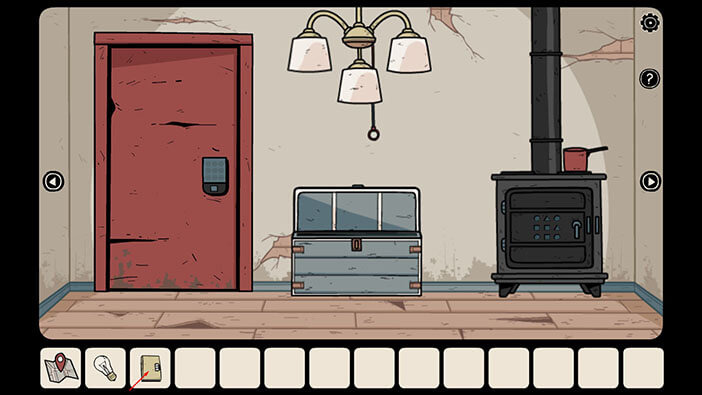
Before we proceed, just take note of the door on the left and stove on the right, because these items are a part of some puzzle that will come later.
For now, let’s tap on the arrow on the right to proceed into the next room.
Ok, in this room we found the last picture. Let’s tap on it to take a closer look.
By looking at the picture, we can see that the plant is here just a seed, so this has to be the first picture. The man is pointing up.
So, the first picture = Up. Memorize or write down this information.
After that, tap on the arrow in the lower-left corner of the screen to go back.
NOTE: As I already mentioned, the direction in which the man is pointing will vary from game to game, because this is one of the randomized puzzles.
There are a few more important items in this room. The chessboard on the left, and the cabinet on the right. Also, there’s another puzzle that includes the vase in front of us, and this puzzle we could partially solve right now, but I would like to finish the puzzle with the pictures before doing this one.
So, if you recall, we saw previously a picture with a seed and roots. This is certainly our second picture so let’s go there.
To get to this location, first go to rooms to the left.
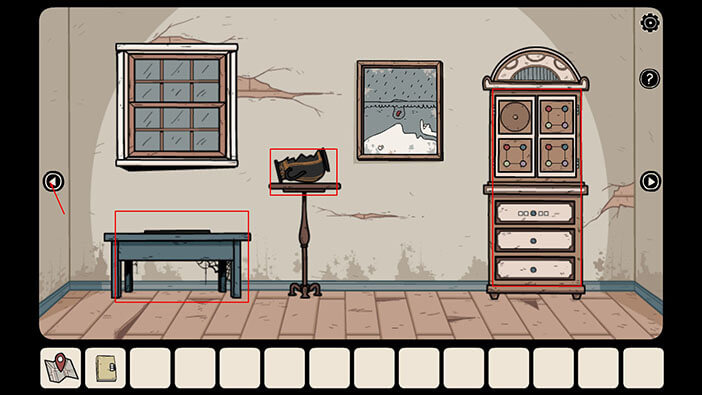
Tap on the door on the left to proceed into the room.
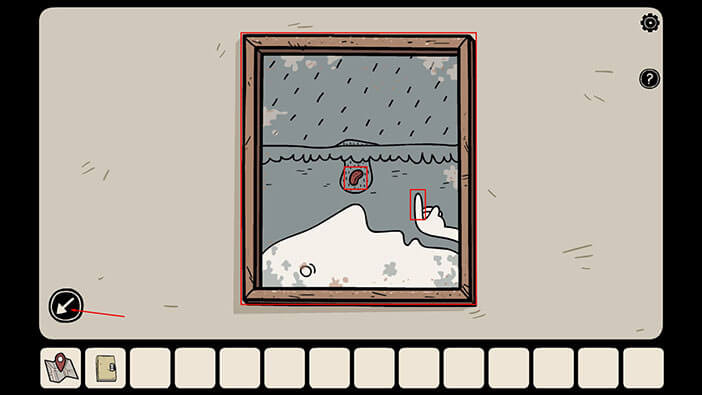
Let’s tap on the picture to take a closer look.

In this picture, we can see that the seed grew roots, so this is the second picture. The man is pointing down.
So, the second picture = Down. Memorize or write down this information.
Tap on the arrow in the lower-left corner to go back, once you’re done.
Tap on the arrow in the lower-left corner to go back to the previous room.
The plant has fully grown here, so we will look at this picture a bit later. For now, let’s tap on the door on the right to go to the next room.
Tap on the picture to take a closer look at it.

Here we can see a small plant, which means that this is the third picture. The man is pointing to the left.
So, the third picture = Left. Memorize or write down this information.
Tap on the “X” in the upper right corner to put down the picture.
Tap on the arrow in the lower-left corner to go back to the previous room.

Ok, let’s tap on the fourth and final picture to take a closer look.
Here we can see a fully grown tree, so this is obviously the fourth picture. The man is pointing to the right.
So, the fourth picture = right. Memorize or write down this information.
Tap on the arrow in the lower-left corner to go back.

Ok, now let’s go back to the chest and unlock it. To get there, tap on the arrow on the right.
Tap on the chest to take a closer look.

Ok, looking from left to right we had,
First picture = Up
Second picture = Down
Third picture = Left
Fourth picture = Right
Tap on the arrows on the padlock to turn them in the correct direction.
NOTE: As I already mentioned, the man in the picture might be pointing in a different direction in your game, because this puzzle is randomized. So, coping with the solution from the image below might not work. However, you can solve the puzzle by following the steps in this guide.

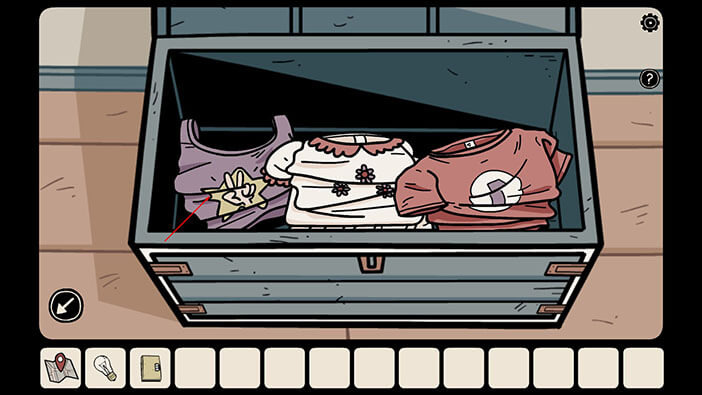
Well, we managed to unlock the chest, so let’s tap on it to see what’s inside.
Tap on the “Light Bulb” to pick it up and it will be added to your inventory. If you recall, we needed three light bulbs for the lamp in the first room, so will go back there once we find more.
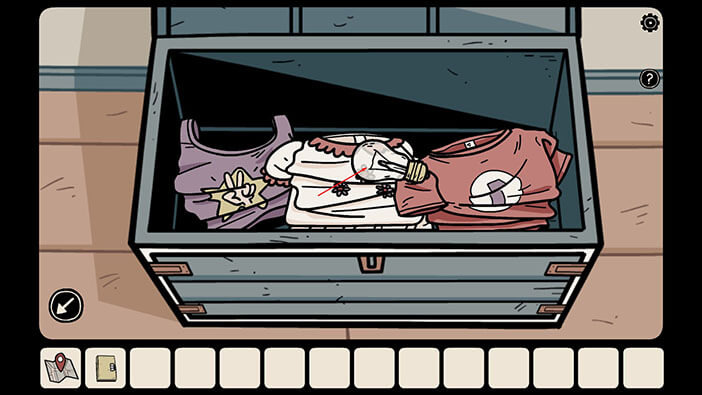
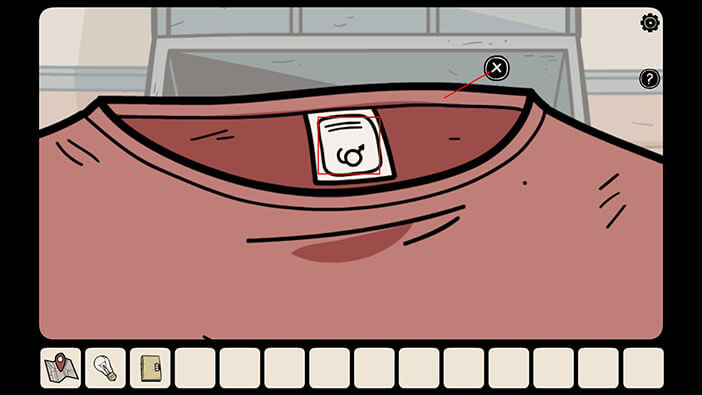
Ok, now tap on the piece of clothing on the right to take a closer look at it.
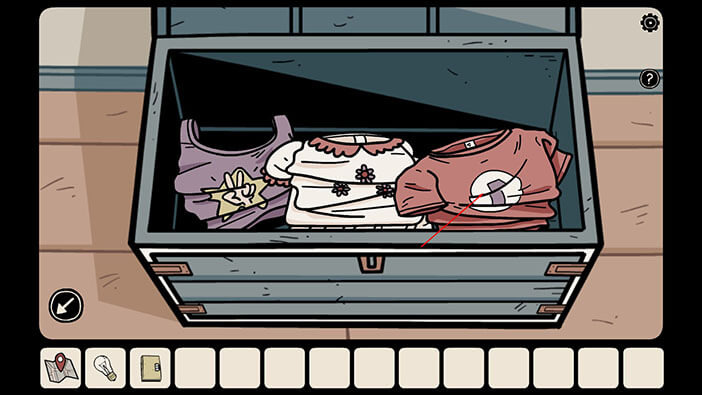
We can see the number “1” on the T-shirt. Let’s tap on the label on the T-shirt so that we can examine it more closely.
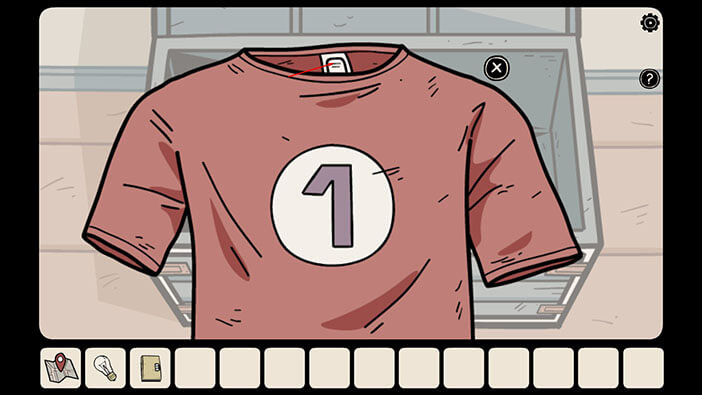
Here we can see some kind of symbol. This is one of the symbols that we need in order to unlock the book that we found in one of the rooms. We will need three symbols to unlock the book, and we can find the other two on the pieces of clothing inside this chest. The number 1 on the T-shirt represents the order of the symbols, so this is the first one.
So, the first symbol = A circle with a “tail” and arrow pointing up and right. Memorize or write down this information.
After that, tap on the “X” to put down the T-shirt.
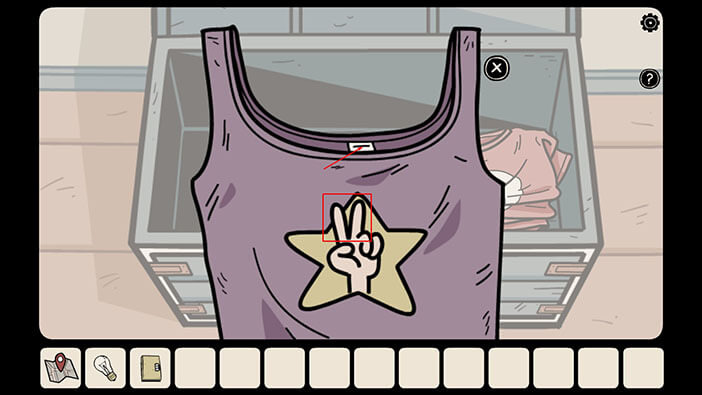
Ok, now let’s take a look at the piece of clothing on our left.
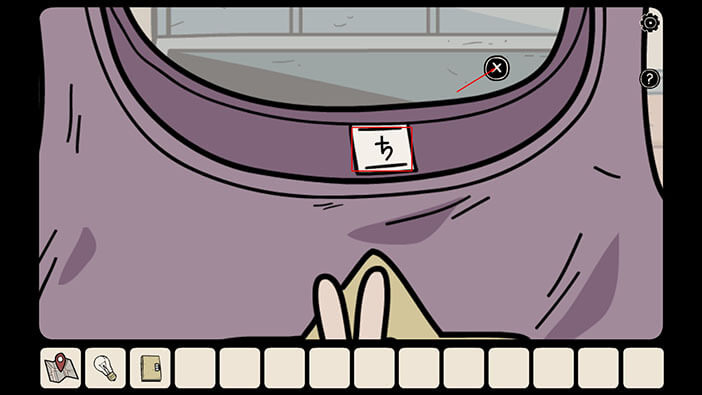
Here, we can see two raised fingers, so the symbol on this shirt is the second one. Tap on the label to take a look at the symbol.
Here we can see a symbol that resembles a Cyrillic letter “Ђ”.
So, the second symbol = a Cyrillic letter “Ђ”. Memorize or write down this information.
After that, tap on the “X” to go back.
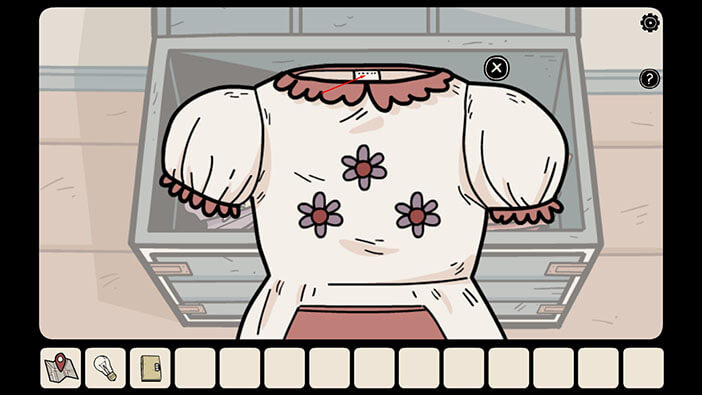
Let’s take a closer look at the third piece of clothing by tapping on it.

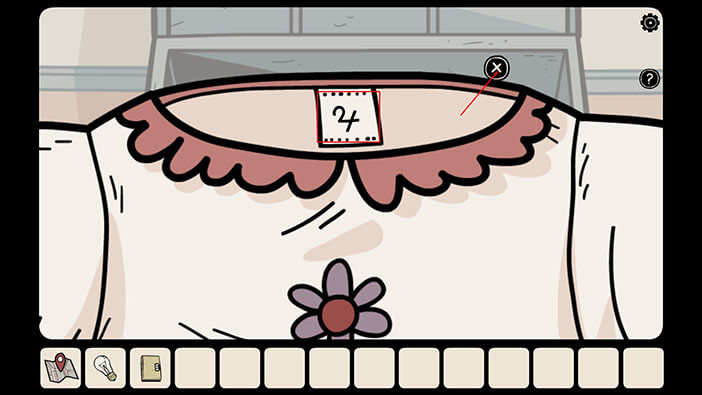
Here, we can see three flowers, which means that the third symbol is on this dress. Let’s tap on the label to take a look at the symbol.
Here we can see a symbol that resembles the number four with a “hook”.
So, the third symbol = number four with a “hook”. Memorize or write down this information.
After that, tap on the “X” to go back.
Ok, let’s enter these symbols and unlock the book. First, tap on the book in your inventory to pick it up. After that, tap on symbols to start the interaction.
Ok, now let’s enter the symbols that we discovered by looking at the labels on clothing. So, (from top to down) we had,
First symbol = A circle with a “tail” and arrow pointing up and right
Second symbol = a cyrillic letter “Ђ”
Third symbol = number four with a “hook”.
Tap on the fields to enter these symbols.
NOTE: The symbols in your game might be different because this puzzle is randomized each time you start the game. However, you can solve this puzzle by using the same logic (the symbol on the T-shirt marked with number 1 is always the first one (top to bottom), the symbol on the shirt marked with two fingers is always the second one, and the symbols on the t-shirt with three flowers is always the third one).
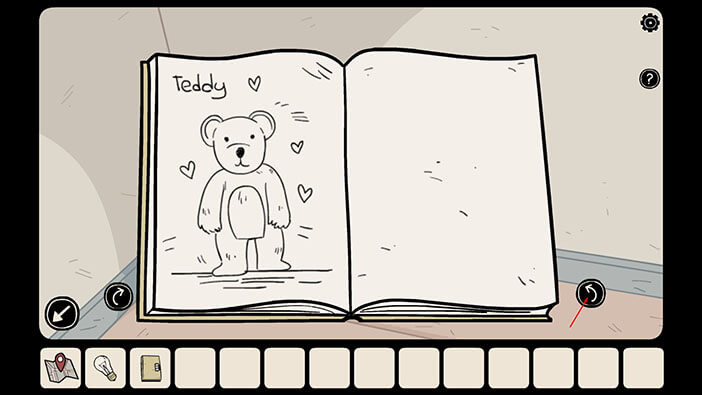
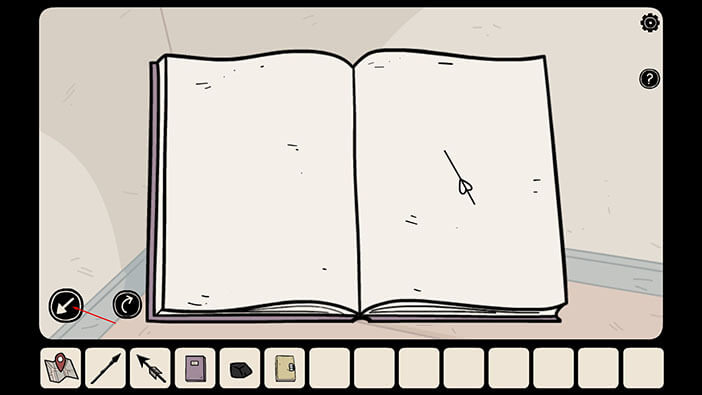
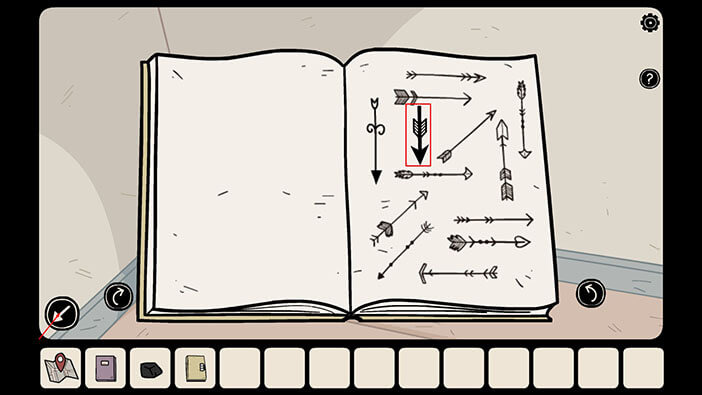
Well, we entered the correct symbols and unlocked the book. Let’s open it and flip through a few pages. To open the book tap on the arrow in the lower right corner.
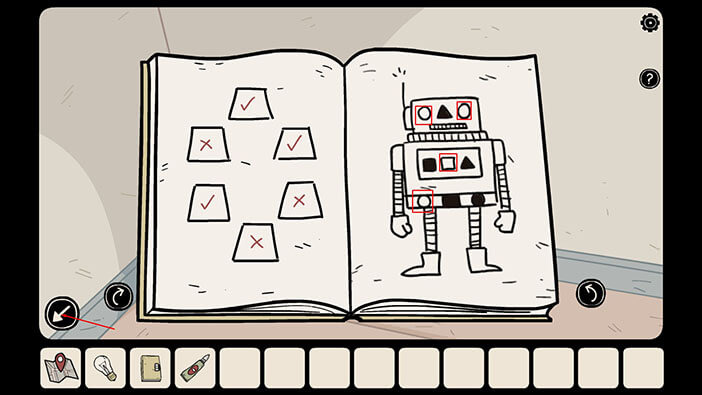
On the first page of the book, we can see a Teddy Bear. Let’s what’s on the other page by tapping on the arrow in the lower right corner of the book.
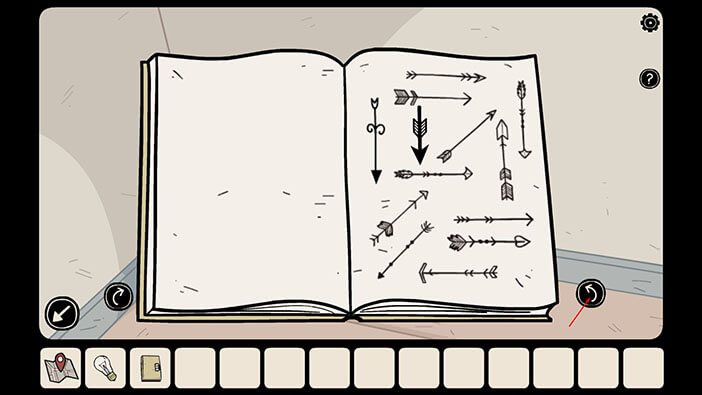
The arrows on this page will be helpful in one of the puzzles, but that will come a bit later. So, for now, let’s skip to the next page.
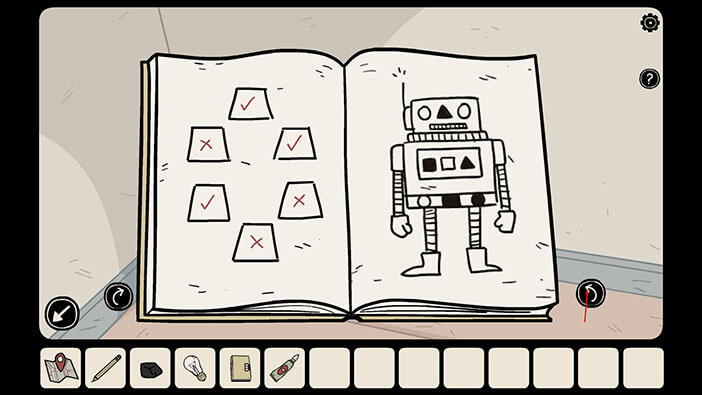
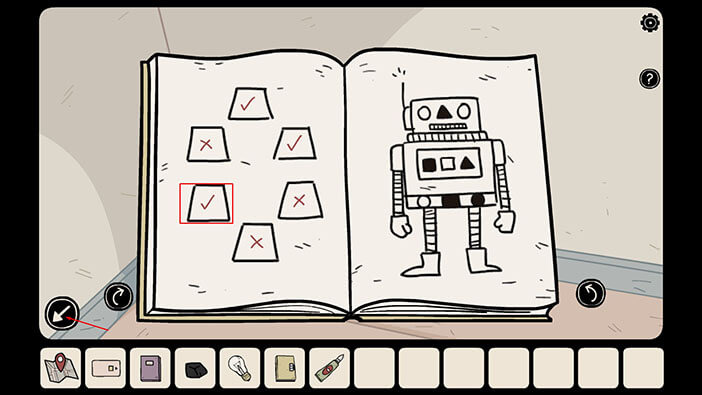
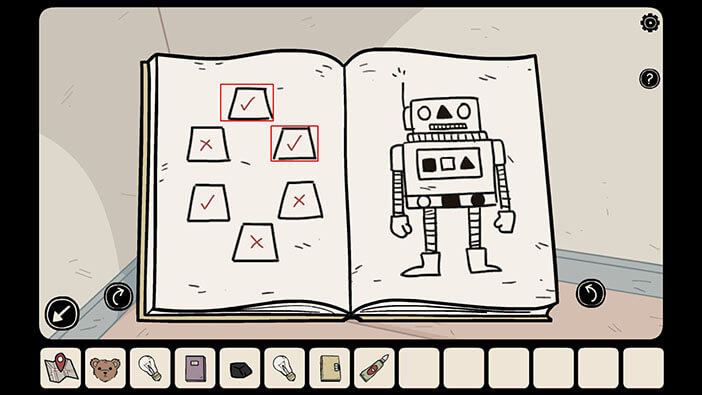
On the next page, we have clues for two puzzles. Let’s first check out the robot on the left. By looking at it, we can see three different types of shapes on it, circles, squares, and triangles. The shapes are arranged in three rows, some are black and some are white. We should now write down/memorize the position and type of the white shapes because we will need this information for the next puzzle.
So, we have
First row: White Circle (Left slot) and White Circle (Right slot)
Second Row: White Square (Middle slot)
Third Row: White Circle (Left slot)
NOTE: The position of the white slots might be different in your game because some of the puzzles are randomized. However, you can still solve this puzzle by applying the same logic.
Ok, after we memorize/write down this information, it’s time to put it to good use. So, tap on the arrow in the lower-left corner to put down the “Puzzle Book”.
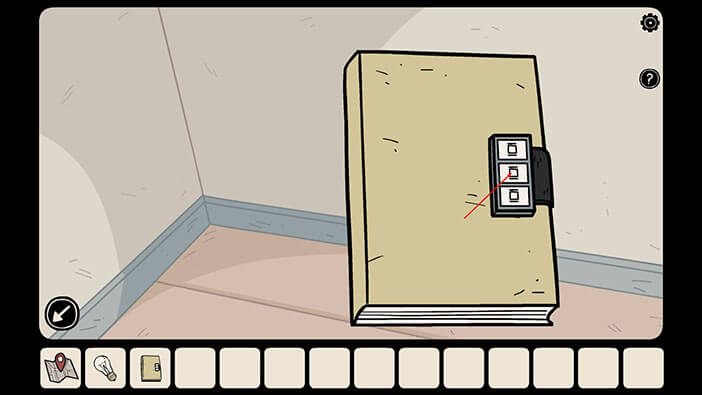
Ok, we can see that the shapes on the stove are arranged in the same manner as the shapes on the robot (3×3). So, let’s tap on the stove to take a closer look at it, and tap once more to start the interaction.

By tapping on the symbols on the stove we can change their color to white. The color of the symbols of the stove should match the color of the symbols on the robot that we saw in the “Puzzle Book”.
Let’s begin. Tap on the following symbols to change their color to white:
First row: White Circle (Left slot) and White Circle (Right slot)
Second Row: White Square (Middle slot)
Third Row: White Circle (Left slot)
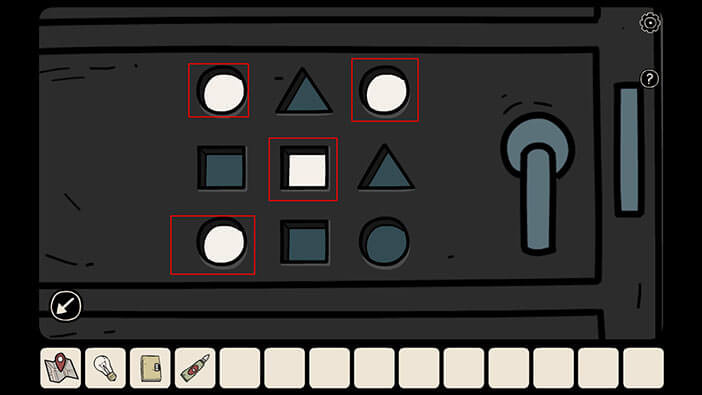
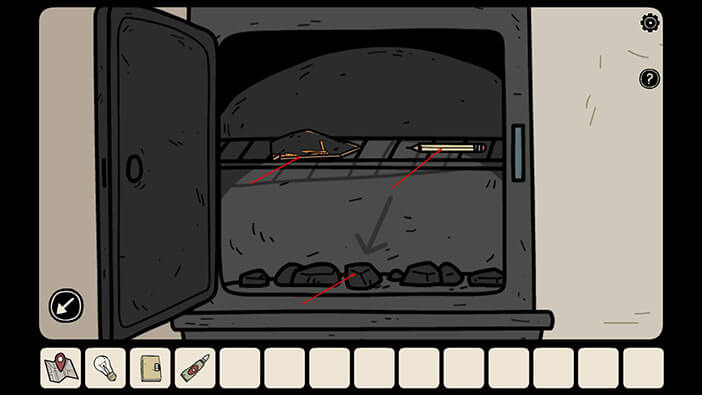
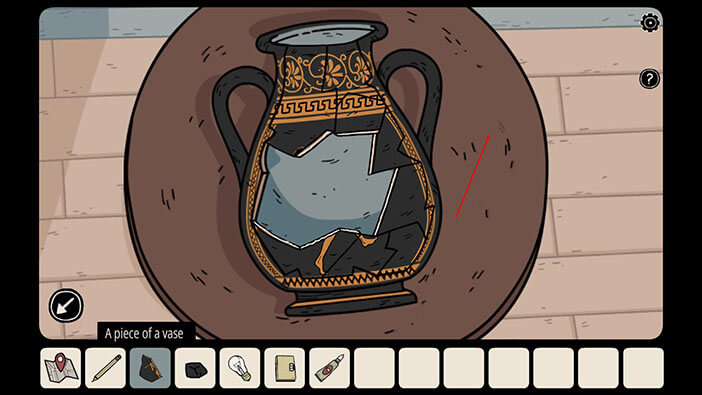
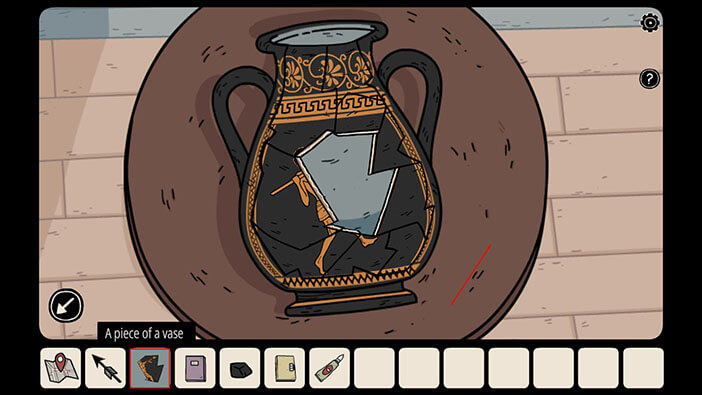
After we changed the color of the symbols to match the ones on the robot, the door automatically opened, and here we can find several items. Tap on “A Pencil” “A Piece of Vase” and “A piece of coal” to pick them and these items will be added to your inventory.
Well, I already mentioned that we could solve a part of the puzzle with the broken vase, and since we just found another piece, we might as well do that now. The room with the broken vase is the first one on the right.

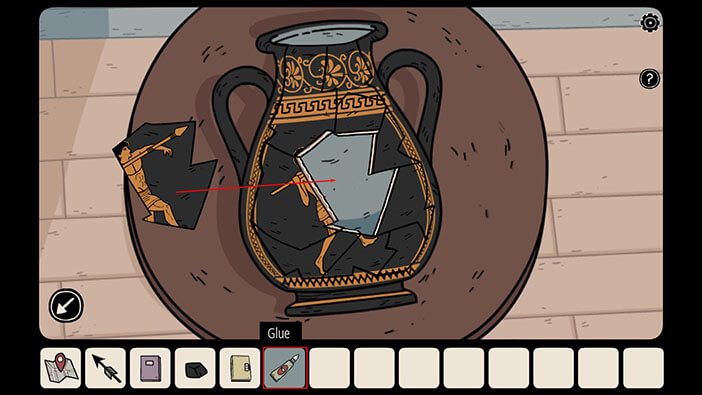
Tap on the vase to take a closer look at it.
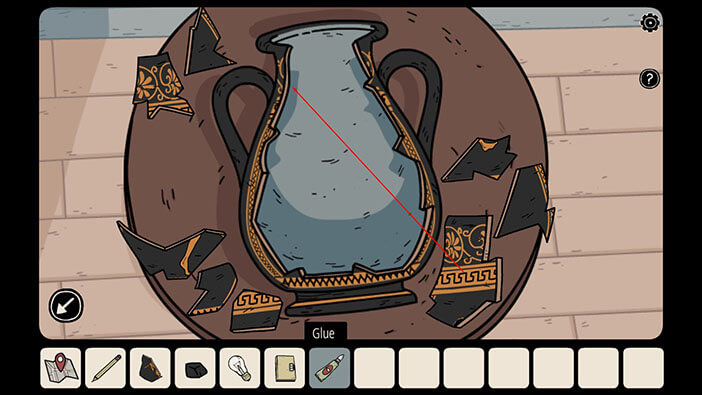
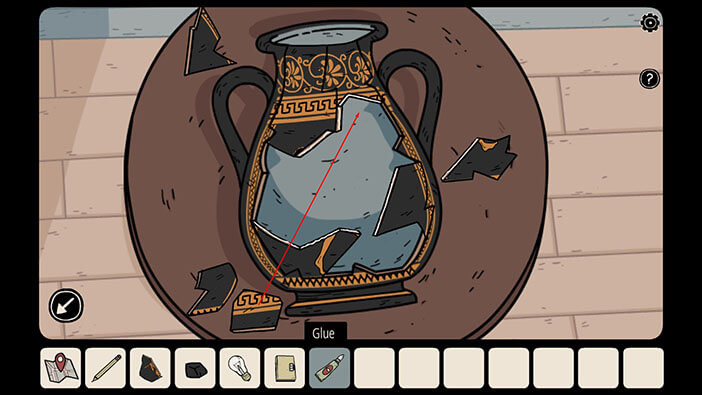
We can use the glue from the inventory to reassemble the vase. We will do this in several steps. Before we begin, tap on the “Glue” in your inventory to select it.
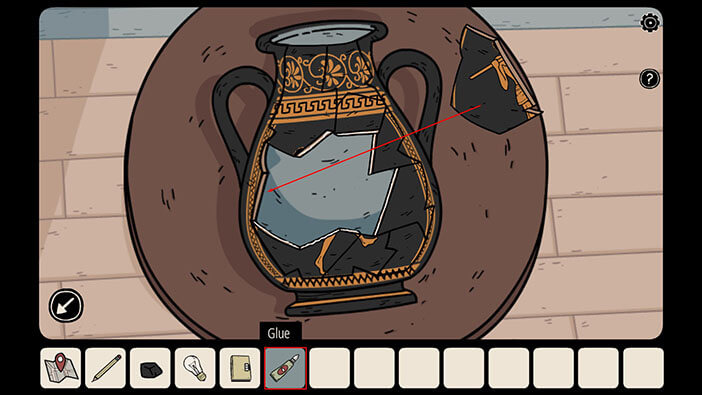
Step 1
Take the largest piece on the right and drag it to the upper left part of the vase.
Step 2
Take the “V” shaped piece of the vase from the left side and drag it to the lower left part of the vase.
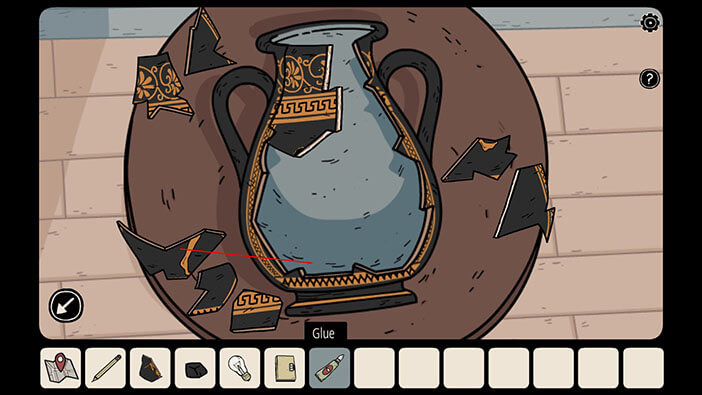
Step 3
Take the larger piece from the right and place it in the middle right part of the vase.
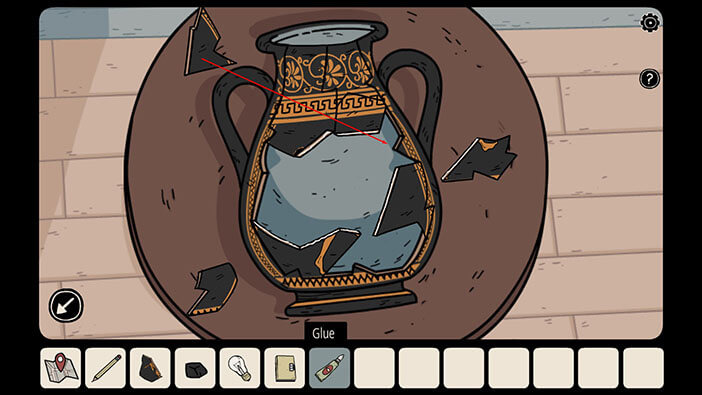
Step 4
Take the largest remaining pieces on the left side and place it on the upper right part of the vase.
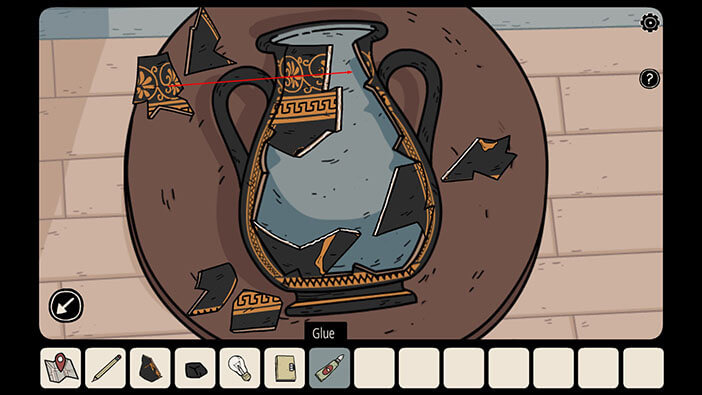
Step 5
Take the square-like piece from the left and place it just below the piece that we glued in the previous step.
Step 6
Take the larger piece from the left side and place it just below the piece that we glued in the previous step.
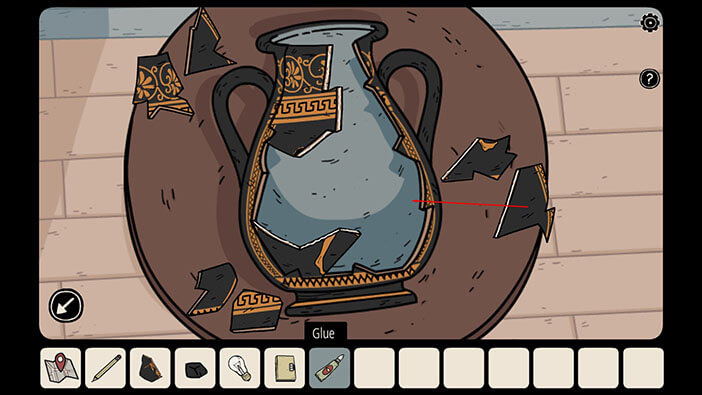
Step 7
Take the last piece from the left side and place it into the bottom right portion of the vase.
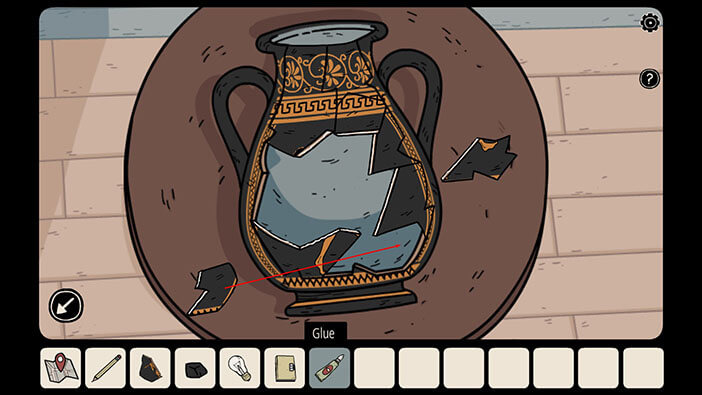
Step 8
Finally, take the last piece from the right side and place it into the empty space at the bottom of the vase.
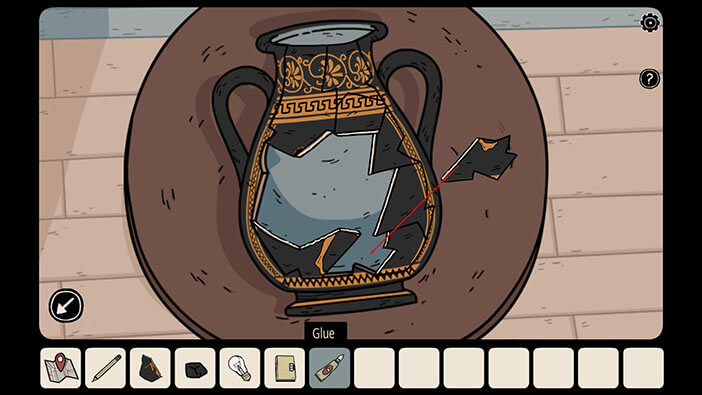
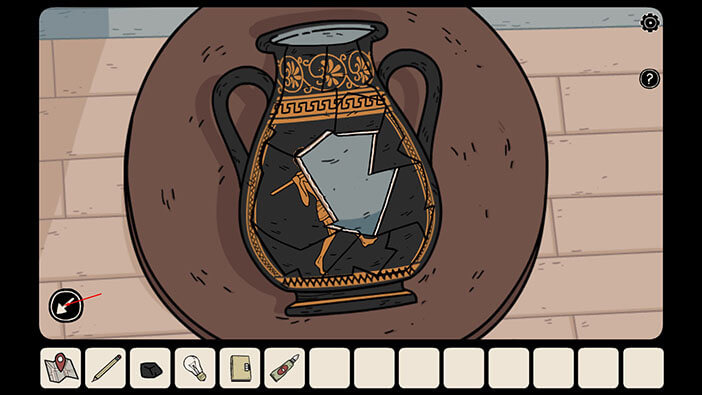
Ok, now let’s add the piece that we found inside the stove. First, tap on the “Piece of Vase” to select it, then tap on the table to put it down.
Next, tap on the “Glue” in your inventory to select it, once more. After that, drag the piece of the vase and place it into the middle left side of the vase.
We are still missing a few pieces, but there’s nothing that we can do about that, right now. So, let’s tap on the arrow in the lower-left corner to go back.
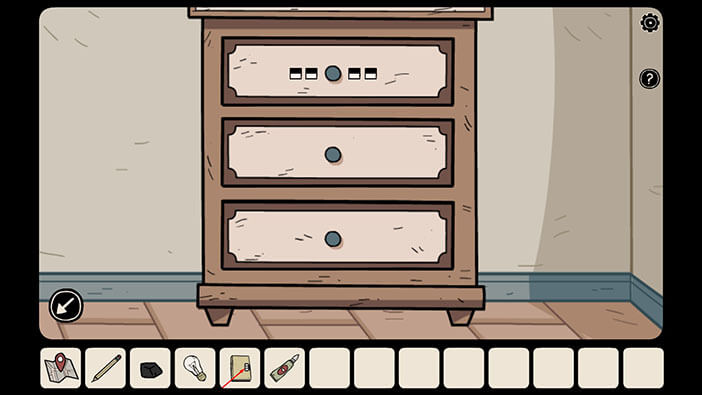
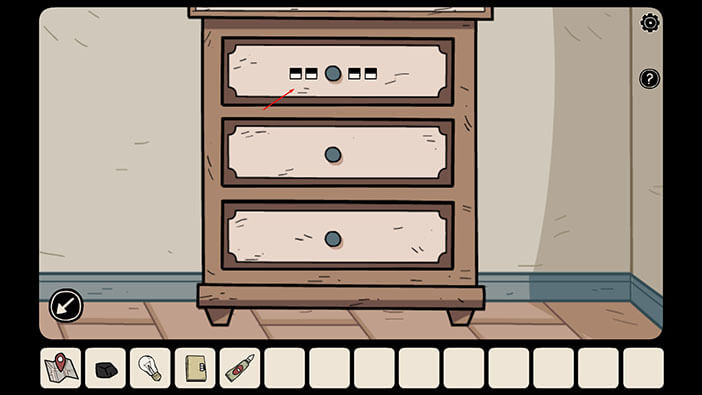
Ok, we’re finished with the vase, for now, so let’s take a closer look at the top drawer on the right.
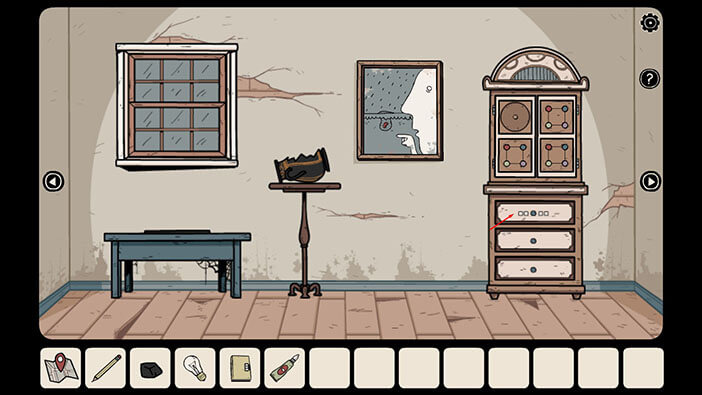
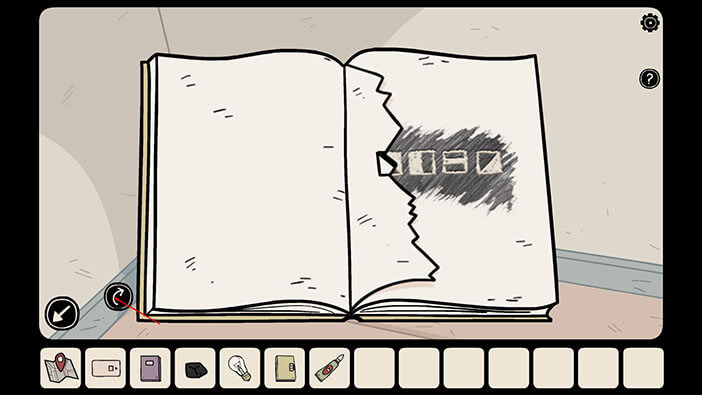
As you can see, the drawer is locked by some combination that involves four squares, and the parts of them are black. We can find the solution for this puzzle inside our “Puzzle Book”. So tap on the “Puzzle Book” in your inventory to select it.
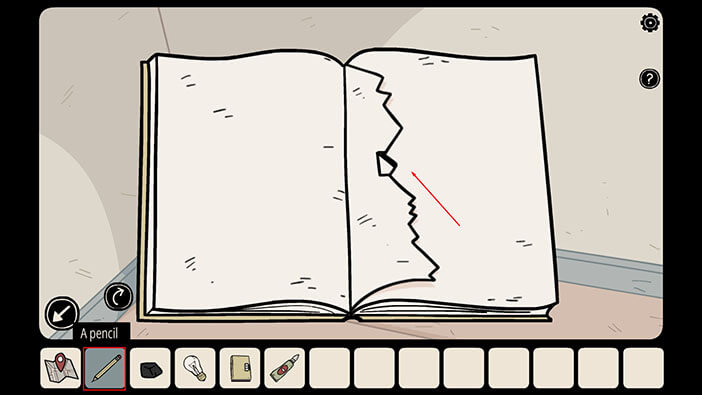
Tap on the arrow in the lower right corner to turn the page.
The next page is torn out. So, select the “Pencil” from the inventory and tap on the page below to shade this area.
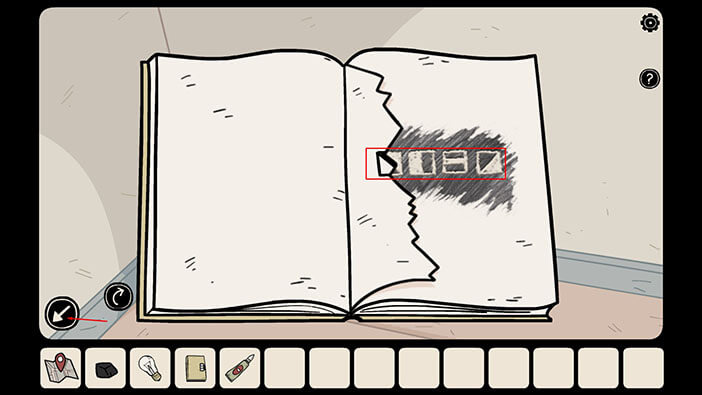
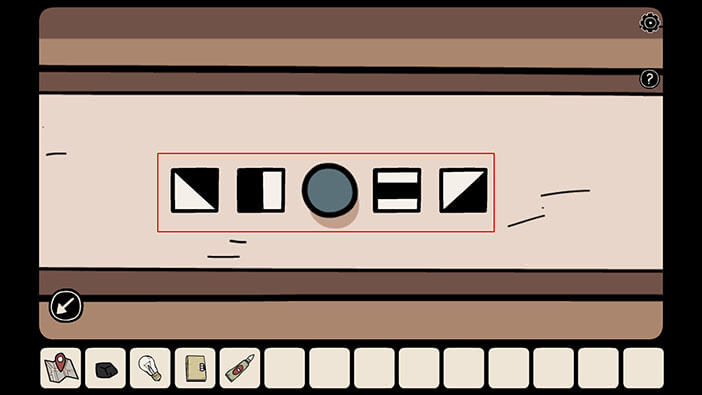
We can now see four squares, and parts of them are black, just like the combination that we saw on the drawer. We should memorize/write down the shape of the black parts of the squares in order to unlock the drawer. Let’s begin. Looking from left to right we have,
First Square = Upper right half (diagonally) is black
Second Square = Left Half is black
Third Square = Black horizontal line in the middle
Fourth Square = Lower right half (diagonally) is black
Ok, after memorizing/writing down this information, tap on the arrow in the lower-left corner to close the book.
Tap on the top drawer to start the interaction.
Let’s enter the correct combination. We had,
First Square = Upper right half (diagonally) is black
Second Square = Left Half is black
Third Square = Black horizontal line in the middle
Fourth Square = Lower right half (diagonally) is black
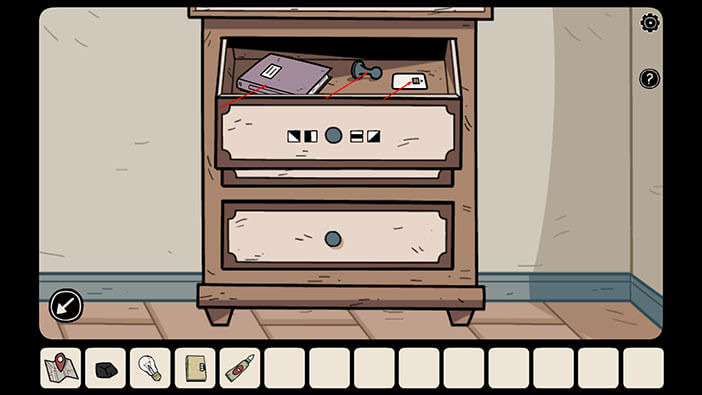
After entering the correct combination we heard the clicking sound, so we managed to unlock the drawer. Tap on the drawer to open it.
Inside the drawer, we will find three items, a “Purple Book”, a “Blue Token” and a “Card with a microchip”. Tap on these items to pick them up and they will be added to your inventory.
Tap on the book in your inventory to select it, then tap on the arrow on the lower right corner of the book to open it.

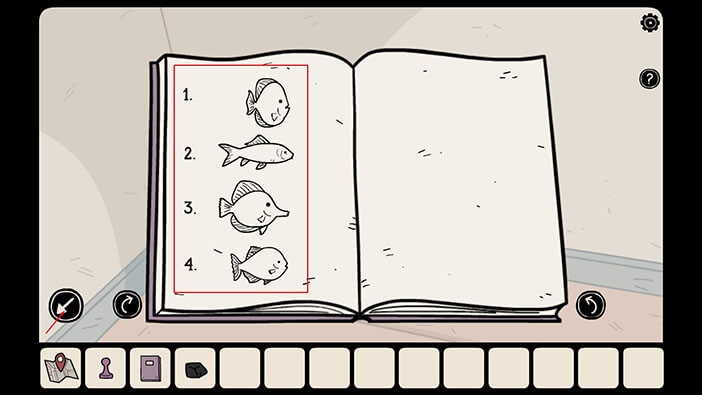
On the first page, we can see four fish, so this probably has something to do with the aquarium that we saw earlier. Tap several times on the arrow in the lower right corner to flip through the pages.
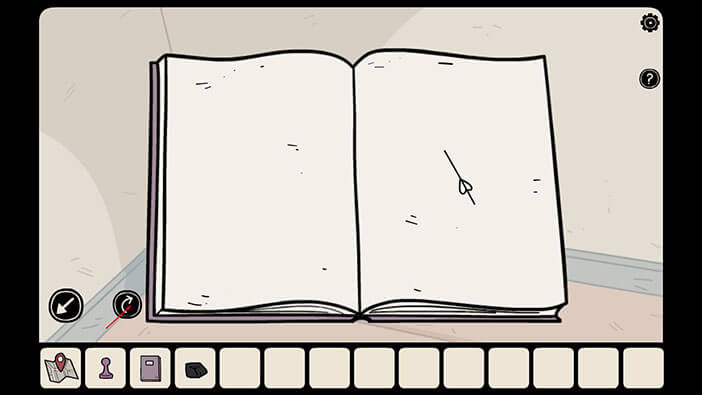
On the last page, we can see a clock hand, so this is probably connected to the wall clock that we saw earlier. For now, let’s tap on the arrow in the lower-left corner to close the book.
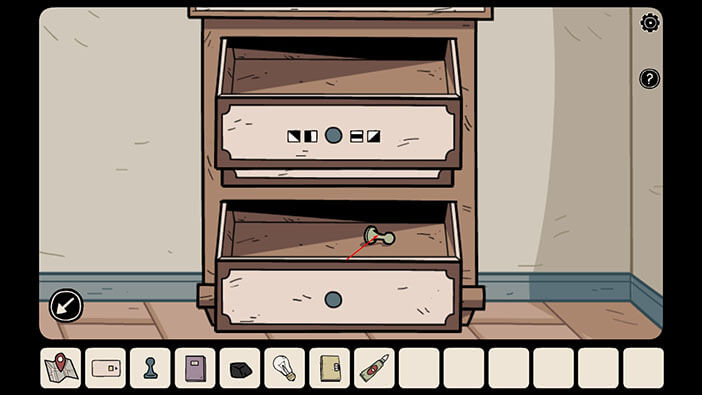
Before we leave there are a few more things that we can do in this room. First, tap on the bottom drawer to open it.
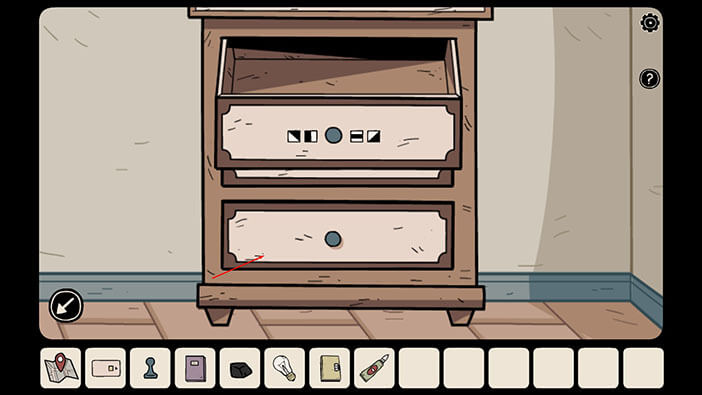
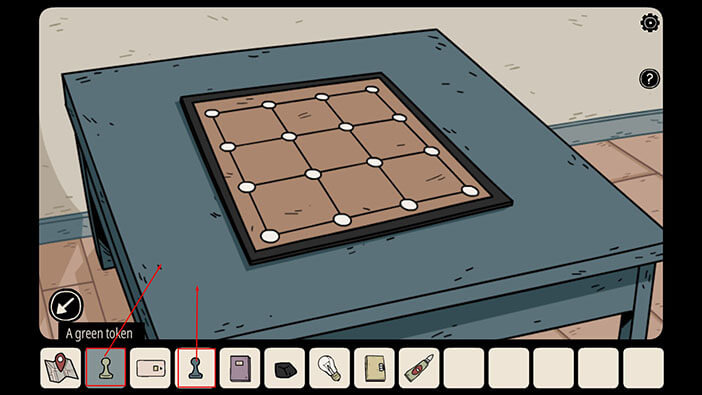
Inside you will see another pawn. Tap on it to pick it up, and a “Green Token” will be added to your inventory.
Ok, now tap on the blue table on your left to take a closer look at it.
Select the “Green Token” and a “Blue Token” from the inventory (one by one) and tap on the table to leave them.
Well, that’s it for now. Tap on the arrow on the left to proceed into the next room.
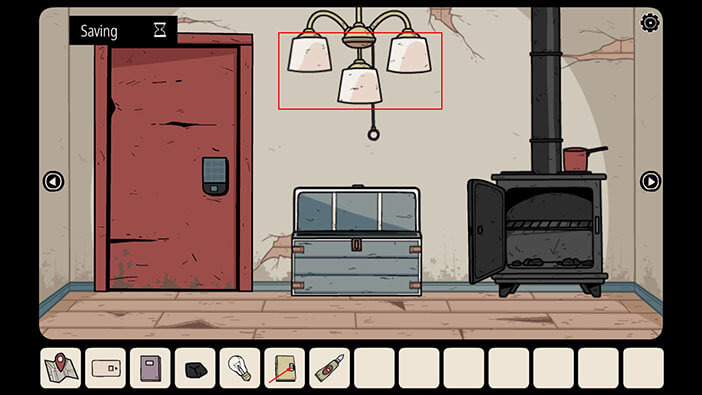
Pay attention to the lampshades on the chandelier. After that, tap on the “Puzzle Book” in your inventory to open it.
Let’s tap on the arrow in the lower-left corner to get back to the previous page.
Ok, now take a look at the shapes on the left page. Those shapes are very similar to the lampshades that we saw on the chandelier, and they’re arranged in the same pattern. So, on the chandelier, we have one lampshade in the middle that is lower than the other two. On the lamp that we saw previously, it’s the other way around, with one lampshade higher than the other two. So, the lower three shapes on the page on the left match the pattern of lampshades on the chandelier, while the upper three shapes match the pattern of lampshades on the lamp that we saw in the first room (when we removed the boards by using termites).
Ok, now we should pay attention to the position of the checkmarks. On the chandelier, only the left lampshade has a checkmark, so we should place the light bulb into the left lampshade and turn it on. Memorize/Write down this information (left lampshade). Let’s do that.
Tap on the arrow in the lower-left corner to return the book to the inventory.
NOTE: The check marks for this puzzle will vary from game to game because this puzzle is randomized every time you start a new game. However, you can solve this puzzle by following the same logic.
Tap on the chandelier to take a closer look at it.
We can see that there are two light bulbs here, one in the left lampshade, and the other one in the right lampshade. Since we know that we need a light bulb in the left lampshade, let’s leave it there, and tap on the light bulb in the right lampshade to pick it up. We will now have two “Light Bulbs” in our inventory and we will need them for the other lamp.
Ok, now let’s tap on the cord to turn on the light.
Great, we completed the first part of the “Light Bulb” puzzle. Let’s proceed into the next room on the left.

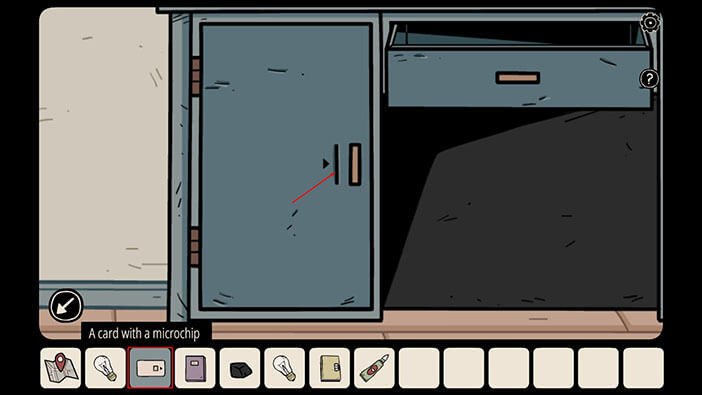
Before we proceed toward the lamp, let’s make a quick detour because we also found a “card with microchip” and we saw a slot for this card on the cabinet in the left room. So, tap on the door on the left to proceed into this room.
Tap on the left cabinet door to take a closer look at it.
Select the “card with microchip” from the inventory and tap on the slot to unlock the cabinet door. After that, tap on the cabinet door to open it.
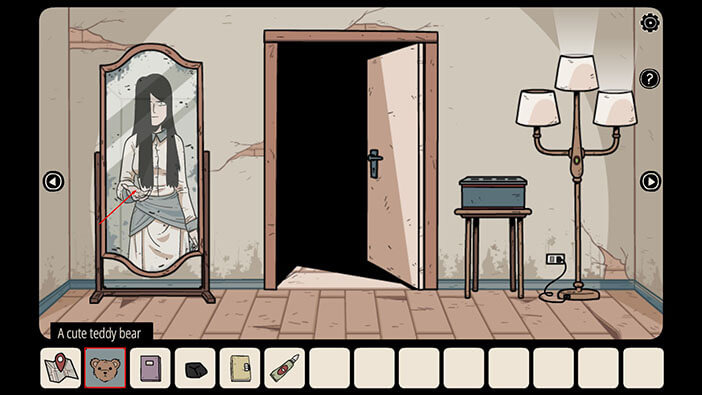
Inside, you will find a Teddy Bear. Tap on it to pick it up and a “cute teddy bear” will be added to your inventory.
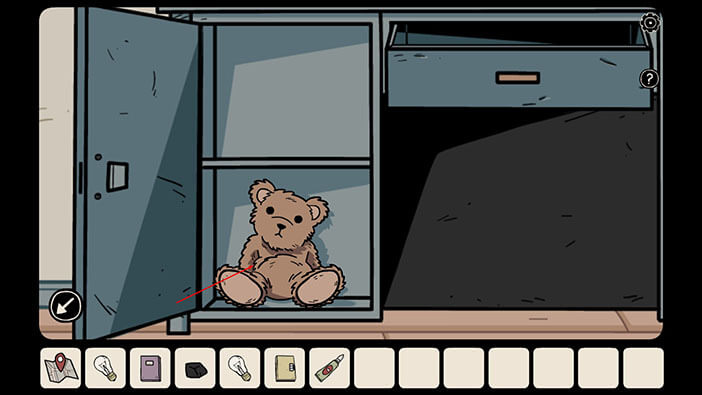
Ok, let’s go back to the previous room.
Tap on the arrow on the left to proceed into the next room.
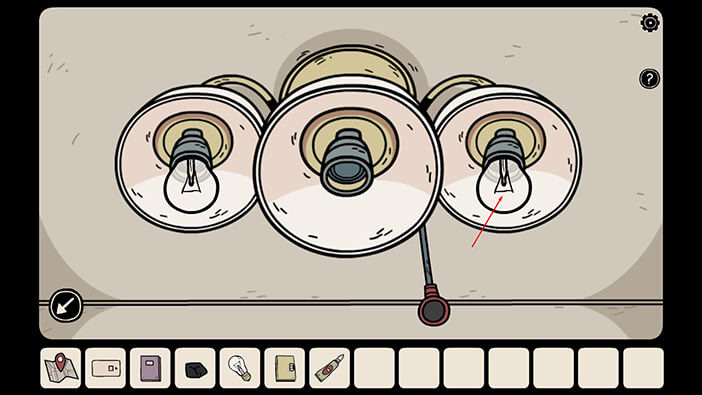
Well, we finally reached the lamp. Tap on the lampshade to take a closer look.
Tap on the “Puzzle Book” in your inventory to take another look at the checkmarks on the lampshades.
So, we have to check marks,
The lampshade on the Right
And Upper lampshade.
Memorize/write down this information, and tap one arrow in the lower-left corner to close the book.
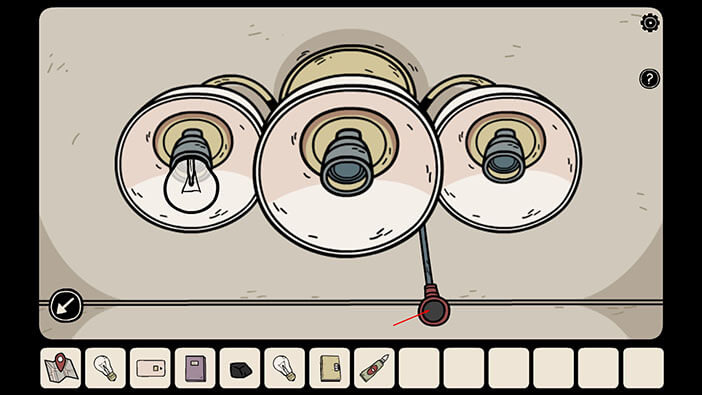
Ok, let’s select the two “Light Bulbs” from the inventory (one by one) and insert them into the upper lampshade on the right and upper lampshade.
Almost done. Tap on the switch below the lampshades to turn on the light.
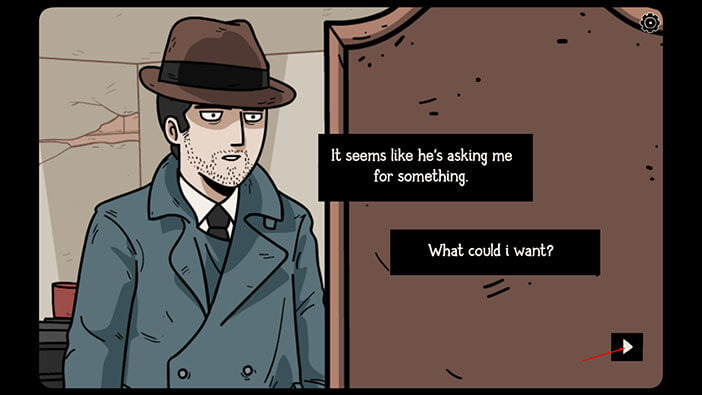
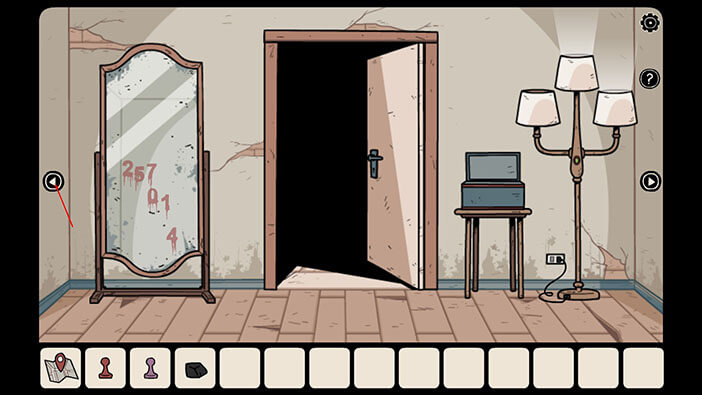
Well, as soon as we completed this puzzle and turned on the light, the ghost of a girl appeared in a mirror. Now, she is looking at us with the outstretched hand, and it seems like she wants us to give her something…
Well, the girl wants her teddy bear, and we already picked it up when we took a slight detour to use the magnetic card. So, tap on the “cute teddy bear” in your inventory to select it, and then tap on the girl to hand it over.
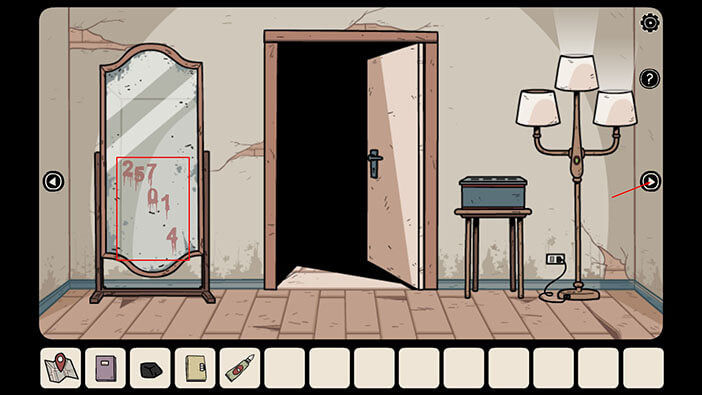
Ok, after we gave her the teddy bear, the girl disappeared, but instead of her, some numbers appeared in the mirror. Let’s write down/memorize these numbers because we will need them for the next puzzle. We have “257014”.
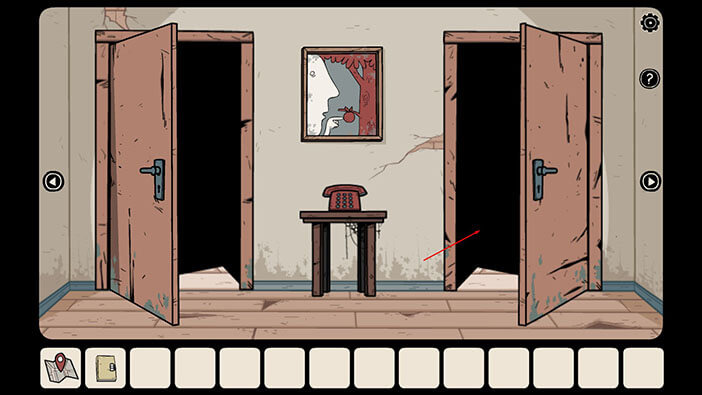
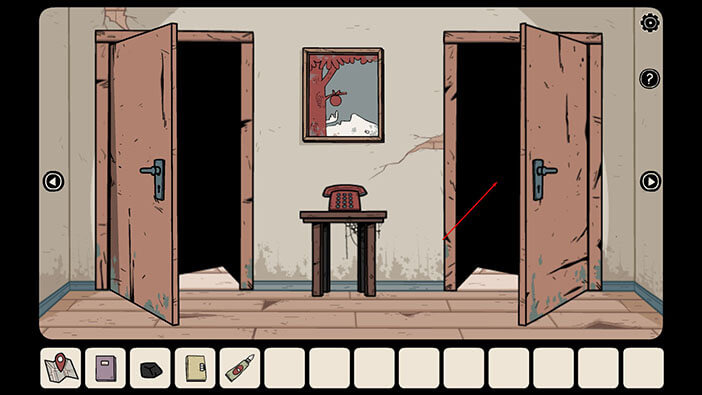
After that, let’s proceed to the room on the right.
NOTE: The numbers on the mirror might vary from game to game.
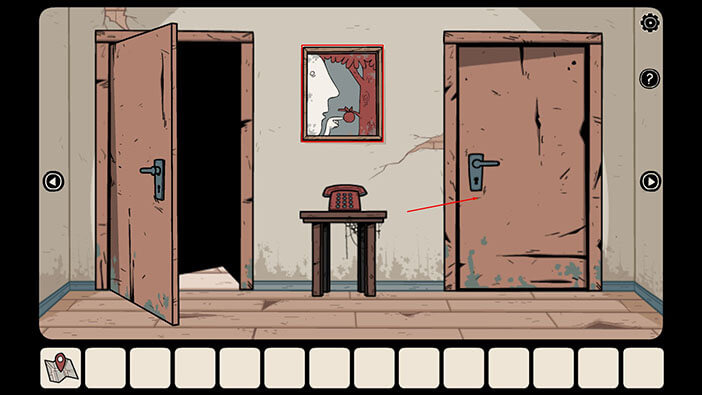
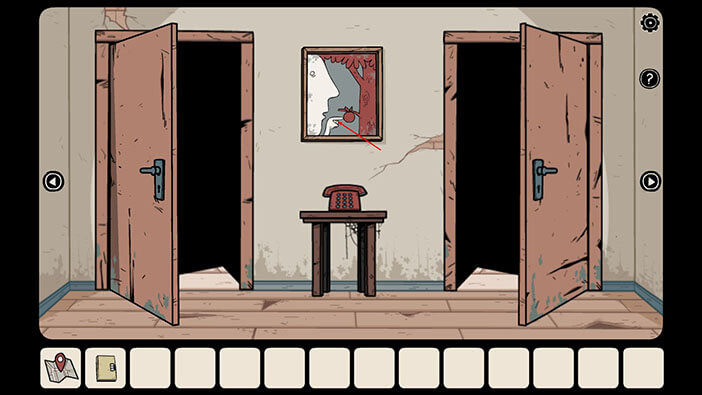
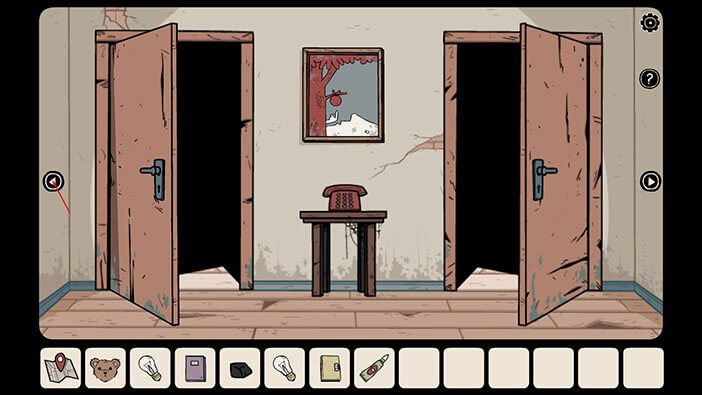
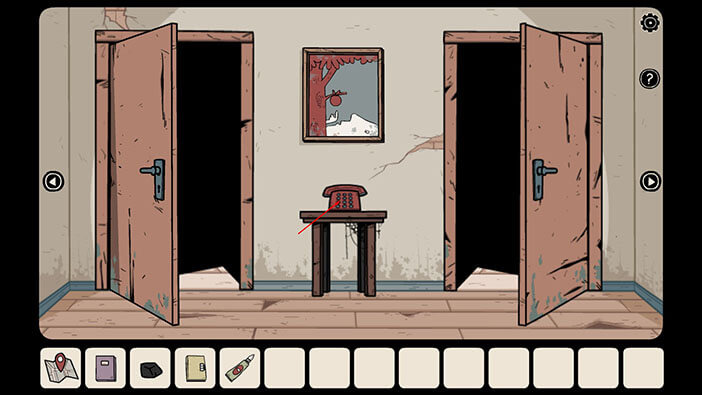
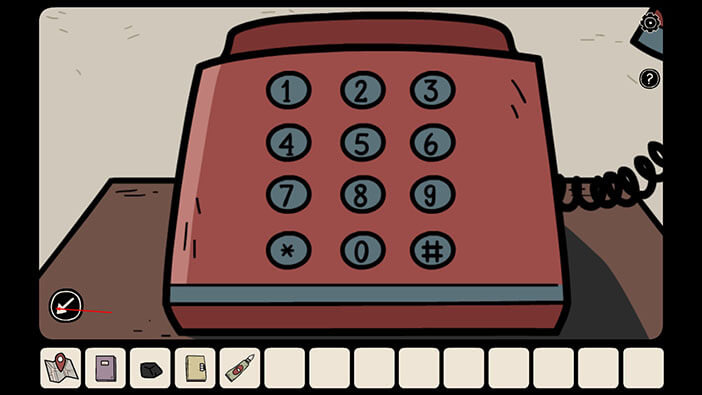
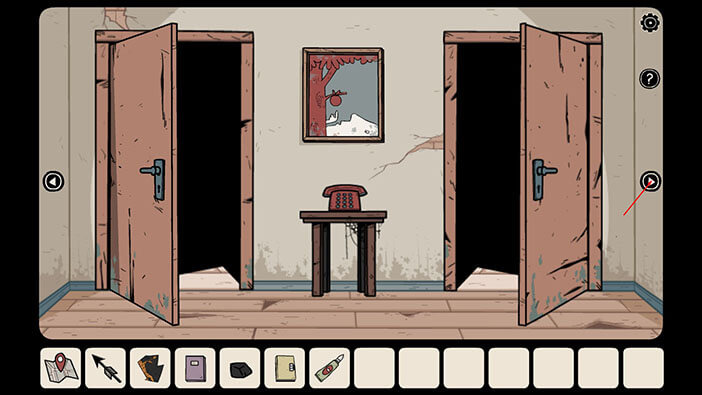
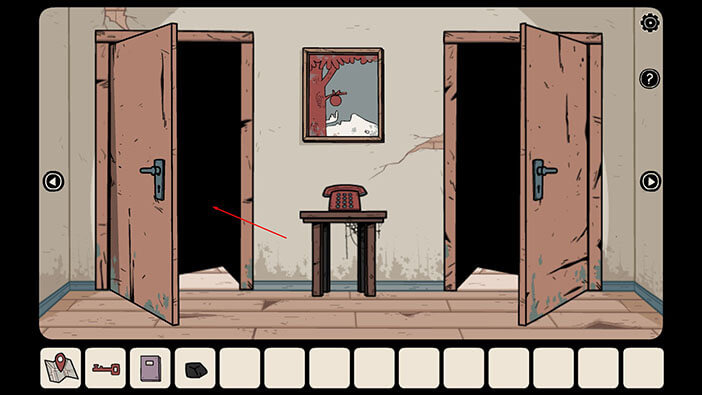
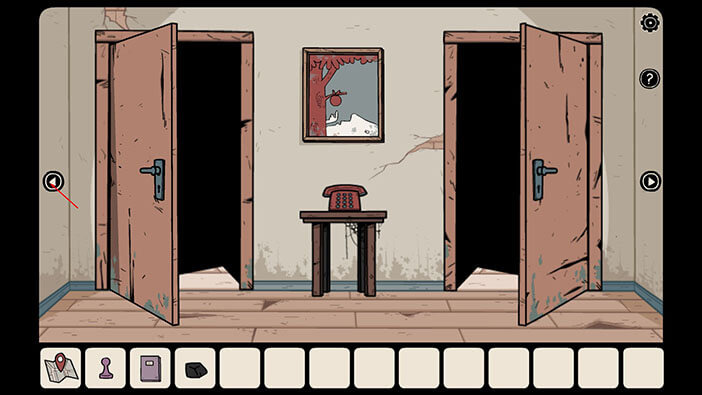
Well, there is a phone in this room, and we will use it to dial the number that we saw in the mirror. So, tap on the phone to take a closer look at it.
NOTE: It’s necessary to have a sound turned on in order to complete this puzzle, so do that before dialing the number.
Ok, dial the number that you saw in the mirror. For me, it was “257014”.
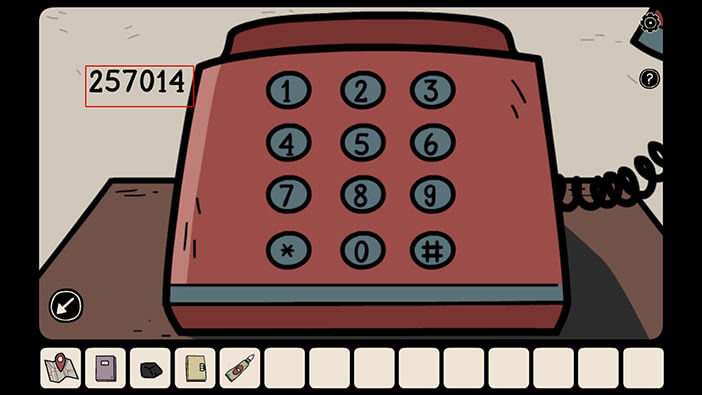
As soon as you dial the number, you will hear a short melody on the phone. It is very important to memorize the melody because we will need to play it in order to complete the next puzzle. Also, if you have to listen to the melody again you can do so by tapping on the arrow in the lower-left corner to exit the interaction from the phone. Once you do that, tap on the phone again to listen to the melody.
If you memorized the melody, tap on the arrow in the lower-left corner to exit the phone interaction screen.
NOTE: This part of the game is very tricky because there are several melodies that you can hear on the phone (randomized like most other puzzles). So, there’s no way for me to help you with this one. You will just have to memorize the melody and figure out how to play it in the next puzzle.
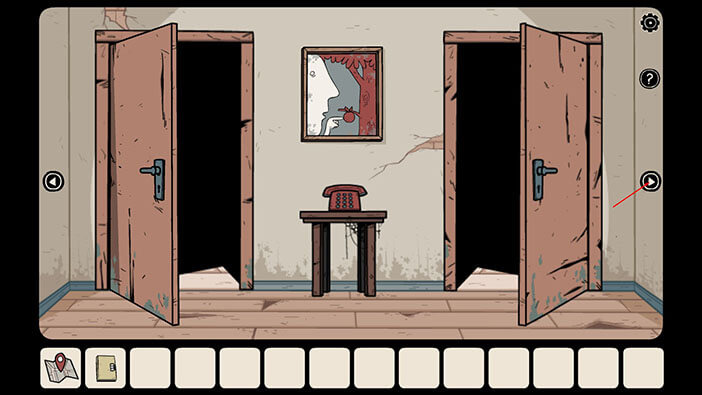
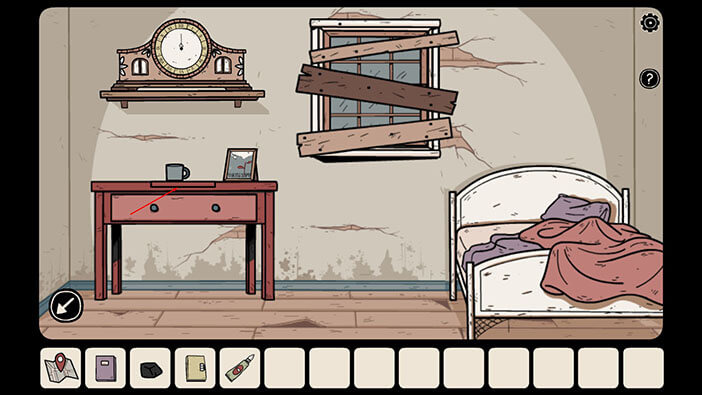
Tap on the door on your right to proceed into the next room.
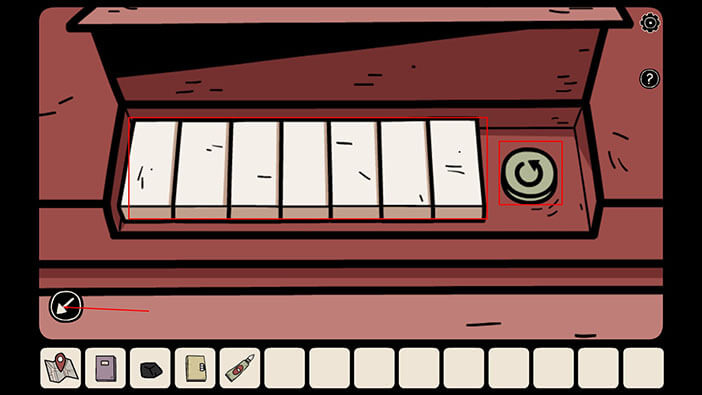
Tap on the table to take a closer look at it, then tap on the small lid to lift it up. You will reveal some kind of a small piano.
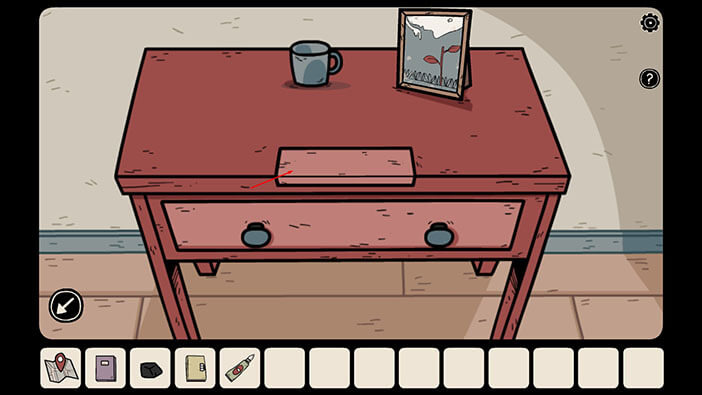
Tap on the piano to start the interaction.
Play the melody that you heard over the phone.
Looking from left to right at the piano keys, I had the following melody:
MY TUNE: 7-4-2-6
Here are some more tunes that I ran into while replaying the game. However, I am not 100% certain these tunes are correct. If you’re struggling, try them out, they might work for you.
FIRST OPTION: 3-5-2-3
SECOND OPTION: 5-1-4-2
THIRD OPTION: 1-6-3-2
NOTE: You can tap on the reset button on the right, before playing the tune.
After you play the correct melody, the drawer will automatically open, and you will see two items inside. Tap on them to pick them up and a “Metal clock hand” and another “piece of vase” will be added to your inventory.

Ok, this should be the last piece of the vase, so let’s assemble it. To get to the room with the vase, first tap on the arrow in the lower-left corner to go back to the previous room, and then go two rooms to the right.
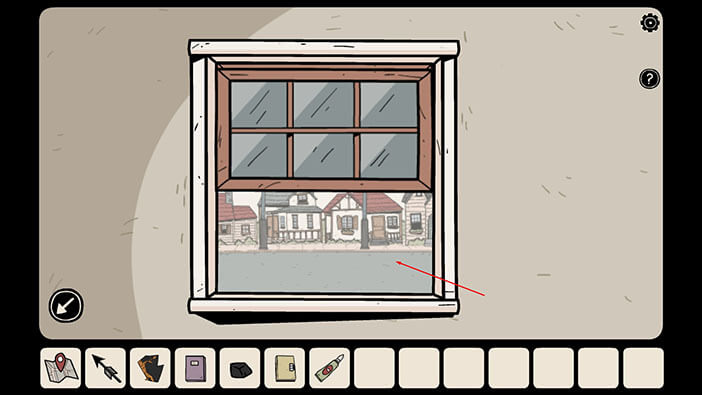
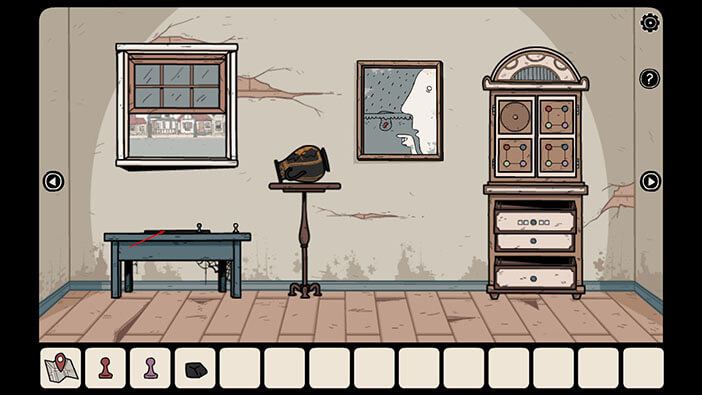
Before we assemble the vase, we should start looking for the owls. Tap on the window on the left to approach it, then tap again to open it. Here you will see another ghostly figure.
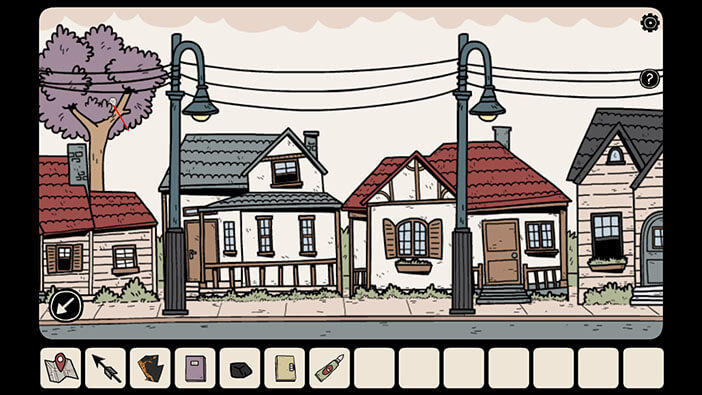
Tap to look outside the window, and you will see an owl high in the canopy of the tree on the left. Tap on the owl to take a closer look at it.
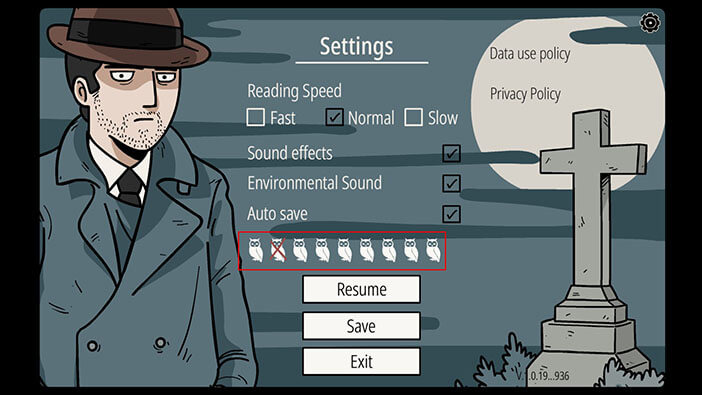
By tapping on the Settings button, you can see how many owls you have found so far.
Ok, let’s get back to the room and repair the vase. First, tap on the vase to take a closer look at it.

Select the “piece of vase” from your inventory and tap on the table to place it next to the vase.
Ok, let’s now select the “Glue” from the inventory. While the glue is selected, drag the piece of the vase and use it to fill the hole.
The spear on the vase changed was engulfed in bright light for a second, and it now looks like an object. Tap on the spear to pick it up and a “Minute hand” will be added to your inventory.
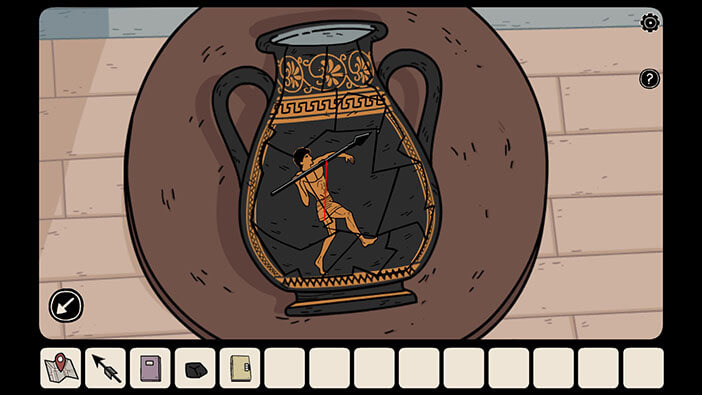
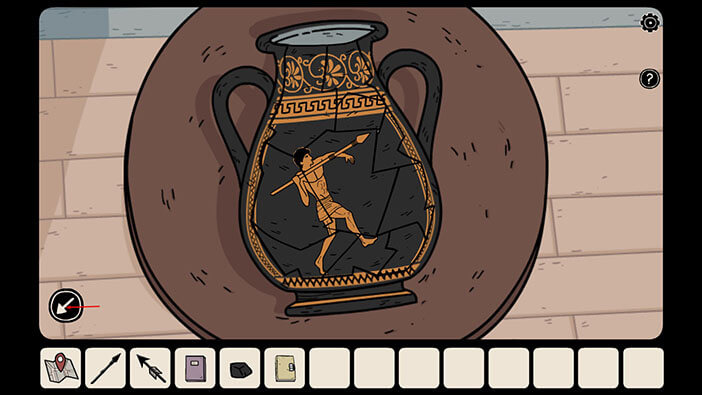
Before we leave, pay attention to the direction in which the spearman is pointing a spear. It’s up and to the right, and that should be 2 o’clock. Memorize/write down the position of the spear on the vase, because we will need it for the next puzzle.
Once you’re done, tap on the arrow in the lower-left corner to go back.
Well, we should now return to the room with a clock. To get there, go two rooms to the left, and after that go to the room on the right.
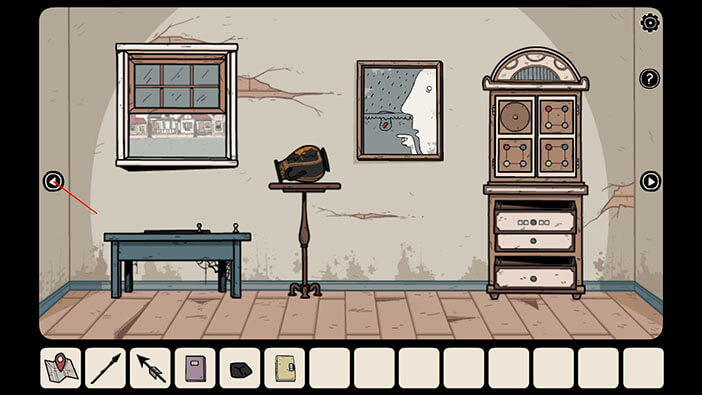
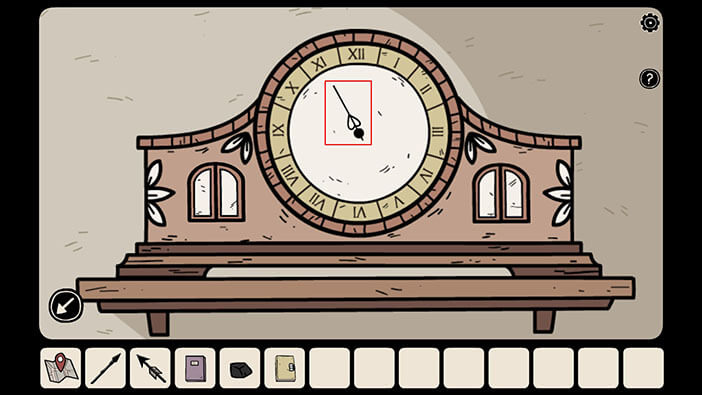
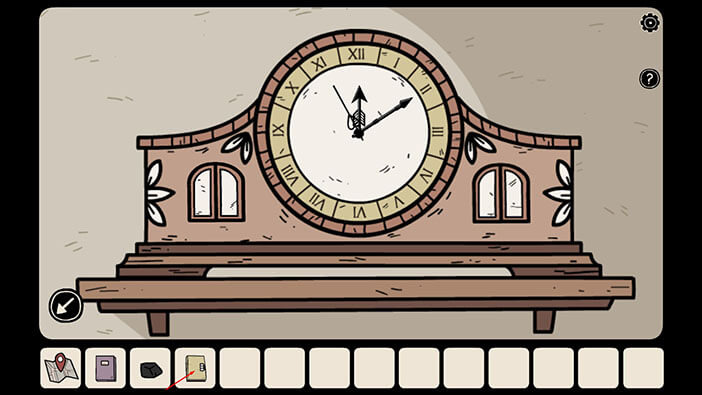
First, let’s take a closer look at the clock.
By looking at the clock, we can see that the second hand is already in place. But, we don’t know its proper position. So, tap on the “Purple Book” in your inventory to see the solution to this problem.
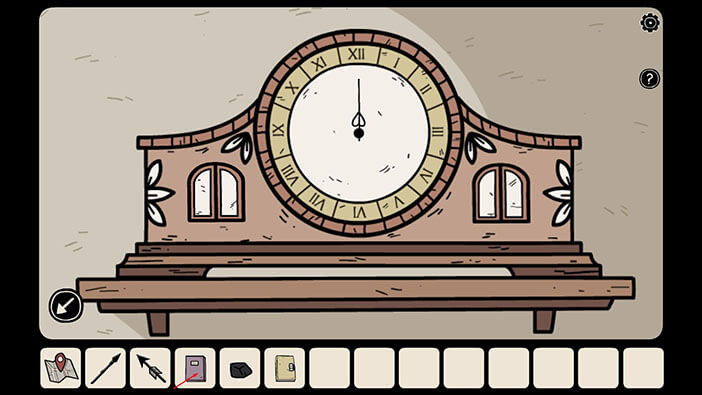
Ok, we can see that the hand is pointing up and to the left. This should be 11 o’clock. Memorize this information, and then tap on the arrow in the lower-left corner to put down the book.
Tap on the second hand to rotate it until it points to 11 o’clock.
Well, we can now select the “Minute hand” from the inventory and tap on the clock to attach it.
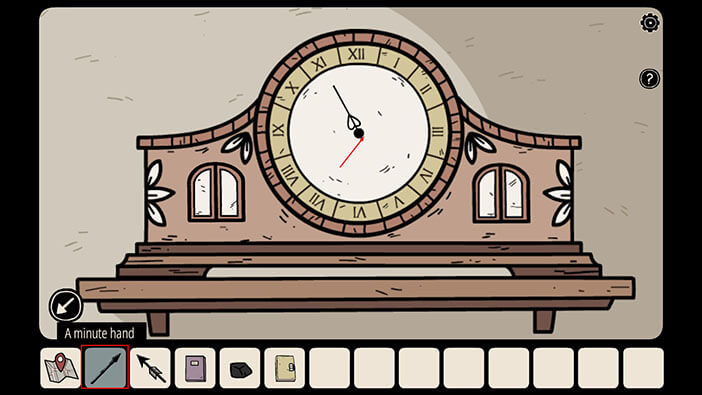
After that, tap twice on the minute hand to rotate it. It should point up and to the right, at 2 o’clock position, just like the spearman on the vase.
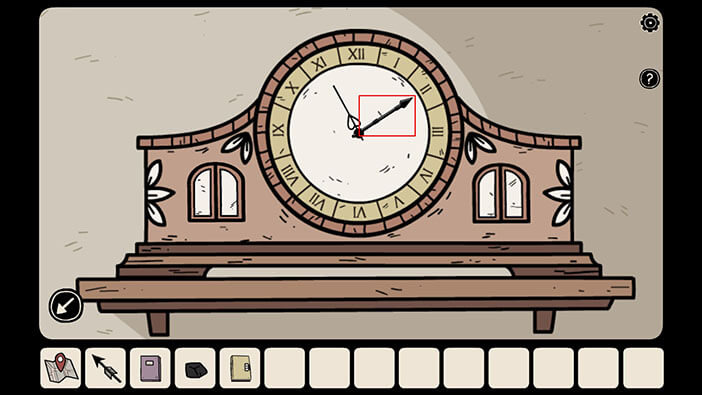
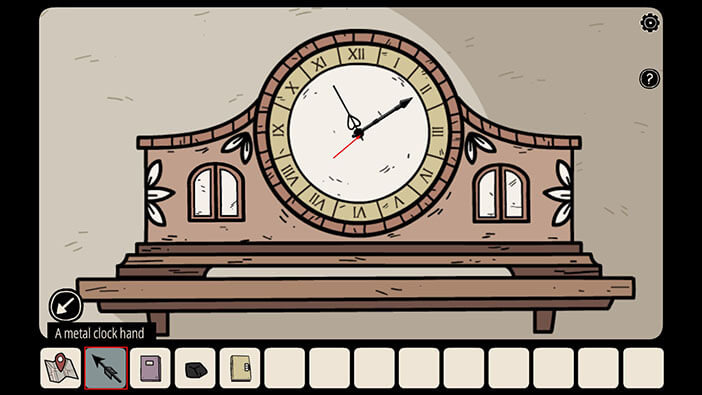
Finally, select the “Metal clock hand” from the inventory and tap on the clock to attach it. This is actually hour hand.
After we attached the hour hand, we now have to determine its proper position. Tap on the “Puzzle Book” to open it and look for the solution.
Tap on the arrow in the lower-left to go back one page.
Here we can see an arrow that looks exactly like our hour hand, and it’s pointing downwards, at the 6 o’clock position. Memorize this, then tap on the arrow in the lower-left corner to put down the book.

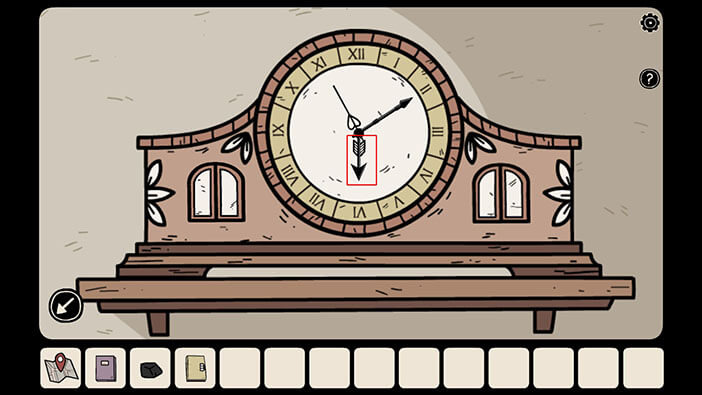
We should now tap on the hour hand to rotate it until it points to 6 o’clock.
NOTE: The position of the hour hand and the second hand will change from game to game because this is another randomized puzzle. However, you will always discover the correct position in the same place (“Puzzle Book” for the hour hand, and “Purple Book” for the second hand). I’m not sure, but it seems that the minute hand (that we found on the vase) is always in the same position, 2 o’clock.
As soon as we placed the hour hand in the correct position, the door on the left side of the clock opened, and the small toy will bring you the key. Tap on it to pick it up, and a “Red key” will be added to your inventory.

The other door should be also unlocked so let’s tap to open it and tap again to look inside.
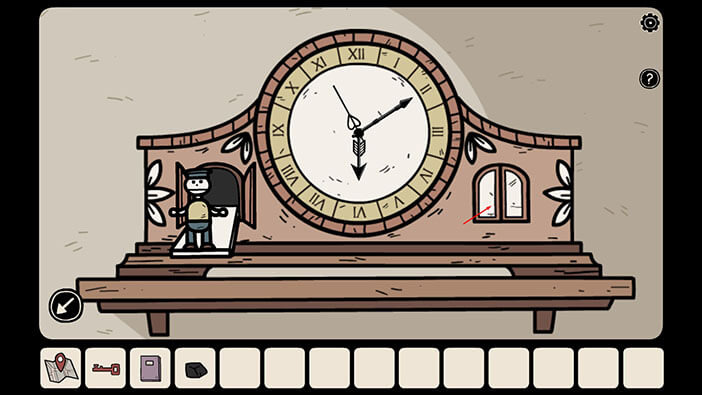
Here, we found another owl. Tap on the arrow in the lower-left corner to go back.

Tap on the arrow in the lower-left corner to go back to the previous room.
Tap on the door on the left to proceed into the room.
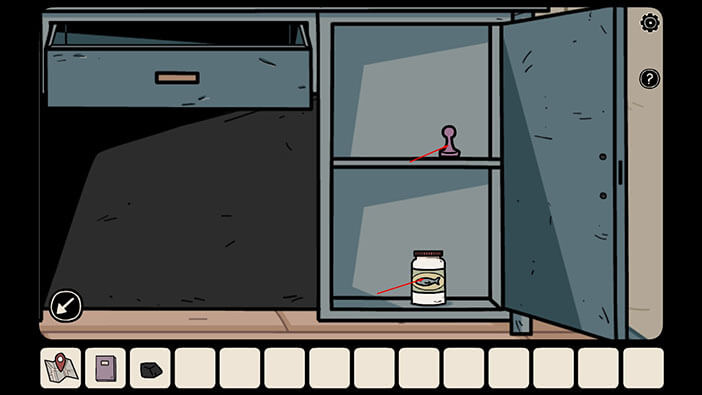
Tap on the cabinet on the right to take a closer look at it.
Tap on the “Red Key” in your inventory to select it, then tap on the keyhole to unlock the cabinet. After you hear the clicking sound, tap on the cabinet again to open it.
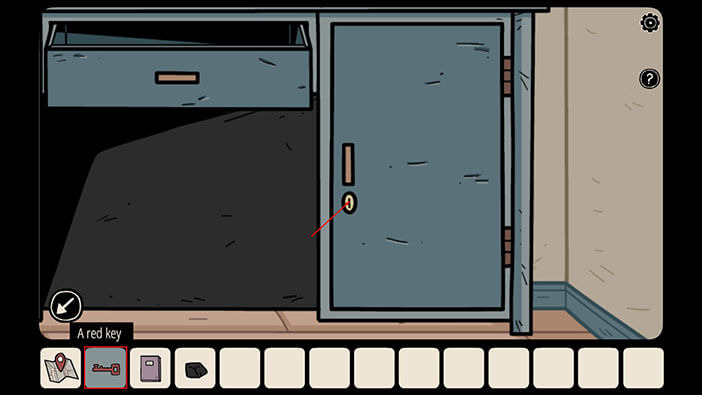
Inside the cabinet, you will see two items. Tap on them to pick them up and a “Fish Food” and a “Purple Token” will be added to your inventory.
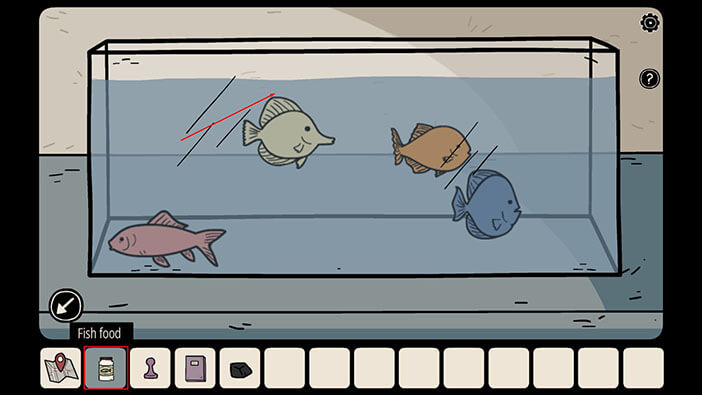
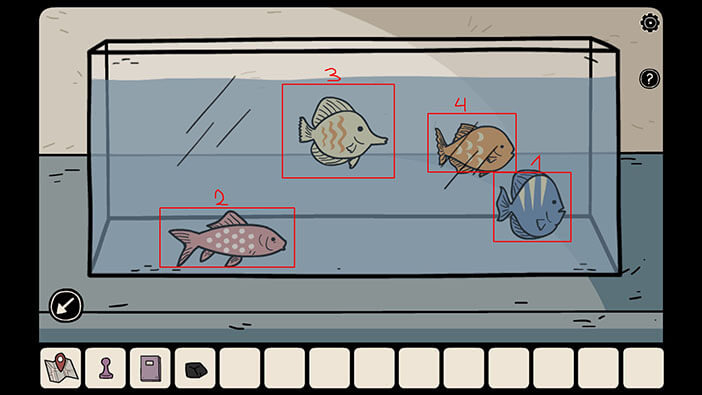
Let’s feed the fish. First, tap on the aquarium to take a closer look at it. After that, tap on the “Fish Food” in your inventory to select it, then tap on the aquarium to feed the fish.
When we fed the fish, the water in the aquarium started to glow, and it seems that the fish suddenly changed.

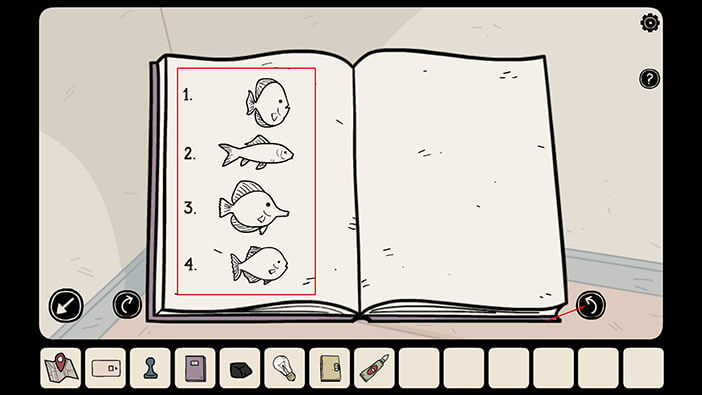
Well, if you recall, we saw an image concerning four fish in the “Purple Book”. So, let’s take a look at it once more. Tap on the “Purple Book” to open it. After that, tap twice on the arrow in the lower-left corner of the book to get back to the first page.
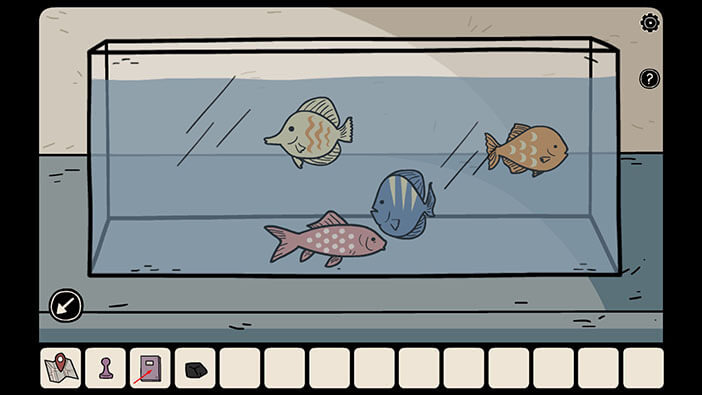
Ok, here we can see that the fish are arranged by numbers from 1 to 4. Try to memorize the shape and order of the fish on this page, because we will have to match them with the fish in the aquarium. There are few easy ways to do this, and you only have to memorize the shape of the 3 fish. For example:
The fish number 2 is slim and easy to recognize.
The fish number 3 has a very long mouth and recognizable shape.
The fish number 1 is very “wide”. So, the last fish is fish number 4.
NOTE: The order of the fish in the book will change from game to game because this puzzle is also randomized.
Once you’re done, tap on the arrow in the lower-left corner to put down the book.
Before we proceed, let’s take a look at the fish in the aquarium and write down their color so that we can more easily identify them.
Fish Number 1 (very wide) is Blue.
Fish number 2 (slim) is Pink.
Fish number 3 (long mouth) is Green
Fish number 4 is Orange.
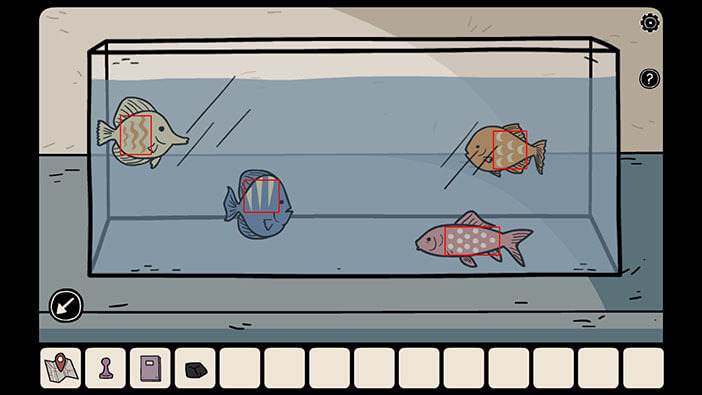
Ok, we should now look at the color patterns (symbols) on the fish and write them down.
Fish Number 1 (Blue) = Tri reversed triangles
Fish Number 2 (Pink) = Dots
Fish number 3 (Green) = vertical “wavy” lines
Fish number 4 (Orange) = Crescents (half moon)
Memorize, or better yet, write down this information because we will need it in order to solve the next puzzle.
We can use the markings on the fish to unlock the box in the first room (room with lamp). To get there, first tap on the arrow in the lower-left corner to exit from this room. After that, go to the first room on the left.
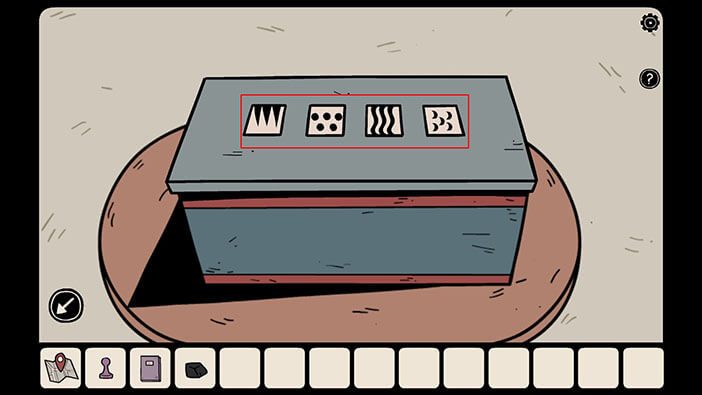
Tap on the blue box, located on the table on the right, to start the interaction.

Ok, we can see that the box is locked by the mechanism that consists of four symbols, and in order to unlock it, we should enter the symbols that we saw on the fish in the aquarium. The symbols should be entered in the same order as the fish in the aquarium (first fish = first symbol) Let’s do that. Looking from left to right we had,
First fish = Tri reversed triangles
Second fish = Dots
Third fish = vertical “wavy” lines
Fourth fish = Crescents (half-moon)
NOTE: As I already mentioned, the order of the fish in the book will change from game to game, because this puzzle is also randomized. However, you can still solve this puzzle by following this walkthrough.
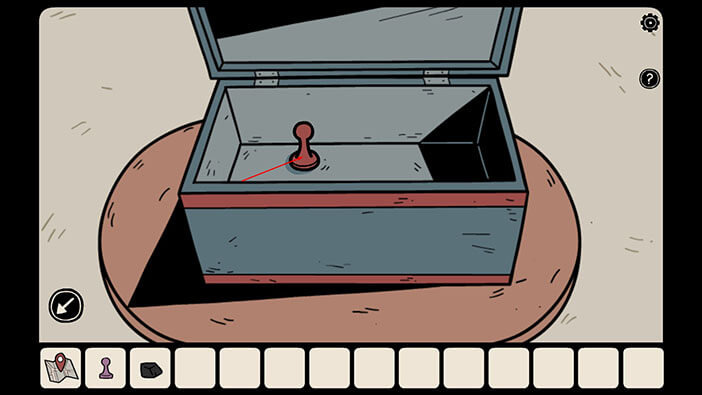
As soon as you enter the correct combination of symbols, you will hear the clicking sound and the box will automatically open. Tap on the pawn inside the box to pick it up and a “Red Token” will be added to your inventory.
Well, we now have two pawns (tokens) in our inventory, so we should now go to the room with the “token board”. This room is the first one on the left.
Tap on the blue table on the left to take a closer look at it.
Select both tokens (pawns) from the inventory (one by one) and tap on the table to place them.
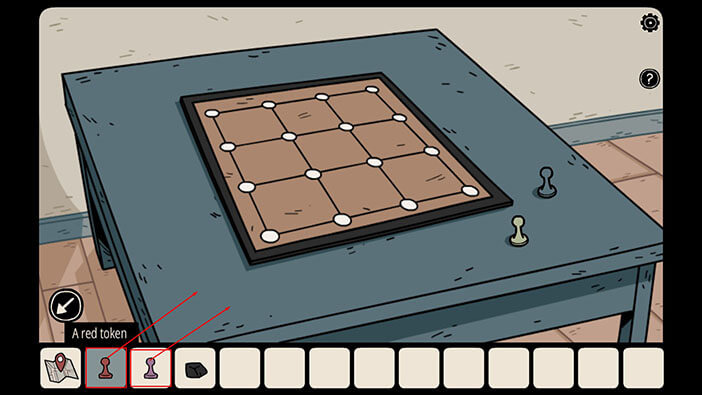
As soon as we placed the fourth token, the ghost of the murdered boy appeared, and he rearranged the tokens. After that, he looked at our character and pointed to the board.
Well, now we can see that he placed the tokens on the board, and he also left us some kind of a wooden disc. Tap on the disc to pick it up and a “Round tile” will be added to your inventory.
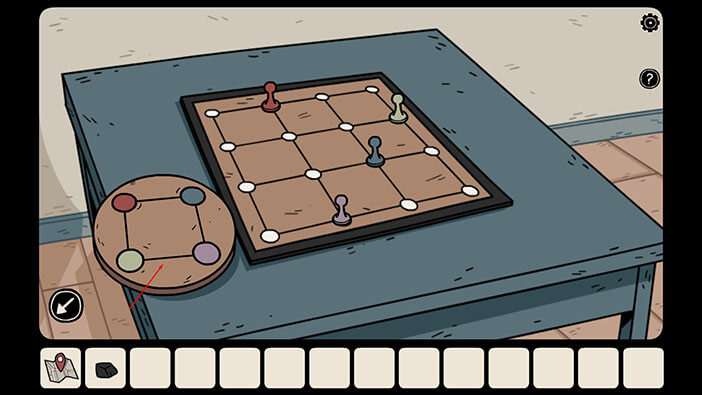
Ok, before we continue I have to explain how the following puzzle works. We will place the “round tile” on the cabinet that is also located in this room. There are four slots for “round tiles” on the cabinet, three are already there, only one tile is missing (and we know have it).
Why is all that important? Well, the tiles have a square inside, and in all four corners of the square, there is one colored circle (red, blue, green, or purple – just like the pawns). The “round tiles” can be rotated, as you will see later, and we will need to match the color of the pawn on the board with the color of the circle inside the tile.
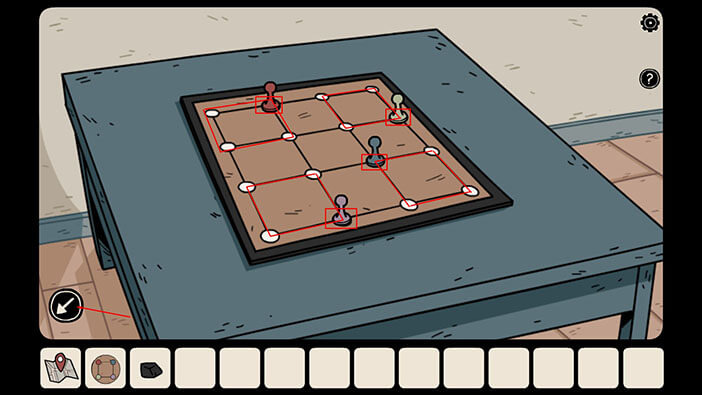
Long story short, we will have to memorize the position and the color of the pawns on the board in order to solve the puzzle. Also, we will look only look at the four squares in the corners of the board because they represent the “round tiles” on the cabinet.
If all of this sounds confusing, take a look at the image below this text.
Finally, let’s memorize/write down the position and the color of the pawns on the squares.
Upper Left Square = The Red pawn is in the upper right corner of the square
Upper Right Square = The Green pawn is in the lower right corner of the square
Lower Left Square = The Purple pawn is in the lower right corner of the square
Lower Right Square = The Blue pawn is in the upper left corner of the square
Once you’re done, tap on the arrow in the lower-left corner of the screen to go back.
NOTE: The position of the pawns is randomized every time your start a new game, so the pawns in your game might be arranged differently. However, you can still solve this puzzle by following the same logic (just write down the position and color of the pawns in your game).
Ok, now tap on the boards on the cabinet on the right to take a closer look at them.
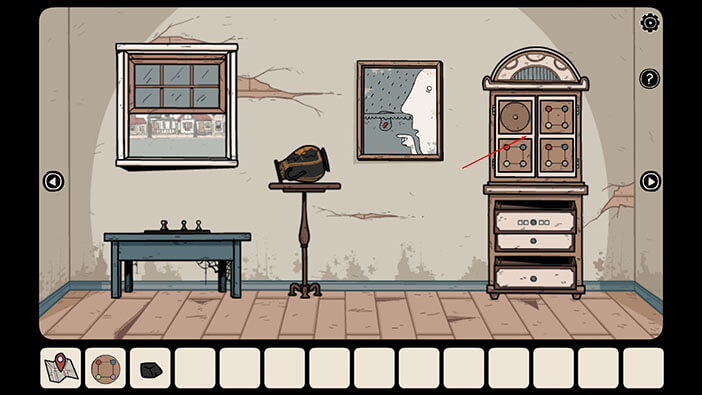
Tap on the “round tile” in your inventory to select it, then tap on the empty slot on the board to insert it.

Ok, now we have all four round tiles. Next, we should tap on the round tiles to rotate them. The color of the circles in the corner of the tiles should match the color of the pawns on the board. So, here you can see why I marked the squares on the board. For example, Upper Right Square on the boar = Upper Right round tile. The same is true for pawns and circles. For example Red pawn on the board = Red circle on the tile.
Finally, let’s tap to rotate the “round tiles” to the correct position. So we should rotate,
Upper left tile = Red circle should be in the upper right corner
Upper right tile = Green circle should be in the lower right corner
Lower right tile = Purple circle should be in the lower right corner
Lower left tile = Blue circle should be in the upper left corner
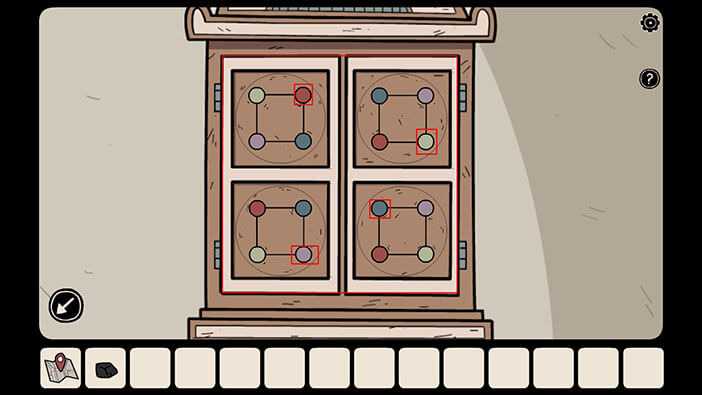
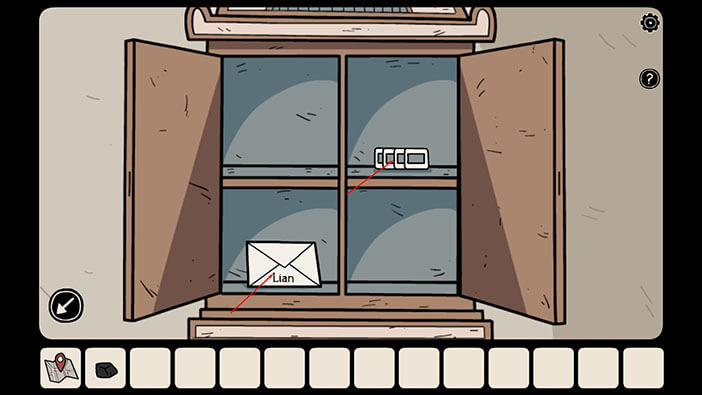
As soon as you rotate the tiles into the correct position, you will hear a clicking sound and the cabinet will open. Inside you will see two items. Tap on both of them to pick them up and “Projector slides” and letter to the “Lian”.
We will end the first part of the walkthrough here. You can check out the second part by tapping on the “Next Part” button.