Find Joe: Lumen – Chapter 2 | Part 2
Intro
Welcome to our walkthrough for Part 2 of the second chapter of the “Find Joe: Lumen” from “Mobiloids”. The virus, invented by a robot, Doug, destroyed nearly all humanity. Help Mike and his faithful robot friend Lumen survive, defeat the robots, and save humanity.
Bunker – Part 1
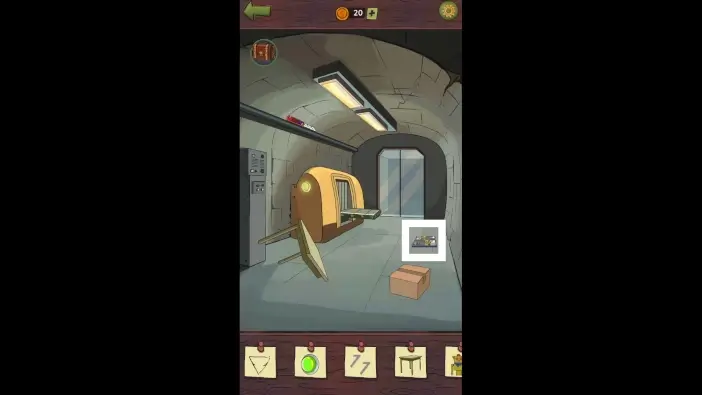
Approach the puzzle on the right.
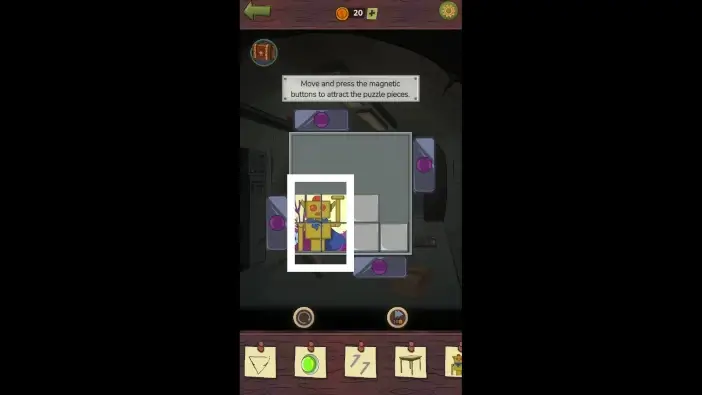
Move magnets on the sides to arrange the puzzle pieces like in the picture above. Press the button on a magnet to activate it and attract the puzzle pieces towards the magnet. Once you get the correct image of the robot, tap on the robot.
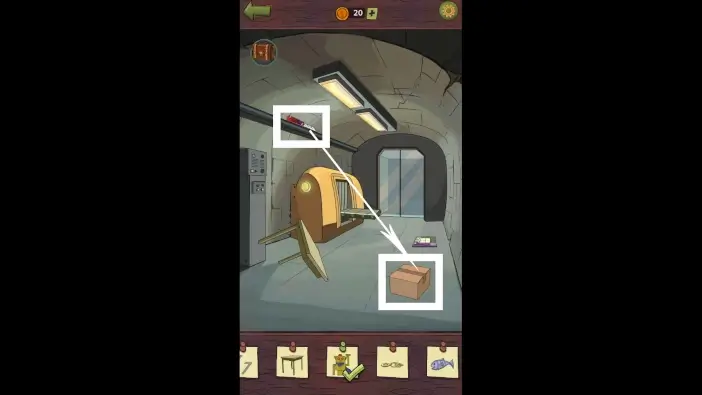
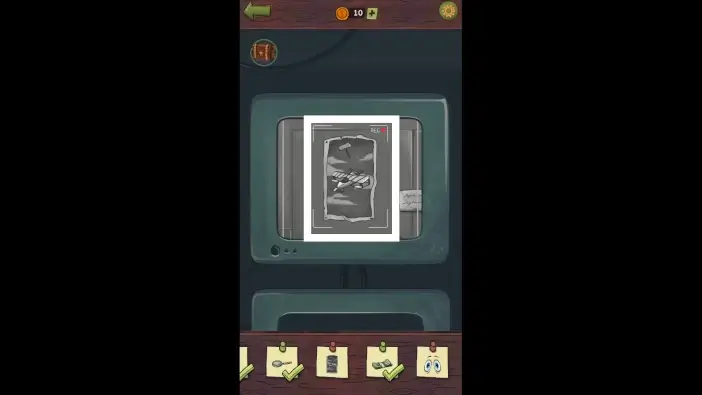
Use a scalpel to open the box. Take the paper from the box. It will be added to your inventory.
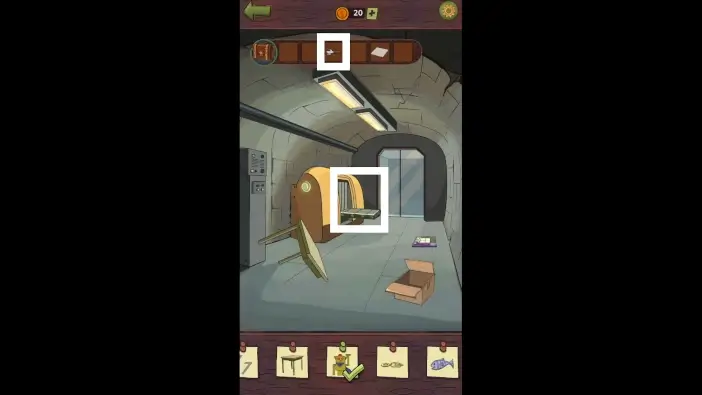
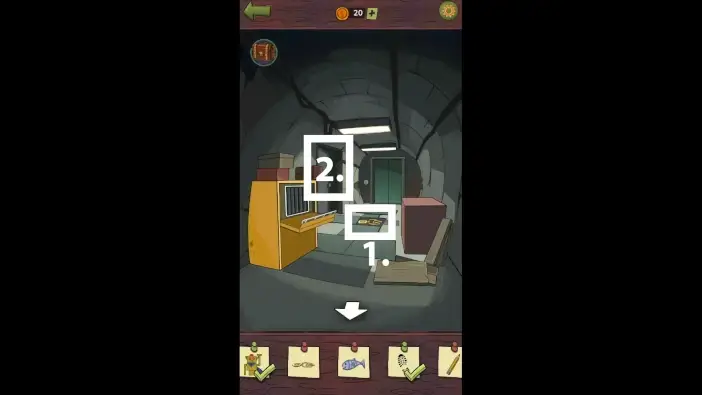
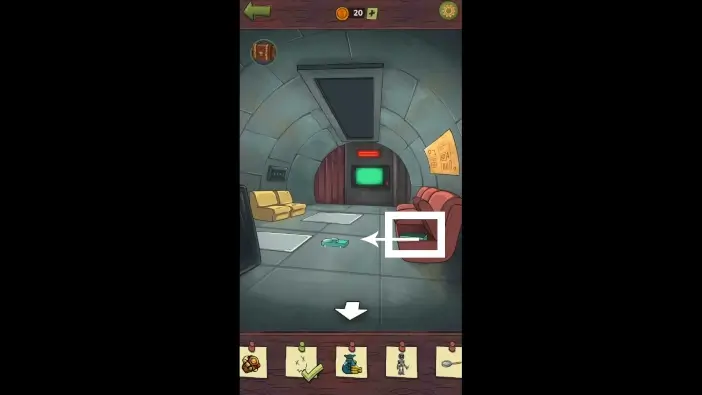
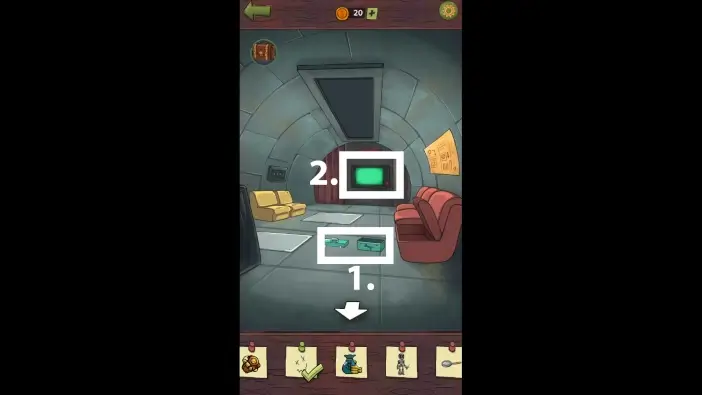
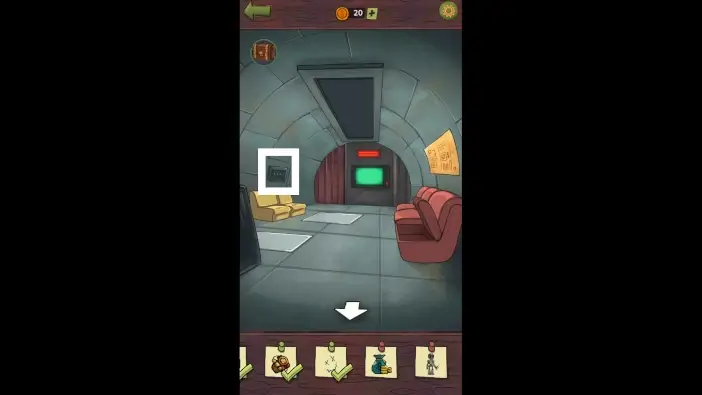
Place the can opener on the machine track. The door will open.
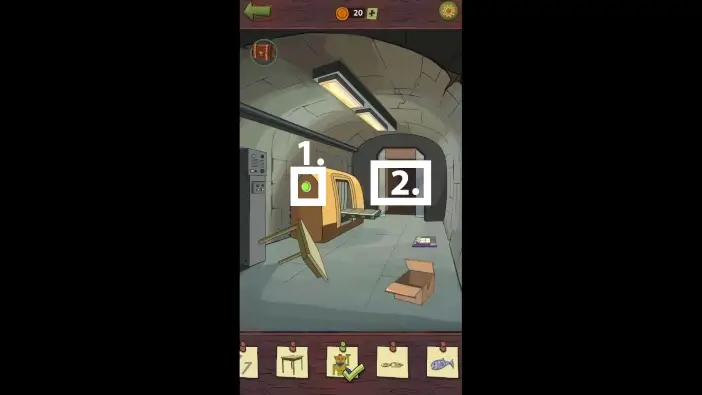
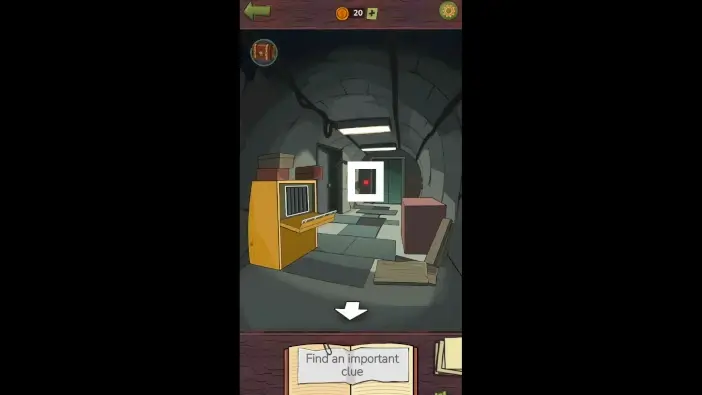
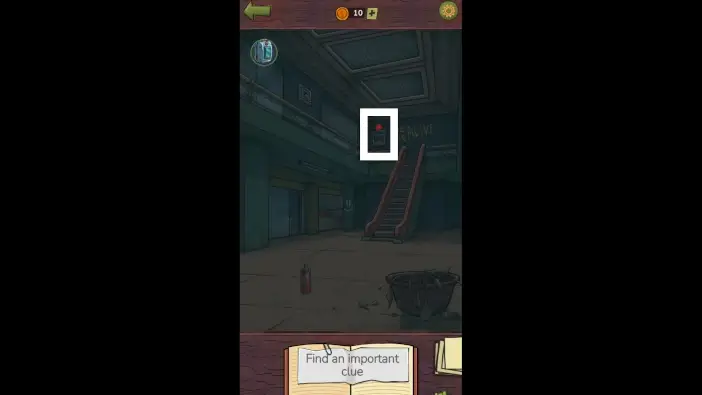
- Tap on the green signal on the machine.
- Go deeper into the bunker.
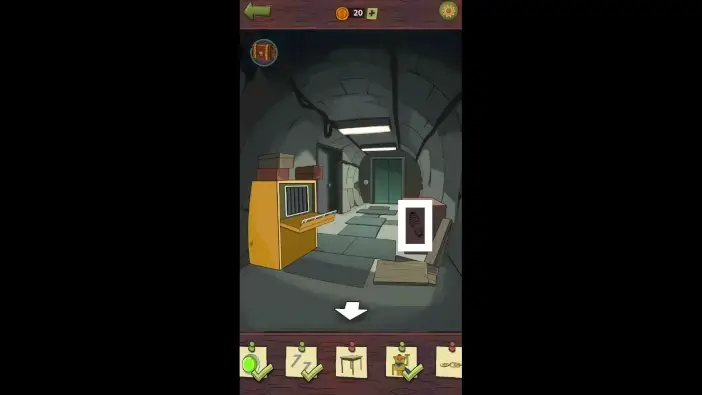
- Take the can opener.
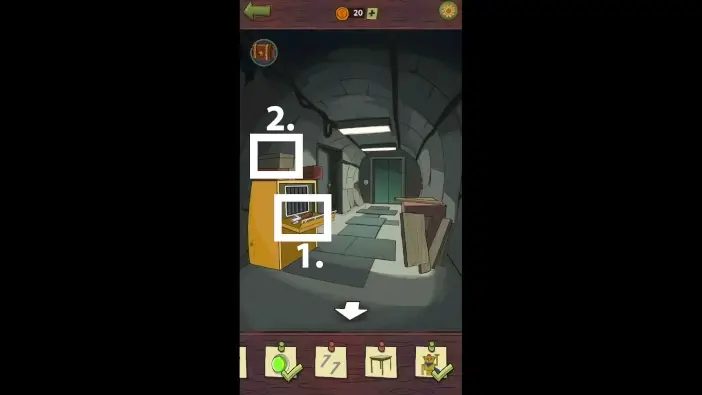
- Open the shoebox on the left, the one that contains the blue shoe.
Turn the blue shoe to see number 11. Tap on the number.
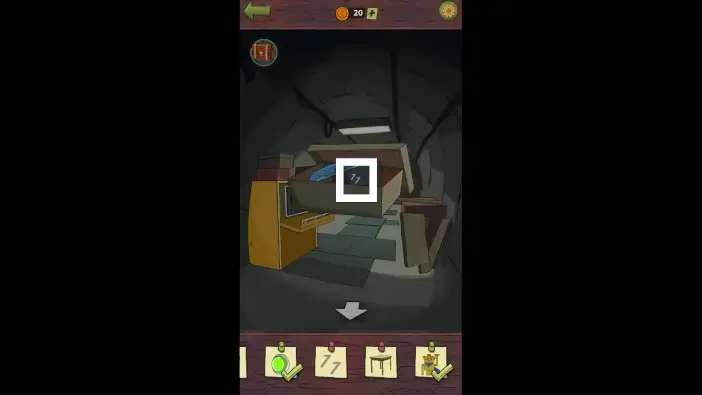
Pick up the table leg from the large box on the right. The table leg will be added to your inventory.
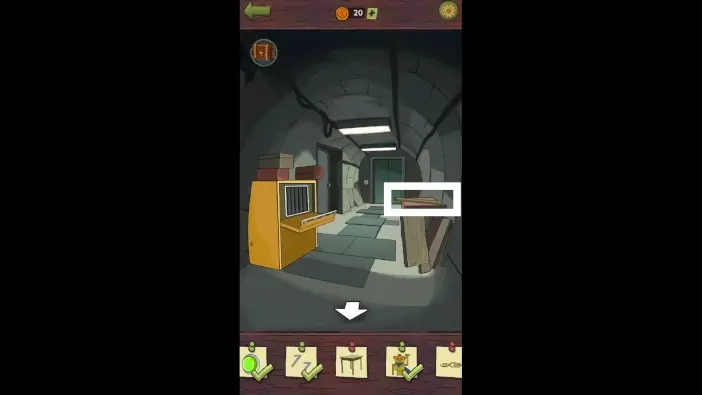
Remove the wooden boards on the right to see a footprint. Tap on it.
- Move the part of the floor to reveal a hidden compartment. Tap on the amulet inside.
- Enter the room on the left. It is a bunker’s warehouse.
Approach the typewriter.
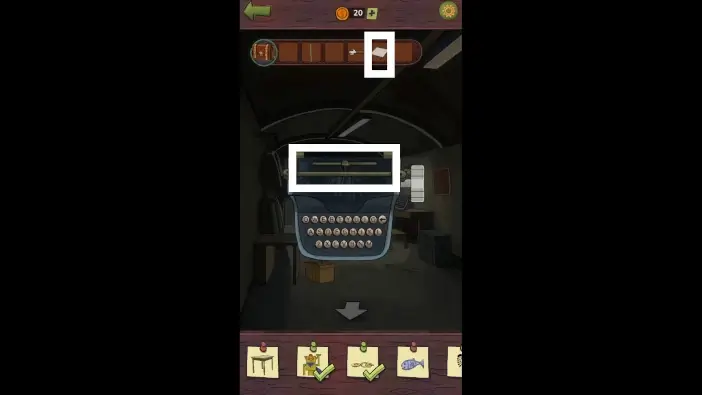
Place the paper from your inventory into the typewriter.
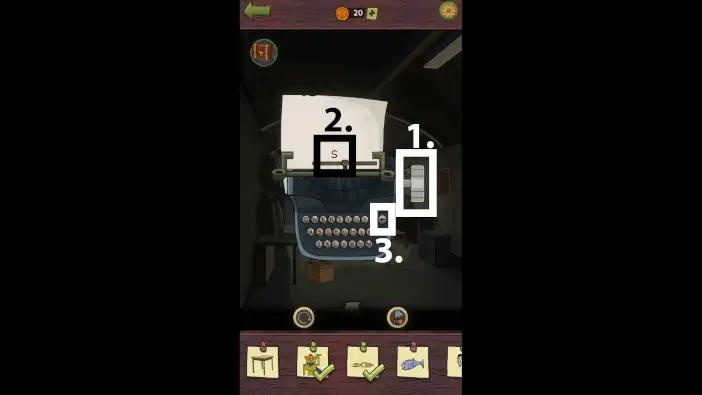
- Move the lever on the right to move the paper upwards.
- Type the “S” letter by tapping on the “S” key on the typewriter keyboard.
- Press the tabulator key on the typewriter keyboard to return the paper to the middle.
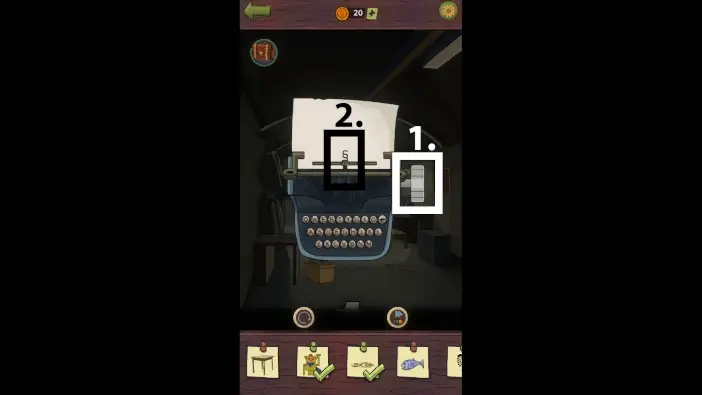
- Move the lever to raise the paper slightly.
- Type the “S” letter again using the typewriter’s keyboard, so that the upper end of the previous S letter and the lower end of the new S letter overlap each other. You will get the symbol you need. Tap on it.
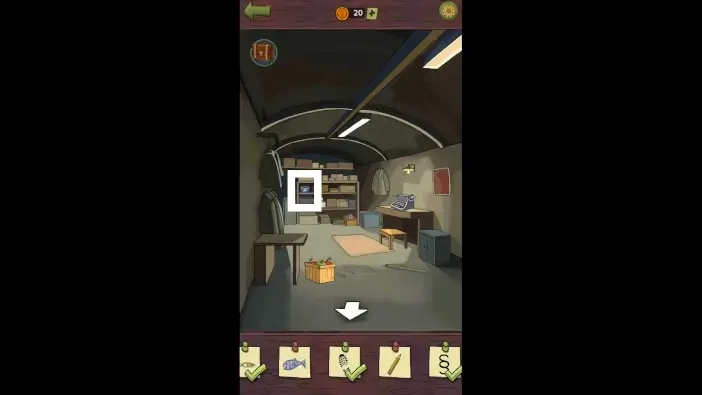
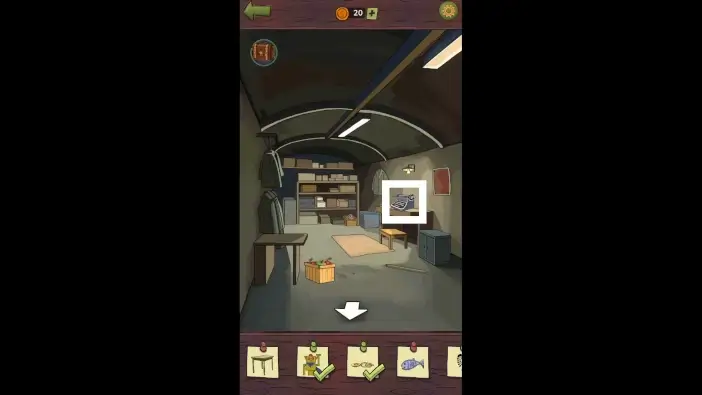
Move the box on the left to see a can of fish food. Take a closer look at the can.
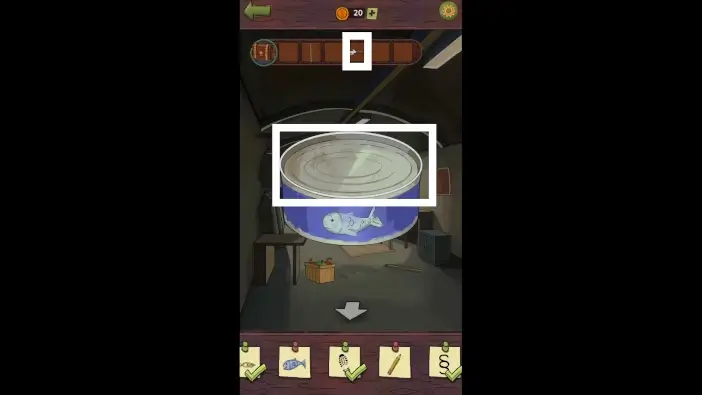
Use the can opener from your inventory to open the can. Tap on the fish inside.
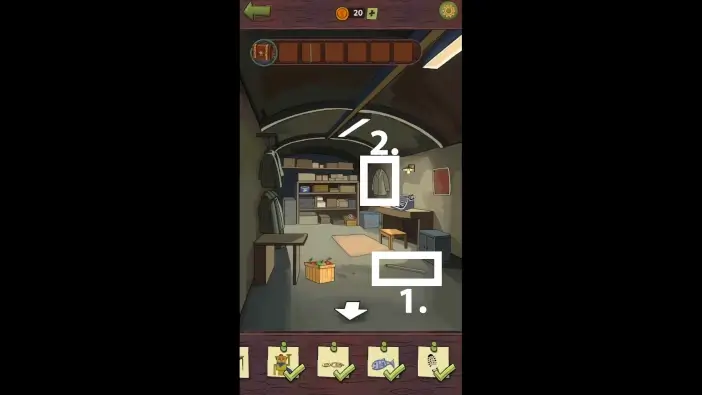
- Take the second table leg from the floor.
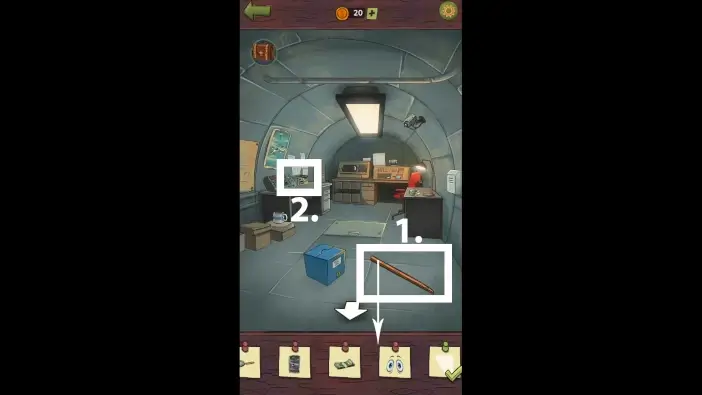
- Approach the coat on the right.
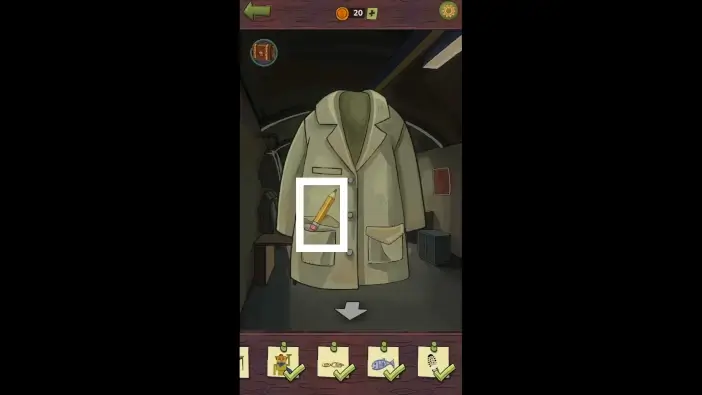
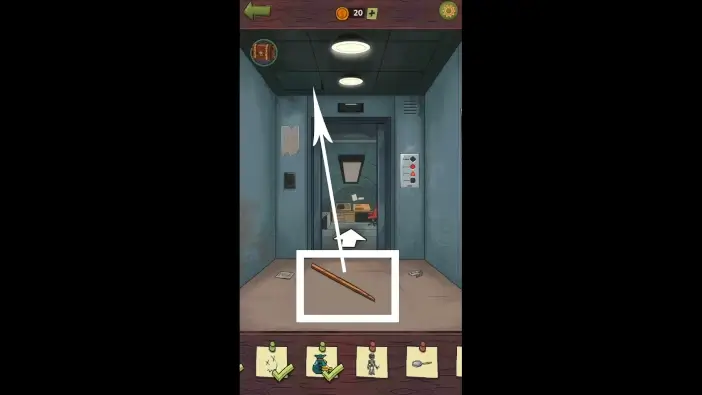
Pull out the pencil from the pocket to see it better, then tap on the pencil.
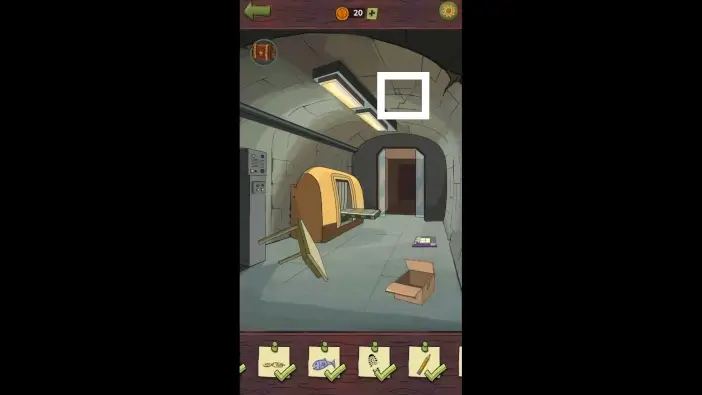
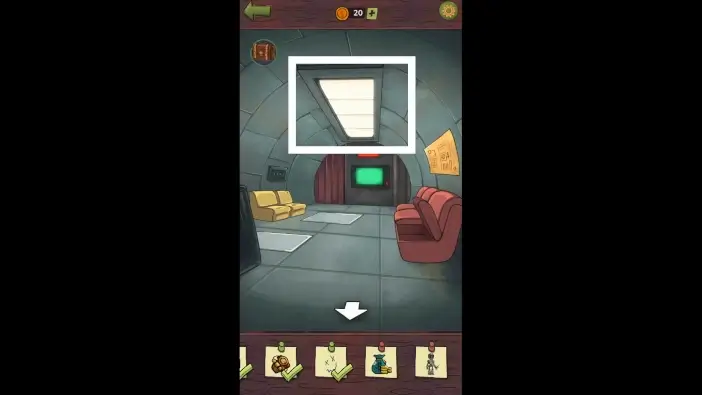
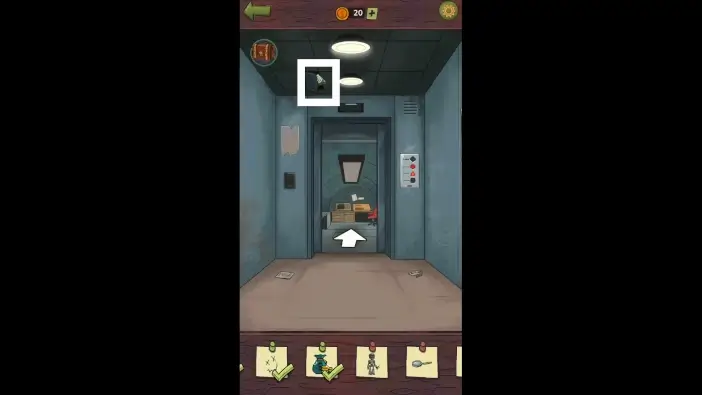
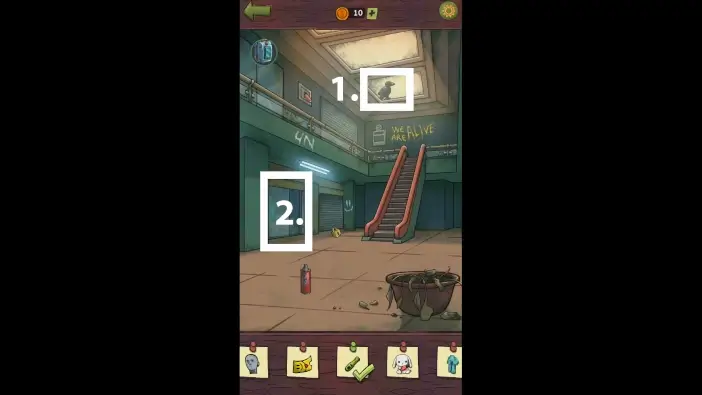
Return to the first area of the bunker. On the ceiling, there is an area where cracks form a shape of a triangle. Tap on the triangular surface on the ceiling.
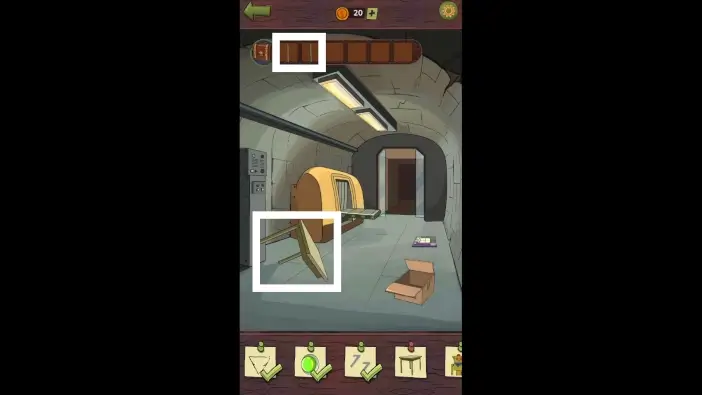
Attach the two table legs from your inventory to the table. Tap on the fixed table.
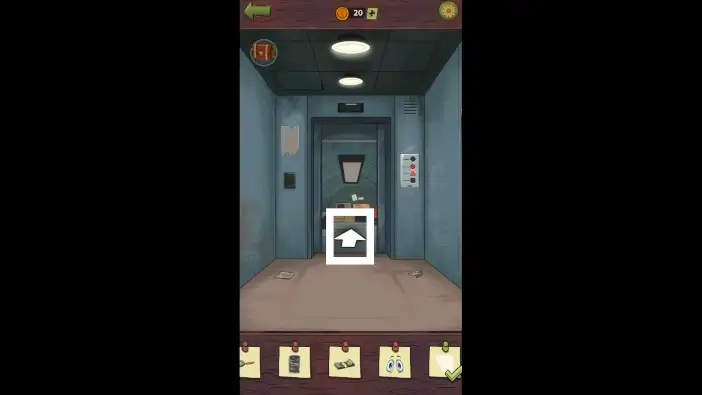
Once you find all the clues, go to the second corridor of the bunker and press the elevator button.
Bunker – Part 2
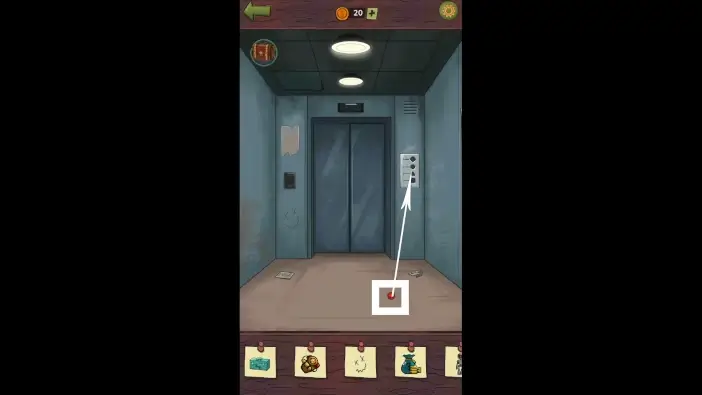
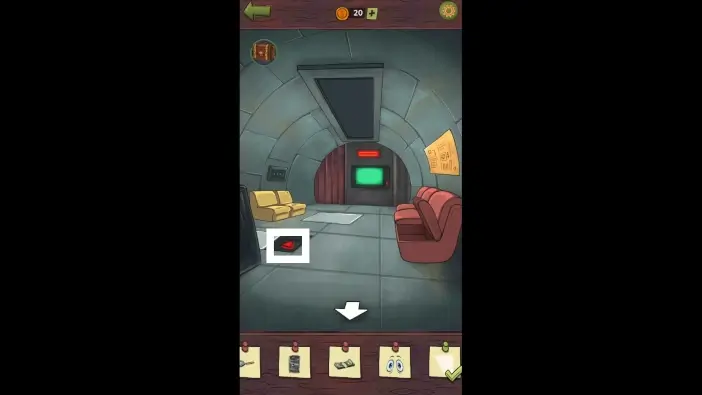
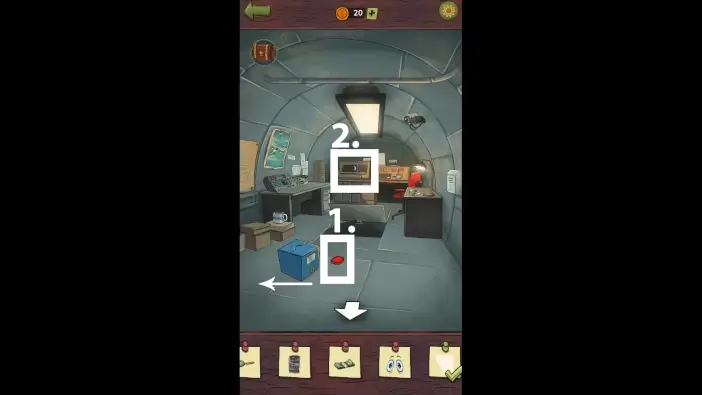
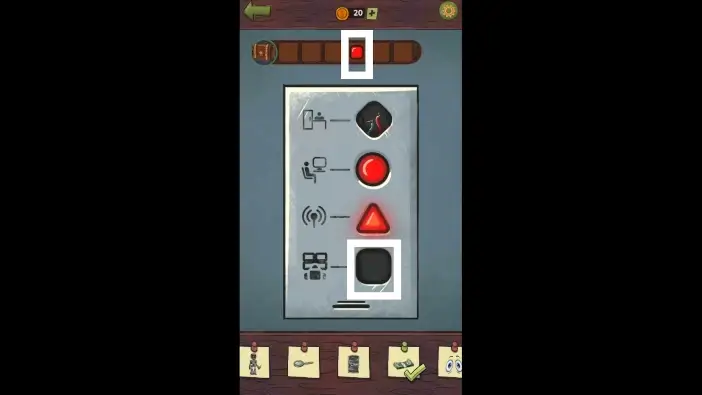
Place the red button on the floor in its place among the floor buttons. Approach the buttons.
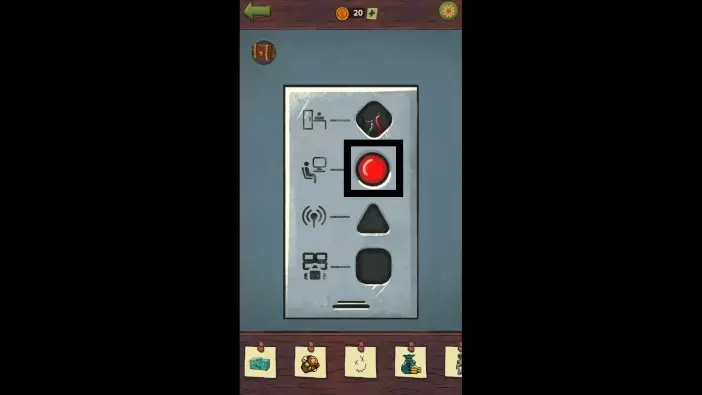
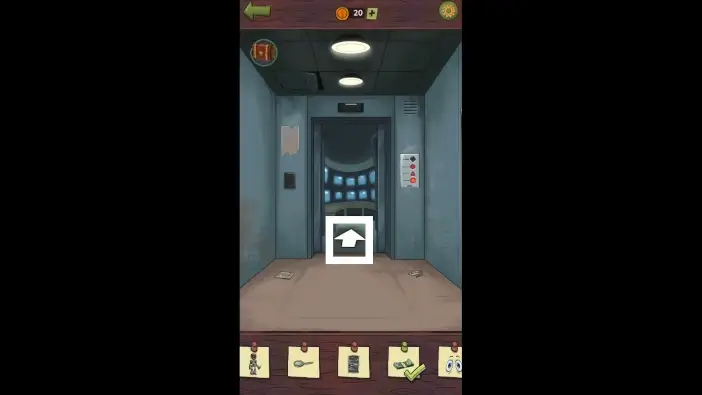
Press the button you just attached to access the living room.
- While still in the elevator, tap on the drawing on the left wall.
- Enter the living room.
Remove the seat on the right, take out the empty toolbox, and place it on the ground.
- Place the toolbox lid that was already on the ground on the toolbox. Tap on the toolbox.
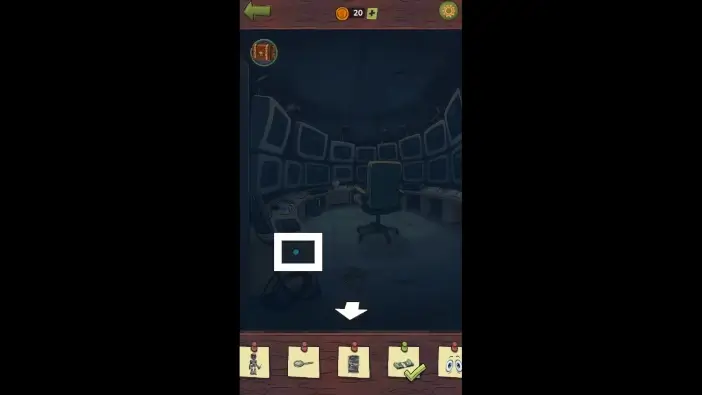
- Approach the screen.

Wait for the scientist Robin to cough to see his wristwatch. Tap on it before Robin moves his hand. If you miss the opportunity, wait for another cough.
Approach the buttons on the left.
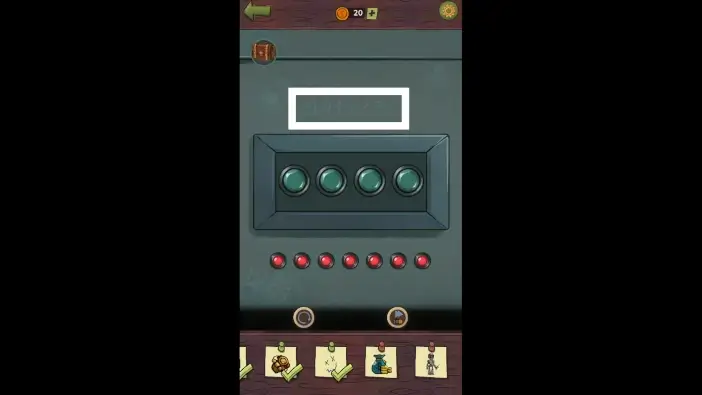
Read the numbers above the buttons. The numbers represent the sequence which buttons to press in which order.
Once you press the buttons in the correct order, the lights on the ceiling will turn on. Tap on the lights.
Open the lid from the floor on the left and take the triangle button. It will be added to your inventory.
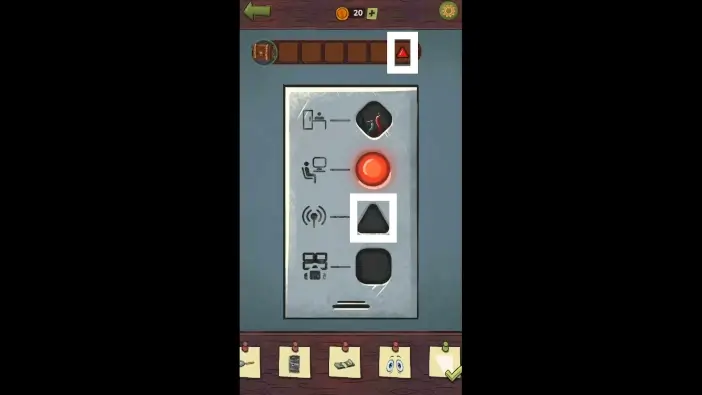
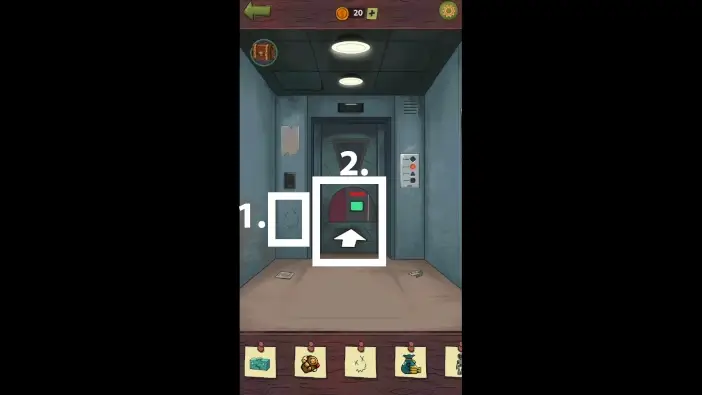
Return to the elevator and place the triangle button in its place. Press it to go to the radio room.
Enter the radio room.
- Move the stick towards the elevator.
- Approach the radio on the left.
- Change the frequency to 240MHz, as Mike suggested.
- Turn on the radio for Mike to contact Lumen.
- After the conversation, move the box on the ground to reveal the next elevator button. Pick it up to have it in your inventory.
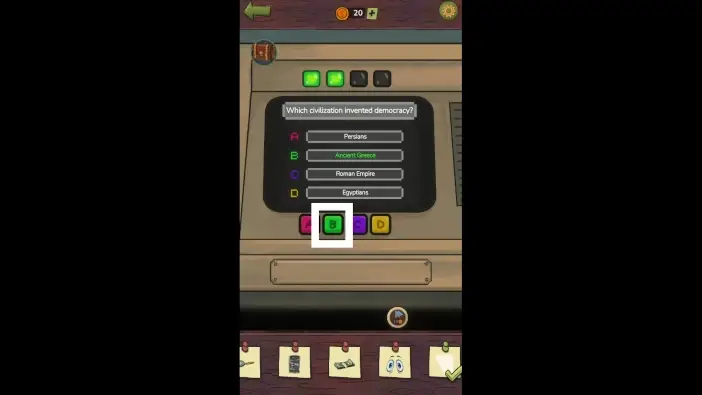
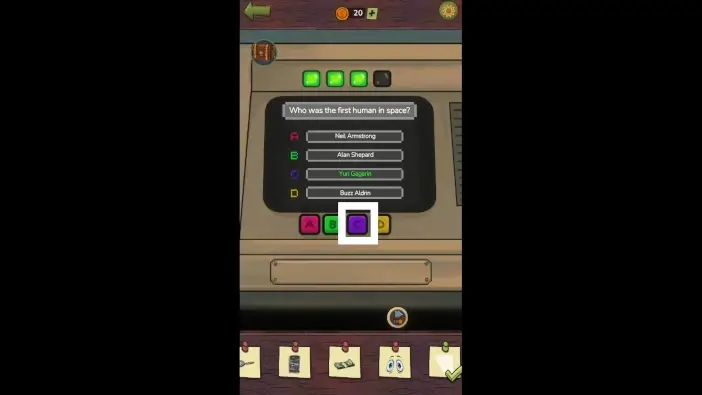
- Approach the quiz machine.
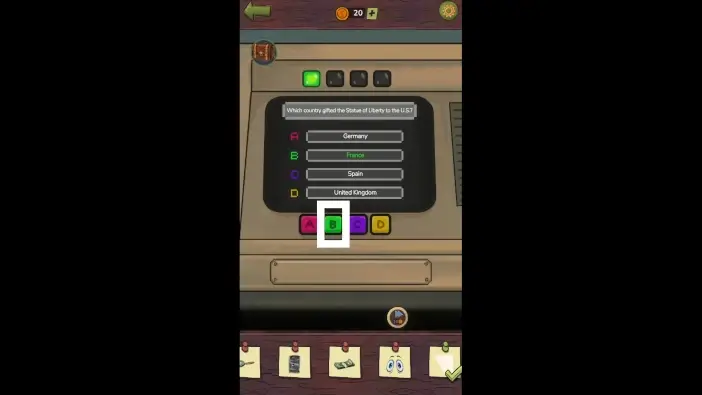
You will have four random quiz questions to answer. Pick one of the four possible answers. Some of the correct answers are in the pictures in this guide, but you might get some other random questions.

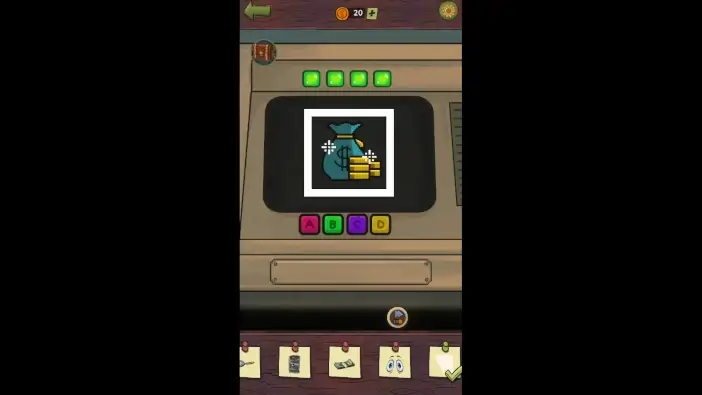
Once you answer all the questions correctly, you will get an image on the screen. Tap on it.
Return to the elevator and use the stick you previously moved to open the part of the ceiling.
There will be money behind the ceiling. Move it a little bit so it drops to the ground. Once on the ground, tap on the money.
Place the square button in the elevator and press it to go to the control room.
Enter the control room.
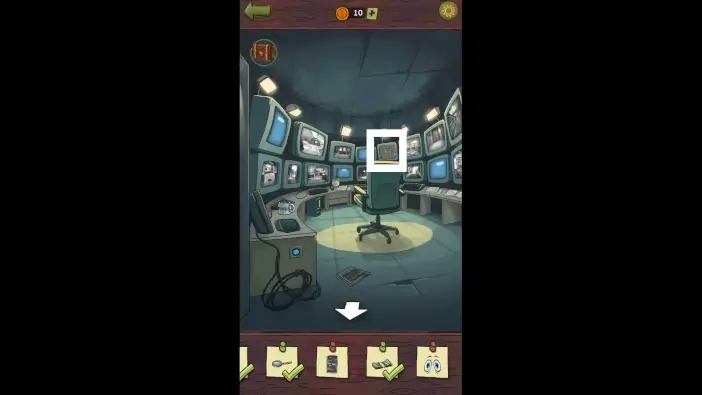
Press the button on the left to turn on the lights.
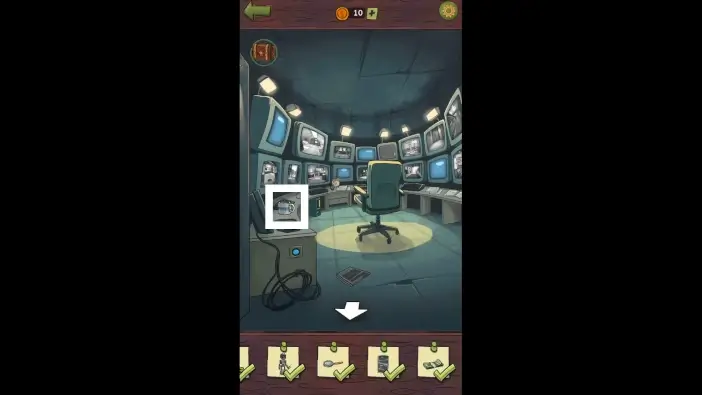
Move the chair and tap on the magnifier on the chair seat.
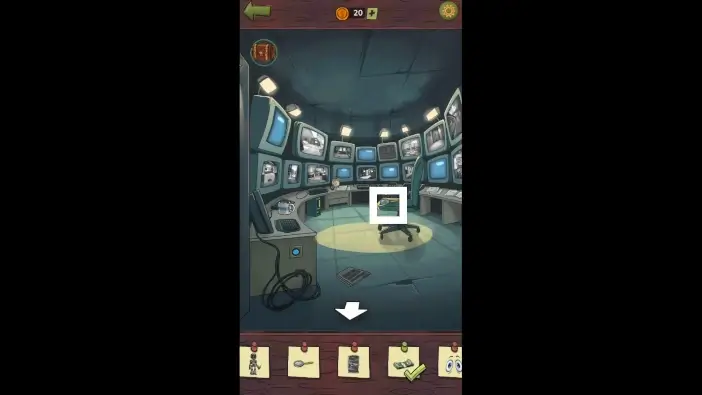
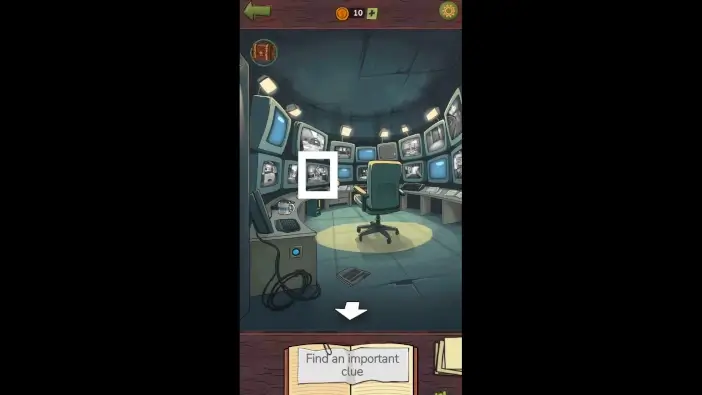
Move the chair to its original position so you can see the screen on the right. Approach it.

On the monitor, you will see a theater (one of the previous levels of the game), and you will see Lumen. Tap on the Lumen.
- Return to the radio room. Move the camera to look at the airplane poster.
- Use the tape from the right table to fix the camera.
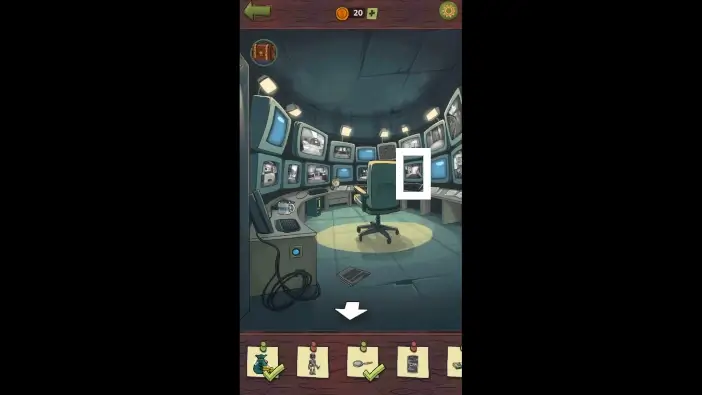
Return to the control room and look at one of the central monitors.
Tap on the airplane poster.
Take a closer look at the mug on the left side of the room.
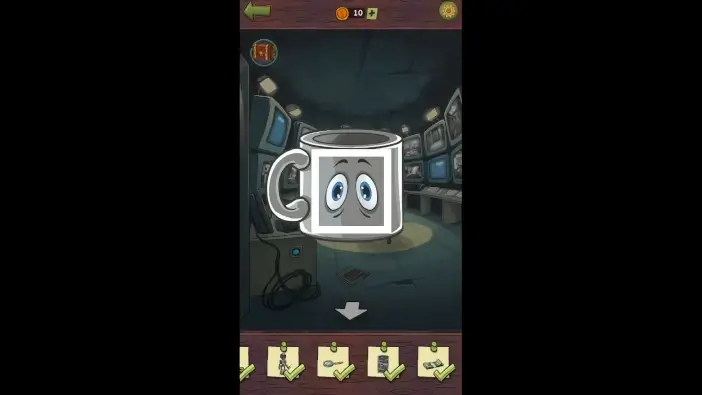
Turn the mug around and tap on the eyes.
Once you find all the clues, check the left monitor.
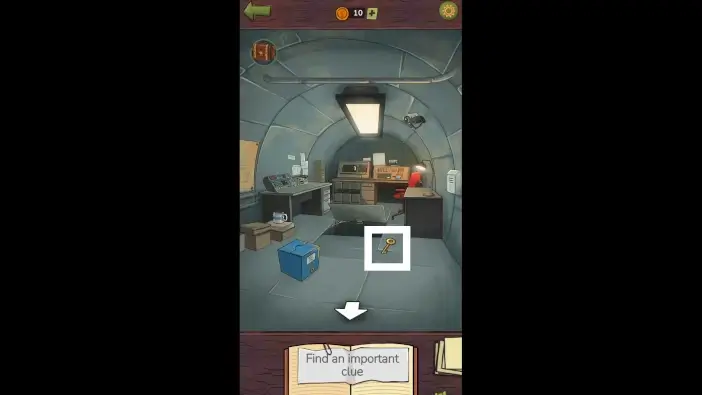
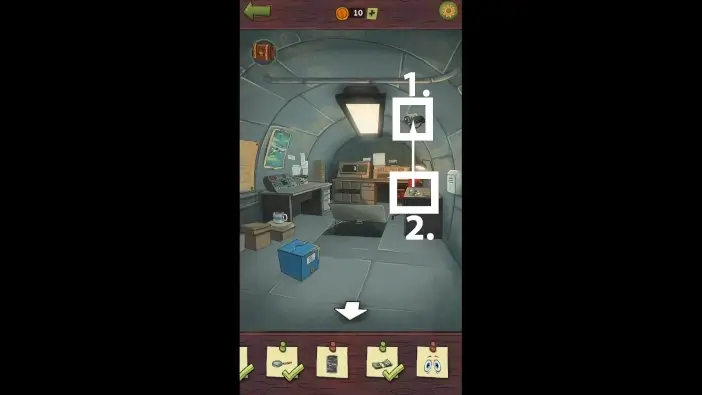
Go to the radio room and pick up the key from the floor.
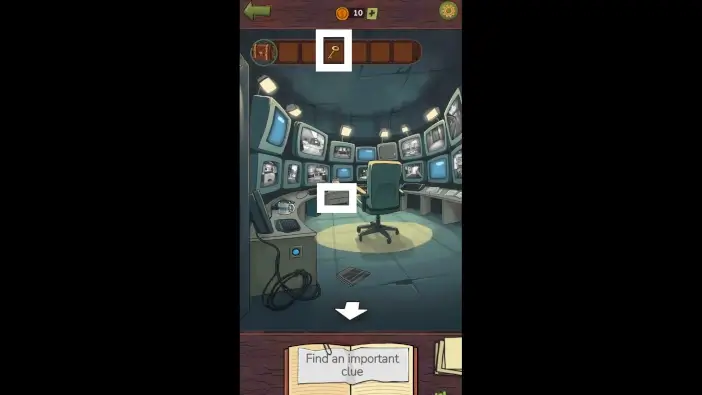
Return to the monitor room and use the key to unlock the drawer.
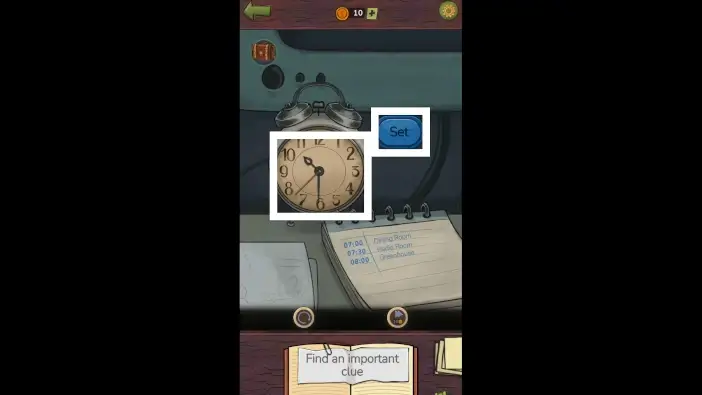
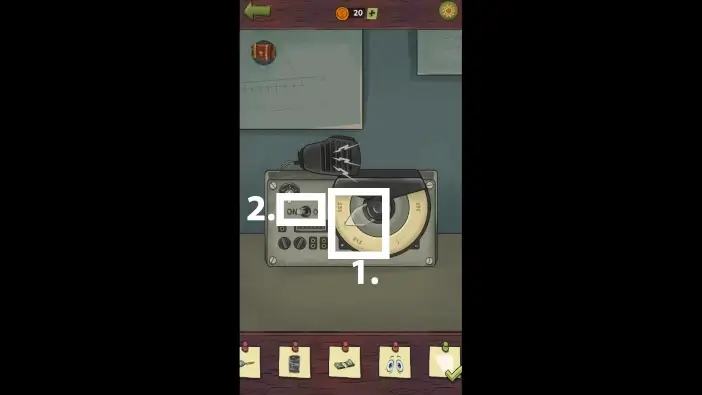
Check the notes to see Robin’s patrol schedule in the bunker. He changes rooms every half hour. When you start looking at the schedule, it is already 10:00 hours. Following the template of scheduled patrols, next time he will visit the radio room at 10:30. Set the alarm clock to 10:30 and press the “Set” button.
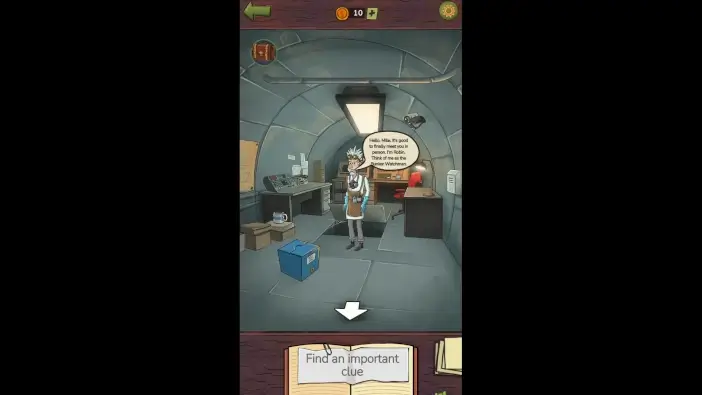
Go to the radio room to meet Robin.
Abandoned Mall
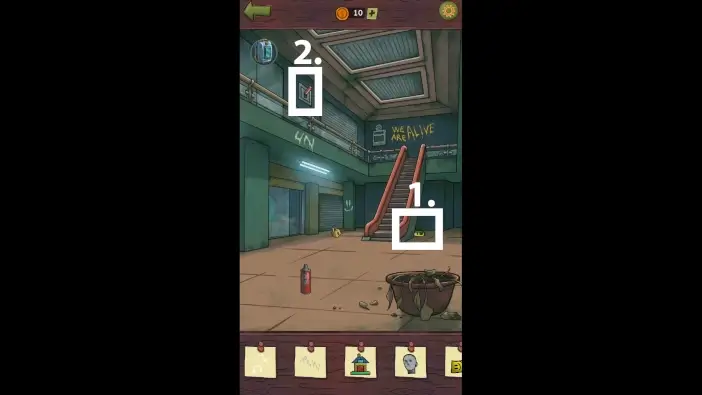
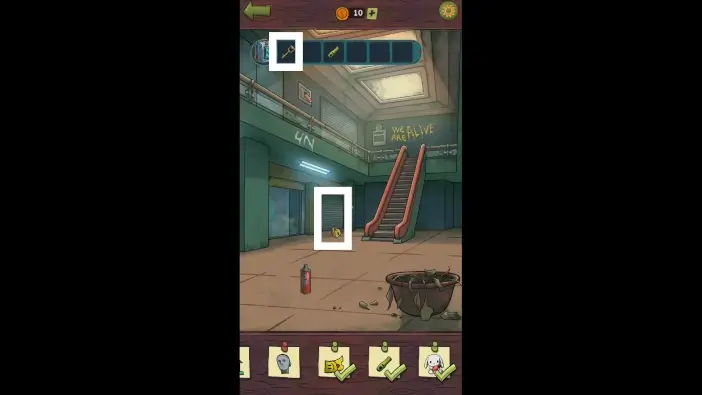
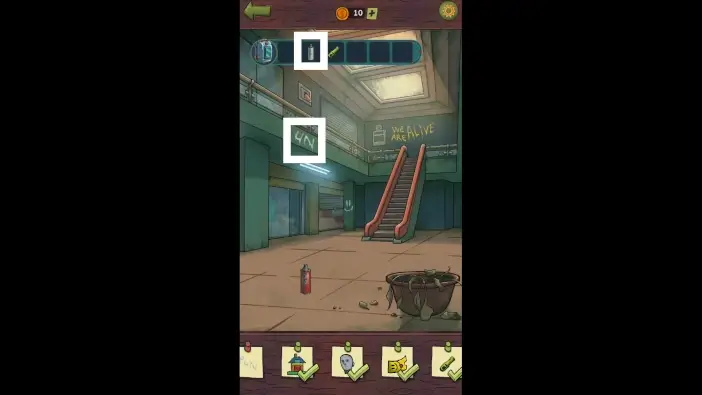
- Move the screwdriver handle behind the staircase to see it better, then pick it up. It will be added to your inventory.
- Press the switch to open the ceiling windows.
- The bird will appear at the ceiling window. Tap on the bird.
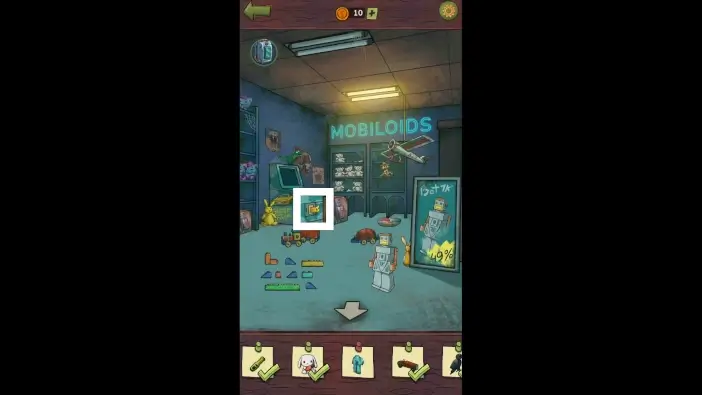
- Go to the toy store on the left.
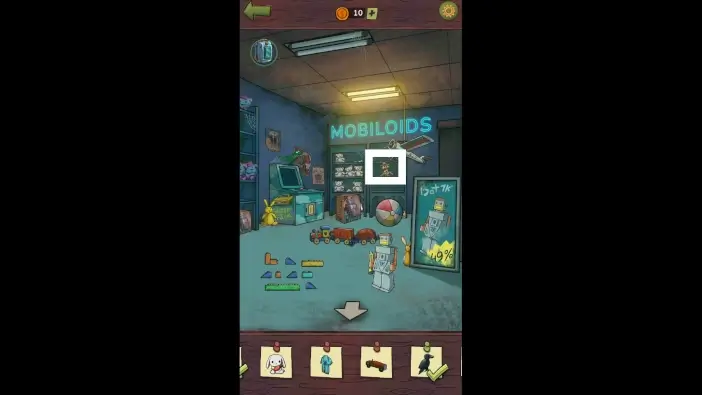
Approach the Sheriff doll.
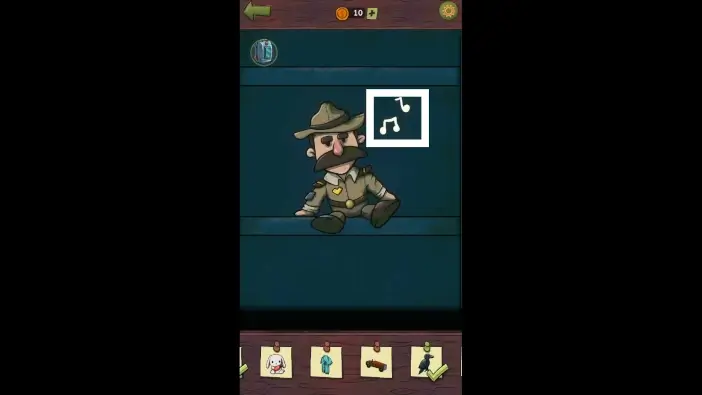
Tap on the heart badge to activate the sheriff doll. It will start singing. Tap on the notes.
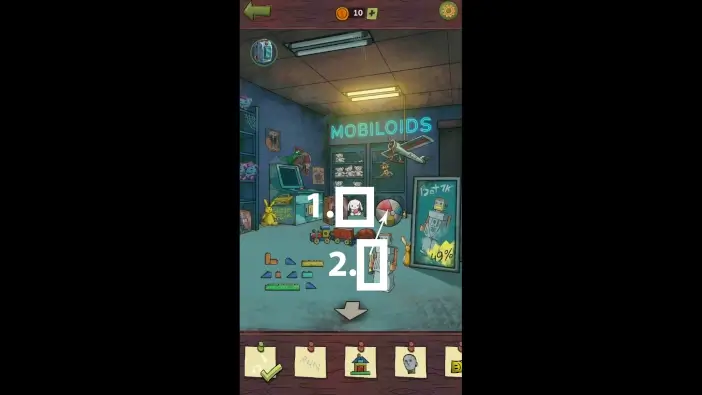
- Move the box to reveal a rabbit plushie. Tap on the plushie.
- Use the scalpel that the robot is holding to deflate the ball.
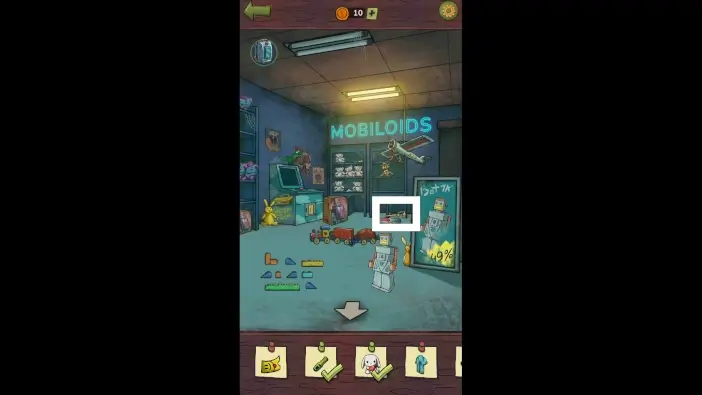
Once you deflate the ball, you can see a key that was behind it. Grab the key. It will be added to your library.
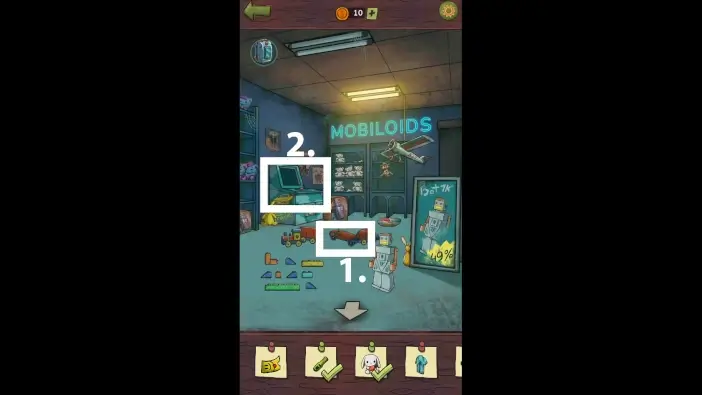
- Move the toys in the middle to see a toy car. Tap on it.
- Approach the arcade game machine.
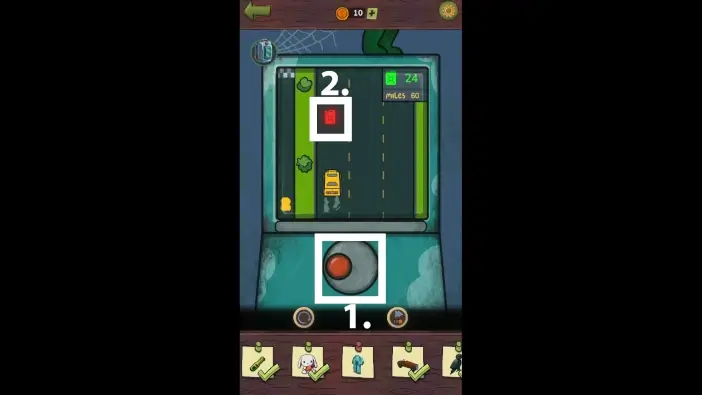
- Hold the red button to give gas to your car (you must hold the button until the end of the game). Move the red button in various directions to change the lane. Avoid hitting other vehicles because you need to start the game all over again if you do so.
- Collect fuel containers. Without them, you will run out of fuel before reaching the end of the game, and you’ll need to start over.
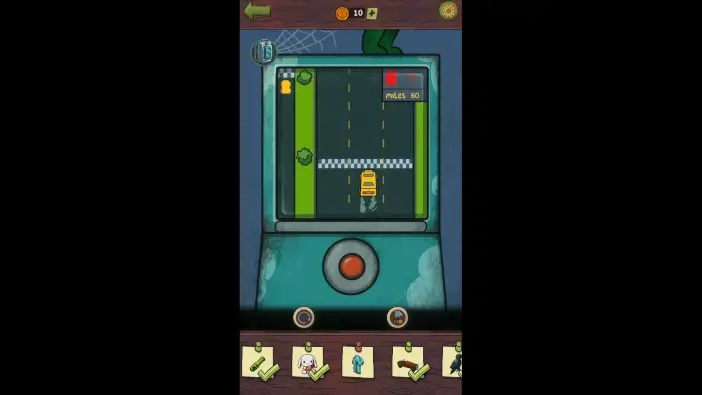
Reach the end to win the game.
Once you win the car game, the game machine will print you a ticket. Tap on it.
Go to the hallway of the mall and use the key you got from the toy store to unlock another room. Go to the dressing room once you unlock it.
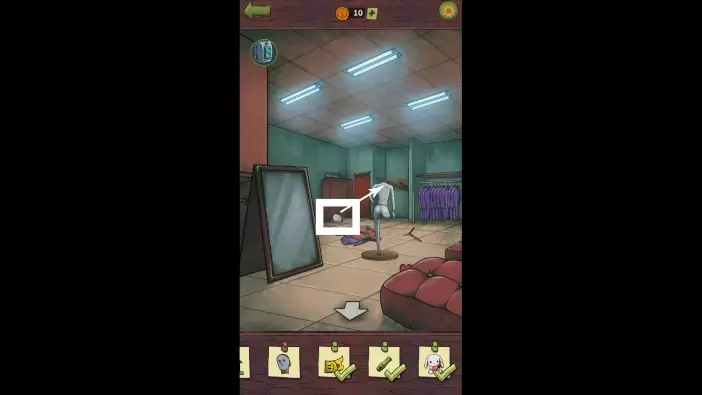
Attach the mannequin’s head to the mannequin.
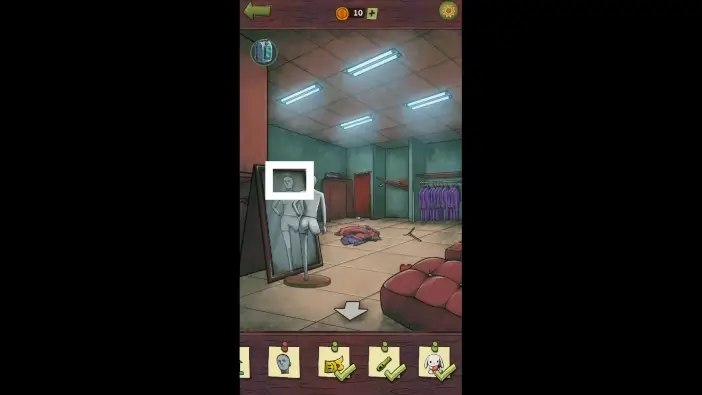
Move the mannequin to the left to position it in front of the mirror. Tap on the mannequin’s head in the mirror’s reflection.
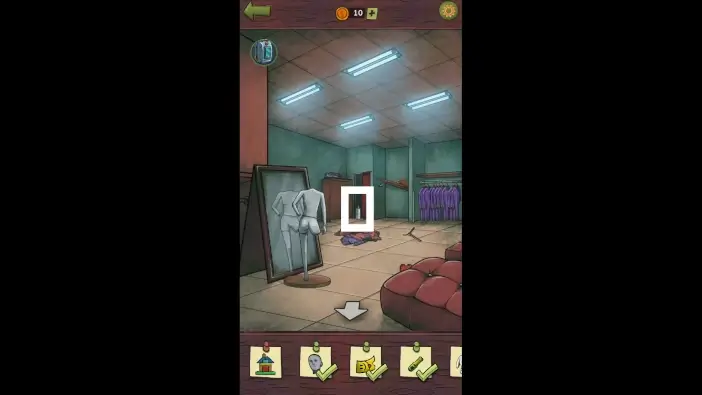
Remove the red curtain and take the spray paint. It will be added to your inventory.
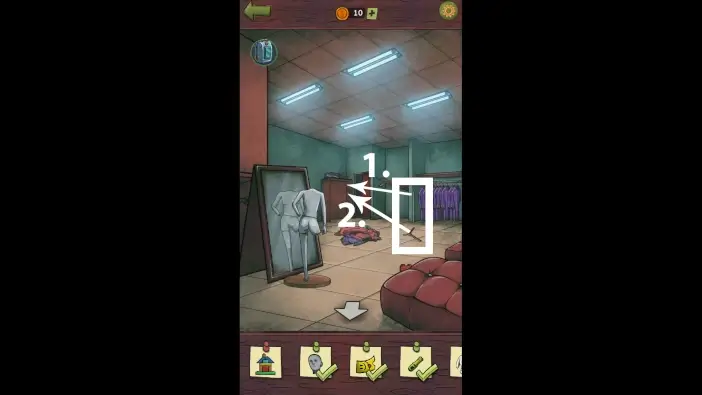
- Place the closet rod into the wardrobe.
- Hang the hanger on the closet rod.
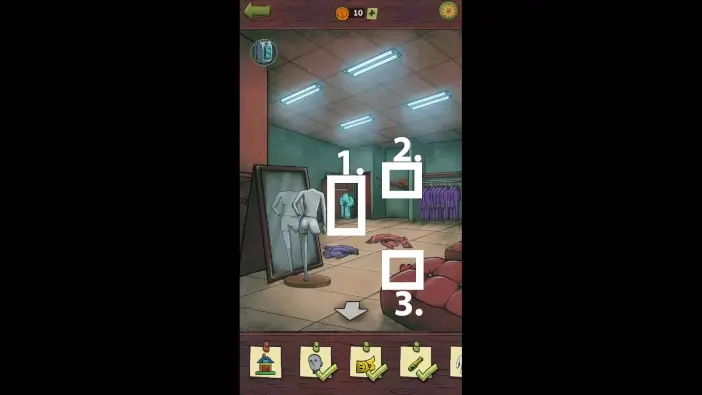
- Move the shirts on the ground until you find a t-shirt with a palm tree pattern. Hang that shirt on the hanger in the wardrobe. Once you hang the t-shirt, tap on it.
- Tap on the wallet on the board.
- There is a building brick next to the sofa. Move it to the left to reveal it fully, then pick it up. It will be added to your library.
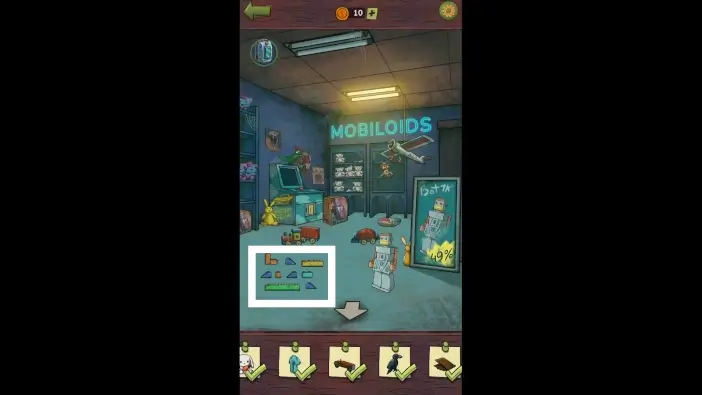
In the toy store, approach the building bricks on the floor.
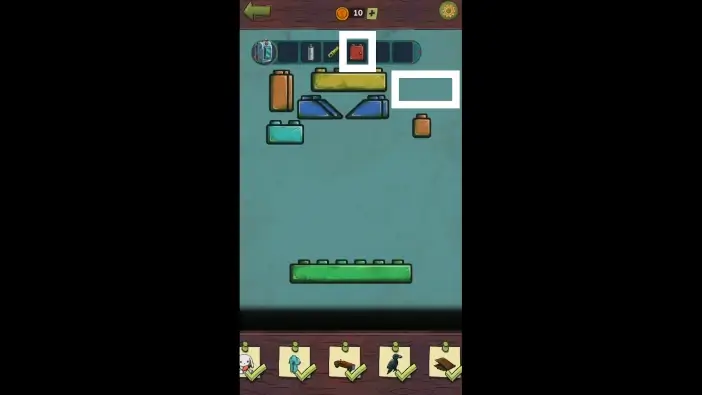
Place the building brick you found earlier to start the puzzle challenge.
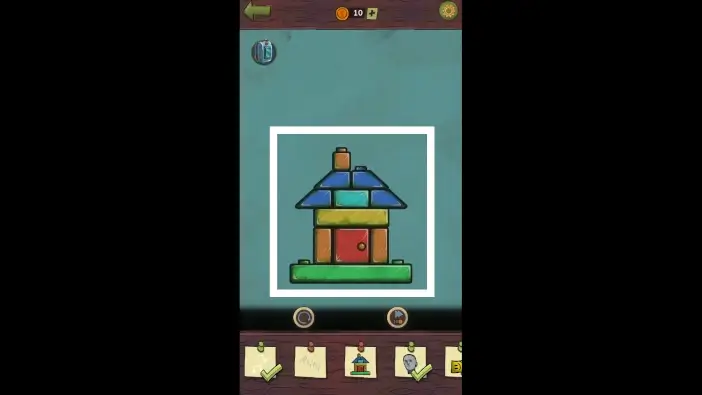
Attach the building bricks to form a shape of the house like in the picture above. Once you do it, tap on the house.
In the mall’s hallway, use the spray paint to leave an “R” letter on the wall. Tap on the “RUN” word.
Once you find all the clues, the electricity will be gone, trapping Lumen. Approach the electrical box.
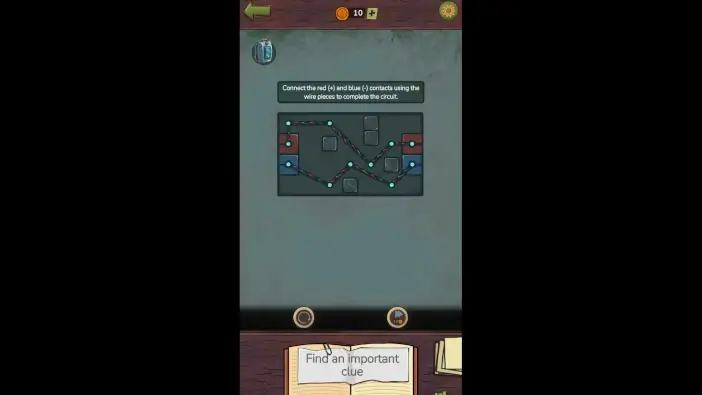
Use wires to connect the red contacts with the blue contacts.
This will mark the end of Part 2 of our guide for Chapter 2 of the Find Joe: Lumen.
Thank you for reading!