Edge of Reality: Lost Secrets of The Forest | Main Chapter Part 6
Intro
Welcome to our walkthrough for Part 6 of the Main Chapter for the “Edge of Reality: Lost Secrets of the Forest” from “Friendly Fox Games”. Help biologist Dr. Amanda solve the mysterious events in the forest.
Walkthrough
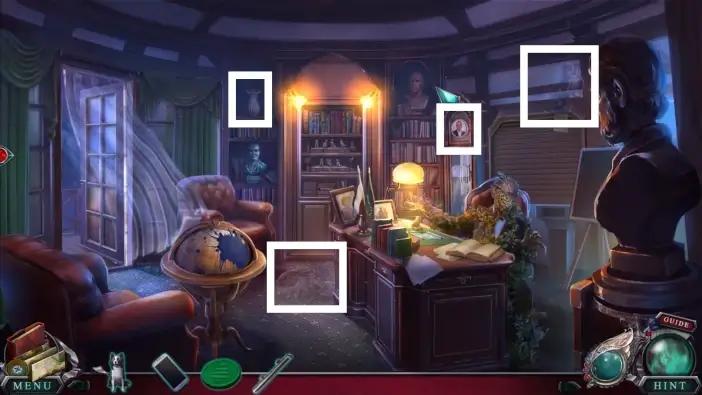
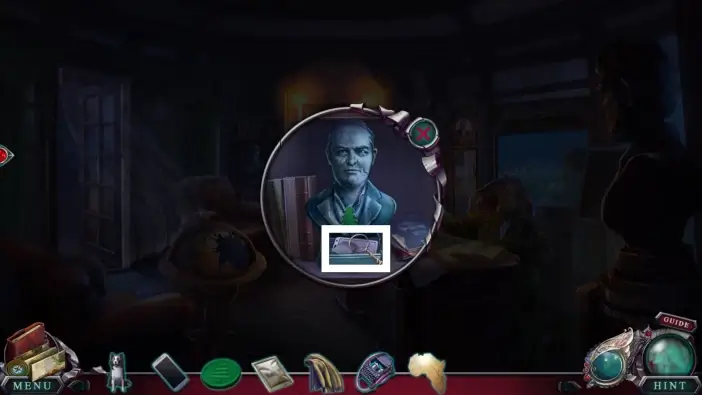
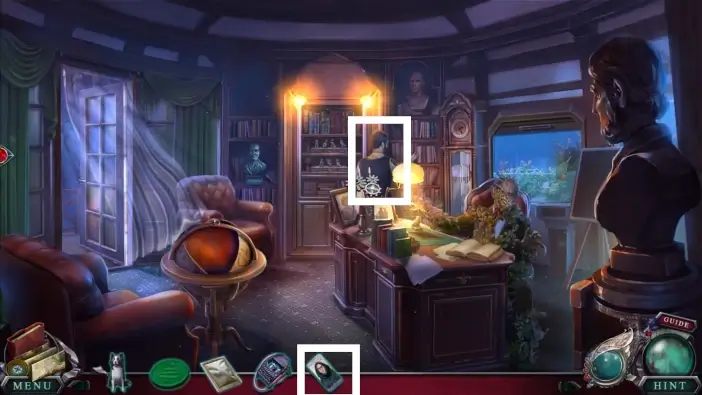
Once you enter the director’s office, find all morphing objects and animals. Their locations are marked in the picture above.
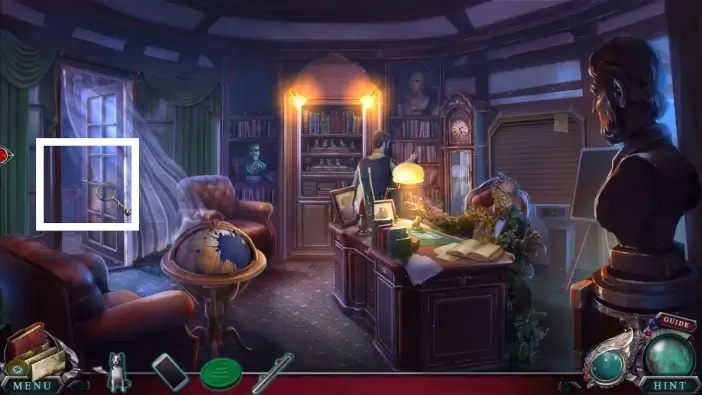
Go to the balcony on the left.
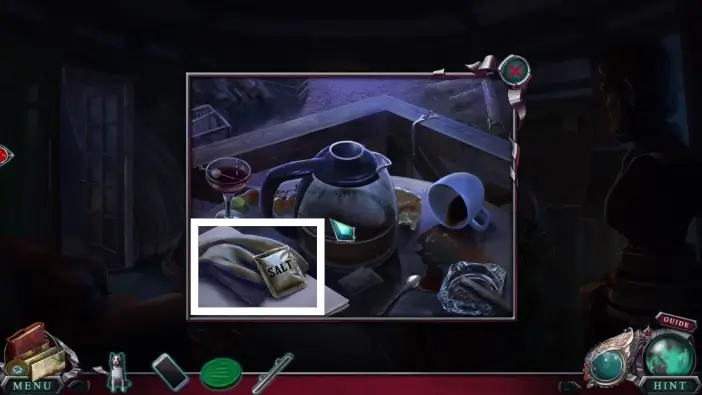
Take the salt packet and the cloth from the table on the left. You will use a cloth to remove the ink stain on the globe, and you will use the salt packet to create the “weed killer” potion much later.
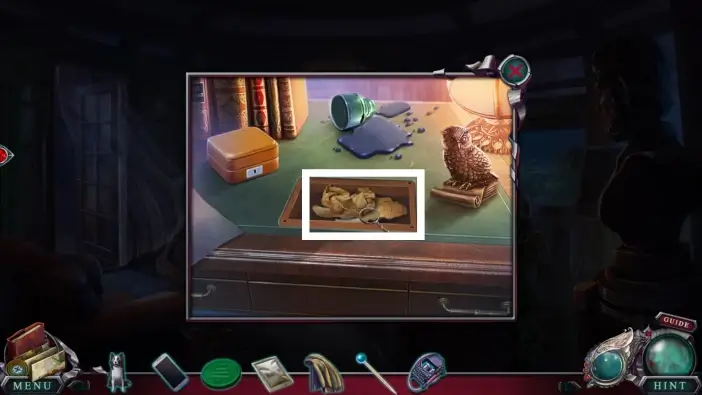
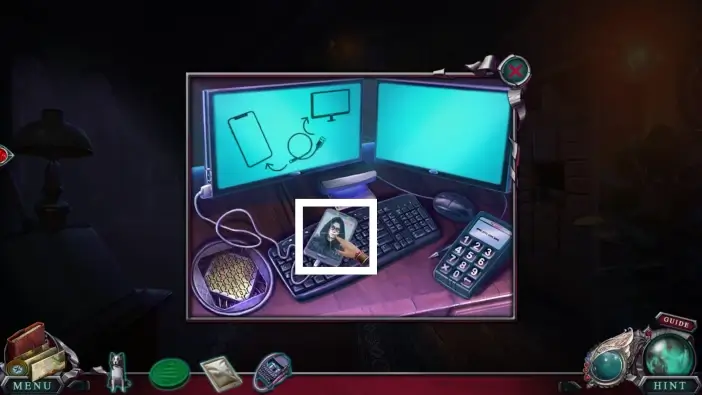
Return to the office and approach the closed aquarium.
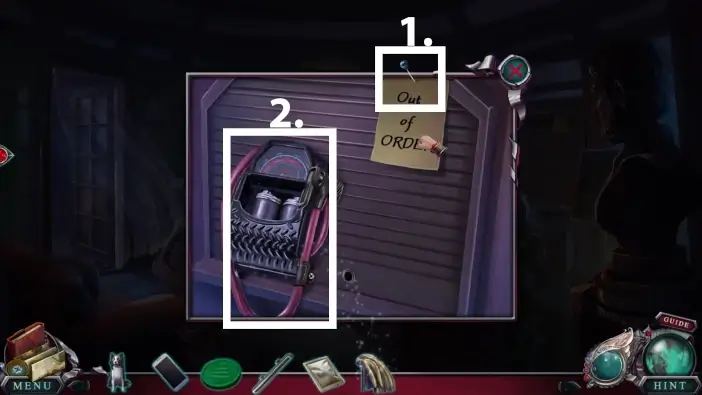
- Remove the note, and the pin will be added to your inventory. You will use the pin to unlock the box on the director’s desk.
- Take the pump. You’ll need it to pump up the tire of the sheriff’s car.
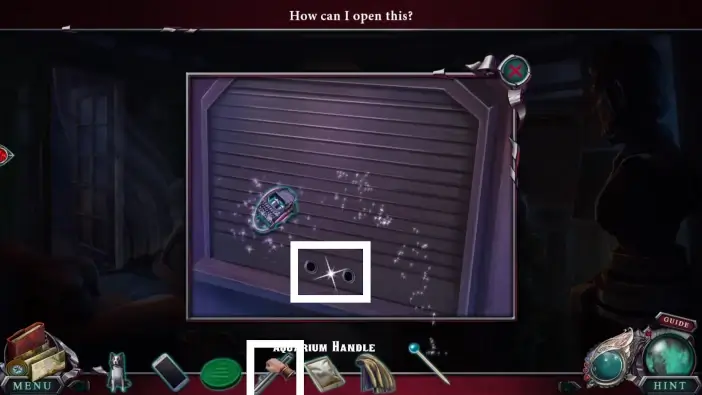
Attach the aquarium handle to the shutter and raise the shutter of the aquarium. Click on the aquarium to start the next mini-game.
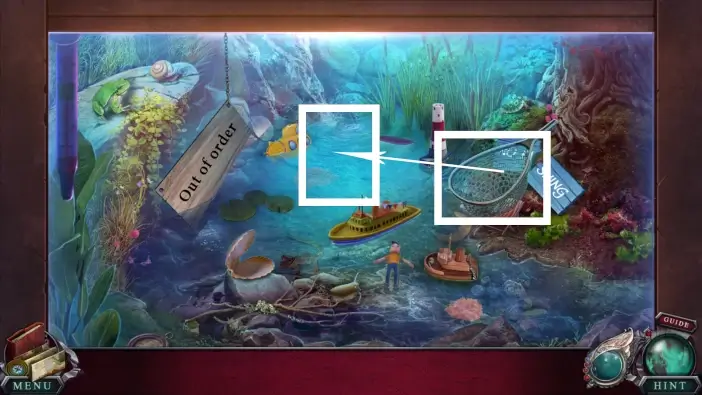
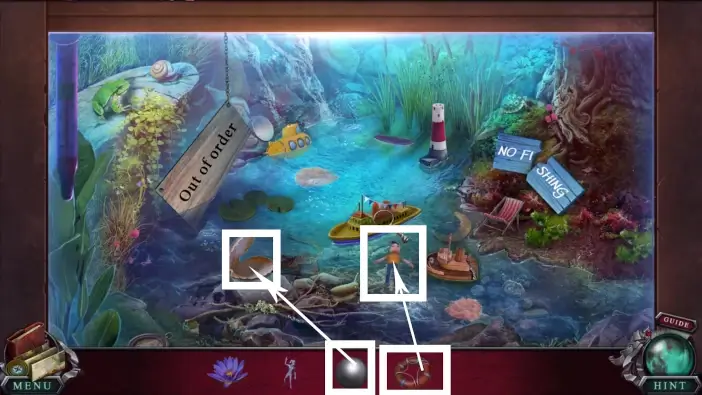
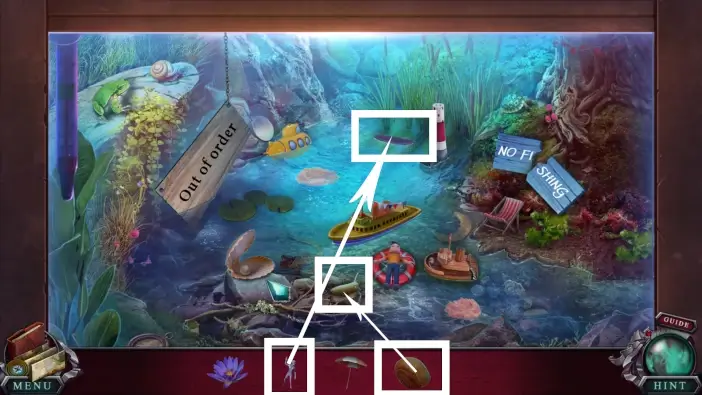
Move the net towards the water.
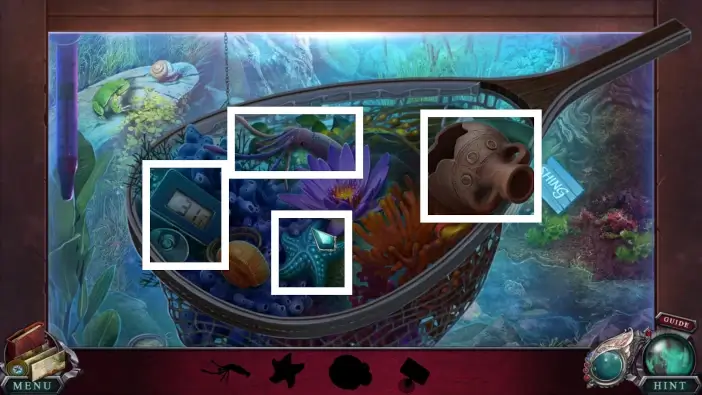
Click on the objects in the net marked in the picture above. After you find all objects, move the net towards water again and find the objects that are marked in the following pictures.
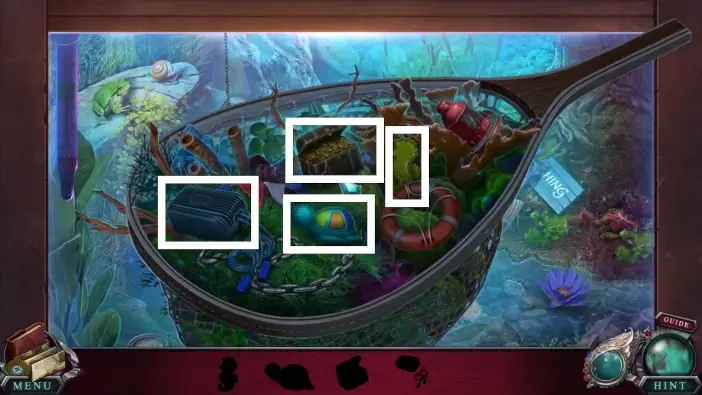
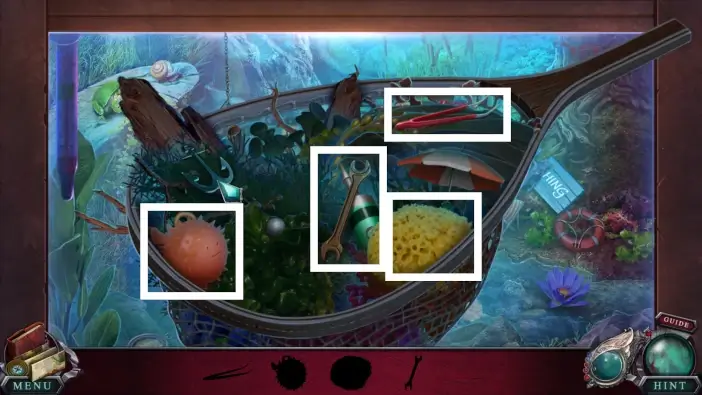
Once you find all the items, the wrench will be added to your inventory.
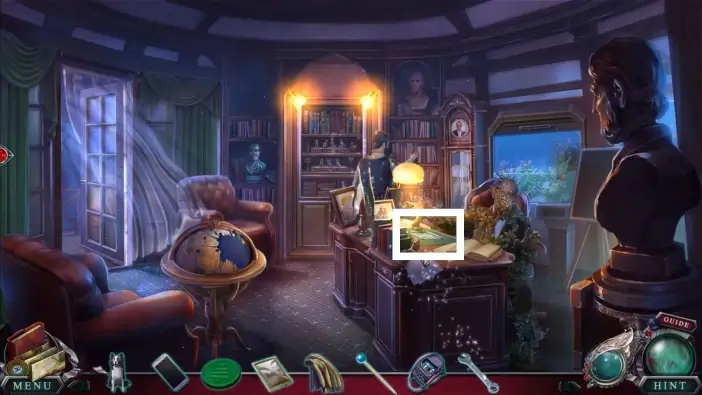
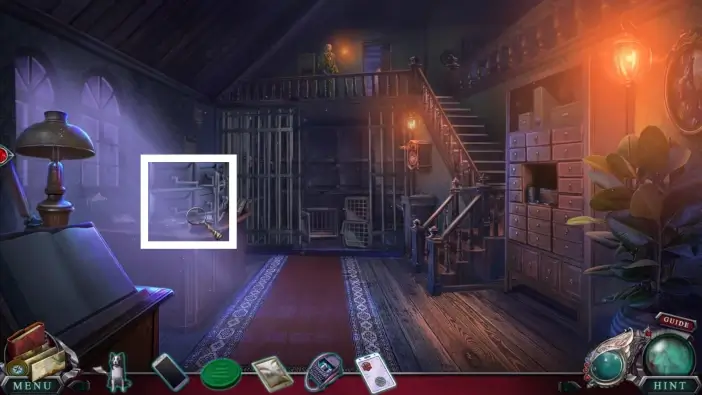
Approach the director’s desk.
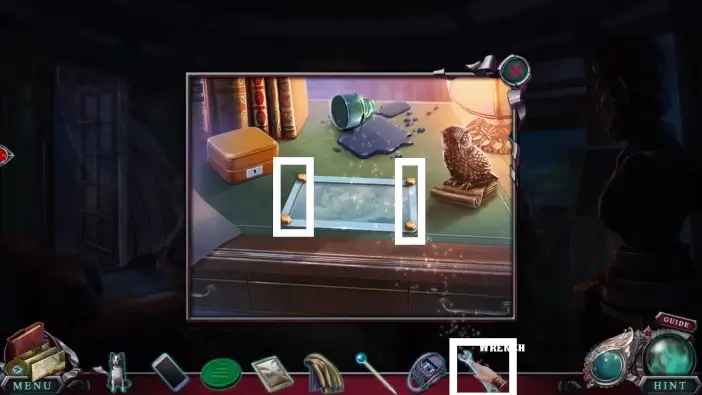
Use the wrench you just acquired to open the compartment on the desk.
Read the note and take the Africa piece of the globe. You’ll need to return it to the globe.
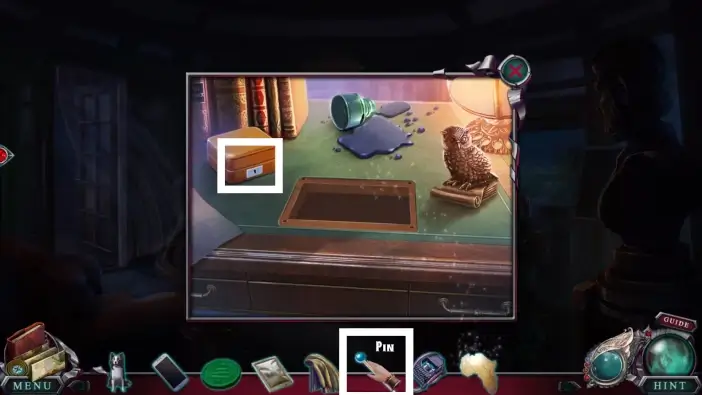
Use the pin to open the box on the desk. Take the badge from the box.
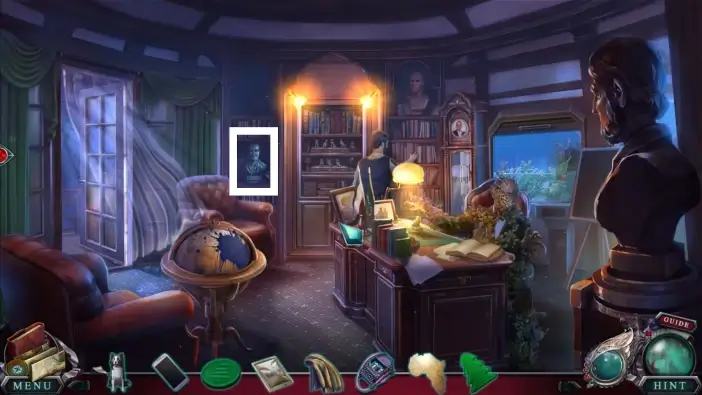
Approach the director’s bust.
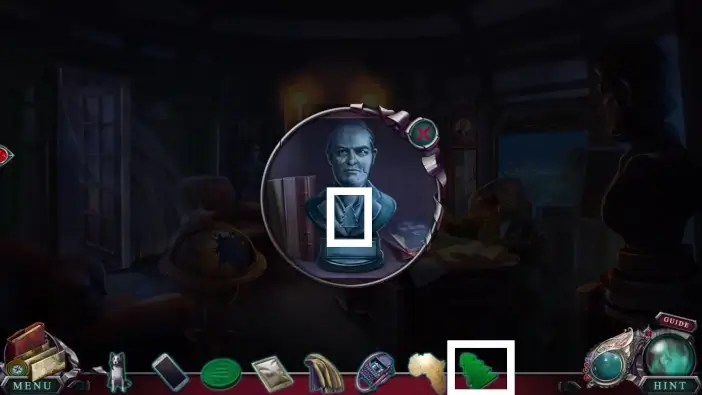
Place the badge from the box into the empty slot on the bust.
A compartment will open. Read the note and take the authorization card. You’ll need to scan it later.

Clean the globe using the cloth you got from the balcony.
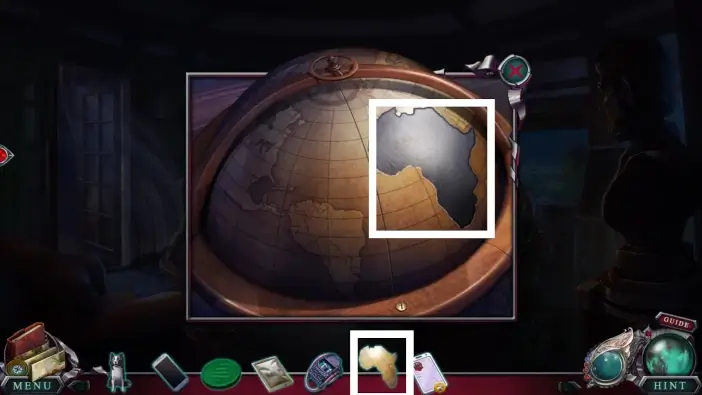
Place the African continent in its correct place on the globe.
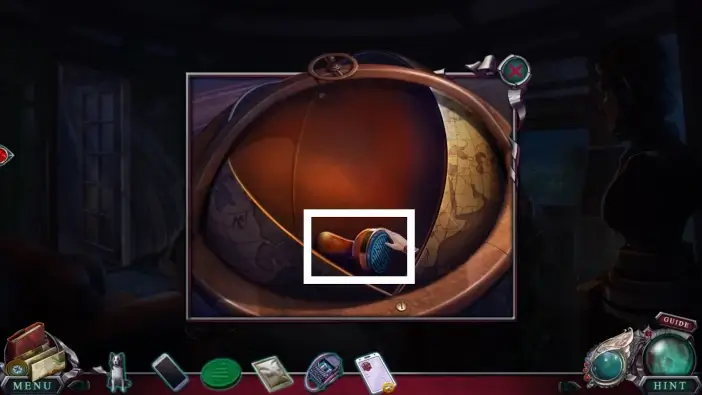
The globe will open. Read the notes and then take the stamp. You will need it for the authorization card.
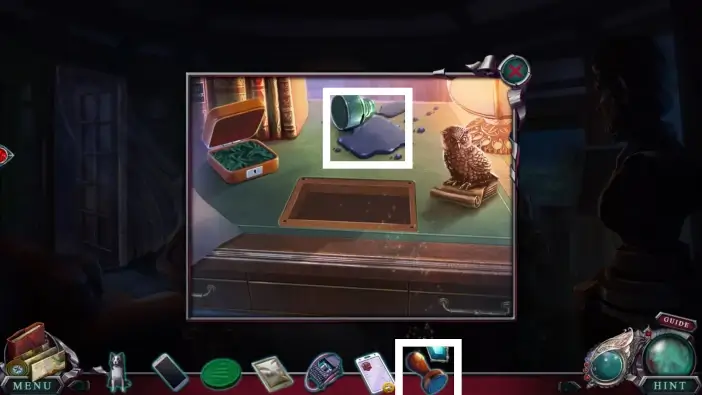
Go to the desk and press the ink with the stamp.
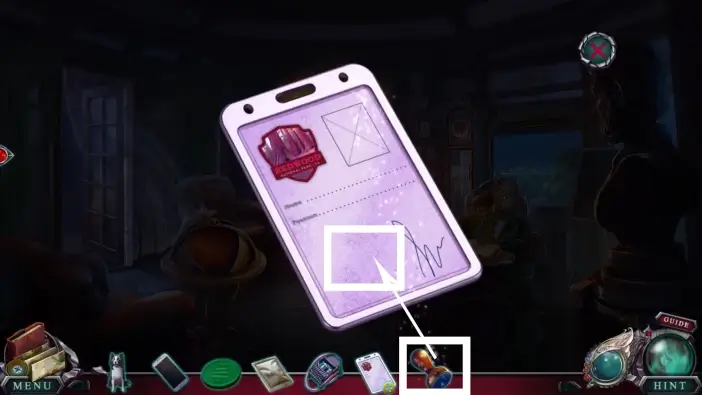
Click on the authorization card in your inventory to examine it. Use the stamp on the authorization card.
Exit the office and go downstairs. Approach the left desk.
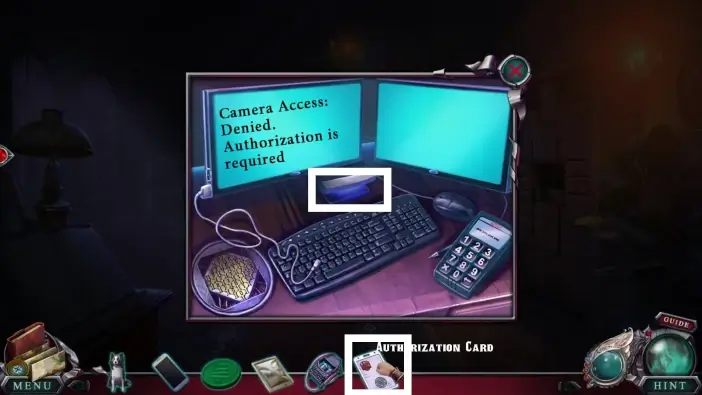
Scan the authorization card with the card scanner. Watch the cutscene.
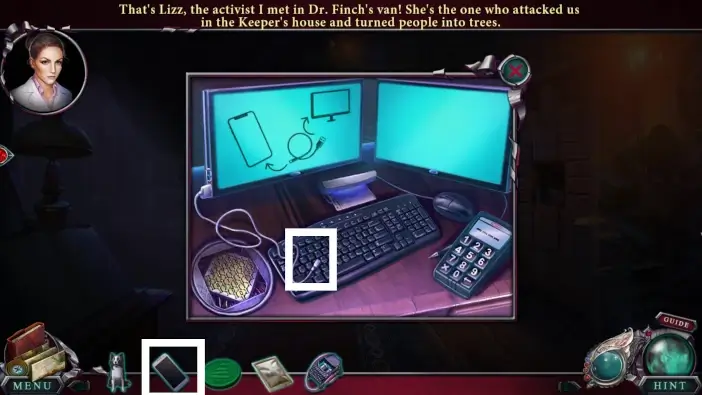
Charge Amanda’s phone using the USB cable.
Once it’s charged, click on the phone again to return it to your inventory.
Go to the office upstairs and show Amanda’s phone to the sheriff.
After the conversation with the sheriff, exit the office building and speak with him near his car.
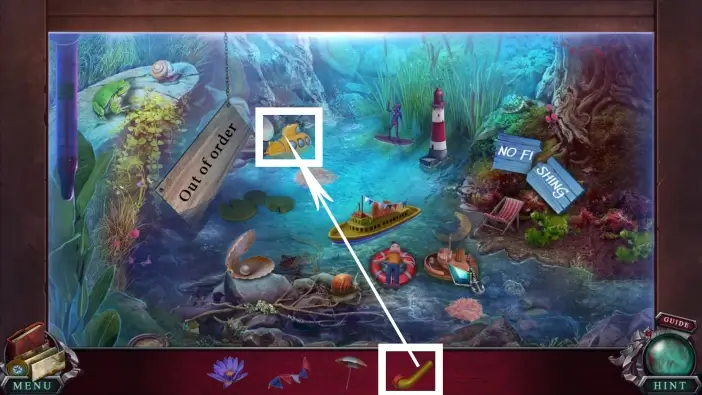
Return to the director’s office and approach the aquarium. Once you approach the aquarium, click on it again to start a new mini-game.
In this mini-game, you will have items on the bottom of the screen that need to be placed somewhere in the aquarium. Give the man a life preserver and place the pearl into the seashell.
Place the surfer on the surfboard and give a snail shell to the snail.
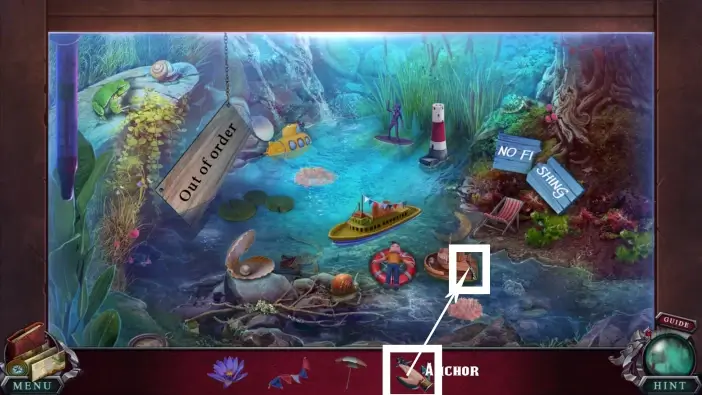
Attach the anchor to the ship’s chain.
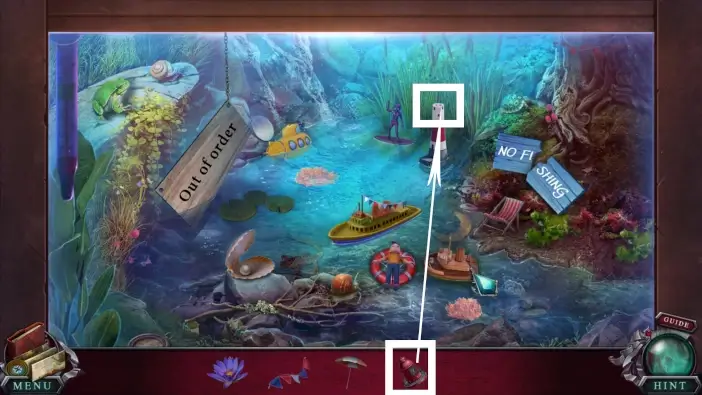
Place the lighthouse lamp on the lighthouse.
Attach the periscope to the submarine.
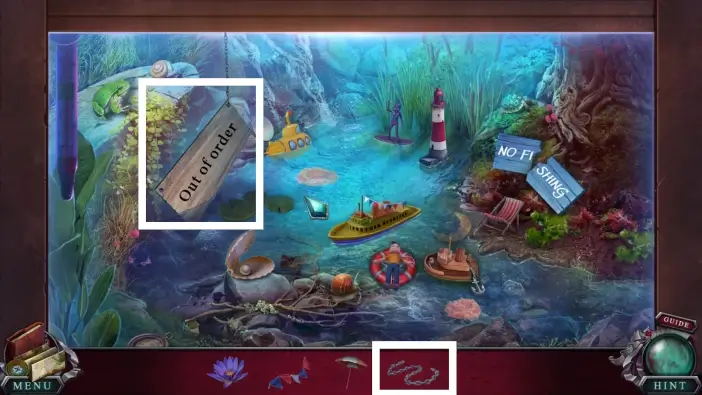
Attach the chain to the sign on the left to fix it.
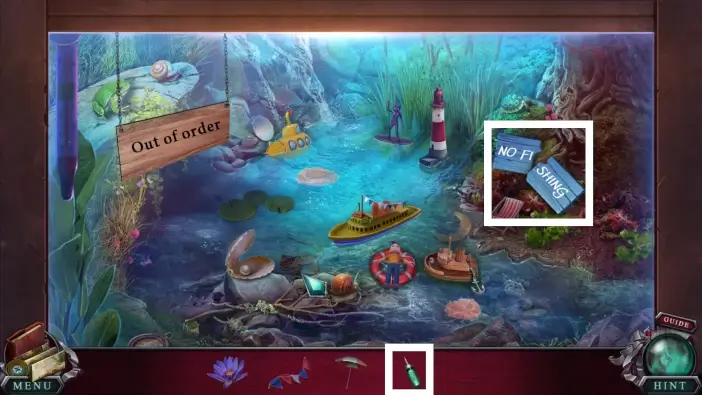
Fix the sign on the right with the glue.
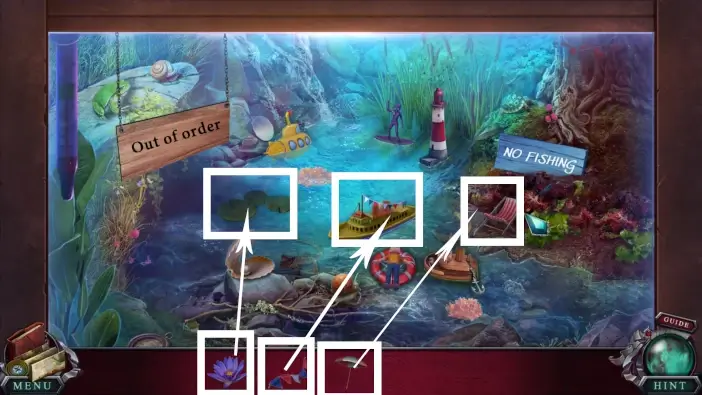
Place the umbrella near the chair, the flags on the large boat in the center, and the lily on the plants. Once you place all the items, the glue will be added to your inventory.
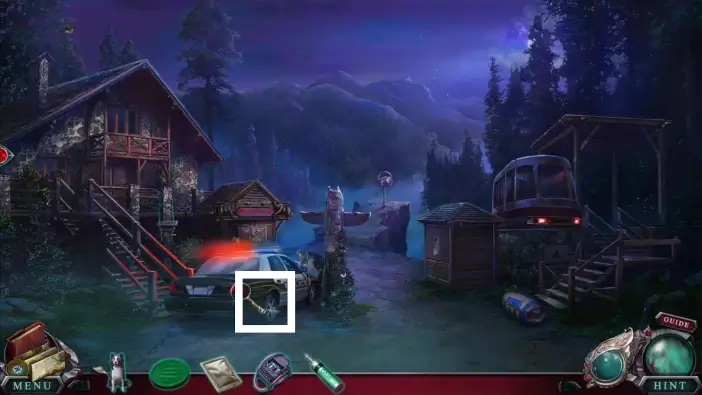
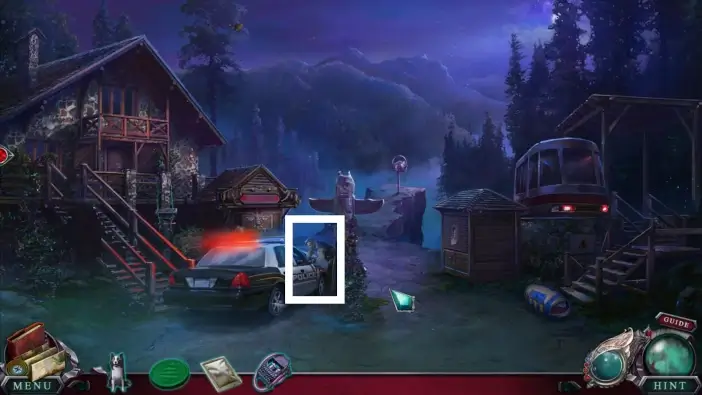
Exit the building and approach the tire of the sheriff’s car.
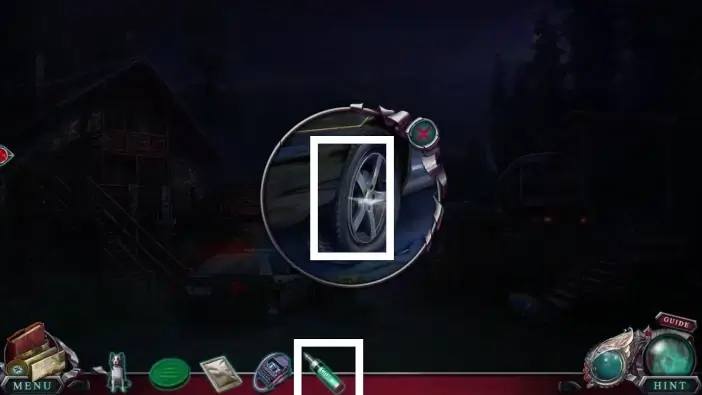
Use the glue to close the hole in the tire.
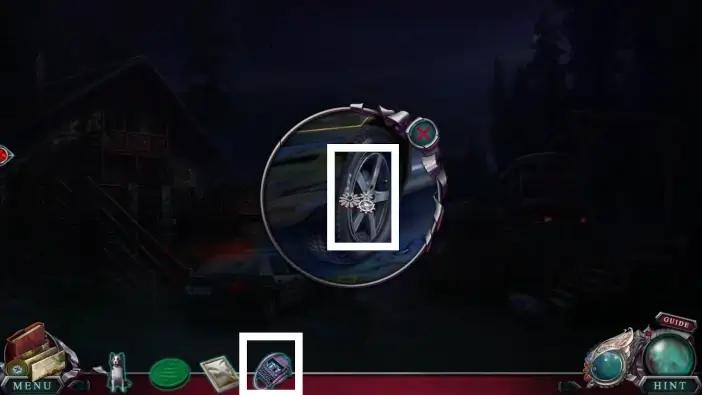
Use the pump from the director’s office to pump up the tire.
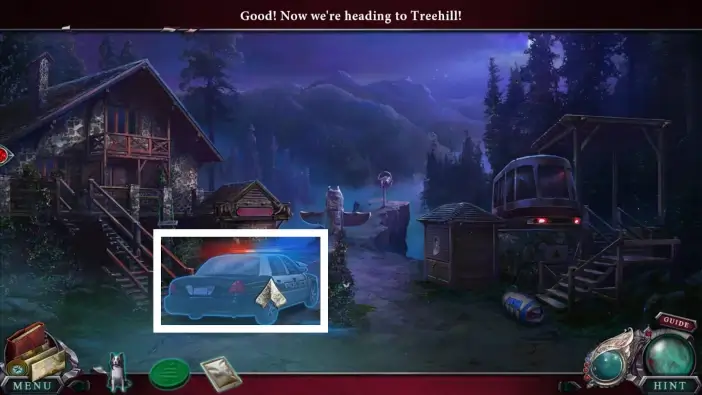
Once you fix the tire, enter the sheriff’s car to access the new location: Treehill.

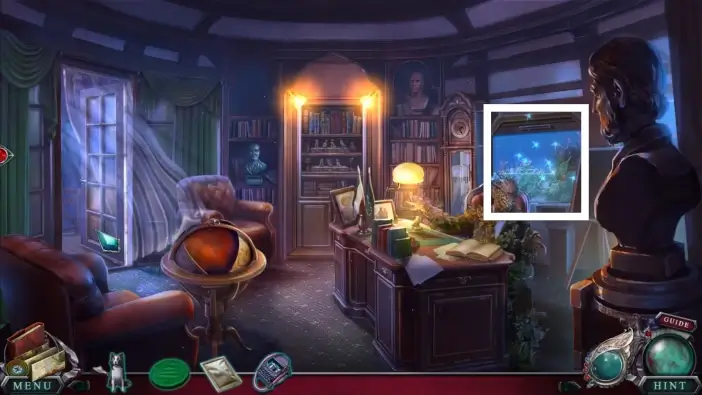
In Treehill, find two animals and two morphing objects. Inside the rectangle on the right in the picture above, there is a morphing object, which is a can on the van roof, and there is an animal in the distance.
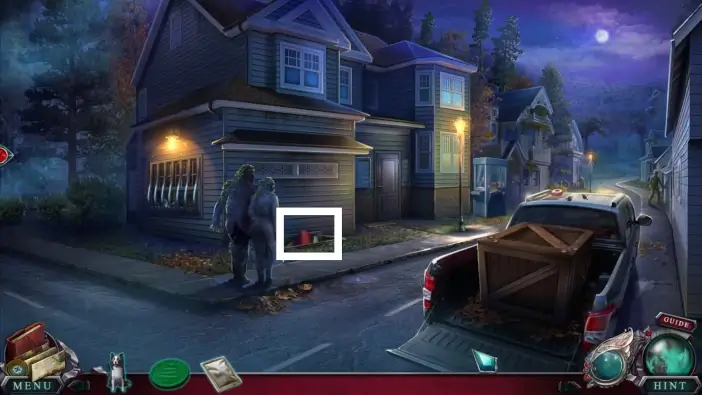
Approach the container.
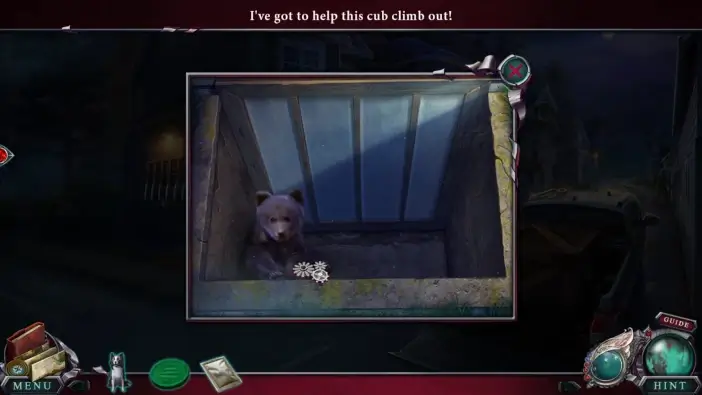
Remove all the boxes from the container until you see the bear cub. You’ll need to help him get out of the container.
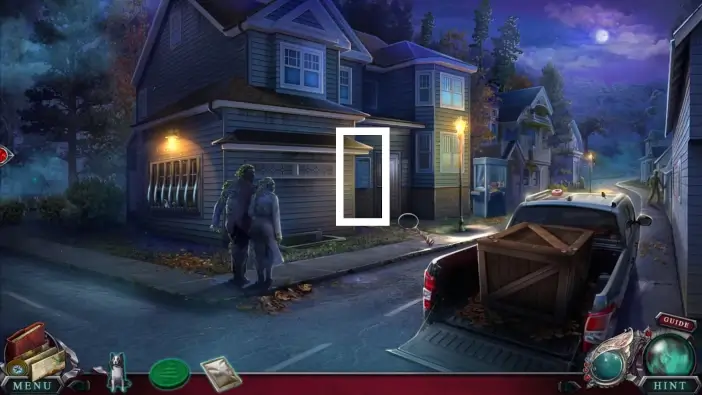
Approach the mailboxes.
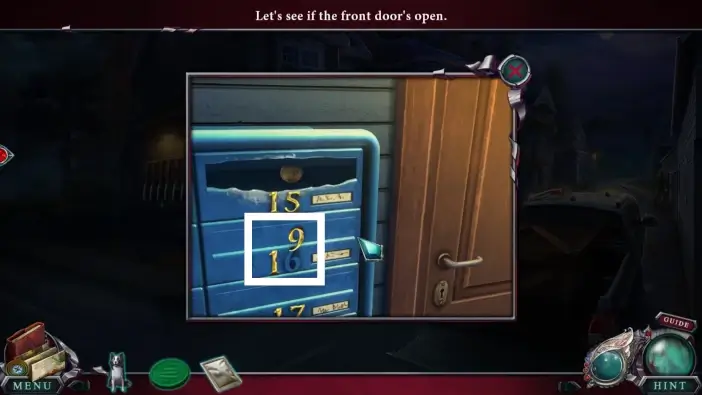
Move the digit to its correct place and open the mailbox number 16.
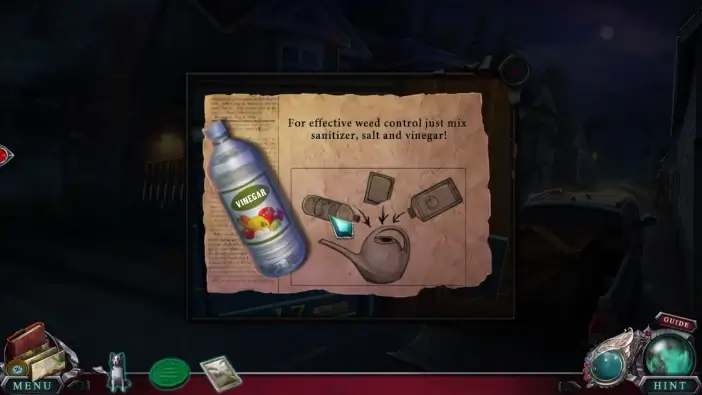
Read and take the instructions on how to create the Weed Killer from the mailbox. Take the vinegar from the mailbox as well. It is one of the ingredients for the Weed Killer.
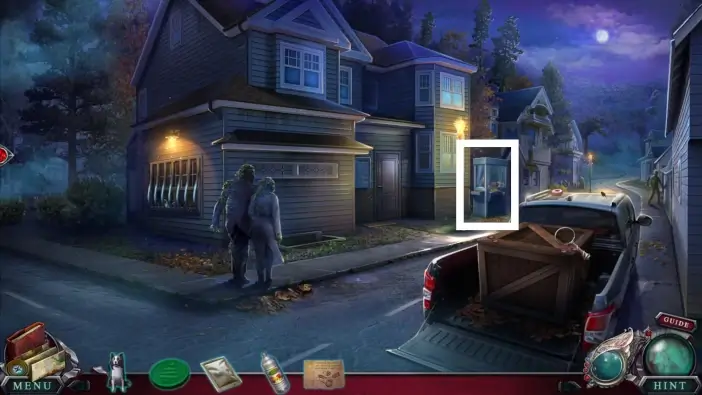
Approach the claw machine.
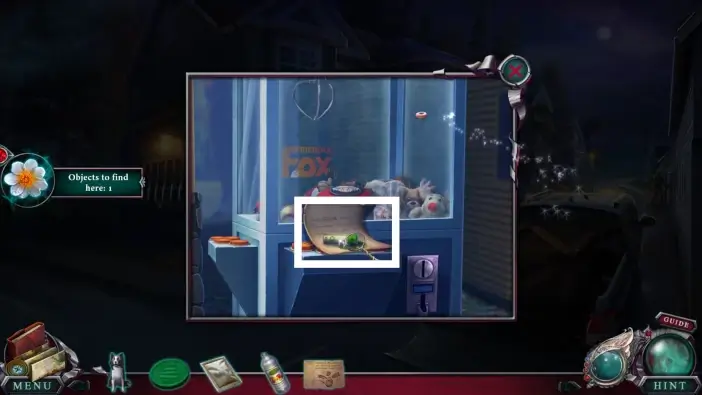
Take the first battery from the claw machine and read the note. You’ll need two batteries for the flashlight in Lizz’s room.
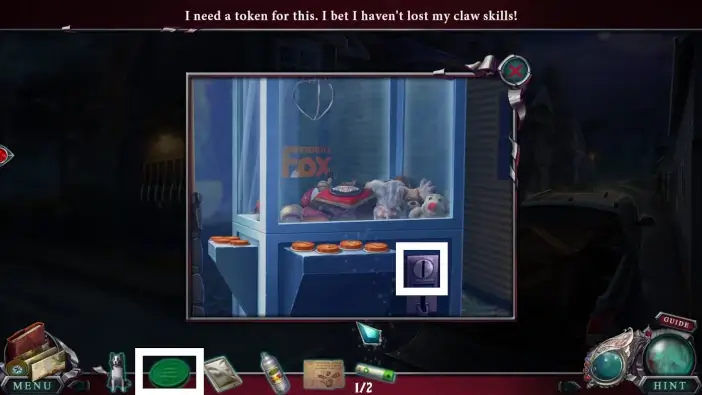
Insert the machine token in the claw machine to start a new mini-game.
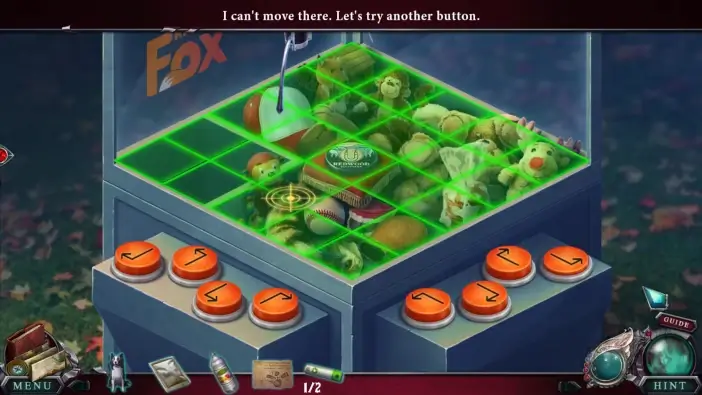
Use the arrow buttons to mark all the cells without repeating. Once you complete this challenge, you will receive a magnet.
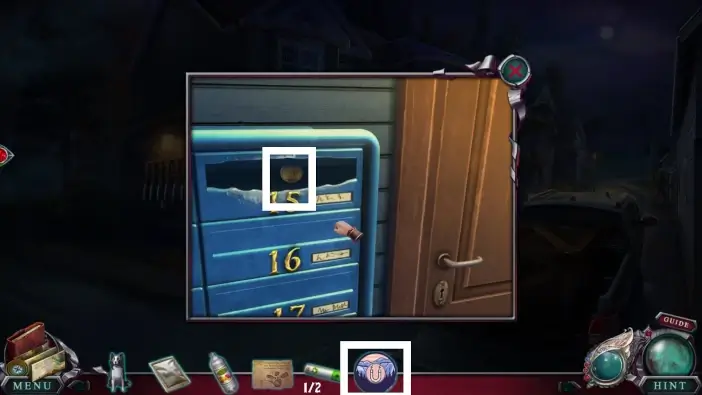
Return to the mailboxes and use the magnet you just acquired to get the coin from the mailbox 15.
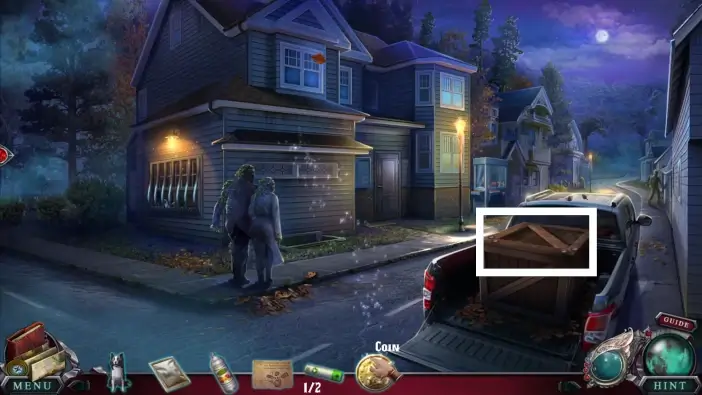
Approach the box on the van.
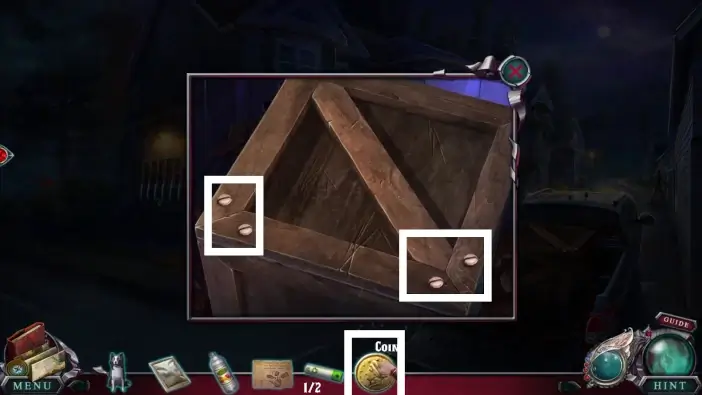
Use the coin from the mailbox to unscrew and open the box.
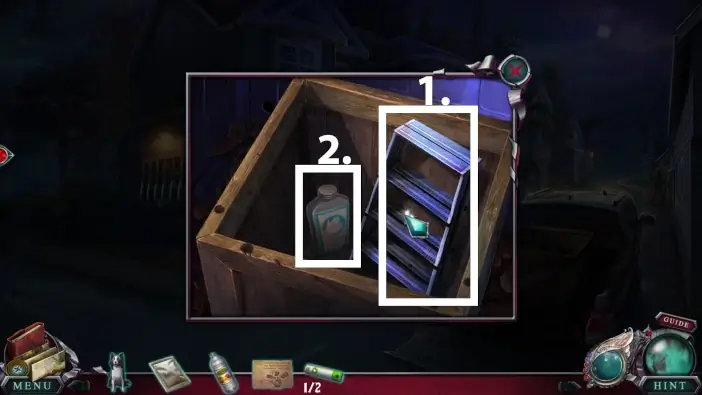
- Take the folding ladder from the box. You will need it to rescue the bear cub.
- Pick up the sanitizer. It’s one of the ingredients for the Weed Killer.
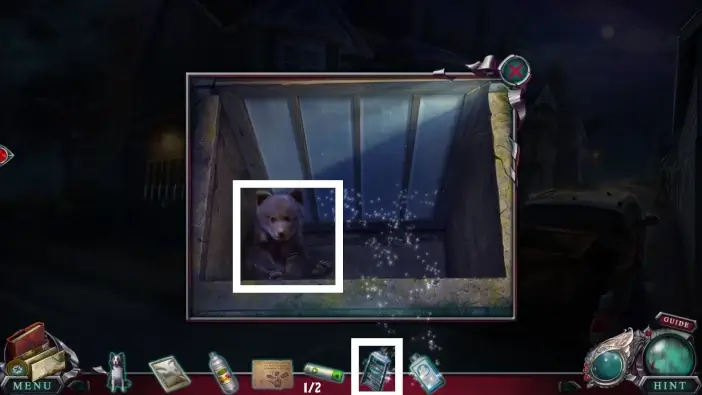
Return to the container and place the folding ladder. The bear cub will exit the container. Because you’ve helped another animal, you can now use the artifact.
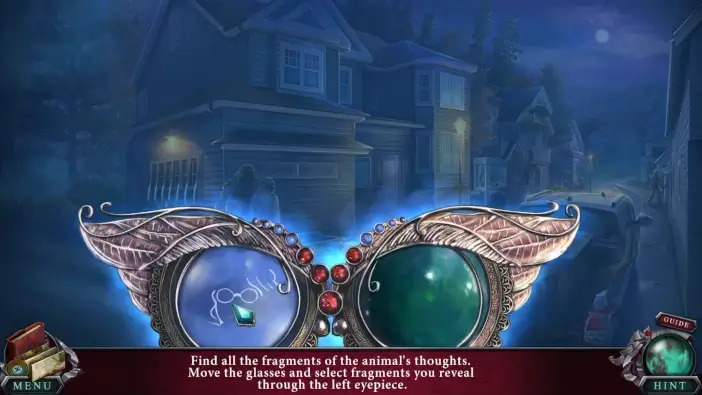
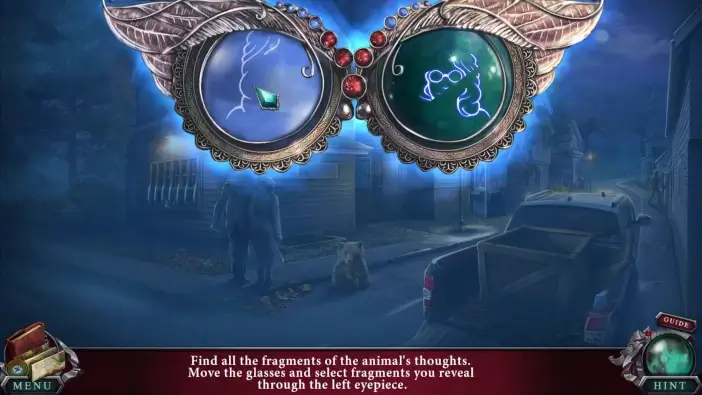
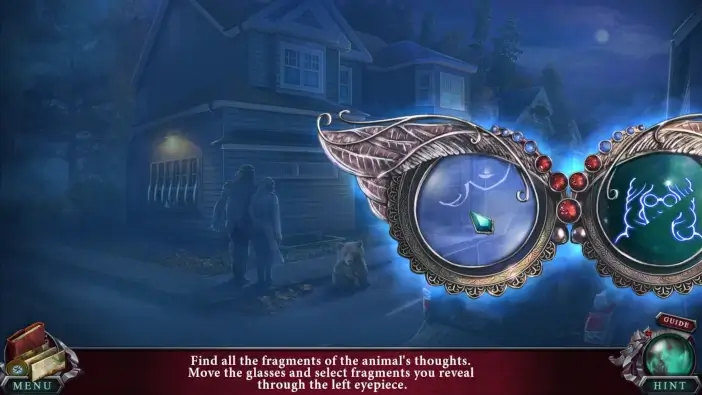
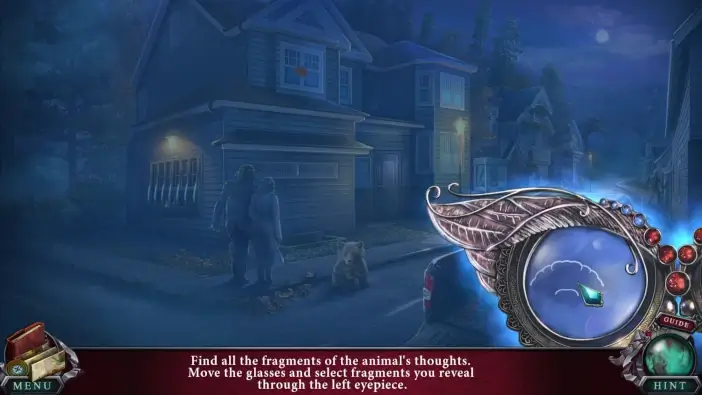
Follow the pictures in this guide to find all memory fragments.
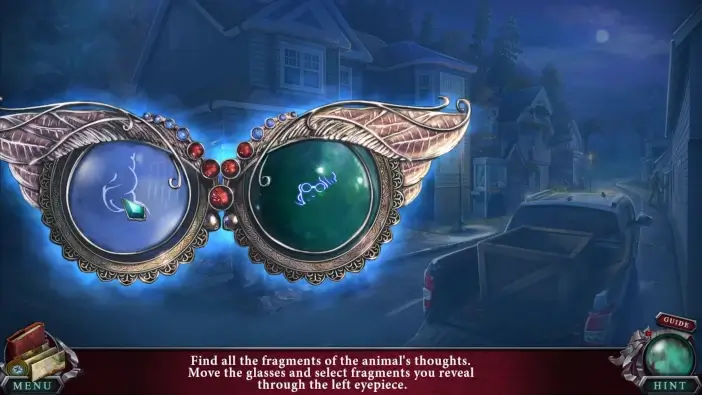
Once you find all memory fragments, watch the bear cub memory.
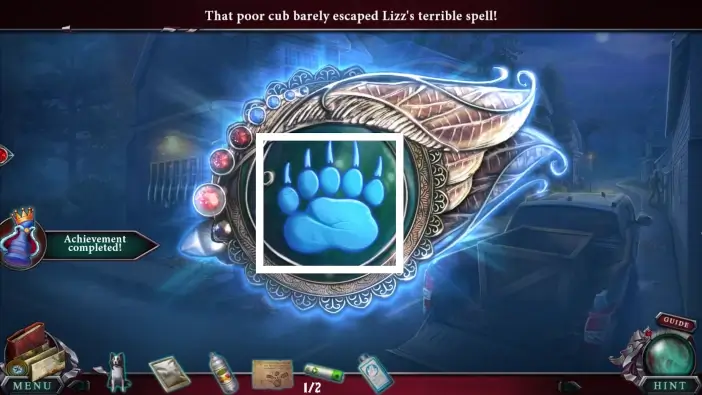
When the cutscene is over, take the Bear Strength ability from the artifact.
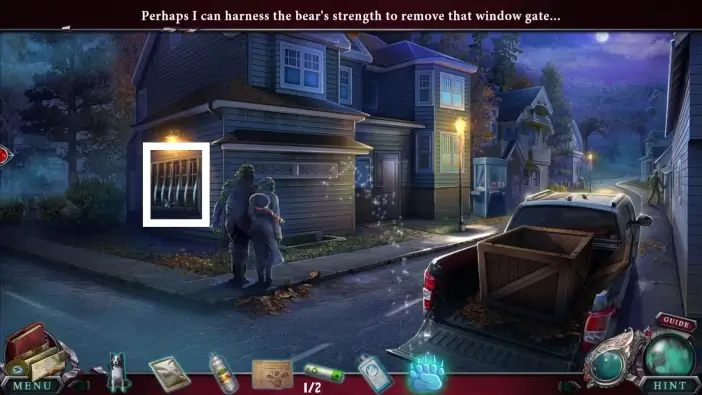
Approach the bars of Lizz’s room on the left side of the building.
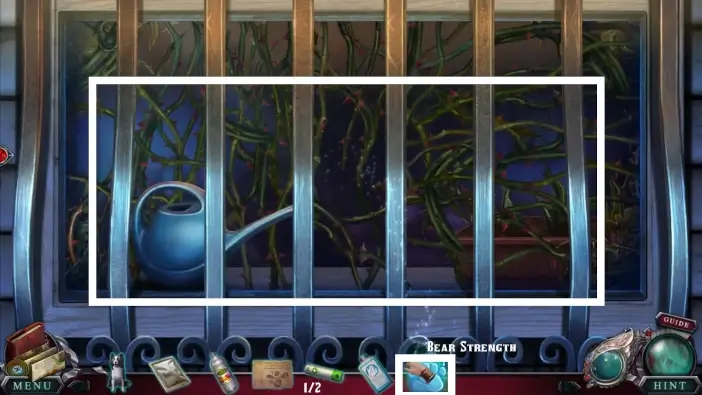
Use the Bear Strength ability to remove the bars.
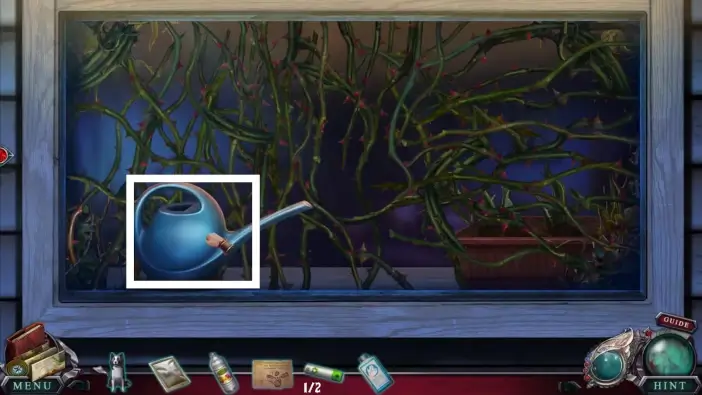
Take the watering can.
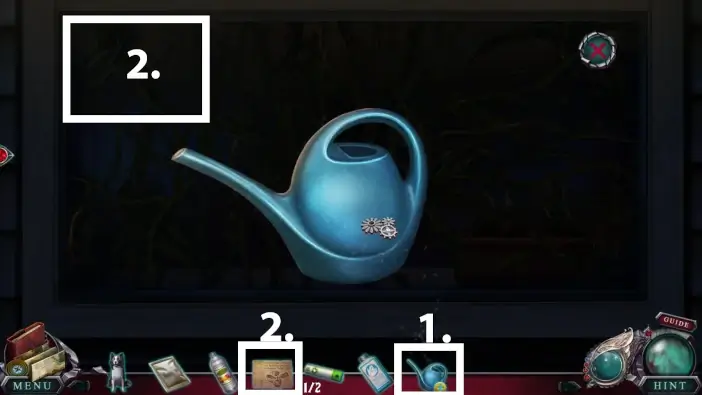
- Select the watering can in your inventory to examine it.
- Place the instructions for making the Weed Killer next to the watering can.
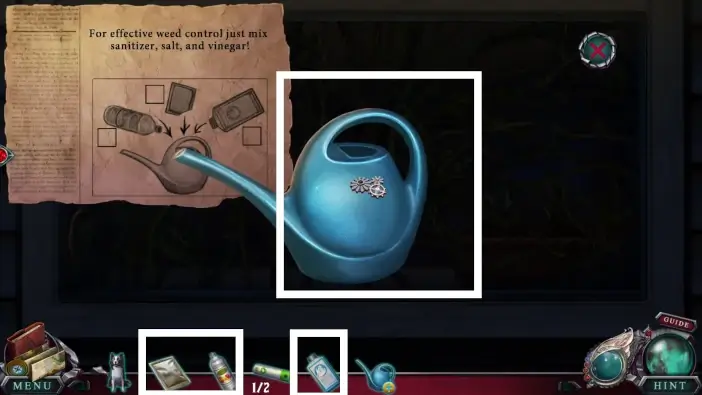
Place the vinegar, the salt, and the sanitizer into the watering can to create the Weed Killer. Click on the watering can again to return it to your inventory.
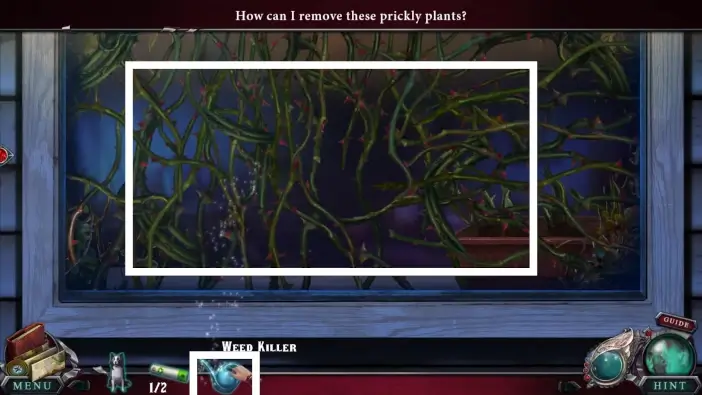
Use the Weed Killer to remove the plants that are blocking the window, and then enter Lizz’s room.
This will mark the end of our guide for Part 6 of the Main Chapter of the Edge of Reality: Lost Secrets of the Forest.
Thank you for reading!