Edge of Reality: Lost Secrets of The Forest | Main Chapter Part 5
Intro
Welcome to our walkthrough for Part 5 of the Main Chapter for the “Edge of Reality: Lost Secrets of the Forest” from “Friendly Fox Games”. Help biologist Dr. Amanda solve the mysterious events in the forest.
Walkthrough
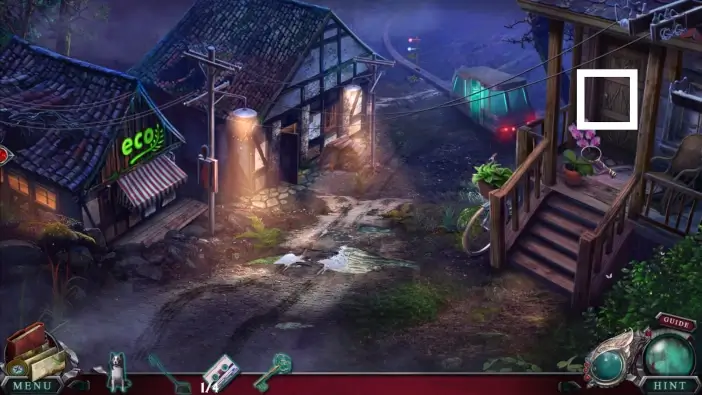
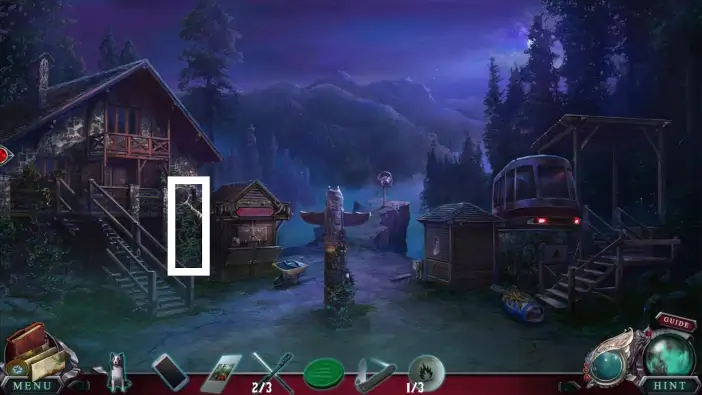
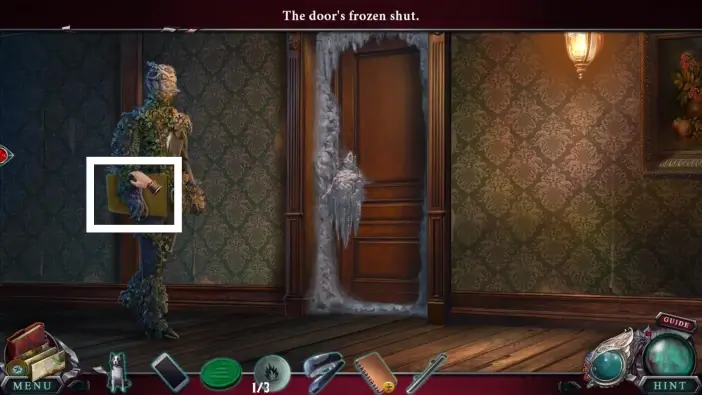
Approach Tina’s house.
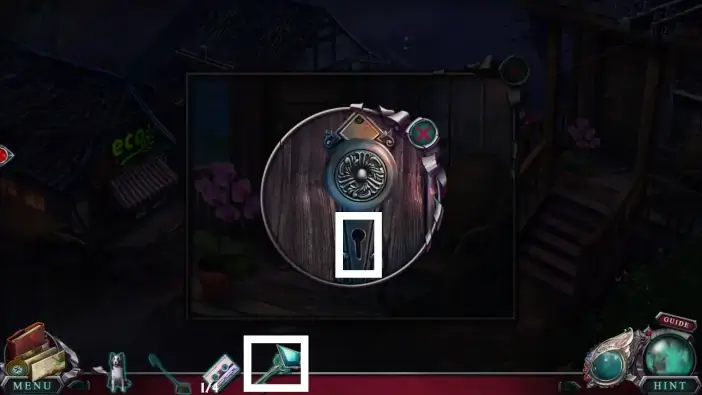
Unlock Tina’s house using the key the Keeper gave you. Enter the house.
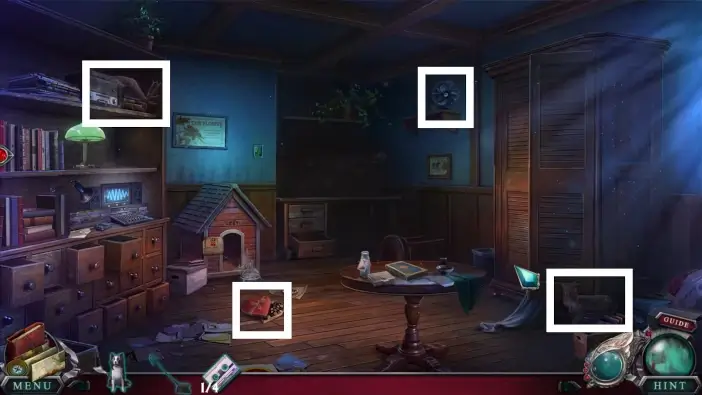
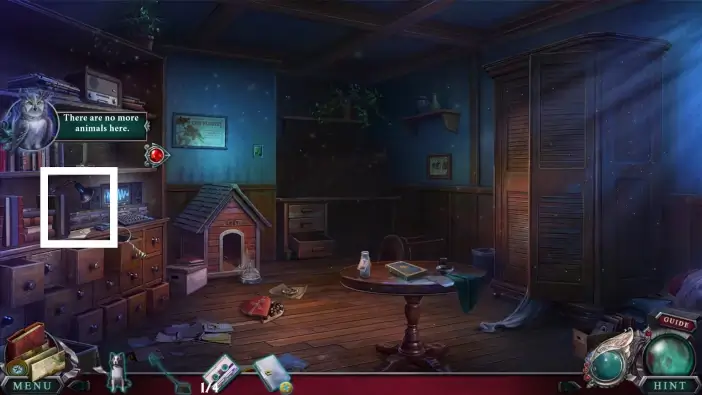
In Tina’s house, find all morphing objects and animals. They are marked in the picture above.
- Read the reward and the newspaper at Gary’s doghouse.
- Approach the central table.
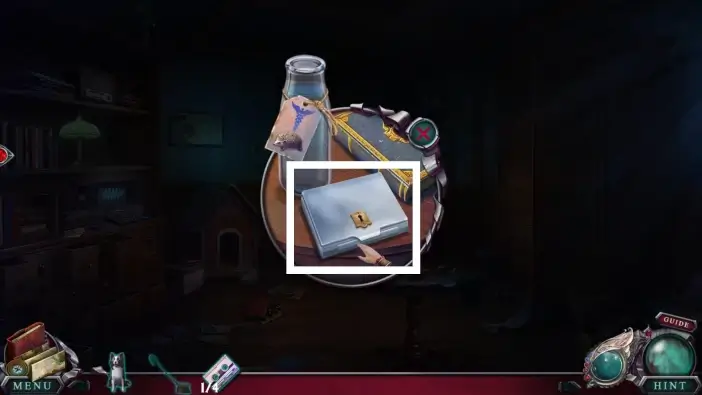
Take the manicure set from the table. It will be locked, but once you unlock it, you will take the scissors from it. It also contains the second cassette.
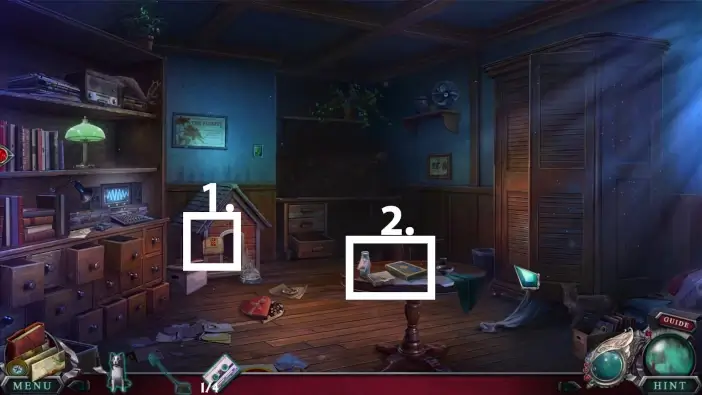
Approach the desk on the left.
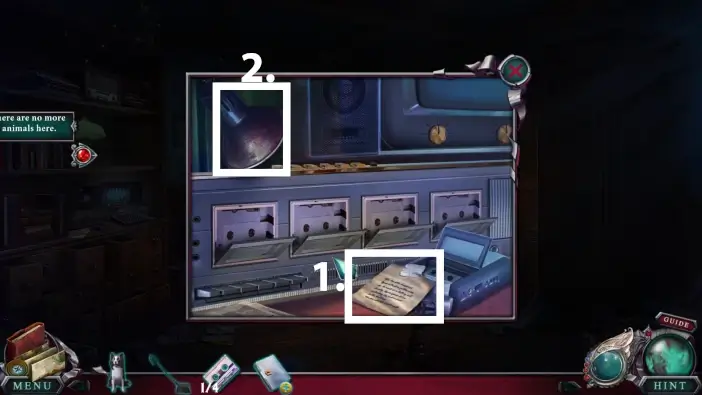
- Read the letter.
- Turn the lamp to the left and take the light bulb. You will need it to illuminate the other desk in the room.
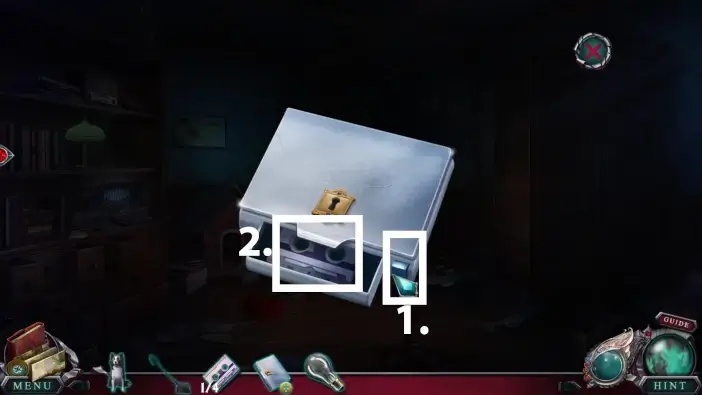
- Select the manicure set in your inventory to inspect it. Click on the set’s button to open a compartment.
- Take the second cassette from the compartment.

Approach the wardrobe on the right.
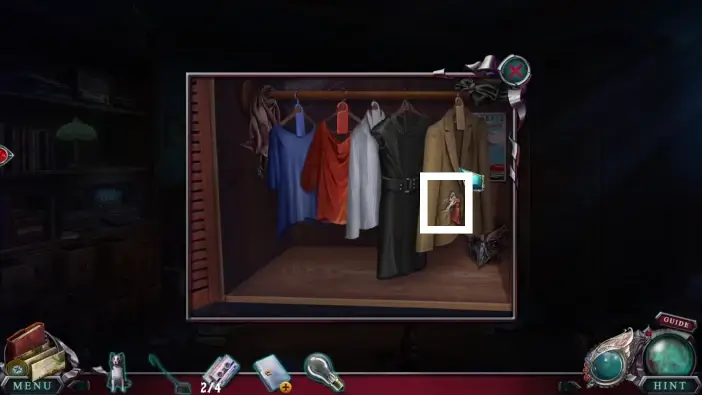
Hang all the clothes and then take the key to the manicure set from the coat’s pocket
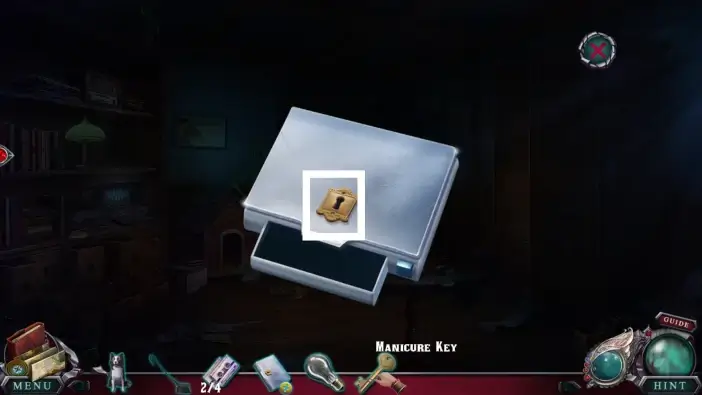
Inspect the manicure set from your inventory and use the key you just acquired to unlock the set. Take the scissors from the set. You will use them later to help the hedgehog by removing the cup from his head.
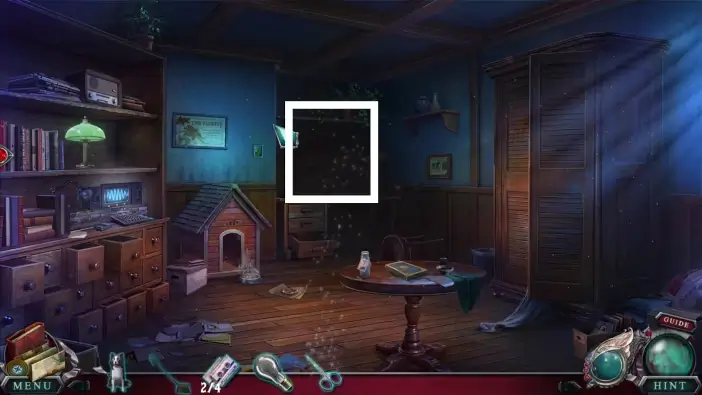
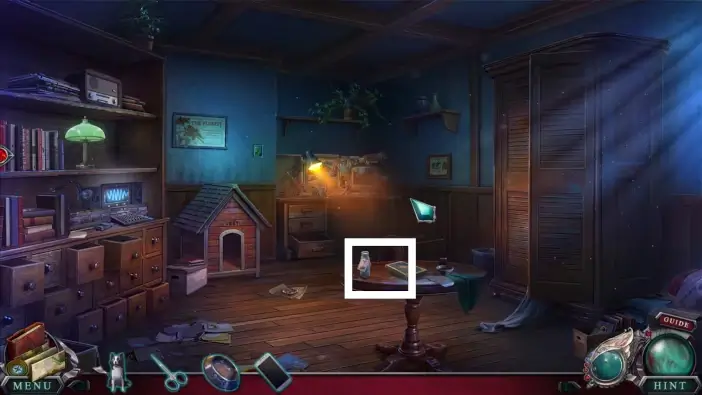
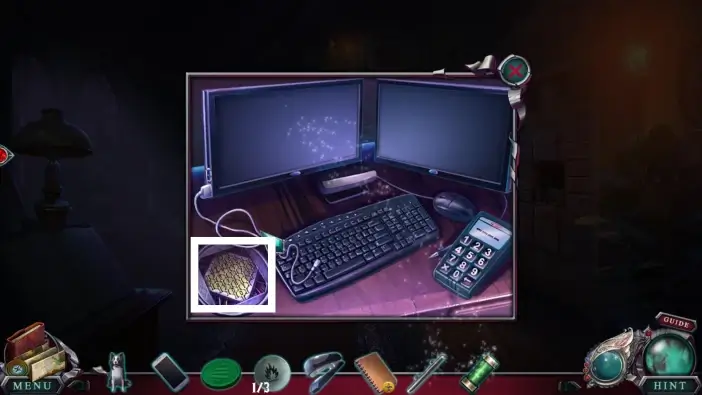
Approach the desk on the far side of the room.
Place the light bulb in the lamp to illuminate this desk.
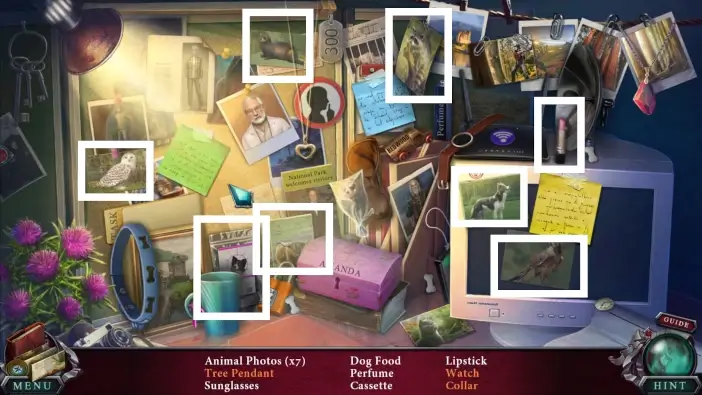
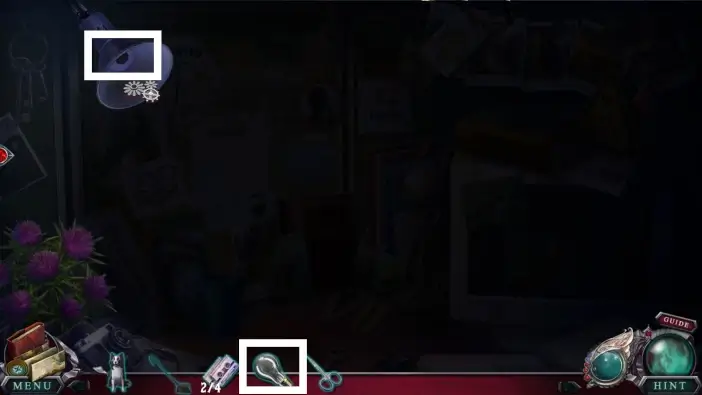
Find all objects that are listed in the lower part of the screen. The objects are marked in the pictures in this guide.
To click on a collar, you will first need to attach the three bone symbols to the collar.
- Once you attach all the bones, click on a collar.
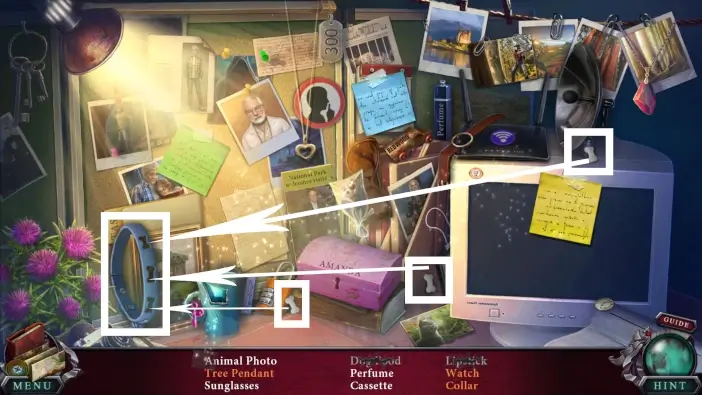
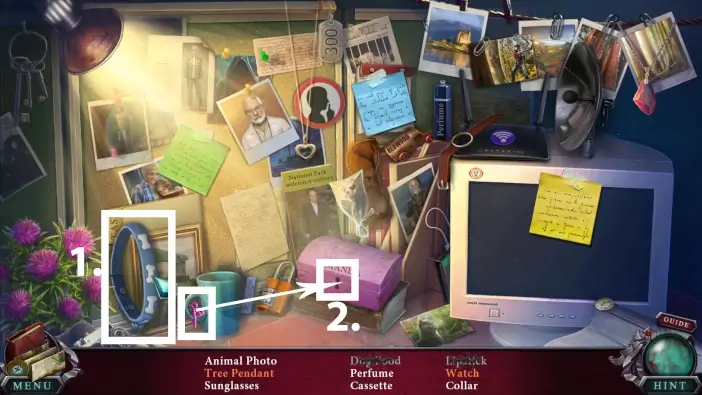
- Use the key on the handle of the mug to unlock the box.
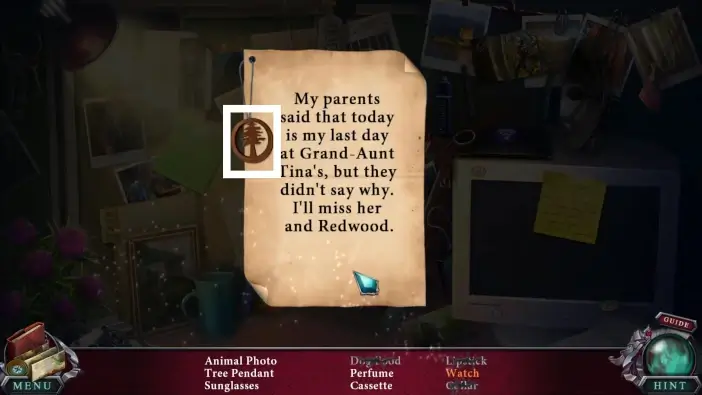
Read the letter from the box and click on the tree pendant.
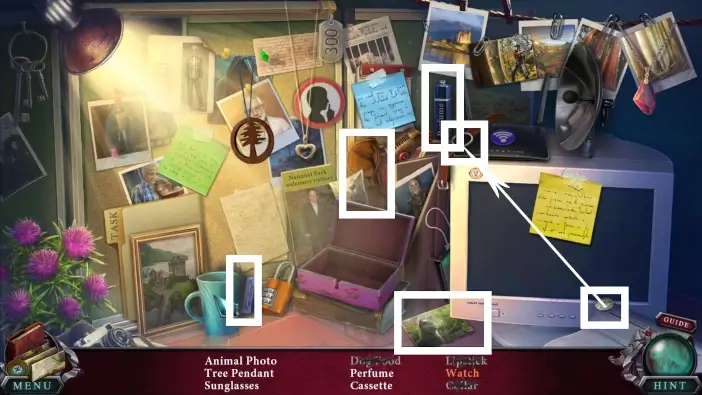
Continue finding the objects that are marked in the picture above. To click on the watch, you’ll need to attach the clock part to the belt.
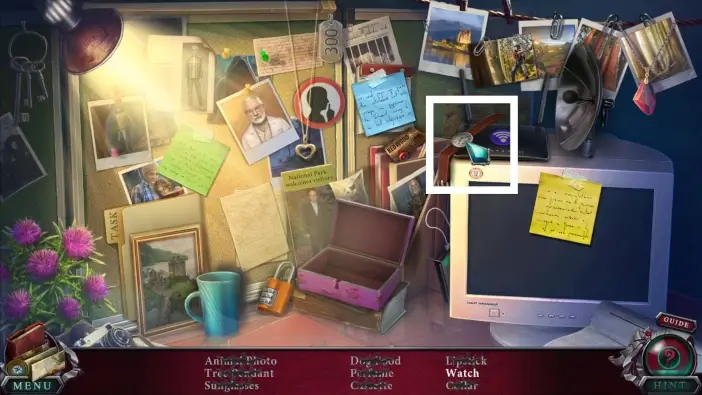
Once you find all the objects from the list, the third cassette will be added to your inventory.
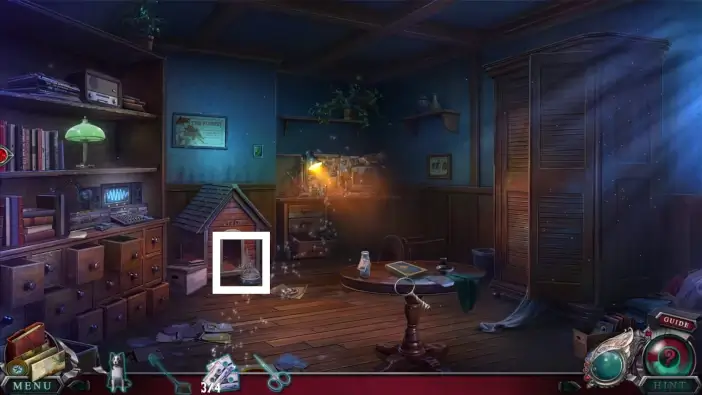
Approach Gary’s doghouse.

Clean Gary’s bowl using the broom. Once you clean it, take the bowl. You will need it to give medicine to the hedgehog.
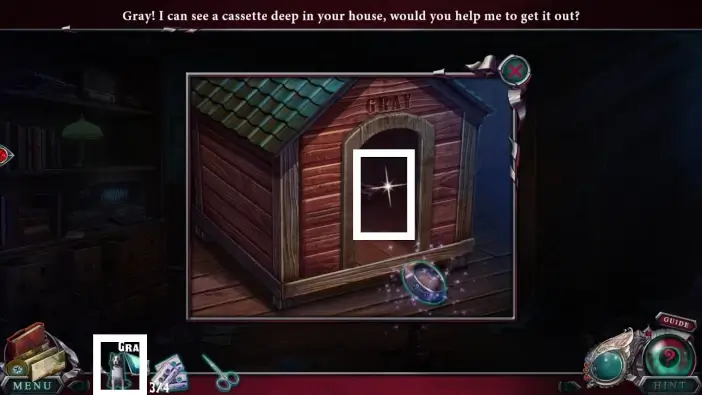
Send Gary to his doghouse. He will find the fourth cassette for you.

Go to the left desk and place all four cassettes to play them. A new puzzle challenge will start.
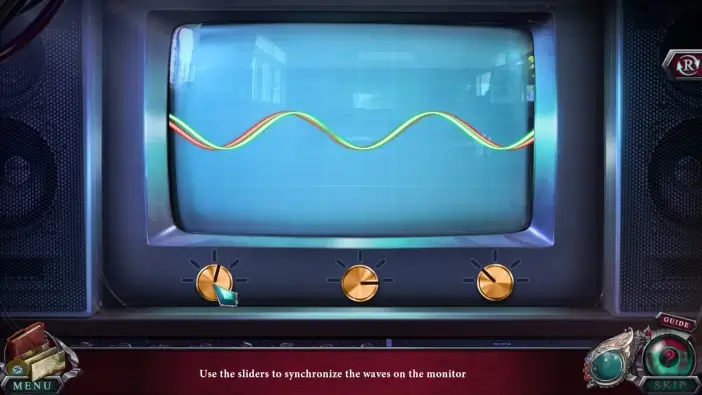
Use the three rotary buttons to change the frequencies on the screen. Align all frequencies like in the picture above, and then the new cutscene will start.
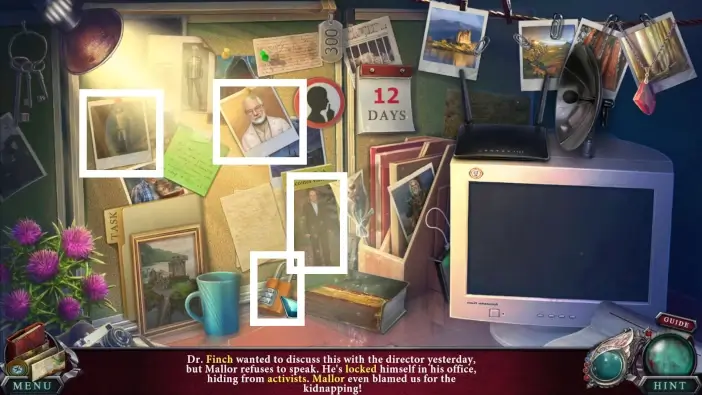
After the cutscene, approach the desk on the far side of the room.
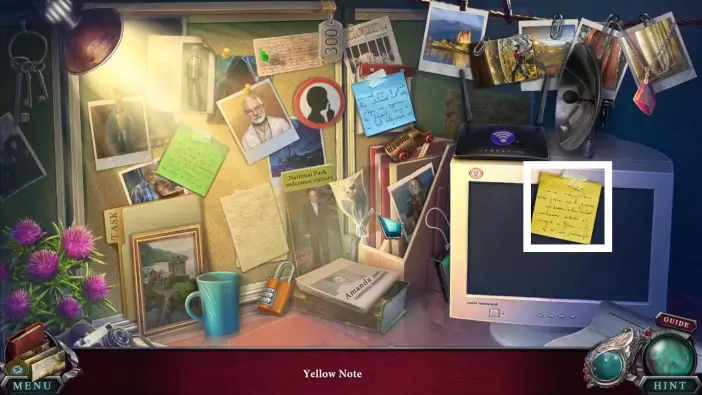
Read the yellow sticky note.
Click on the items marked in the picture above.
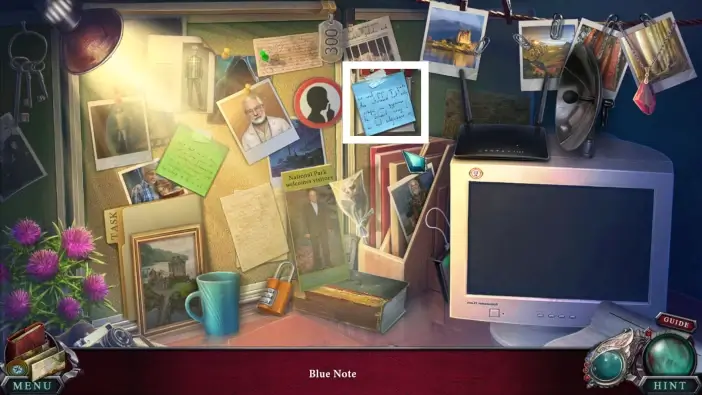
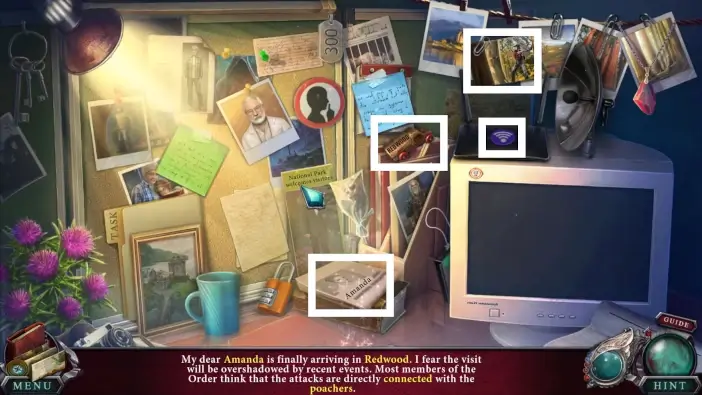
Read the blue note.
Click on the items marked in the picture above.
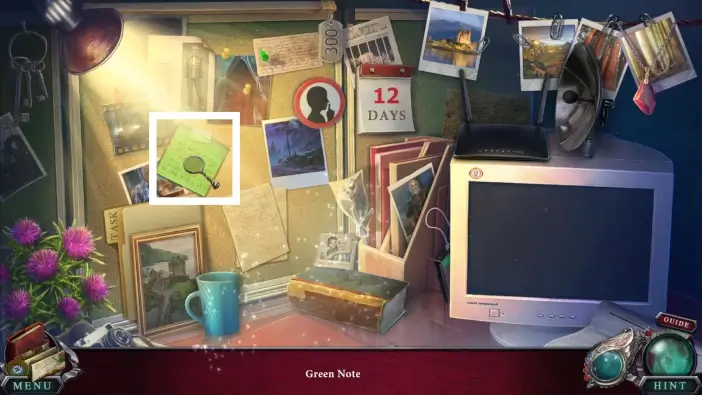
Read the green note.
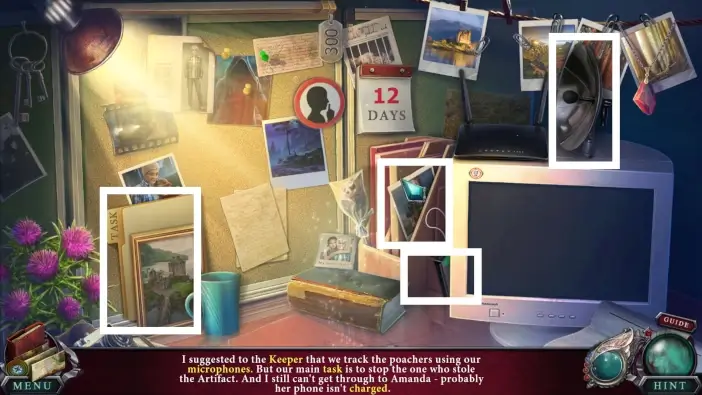
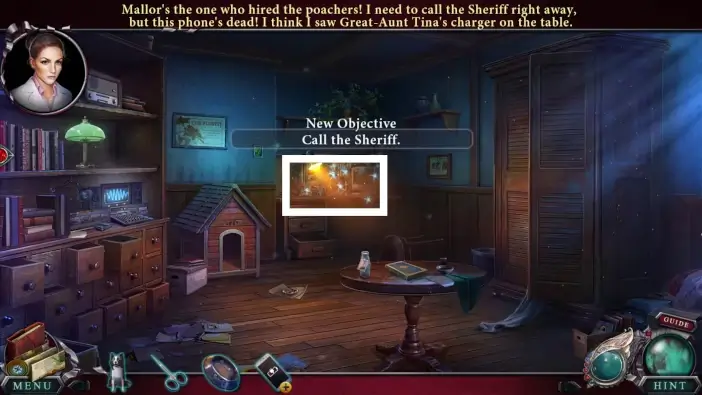
Click on the items marked in the picture above. After you find all the objects, the charger will be added to your inventory.
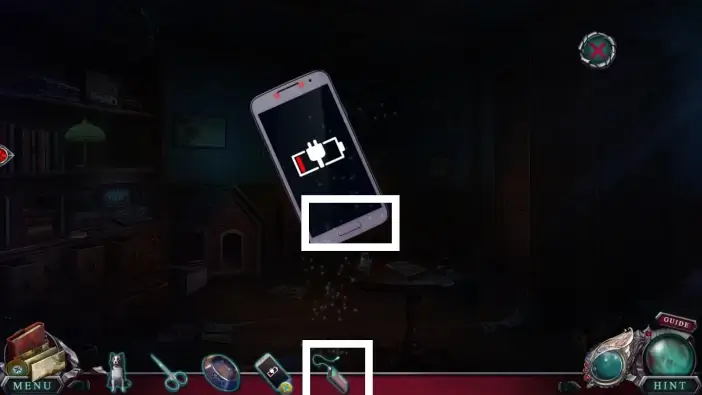
Select Amanda’s phone from your inventory and then use the charger to charge the phone. Amanda will then call the sheriff.
After the conversation with the sheriff, approach the central table.
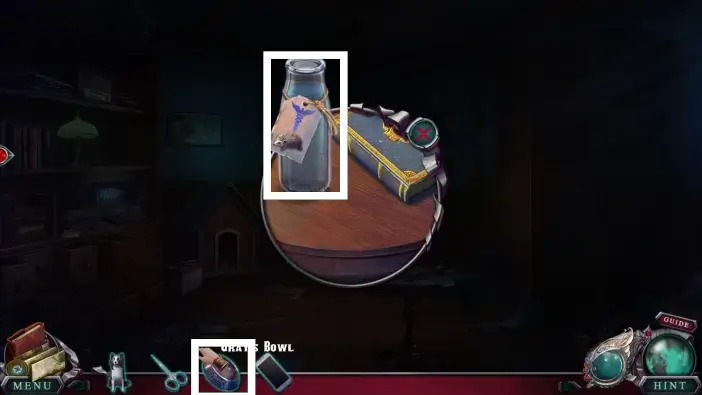
Fill Gary’s bowl with medicine from the bottle.
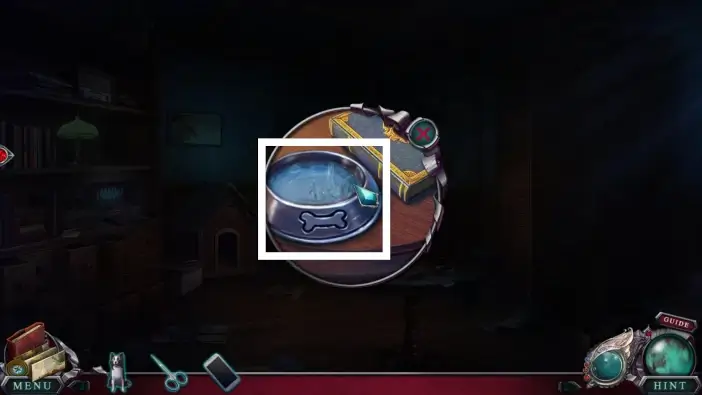
Take the bowl.
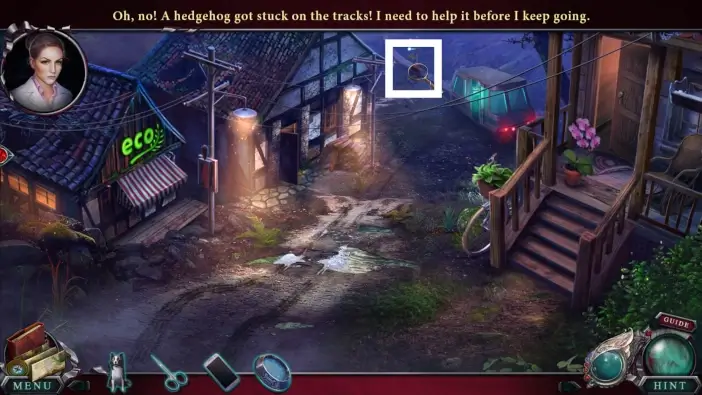
Exit Tina’s house and go to the rails behind the train.
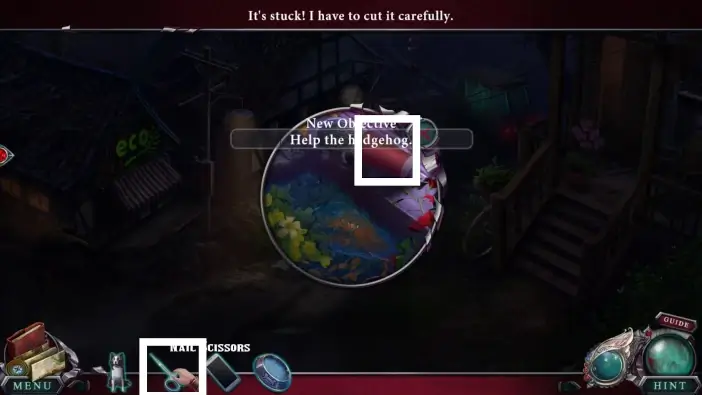
Remove the cup from the hedgehog’s head using scissors.
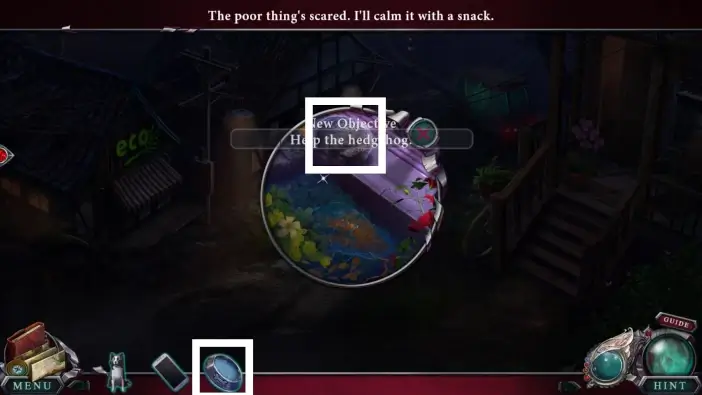
Give the hedgehog the bowl of medicine. He will drink it and go away. After this, you can use the train.

Click on the train, and Amanda will travel to the director’s office area.
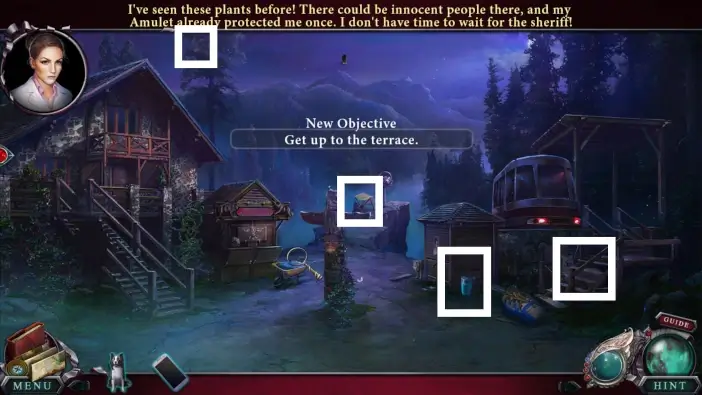
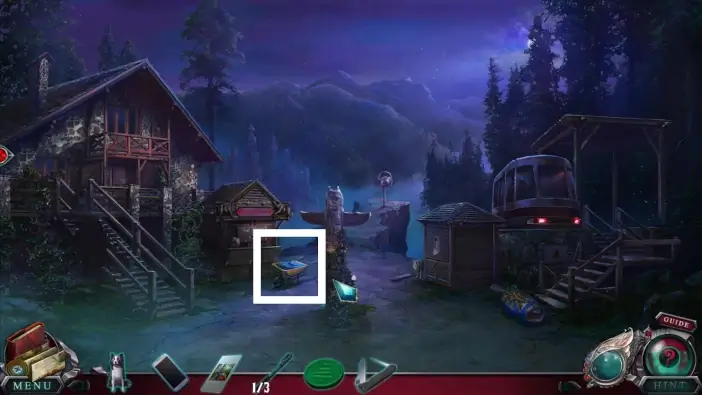
Once you arrive, find all morphing objects and animals in this area. They are marked in the picture above.
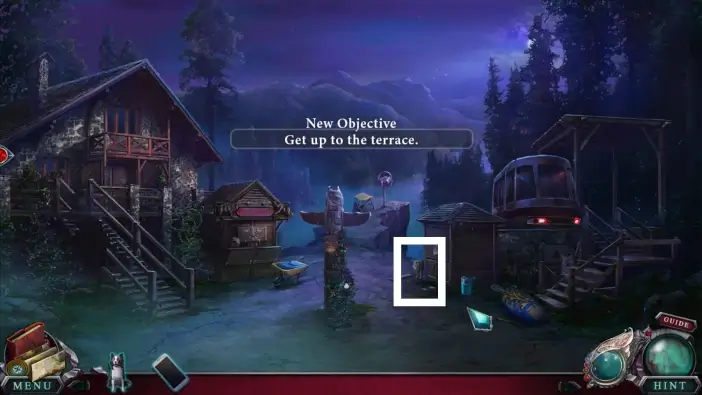
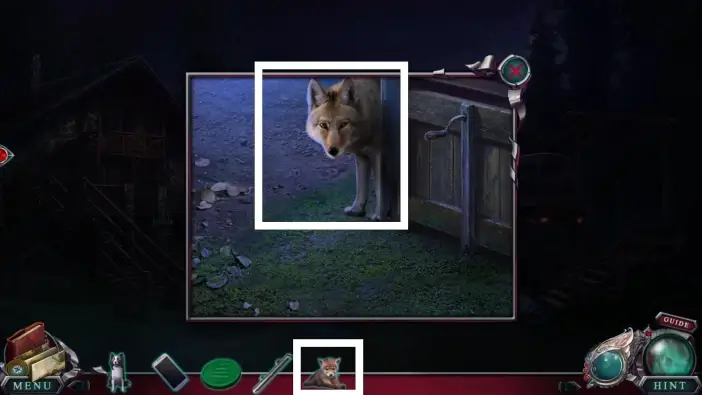
Approach the magic coyote.
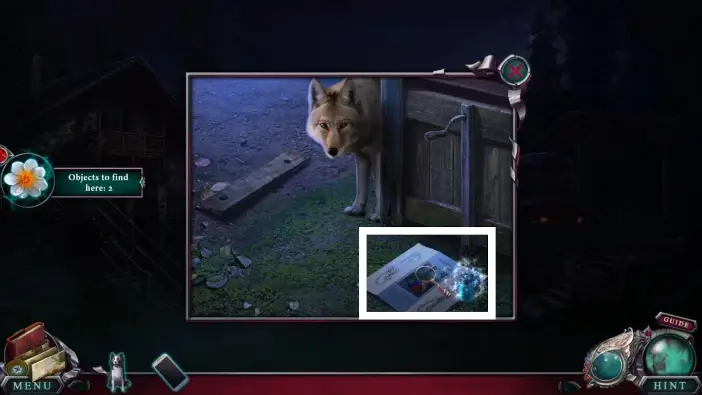
Pick up the knot instructions from the ground. You’ll need it for the improvised rope ladder later.
Approach the bag on the ground.
Take the first improvised rung. You will need two more items that will serve as rungs to create an improvised rope ladder.
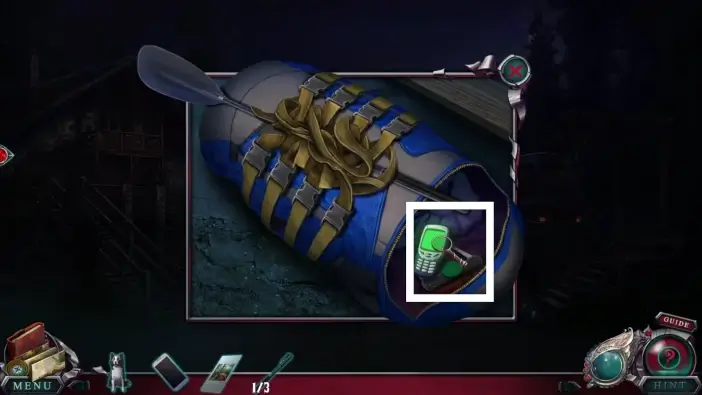
Unzip the lower part of the bag, read the message from the phone, and then take the machine token and the folding knife. You will use the machine token to start the claw machine in Treehill much later, and you’ll use the folding knife multiple times.
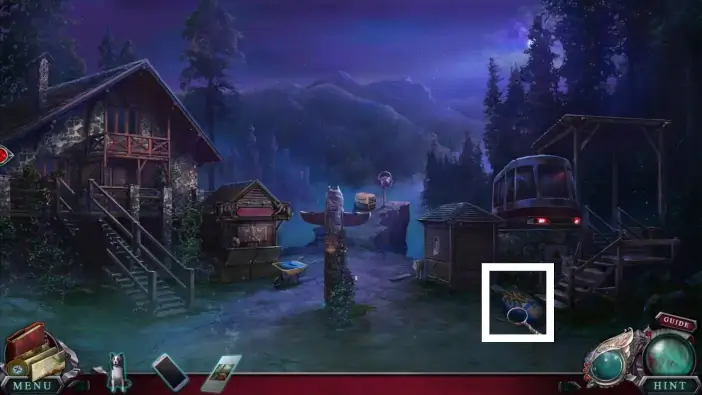
Approach the cart on the left.
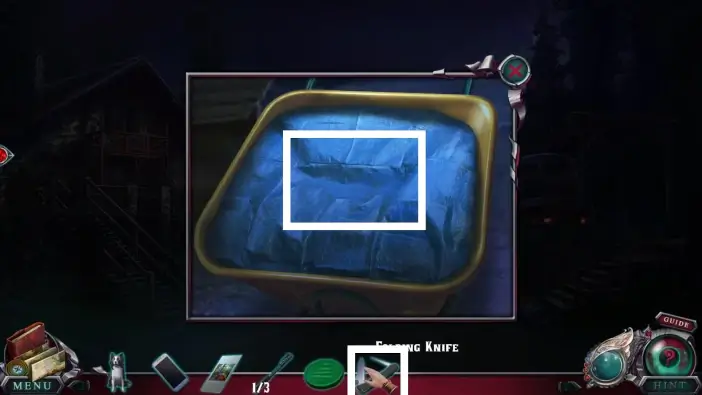
Cut the tarpaulin in the cart using the folding knife you got from the bag.
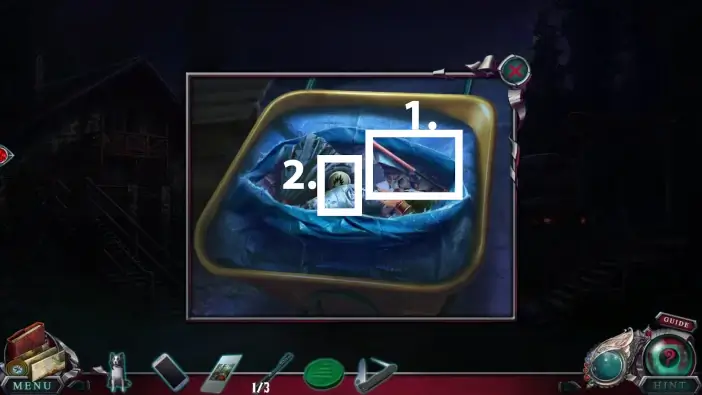
- Take the second item that will serve as a rung.
- Take the first fire token. You’ll need three fire tokens to release a coyote pup from the cage.
Approach the vines on the director’s office building.
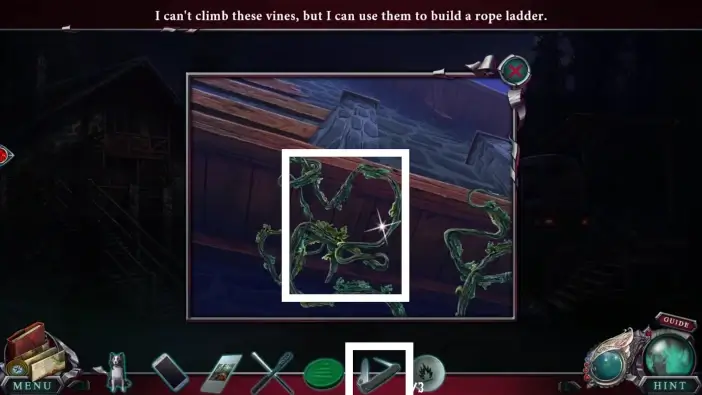
Cut the vines using the folding knife. You’ll need vines to create an improvised rope ladder.
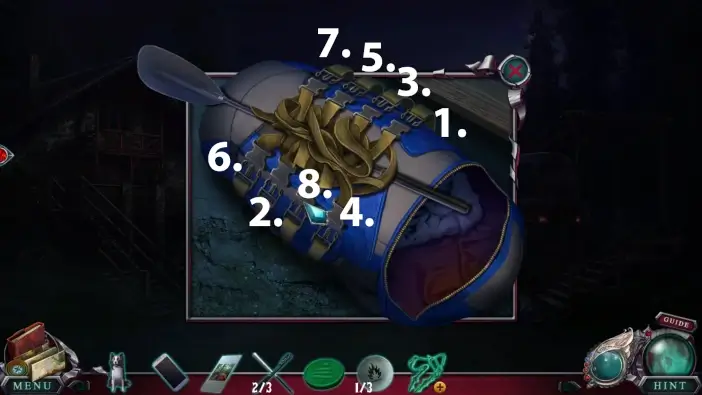
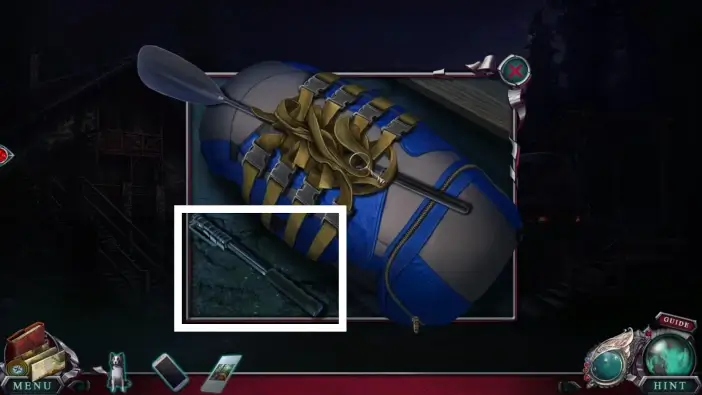
Return to the bag and open the belts in the order shown in the picture above.
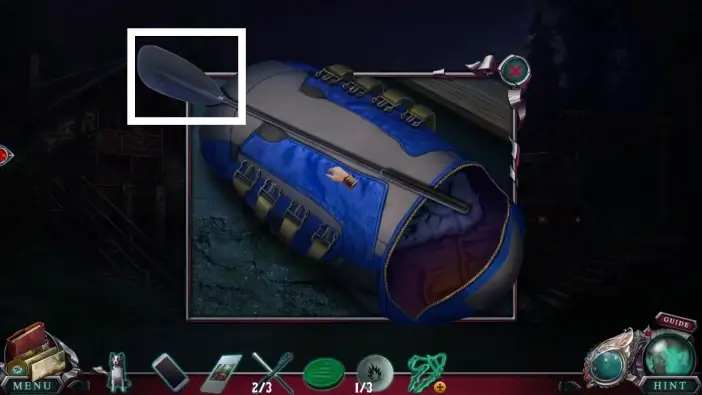
Once you open all the belts, take the paddle.
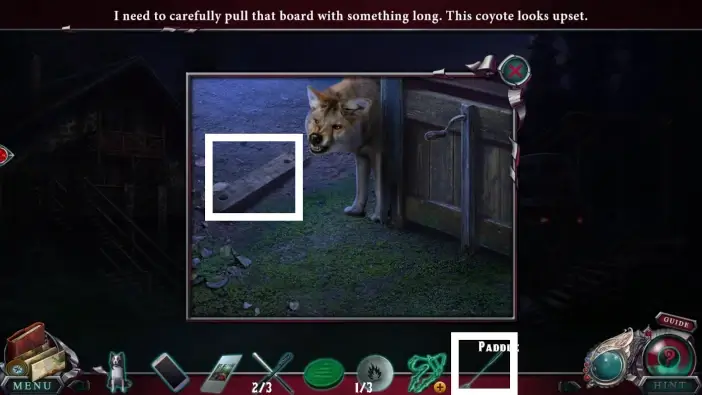
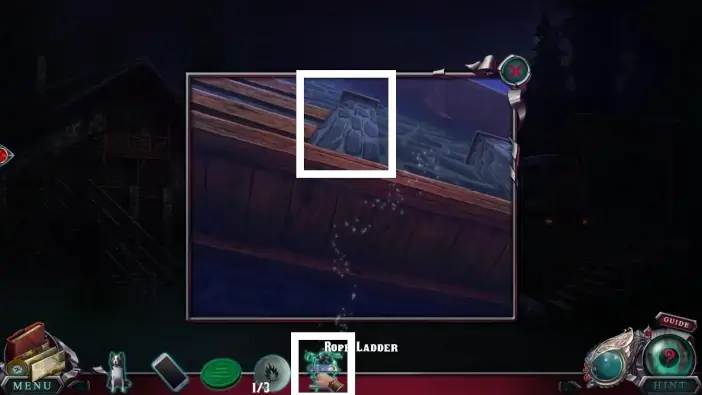
Return to the magic coyote and use the paddle to safely reach and take the third item that will serve as a rung.
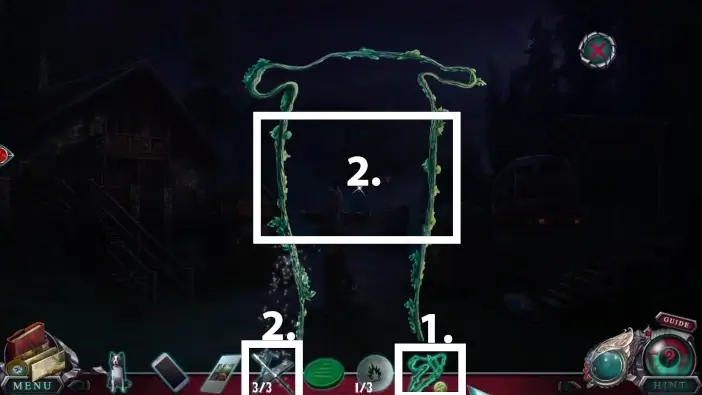
- Select the vines in your inventory to inspect them.
- Place the three rungs on the vine.
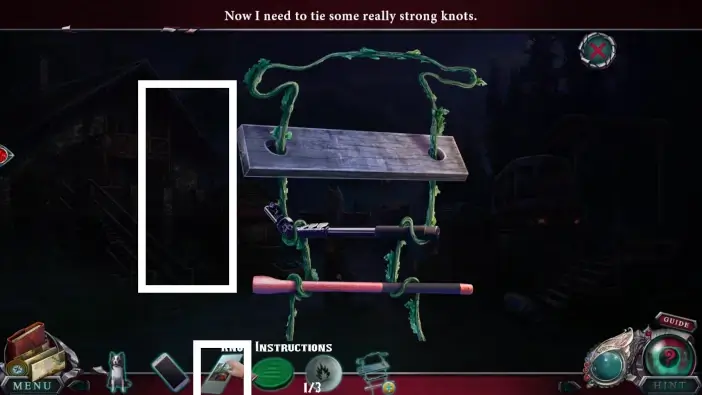
Place the knot instructions next to the vines, and Amanda will create an improvised rope ladder. Click on the ladder to add it to your inventory.
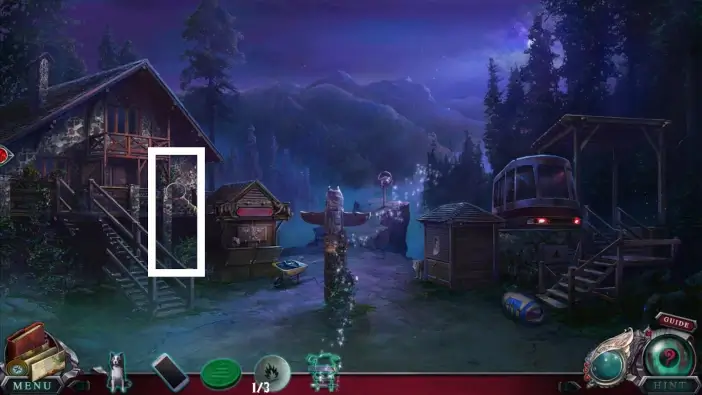
Approach the director’s office building.
Place the rope ladder.
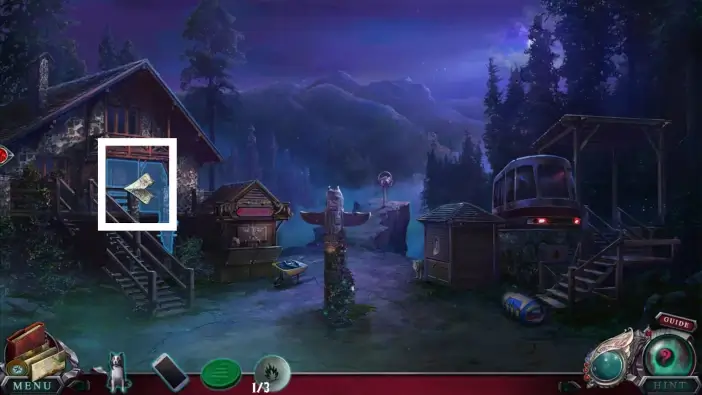
Enter the office building.

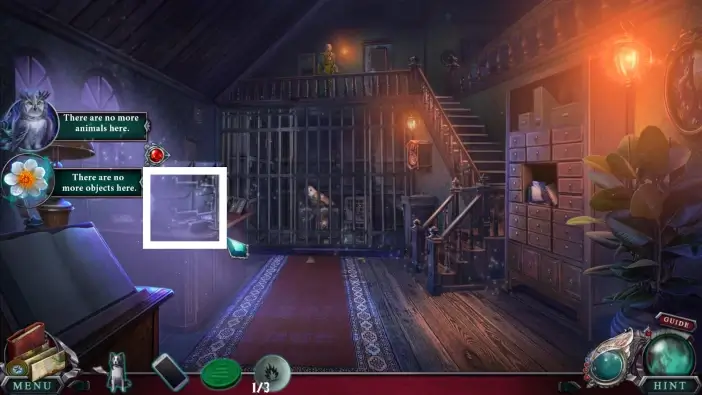
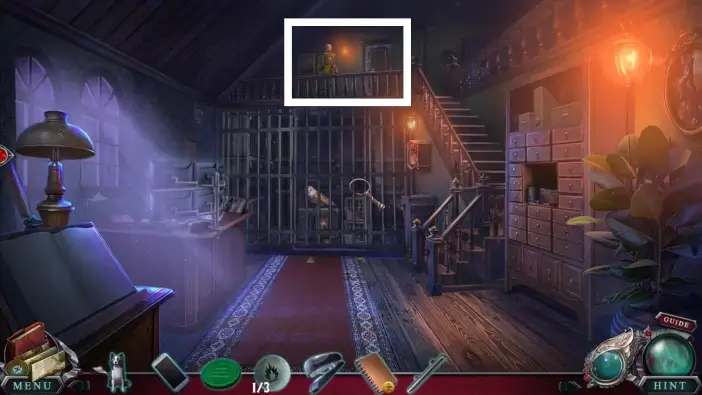
Once you are inside the office building hallway, click on all morphing objects and animals. They are marked in the picture above.
Approach the desk on the left.
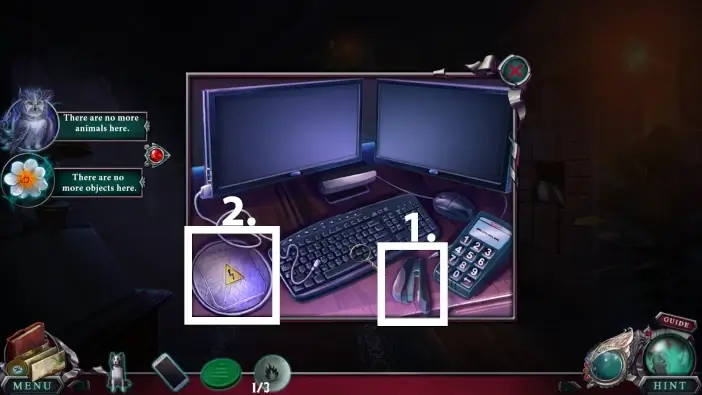
- Take the stapler. You’ll need it to attach the torn page to a notebook.
- Open the panel and remove the dysfunctional LED. You’ll need to find a replacement to fix the panel.
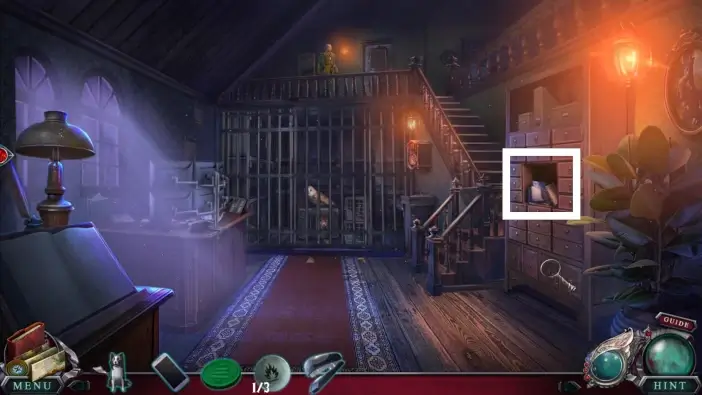
Approach the shelf on the right.
- Take the notebook. The notebook will have a torn page, and you’ll need to collect the pieces of it to read the password for unlocking the cell.
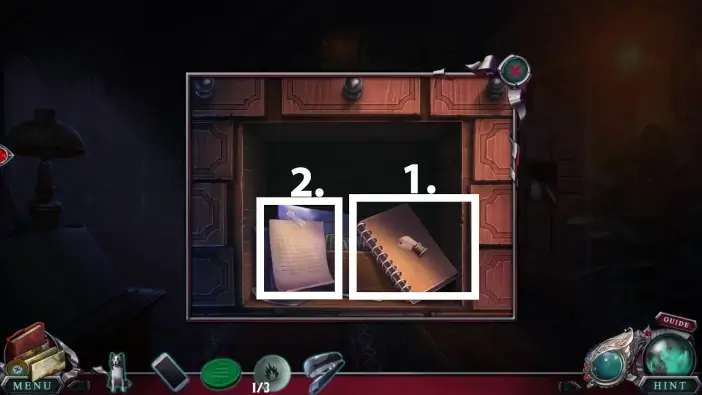
- Read the note.
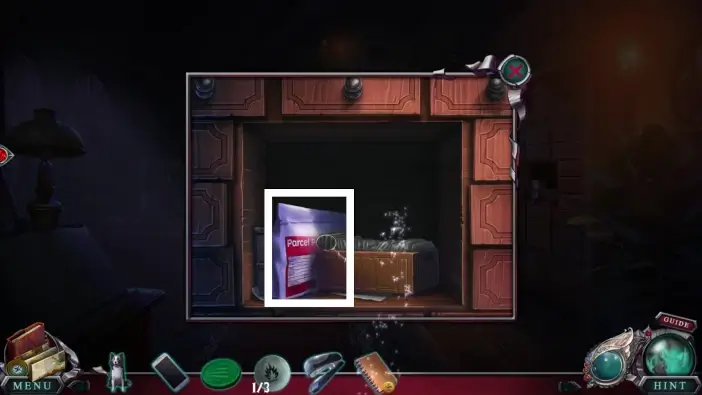
Open the package that was behind the note.
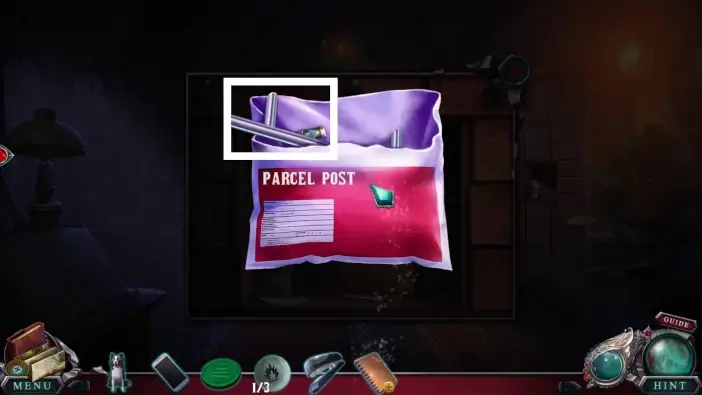
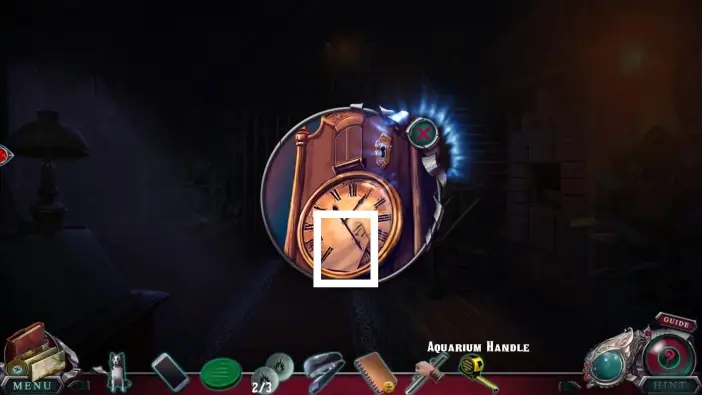
Take the LED lamp and the aquarium handle. You’ll need the LED lamp to fix the panel and the aquarium handle to open the aquarium in the director’s office upstairs.
Return to the left desk and approach the panel.
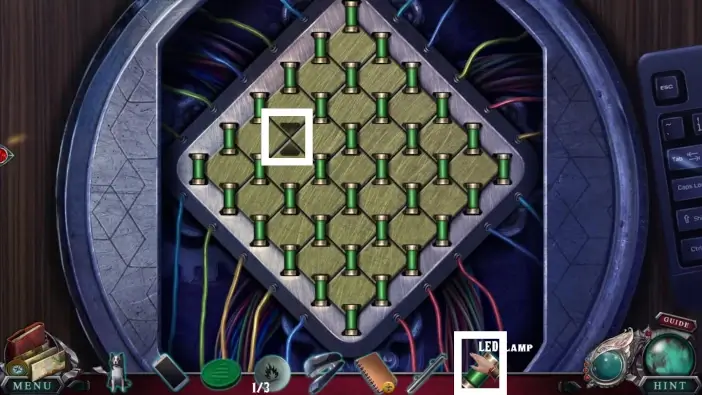
Place the LED lamp. A new puzzle challenge will begin.
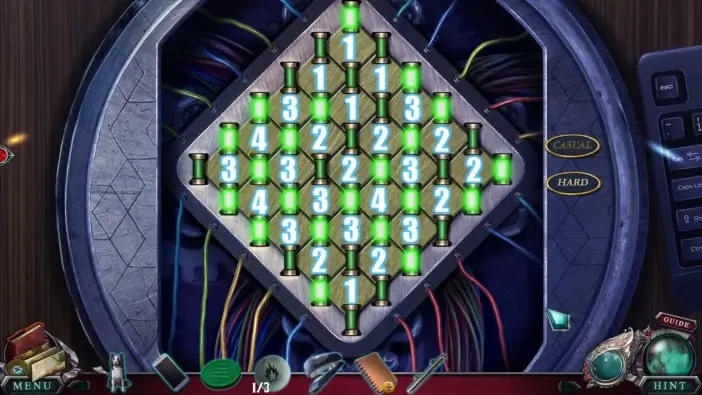
Each number represents how many fuses need to be activated around it. The solution is in the picture above. Once you complete this puzzle challenge, the PC and the password device for the cell will be activated.
Go upstairs.
Click on the folder, and it will be dropped to the floor.
- Pick up the measuring tape. You will use it to reach one piece of the torn notebook page, behind the cell.
- Read the document and then take the second fire token that was beneath the document.
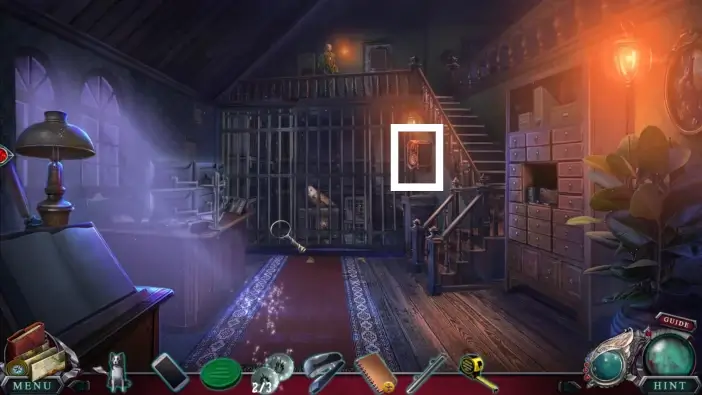
In the hallway, approach the clock.
Take the first code piece (part of the torn notebook page). You’ll need to collect four code pieces to restore the page.
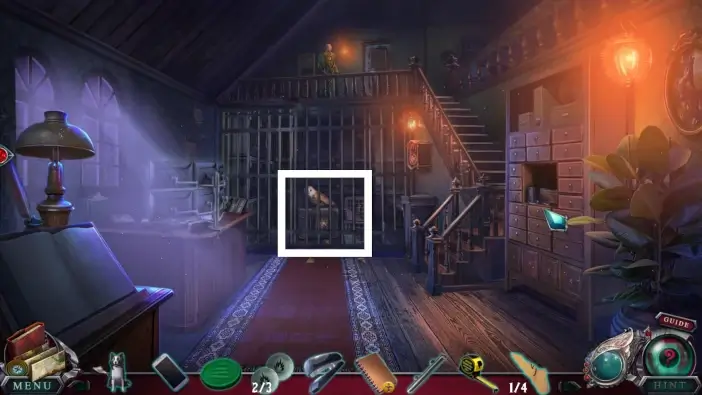
Approach the cell where the magic animals are imprisoned.
Use the measuring tape to reach and take the second code piece.
Collect the third and fourth code pieces from the floor.

- Click on the notebook in your inventory to open it.
- Place the code pieces on the right side.
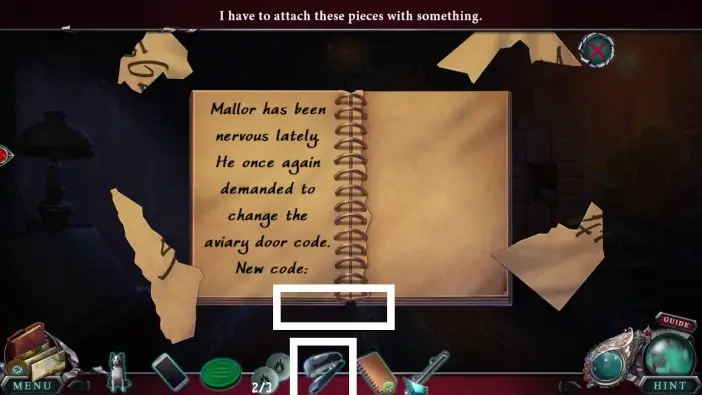
Place the stapler.
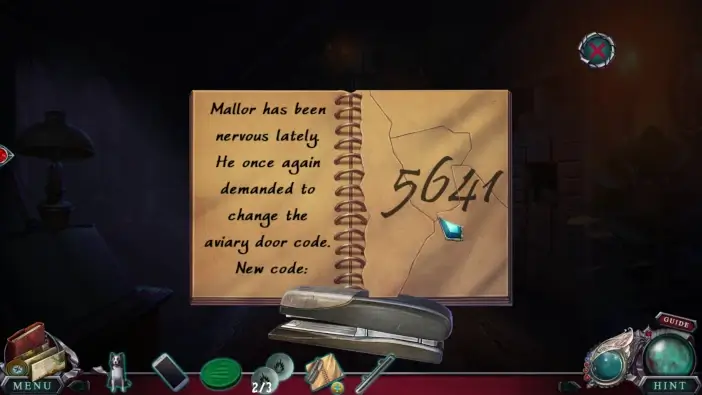
Restore the page. You will see the code “5641”. Click on the notebook one more time to return it to your inventory.
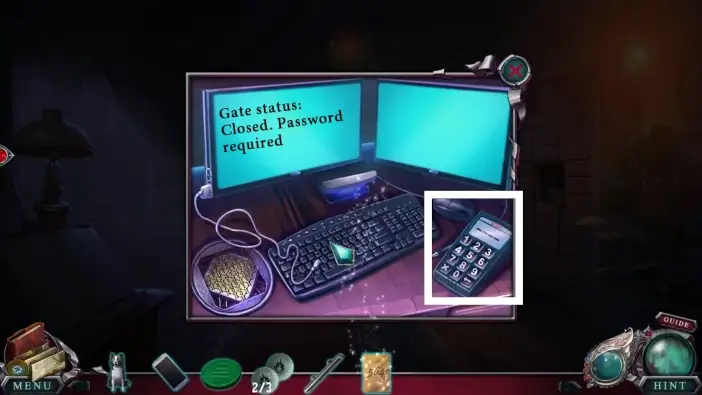
Go to the left desk and approach the password device.
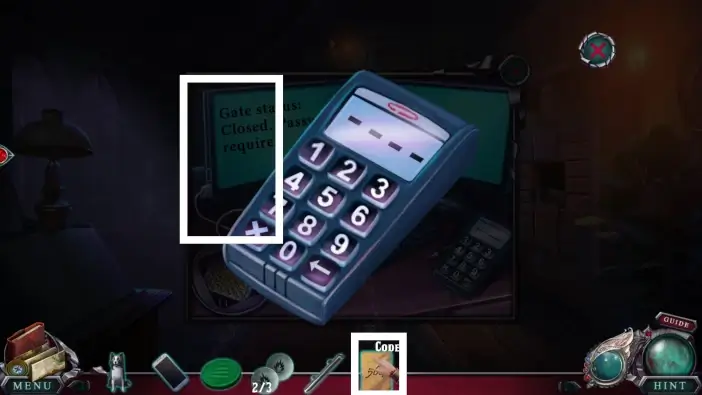
Place the code from the notebook beside the device.
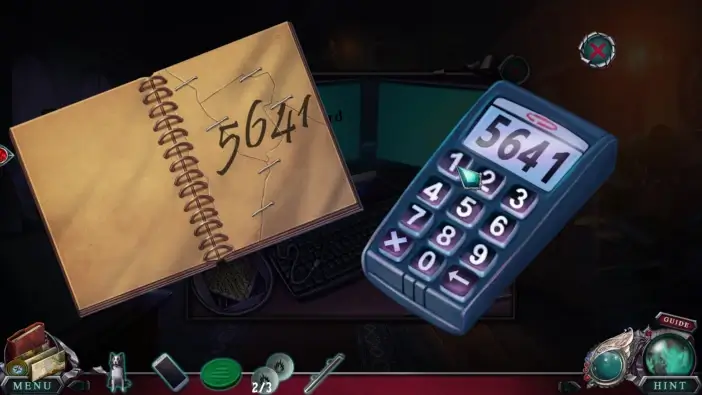
Press the buttons of the device to input the code “5641”. This will open the cell bars, and the magic owl will escape the prison.
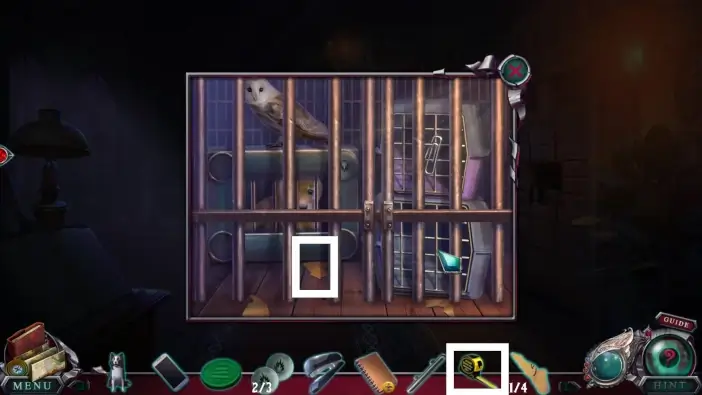
Go inside the cell and take the paperclip.

Return to the clock and use the paperclip to unlock the lock.
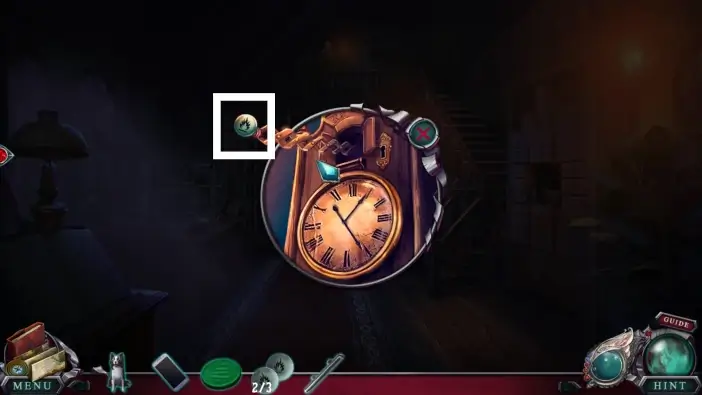
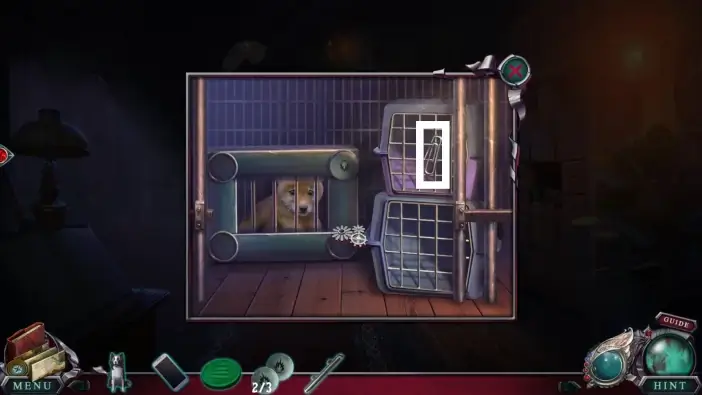
Take the third fire token.
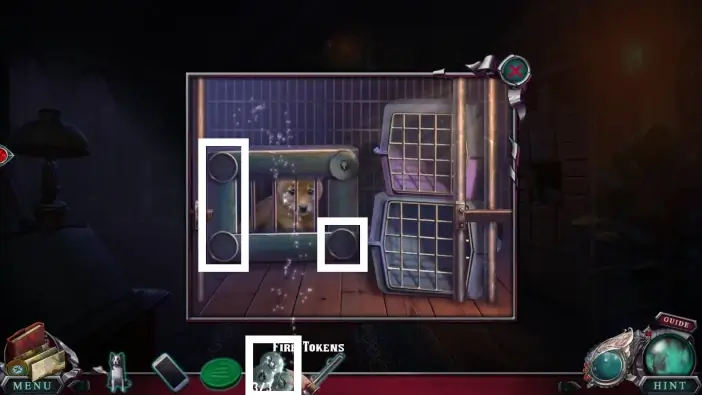
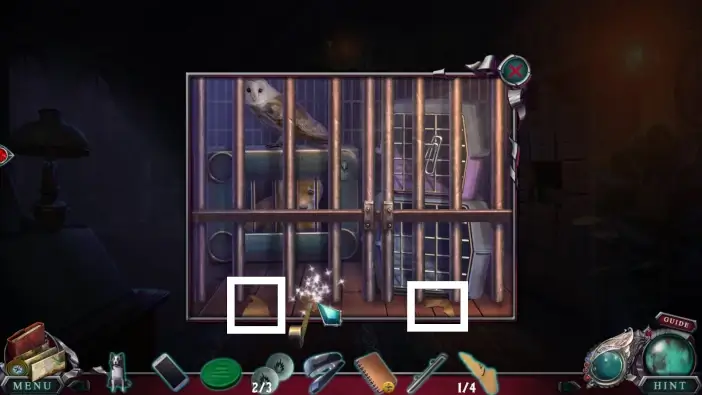
Return to the cell and place the fire tokens on the slots on the side of the coyote cage.
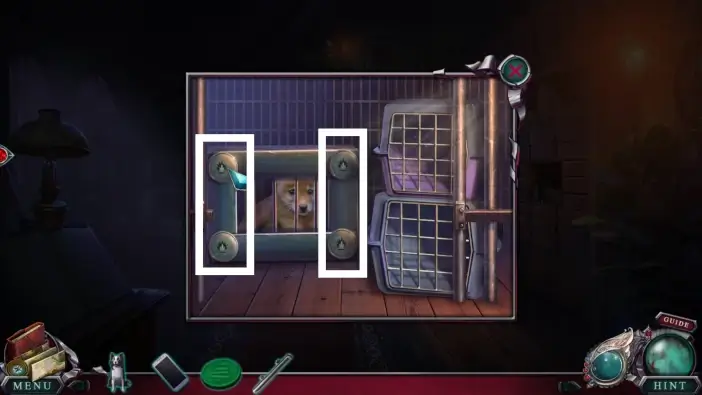
Rotate all the fire tokens like in the picture above to release the coyote pup. The coyote pup will be added to your inventory.
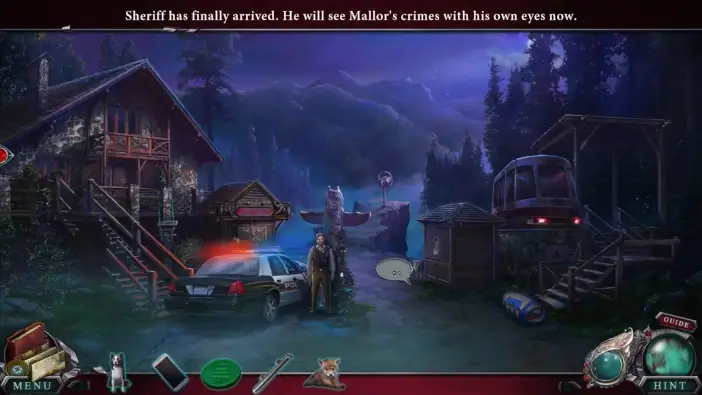
Exit the office building and speak with the sheriff.
After the conversation with the sheriff, approach the magic coyote and bring her her pup. Because you’ve helped another animal, you can now use the artifact.
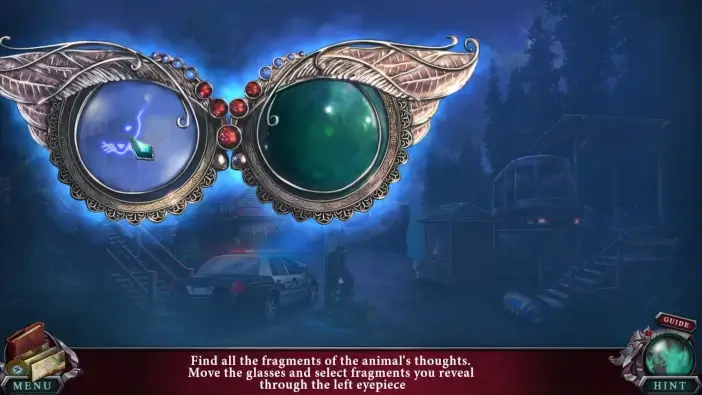
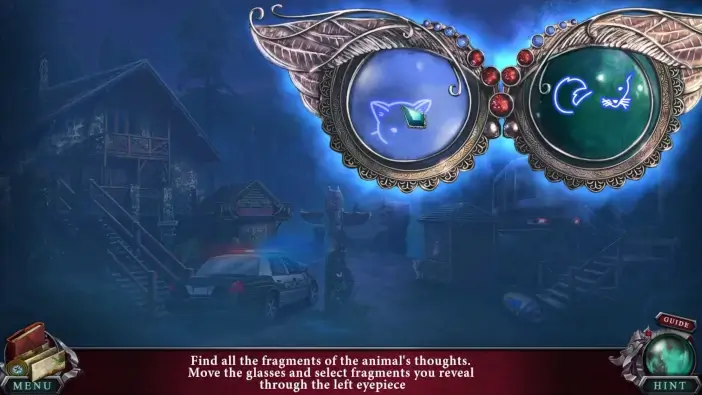
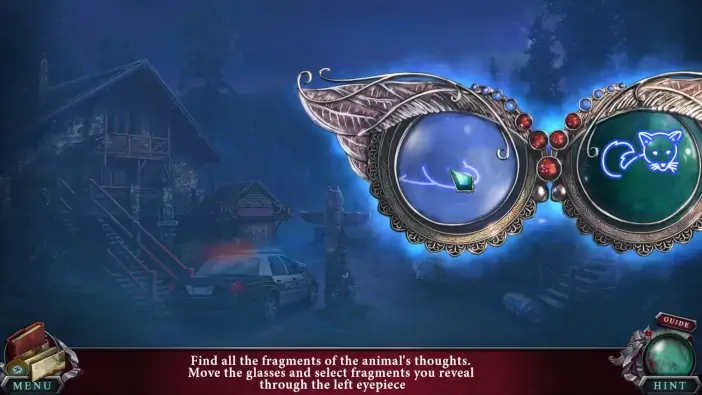
Follow the pictures in this guide to find all memory fragments of the coyote.
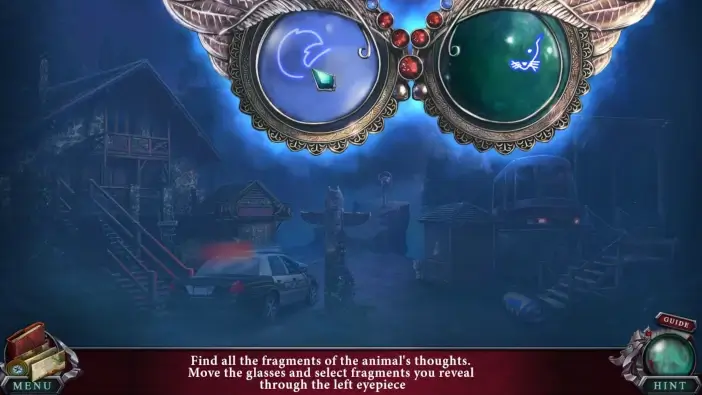
Once you find the last memory fragment, watch the coyote’s memory cutscene.
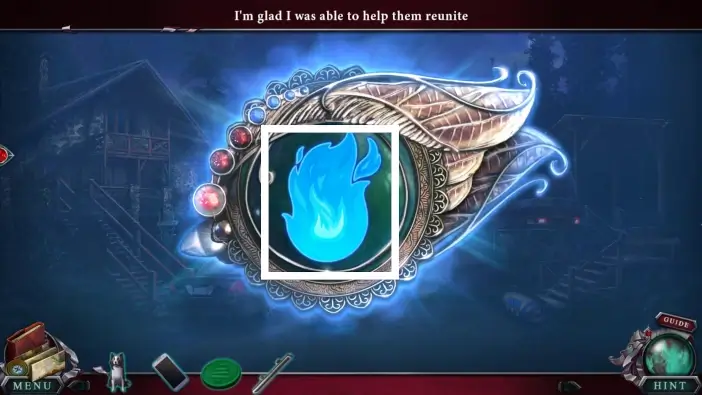
After the cutscene, take the Coyote Breath ability from the artifact.
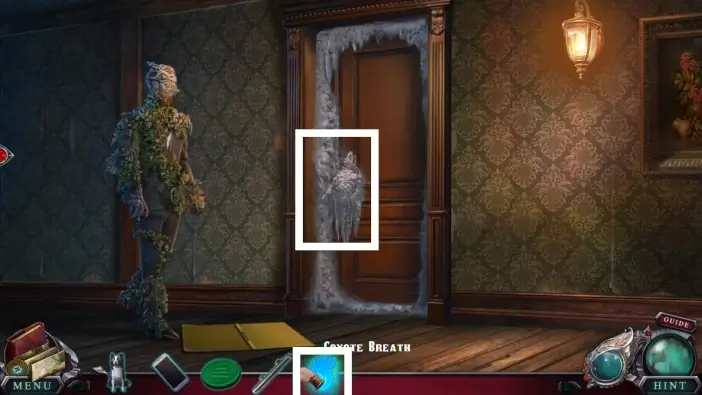
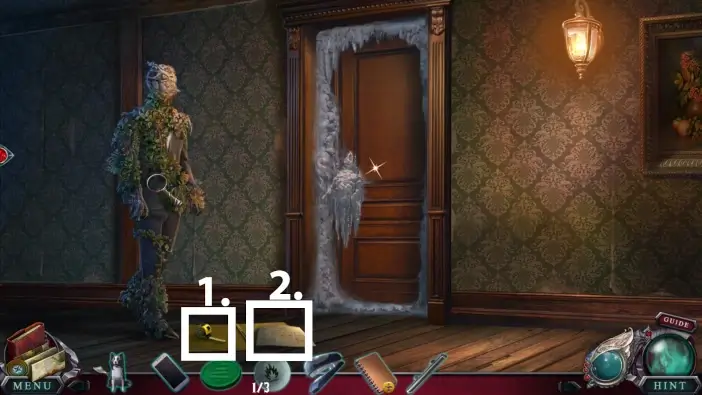
Enter the office building, go upstairs, and use the Coyote Breath ability to melt the ice from the office door. Enter the director’s office.
This will mark the end of our guide for Part 5 of the Main Chapter of the Edge of Reality: Lost Secrets of the Forest.
Thank you for reading!