Edge of Reality: Lost Secrets of The Forest | Main Chapter Part 4
Intro
Welcome to our walkthrough for Part 4 of the Main Chapter for the “Edge of Reality: Lost Secrets of the Forest” from “Friendly Fox Games”. Help biologist Dr. Amanda solve the mysterious events in the forest.
Walkthrough
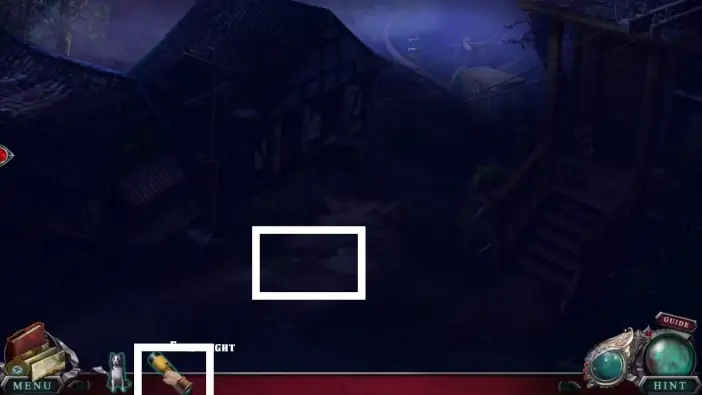
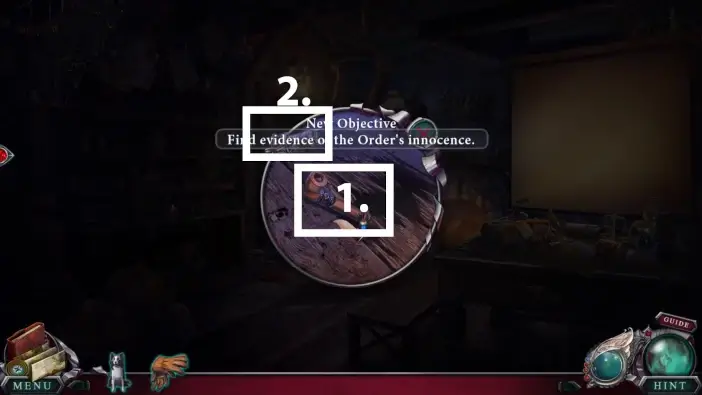
In the village center, use the flashlight.
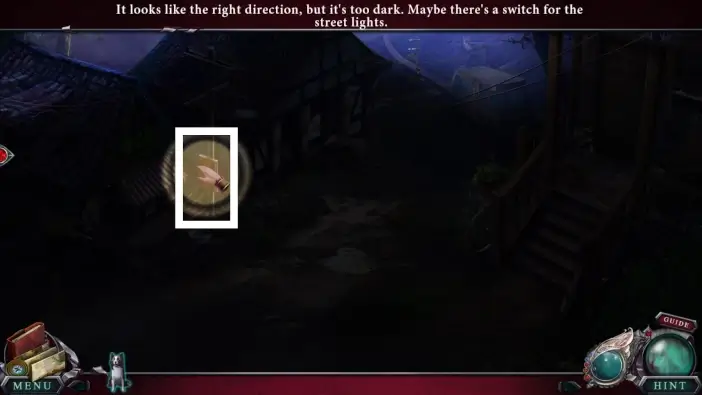
Move the cursor or finger and find the switch. Pull up the switch to return the streetlight.
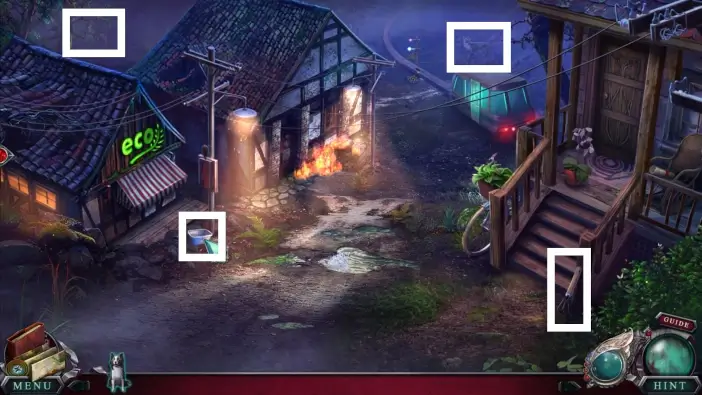
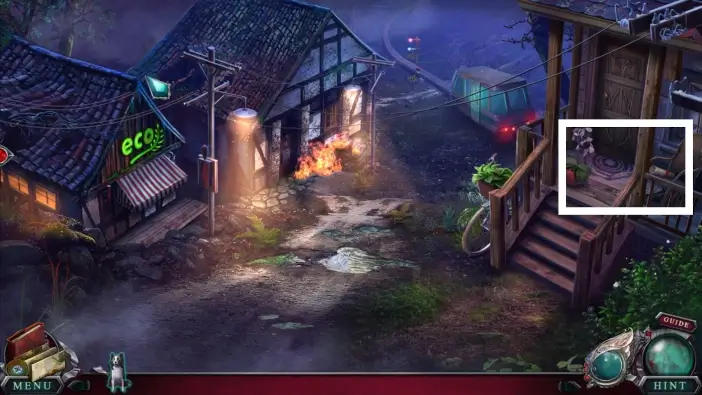
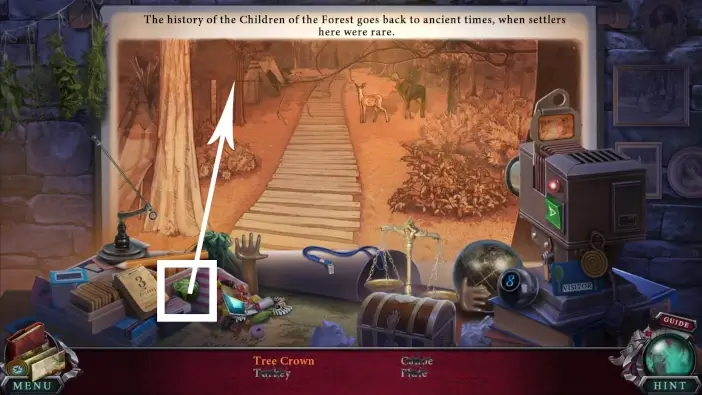
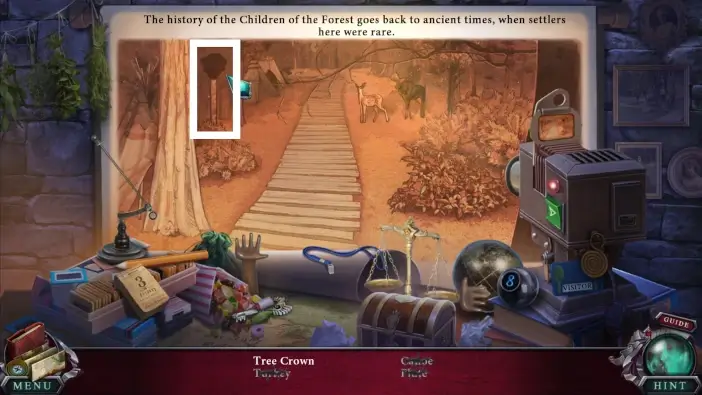
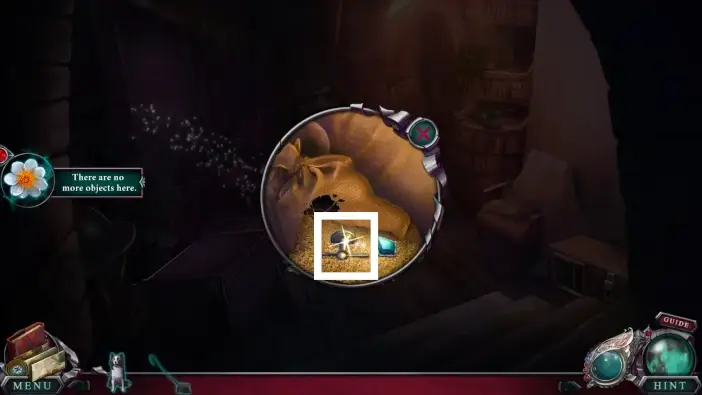
Find all morphing objects and animals. They are marked in the picture above.
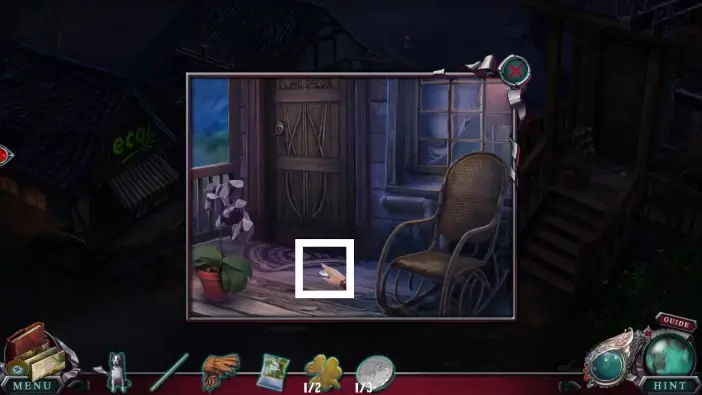
Approach Tina’s house on the right.
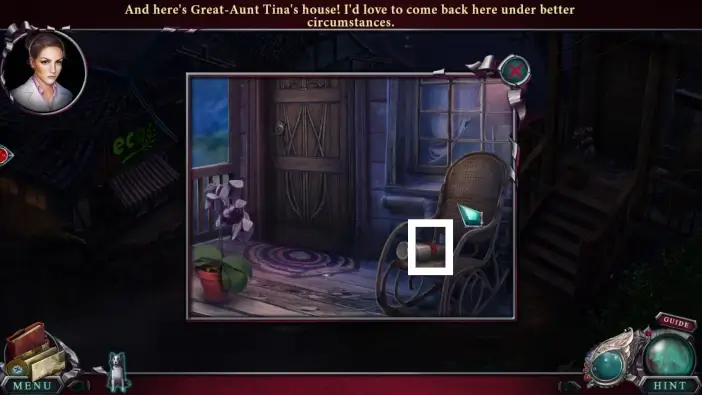
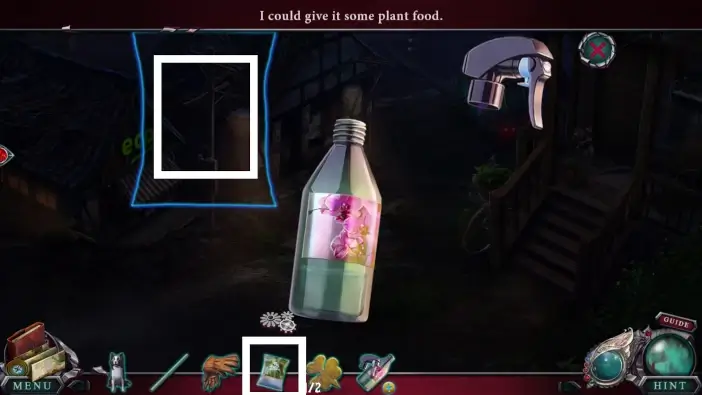
Take the ribbon from the note on the chair. You will use it to tie a curtain later. Also, read the note, which contains the hint about the plant fertilizer that you’ll need.
Enter the train.
- Read the leaflet to reveal the headphones beneath it. You will use headphones to tie another curtain.
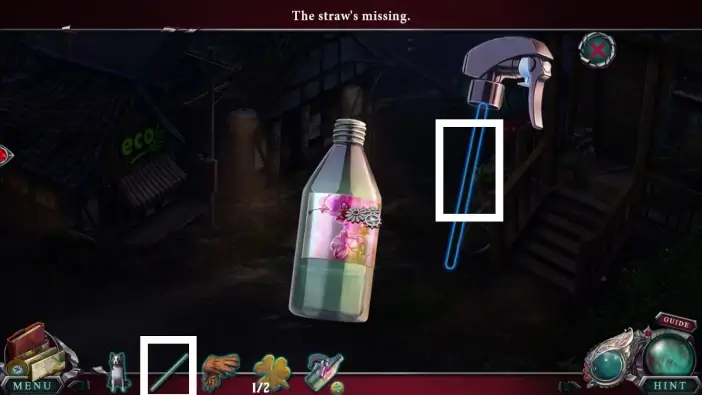
- Take the straw. You’ll need it for the plant spray that will contain the plant fertilizer.
Go to the eco shop on the left.
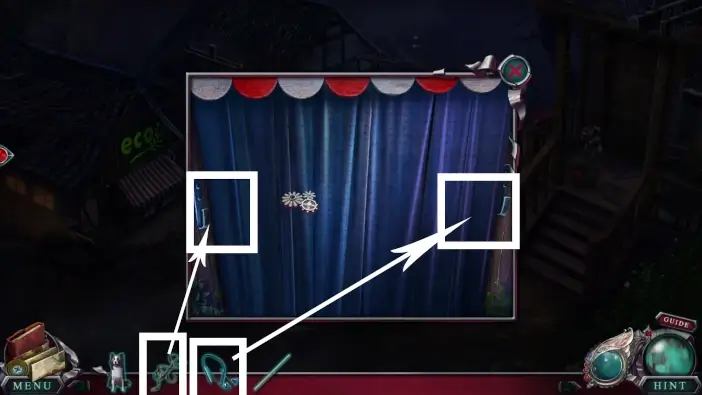
At the shop window of the eco shop, tie the curtains with the ribbon and the headphones.
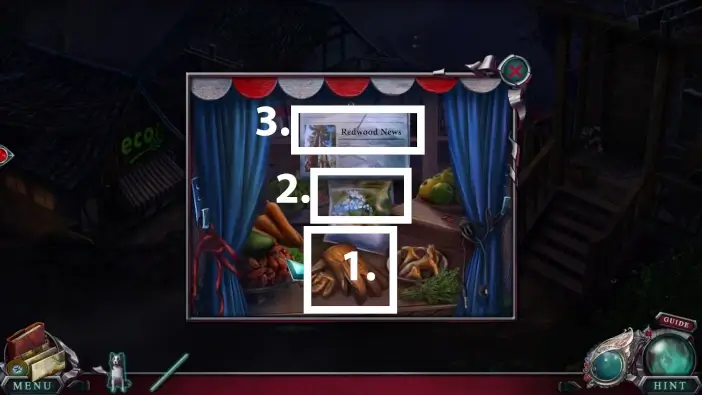
- Take the gloves. You will use them to take one of the owl keys.
- Take the plant food. You will put it in the plant spray.
- Read the newspapers.
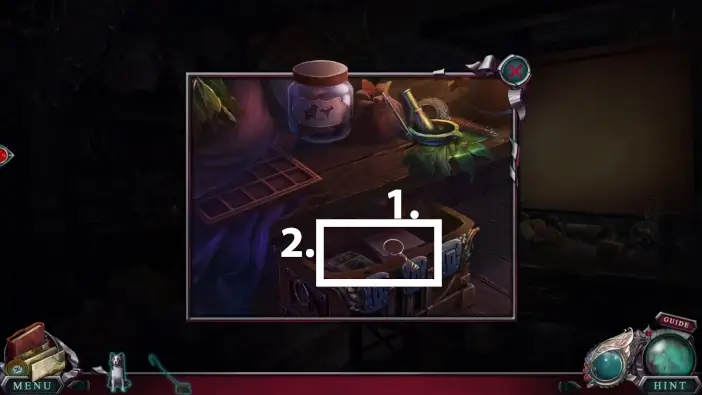
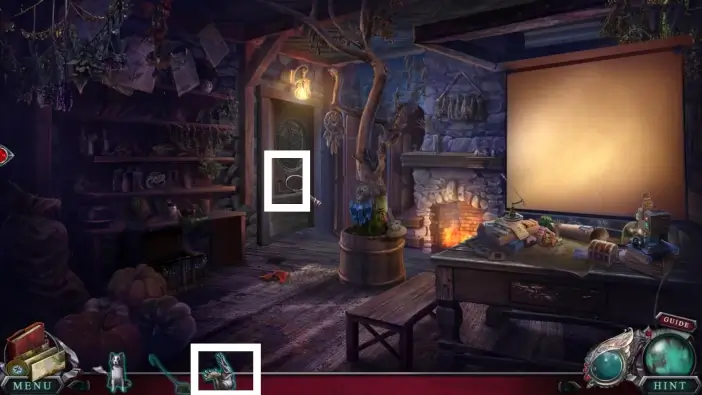
Approach the rails behind the train.
Take the first seedling tag and the first coin from the ground. You’ll need two seedling tags to unlock the Keeper’s house. As for coins, you’ll need three coins for a vending machine on the train.
Return to Tina’s house and take the second coin under the carpet.
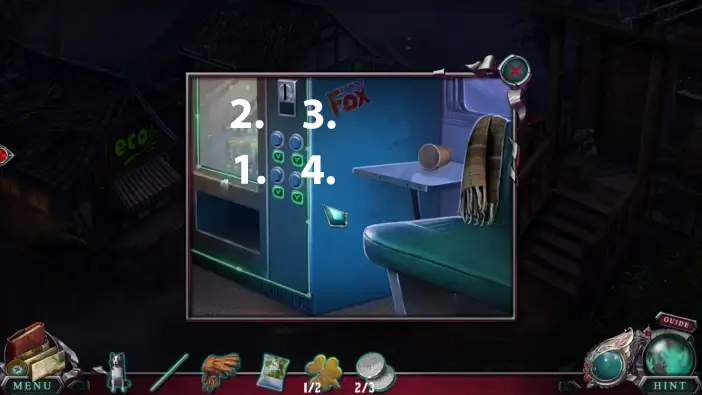
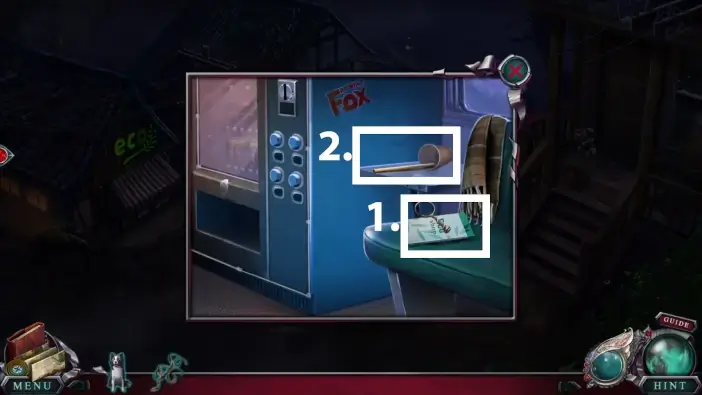
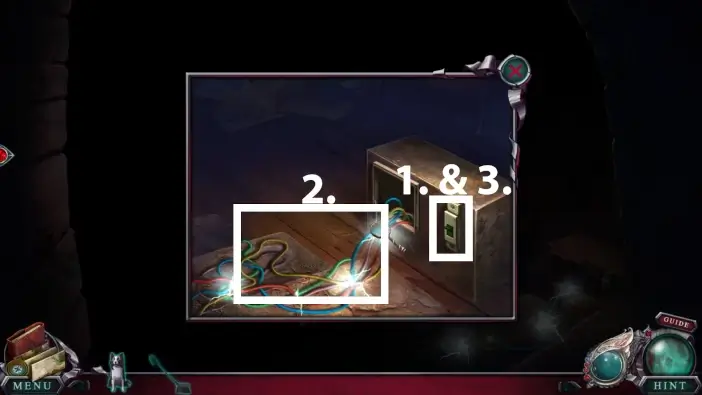
Return to the train and press the buttons on the vending machine in the correct sequence. The sequence is shown in the picture above: lower-left, upper-left, upper-right, lower-right. This will activate the vending machine, but first, you’ll need to collect the third coin before using it.

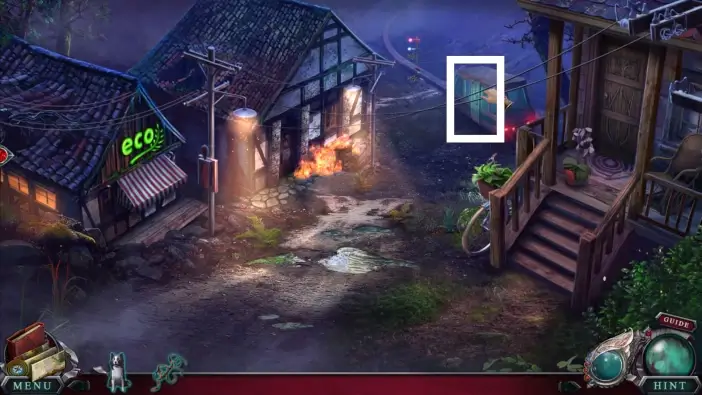
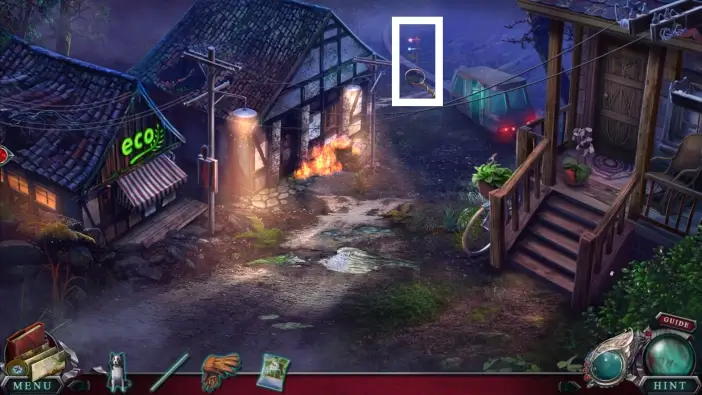
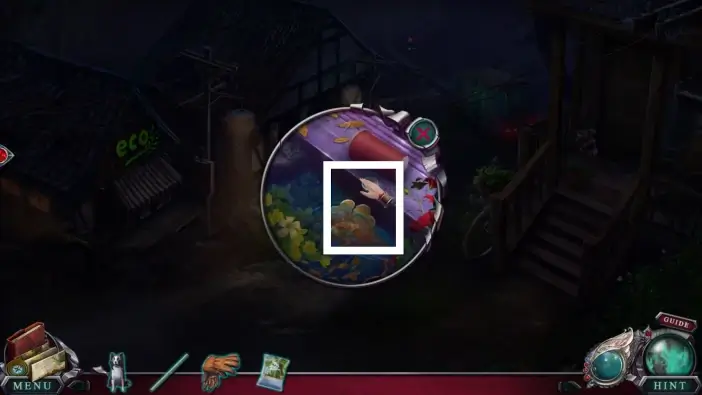
Go to the truck area and approach the anomalies on the left.
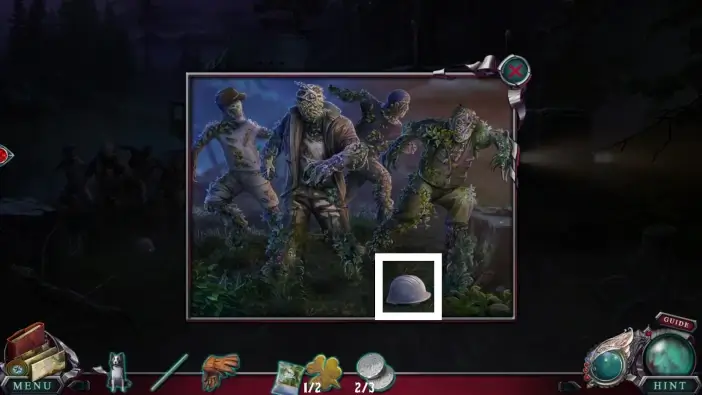
Move the white hard hat to reveal the third coin. Pick up the coin from the ground. Optionally, you can read the letter from the hard hat.
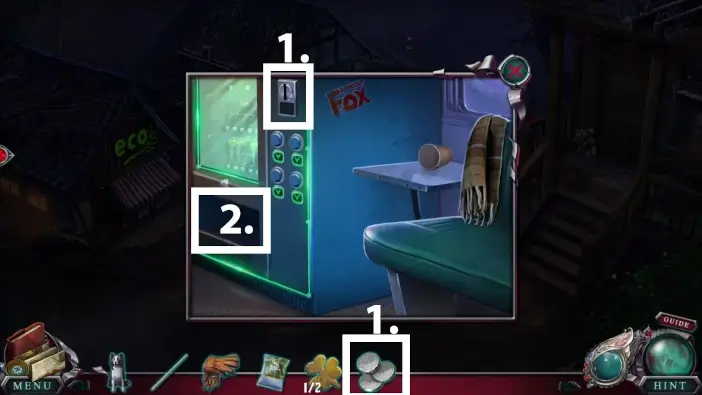
- Return to the vending machine and insert three coins.
- Take the bottles of water.
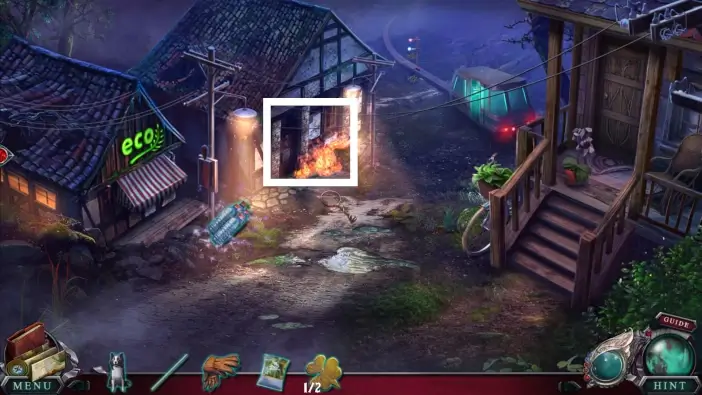
Go to the Keeper’s house.
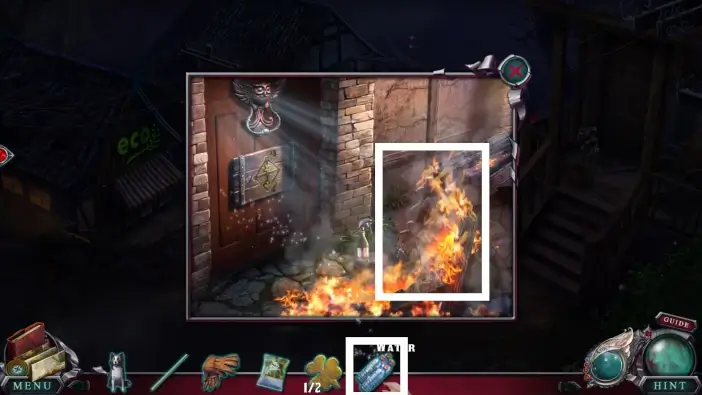
Use water to extinguish the fire.
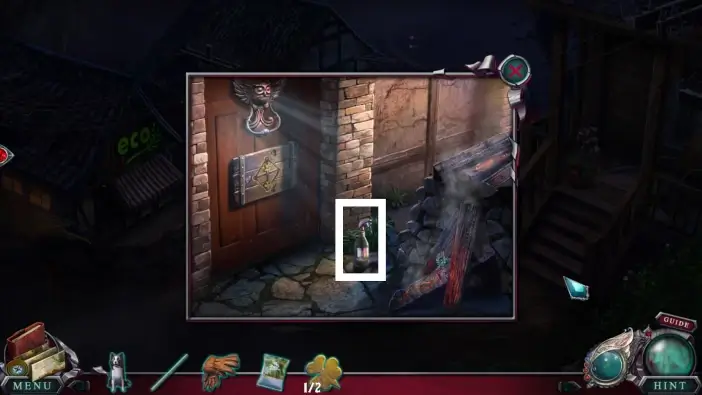
Pick up the empty plant spray from the ground.
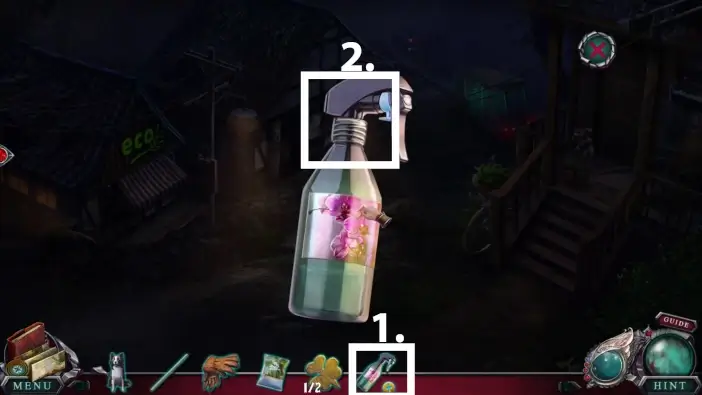
- Select the plant spray from your inventory to inspect it.
- Open the spray bottle.
Place the plant food next to the spray bottle, and Amanda will fill the spray bottle with food.
Attach the straw to the spray part. Lastly, click on the plant spray bottle to return it to your inventory.
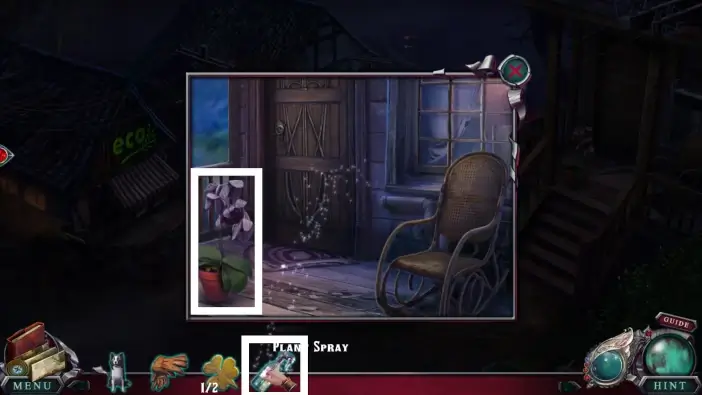
Go in front of Tina’s house and feed the plant using the plant spray.
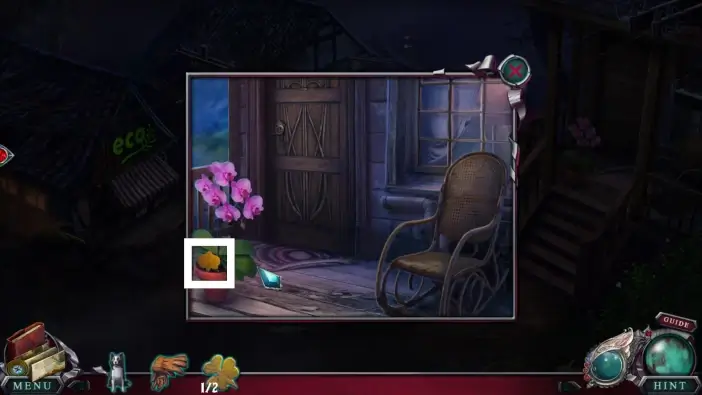
Once the plant is blooming, take the second seedling tag from the flowerpot.
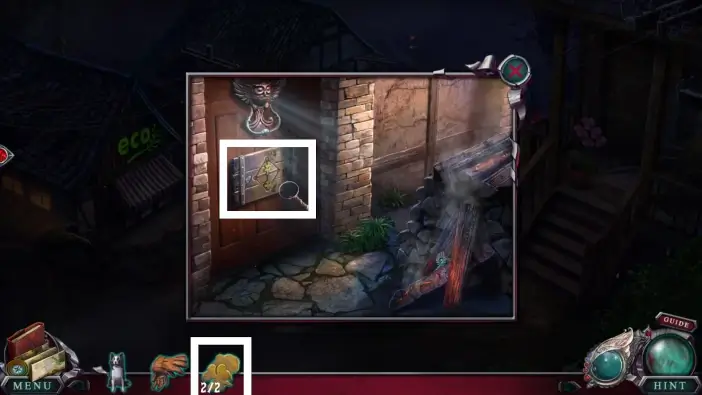
Go to the Kepper’s house and approach the door. Place the two seedling tags to start a new puzzle challenge.
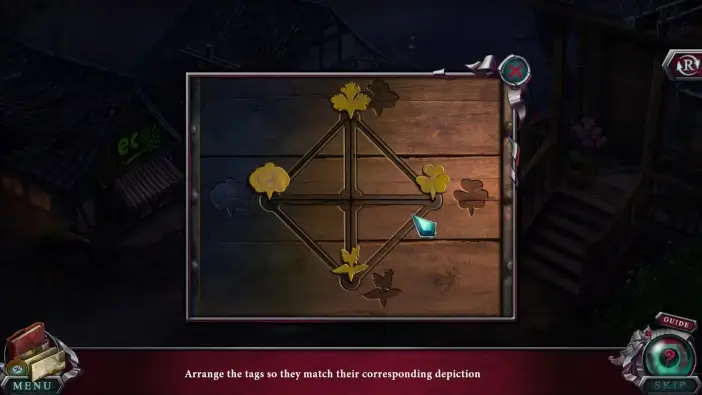
Rearrange the leaf-shaped tags like in the picture above. Every tag should be next to the same shape on the door.
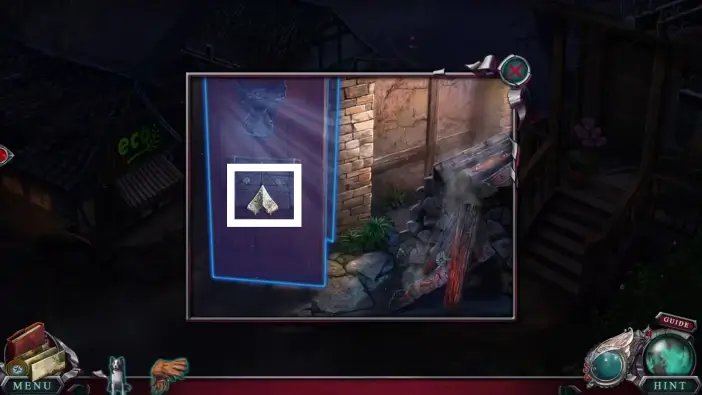
Once you solve the previous challenge, you can enter the Keeper’s house.
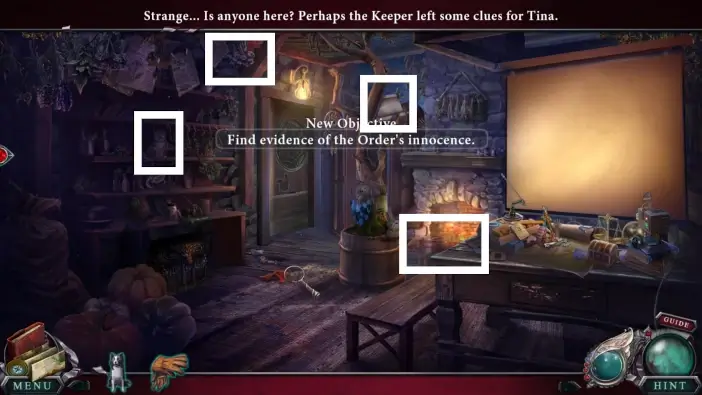
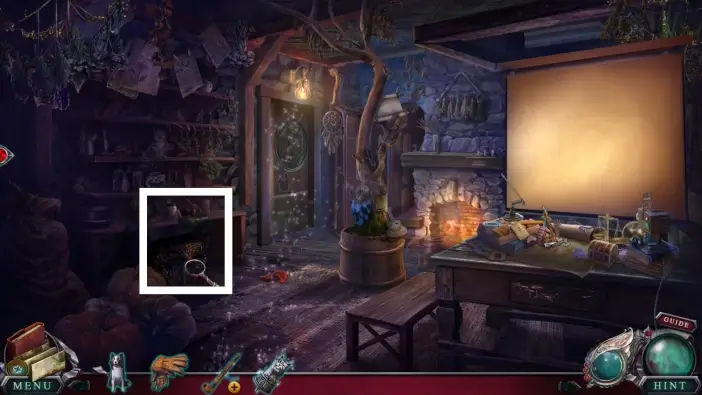
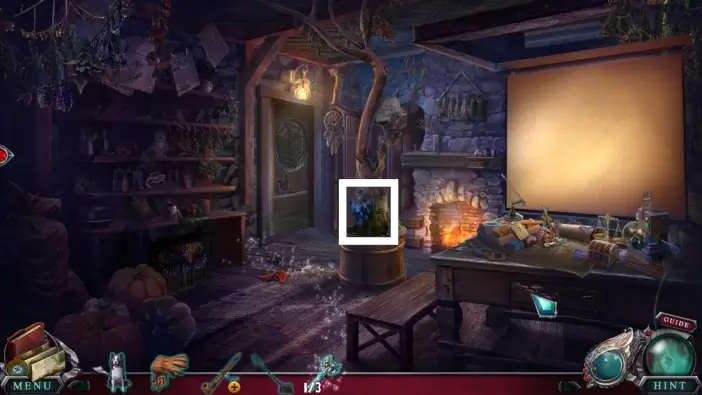
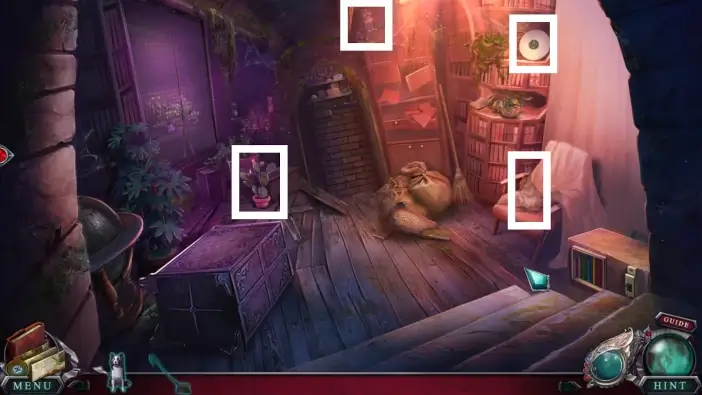
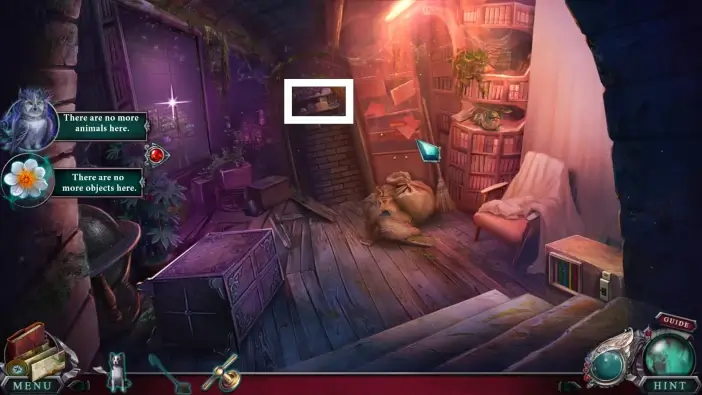
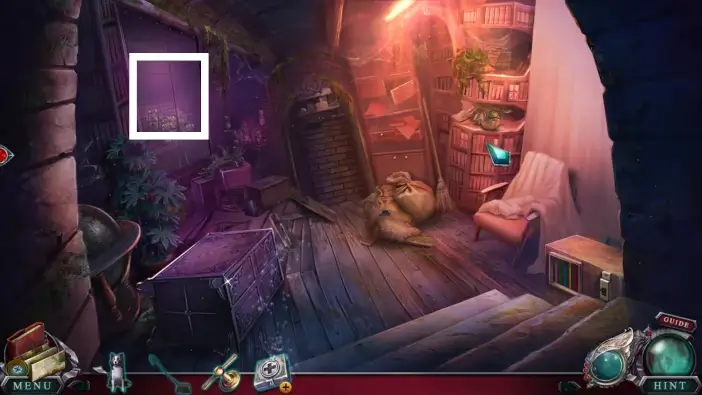
In the Keeper’s house, find all morphing objects and animals. They are marked in the picture above.

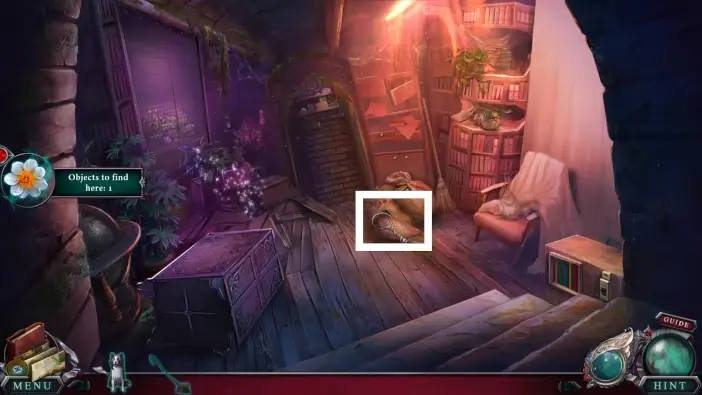
Approach the crack on the floor.
- Take the pipe. You’ll need to remove the stuck note from it later.
- Pick up the mountain lion figure. You’ll need it for a chessboard.
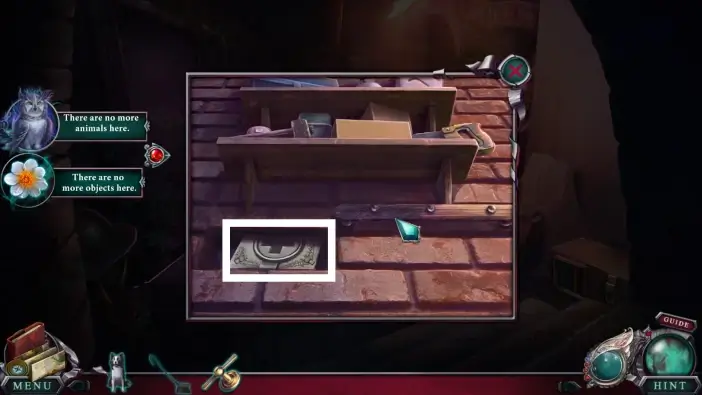
Approach the desk on the left.
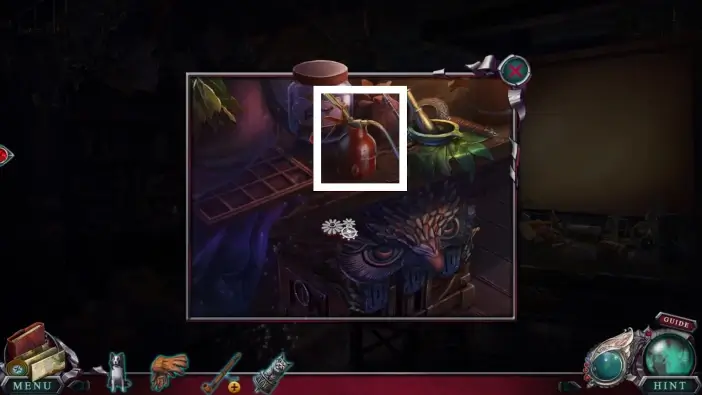
Take the oil from the desk. You will need oil for the pipe.
Approach the desk above the fireplace.
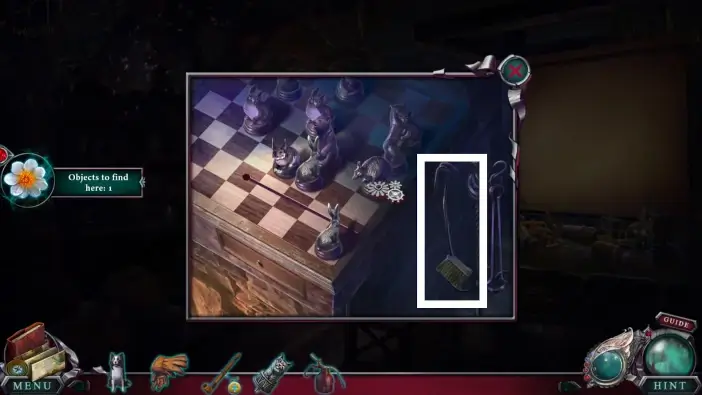
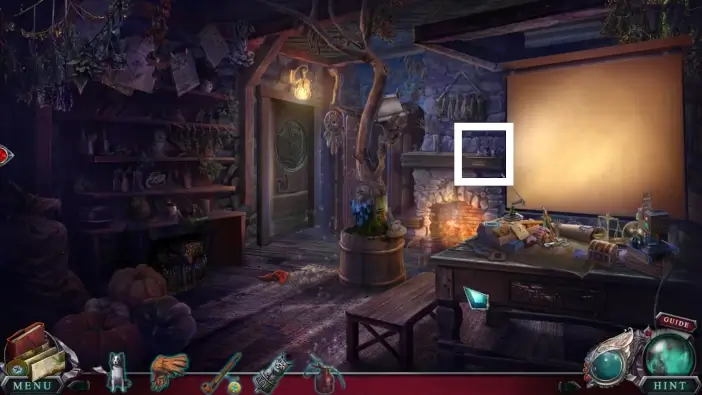
Take the broom next to the chessboard. You’ll use it to clean the Gray’s bowl in Tina’s house.
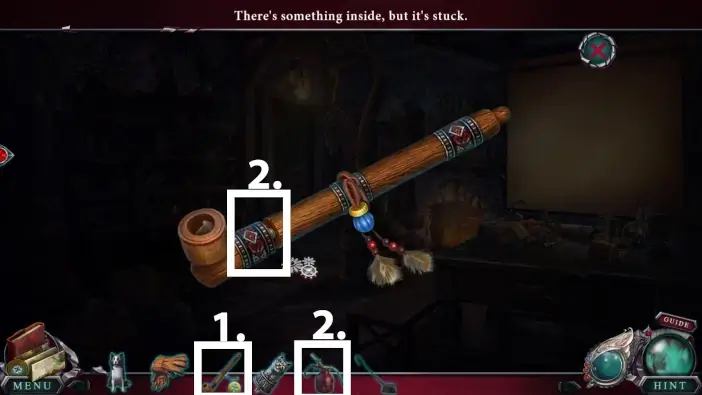
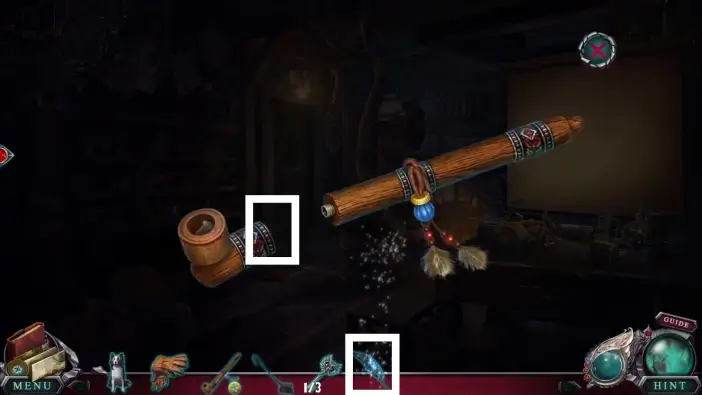
- Select the pipe from your inventory
- Use the oil you’ve found on the left desk to detach the parts of the pipe.
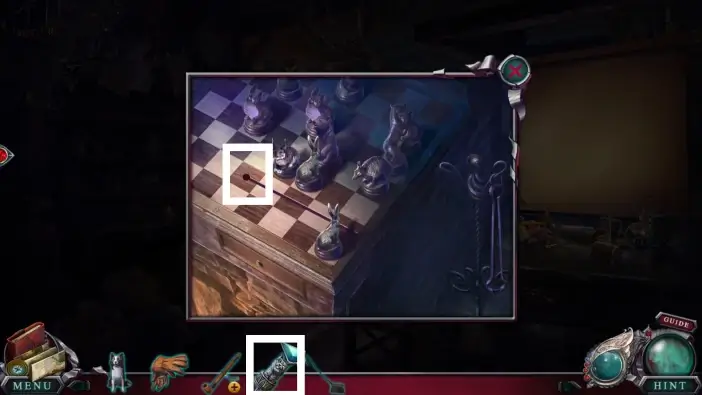
Return to the chessboard and place the mountain lion figure.
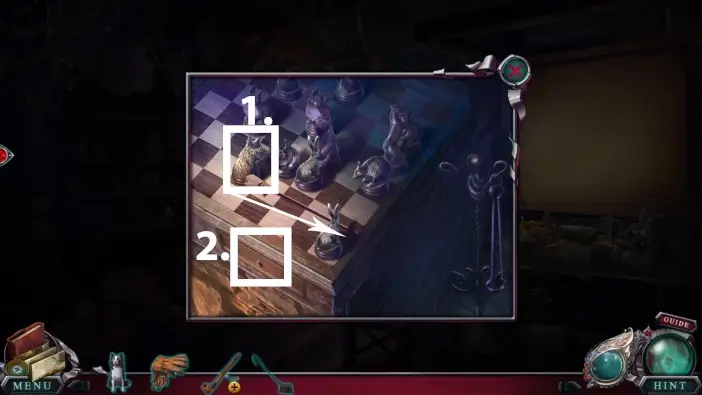
- Move the mountain lion figure to the right. This will open the drawer.
- Take the first owl key. You’ll need three owl keys to unlock a chest in the Keeper’s house, under the left desk.
Approach the tree in the center of the room.
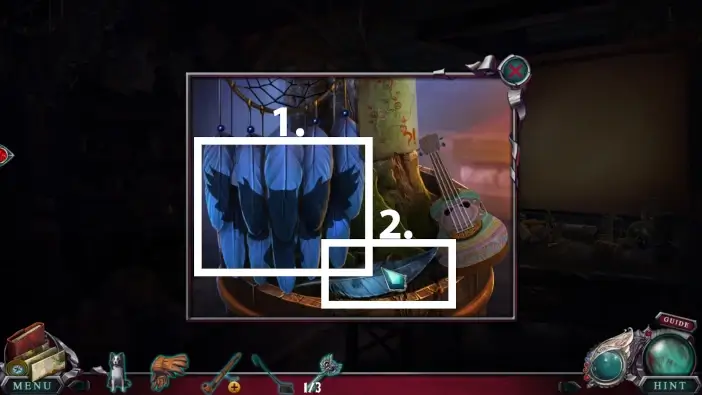
- Click on the feathers until you get the owl shape, like in the picture above.
- Once you get the owl shape, the feather will appear. Grab it.
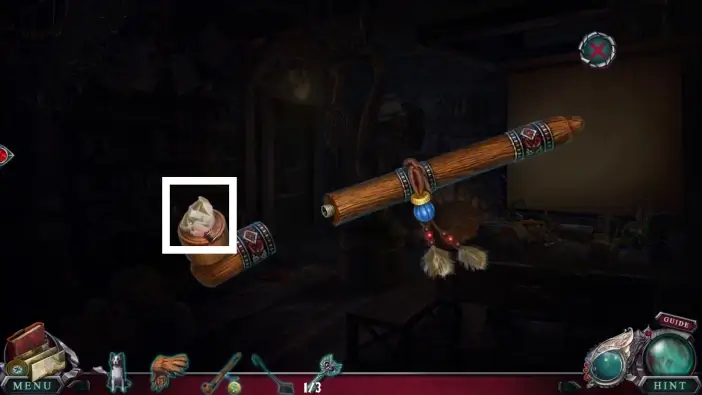
Inspect the pipe from your inventory again. Use the feather you just acquired to push the note out of the pipe.
Read the note.
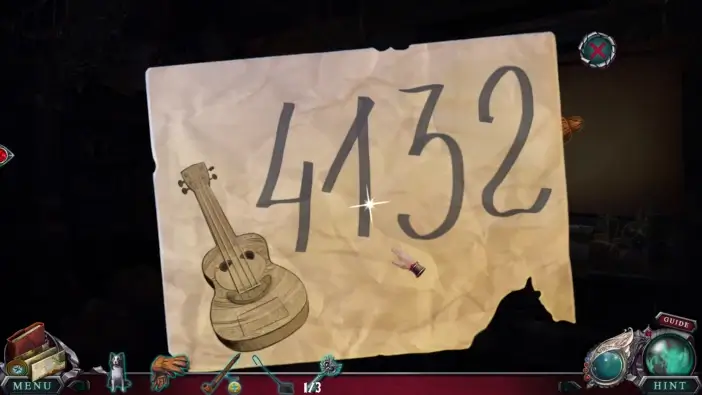
Once you read the text on one side, click on the note again to flip the paper. On the other side, the note will contain the clue about playing the guitar. Remember the numbers.
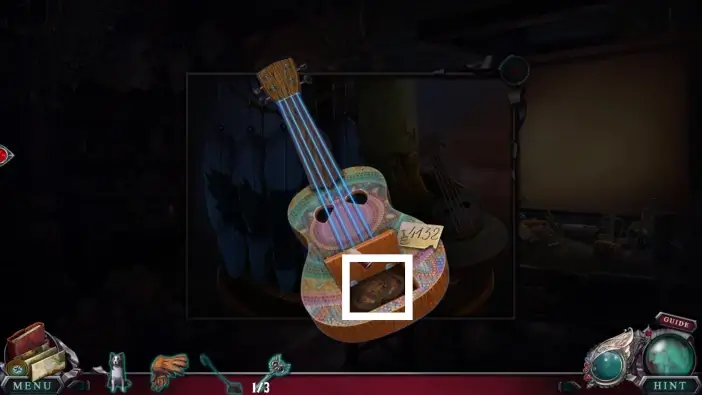
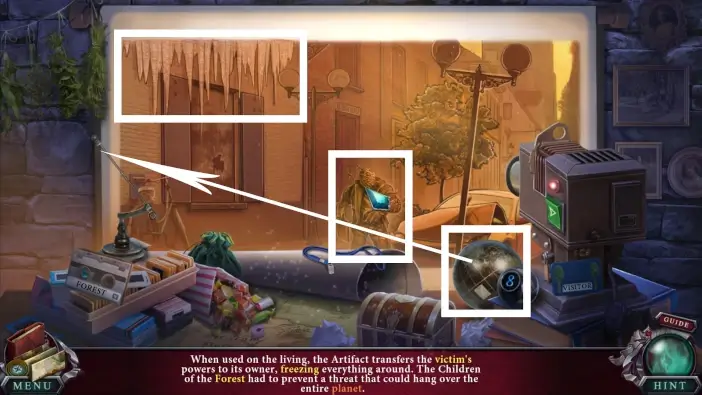
Approach the guitar that is next to the blue feathers. Place the note on the guitar. Below the strings, you will see numbers. Play the strings in order described in the note: 4th, 1st, 3rd, and 2nd. Once you’ve played the correct sequence, a compartment on the guitar will open. Take the slides from the compartment. You will use it on a projector to see the evidence.
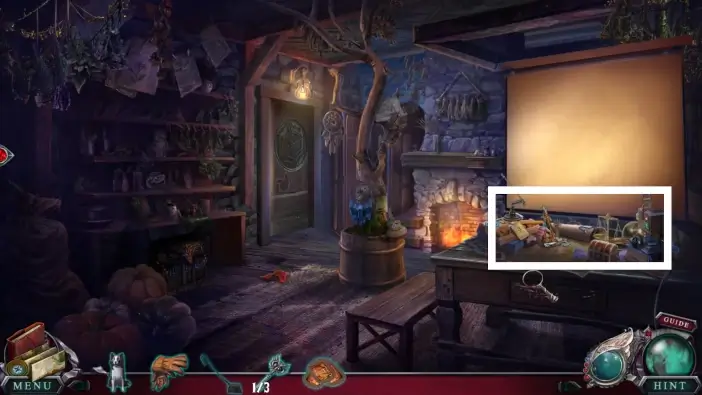
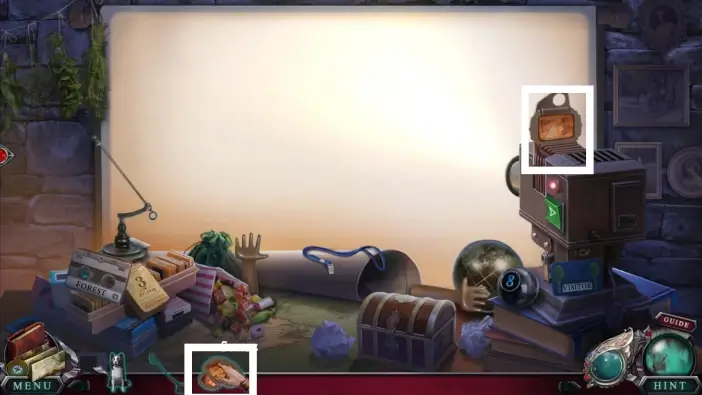
Approach the desk on the right.
Place the slides into the projector.

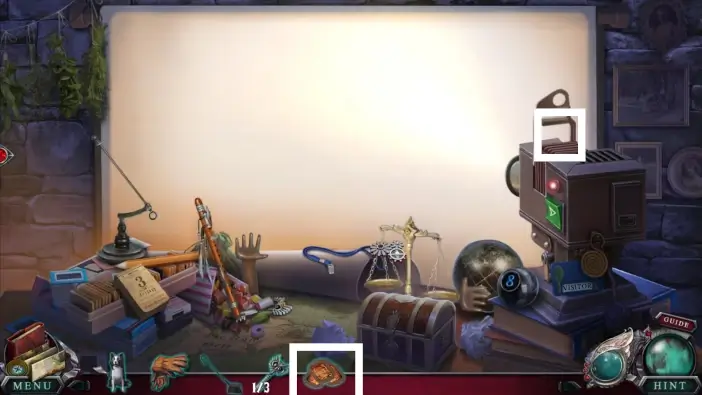
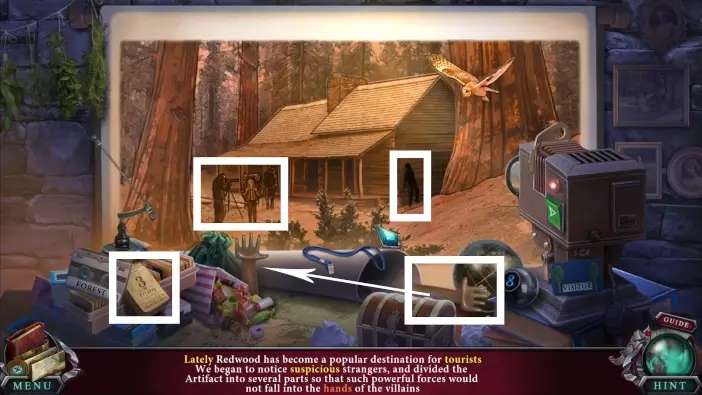
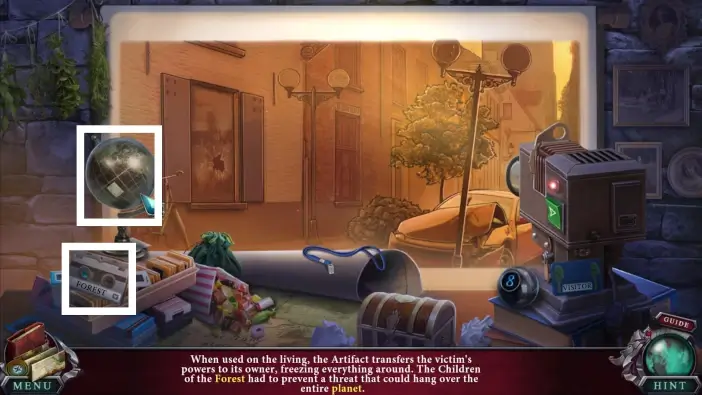
During the presentation, locate the objects listed at the bottom of the screen. Turkey, canoe, and flute are marked in the picture above.
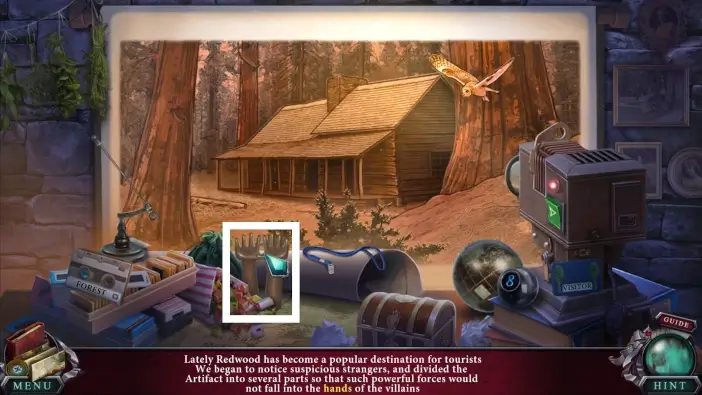
Move the broccoli next to the tree trunk to create a shadow.
Once the tree has a shadow, click on it.
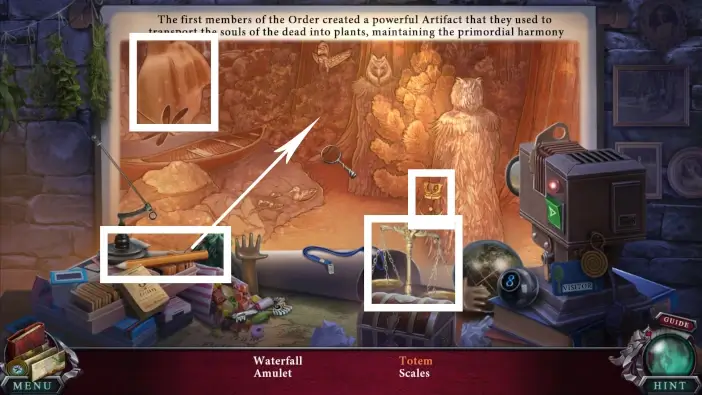
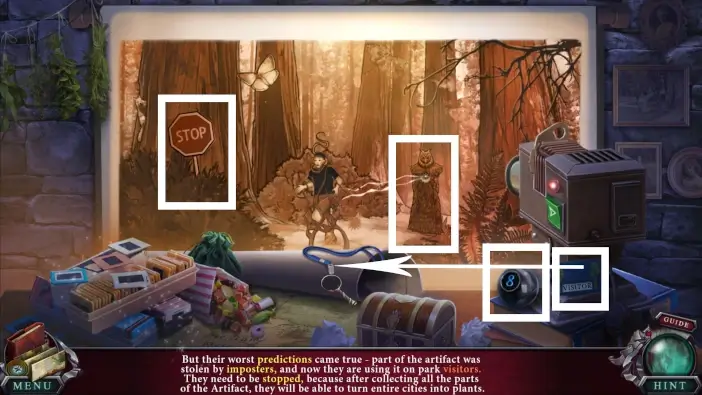
Once you select the amulet, the waterfall, and the scales, move the pencil from the table to the area next to the totem.
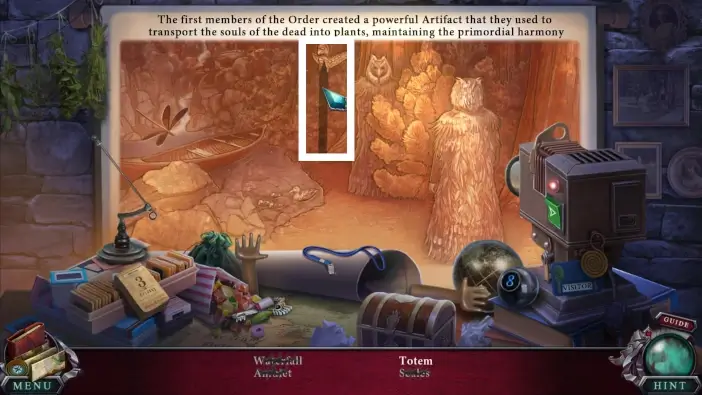
Ensure that the pencil’s shadow is part of the totem, then click the totem.
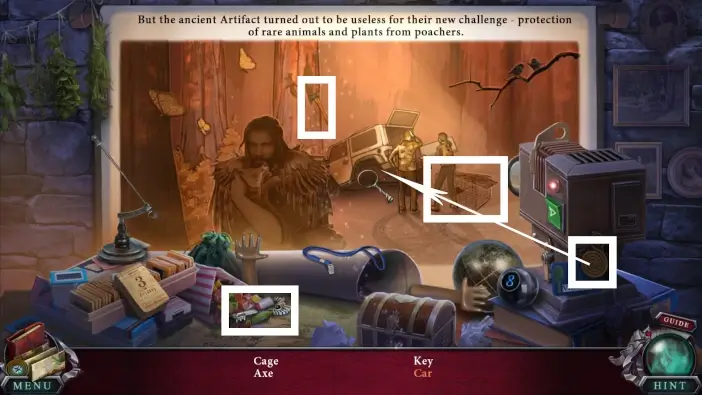
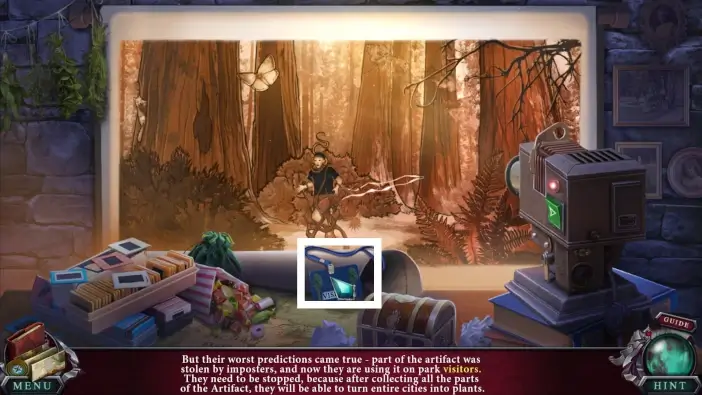
Select the cage, the key, and the axe. Move the wheel from behind the projector to the area near the car to cast the shadow.
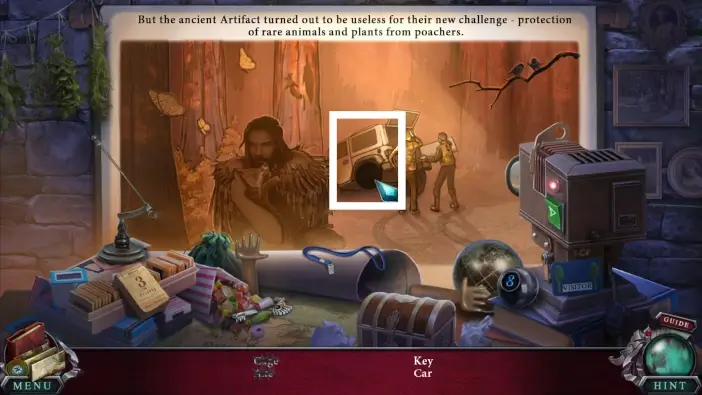
Once the shadow of the wheel appears in the correct spot, click on the car.
Once you find all the objects, a second owl key will be added to your inventory.
Exit the Keeper’s house, and in front of the Keeper’s house entrance, use the gloves from the eco shop window to grab the third owl key from the hot coal.
Enter the Keeper’s house and use the three owl keys to unlock the chest under the left desk.
- Read the letter from the chest.
- Take the photos. This will start a new cutscene.
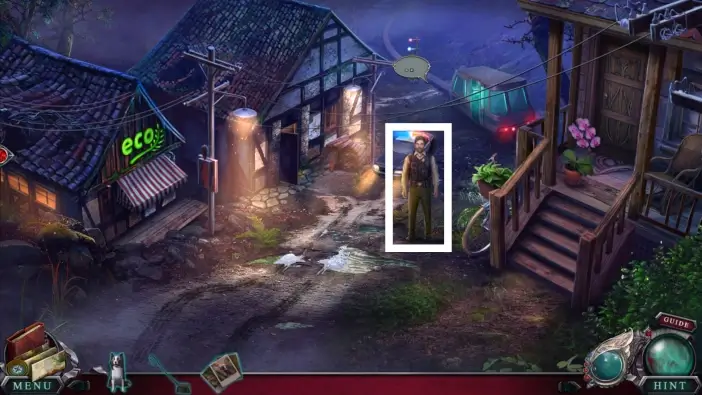
After the cutscene, exit the Keeper’s house and speak with the sheriff.
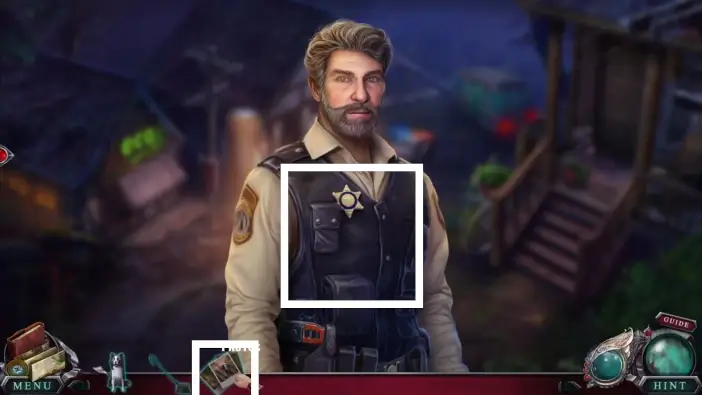
Give photos to the sheriff.
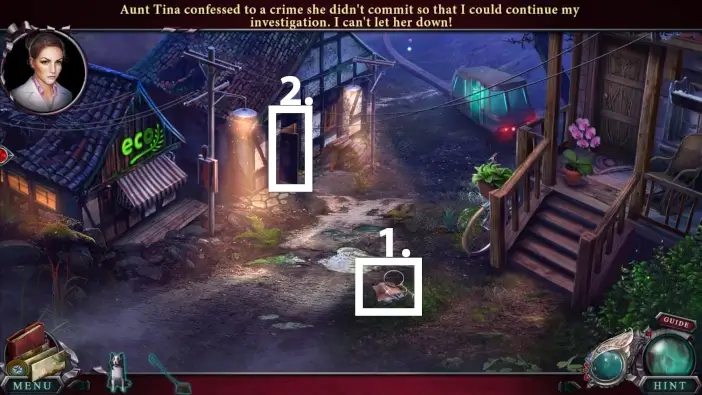
- After the conversation with the sheriff and Tina, read the letter on the ground, then pick up the squirrel token that was beneath the letter.
- Enter the Keeper’s house.
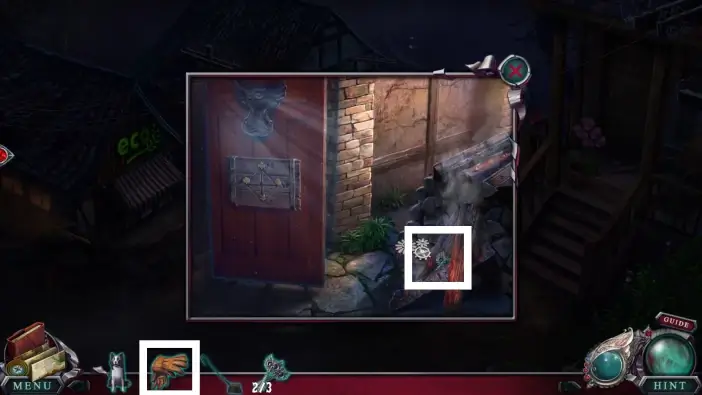
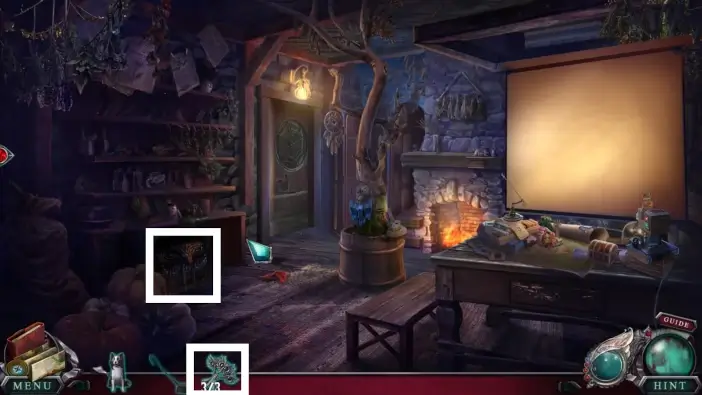
Use the squirrel token to unlock the door on the left. Go into the dark room.

Approach the power supply on the right.
- Turn off the power.
- Click on the cables, and Amanda will fix them.
- Turn on the power.
Find all the morphing objects and animals in the room. They are marked in the picture above.
Approach the sacks in the center of the room.
Take the safe knob. You will need it for the large safe in the room.
Approach the shelves on the far side of the room.
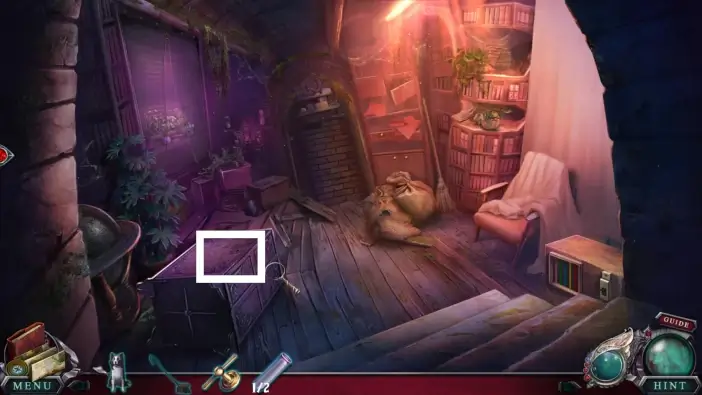
Remove one of the bricks in the wall to reveal a hidden compartment. Take the medicine box from there.
Approach the plants on the left. Unzip the curtain.
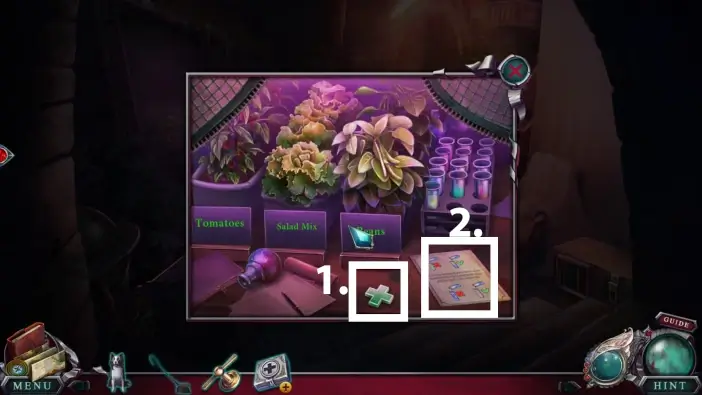
- Take the first aid symbol. You will use it to open the medicine box.
- Read the note. It is a clue for the next puzzle challenge.
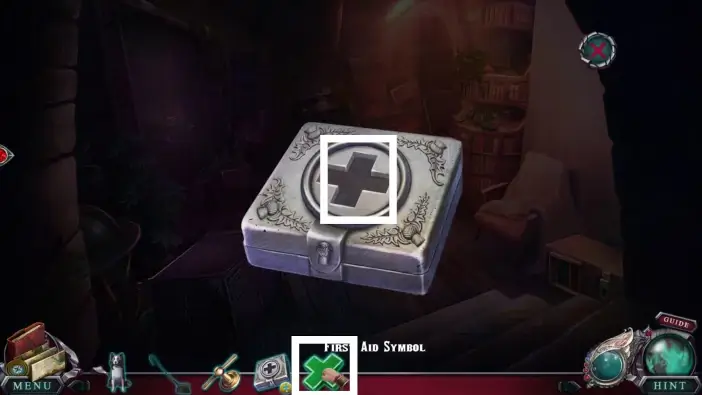
Select the medicine box from your inventory to examine it. Place the first aid symbol on the box to unlock it.
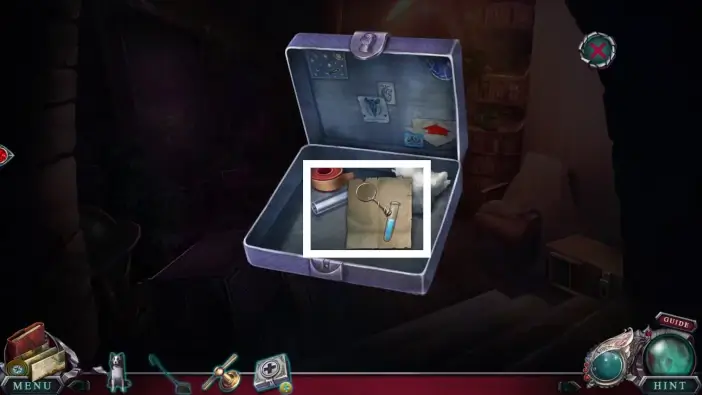
Read the note and take the first test tube. You will need one more test tube to start the next puzzle challenge.
Approach the large safe on the left.
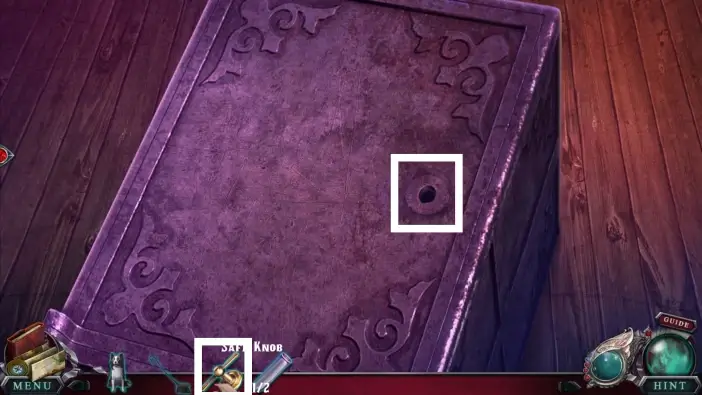
Attach the knob you found in the sack and open the safe.
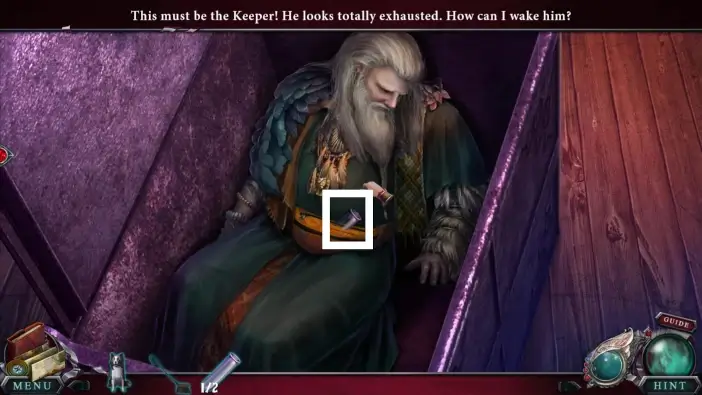
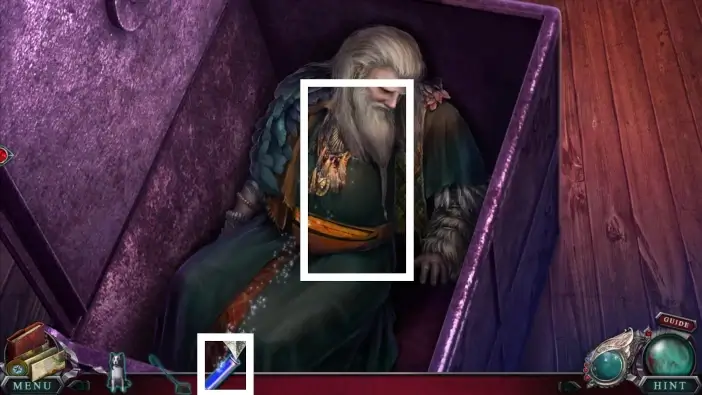
Take the second test tube from the Keeper.
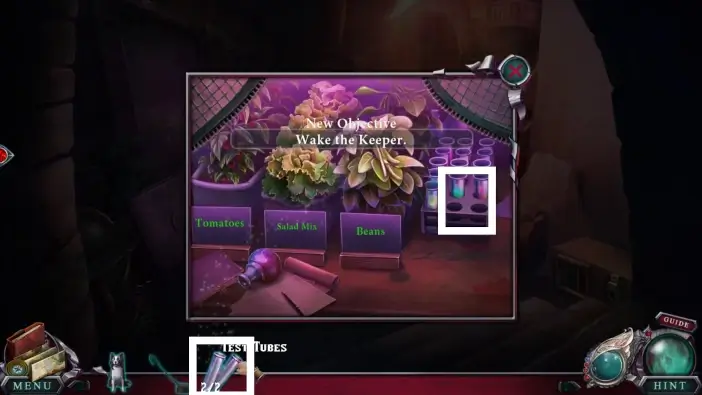
Return to the plants area of the room and place the two test tubes next to the other test tubes. This will start a new puzzle challenge.
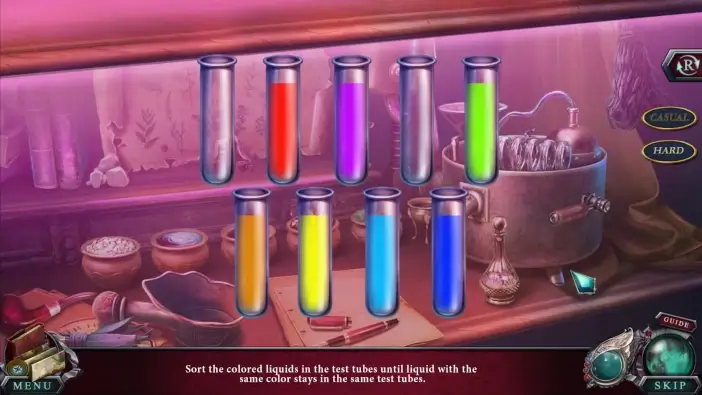
Rearrange the liquids from the test tubes so that each tube has a liquid of only one color. The solution is in the picture above. Once you complete this puzzle challenge, the “Blue Beaker” item will be added to your inventory.
Return to the Keeper in the safe and use the Blue Beaker to wake him up. After the few cutscenes and conversations with the Keeper, he will give you more slides for the projector.
Return to the living room of the Keeper’s house, approach the right desk, and place more slides into the projector.
Click on the objects marked in the picture above. Whenever you see an arrow in the pictures in this guide, it means you’ll need to click, hold, and drag an object to a different spot. For example, in the picture above, you’ll need to reposition the hand on the right to be next to the left hand and then click them.
Once you find all the objects from the presentation, the first cassette will be added to your inventory. You’ll need to collect four cassettes to play them in Tina’s house. You will also have a conversation with the Keeper again, and he will give you the key to Tina’s house.
This will mark the end of our guide for Part 4 of the Main Chapter of the Edge of Reality: Lost Secrets of the Forest.
Thank you for reading!