Edge of Reality: Lost Secrets of The Forest | Main Chapter Part 3
Intro
Welcome to our walkthrough for Part 3 of the Main Chapter for the “Edge of Reality: Lost Secrets of the Forest” from “Friendly Fox Games”. Help biologist Dr. Amanda solve the mysterious events in the forest.
Walkthrough
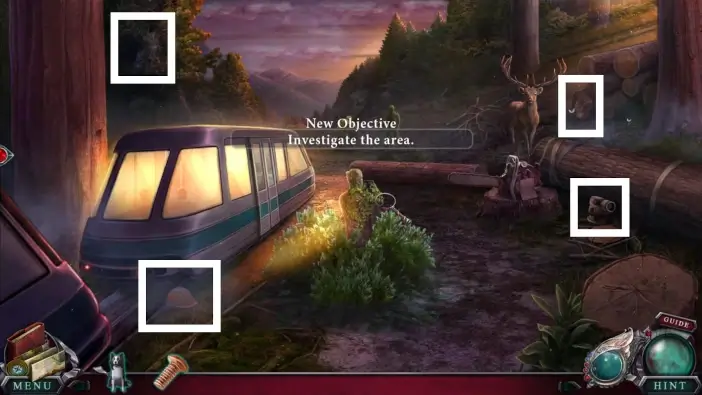
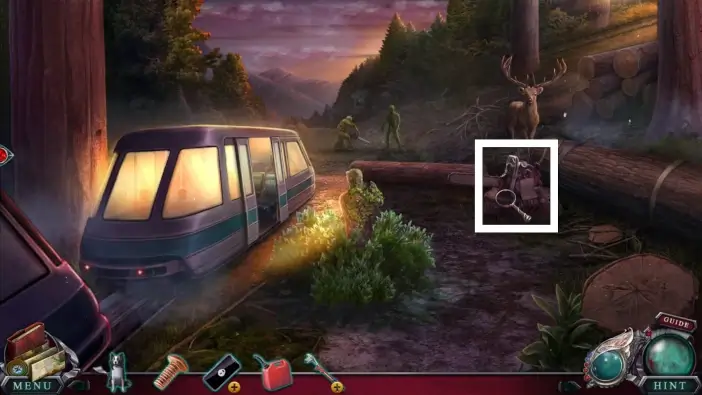
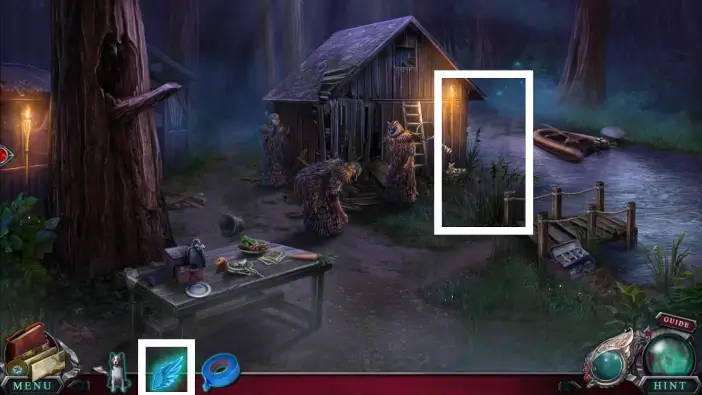
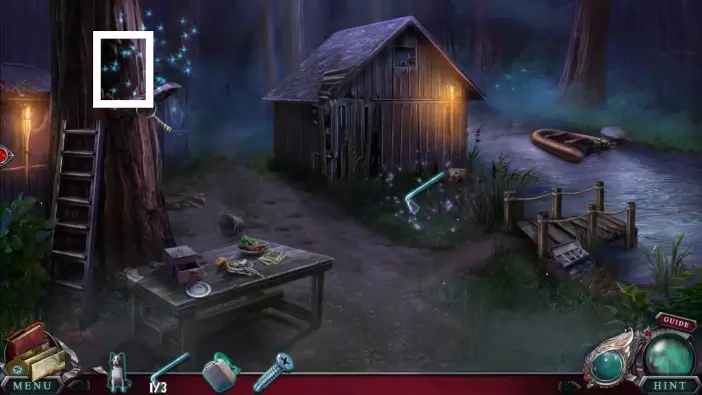
After travelling by train, you will arrive at the new location. Find all the morphing objects and the animals. They are marked in the picture above.
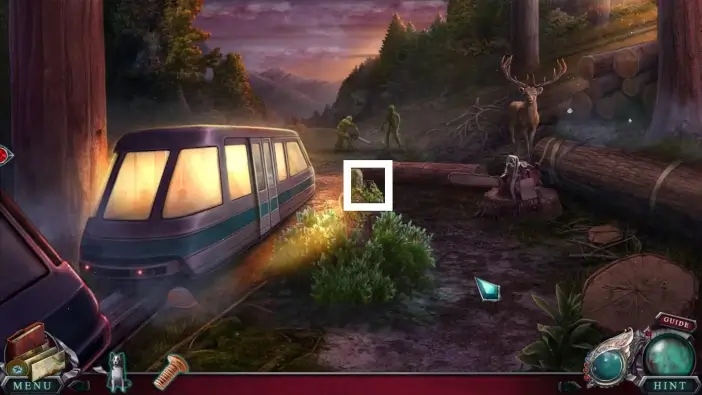
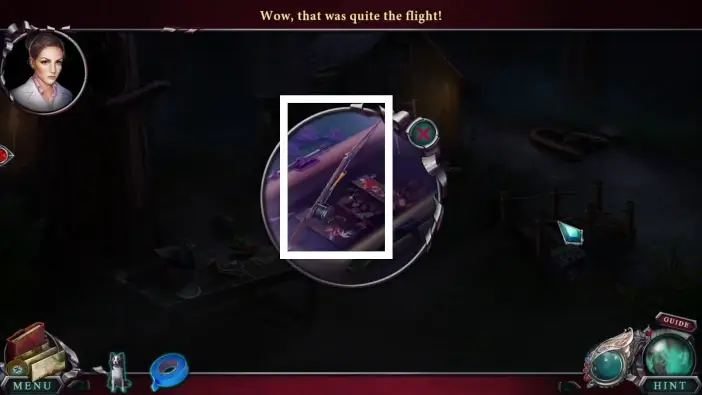
Approach the anomaly near the train and take the phone.
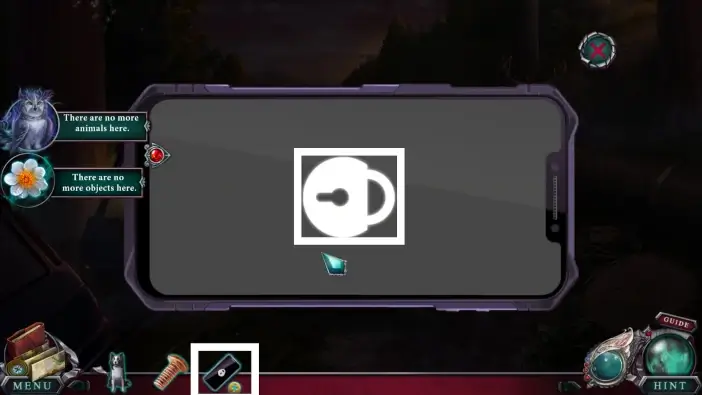
Click on the phone you just acquired in your inventory and then click on the padlock icon. You will not be able to access phone files without the pattern lock. You’ll need to find out what the pattern lock is to unlock the phone.
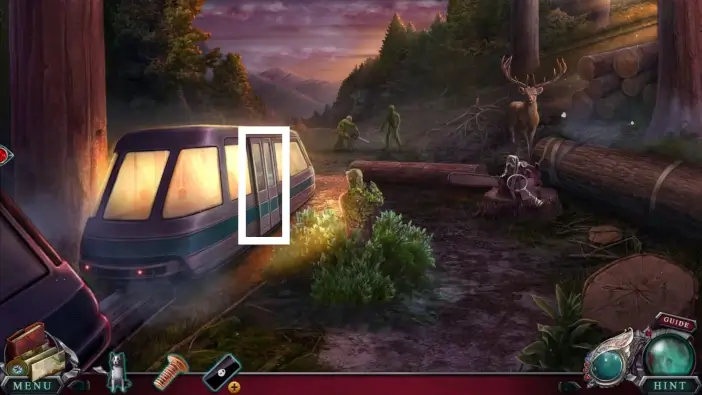
Enter the train.
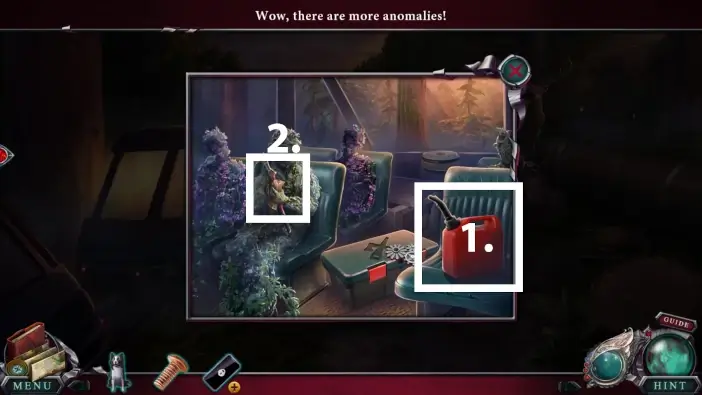
- Take the fuel canister from the seat on the right. You’ll use it to fuel the chainsaw.
- On the anomaly on the left, there is a letter. Read the letter and then take the first bolt cutter part. You’ll need one more part to find to create a bolt cutter.
Exit the train and approach the chainsaw on the stump.
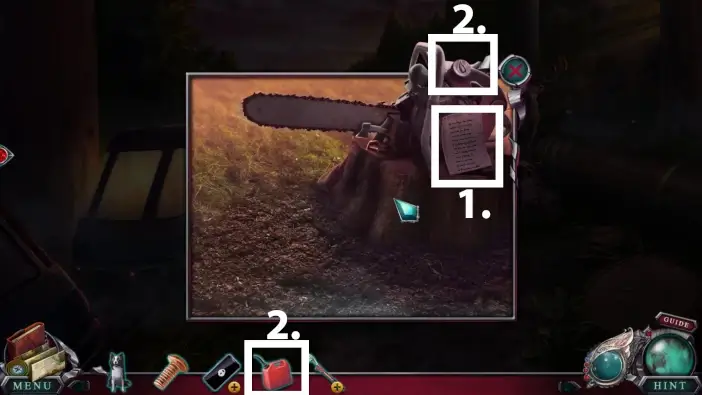
- Read the letter on the chainsaw.
- Use the fuel canister you found in the train and fill the chainsaw.
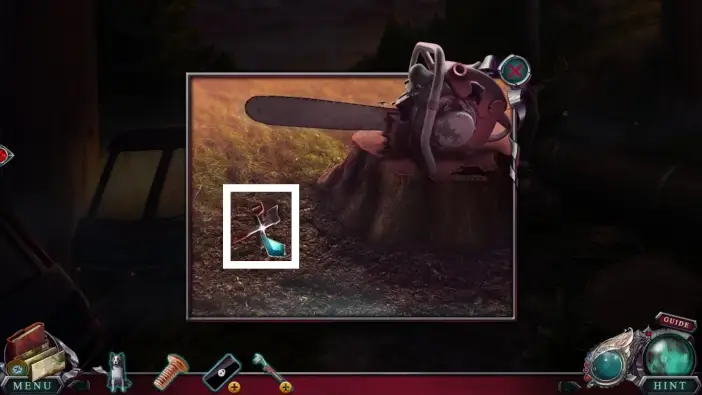
Once the chainsaw starts working, the box inlay will fall to the ground. Pick it up. You will use it to open one briefcase on the train.
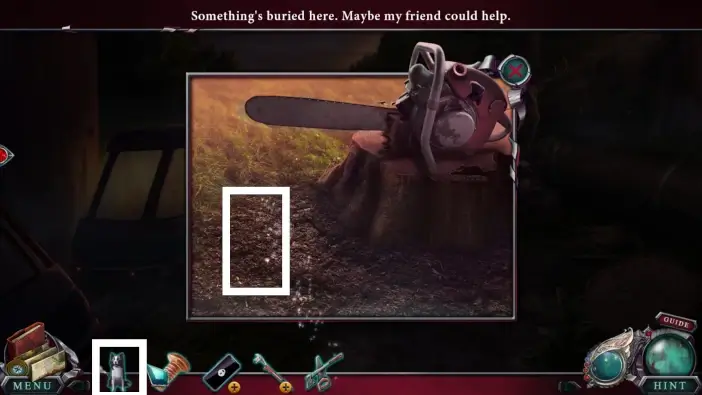
Send Gray to dig the hole in front of the stump.
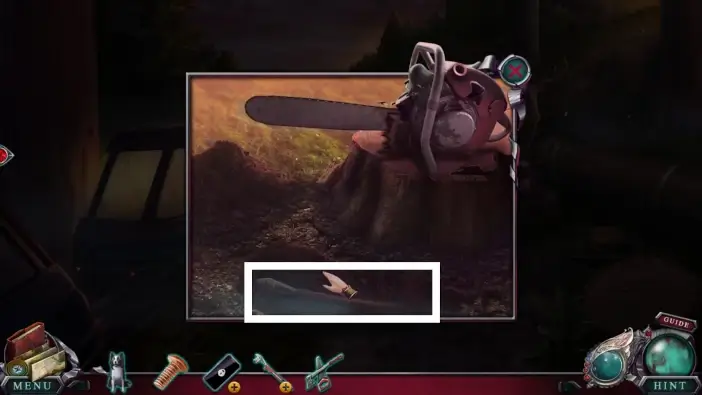
Take the second bolt cutter part from the hole.
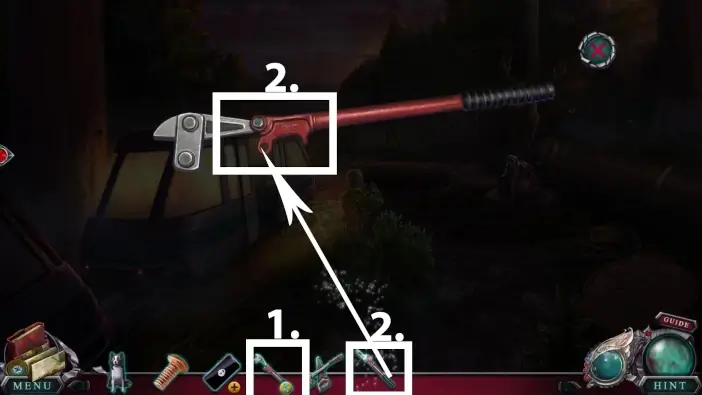
- Click on the first bolt cutter part in your inventory (one that has a “+” sign) to inspect it.
- Place the second bolt cutter part on the first one.
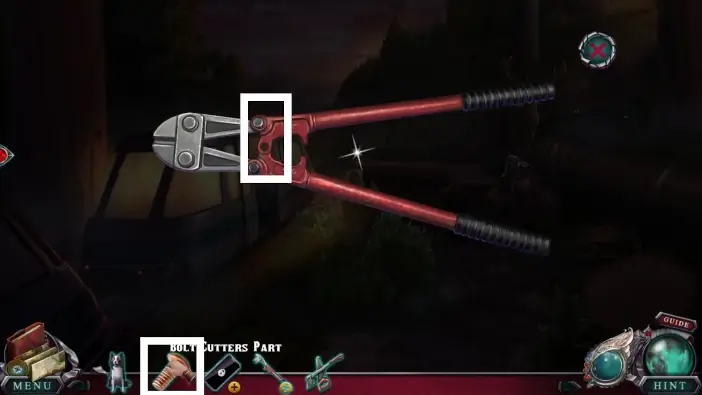
Place the bolt cutter screw you’ve found on the telescope earlier to connect the two parts. The functional bolt cutter will be added to your inventory.
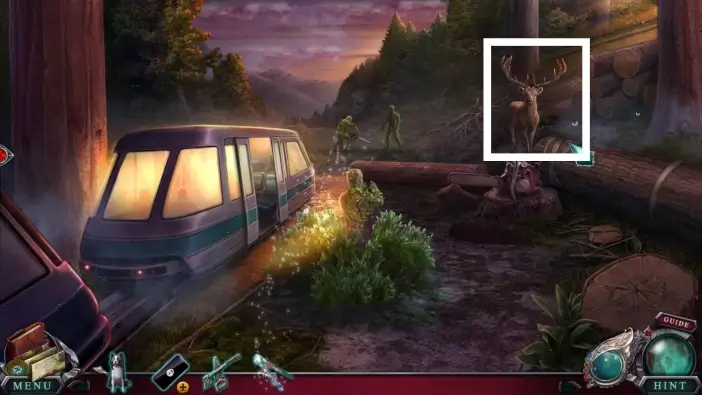
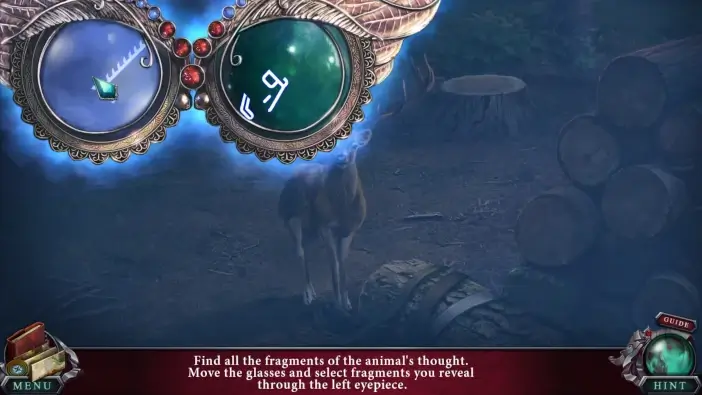
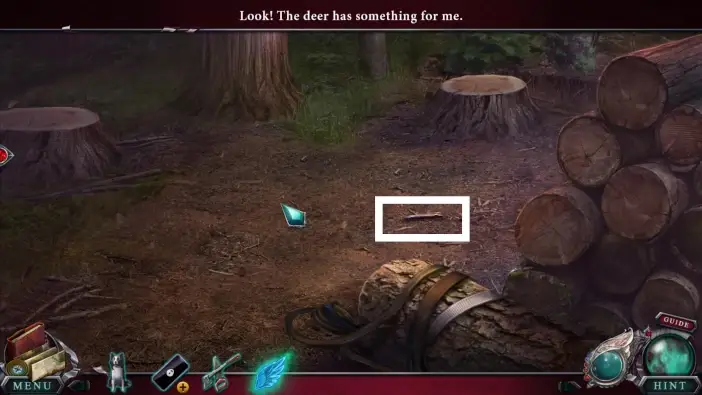
Approach the winged deer.
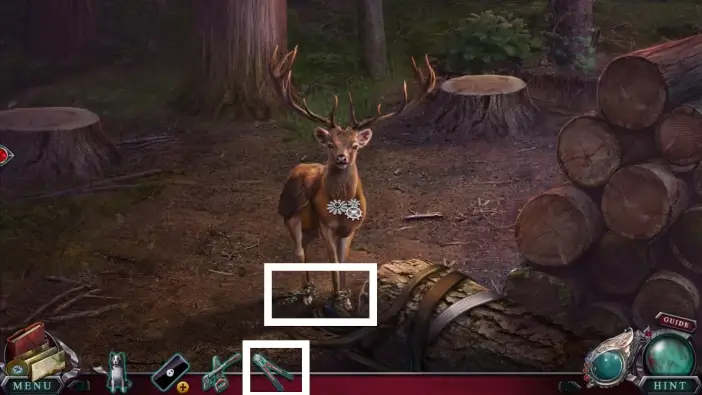
Use the bolt cutter to cut the chains. This will start a new puzzle challenge.

To solve this challenge, move the tokens to the bottom slots simultaneously. Tokens can only move through broken chain links. Use arrows on the sides to move the chain links left or right.
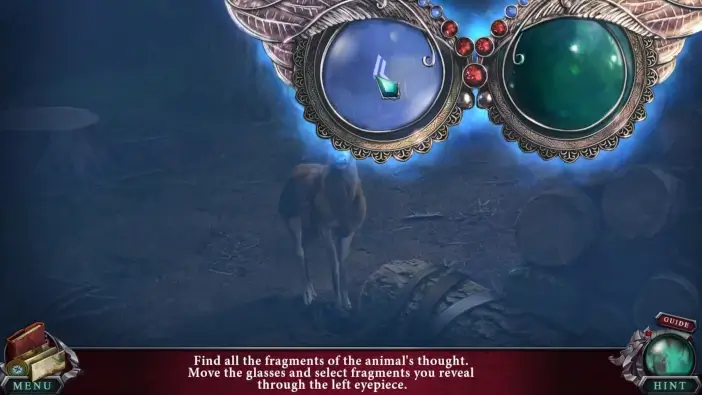
Once you complete the previous puzzle challenge, you will free the magical winged deer. Because you’ve helped an animal, you can use the artifact again.
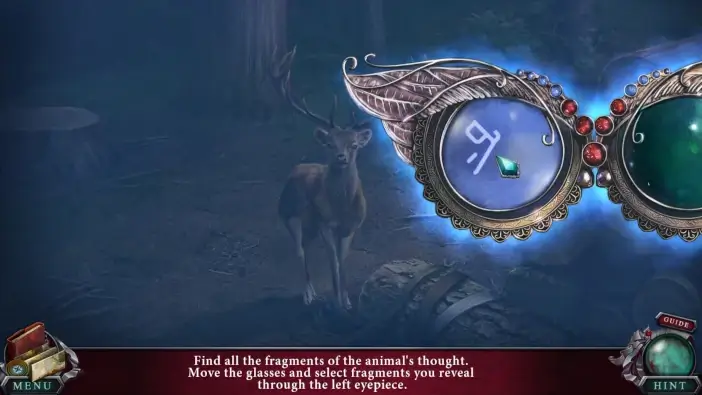
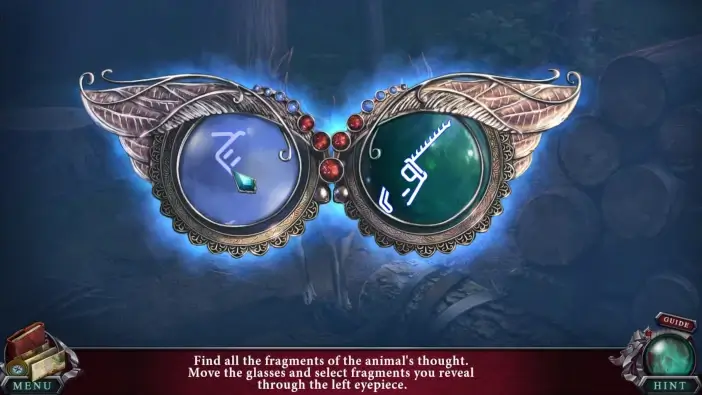
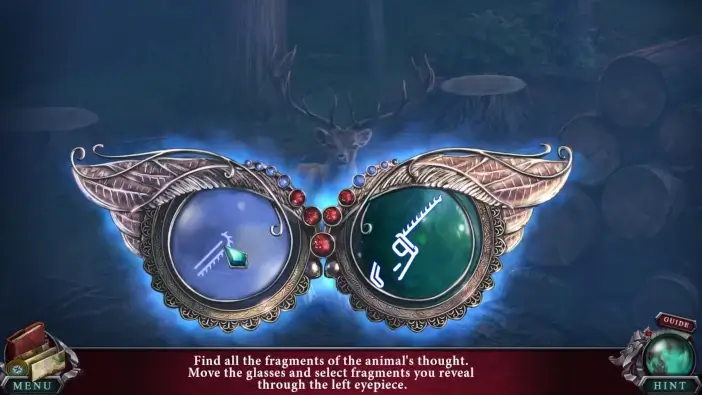
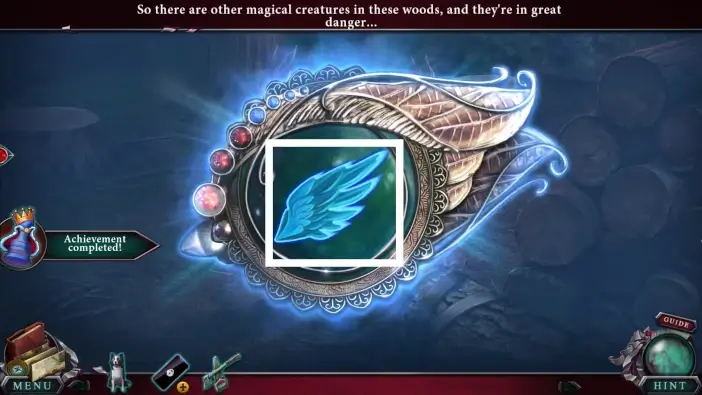
Once you find all the fragments of the memory, and after you see the deer’s memory, take the Swiftness ability from the artifact.
Once the winged deer flies away, pick up the pencil from the ground. You’ll use it to draw the pattern lock in the journal.
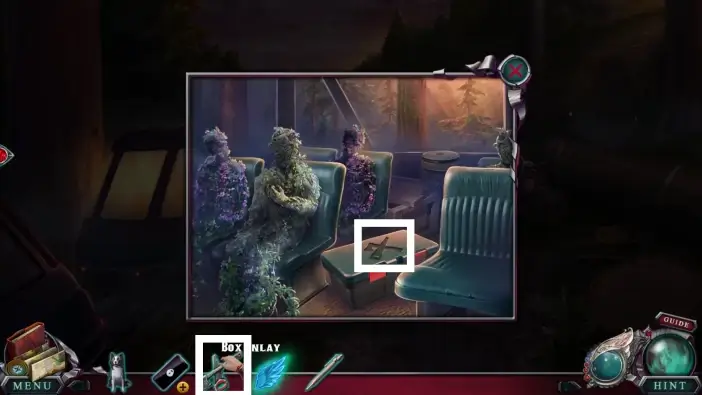
Return to the train and use the box inlay to open the briefcase.
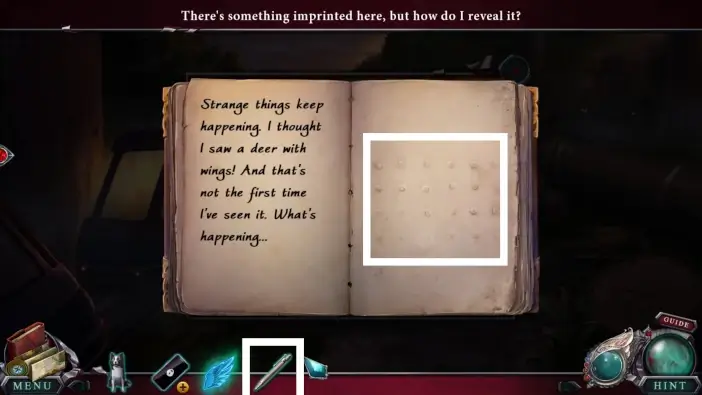
Read the journal from the briefcase and turn several pages until you see an empty page. Use a pencil on the page, and Amanda will draw the correct pattern lock for the phone you’ve found.
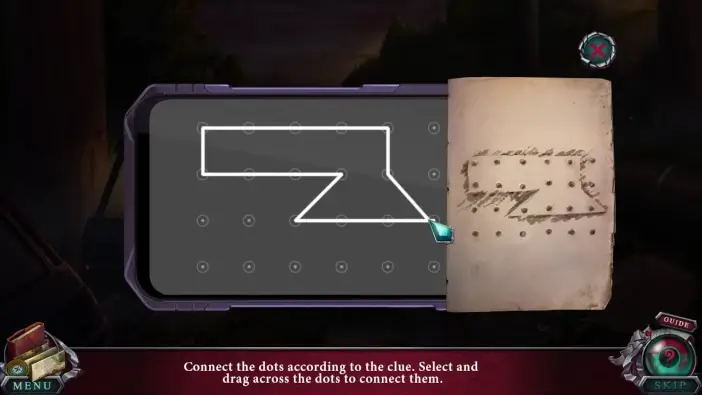
Inspect the phone again, place the phone code next to the phone, and then draw the shape from the phone code. Once you complete this task, click on the Play button on the phone’s screen and watch a cutscene.
After the cutscene, Amanda will call Sheriff Taylor. After the conversation is over, Amanda will be taken by the Order of the Children of the Forest to the village near the river.
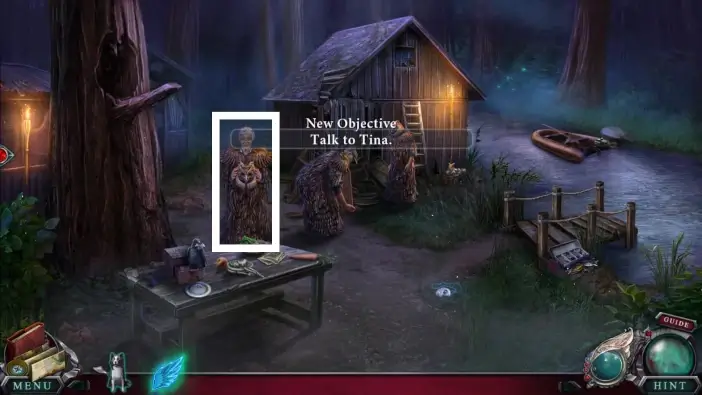
After all the cutscenes are over, speak with Amanda’s great-aunt Tina.
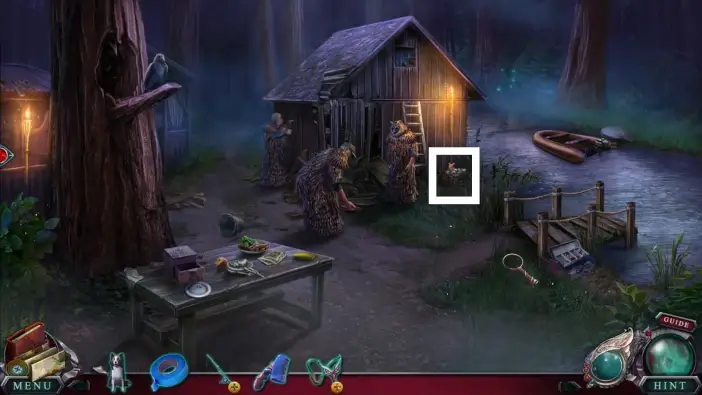
Once you talk with Tina, find all the morphing objects and animals in the village.
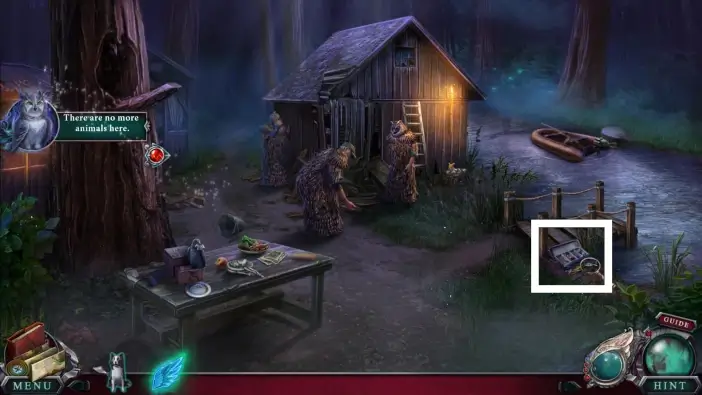
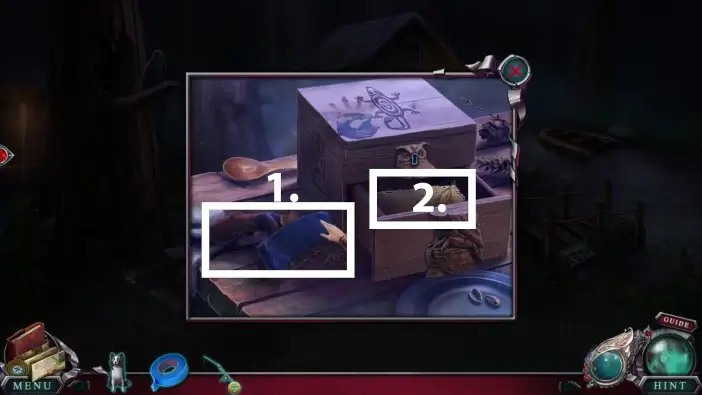
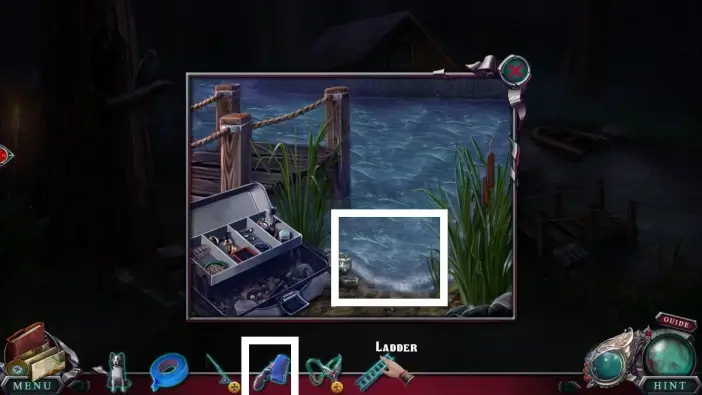
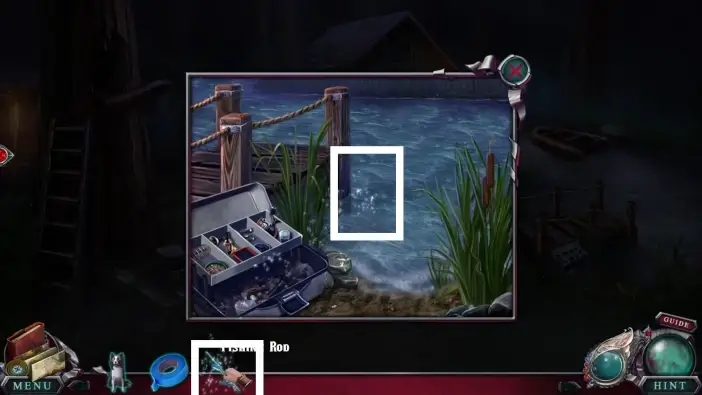
Approach the fishing kit near the river.
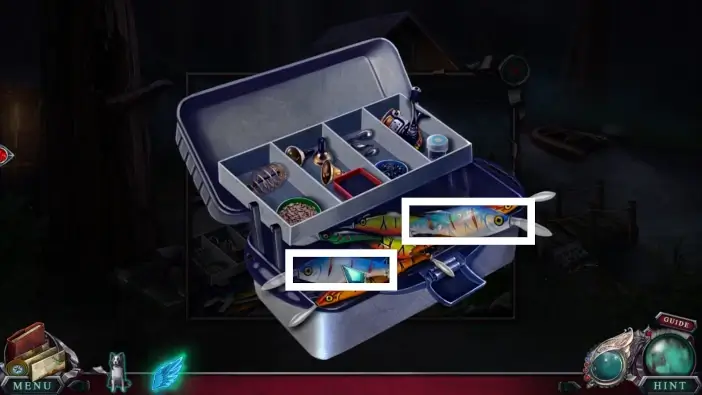
In the fishing kit, select two identical fishing baits, and they will disappear. Do this for all the fishing bait pairs to remove them.
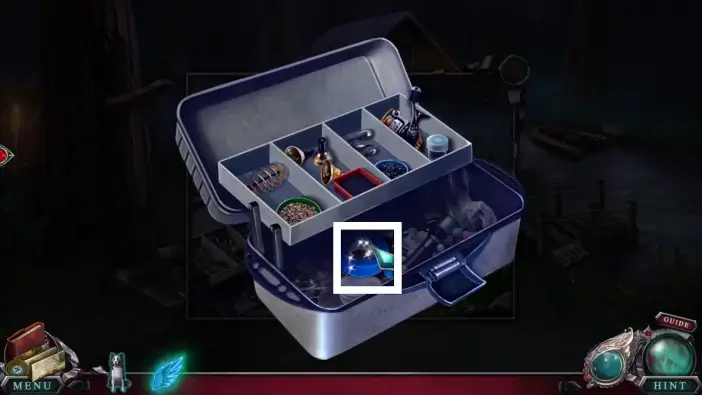
Once you remove all the fishing baits, you will see a tape. Take it, because you will use it multiple times.
Use the Swiftness ability to reach the boat on the other side of the river.
Take the broken fishing rod from the boat.
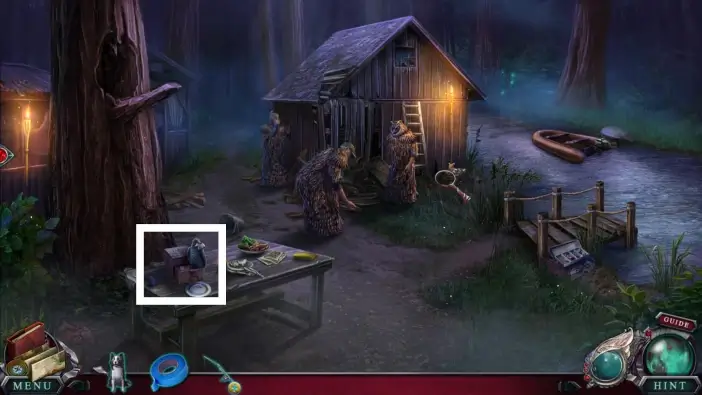
Approach the table on the left.
- Take the dirty brush. You will use it later to clean one squirrel, but you’ll need to wash the brush first.
- Take the slingshot from the drawer. You’ll need it to distract the crow.
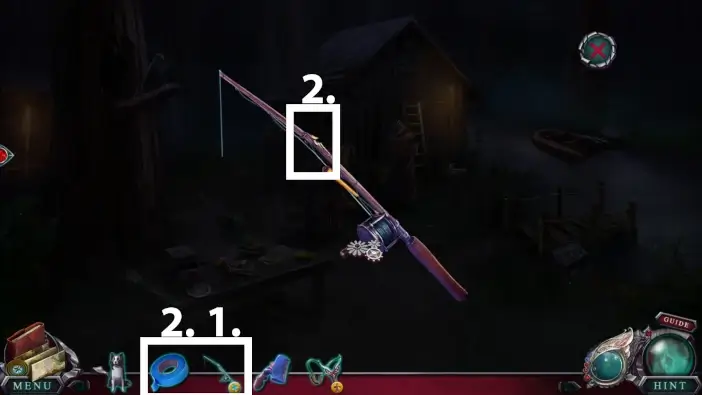
- Select the broken fishing rod from your inventory.
- Use a tape you’ve found in the fishing kit to fix the fishing rod.
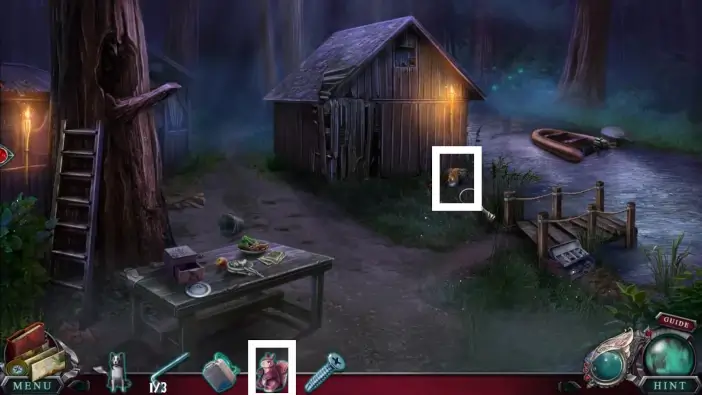
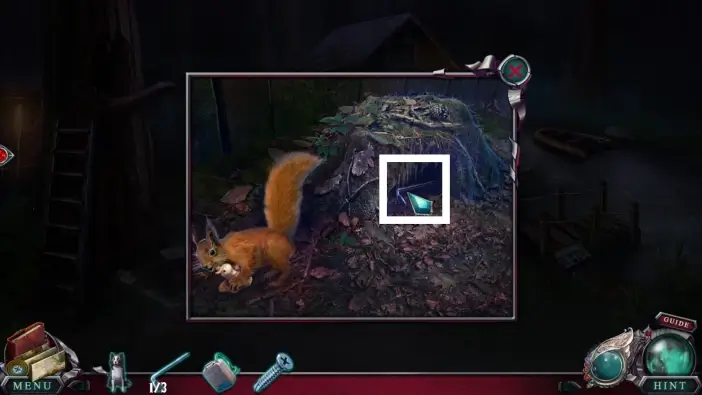
Approach the pile of leaves near the shed.
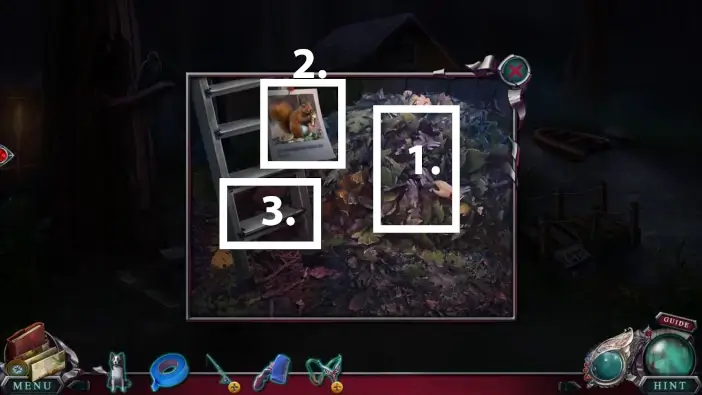
- Remove the pile of leaves to reveal a squirrel.
- Read and remove the poster from the ladder.
- Take the ladder. You’ll use it to reach the tree hollow.
Go to the river and clean the brush.
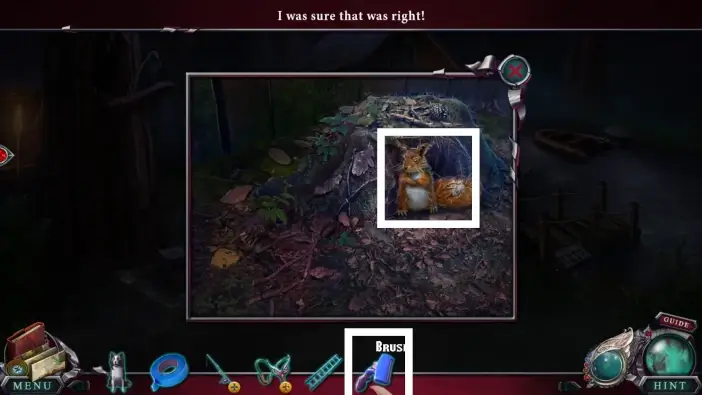
Clean the squirrel with the brush. Take the scrap paper that was on the squirrel’s tail.

- Select the unloaded slingshot from your inventory to examine it.
- Load the slingshot with the scrap paper.
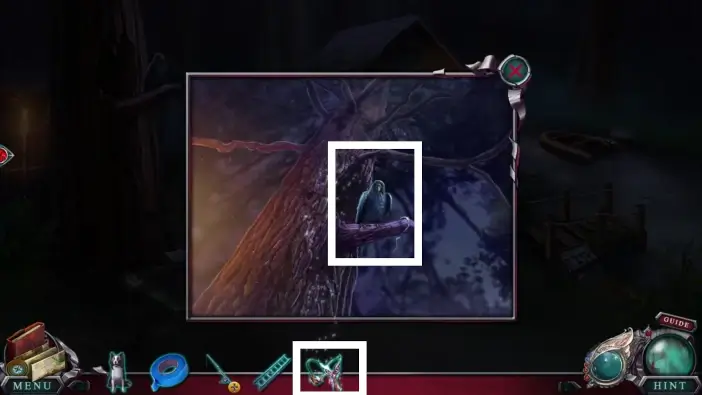
Approach the tree on the left and use the slingshot to distract the crow.
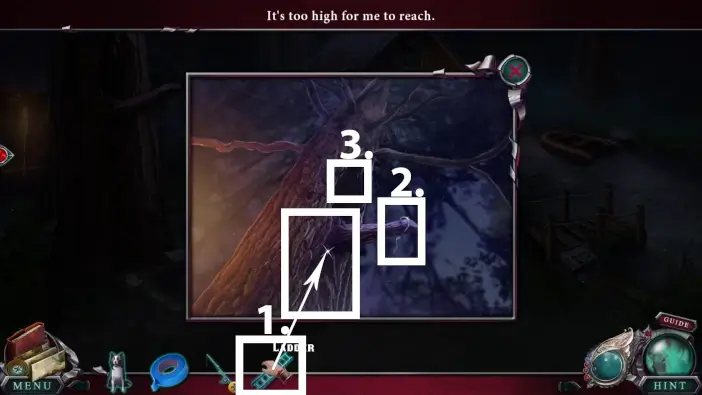
- Place the ladder on the tree.
- Take the hook from the branch.
- Approach the tree hollow.
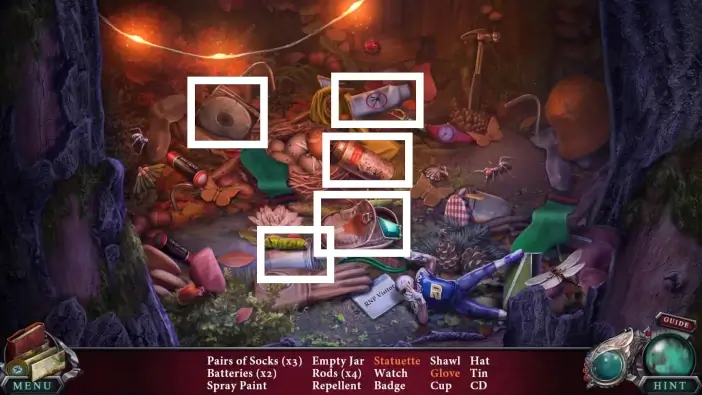
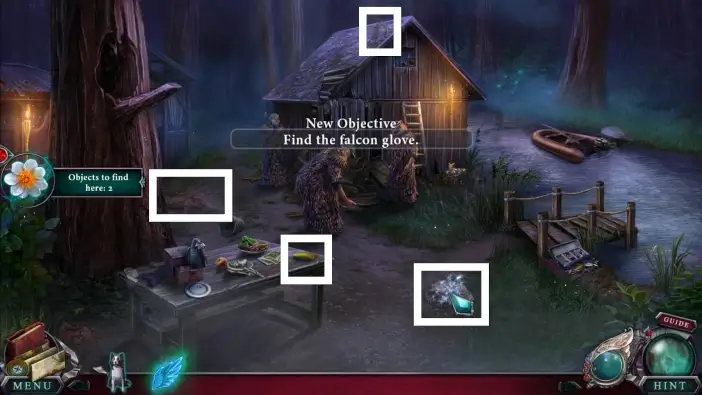
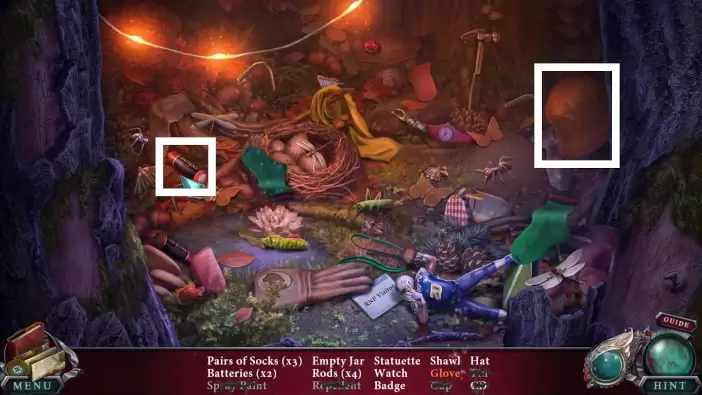
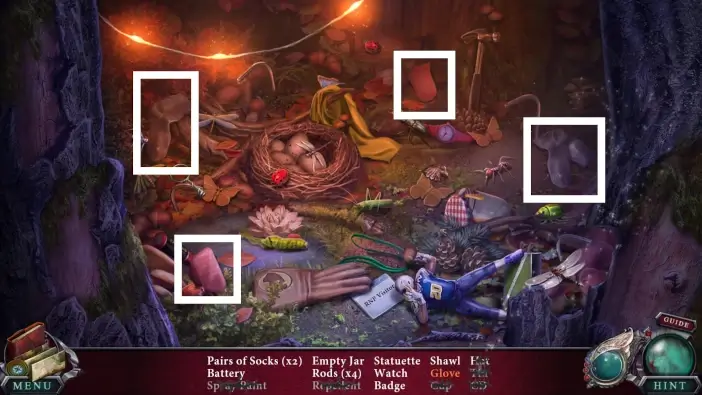
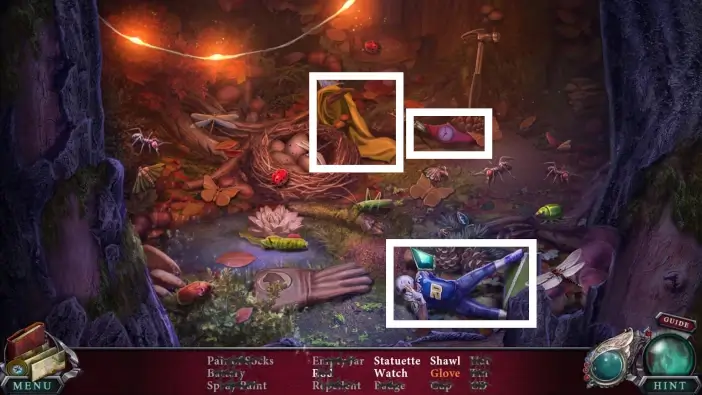
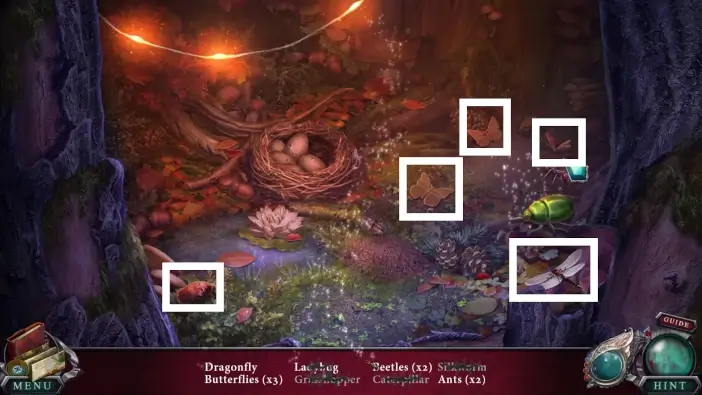
Locate all the items in the tree hollow that are listed at the bottom of the screen. The items are marked in the picture above and in the following pictures below.
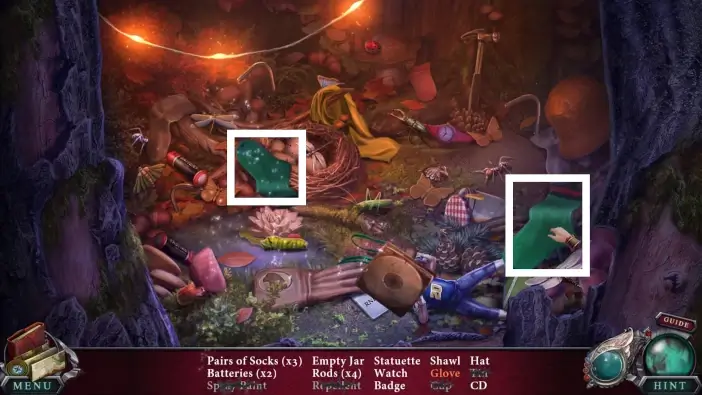
For socks, you’ll need to find them in pairs.
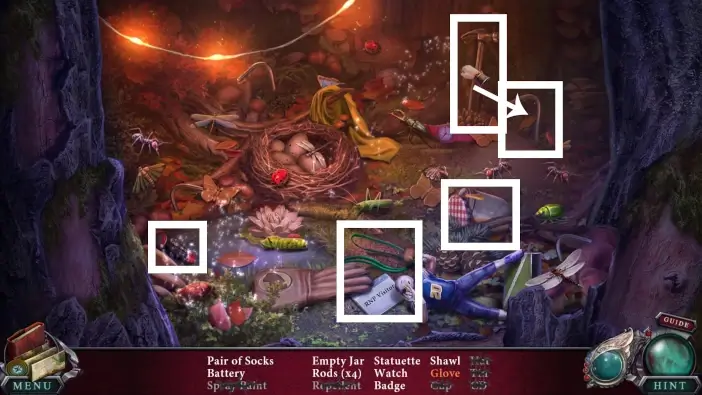
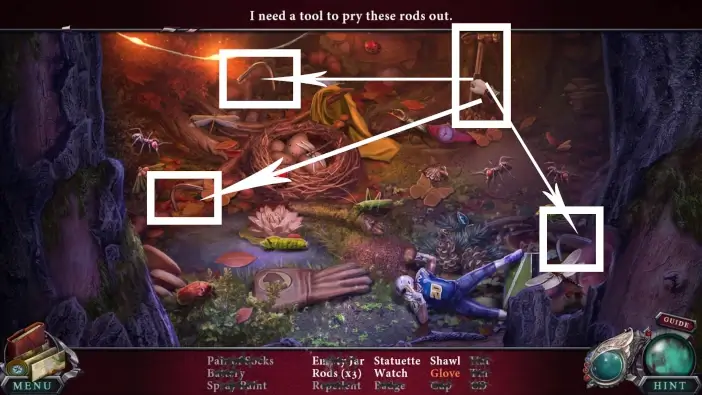
To collect rods, you’ll need to use a hammer. Select and drag the hammer and move it to the rod to collect the rod.
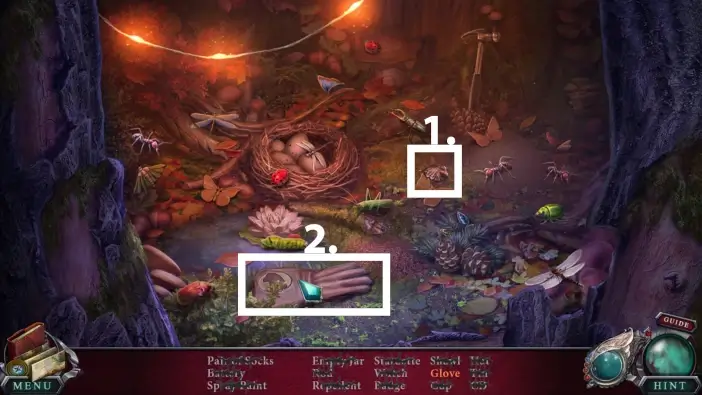
- Click on the falcon symbol to place it on the glove.
- Click on the glove.
Once you have found all the items, you will receive the Falcon Glove in your inventory.
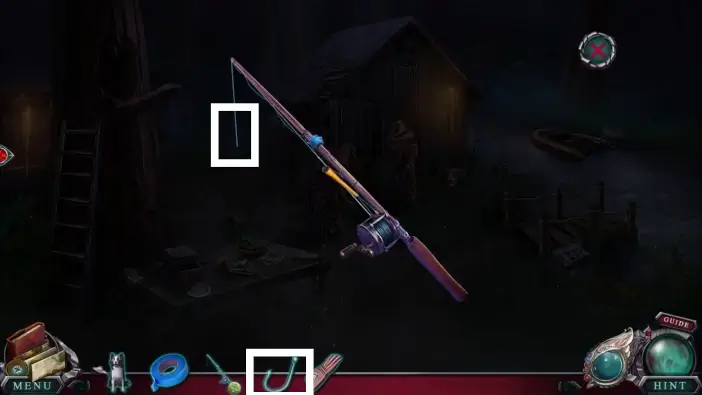
Select the fishing rod from your inventory again and place the hook you found on the branch.
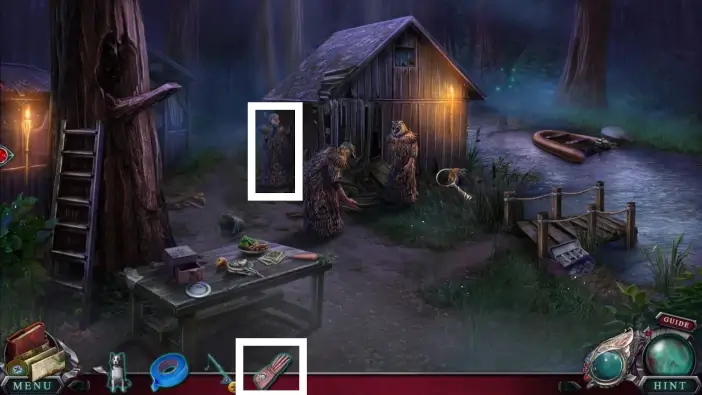
Give the Falcon Glove to Tina.
Click on the falcon and you will receive the feather.
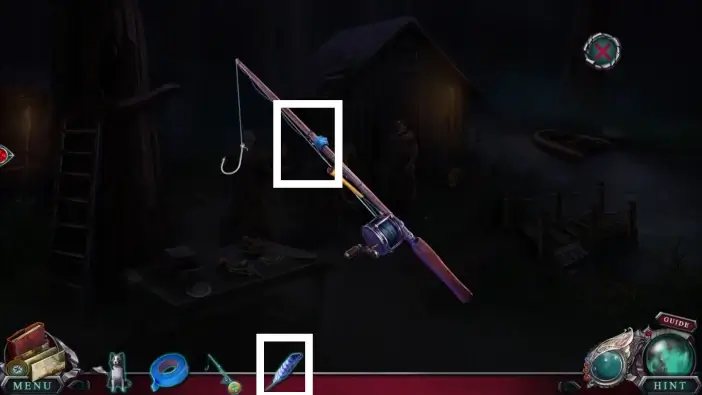
Attach the feather to the fishing rod from your inventory, and the fishing rod will be completed.
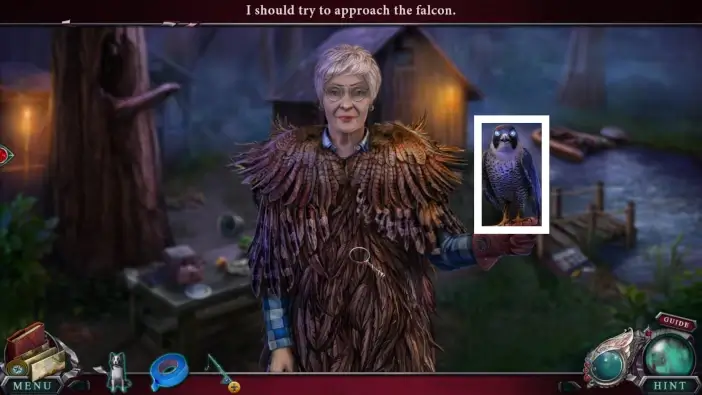
Go fishing on the river with the fishing rod. Take the caught fish.
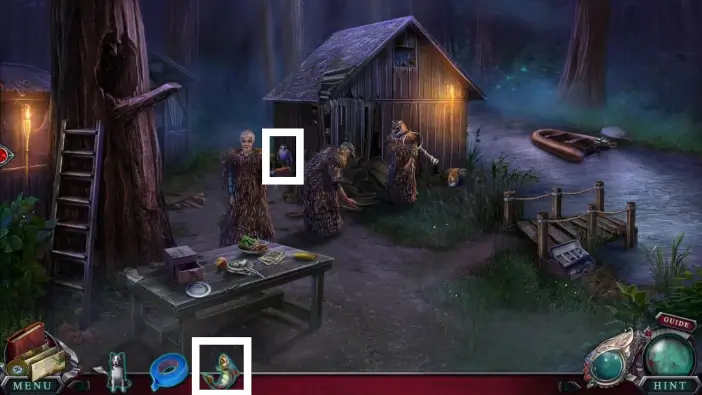
Feed the falcon with the fish.
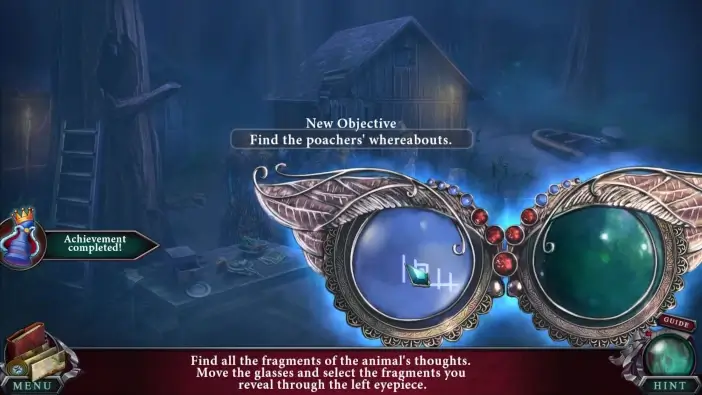
Once you’ve fed the falcon, you will be able to use the artifact again. The locations of the memory fragments are shown in the pictures.
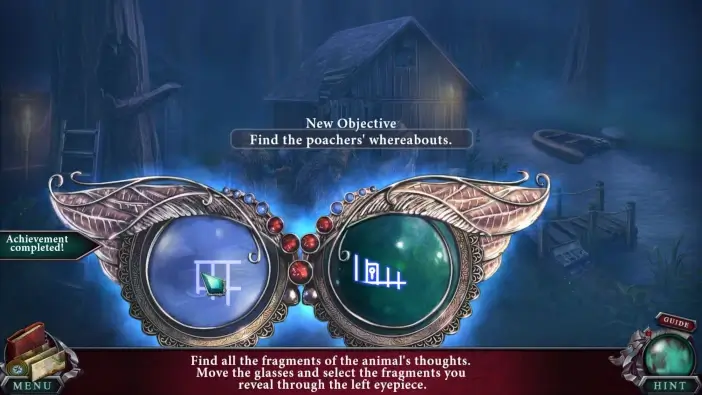
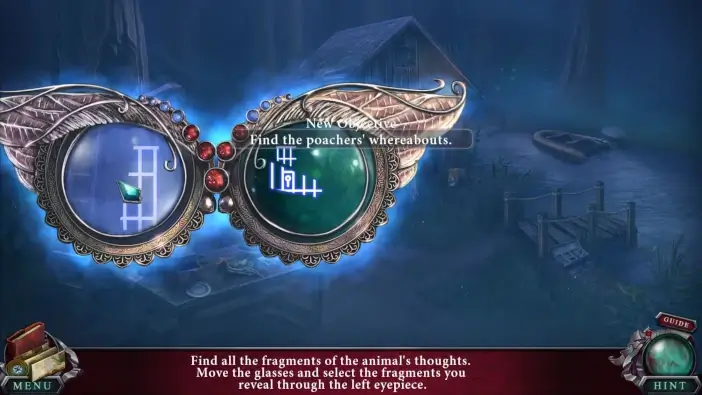
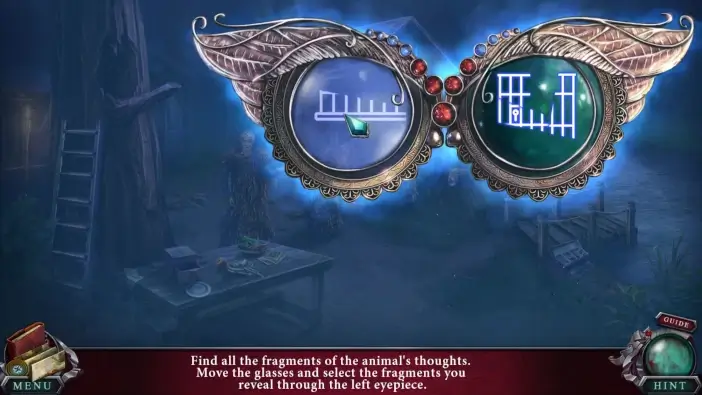
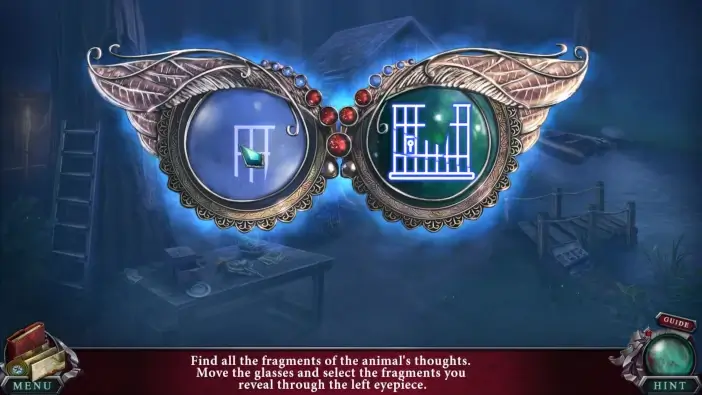
Once you’ve found all the memory fragments, watch the falcon’s memory.
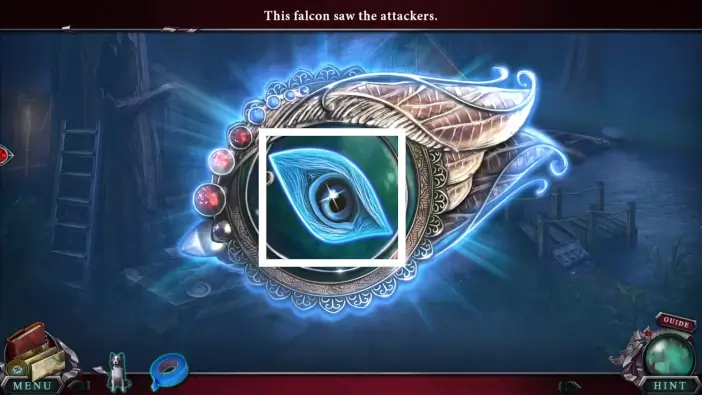
After the memory cutscene, acquire the Falcon Vision ability.
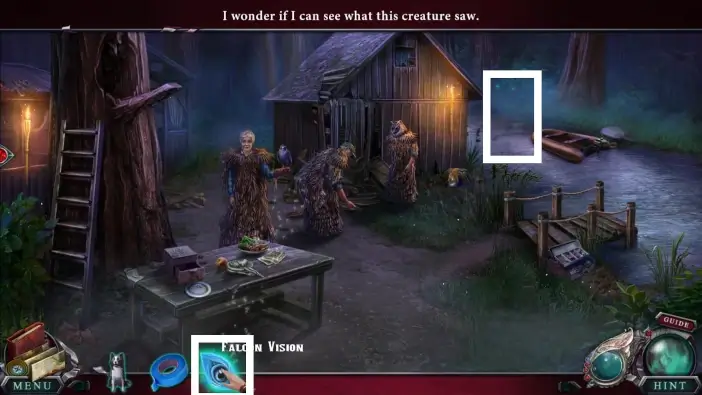
Use the Falcon Vision ability to discover a new location.
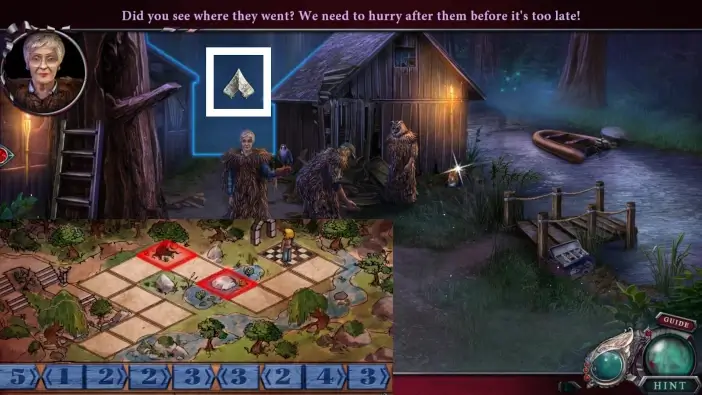
Go through the path behind Tina to access the new location. A new puzzle challenge will begin.
In the next challenge, you’ll have a path made of multiple fields and the goal field at the end. You’ll need to place commands at the bottom of the screen to get a correct sequence of movement towards the goal. For each command, you’ll have an arrow showing the direction of movement, and the number showing how many steps in that direction Amanda will move. The solution is in the picture above.
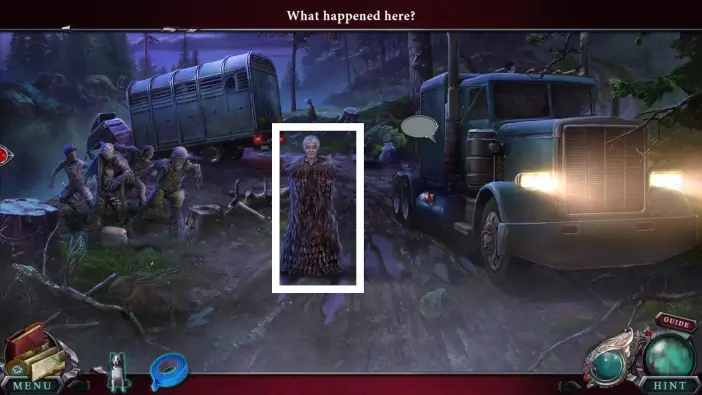
Once you solve the previous challenge, you will arrive at the road where pouchers were turned into anomalies. Speak with Tina.
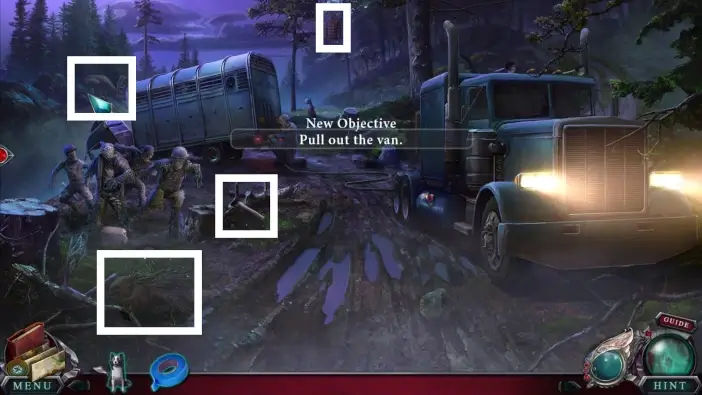
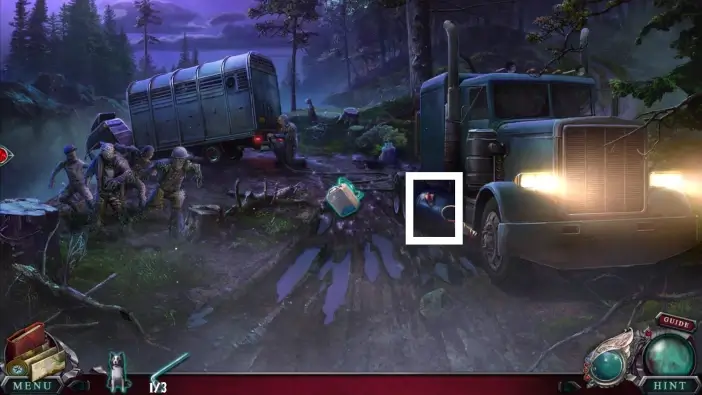
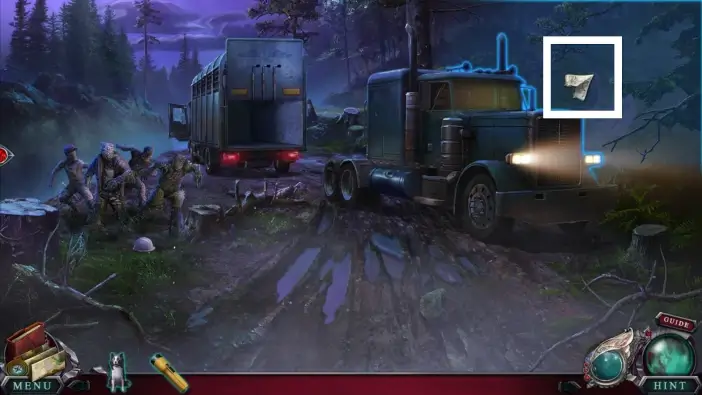
Once the conversation is over, find all the morphing objects and the animals in this location. They are marked in the picture above.
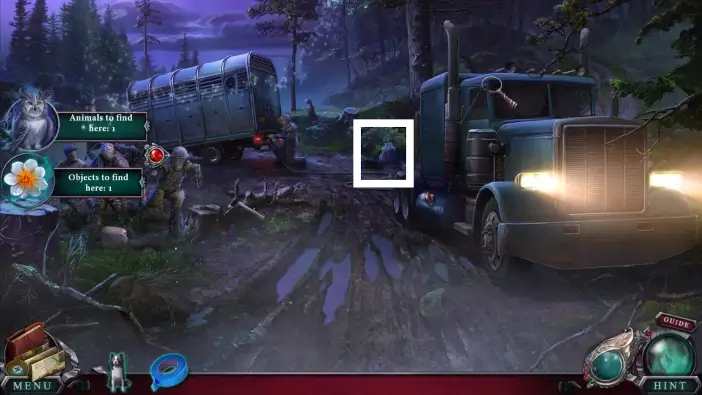
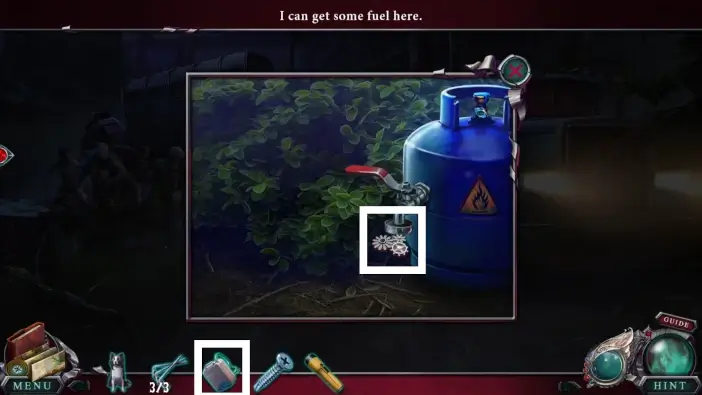
Approach the fuel canister.
- Take the first bolt. You’ll need to collect three of them to unlock the trailer.
- Send Gray to find the hose. You will use it soon for a new canister that you’ll find.
Pick up the hose.
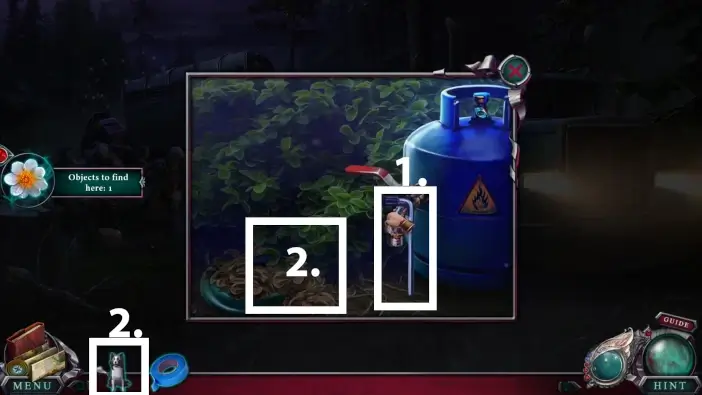
Take the leaky canister near the anomalies.
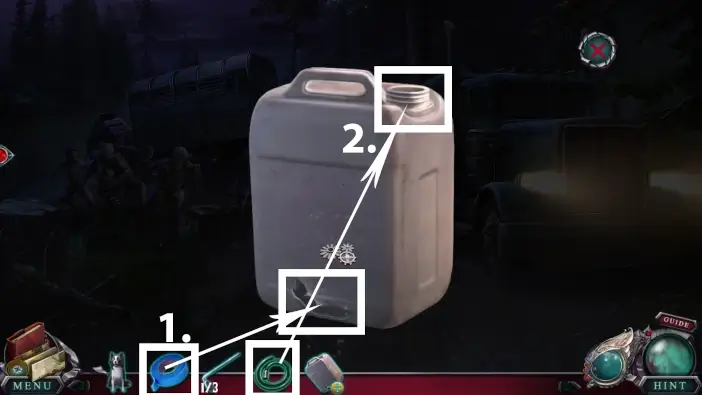
- Use the tape to fix the leaky canister.
- Place the hose.
Click on the canister to return it to your inventory.
Approach the fuel filler of the truck.
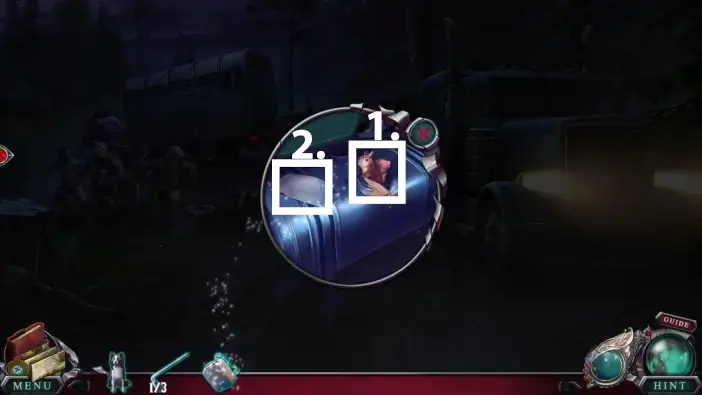
- Take the toy from the fuel filler.
- Read the note on the left from the fuel filler, and once you read it, take the screw that was beneath the note. You will use it on the van’s lock later.
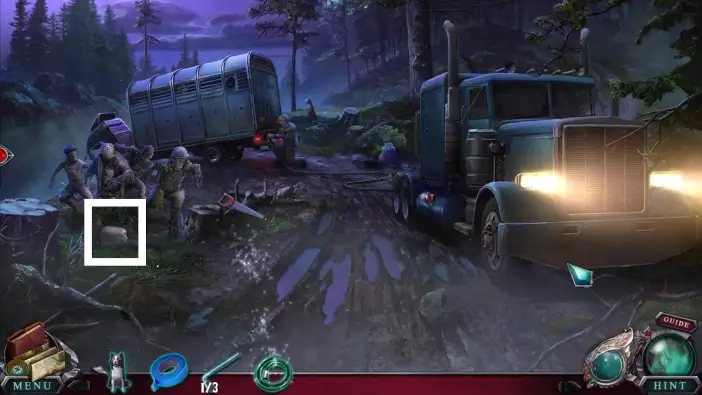
Return to the village and give the toy to the squirrel.
The happy squirrel will go, and you will be able to take the second bolt for the trailer.
Return to the treehole on the left.
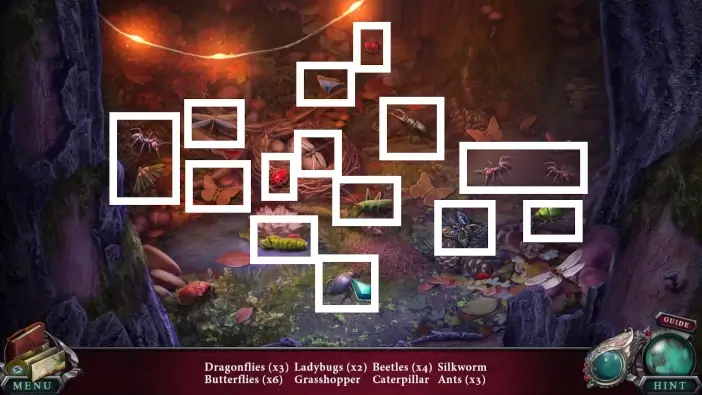
Find all the insects in the tree hollow that are listed. They are marked in the pictures above and below.
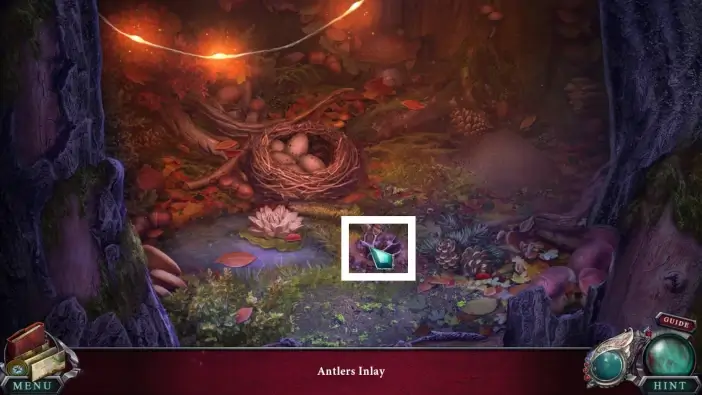
Once you have found all the bugs, the antlers inlay will appear. Take it. You will use it to open the glove compartment in the truck.
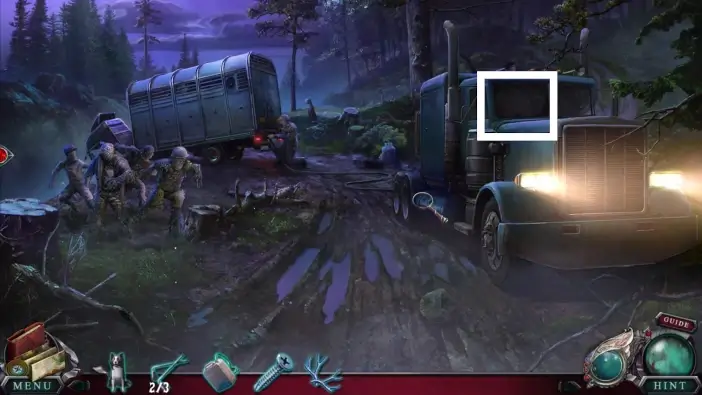
Return to the road where the truck is and enter the truck.
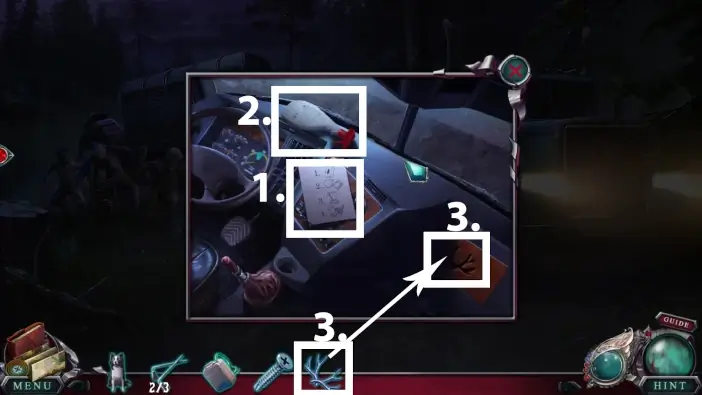
- Take the instructions on how to start the truck.
- Take the solvent.
- Use the antler inlay to open the glove compartment. Take the flashlight and the third bolt.
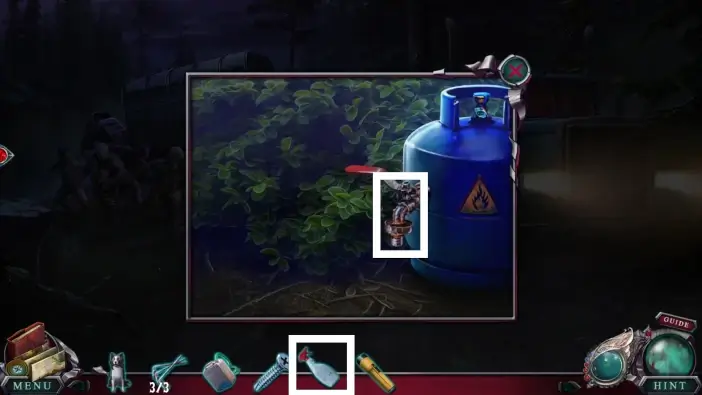
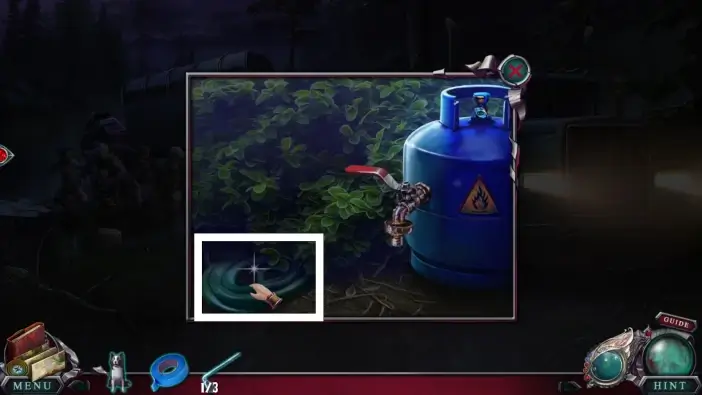
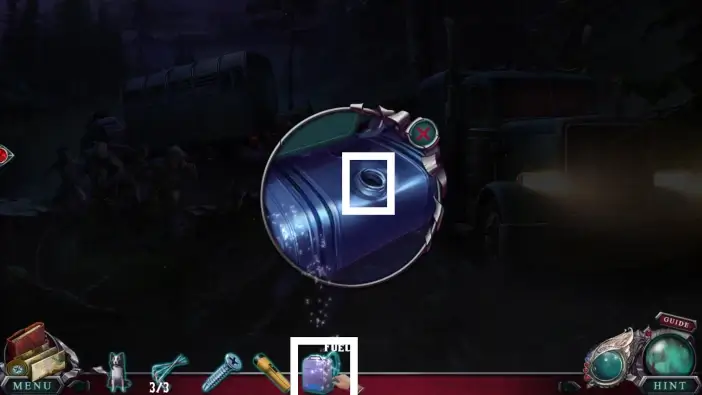
Return to the fuel canister and use the solvent on the faucet.
Fill the cainster from your inventory with fuel.
Return to the fuel filler of the truck and pour the fuel from your canister.

- Enter the truck. Press the red button.
- Change the gear.
- Press the pedal.
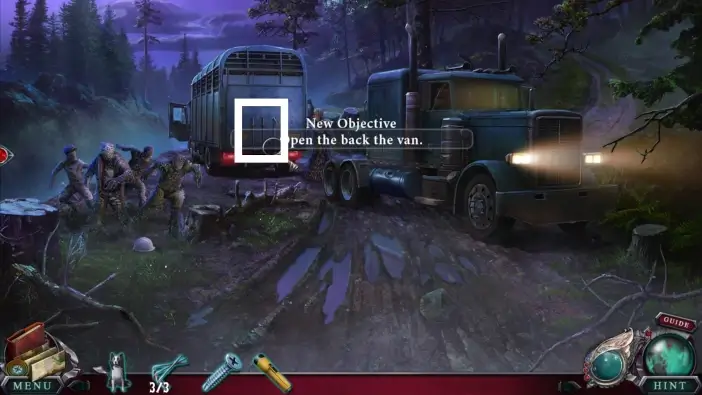
Speak with Tina again and then approach the trailer.
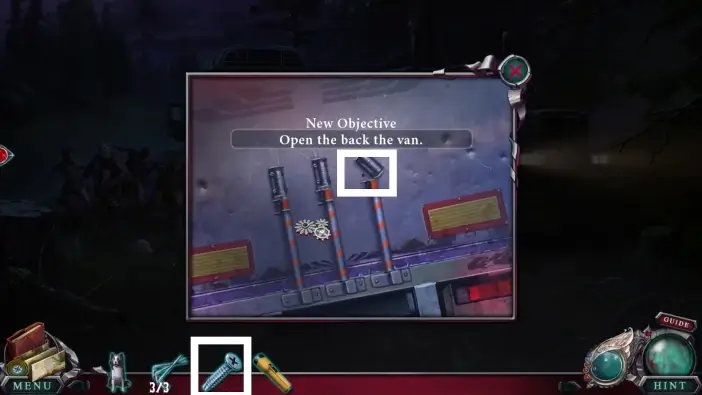
Use the screw to fix one of the locks.
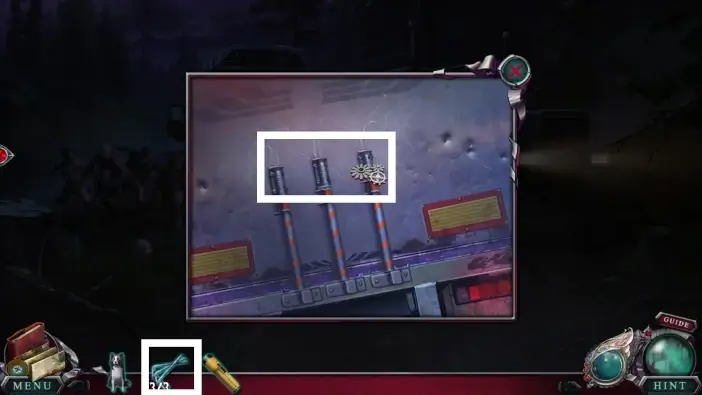
Place the three bolts, and a new puzzle challenge will begin.
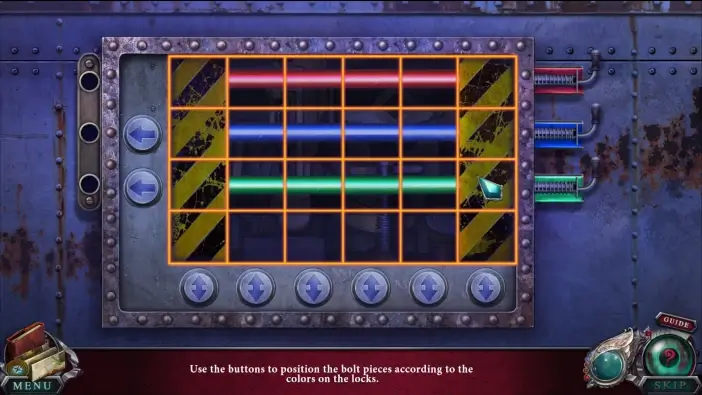
In this puzzle challenge, use the arrow buttons to match the positions of the bolt pieces to their corresponding colors. The solution is in the picture above.
Once you’ve completed the puzzle challenge and opened the trailer, speak with Tina again, then go to the path on the right to find the Keeper’s house.
This will mark the end of our guide for Part 3 of the Main Chapter of the Edge of Reality: Lost Secrets of the Forest.
Thank you for reading!