Detective – Escape Room Games | Chapter 8: Drawing the Line
Intro
Welcome to our walkthrough for Chapter 8 of the “Detective – Escape Room Games” from “Escape Adventure Games”. In this chapter, Detective Andrew will go to the Collector’s house to stop the Collector once and for all.
Walkthrough

In the library, open the cabinet on the left.
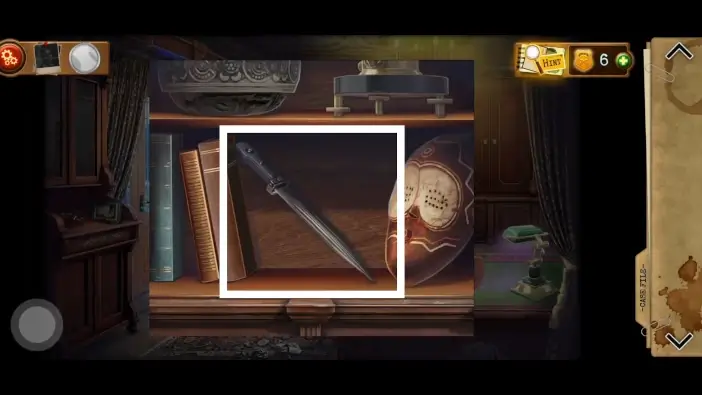
Take the dagger from the cabinet.
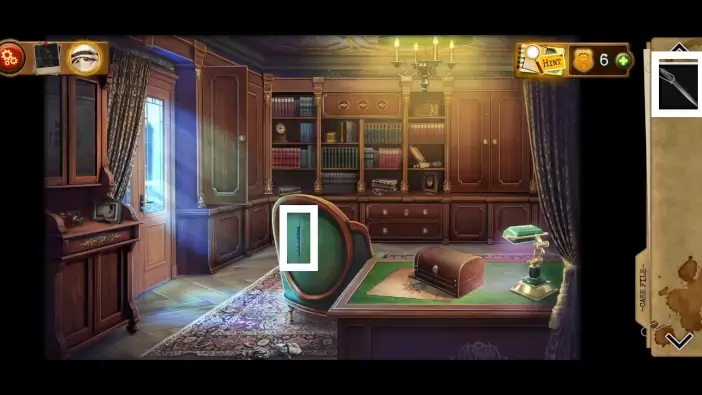
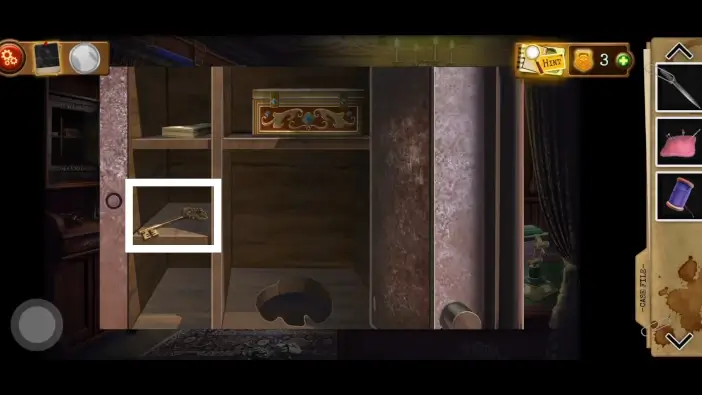
Rotate the chair and use the dagger you just got to cut the backside of the chair. Take the hidden box key that was inside the chair.
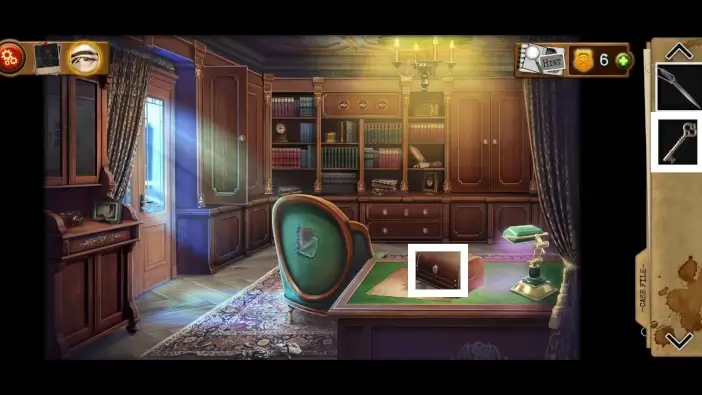
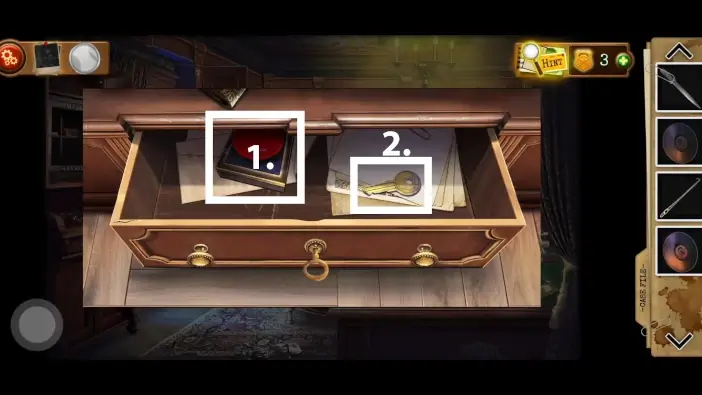
Use the key to open the box on the desk.

- Remove most items from the box. Take the sideboard key and the needles.
- Examine the photo on the left and take the thread beneath the photo.
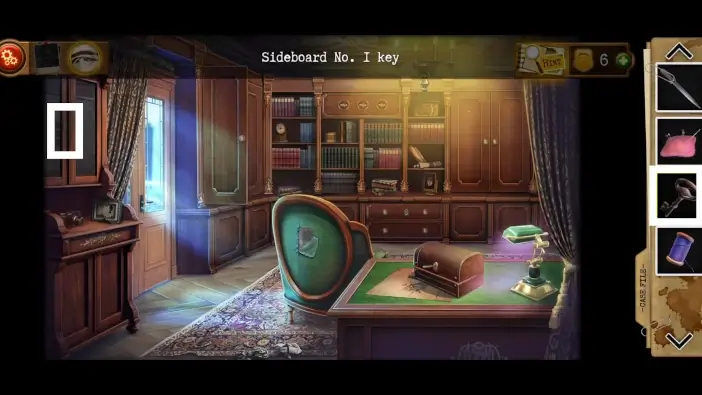
Use the key you just got to open the sideboard on the left.

Inside the sideboard, there will be a safe. Find the triplets of pictures before time runs out to unlock the safe.
Take the door key from the safe.

Use the key you just picked up to unlock the door to the corridor.

- In your inventory, merge the thread and needles to create a “Needle and Thread” item.
- Approach the painting.
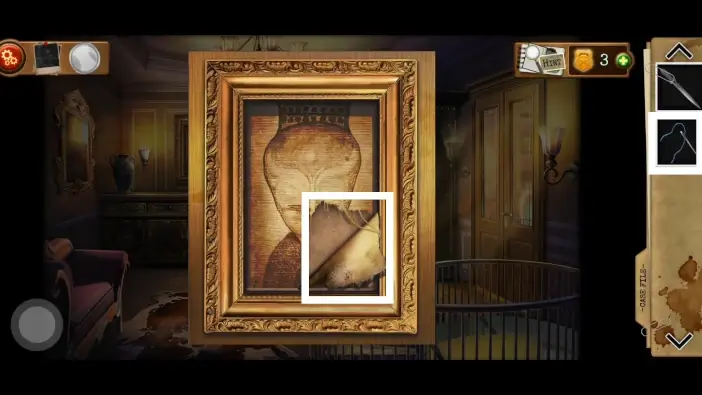
Use the “Needle and Thread” item to sew a painting.

Pay attention to the sewn part of the painting. X represents Roman numerals. Two of them means number 20. Hearts below represent 1s, and there are five of them. So 20 + 5 = 25.

Approach the mirror on the left.

Count the lines on the bottom of the mirror, including both vertical and horizontal ones. The number of lines is 5 + 6 + 2 = 13.

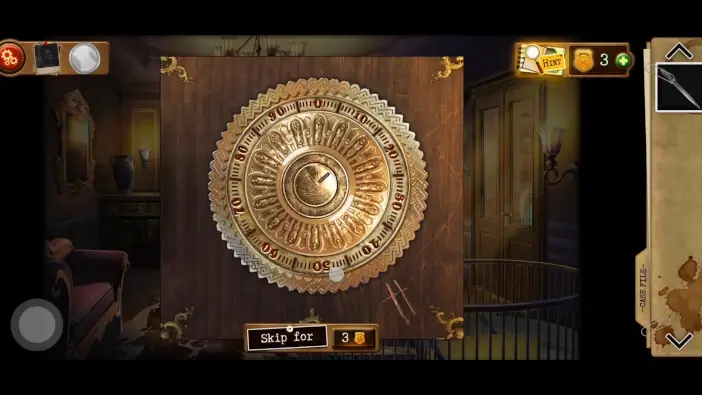
Approach the lock mechanism close to the window.

Below the lock is a red paint, similar to one on the painting. The solved clue on the painting is number 25. Move the lock to position 25.

Approach the lock mechanism close to the mirror.
Below the lock are the lines, similar to the ones on the mirror. Since the solution to the clue in the mirror is number 13, add three more lines from the lock to get a sum of 16. Move the lock to the position of 16.

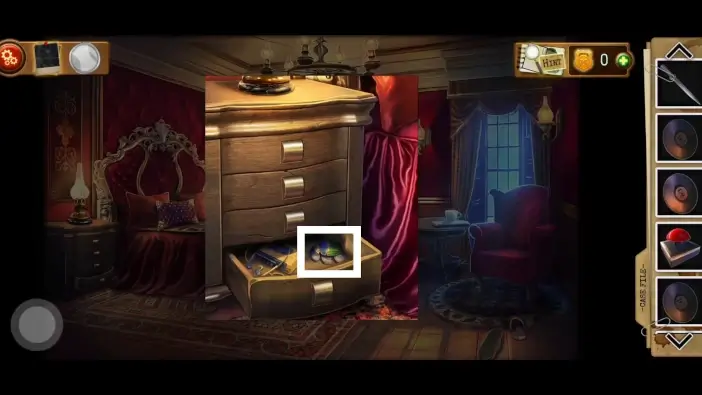
- Once you solve both locks, the nightstand will open. Take a photo of a gun inside the nightstand. It is evidence.
- Take the first vinyl record called D4. You will need three vinyl records to unlock a secret area of the house.
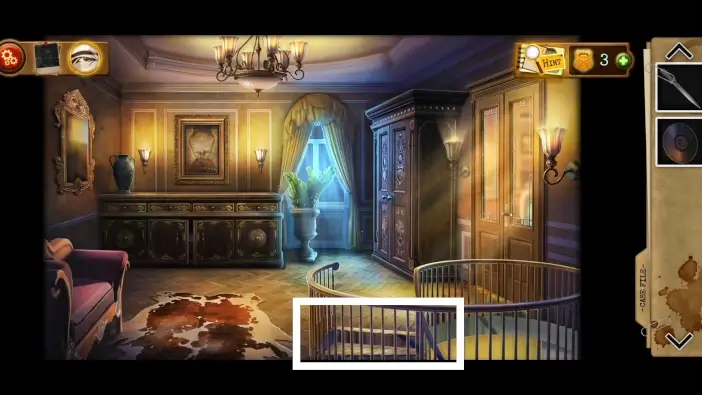
Go downstairs.
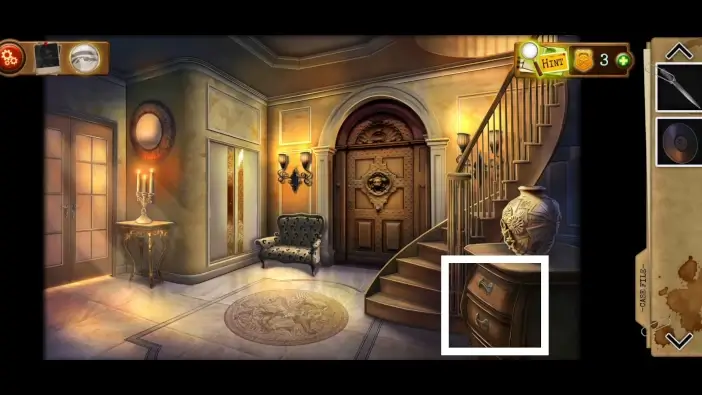
In the ground floor hallway, open the drawer on the right.
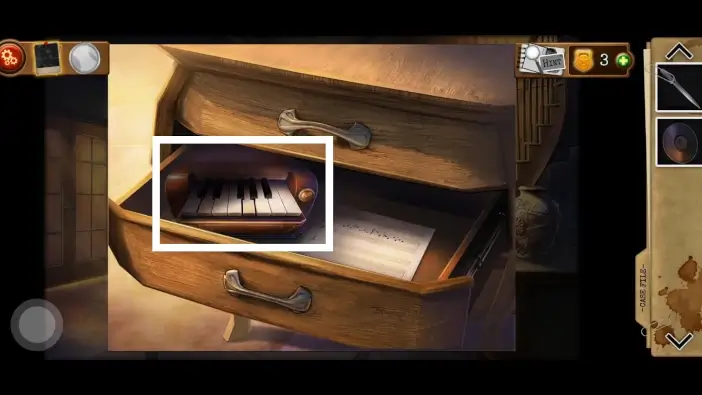
Take a closer look at the musical instrument.

Press the keys when the dashes are close to them.
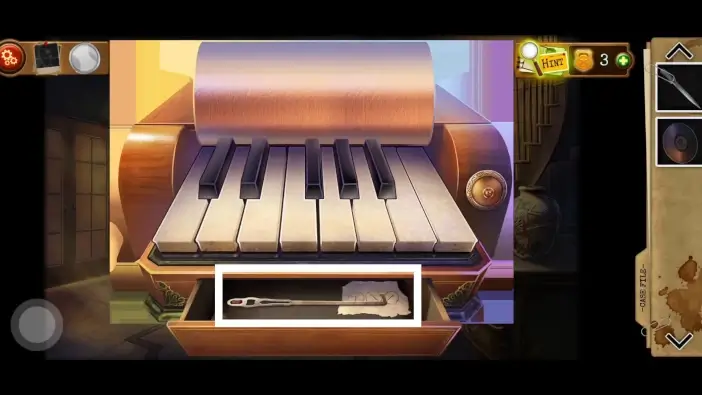
Once you complete the challenge, a drawer will open. Take the master key and look at the drawing on the paper. It is a clue to open a cabinet in the library.
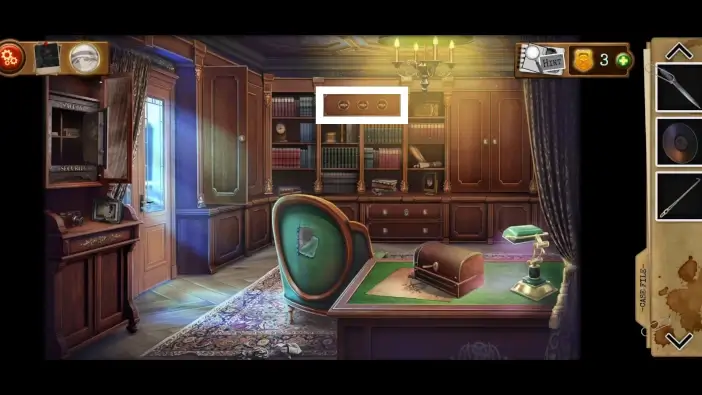
Return to the library and approach the switches on the bookshelf.
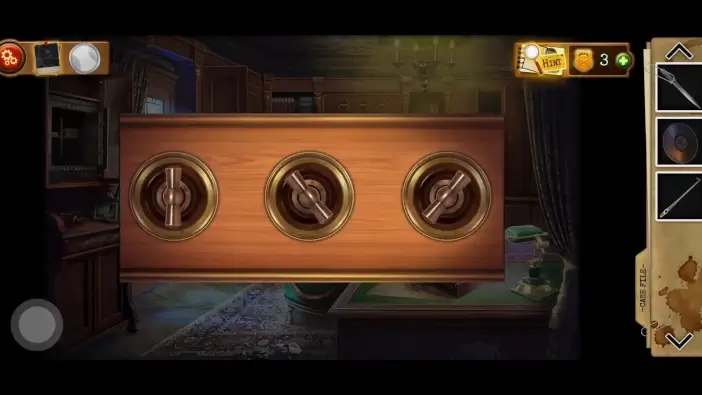
Rotate the switches following the clue on the paper you saw earlier.
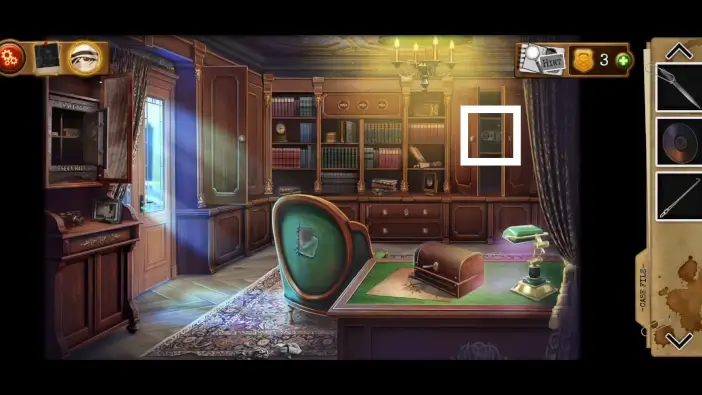
Once you rotate the switches correctly, the cabinet will open. Approach the safe inside the cabinet.

Take the sticky note from the safe.

Approach the UV lamp on the desk.
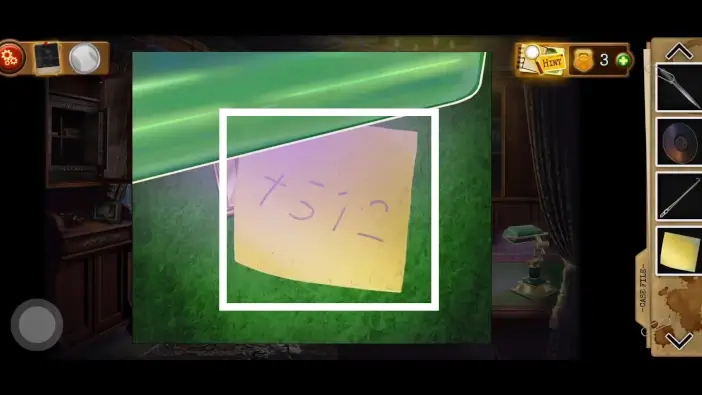
Place the sticky note near the IV lamp to see the safe code.
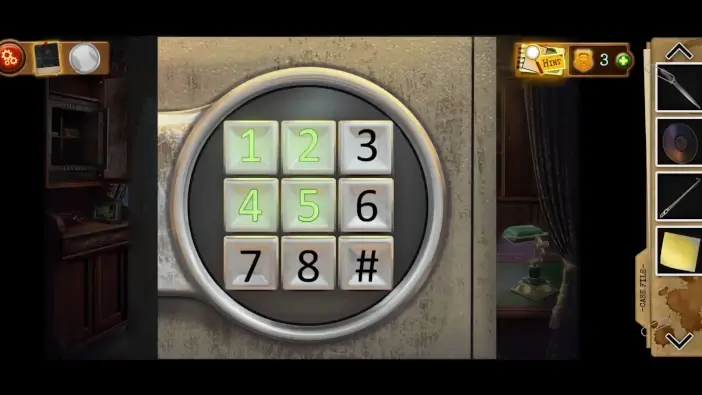
Return to the safe and type the password, which is “4512”.

Take the second vinyl record “C2” and the cabinet drawer key from the safe.

Use the cabinet drawer key to unlock the drawer.
- Take the button. You will use it, together with vinyl records, to open the secret area of the house.
- Take the cabinet key.
Go to the corridor next to the library and use the key you just obtained to unlock the cabinet.
- Read and remember the password from the sticky note.
- Take a closer look at the box.

Place the master key inside the box’s lock.
Move the master key and tap it when the green light appears above it.

Once you unlock the box, take the bedroom key.
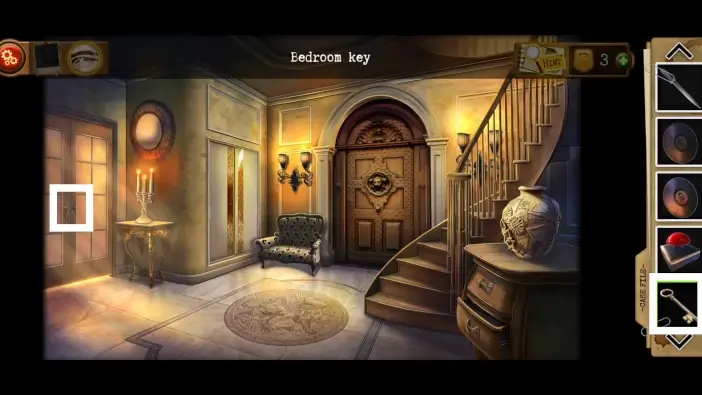
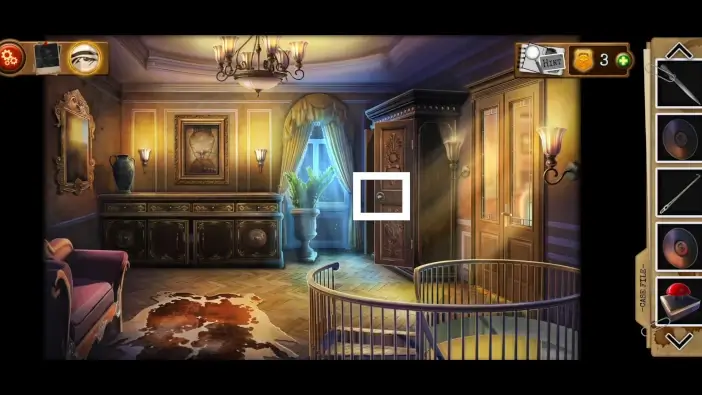
Go downstairs and use the bedroom key to access the bedroom.

Turn on the lights in the correct order. Once you turn on all the lights, the painting will move.
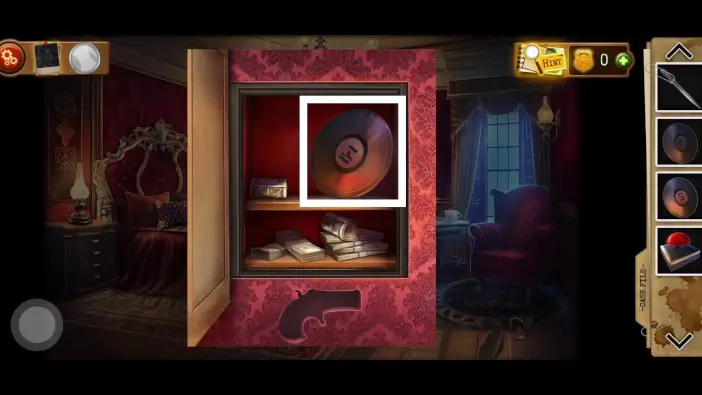
Behind the painting is a hidden compartment. Take the third vinyl record “B1”.
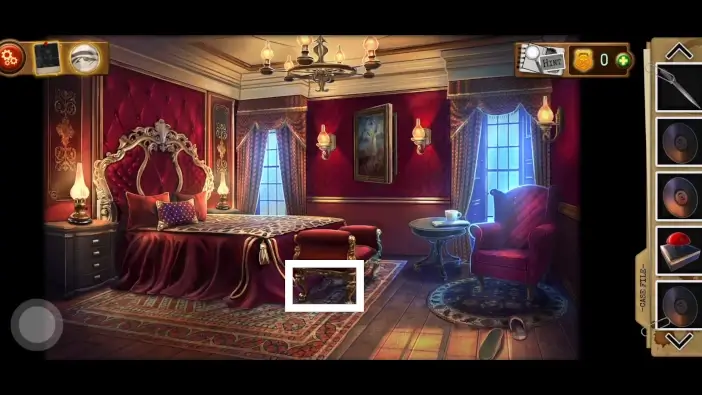
Approach the area beneath the sofa.
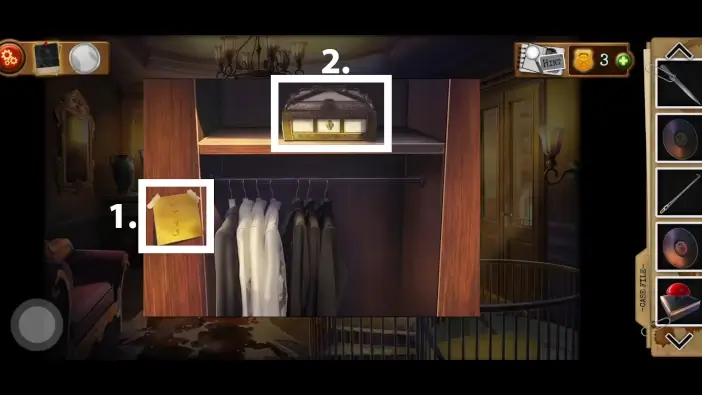
Take a photo of the note.

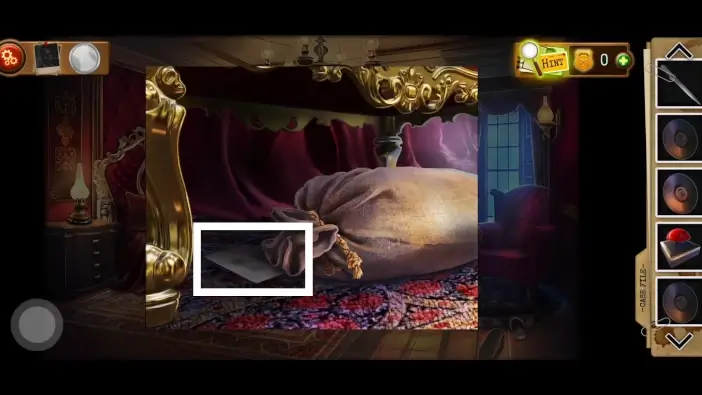
Open the bag and take the cat figurine. It’s one of the figurines that will unlock the puzzle challenge on the floor of the ground level.

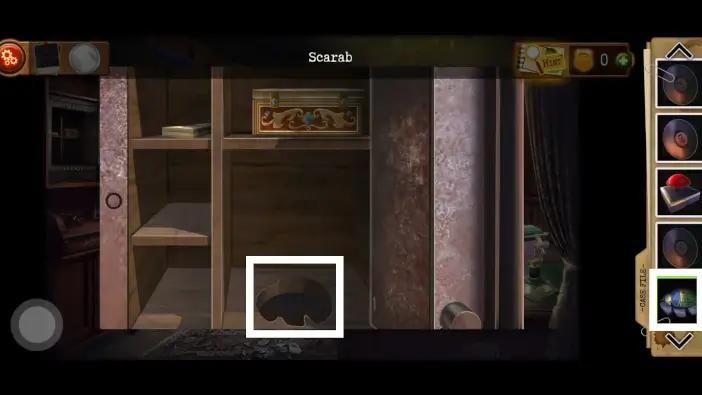
Go to the nightstand on the left. Remember the numbers on the sticky note: “6343”. Each digit represents how many angles the shape should have on the drawer (for example, “6” means a hexagon, “3” means a triangle, etc). Set the symbols like in the picture above.
Once you unlock the nightstand, take the scarab. It’s one of the figurines that will unlock the puzzle challenge on the floor of the ground level.

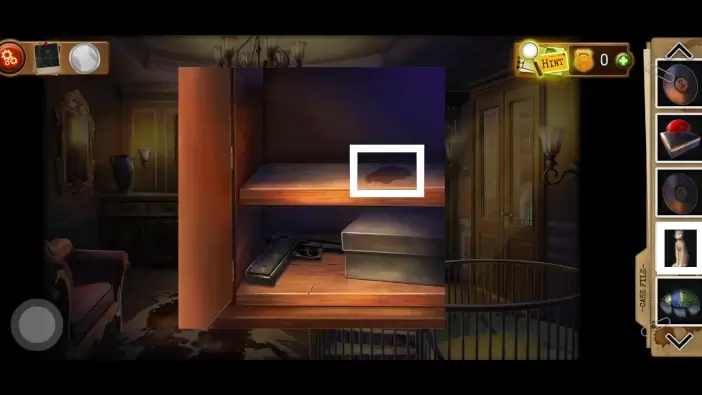
Approach the pillow on the bed.

Use a dagger to cut the pillow. Take the replica gun from the pillow.

Approach the safe in the bedroom and place the replica gun in its place.
Go to the upper corridor and approach the cabinet on the right. Place the cat figurine in its place.
Go to the library and approach the safe on the left. Place the scarab figurine in its place.

Once you place the replica gun and two figurines where they belong, the images on the floor in the lower hallway will change. Go downstairs and approach the image.

Swap the parts of the image until you get the image like in the picture above.

Once you complete the previous puzzle challenge, a hidden door will open. Go there.

Place the button you found in the library.

Place all three vinyl records you collected so far.
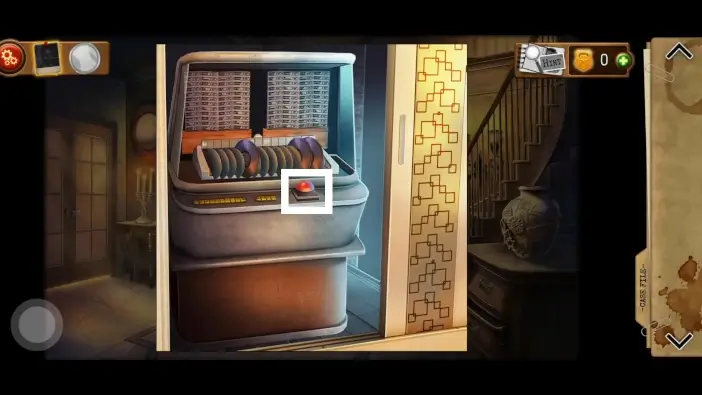
Hit the button you just pressed. This will unlock a hidden area of the house. Go through the hidden passage.

Unfortunately, it will be a trap. The detective will be trapped inside the abandoned bathroom.
- Take the gun. You will not use it in the gameplay, but Andrew will use it after you complete the chapter to kill the Collector.
- Take a picture of the note on the ground.
- Go right by clicking on the right arrow.
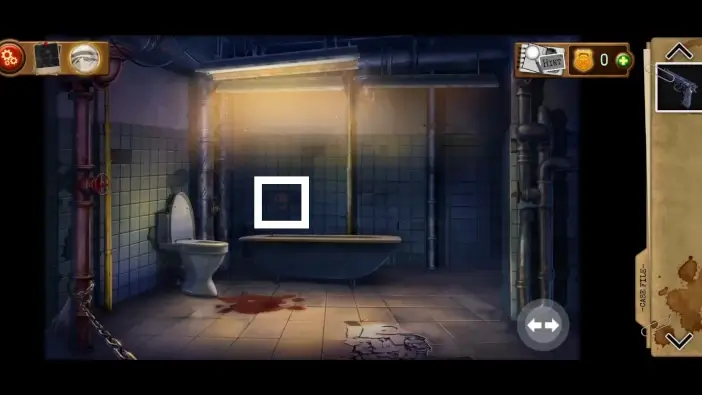
Remember the number 9 above the bathtub and its red color.
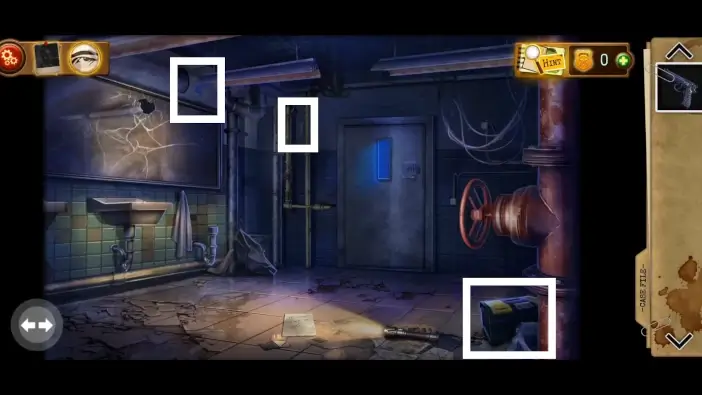
Return to the previous area and remember number 5 written in blue, and number 1 in white. Approach the toolbox on the right.
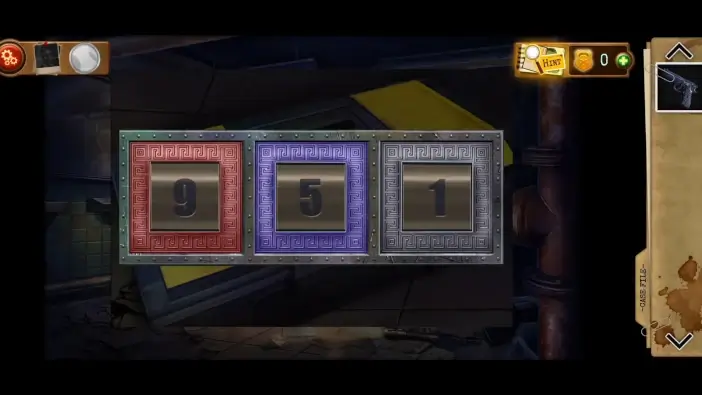
The password for the toolbox is “951”, which are the same numbers and colors as you saw previously on the walls.
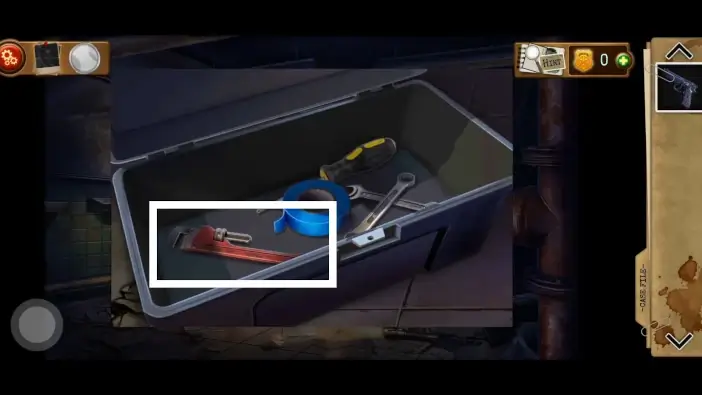
Take the wrench from the toolbox.

Go to the bathtub area and approach the pipe on the left.
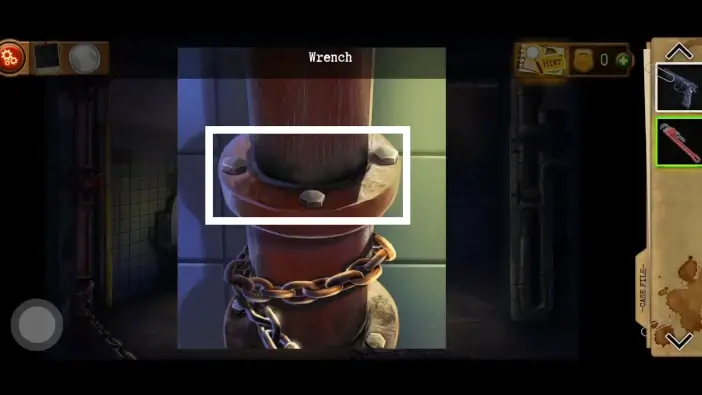
Use wrench to remove the screws and remove the pipe.

Take a closer look at the box that was hidden inside the pipe. Move all the pins away from the central circle, then spin the circle clockwise to open the box.
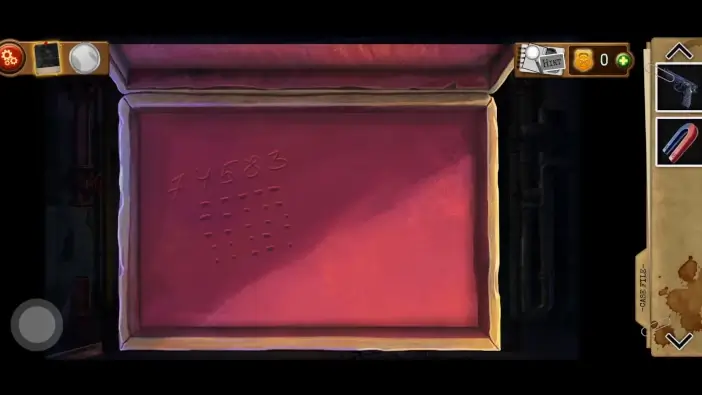
Take the magnet from the box and remember the number “74583”. It is an important clue.
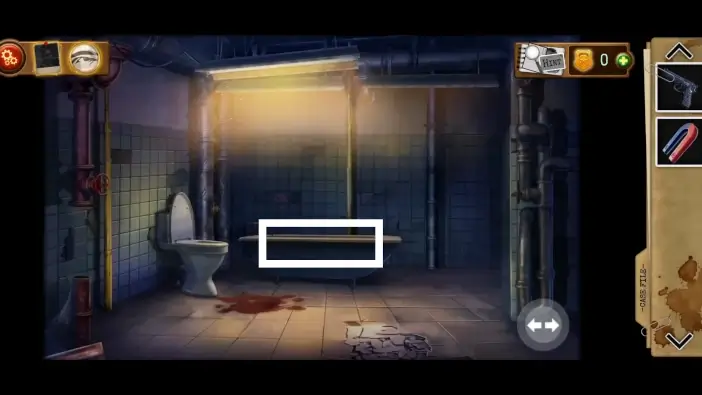
Approach the bathtub.

Take the fishing line.
- In your inventory, merge the fishing line with the magnet to create a “Magnet on a Fishing Line” item.
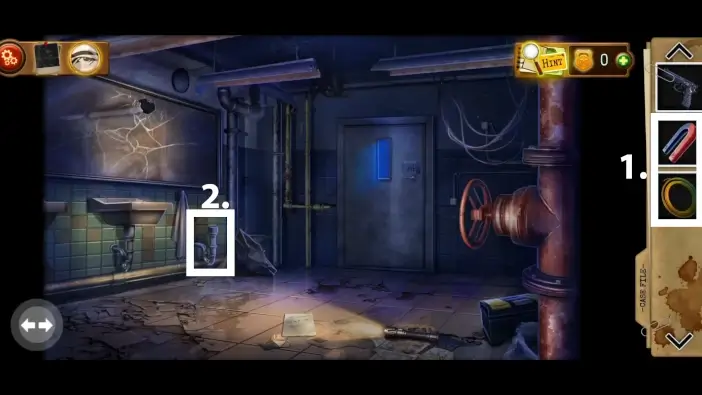
- Go to the previous area and approach the pipe.

Use the “Magnet on a Fishing Line” item on a pipe to get the door key.

Approach the crack on the glass.

Take the tank drawer key.
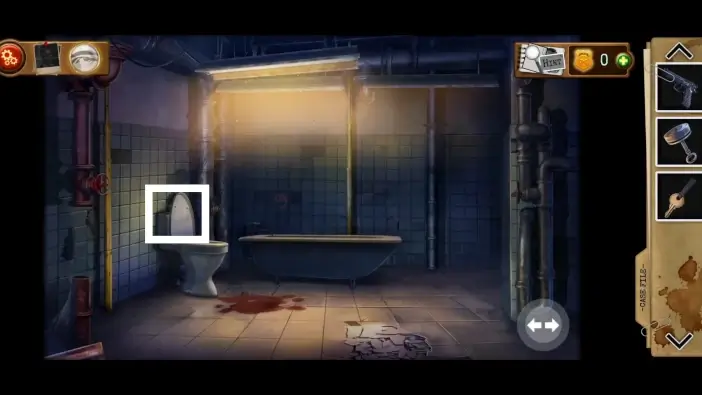
Go to the bathtub area and approach the toilet cistern.
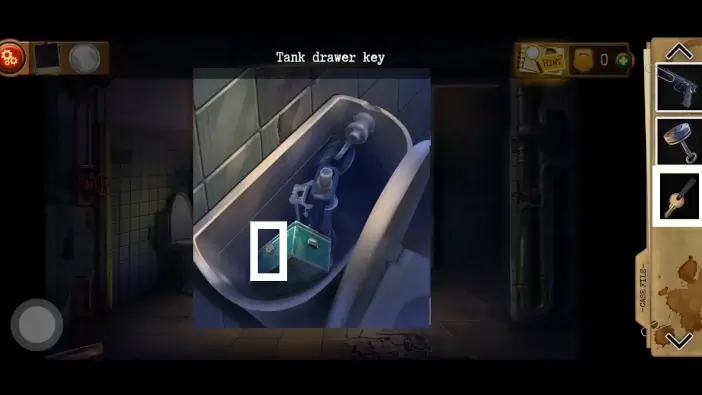
There will be a box inside the toilet cistern. Use the tank drawer key to open it.
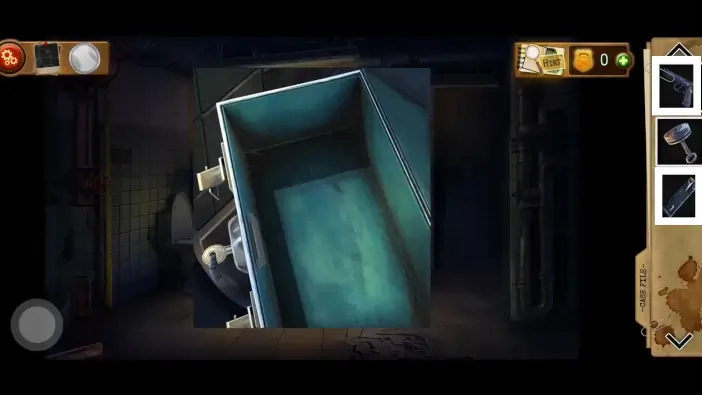
Take the clip from the box. Merge the clip with the gun in your inventory to load your gun with bullets.

Go to the main bathroom area and use the door key on the door.

To unlock the door, you need to solve a final puzzle challenge. There are numbers to the left of the buttons and letters above the buttons. Each button in the row corresponds to the number on the left. You need to click on two numbers in the column so that the sum matches the number of the letter. You can know the number of the letter if you look at the last note (“It Will Never Be Over”) where the first letter of each word corresponds to the order of digits from the box in the toilet cistern. For example, letter “I” will have a corresponding number of “7”, so you need to click buttons in an “I” column in rows 3 and 4 to get the sum of 7. The second letter “W” has a corresponding digit “4”, which is the second digit from the box. Below letter “W”, press the buttons on row number 1 and row number 3 to get the sum of 4, and so on. The solution and clues are in the picture above.
Once you press all the correct buttons, turn the door key.
This will mark the end of our guide for Detective – Escape Room Games. Andrew will chase the Collector, and he will manage to kill him. There is an alternative ending: if you collected all the evidence throughout the entire game (in all chapters), Andrew will arrest the Collector. Either way, Andrew will avenge Hank.
Thank you for reading!