Legendary Tales 5 – Chapter 3: Downfall | Part 3
Intro
Welcome to our walkthrough for Part 3 of Chapter 3 of “Legendary Tales 5” from “FIVE-BN GAMES”. To risk everything to change the world, or to stand aside? Every significant change requires the first small, but brave step.
Walkthrough
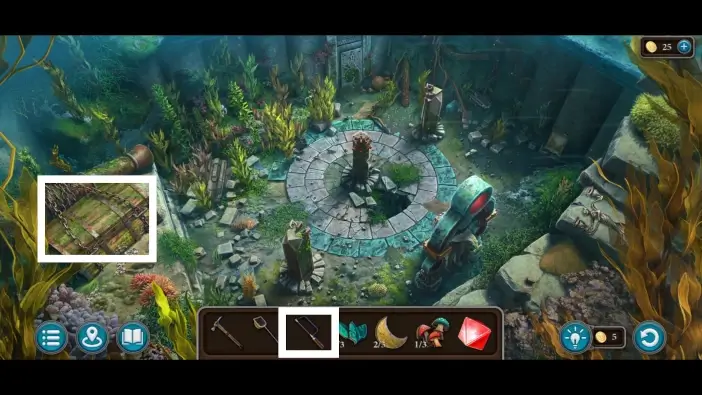
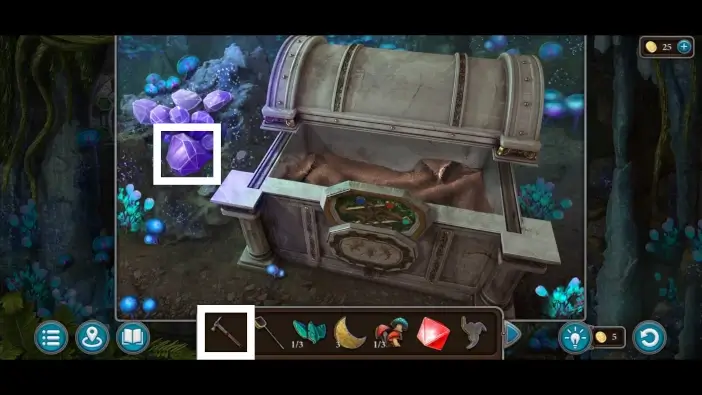
In the underwater columns area, use the hacksaw to cut the chains on the chest.
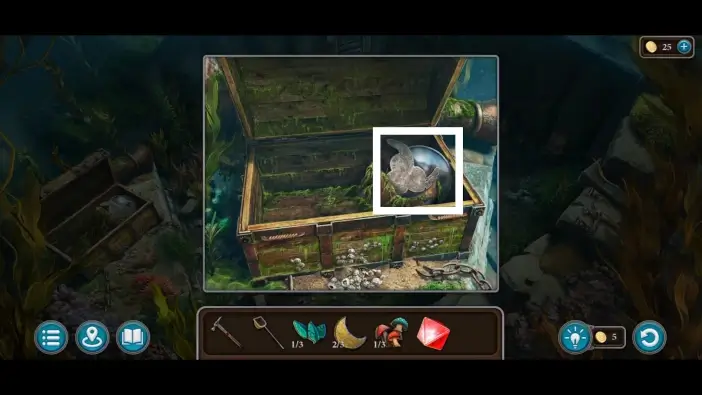
Open the chest and take the totem part and the mirror. You will use the totem part to unlock the wings for the Air Trial, on the peak of the mountain. As for the mirror, you’ll need three mirrors to put on the totems in the underwater area.
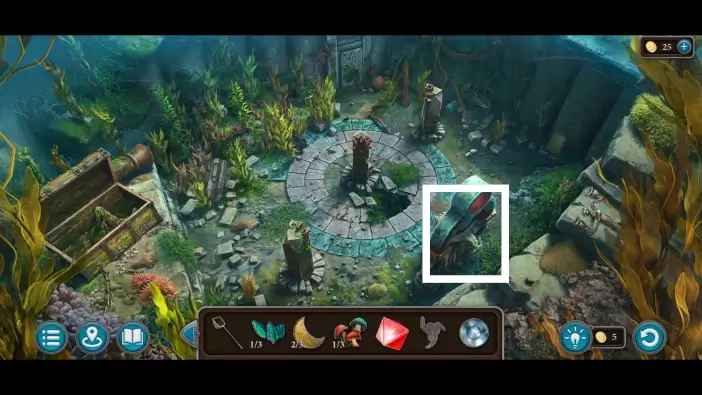
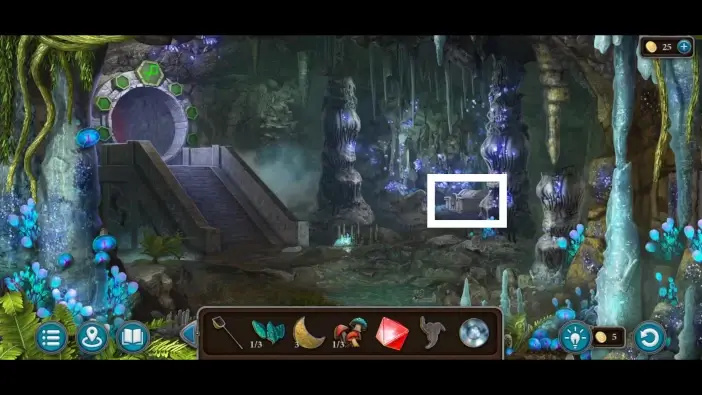
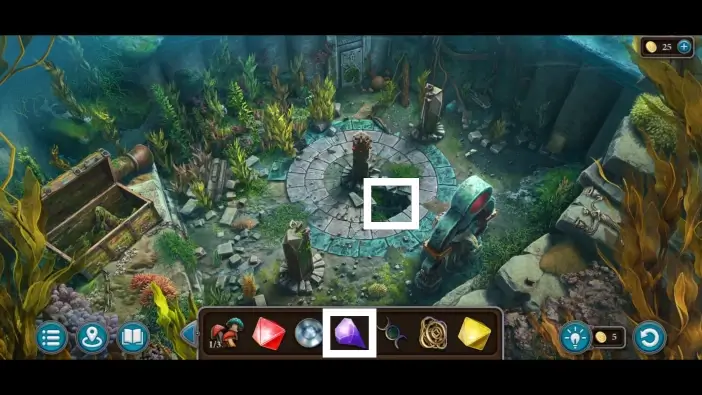
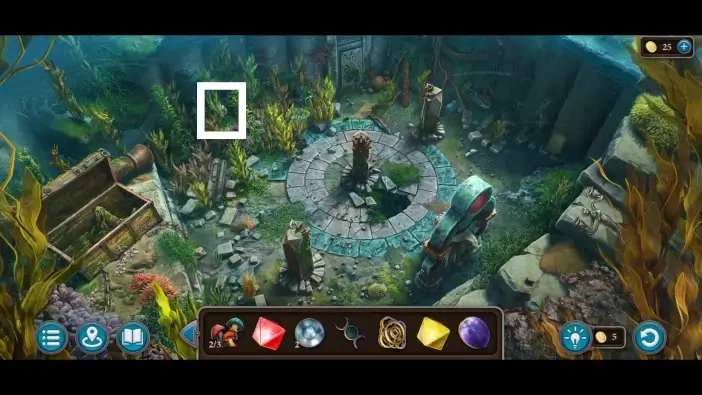
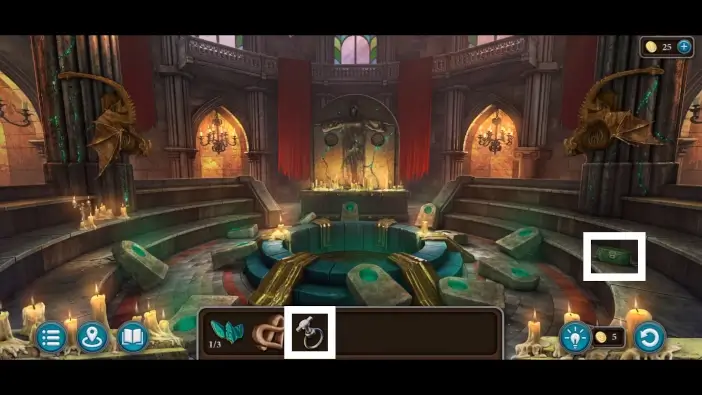
Approach the pillar on the right.
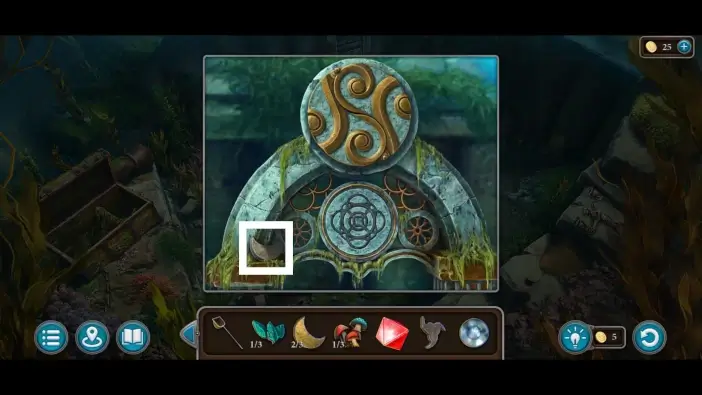
Take the third half moon.
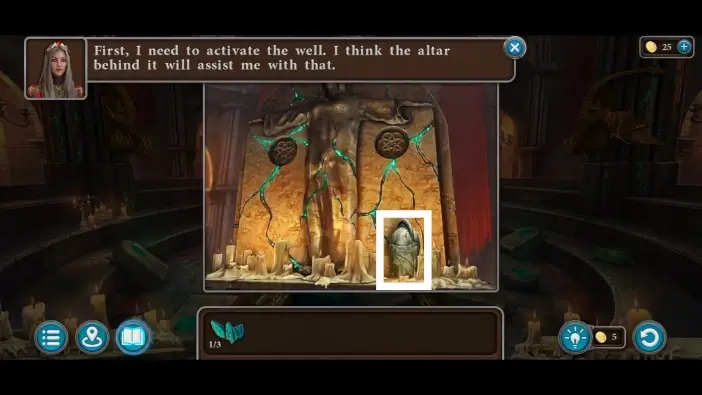
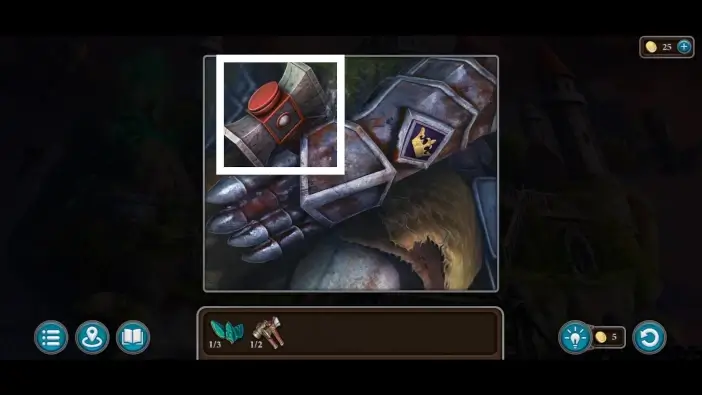
Return to the cave where the Fire Trial portal was and approach the chest you’ve opened before.
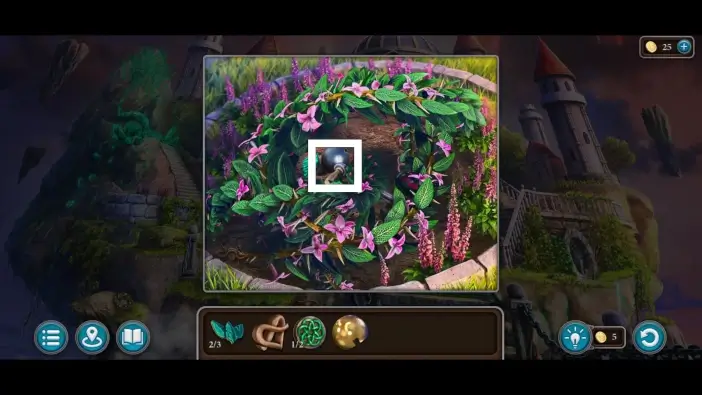
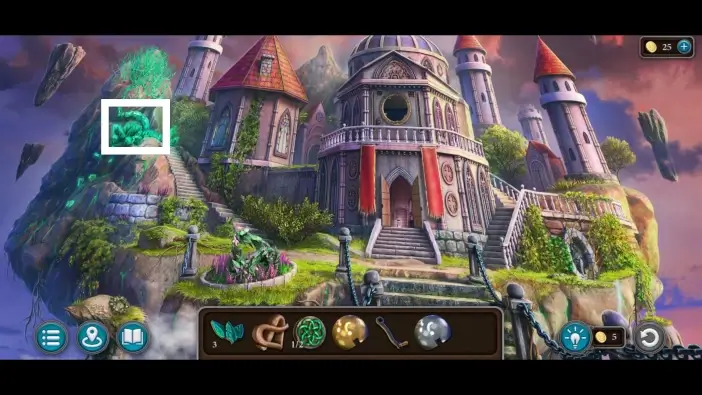
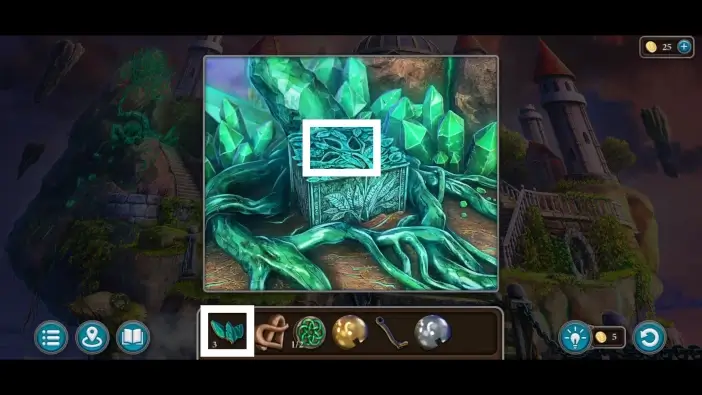
Use the hammer to mine the crystal. Add the crystal to your inventory. You’ll need it to illuminate a hole in the underwater area.
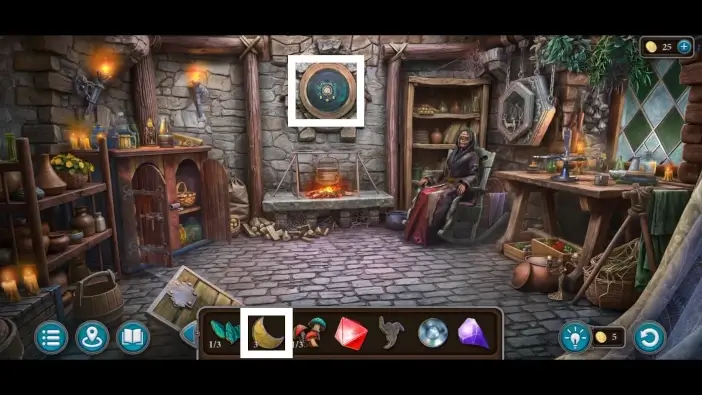
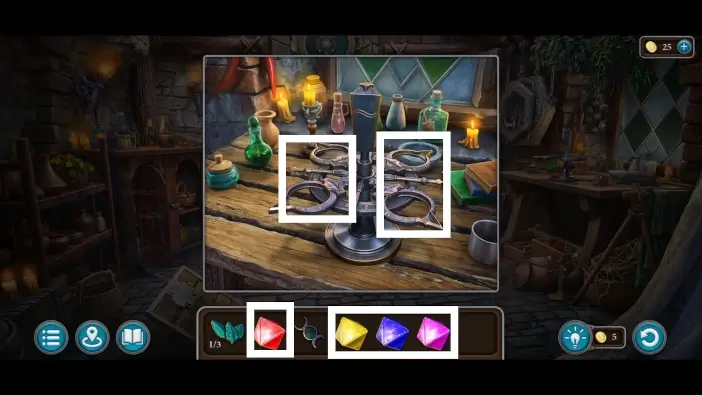
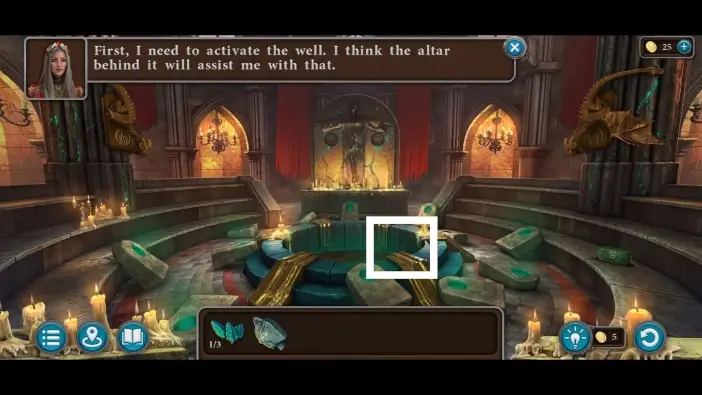
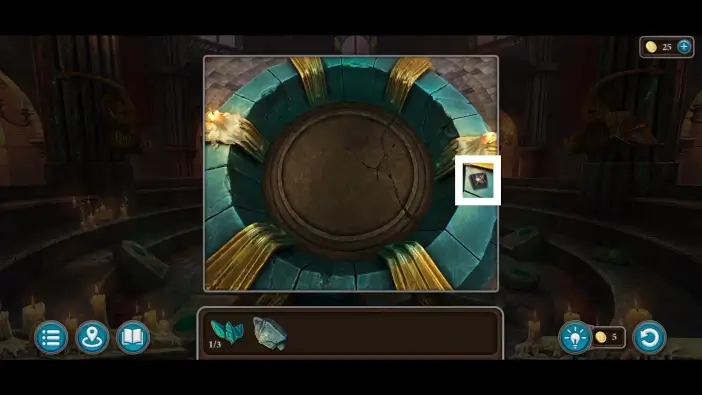
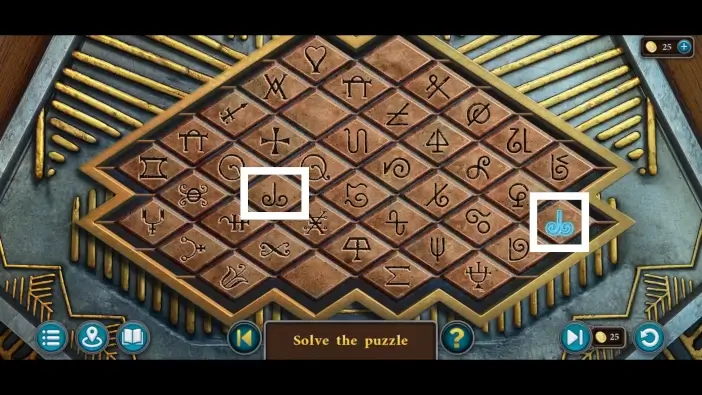
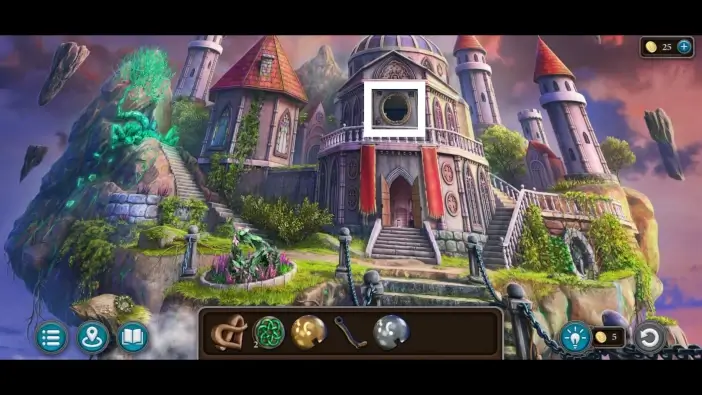
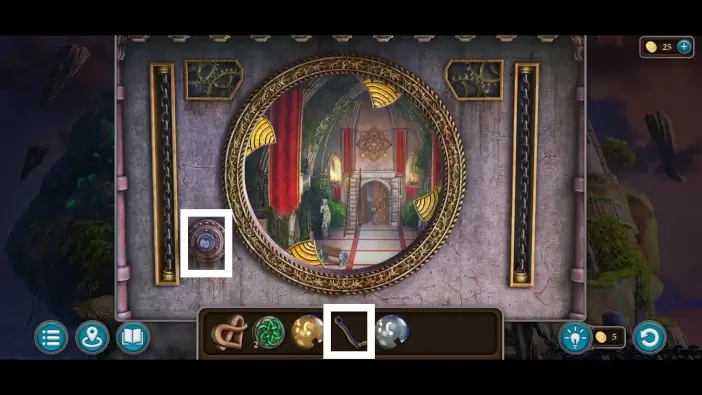
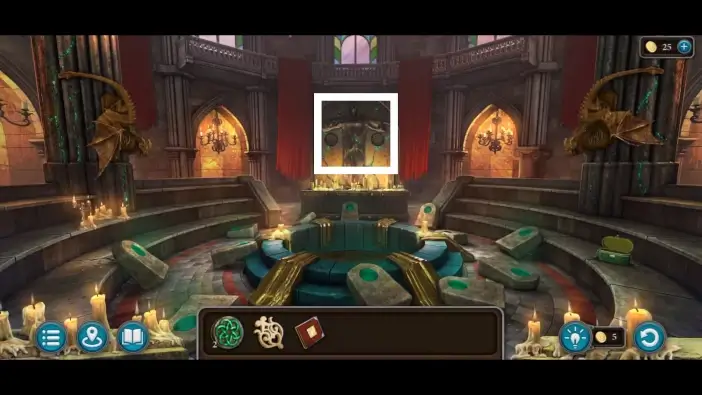
Go to the Oracle’s Tower and place the three moons into the shield on the middle wall, above the cauldron. A new puzzle challenge will start.
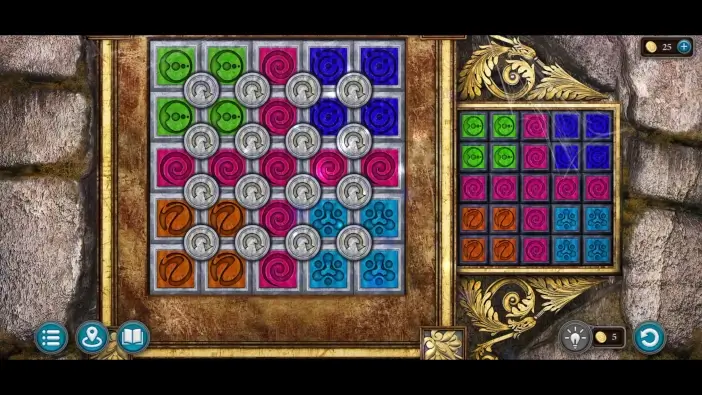
In this puzzle challenge, you will see the solution on the right. You’ll need to rearrange the colors to be in the same positions as in the solution. You can move the colors only by clicking one of the grey rotation buttons, which will rotate the colors around it clockwise.
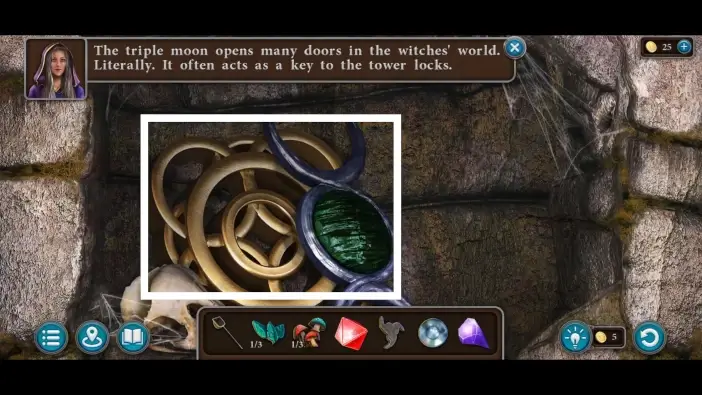
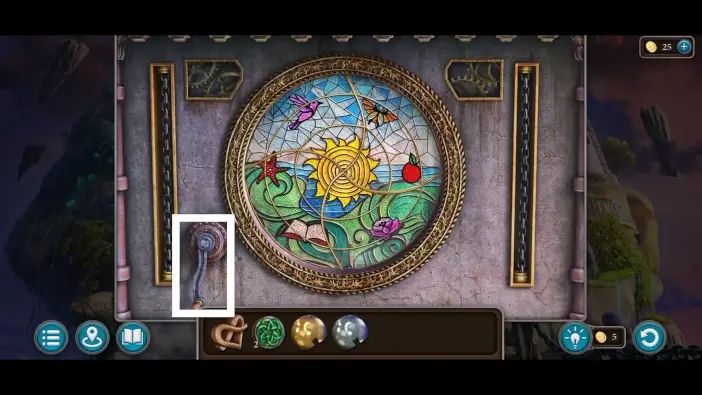
After the puzzle, take the triple moon and the ornament. You will use the ornament on the pillar in the underwater area, and you will use the triple moon to access the archwitches’ floating castle.
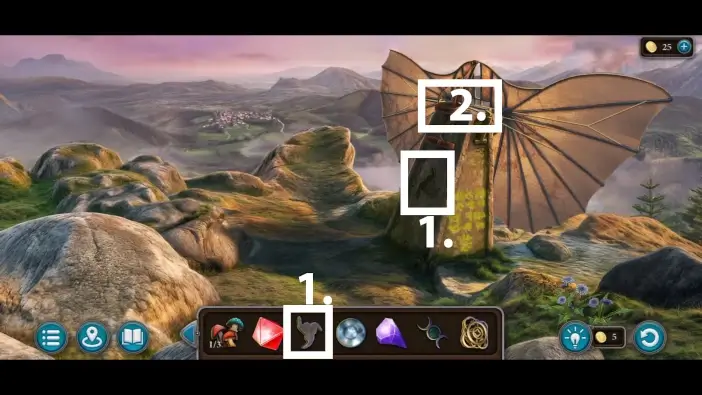
- Go to the peak of the mountain for the Air Trial and place the totem part into the stone holding the wings.
- Click on the wings to start flying, which will start the Air Trial.
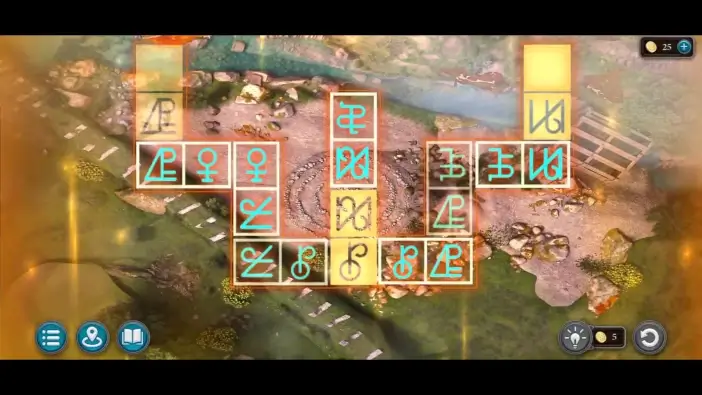
During the Air Trial, rearrange the symbols so that the pairs of identical symbols are next to each other.
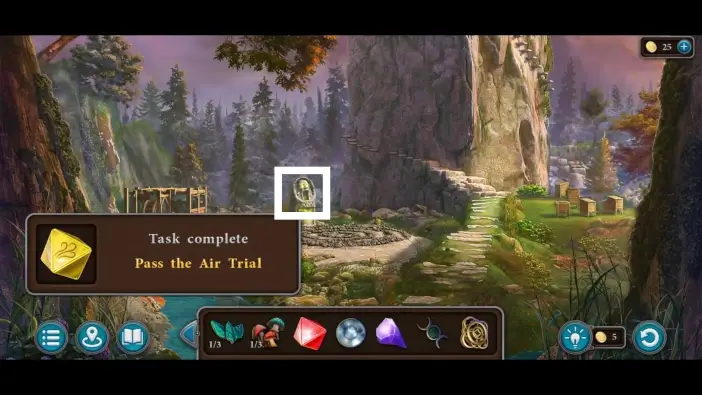
Once you complete the Air Trial, approach the totem below the mountain and take the air shard.
Go to the underwater area and illuminate the hole in the floor using the crystal you’ve mined in the cave.
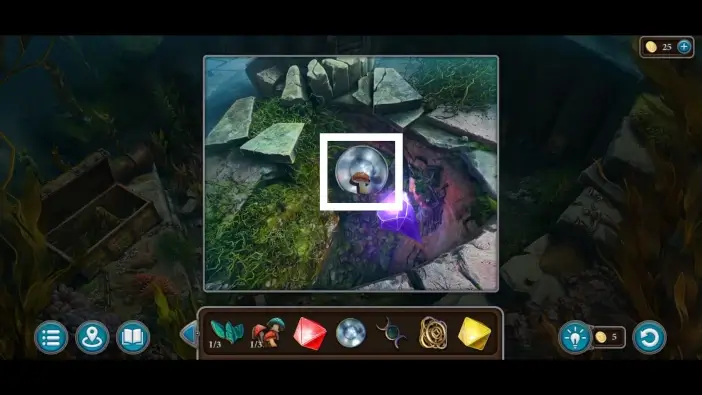
Take the second mushroom and the second mirror.
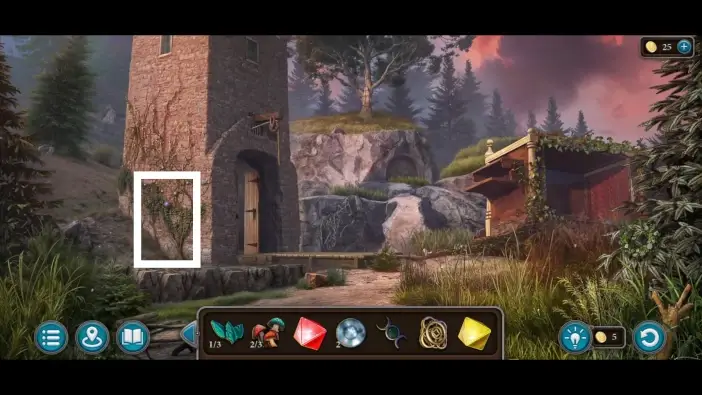
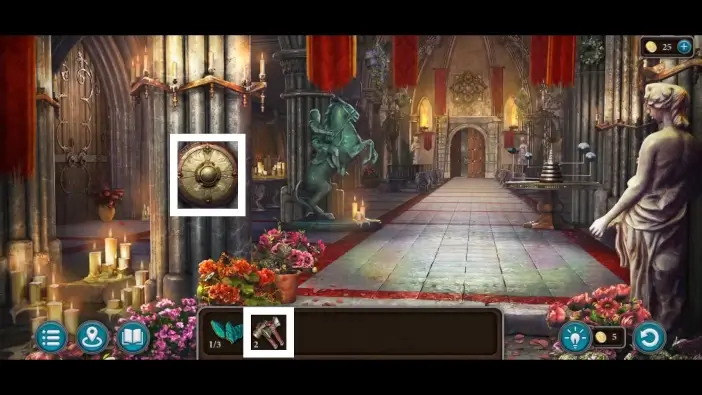
Go to the Oracle’s Tower area and approach the wall of the tower.
Use the net to take one warfi fruit.
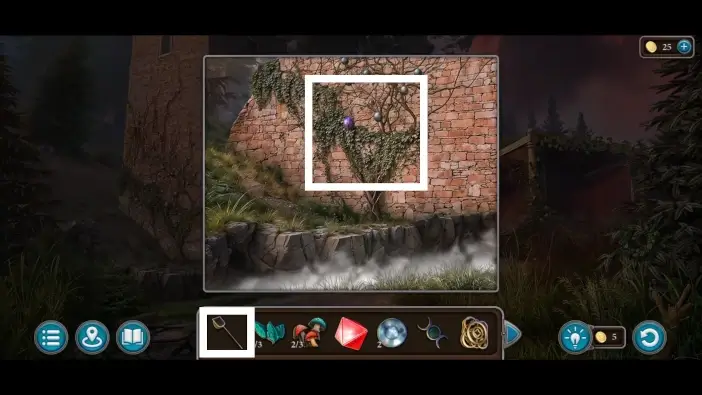
Return to the underwater area and approach the algae on the left.
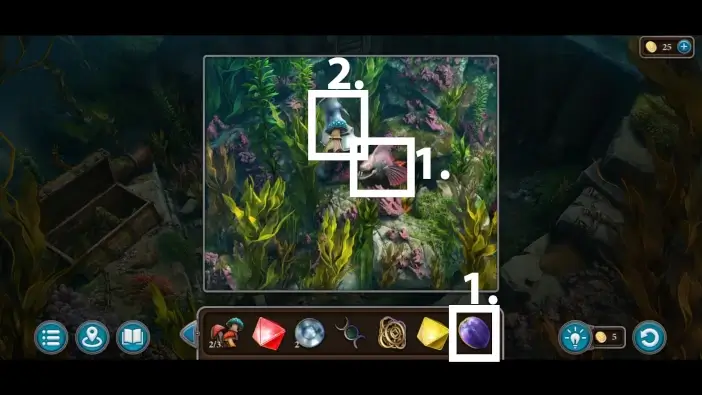
- Give the warfi fruit to distract the eel.
- While the eel is distracted, take the third mushroom and the third mirror.

Attach the mirrors to the three smaller pillars, one mirror per pillar.
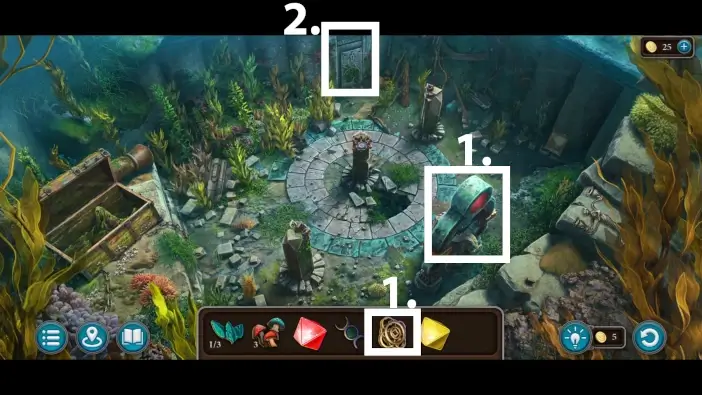
- Approach the largest column and attach the ornament to it. A compartment will open, revealing the red crystal, and the ray from the crystal will open the new location.
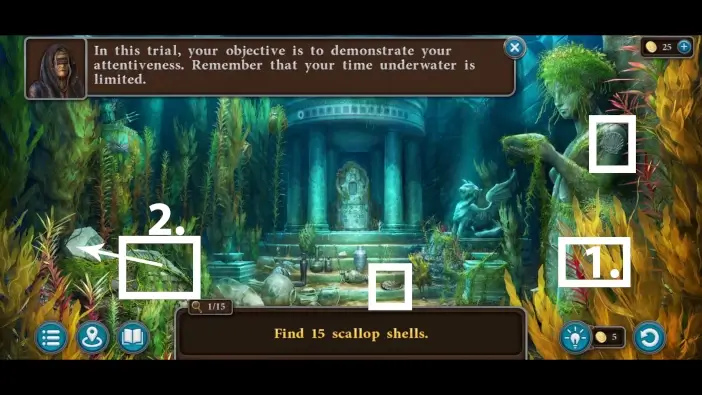
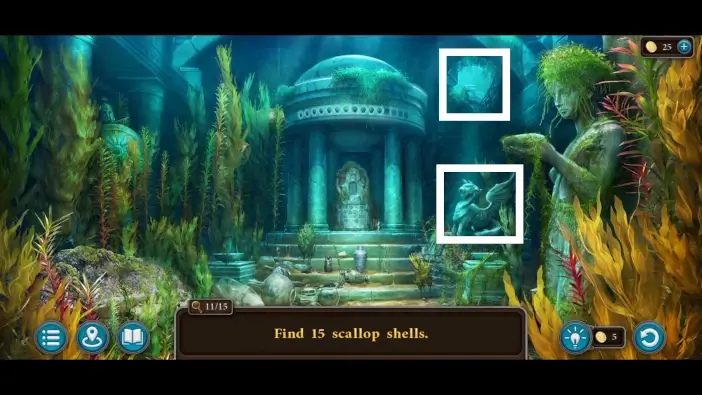
- Go to the newly opened door to start the Water Trial.
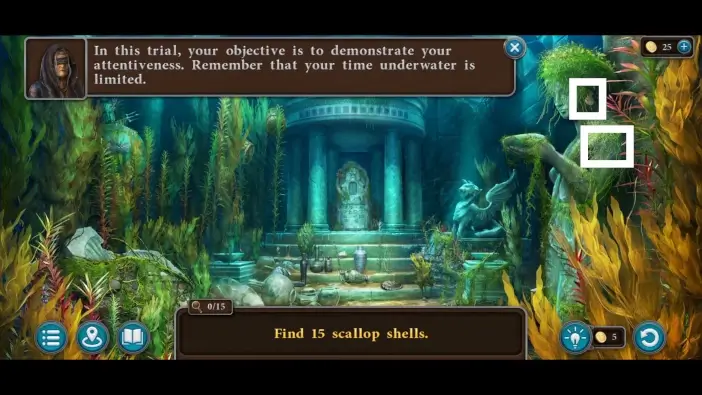
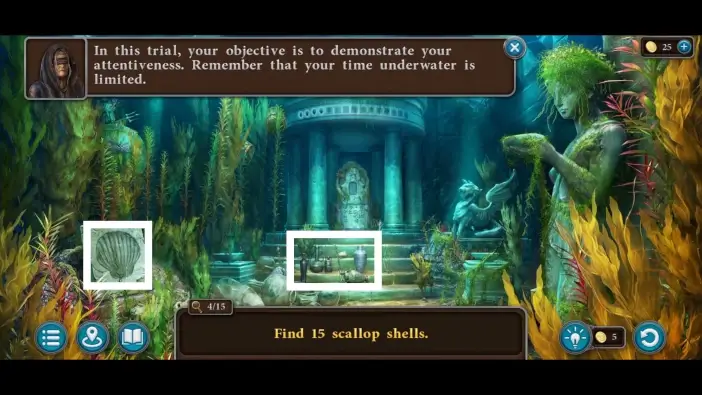
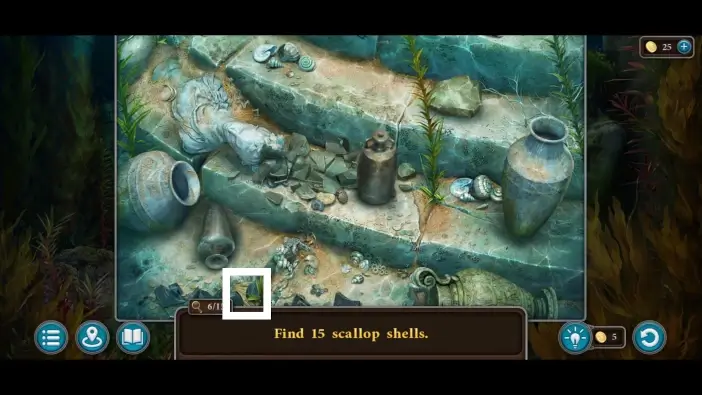
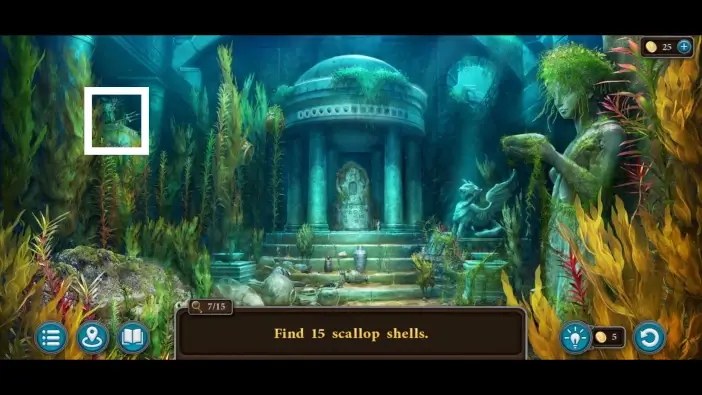
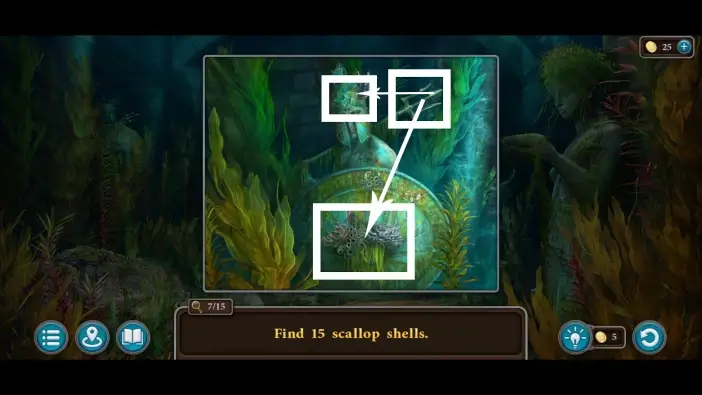
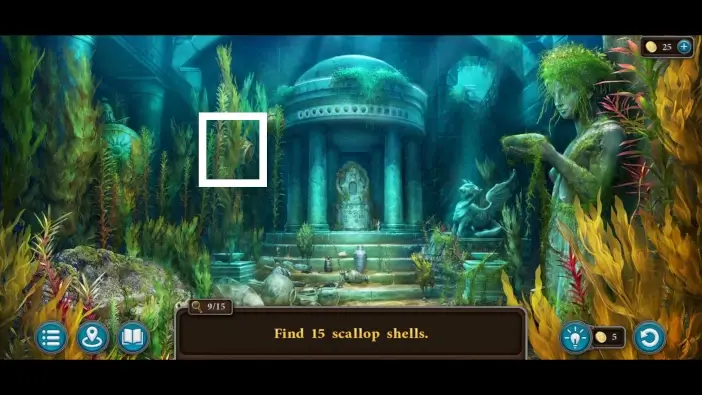
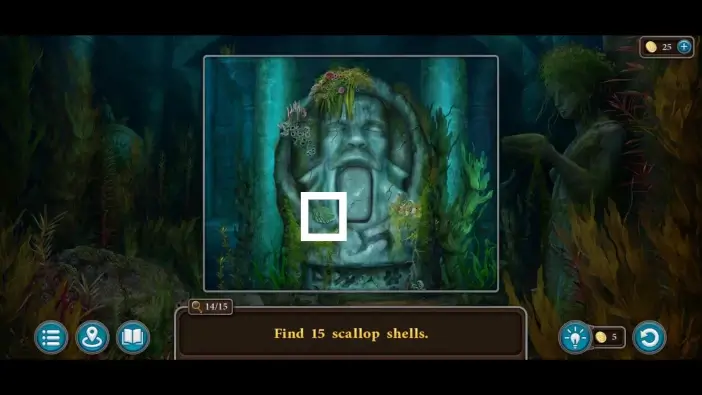
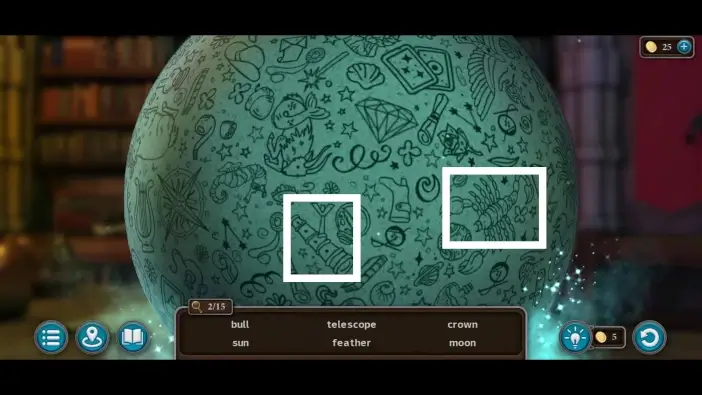
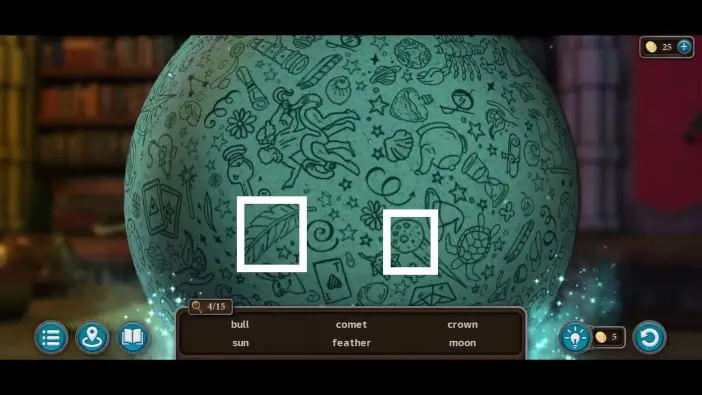
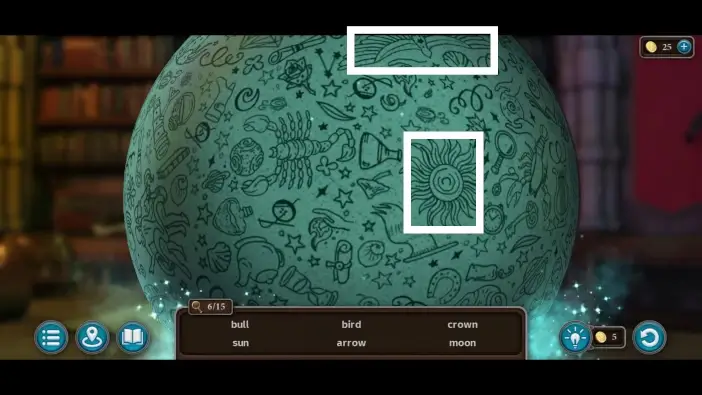
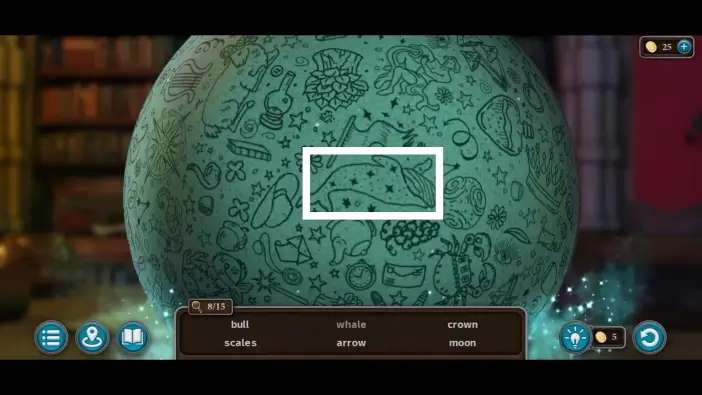
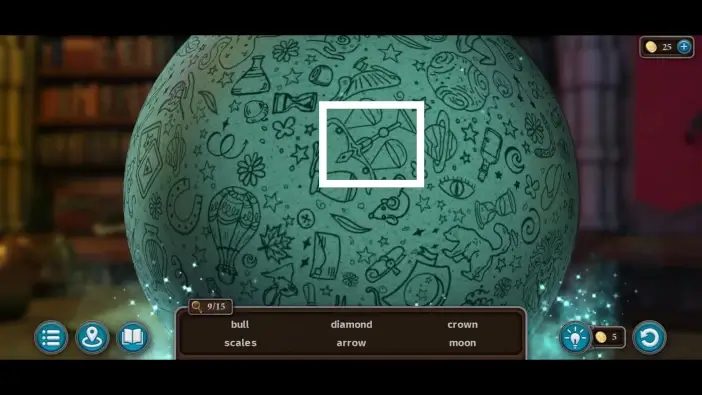
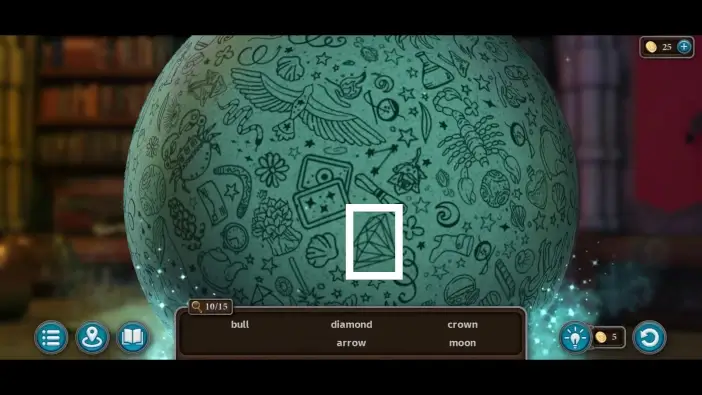
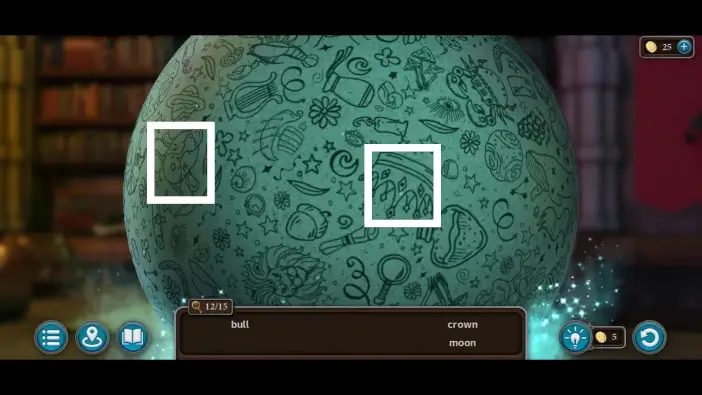
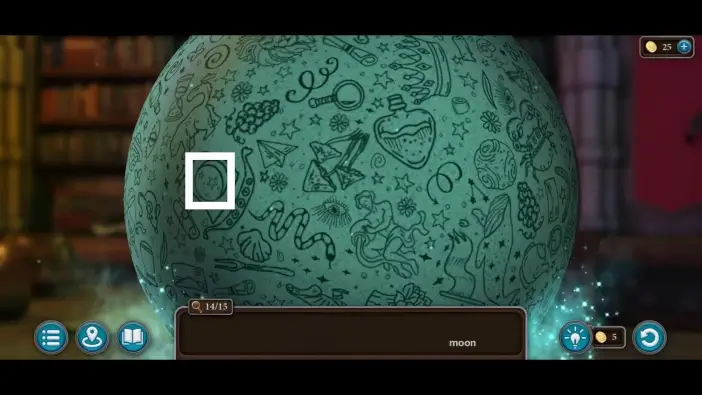
A new mini-game will start where you’ll need to find 15 scallop shells. Follow the marked locations in the pictures in this guide to find them all with no problem. Some of the scallop shells will be hidden, and you’ll need to click on the obstacle first to reveal it.
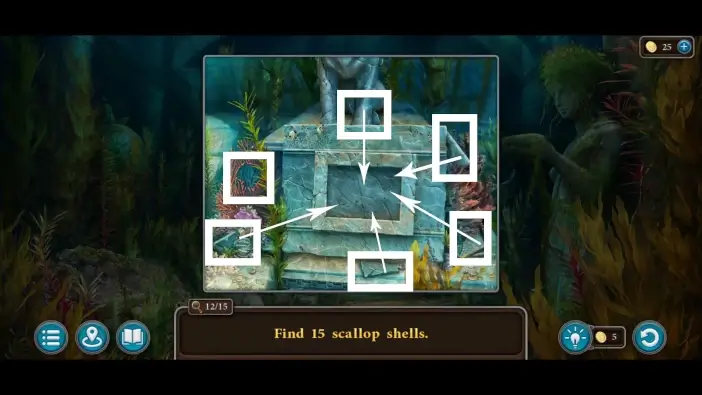
- Move the plant on the right to see another shell.
- Assemble the two parts of the stone to form the shell.
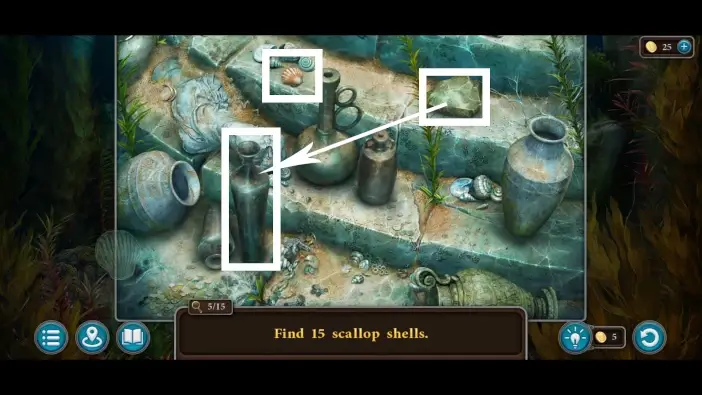
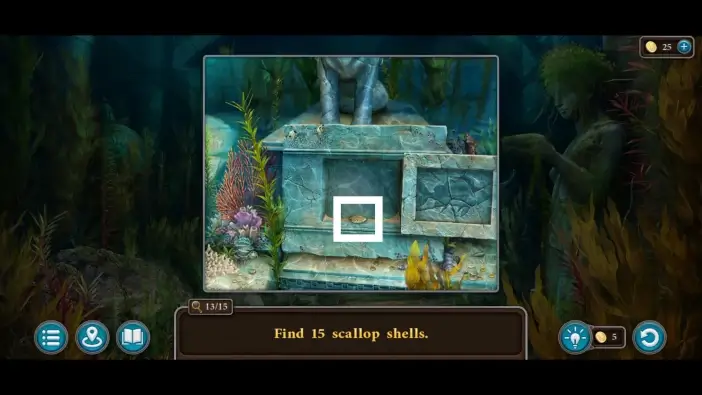
On the staircase, use the stone to break the bottle that is marked in the picture above to find another shell.
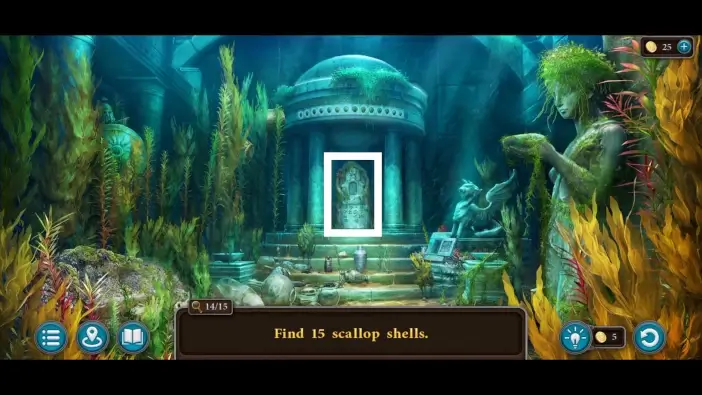
When you approach the statue, use the trident to remove the corals from the shield and the helmet. This way, you will discover more shells.
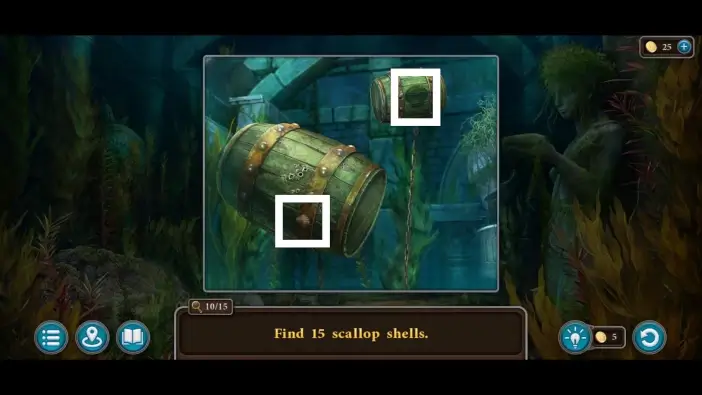
Rotate the smaller barrel to find the shell shadow, which counts towards the objective if you click on it.
On the statue on the right, you’ll need to assemble the puzzle pieces into the stone frame.
A compartment will open, revealing the next shell.
Once you find all 15 shells, a cutscene will begin, and after the cutscene, you will automatically get the water shard in your inventory.
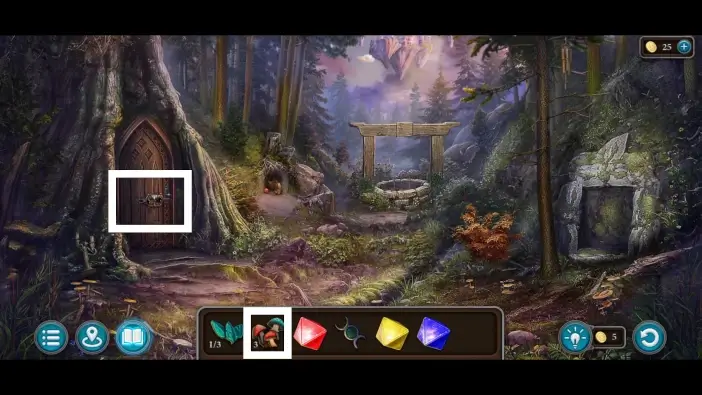
Go to the well area and use the three mushrooms you’ve collected so far to unlock the door on the tree. Enter the tree, and the Earth Trial will begin.

During the Earth Trial, choose the paths in order, as shown in the pictures in this guide.
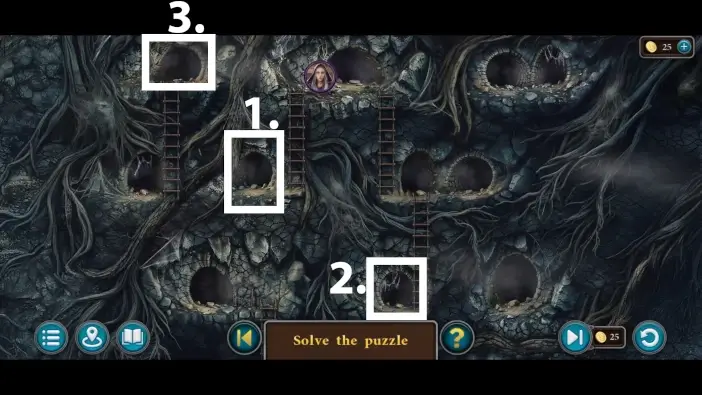
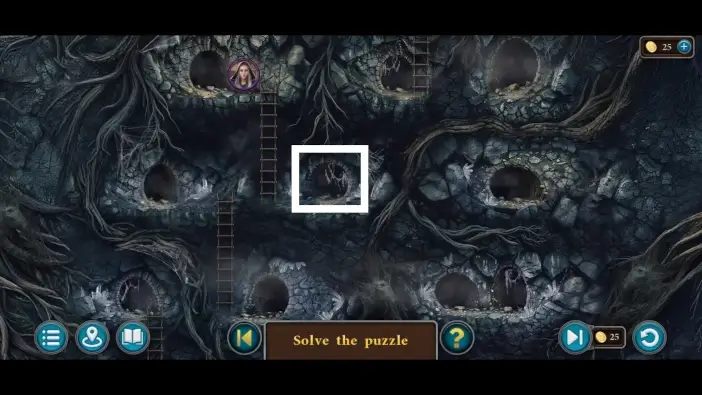
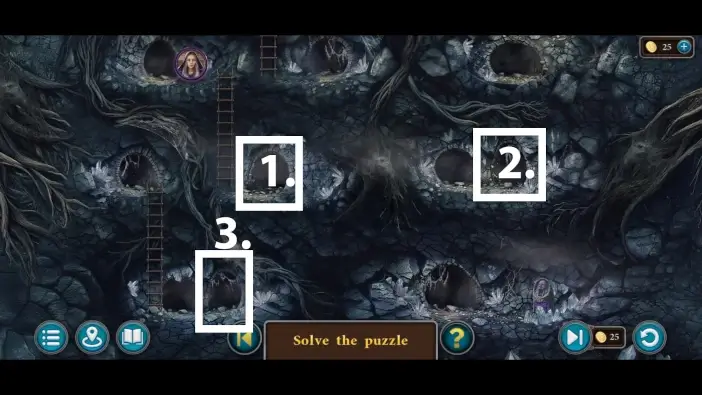
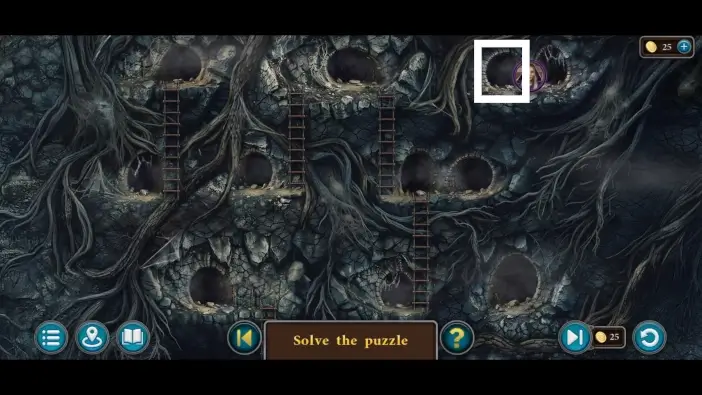
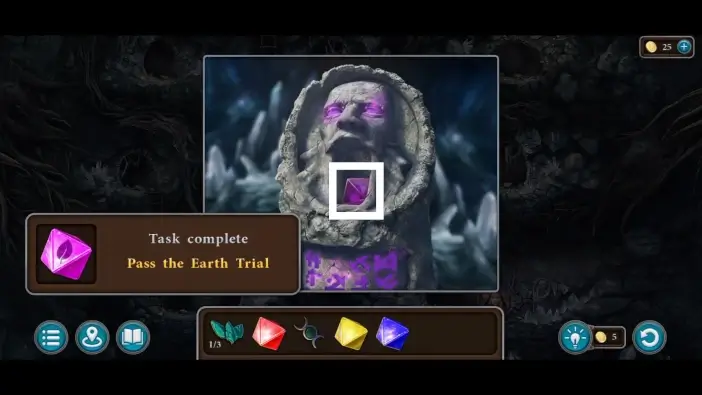
Once you reach the bottom of the cave, take the Earth Shard from the totem.
- Once you collect all the shards, speak with the Oracle in the Oracle’s Tower.
- After the conversation, approach the alchemy table on the right.
Place all the shards into the device on the table. A new cutscene will begin. Scarlett will gain new powers, and she will fly to the archwitches’ castle.
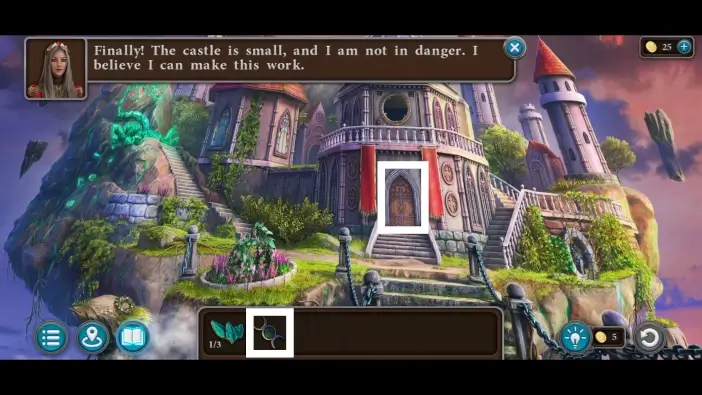
After the cutscene, use the triple moon to open the castle’s main entrance, then enter the castle.

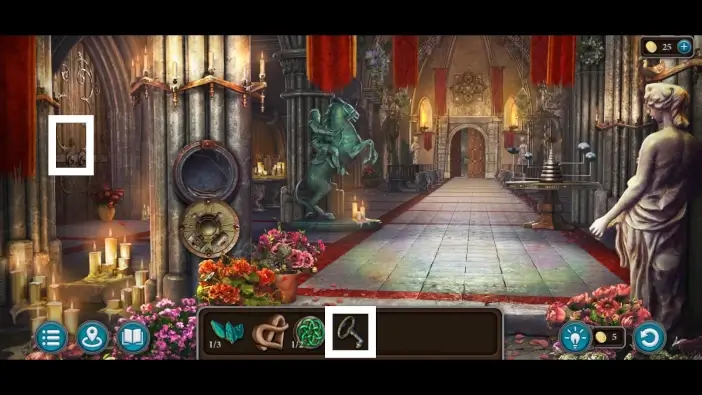
In the hallway, approach the door on the left.
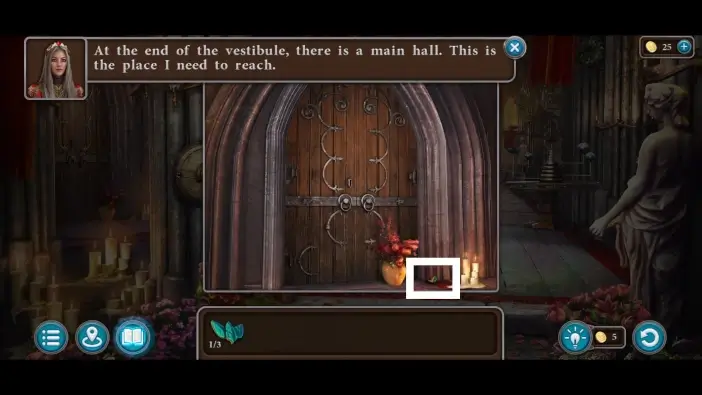
Move the flowerpot and take the ring from the ground.
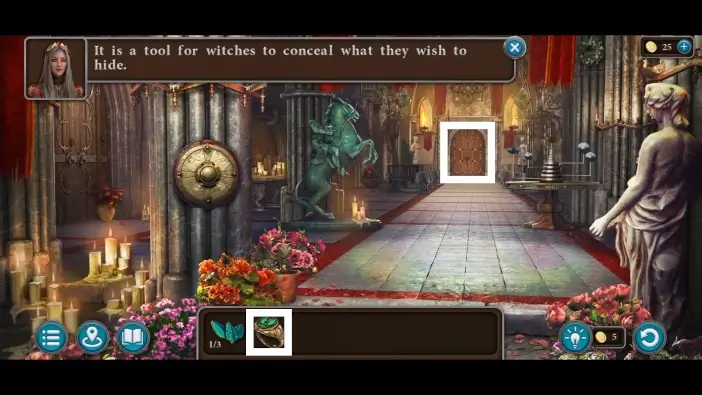
Use the ring to unlock the door on the far side of the corridor, then enter the main hall.
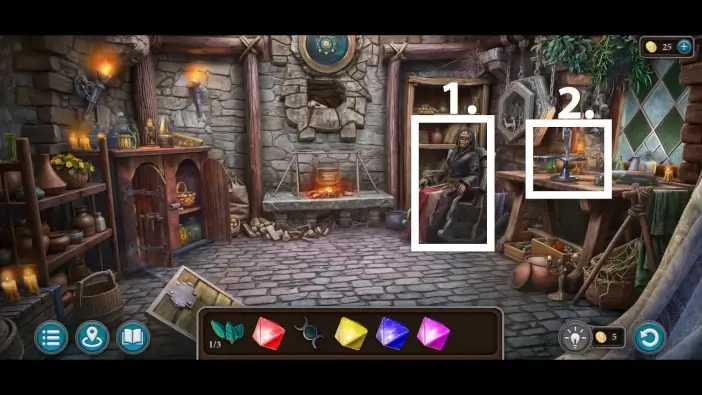
- In the main hall, speak with the archwitch.
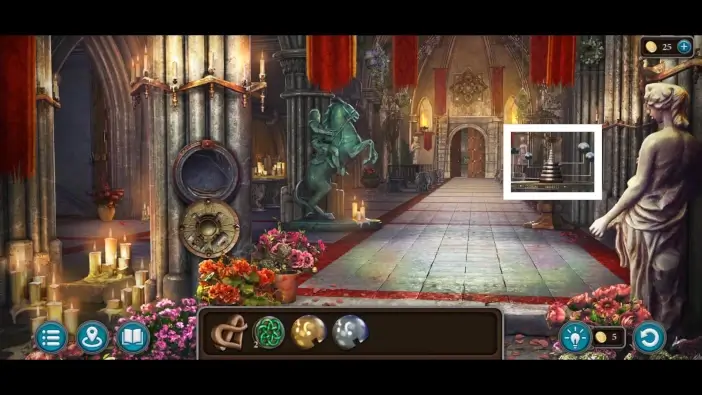
- Approach the table on the far side of the main hall.
Take the statue’s head from the table.
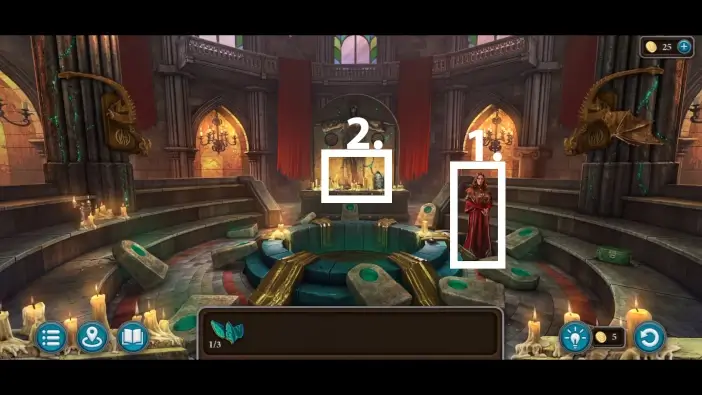
Approach the magic well.
Take the emblem.
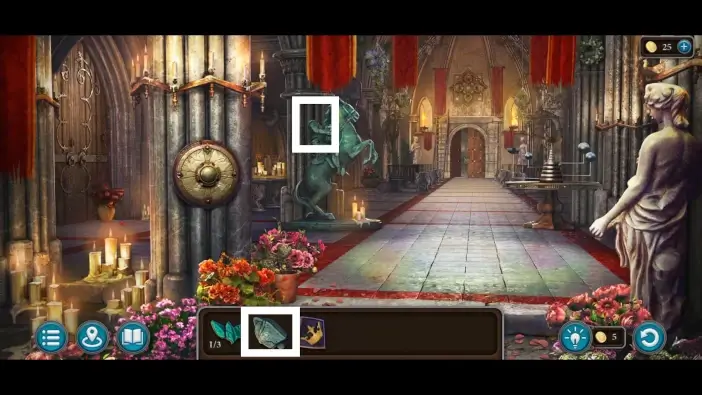
Go to the hallway and attach the head to the horseman statue on the left.
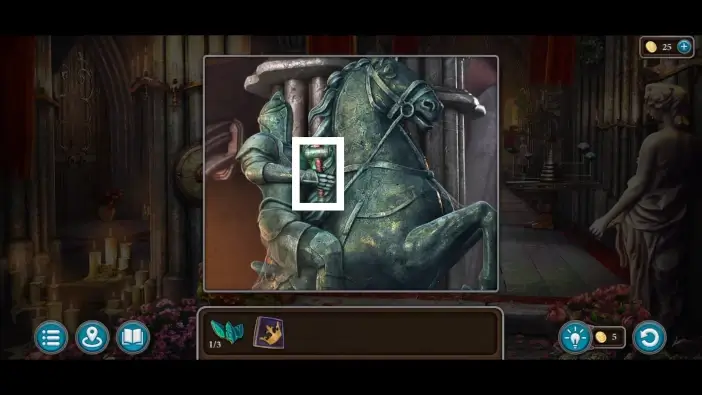
The statue will loosen the grip on the hammer. Take the first hammer. You’ll need two hammers to start the puzzle on the shield in the hallway.
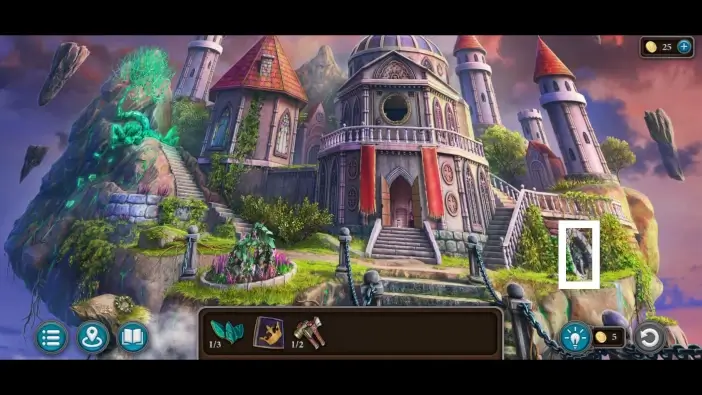
Exit the castle and approach the sewer tunnel on the right.
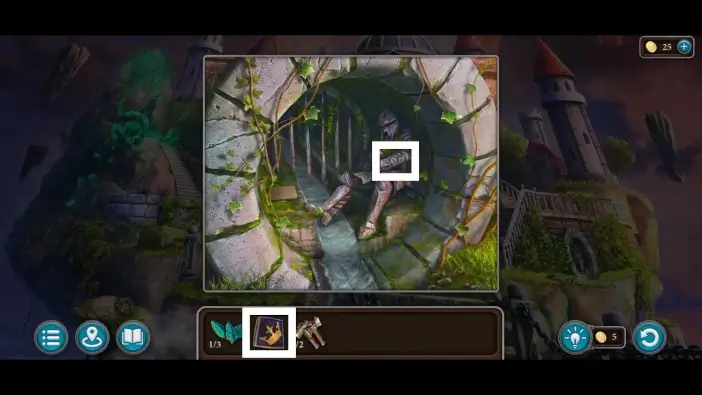
Place the emblem on the hand part of the armor, and the dead warrior will loosen the grip on the hammer.
Take the second hammer.
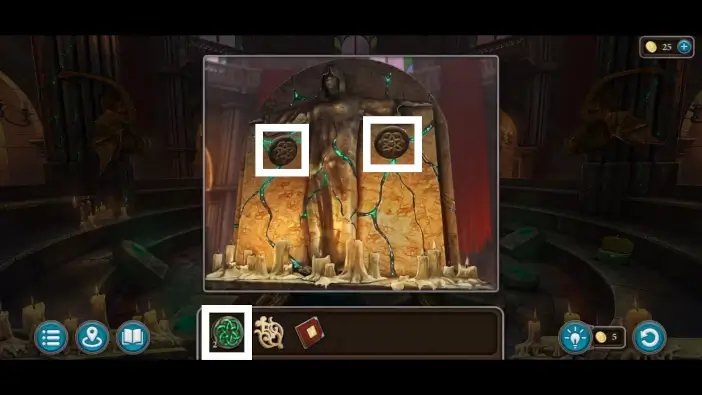
Go to the hallway and place the two hammers on the shield on the left column. A new puzzle challenge will start.

Rotate the inner ring so that all the symbols from the inner ring are next to their counterparts of the outer ring (the flower from the inner ring should be next to the same type of flower of the outer ring). You can change the positions of flowers in the inner ring by moving them to the empty places on the sides and inserting them into the other part of the ring. The solution is in the picture above.
Once you complete this puzzle challenge, the shield will move, revealing a compartment. Take the pattern piece and the wing from the compartment.
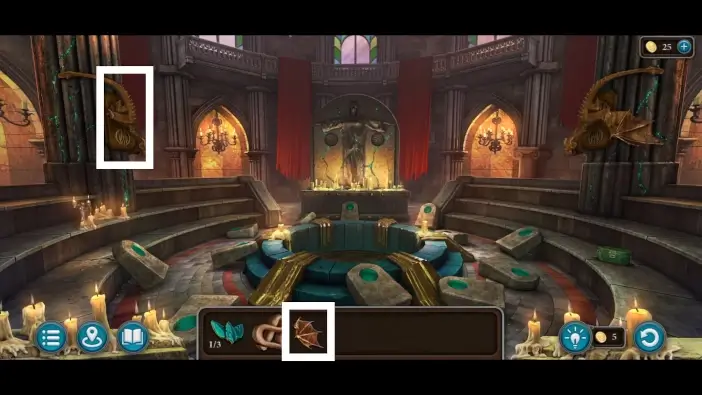
Go to the main hall and attach the wing to the dragon statue on the left pillar.
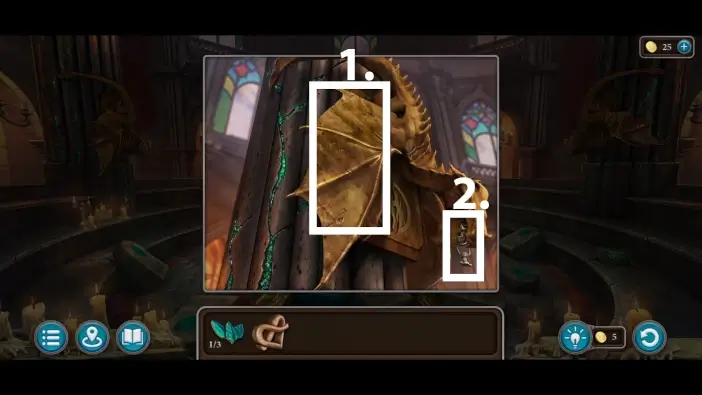
- Move the wing.
- Take the key from the dragon’s mouth.
Approach the bag on the right and open it using the key from the dragon. Take the first bas-relief and the key from the bag.
In the hallway, unlock the door on the left and enter the supreme archwitch’s office.
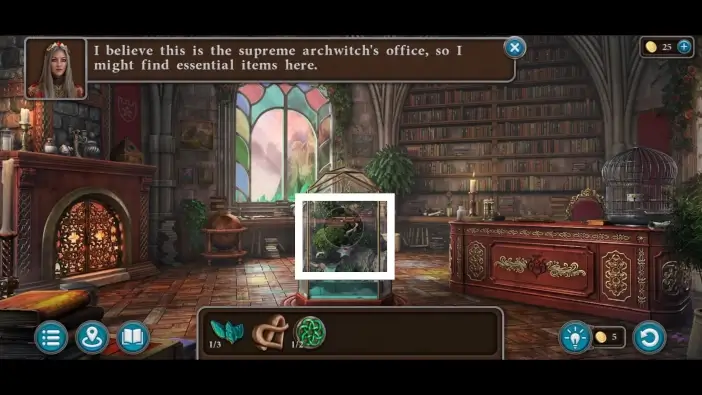
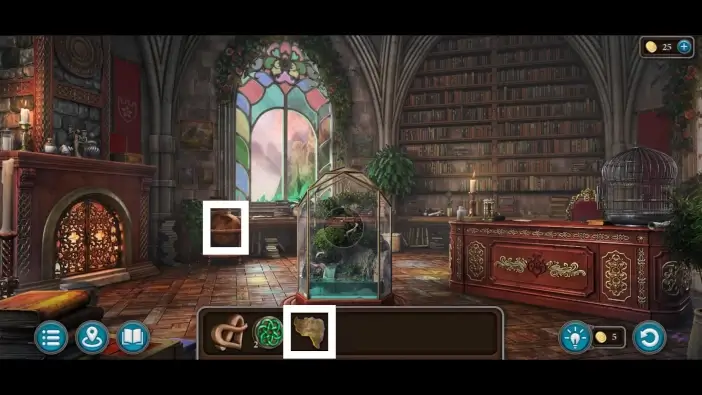
In the office, approach the small greenhouse in the center of the room.

Take the star-shaped item from the greenhouse.
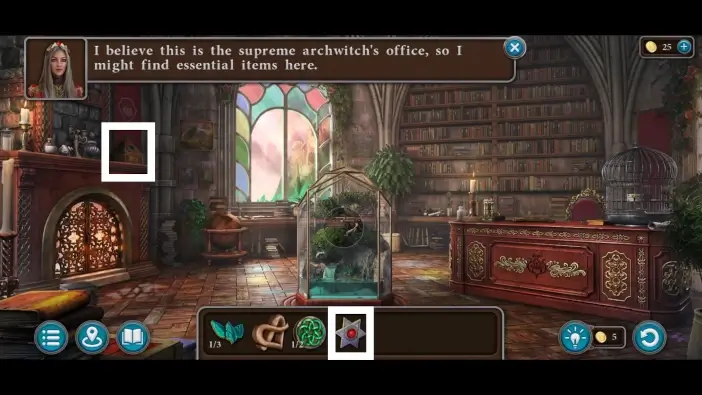
Use the star-shaped item to unlock the box on the left.
To unlock the box, you’ll need to find all pairs of identical symbols. Just click on two identical symbols to progress through the puzzle until all the symbols disappear. Once you solve this puzzle challenge, take the tweezers and the second leaf-shaped item from the box.

Go to the main hall and approach the crack on the floor on the left.
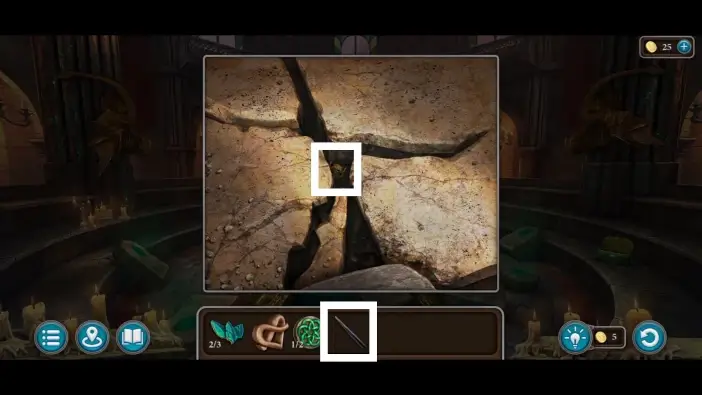
Use tweezers to grab the key from the crack.
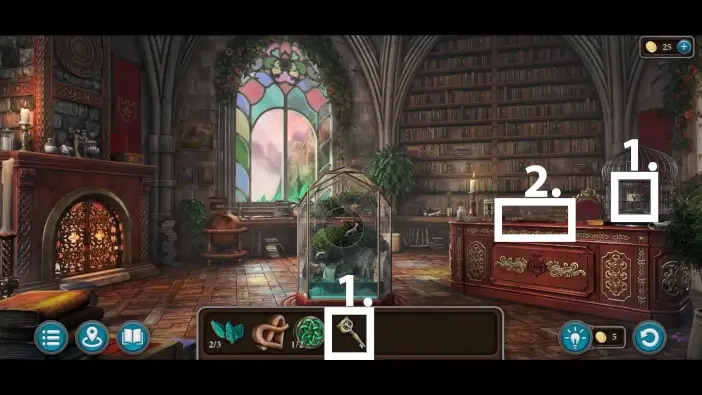
- Go to the supreme archwitch’s office and unlock the birdcage on the work desk, on the right. Take the golden sphere from the birdcage.
- Don’t forget to take the glove from the work desk as well.
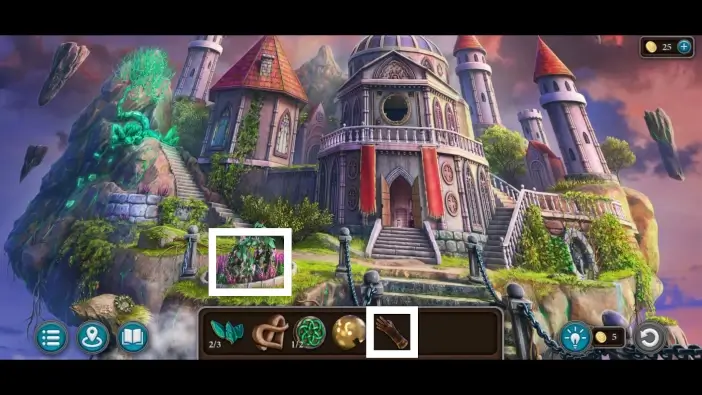
Exit the castle, and on the left side of the castle’s courtyard, use a glove to move the plants.
Once you reveal the items, take the lever, the silver sphere, and the third leaf-shaped item.
Go towards the chest at the top of the left staircase.
Click on the chest and then place the three leaf-shaped items to start the puzzle challenge.
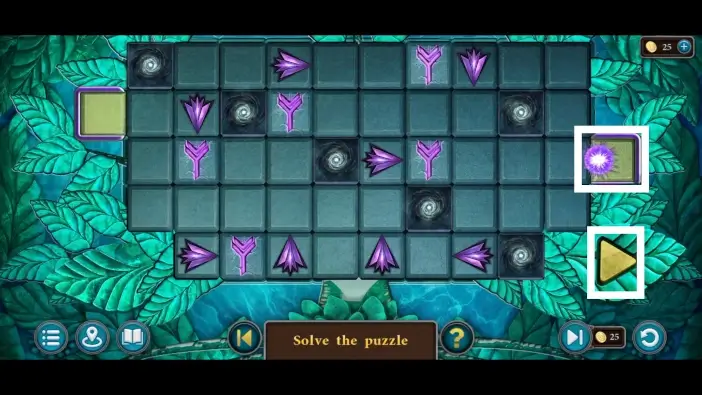
In this puzzle challenge, you’ll need to rearrange the arrows to change the path where the magic orb will travel. The magic orb must touch all the runes in the puzzle, and it has to reach the square on the right. Once you rearrange the arrows as in the picture above, click on the play button on the bottom-right. Once you solve this puzzle and open the chest, take the second bas-relief.
Approach the top window of the castle.
Attach the lever to the mechanism on the left.
Use the lever to close the window. Memorize the position of elements on the window.
Enter the hallway of the castle and approach the orrery on the right.
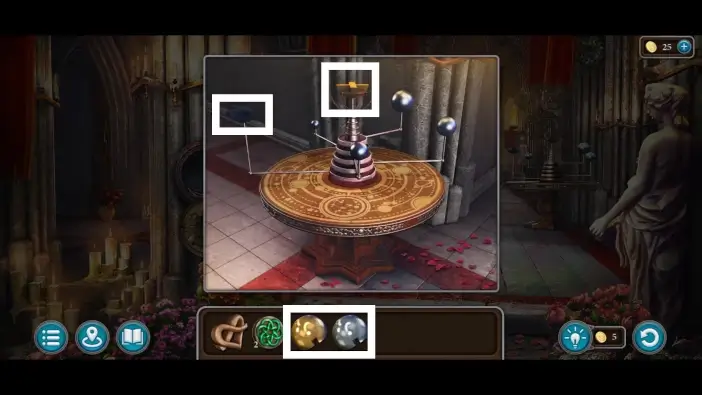
Attach the golden and silver spheres to the orrery.
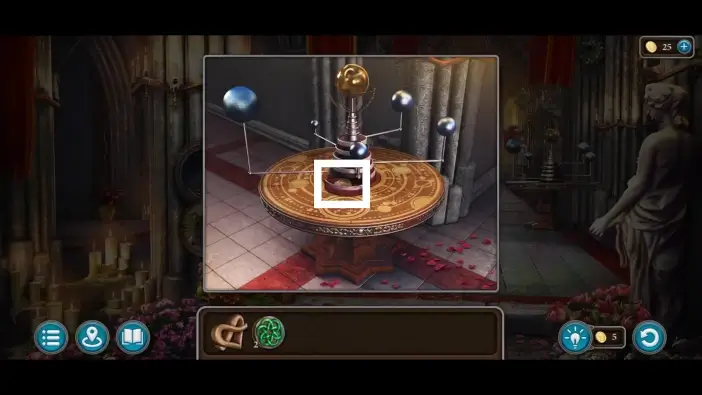
Take the continent item from the orrery’s drawer.
Go to the supreme archwitch’s office and place the continent item into its place on the globe near the window. The globe will open. Take the manuscript collectible and the pattern item.
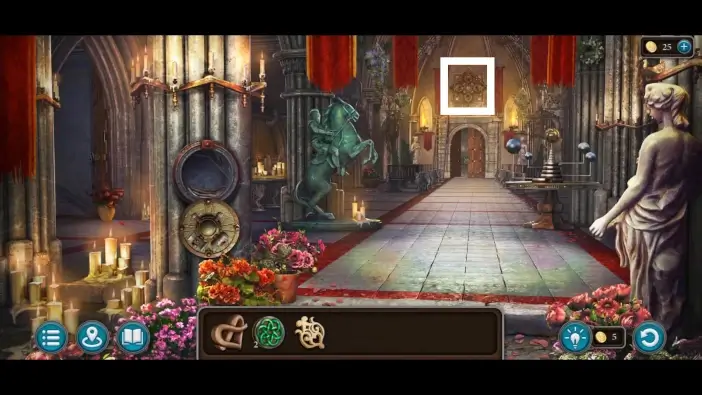
In the hallway, approach the large pattern on the wall, above the door to the main hall.
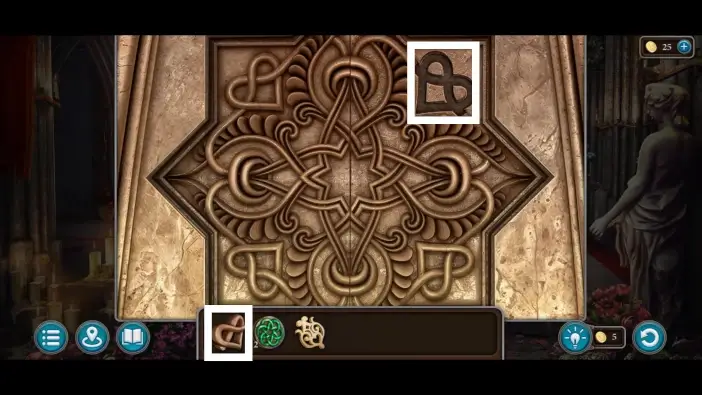
Select the first pattern piece you got earlier from the shield puzzle and place it on the top-right corner of the wall pattern to start the new puzzle challenge.
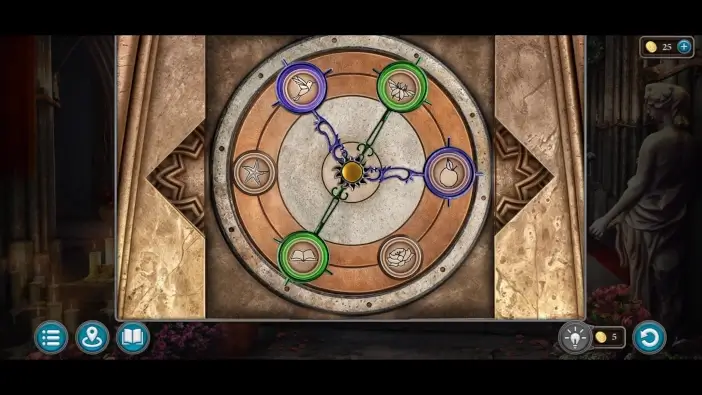
Remember the positions of the elements on the castle’s window and rearrange the images using that clue. The solution is in the picture above.
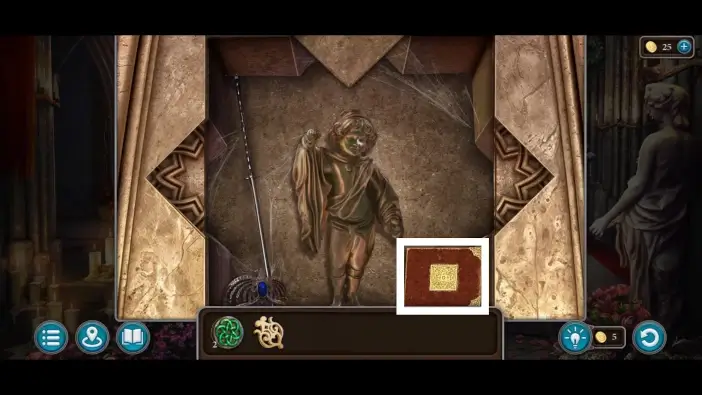
Read and take the book about message encryption.
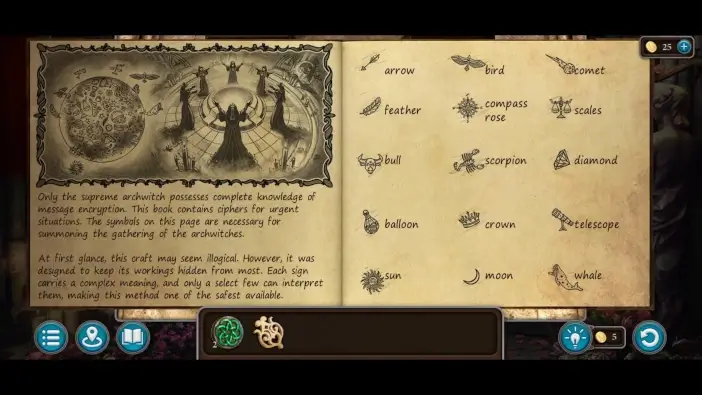
This is actually not a clue, because you will have a list of these symbols in the last puzzle. You won’t need to encrypt anything yourself, and this book only progresses the story.
Go to the main hall and approach the statue on the wall.
Place the two bas-reliefs on the wall to activate the magic well.

- Go to the supreme archwitch’s office and place the second pattern item you’ve got into the work desk drawer’s pattern to open it.
- Approach the work desk.
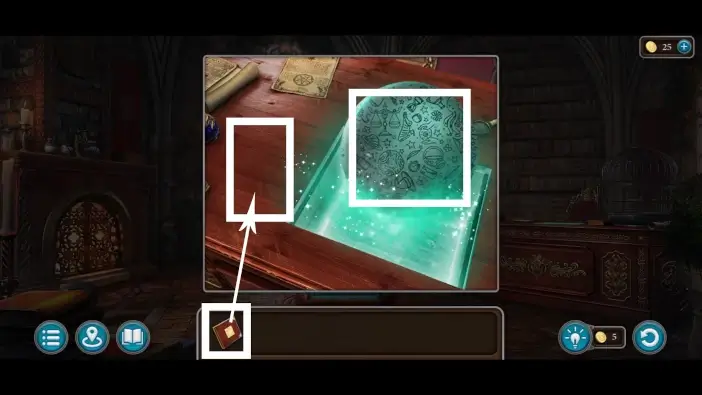
Place the book and then click on the ball to start the last puzzle challenge.
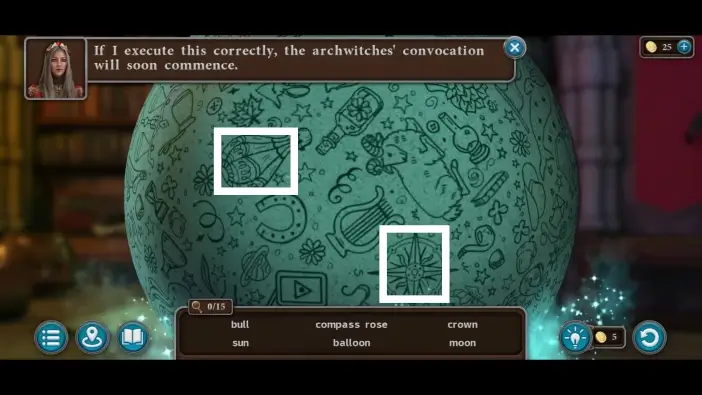
You’ll need to find all 15 items on the globe to send a message to the archwitches. Follow the images in this guide to find them easily. You can move the globe in any direction to find more items.

This will mark the end of our guide for Chapter 3 of Legendary Tales 5.
Thank you for reading!