Legendary Tales 5 – Chapter 2: Ancients Technologies | Part 3
Intro
Welcome to our walkthrough for Part 3 of Chapter 2 of “Legendary Tales 5” from “FIVE-BN GAMES”. Many use the devices of the Ancients, but no one knows how they work or how to fix them. Except for the Ancients themselves.
Walkthrough
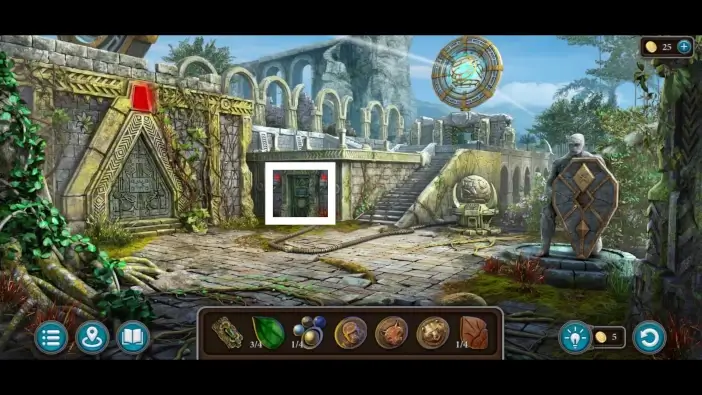
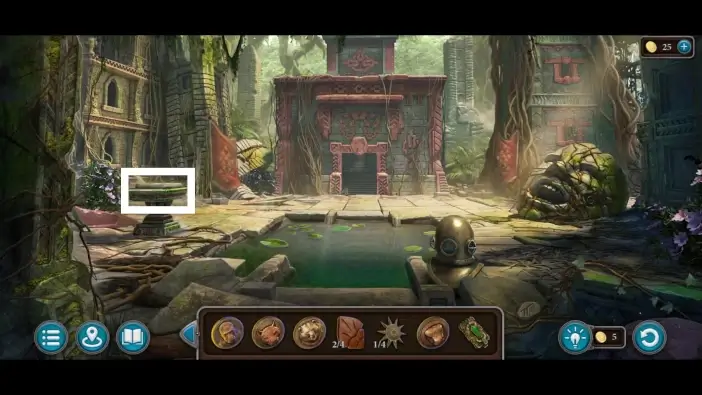
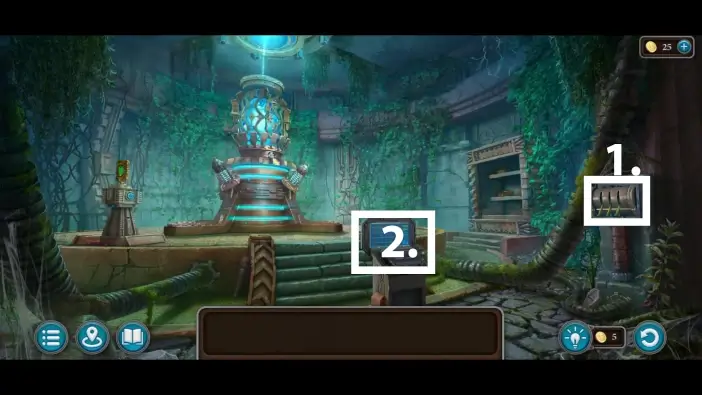
Once the crystal returned power to the city, go to the energy district and approach the touch screen on the mechanical workshop door.
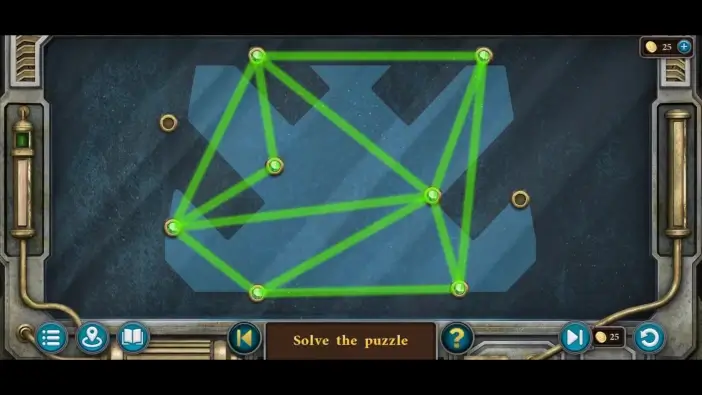
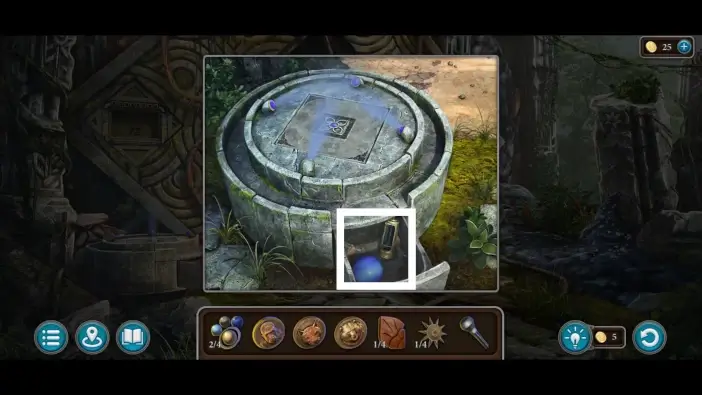
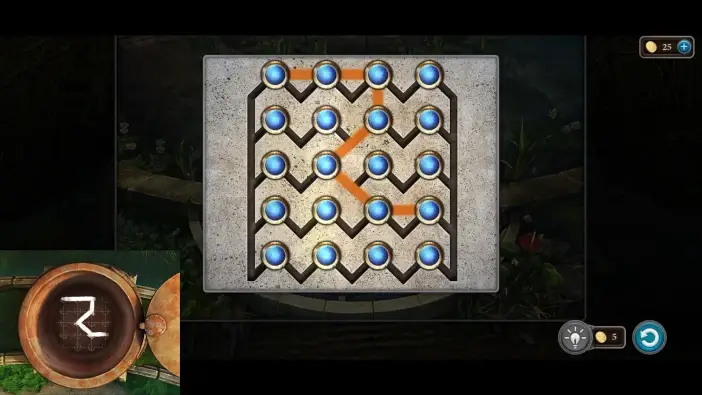
To unlock the workshop door, place the nodes into the slots like in the picture above, and make sure that all the lines are green and don’t intersect.
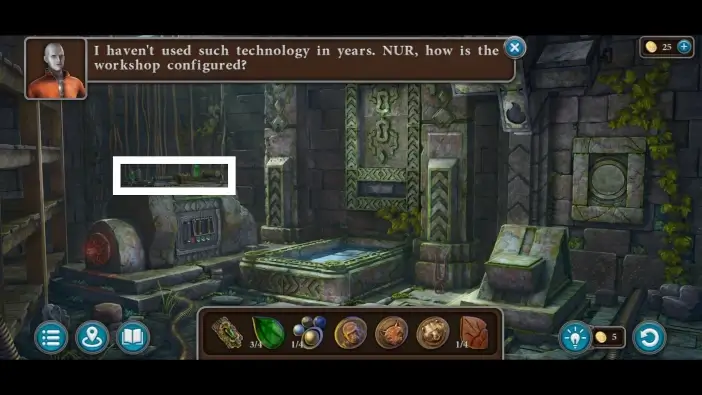
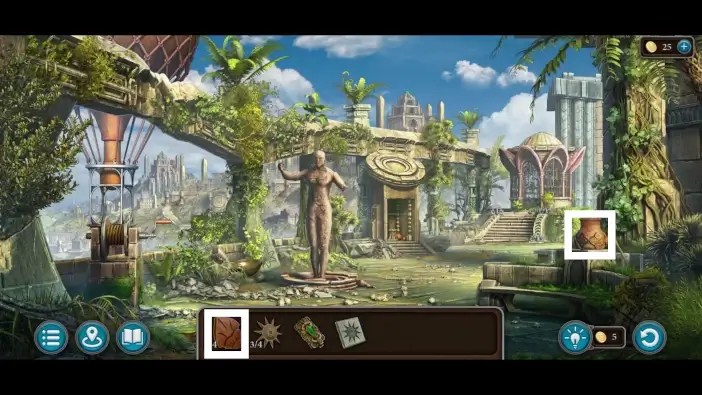
In the workshop, approach the artifact machine on the left.
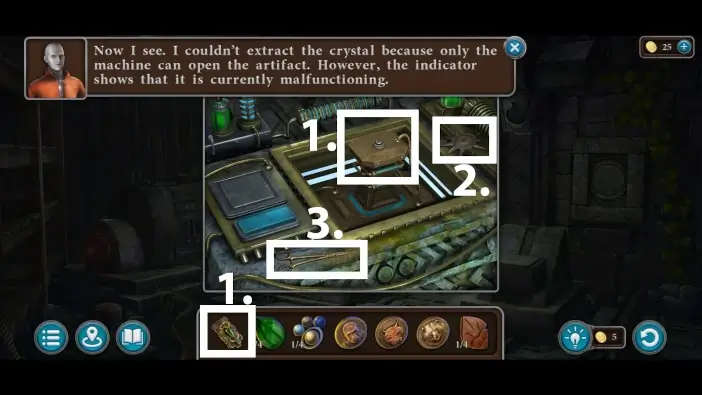
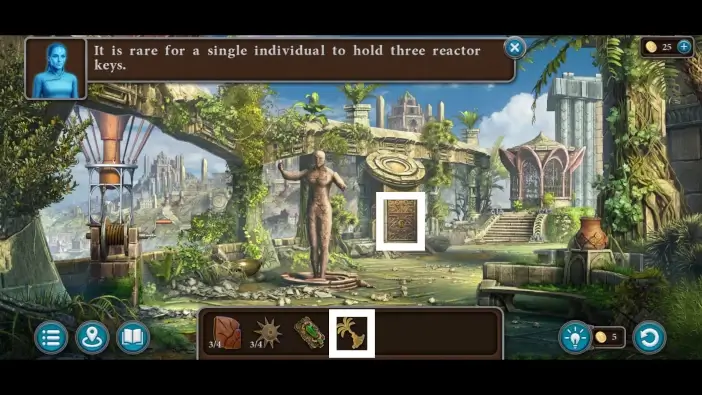
- Place the broken artifact on the machine.
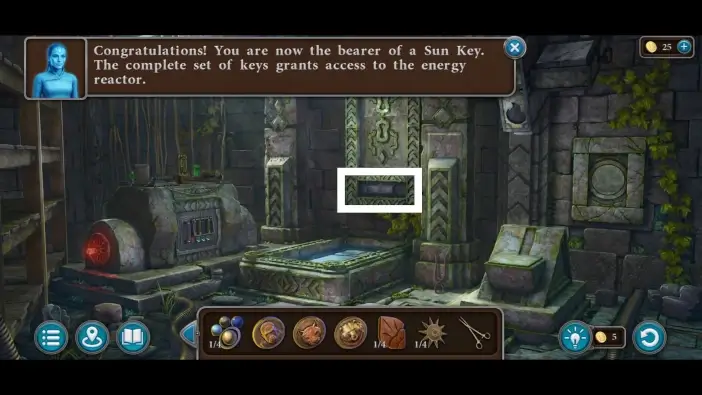
- Take the first small sun key. You’ll need to find four of these sun keys to unlock the reactor room.
- Pick up small scissors. You’ll need it to reach one emerald leaf.
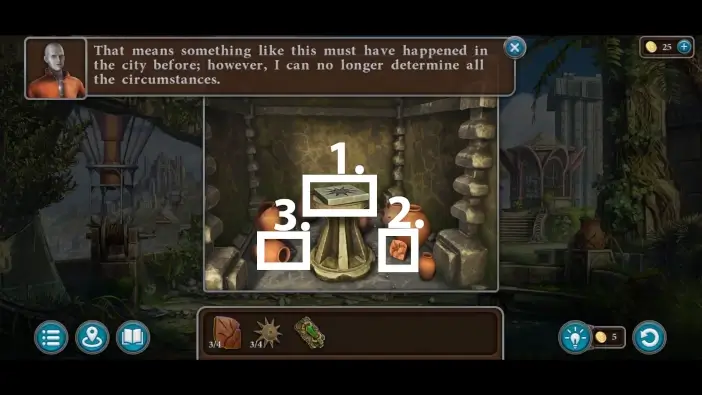
Open the narrow compartment in the wall.
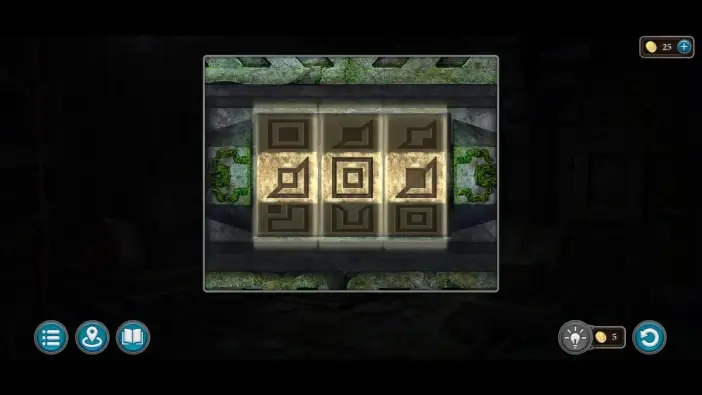
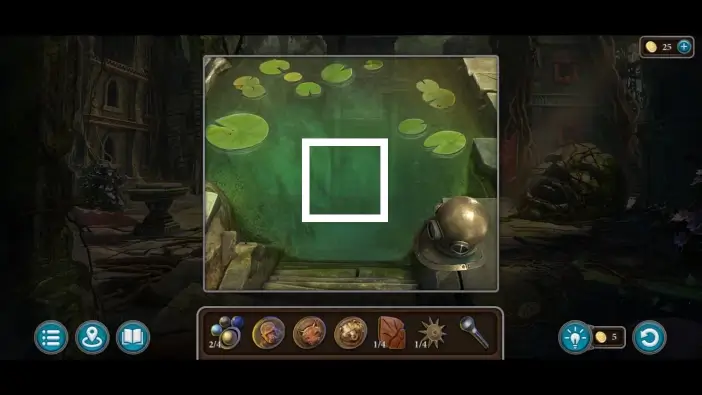
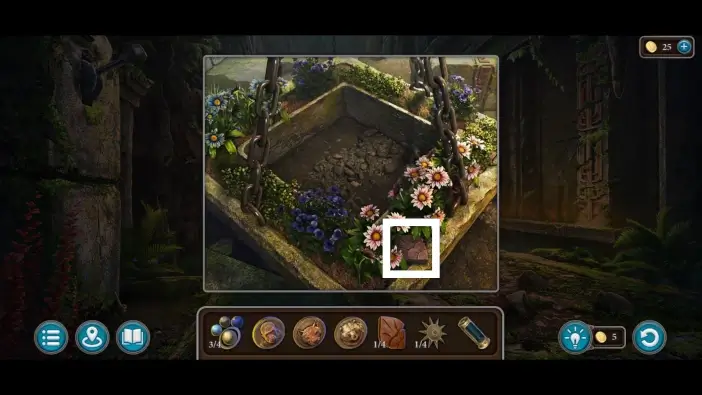
Remember the clue in the pond in the gateway hallway. Place the symbols like in the picture above to unlock the larger compartment in the wall.
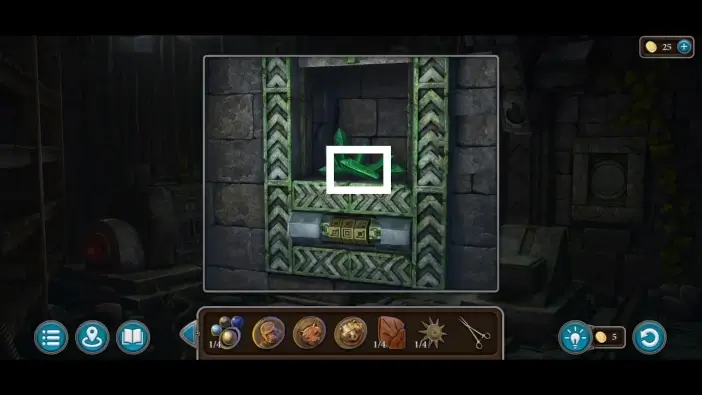
Take one crystal from the wall.
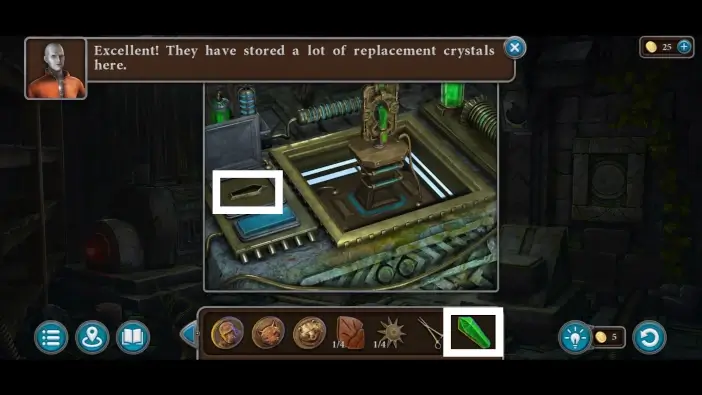
Return to the artifact machine and place the crystal into the left slot (open the lid first).
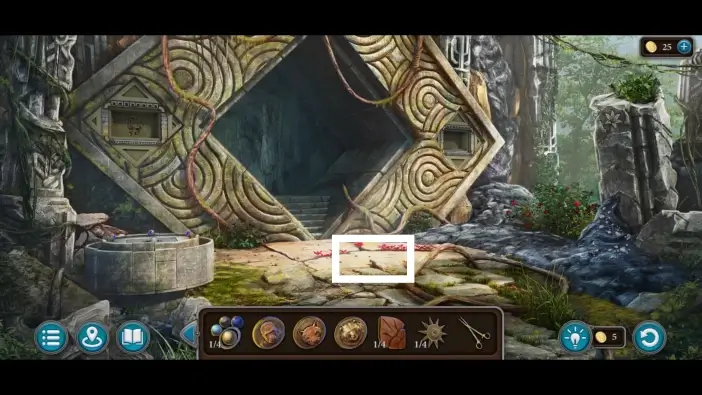
Go to the gate area and approach the crack on the road.
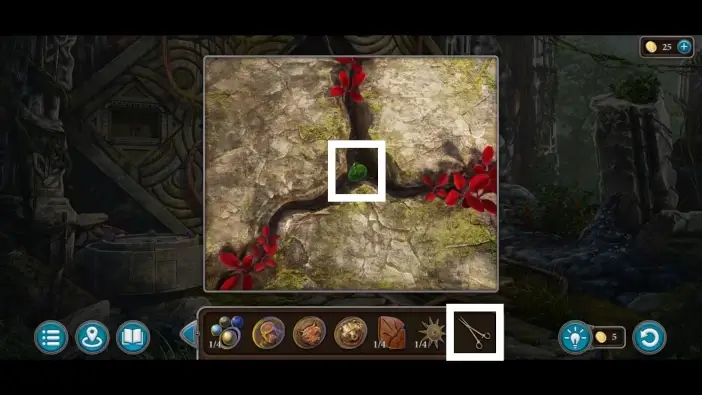
Use the small scissors to get the fourth emerald leaf.
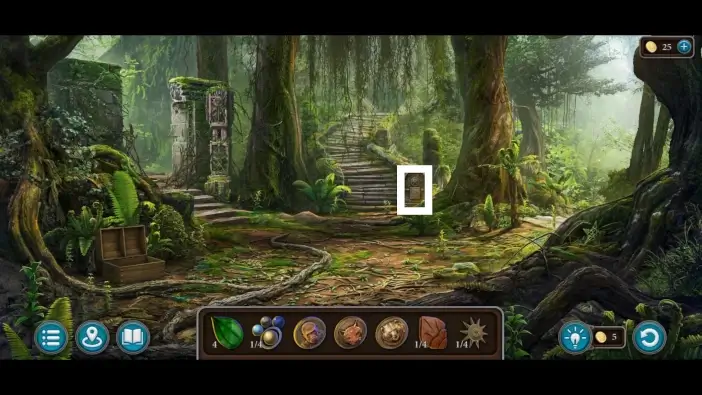
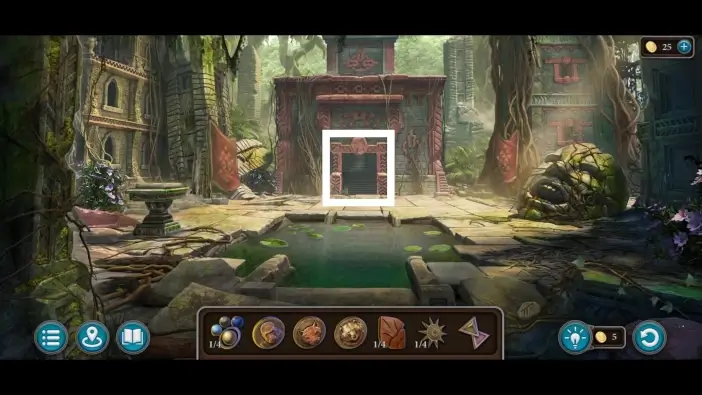
Go to the crossroad area and approach the stone sign near the staircase.
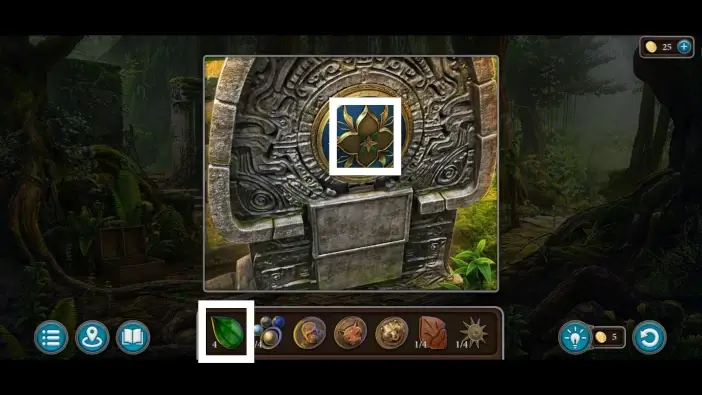
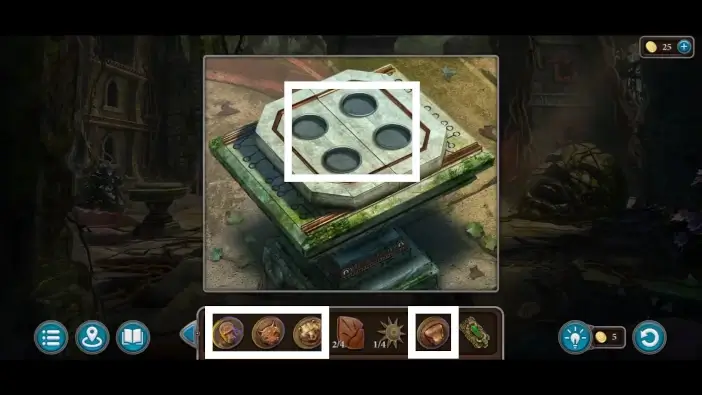
Place the four emerald leaves into their slots to start a new puzzle challenge.
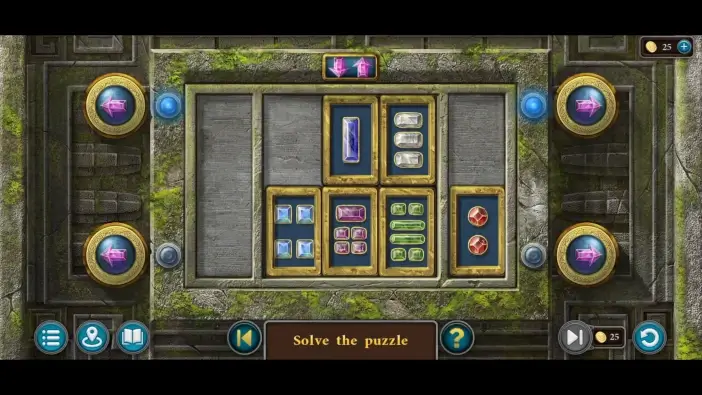
On the board, there will be containers that have specific sets of gems. Under them, you can notice the clue on where each container needs to be to solve this puzzle challenge. You can move the containers using the buttons on the left and right. You can use the top button to switch the position of the containers between the top and bottom containers. The solution is in the picture above.
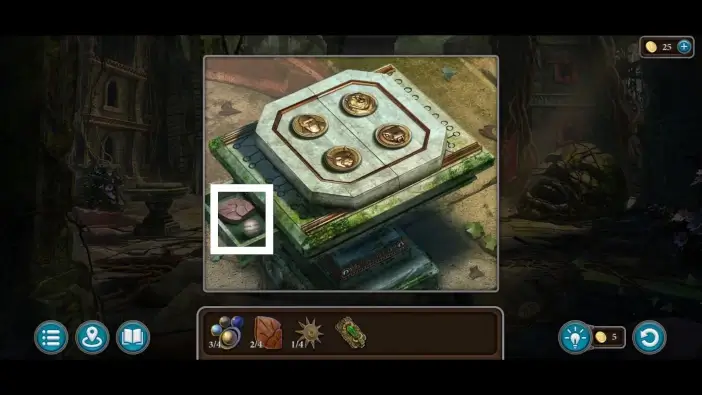
Once you solve the puzzle, a compartment will open. Take the stone key.
Go to the manor area and approach the main entrance.
Place the stone key you just acquired into the pedestal to discover new items.
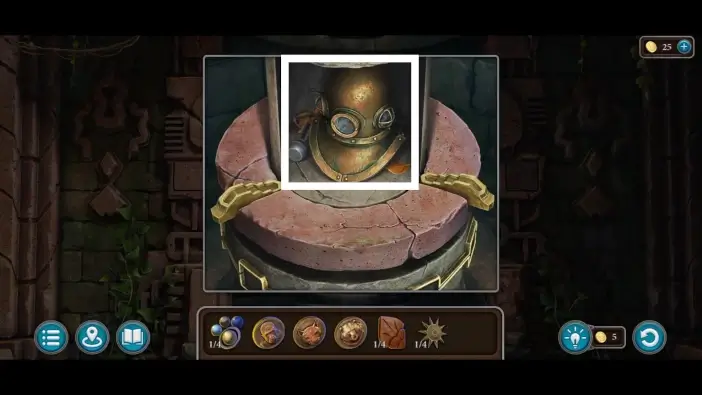
Take the diving helmet, the second planet for the orrery, and the lever. You will use the lever later in the gateway hallway to lower the chain.

Place the diving helmet near the pool.
Dive into the water.
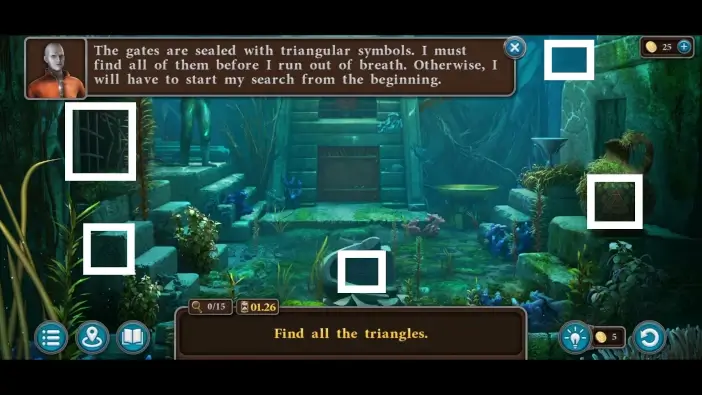
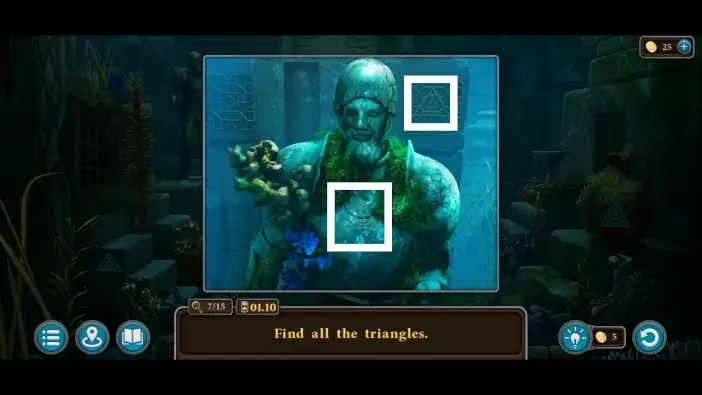
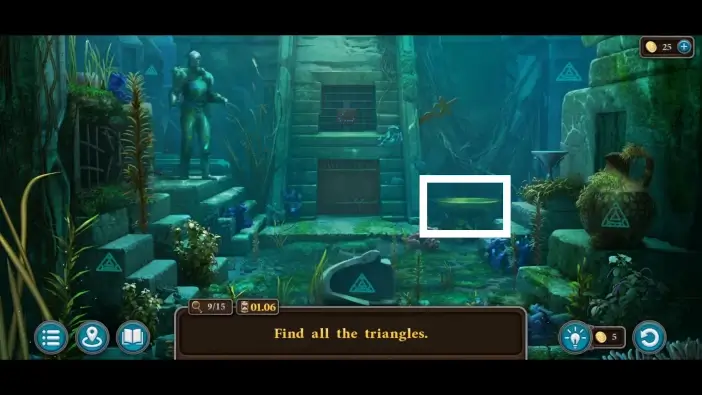
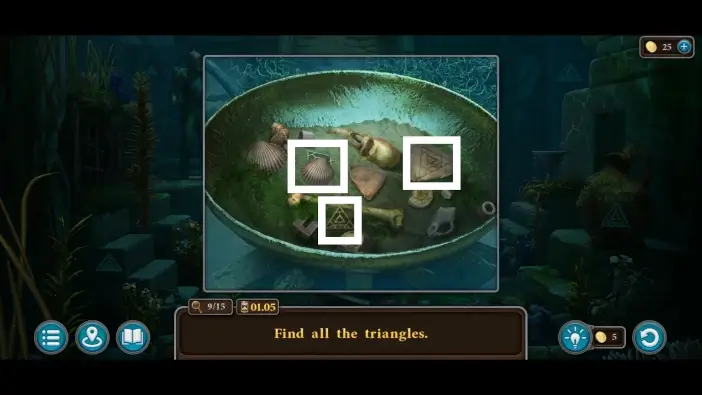
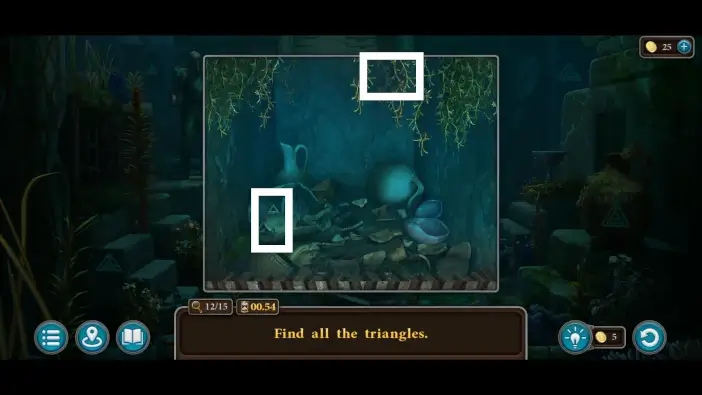
A new mini-game will start where you’ll need to find 15 triangles, but beware: this time you will have only 1 minute and 30 seconds to find all the triangles. Follow the marked areas in the pictures in this guide to find them quickly.
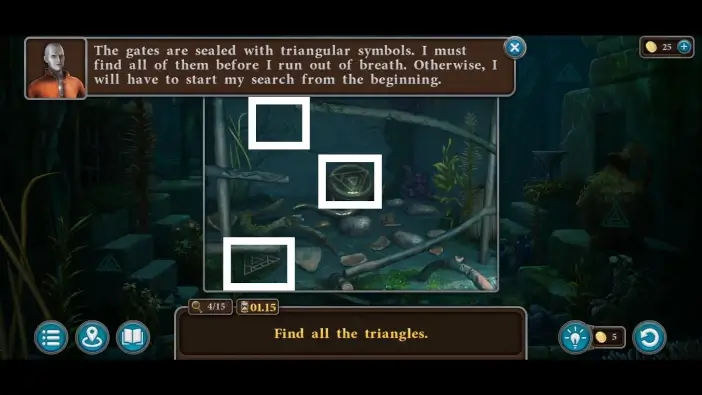
When you click on certain areas, you will approach them to look closely. Each time, you will find more triangles.
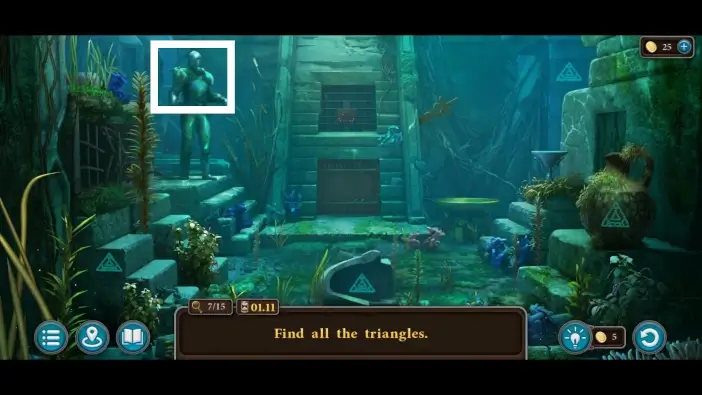
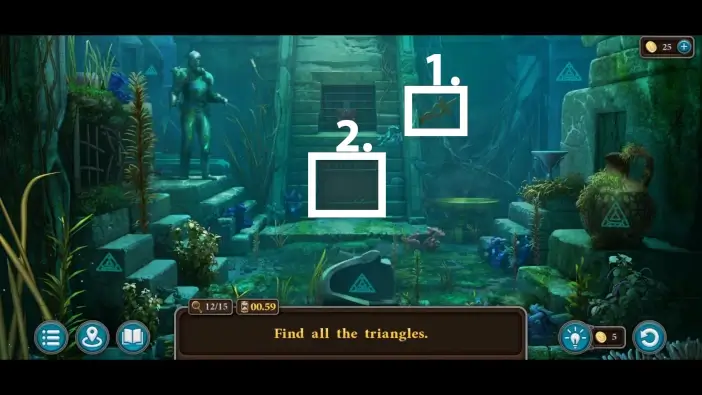
- Use the lever to open one section.
- Approach the newly opened section.
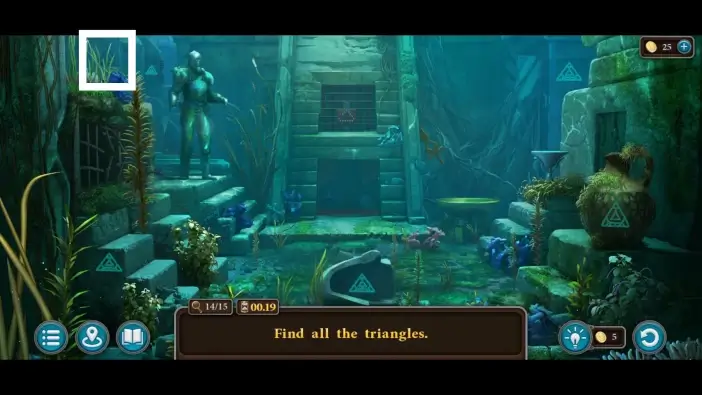
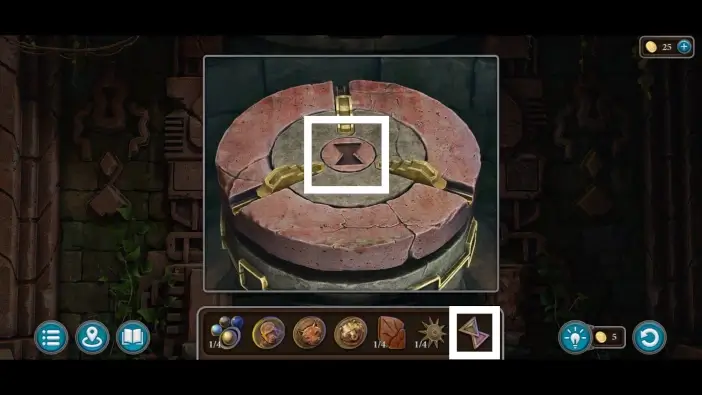
Once you find all the triangles, the bars blocking the neocube will be removed, and the game will automatically zoom in on the neocube location. Take the neocube from the pedestal.

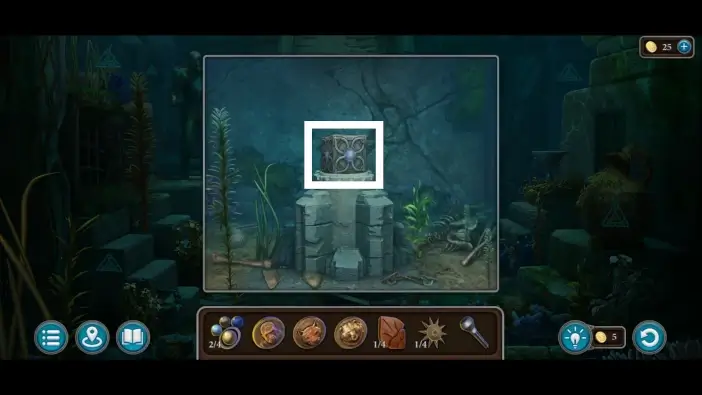
Go to the gate area and place the neocube on the pedestal on the left. A new puzzle challenge will begin.
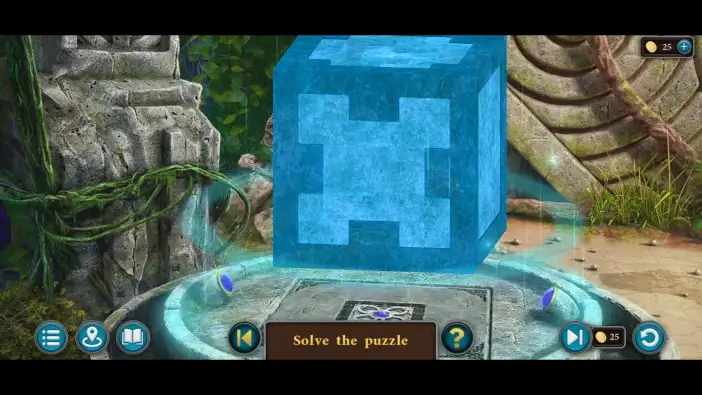
In this puzzle challenge, you’ll need to assemble all the puzzle pieces for each side of the cube. You will have individual puzzle pieces to use around the cube. Once you solve this puzzle challenge, a drawer will open from the pedestal.
Take the third planet for the orrery and the flask from the drawer. You will need the flask to repair the artifact machine in the mechanical workshop.

Go to the hallway area and attach the lever to the mechanism on the left. Use the lever to lower the chain.
Approach the platform that is attached to the chain.
Take the second iron petal.
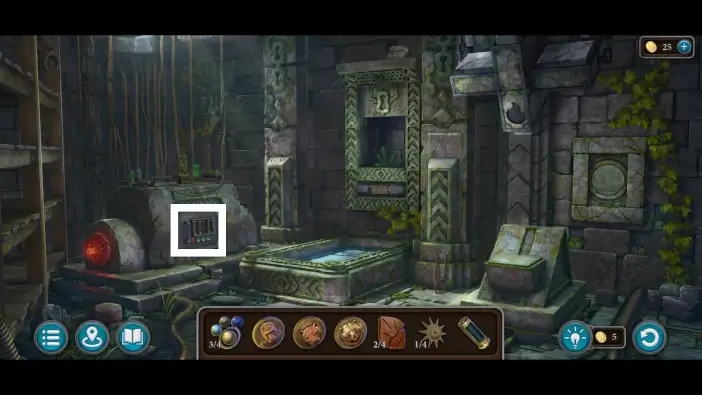
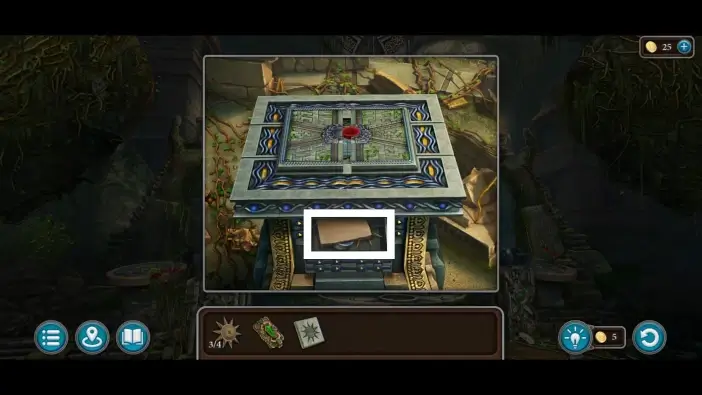
Return to the mechanical workshop and approach the lower part of the artifact machine.
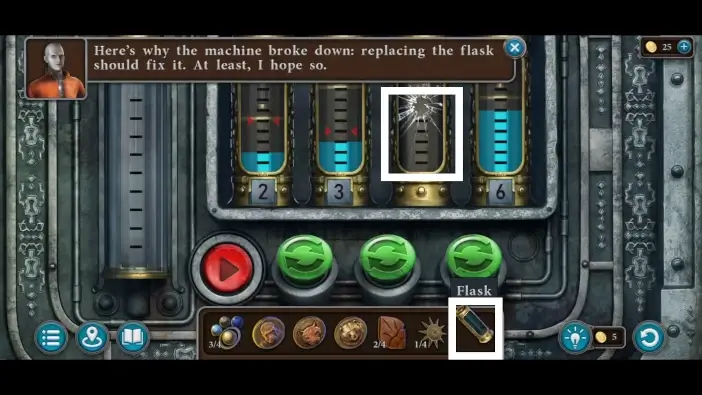
Remove the old flask and replace it with the new one from your inventory. A new puzzle challenge will start.
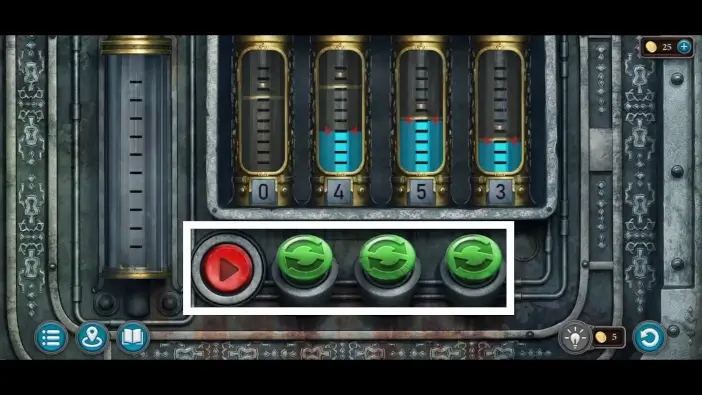
Each flask will have the red arrows that indicate how much liquid one flask should have. Each flask should have a liquid that fills it up to the point where the arrows show. The red button will pour the liquid from the leftmost flask into the flask to its right. Use the green buttons to switch the position of the flasks. The solution will look like the picture above.
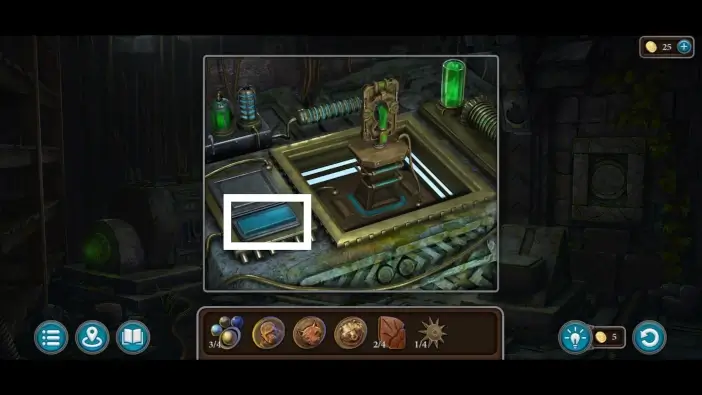
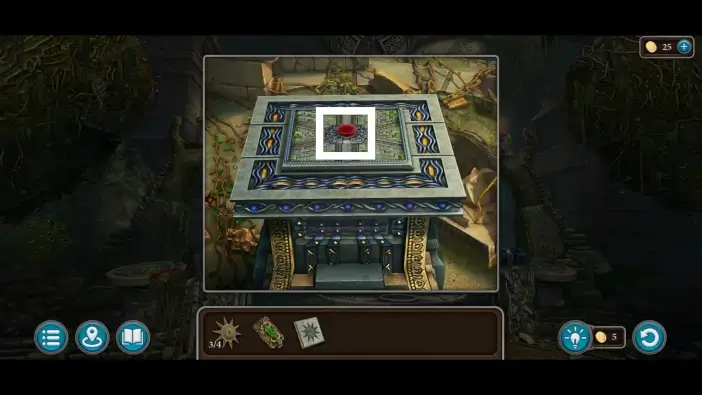
After fixing the artifact machine, approach its upper part and press the blue button to replace the crystal in the artifact.
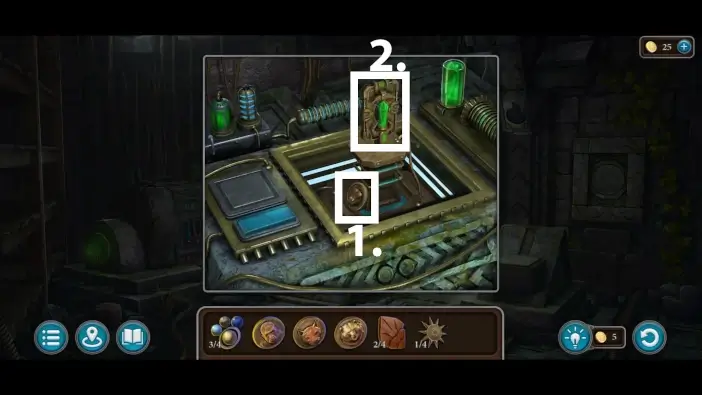
- After the process is over, take the snake medallion, which is the last animal medallion you’ll need.
- Take the new uncharged artifact. You’ll need to charge it using the reactor to finish Chapter 2.
Go to the manor area and approach the pedestal on the left.
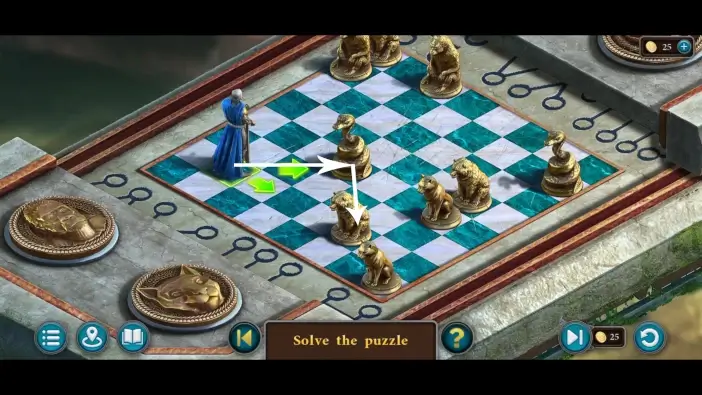
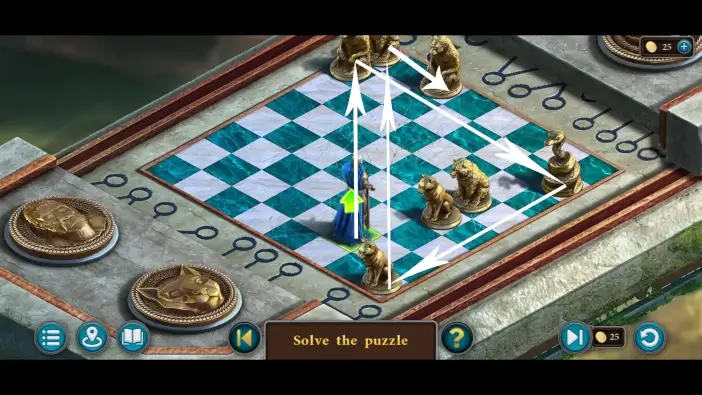
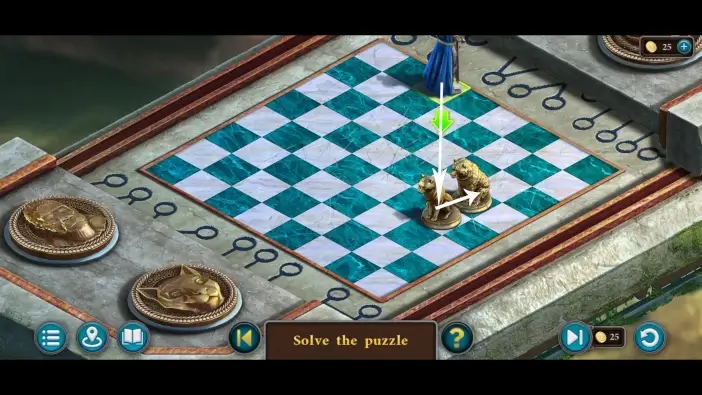
Place the snake, bear, puma, and gorilla medallions into the slots of the pedestal. You will begin a new puzzle challenge.
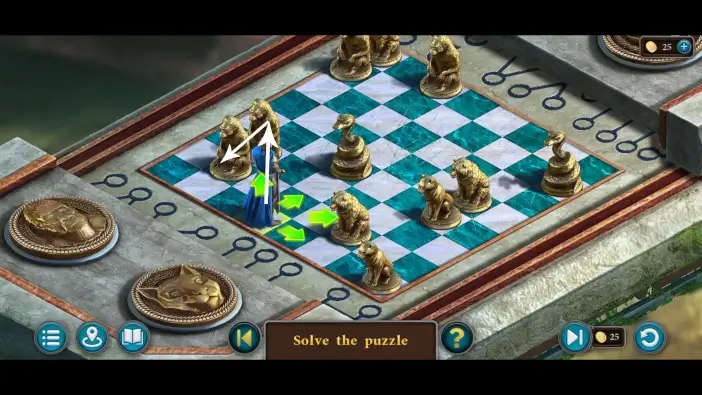
Choose a direction where the knight should go. Each time you move the knight, he should remove one animal figurine. Follow the white arrows in the images in this guide to solve this puzzle in no time.
Once you solve the previous puzzle challenge, a drawer will open from the pedestal. Take the fourth planet and the third iron petal.
Go to the Alley of Light district and attach the four planets to the orrery on the left.
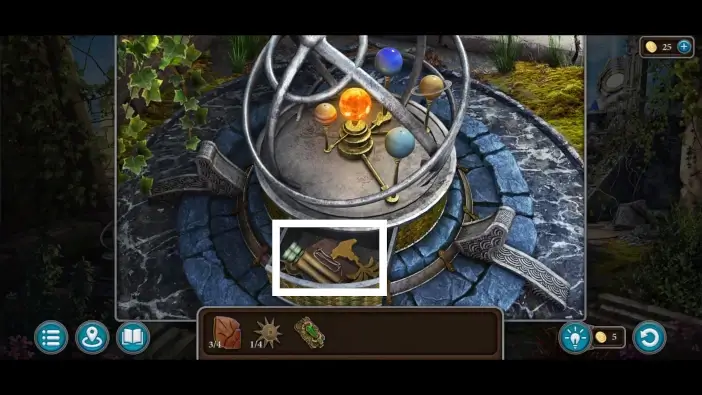
A drawer will open. Take the palm tree item, which can unlock one compartment in the park area, a wire, which will help you connect the chains of the braizer, and the second small sun key. Optionally, you can read the “Decree of the Cognitarium” scroll for more in-game lore.
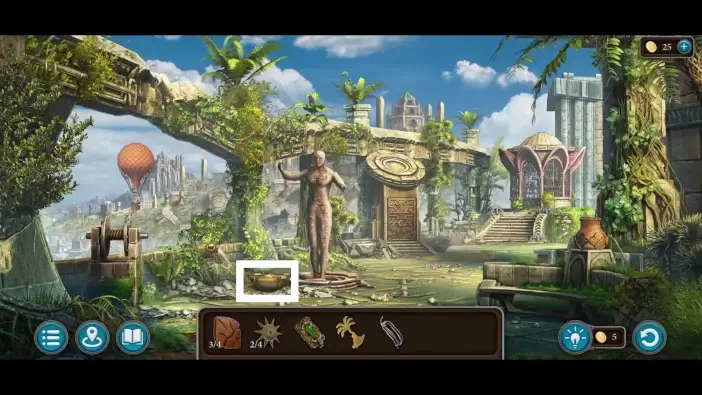
Go to the park area and approach the small brazier near the statue.
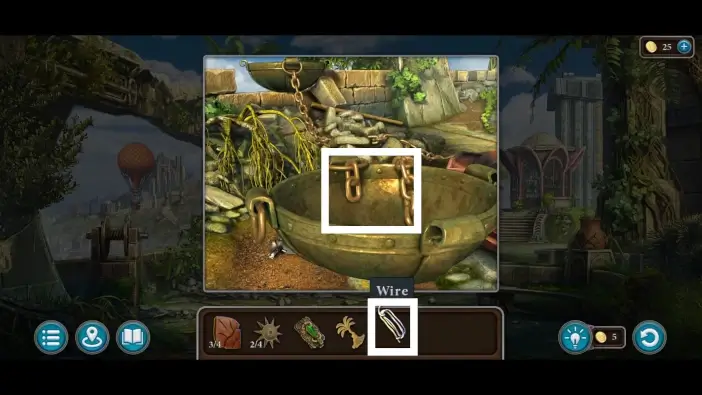
Use the wire from the orrery to connect the chains.
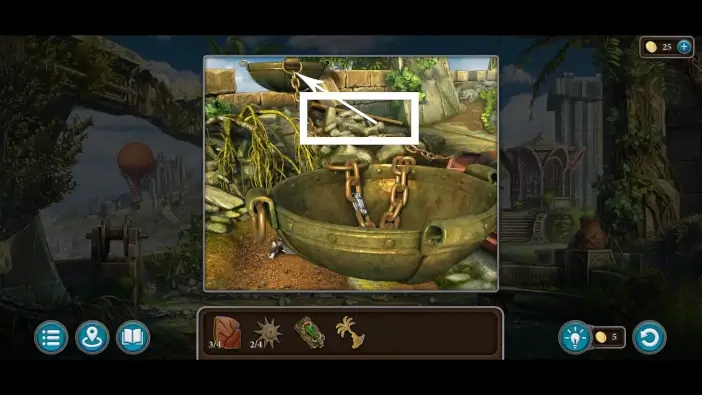
Use a stick near the wall to push the second brazier, which is connected via chains to the brazier near you. Once the first brazier falls from the wall, the second one will also move, revealing the handle that was under it.
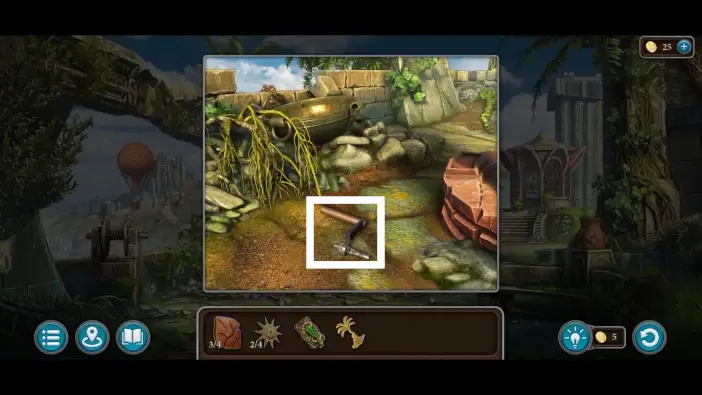
Pick up the handle from the ground
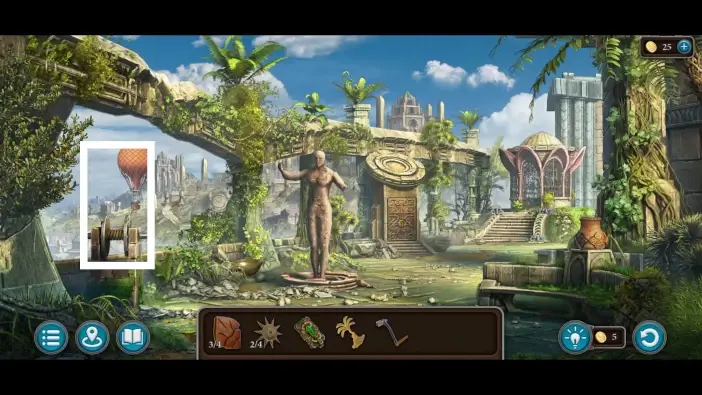
Approach the rope mechanism on the left.
Attach the handle to the rope mechanism.
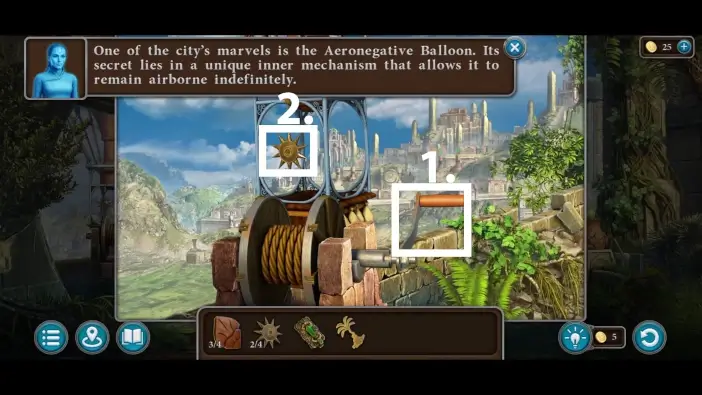
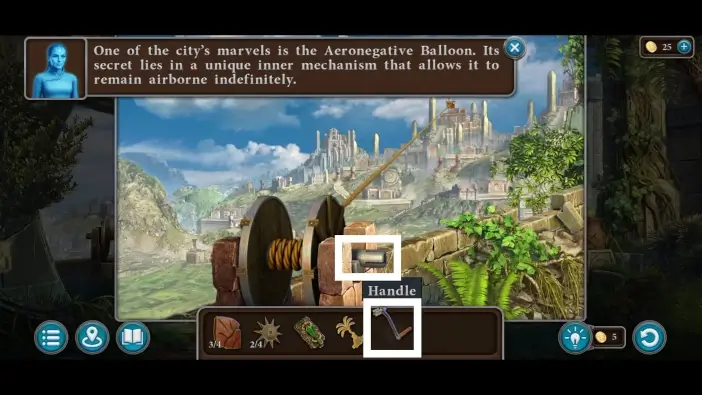
- Use the handle to pull the balloon towards you.
- Take the third small sun key from the balloon.
Approach the ornate door and use the palm tree item to unlock the compartment.
- Take the casting mold from the pedestal. You’ll need it to create the large sun key.
- Take the fourth iron petal.
- Move the vase on the ground and take the fish-shaped item. You will use it shortly.
Go to the Kainbekh area and approach the mosaic circle.
Place the fish-shaped item into the mosaic. It is the beginning of the next puzzle challenge, but first, you’ll need it to find the clue for it.
Go to the park area and place the four iron petals on the vase on the right to open it.
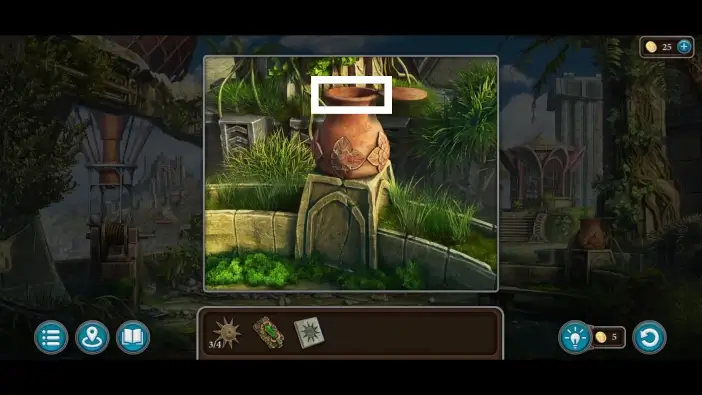
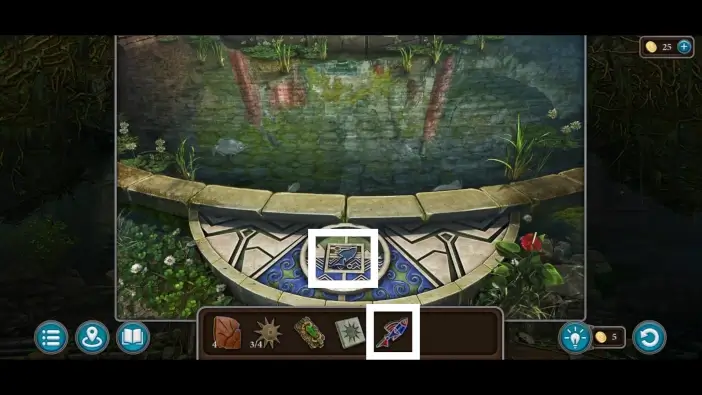
Take a peek inside the vase. You will see a pattern that is a solution to the fish mosaic puzzle.
Return to the fish mosaic puzzle in Kainbekh and connect the buttons like in the picture above. You can connect the buttons simply by clicking on them.
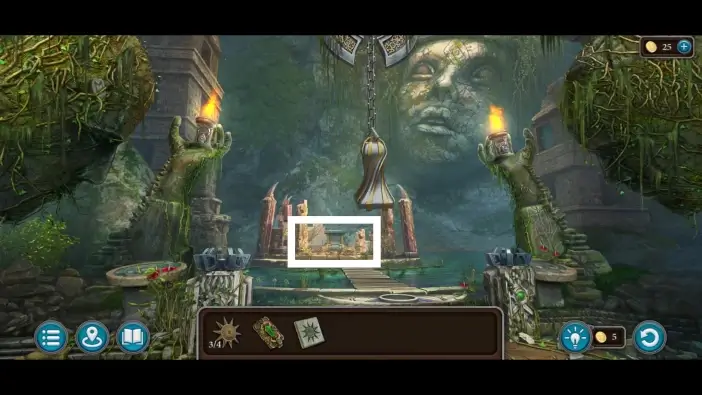
Once you solve the previous puzzle challenge, the bridge towards the central pedestal will appear. Go to the pedestal.
Click on the red button on the pedestal to start yet another puzzle challenge.
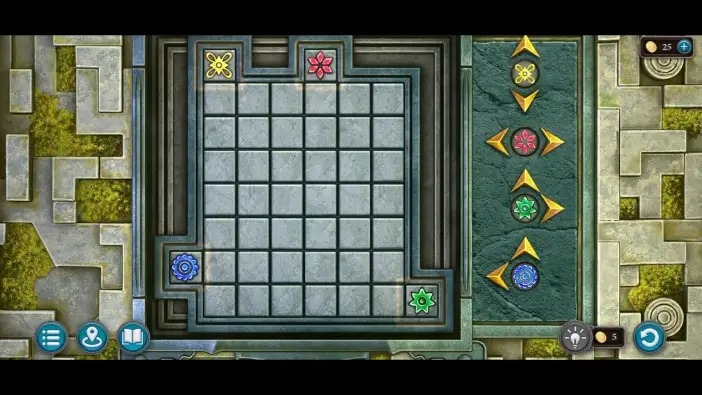
In this puzzle, you’ll need to move the specific flowers to their correct positions (you will have a hint where each flower needs to go). The catch is that each flower can move only in specific directions. Use the arrows for a particular flower to move it. Sometimes, you will need to push one flower by moving the other one.
Once you solve the previous puzzle challenge, take the fourth small sun key and the fire symbol (and the manuscript collectible as well).
Go to the mechanical workshop and place the fire symbol into the slot on the wall.
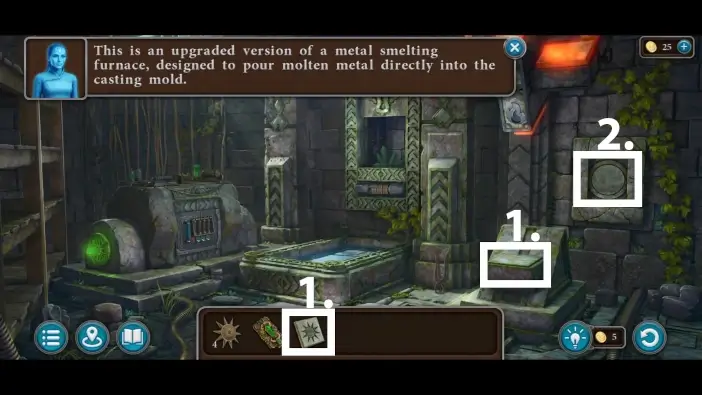
- Place the casting mold.
- Press the huge button on the wall to pour the molten metal into the casting mold.
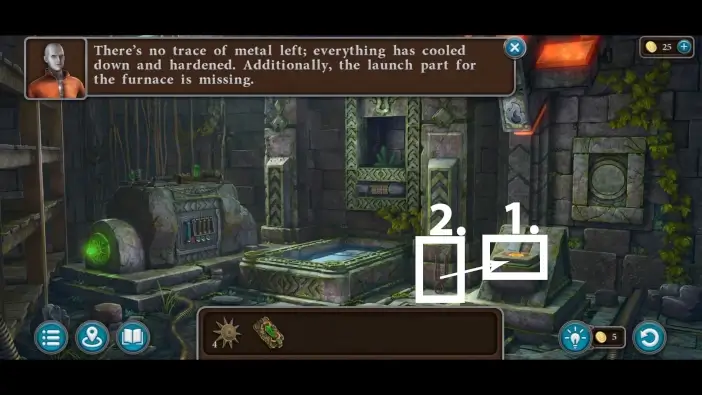
- Break the casting mold.
- Use the pincers from the ground to cool the metal in the water. The big sun key will be added to your inventory.
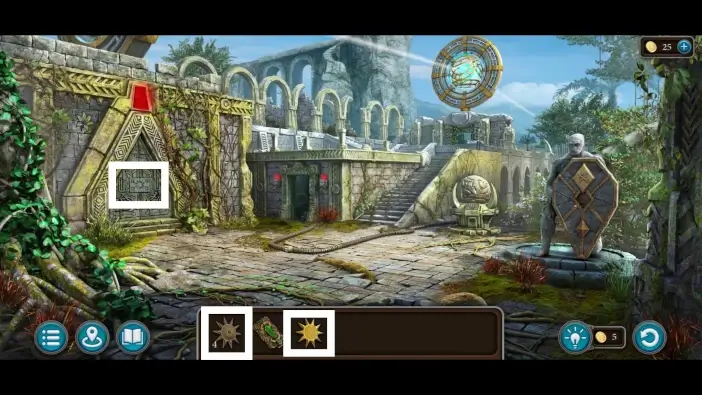
Go to the energy district and approach the reactor door room. Place the four small sun keys and one big sun key to start a new puzzle challenge.
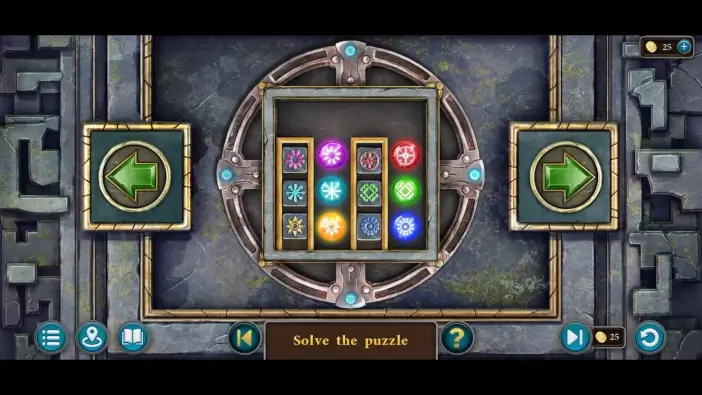
Use the arrow buttons to rotate the square. You’ll need to place the shining symbols next to their square counterparts. The only way to move the shining version of symbols is through rotation via the arrow buttons. The solution looks like in the picture above. Once you solve this puzzle, you can enter the reactor room.
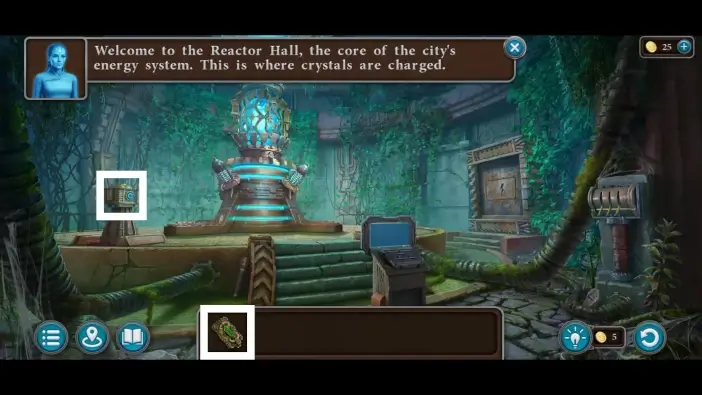
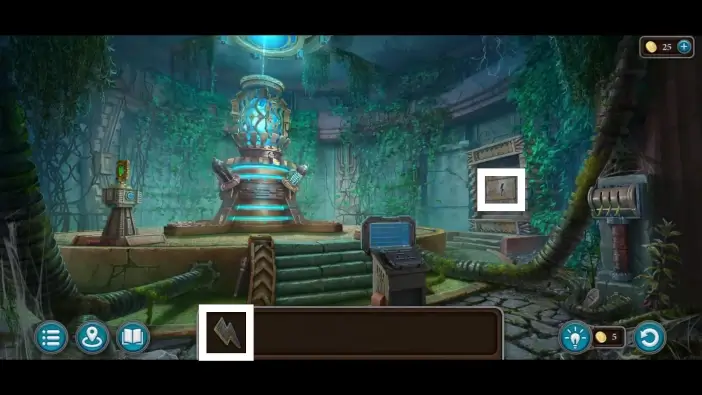
Attach the uncharged artifact to the device on the left.
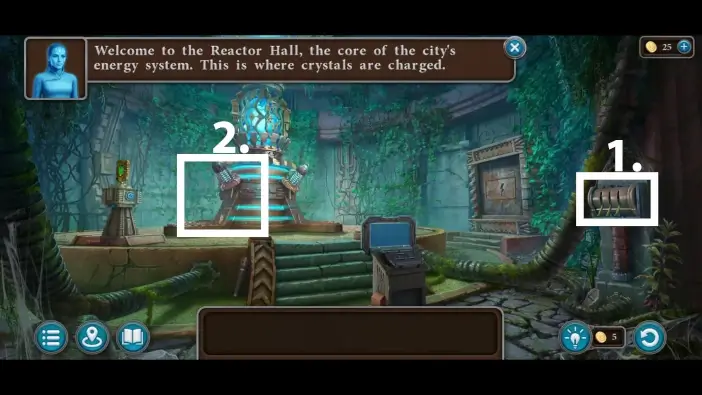
- Pull the levers on the right side of the room.
- Approach the reactor.
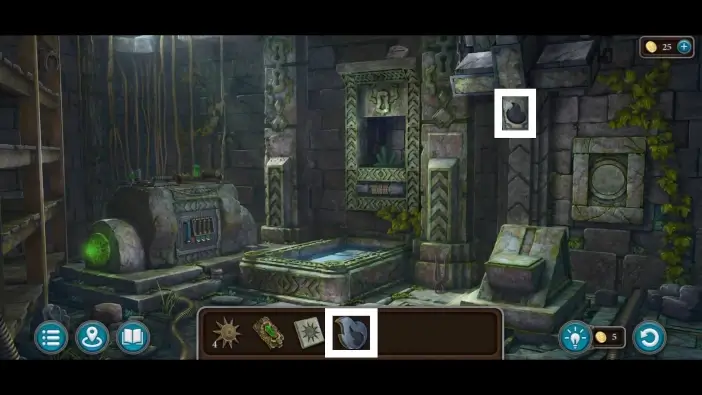
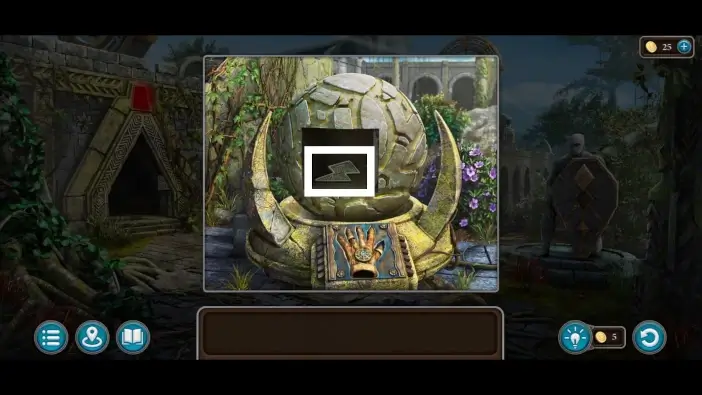
Take the control glove from the skeleton hand.
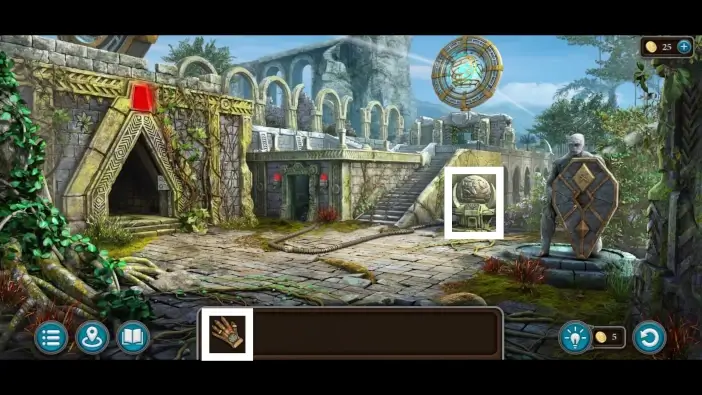
Go to the energy district and place the control glove into the mold in front of the stone globe.
The compartment in the stone globe will open. Take the lightning-shaped item.
Return to the reactor room and open the cabinet on the right using the lightning-shaped item.
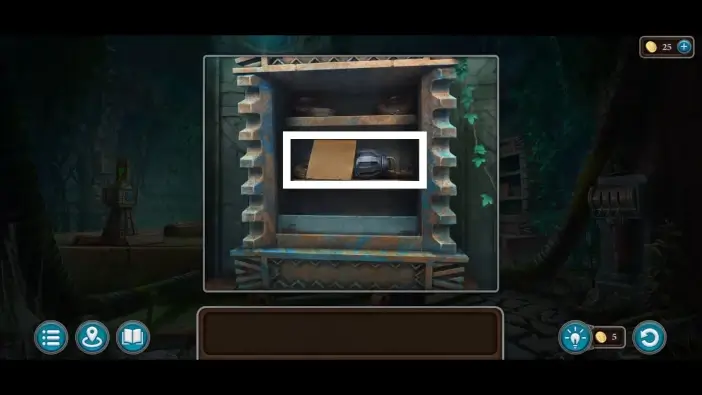
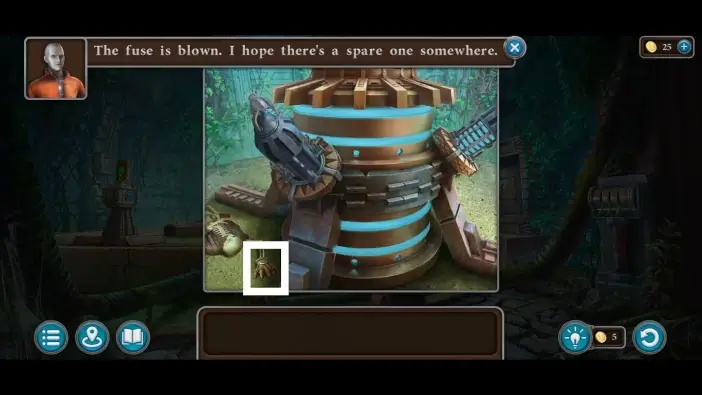
Take the fuse from the cabinet.
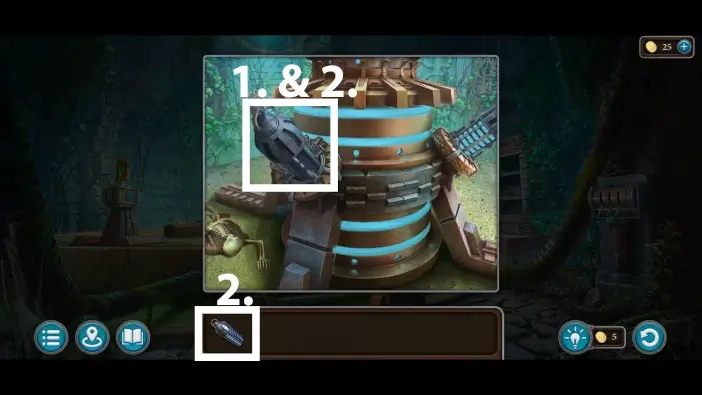
- Remove the old fuse from the reactor.
- Place the new one.
- Pull the levers again. This time, the reactor will work.
- Approach the control panel device.
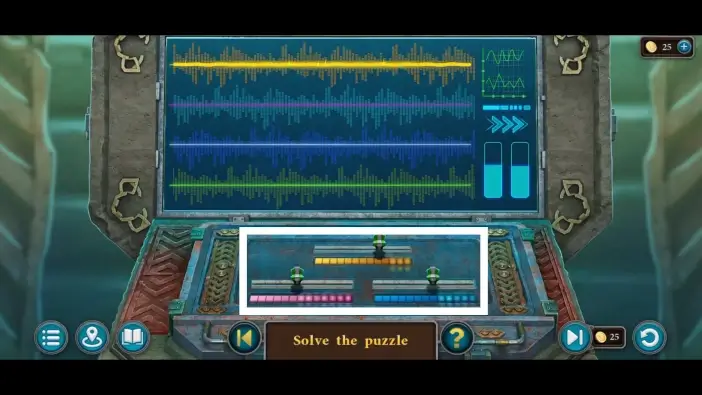
Use sliders to change the frequency of one of the lines. In the pictures in this guide, you can see where you’ll need to place each slider to solve a particular line (from top to bottom). For the first line, the solution is in the picture above.
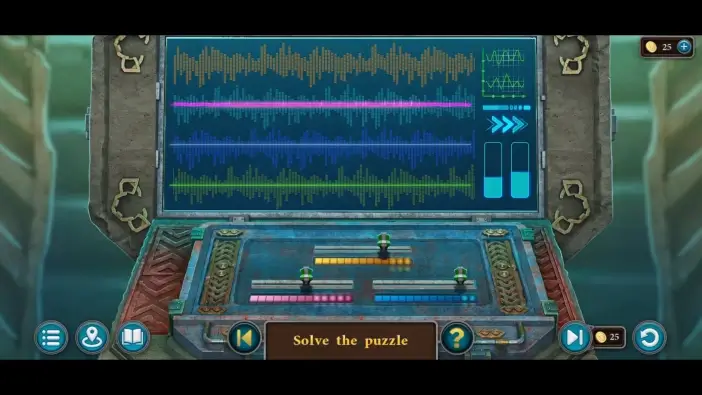
For the second line.

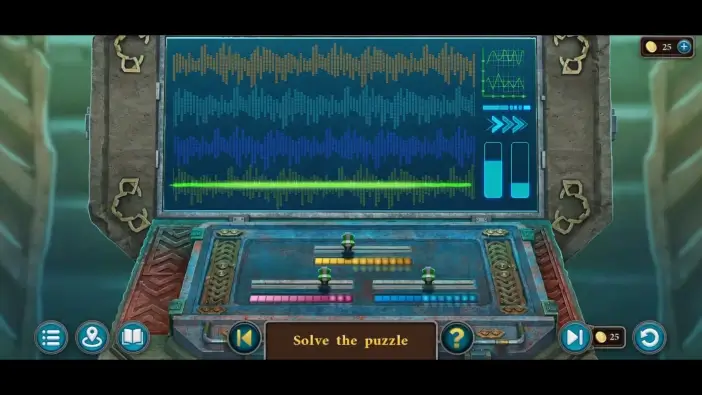
For the third line.
For the fourth line.
After this puzzle challenge, the artifact will be charged, and Chapter 2 will be completed.
This will mark the end of our guide for Chapter 2 of Legendary Tales 5.
Thank you for reading!