Legendary Tales 4 – Chapter 2: Strange Coincidence | Part 3
Intro
Welcome to our walkthrough for Part 3 of Chapter 2 of “Legendary Tales 4” from “FIVE-BN GAMES”. Find out where the maps of magical creatures are coming from and destroy their source.
Walkthrough
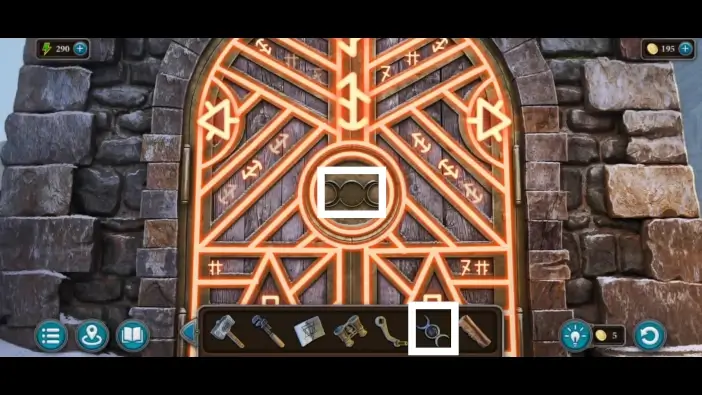
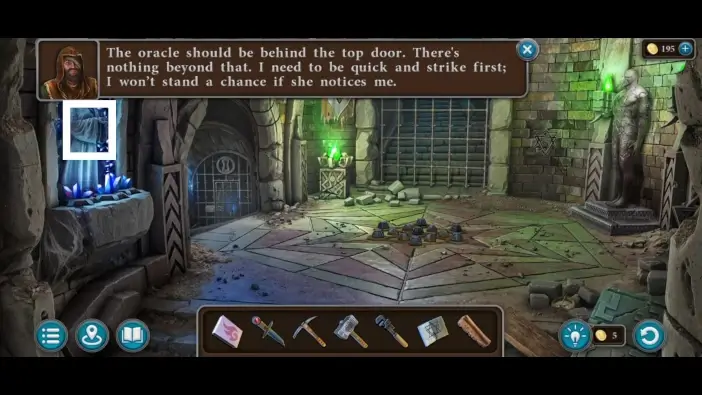
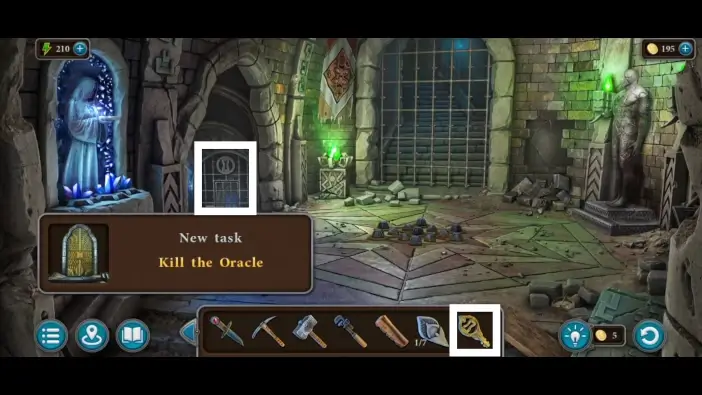
Go to the Oracle’s Tower and place the triple moon on the door. The door will remain locked because of the magic threads. You’ll need to find out somewhere else which rune is the main one.
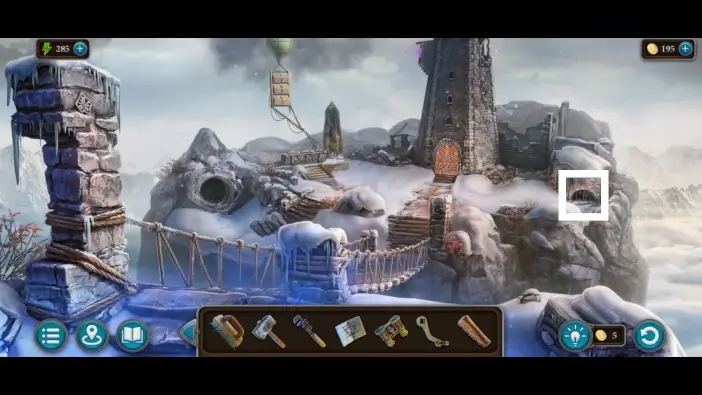
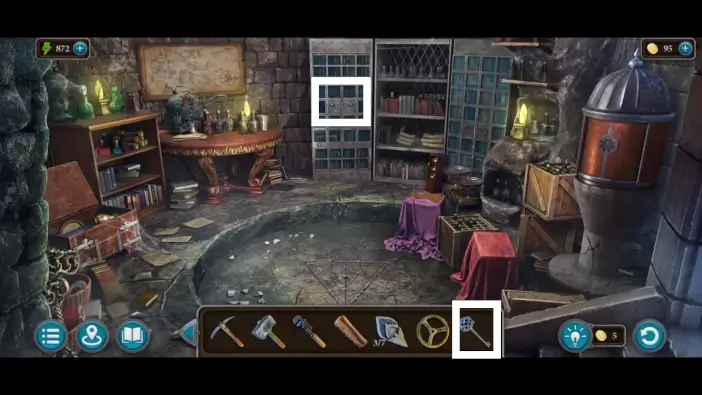
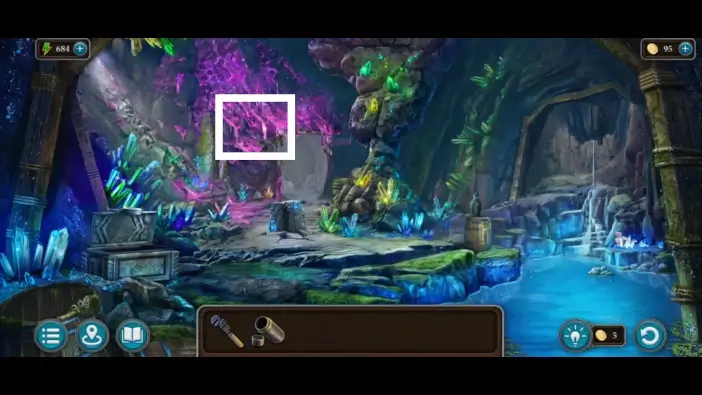
Approach the basement on the right.
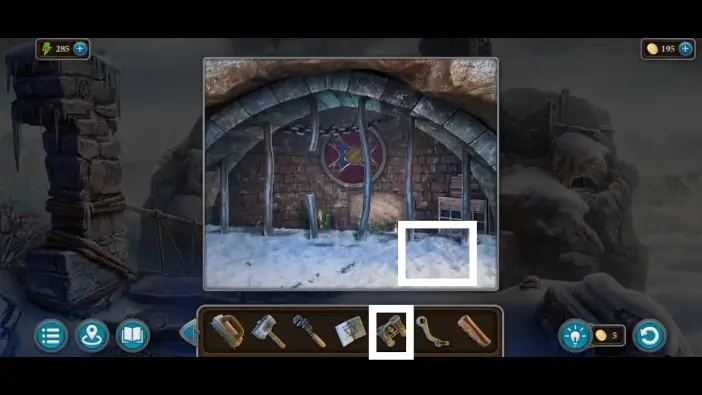
Place the binoculars on the ground and then use them.

Remember the runes on the mosaic. It is a clue for the next puzzle.
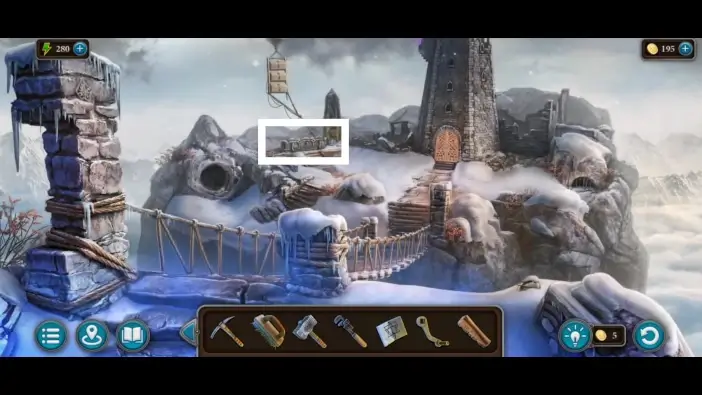
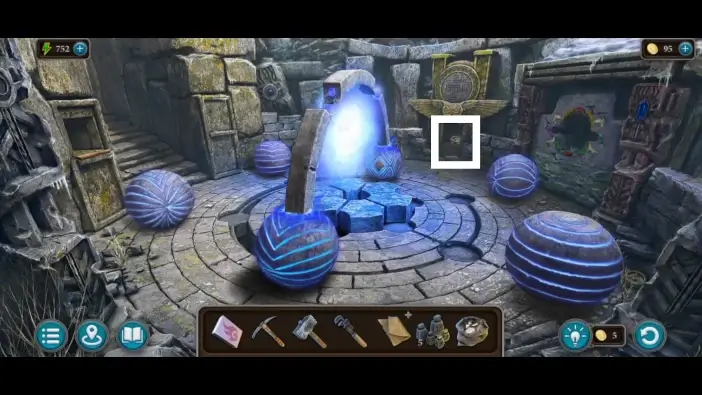
Go near the crystal obelisk on the left.
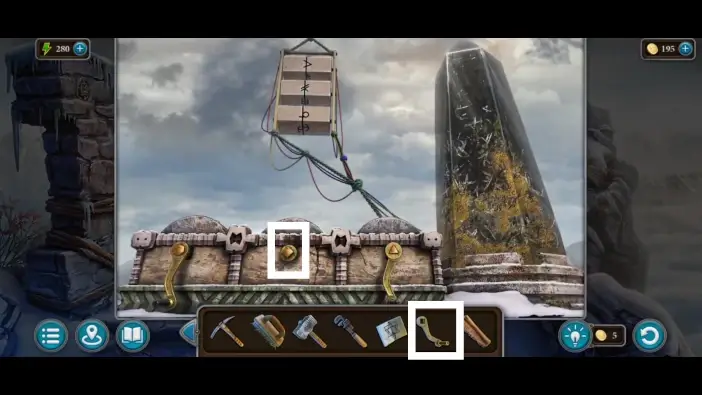
Place the handle on the middle section.
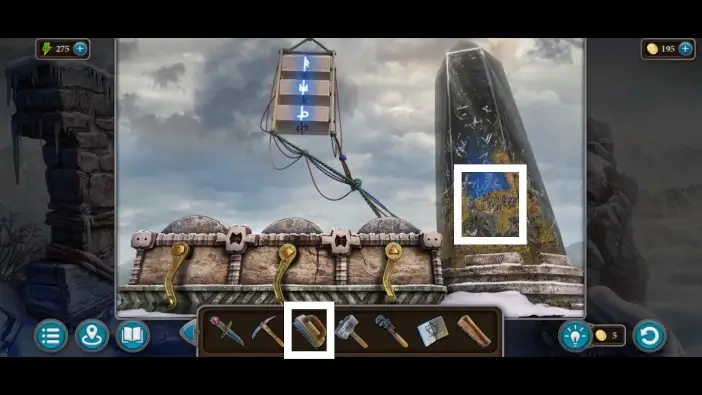
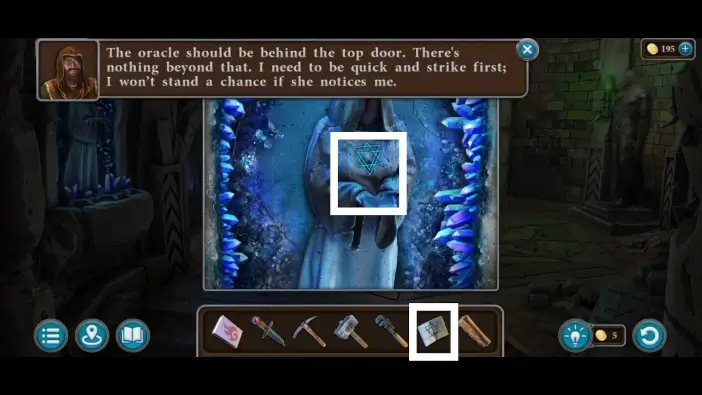
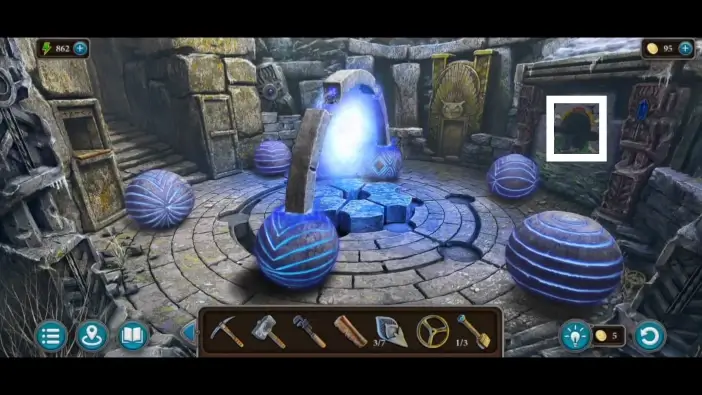
Use handles to change the runes on the floating stones above. Set the runes to be like the runes in the mosaic and in the same order as in the mosaic. The runes will glow, and a thunderbolt will hit the crystal obelisk. Use a brush from your inventory to clean the obelisk. You will see the main rune that keeps the Oracle’s Tower locked. Remember its shape.
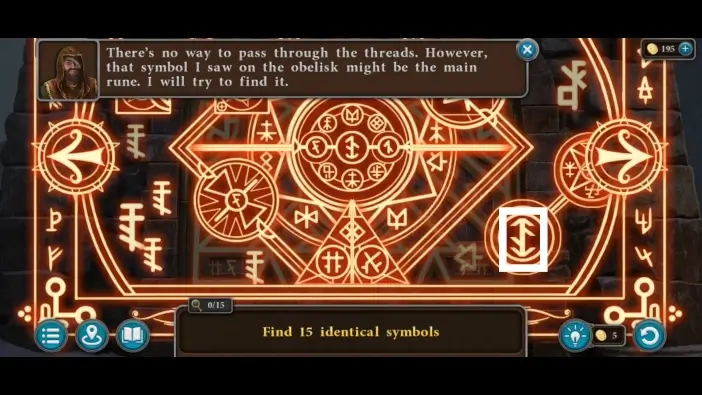
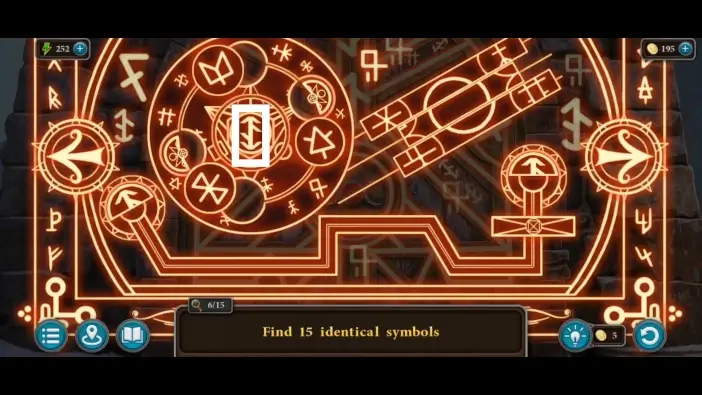
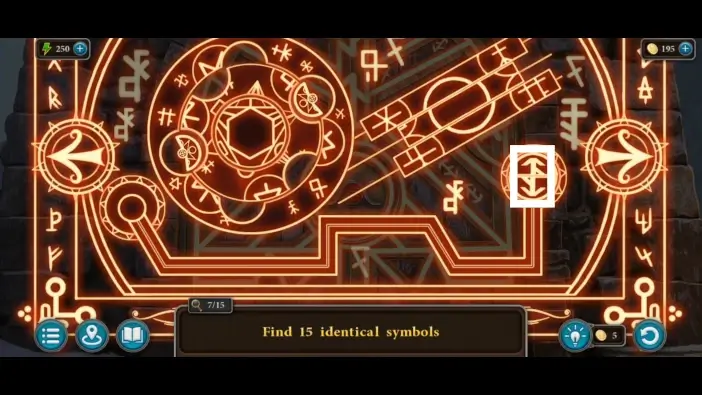
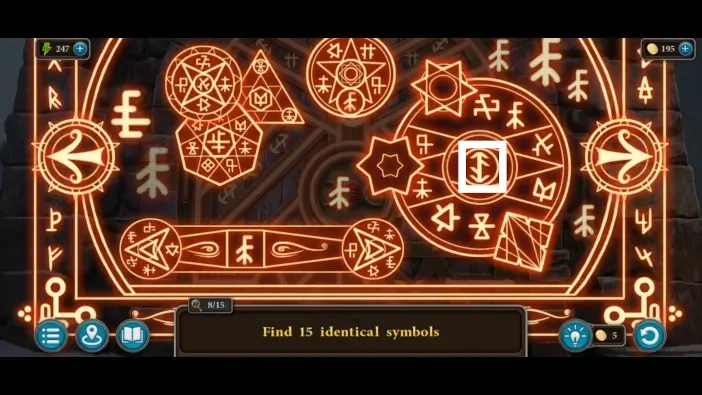
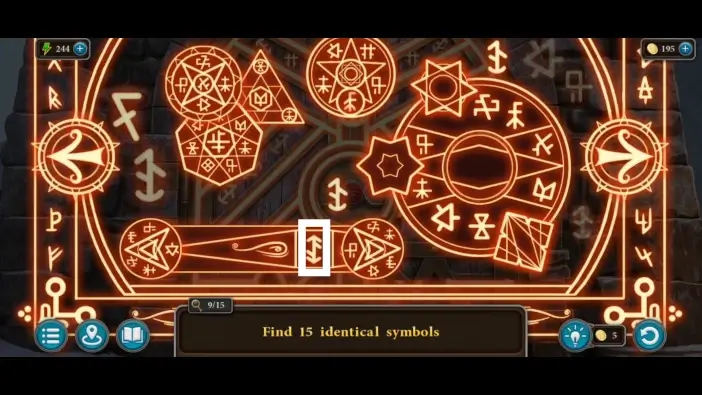
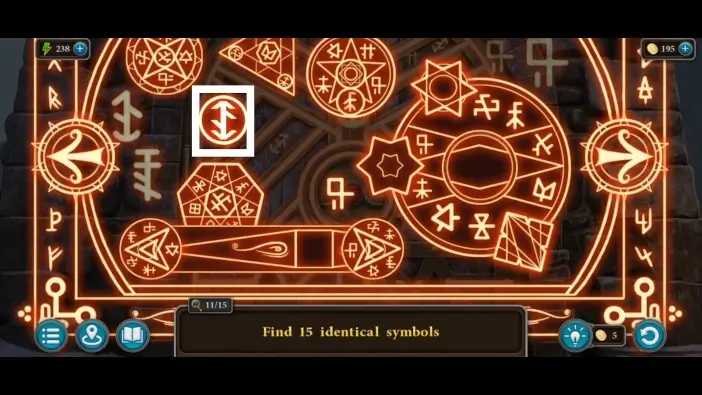
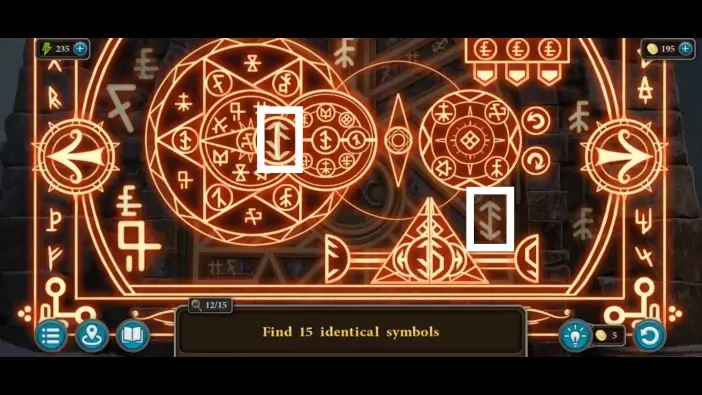
Return to the main entrance of the Oracle’s Tower. Find fifteen runes that look the same as the rune on the crystal obelisk. Sometimes the rune will appear after a certain time, so you’ll need to wait. Other times, you might need to move certain elements to assemble the rune or rotate the circles. You can use the arrows on the left and right to switch between the magic threads.
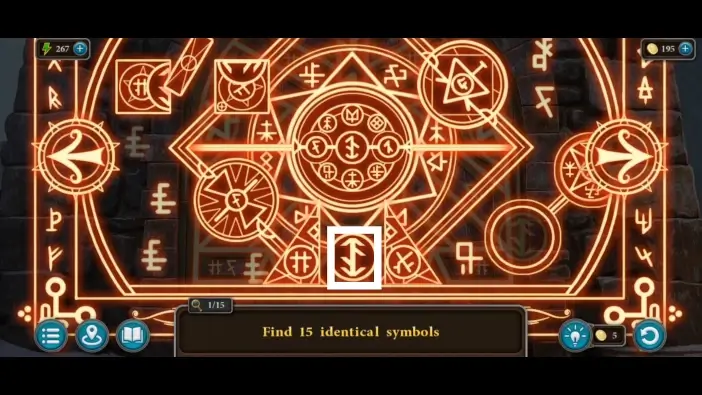
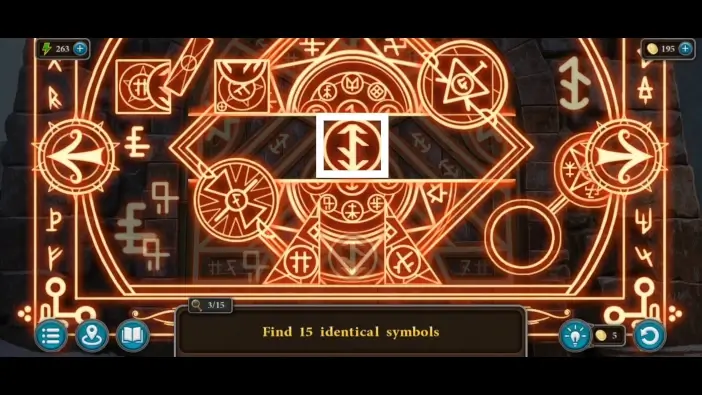
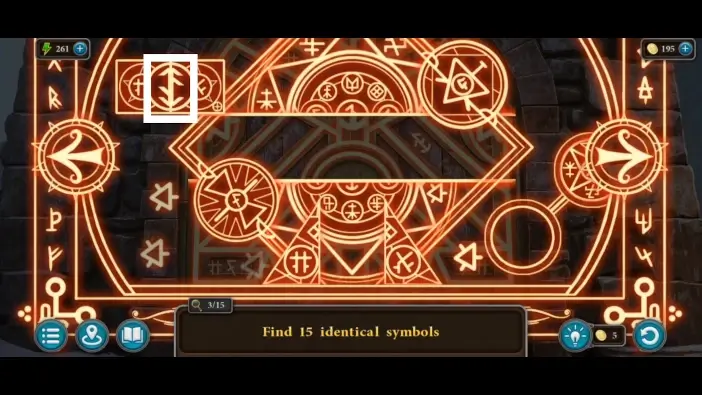
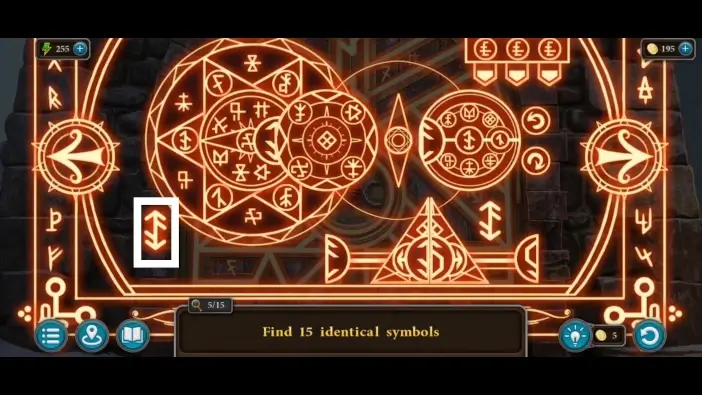
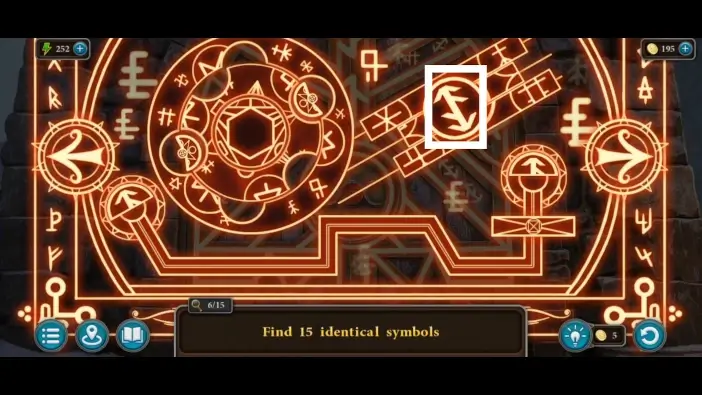
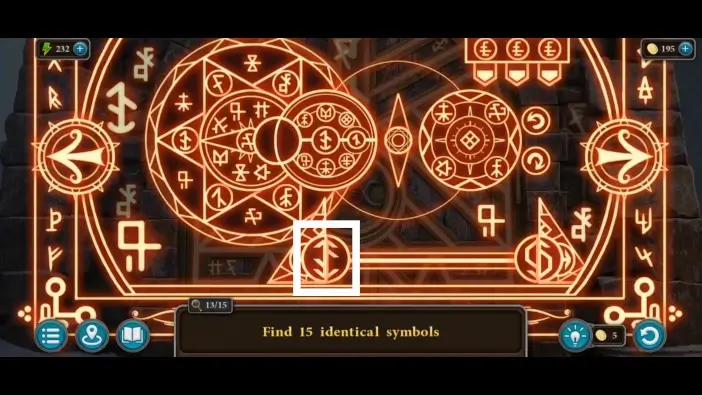
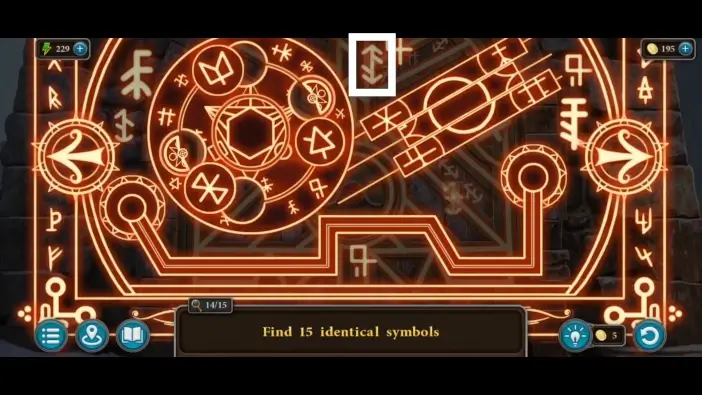
Once you find all fifteen runes, the door to the tower will open. Enter the Oracle’s Tower.
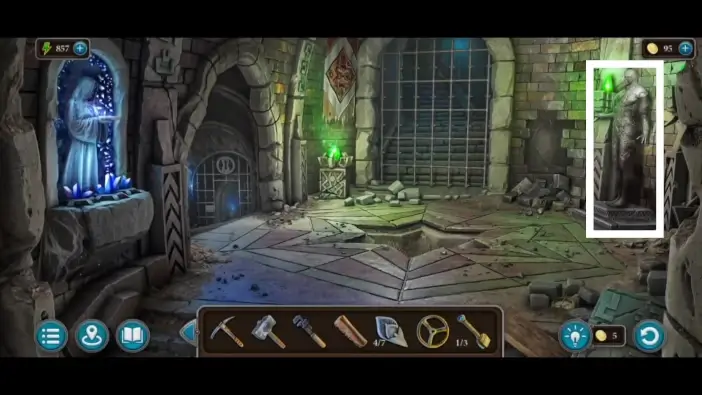
In the hallway of the Oracle’s Tower, approach the statue on the left.
Place the book you found in the birder’s house on the statue’s hand.
After you place the book, the crack on the right wall will appear. Approach it.
- Pick up the first petal-shaped item. You’ll need seven petals to unlock one puzzle challenge later in the storage room.
- Take the key to the storage room.
Use the key to unlock the door to the basement.
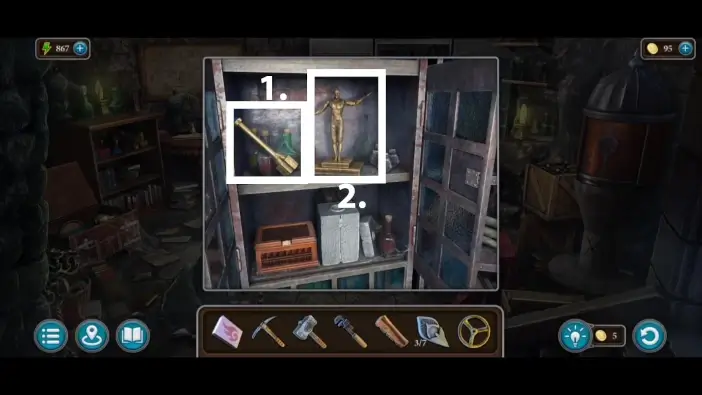
Enter the basement and take the valve from the table on the left. You will need it for the map printing machine.
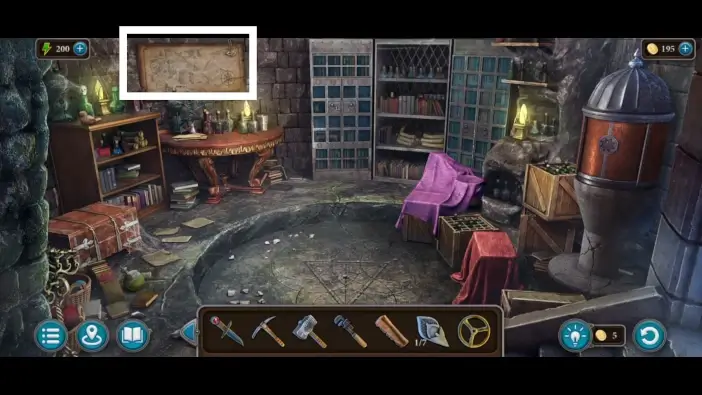
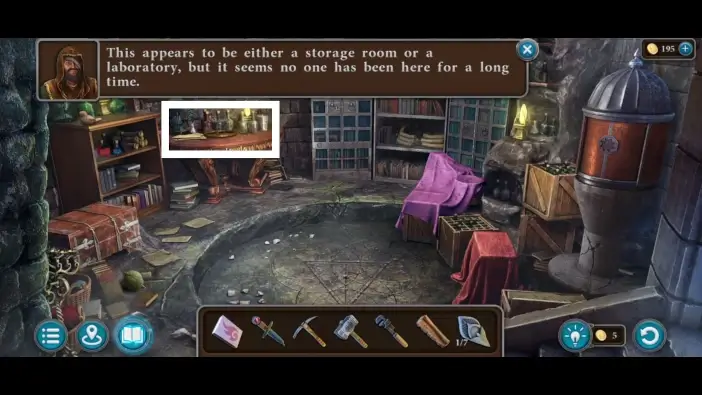
Approach the map on the wall.
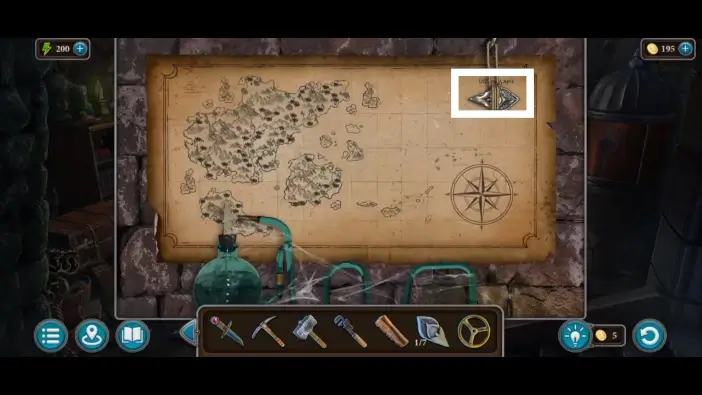
Take the second petal. When you pick it up, the protagonist will see the Ultima Lapis island in the corner of the map. This is where you will go in Chapter 3.
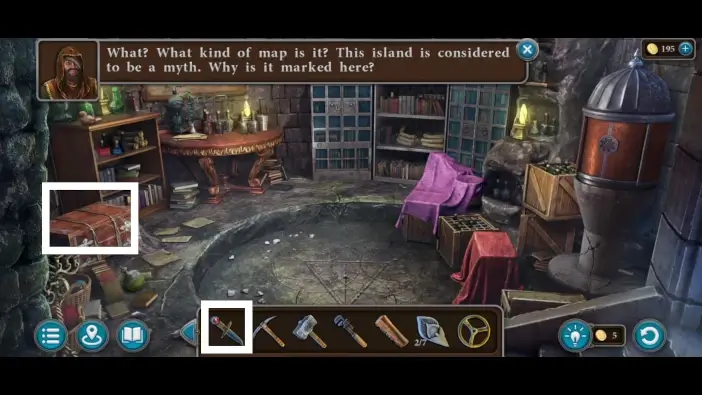
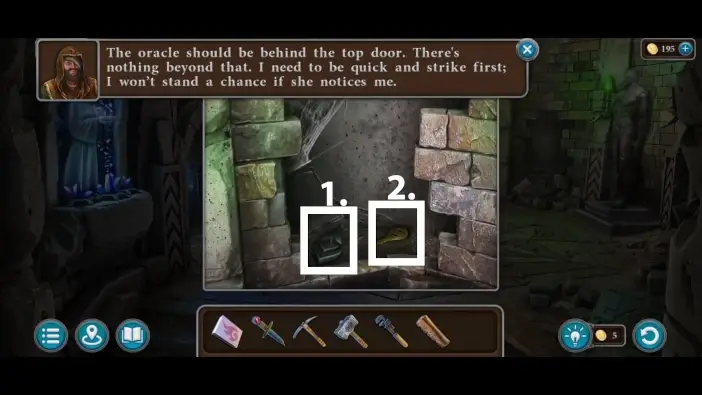
Use a knife to cut the ropes on the chest and then open the chest. Take the “detail” item from the chest.
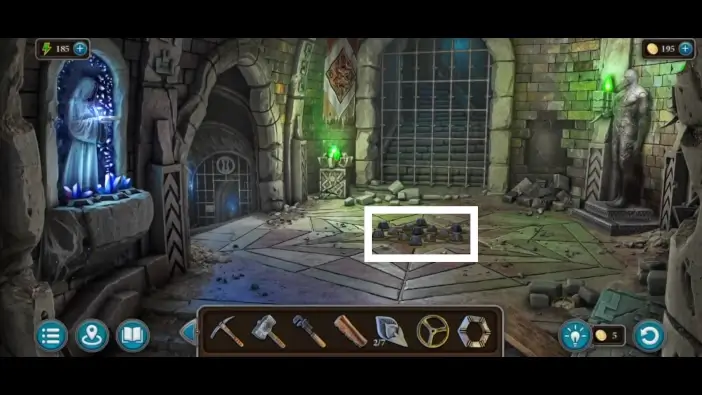
Return to the hallway and approach the pattern on the floor in the center.
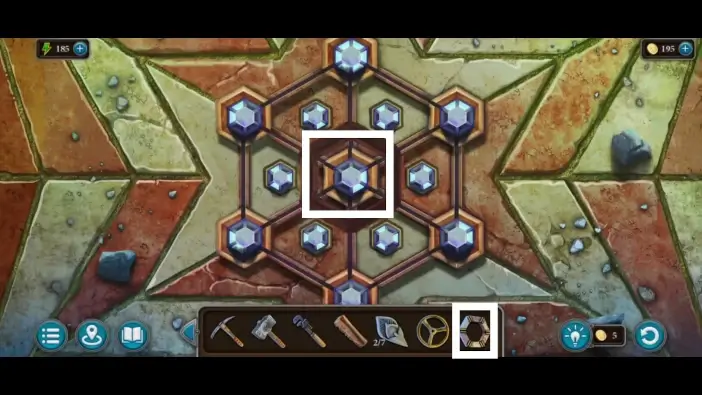
Place the detail you found in the storage room. This will start a new puzzle challenge.
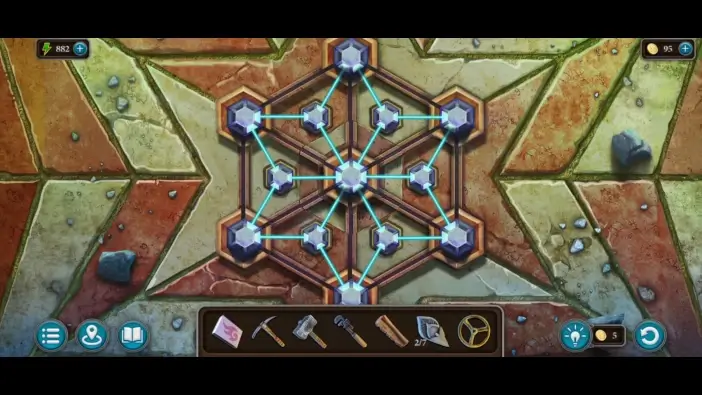
Rearrange the crystals so that all crystals are connected via light beams. You rearrange by swapping the positions of two crystals. Once you solve this challenge, take the third petal and the key for the cabinet.
Return to the storage room and unlock the cabinet with the key you just got.
- Take the first lever. You will need three levers for the map-printing machine near the end of this chapter.
- Remember the position of the figurine. This is a clue for the puzzle about the statue on the right side of the hallway.
Return to the old location spheres room, and take the fourth petal.
Go to the hallway of the Oracle’s Tower and approach the statue on the right.
Move the parts of the statue until the statue looks the same as the figurine in the cabinet in the storage room. The solution is in the picture above.
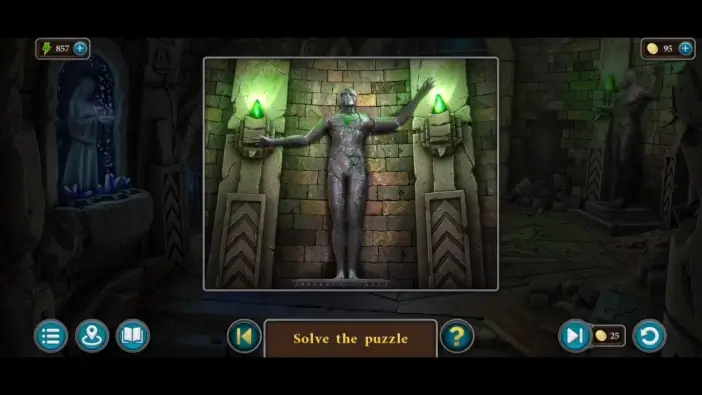
Once you solve the statue’s puzzle, the bars will be raised. Go to the door of the oracle’s room. The door will be locked, and to unlock it, you’ll need to solve the next puzzle challenge.
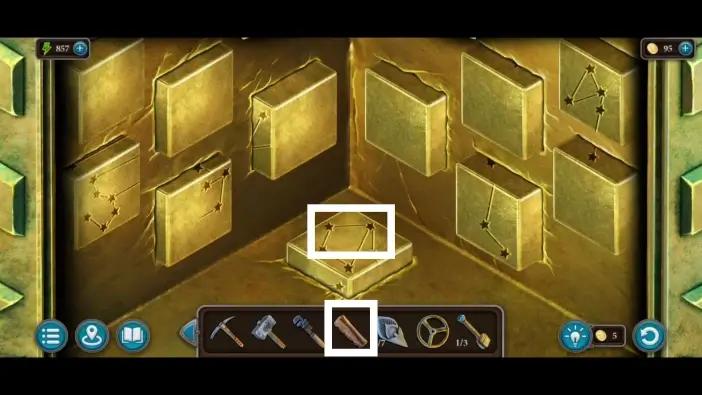
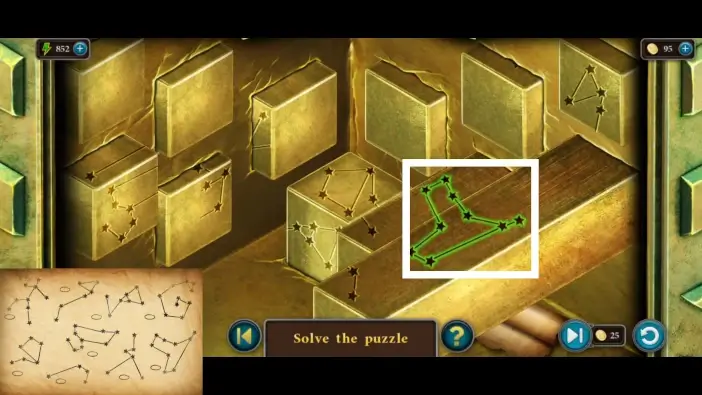
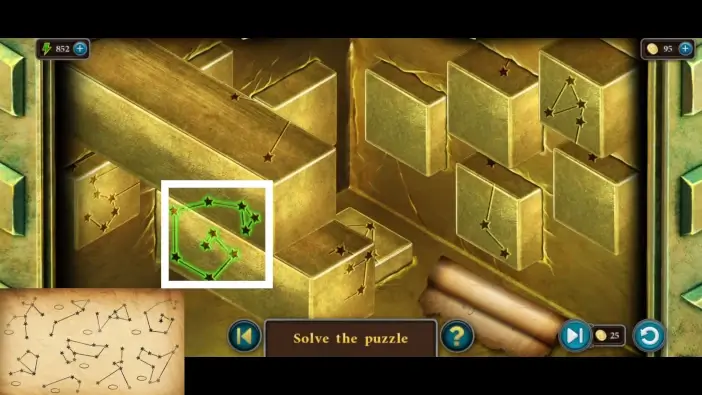
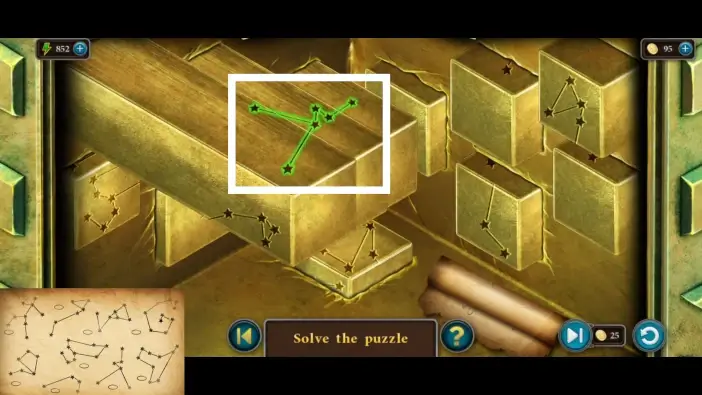
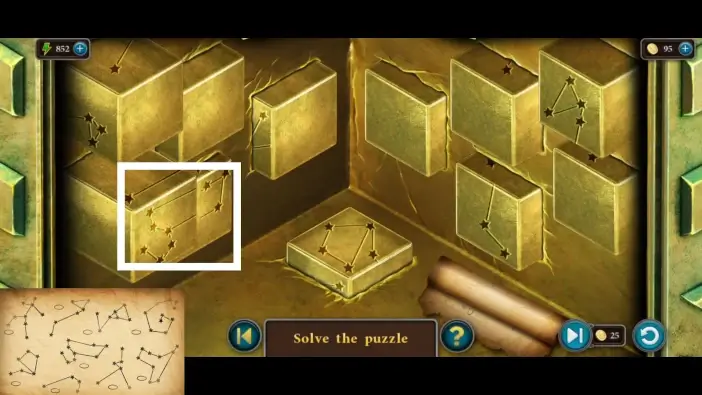
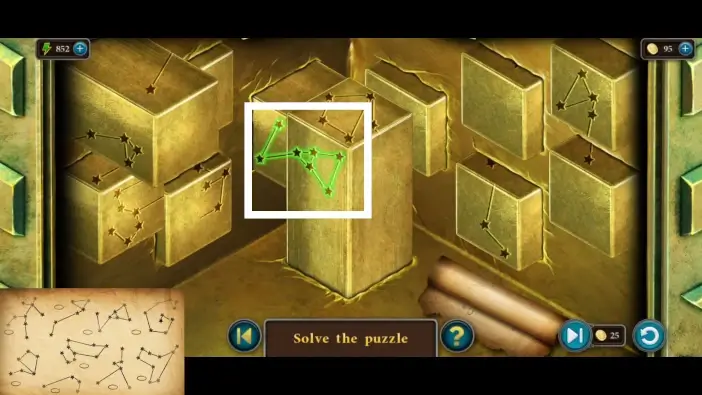
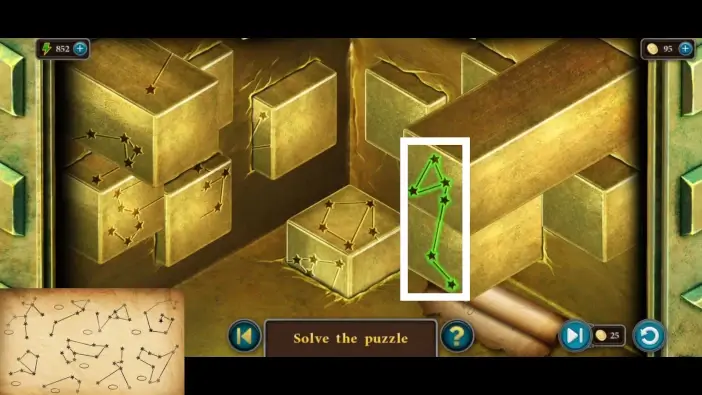
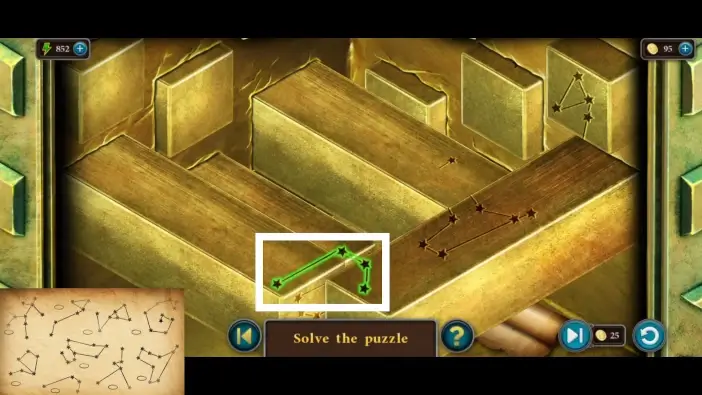
Place the parchment that shows constellations. During the puzzle challenge, you can read it for a clue.

Move the blocks to create constellations. When you find a constellation that is on the parchment, tap on it. Find all constellations from the parchment to unlock the door.

Once you solve this puzzle challenge, enter the room.
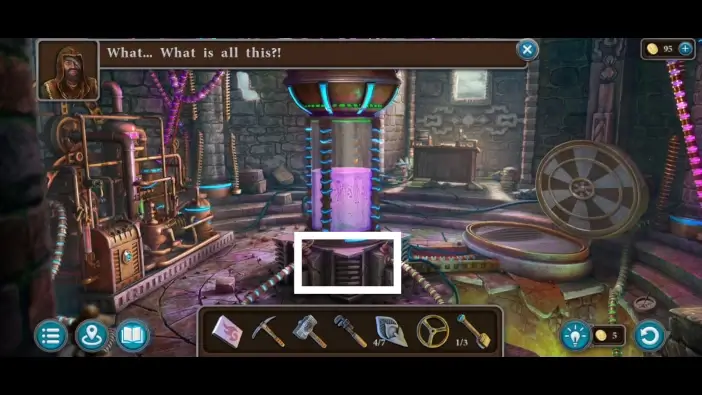
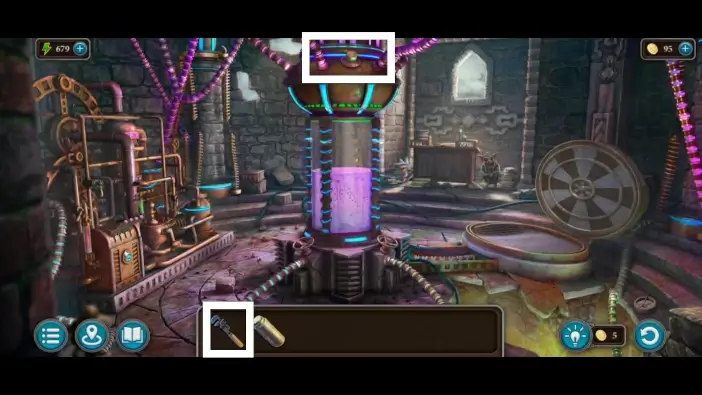
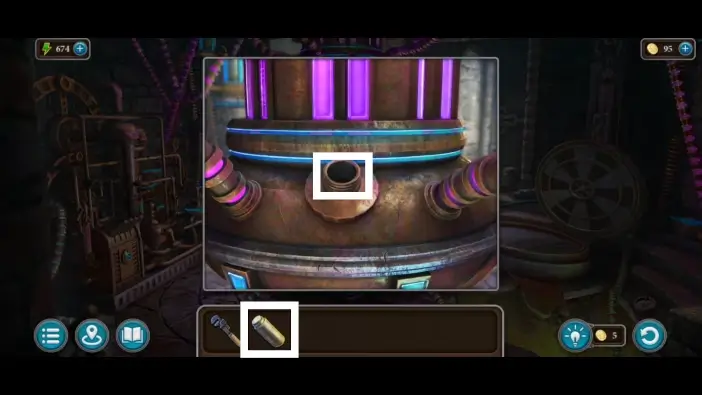
You will find out that the Oracle’s Room is a laboratory. Approach the lower part of the container.
Place the valve on the right side.
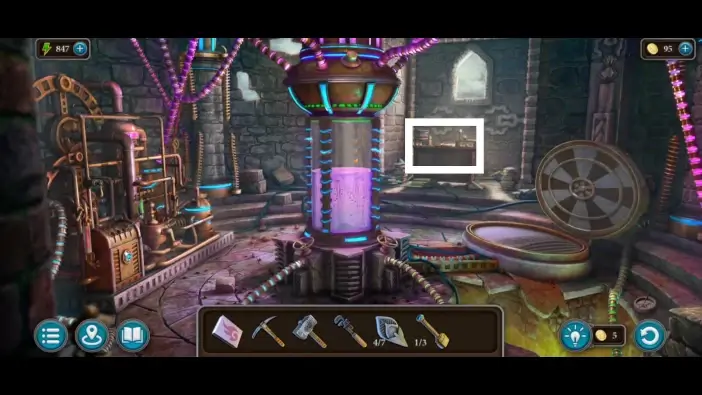
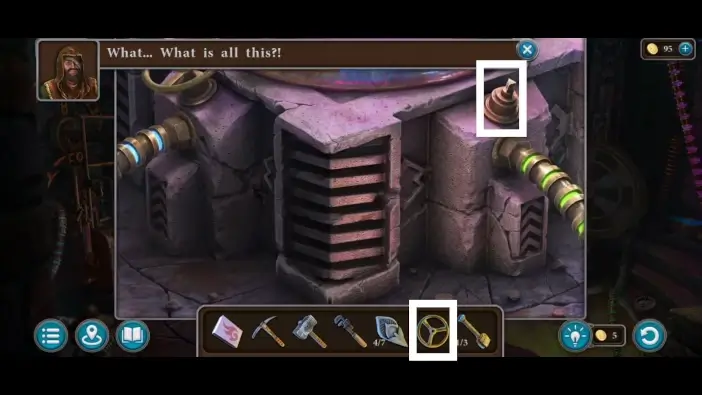
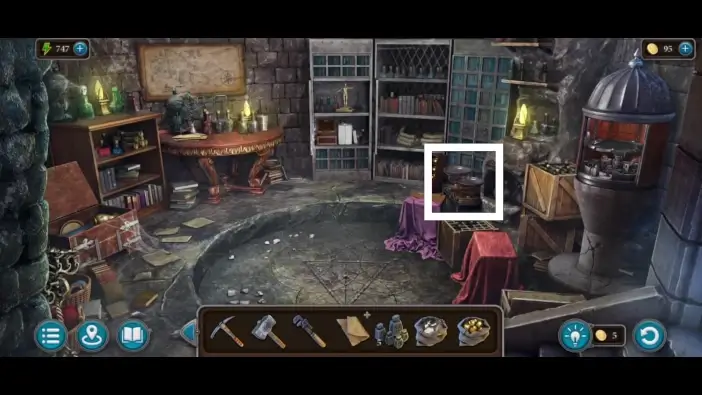
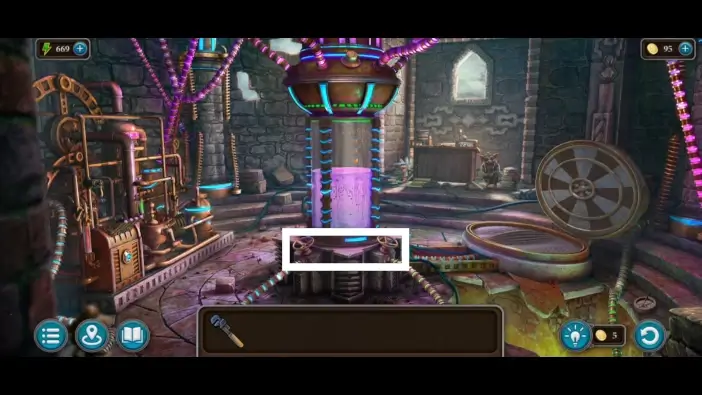
Approach the work desk.
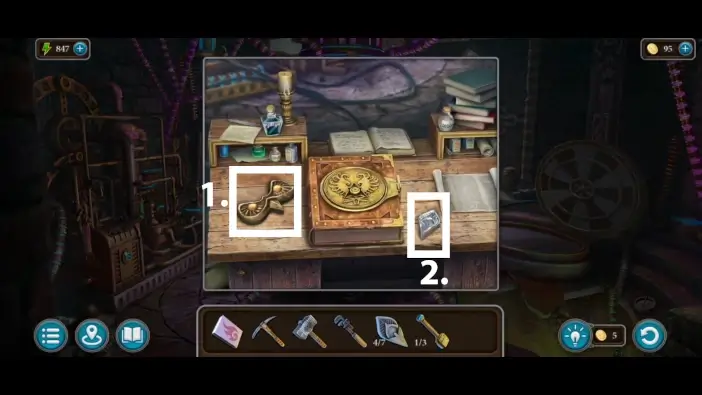
- Take the mask. You will need it in the spheres room.
- Take the fifth petal.

Approach the map-printer.
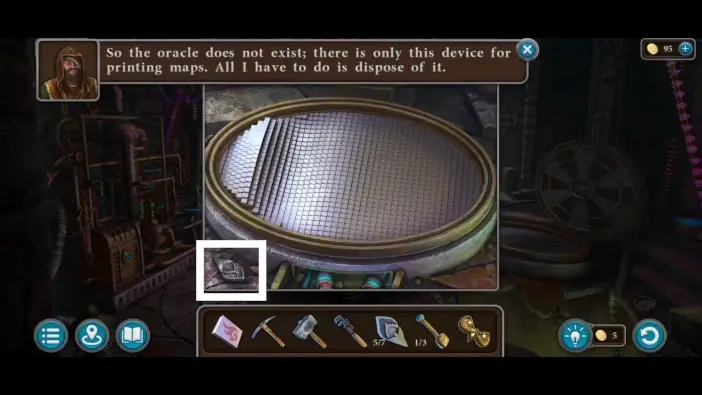
Pick up the sixth petal near the map-printer.

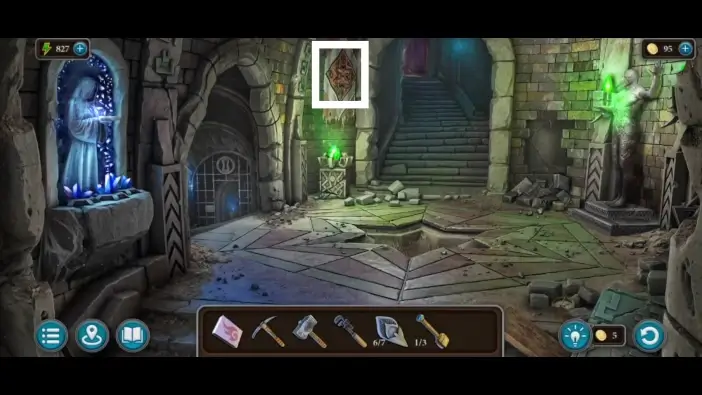
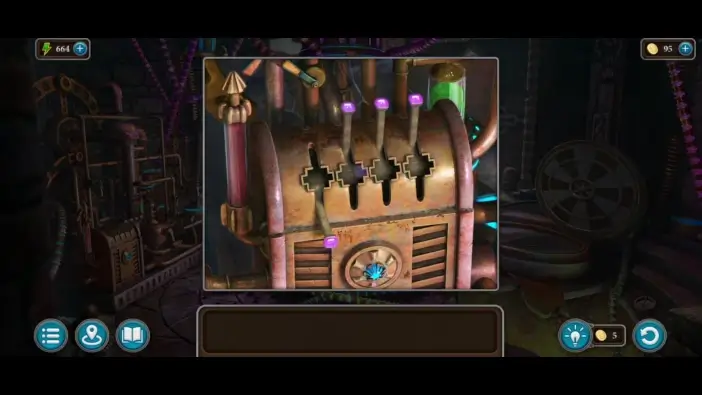
Go to the spheres room where the portal is and place the mask you just found in the owl-shaped placeholder. This will reveal a puzzle, but first, you’ll need a clue for it.
In the Oracle’s Tower’s hallway, there is a banner. Approach it.
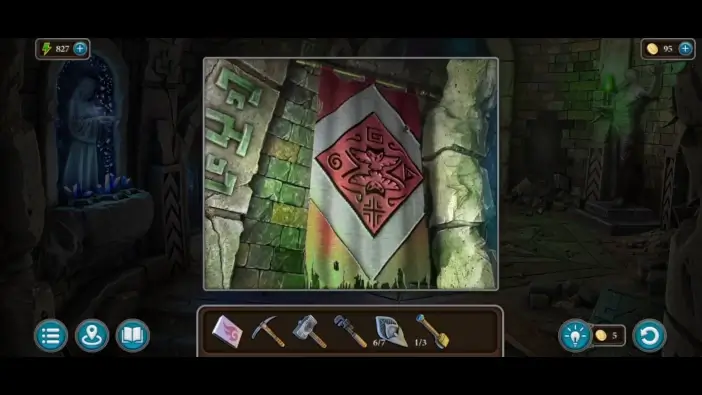
Remember the patterns on the banner and their positions.
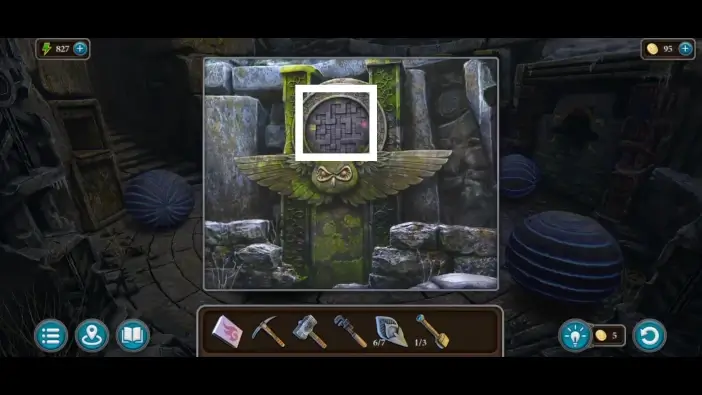
Return to the spheres room and approach the owl’s puzzle.

Move the tokens to their correct places: yellow token on the bottom, blue token on the left, red token on the top, and green token on the right. Once you finish this puzzle challenge, take the second lever and the seventh petal.
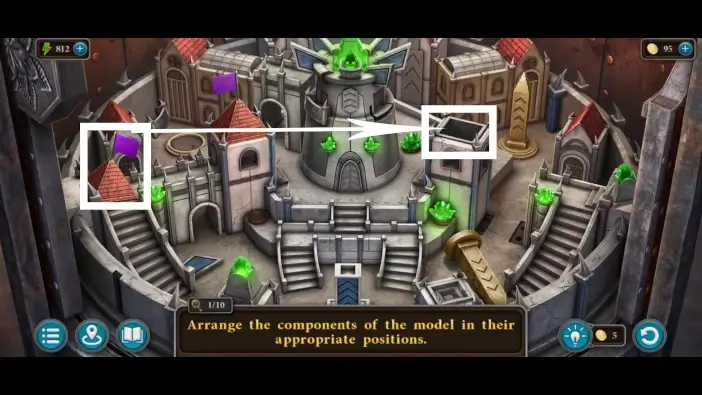
Go to the storage room and unlock the mechanism on the right using the seven petals you collected. The model and the new puzzle challenge will begin.
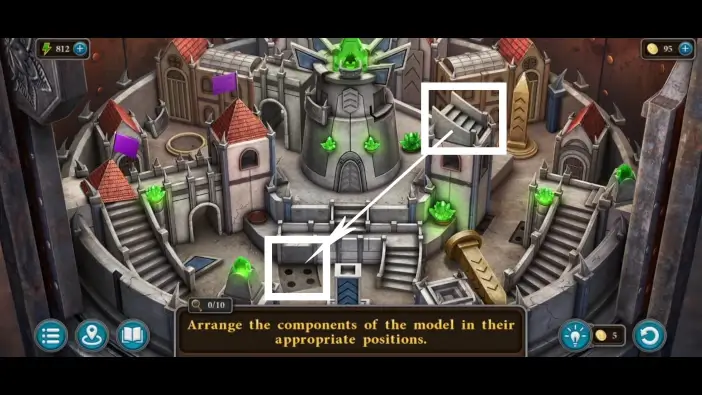
Move the components to their correct positions shown in this guide. Move the staircase.
Move the roof to the right tower.
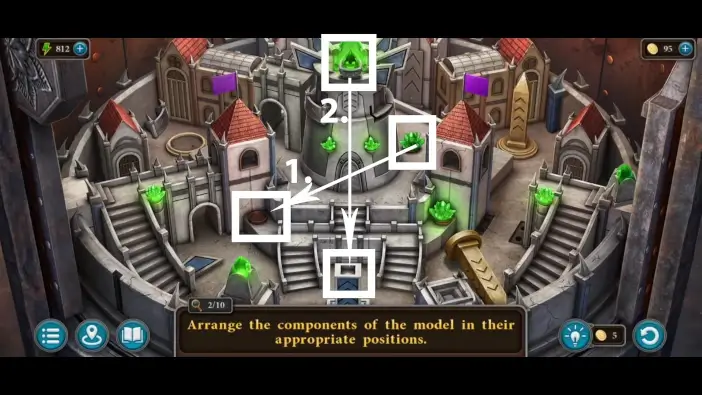
- Move the crystal to the left slot.
- Move the crystal from the central tower to the pedestal at the bottom.
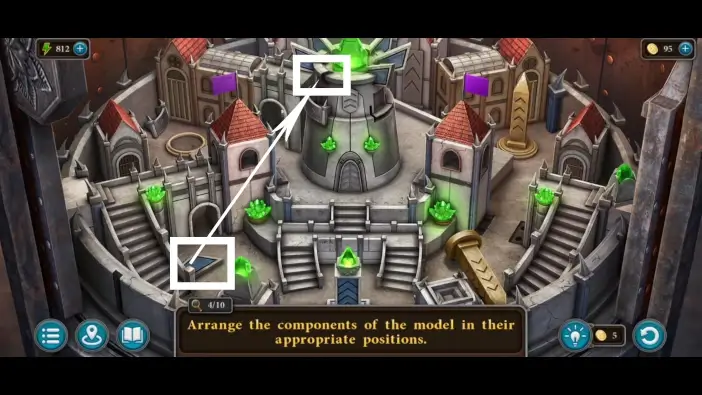
Move the part of the decoration on the left to its place on the central tower.
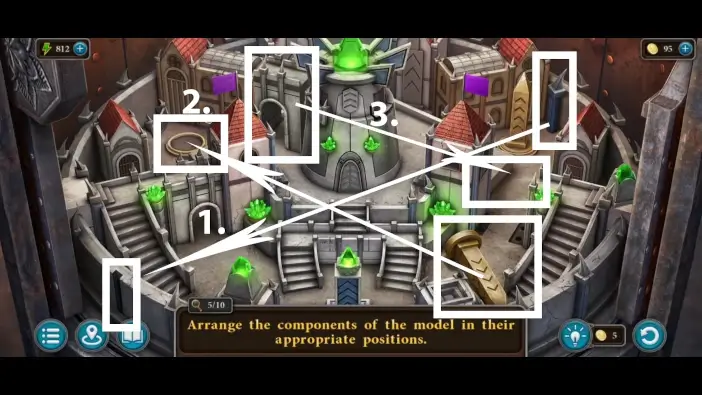
- Move the spike on the top-right corner to the bottom left corner, into the outside part of the wall.
- Move the obelisk to the left.
- Move the gatehouse to the right.
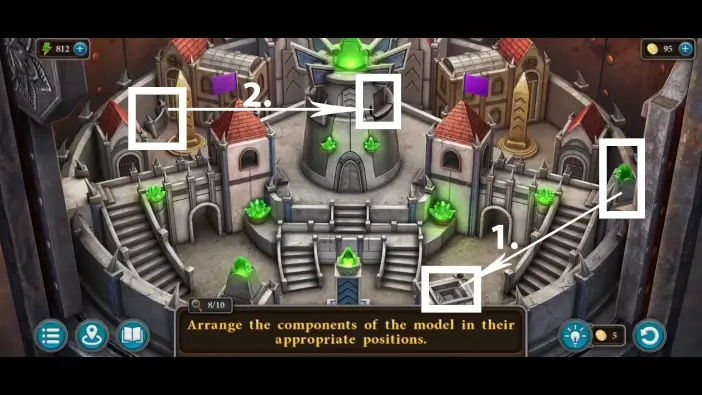
- Move the crystal on the wall to the empty slot on the pedestal at the bottom.
- Move the balcony to the central tower.
After you rearrange all ten components, new items will appear. Take the third lever and the Ring of the Archwitch.
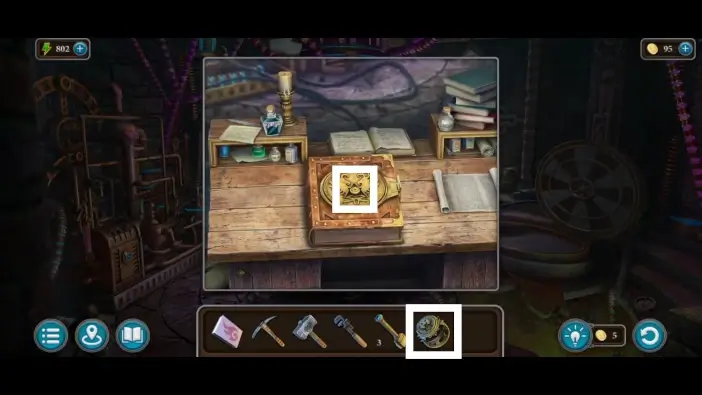
Go to the laboratory and return to the work desk. Unlock the book using the Ring of the Archwitch. Take the key from the book and read the book.
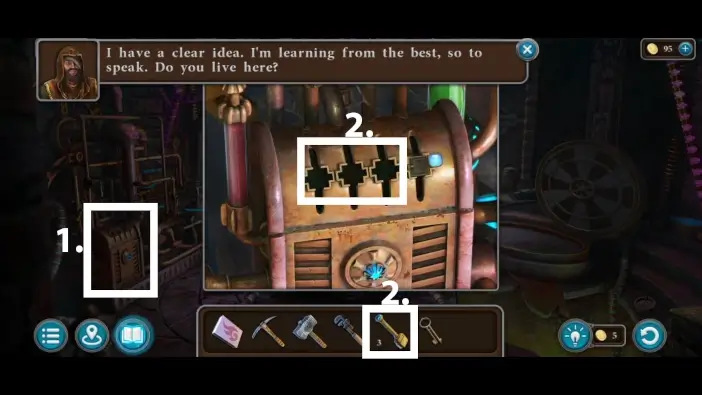
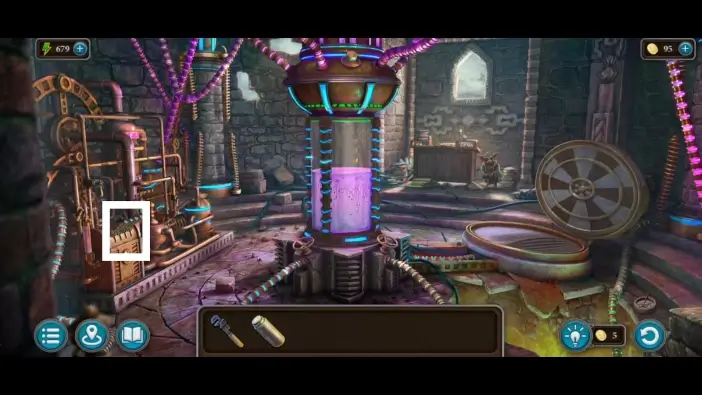
- Approach the machine on the left in the laboratory.
- Place the three levers you collected.
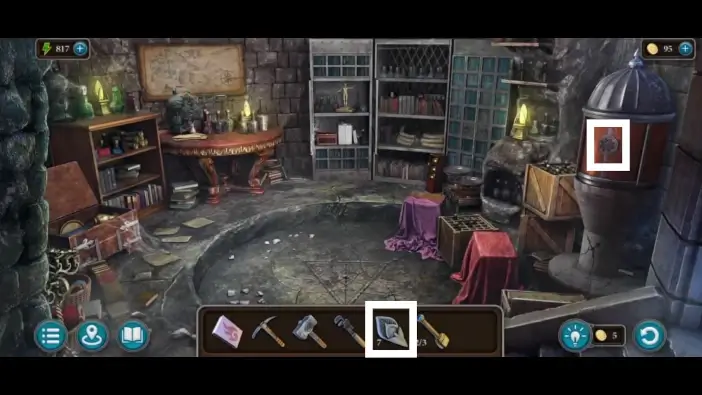
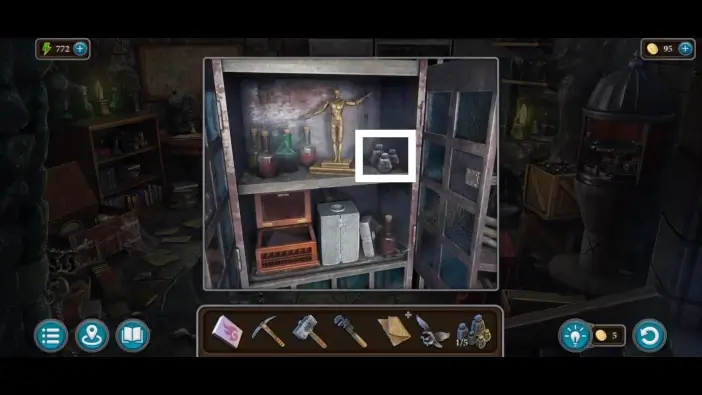
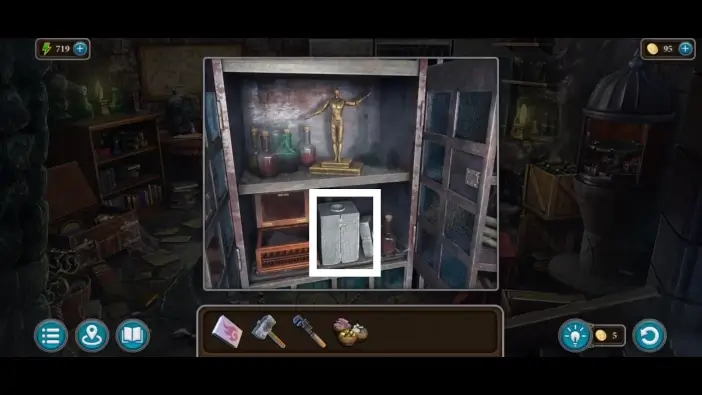
Go to the storage room and approach the cabinet.
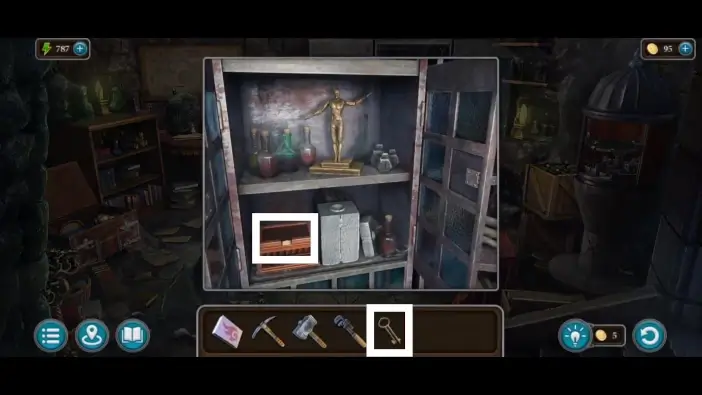
Unlock the chest using the key that you found in the Archwitch’s book.
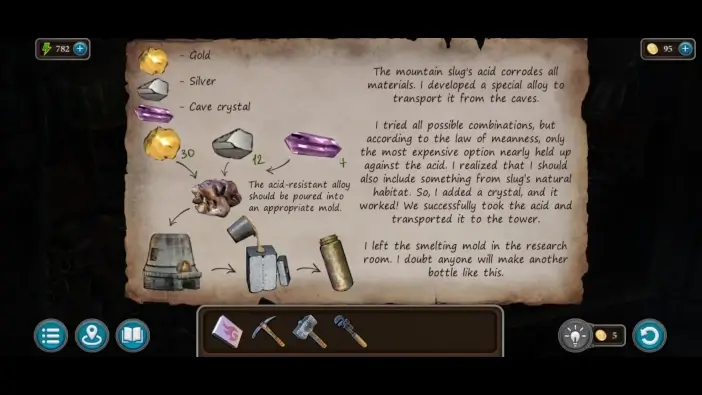
Take the metal hawk item and read the alloy formula. The formula will be added to your inventory.
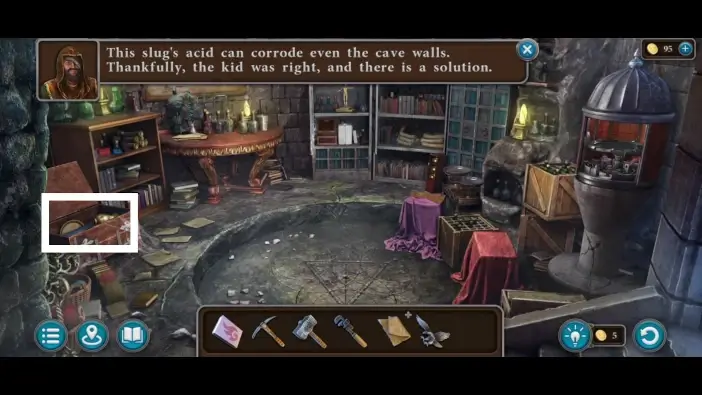
Approach the large chest on the left that you’ve opened earlier.
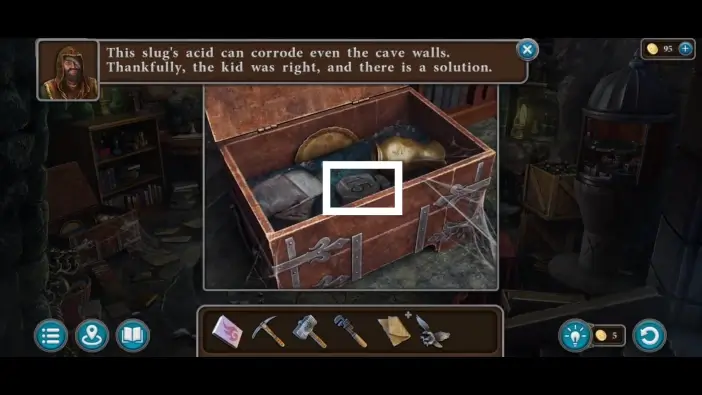
Take the first weight. You’ll need five of them for the scales puzzle.
Return to the cabinet and take three weights.
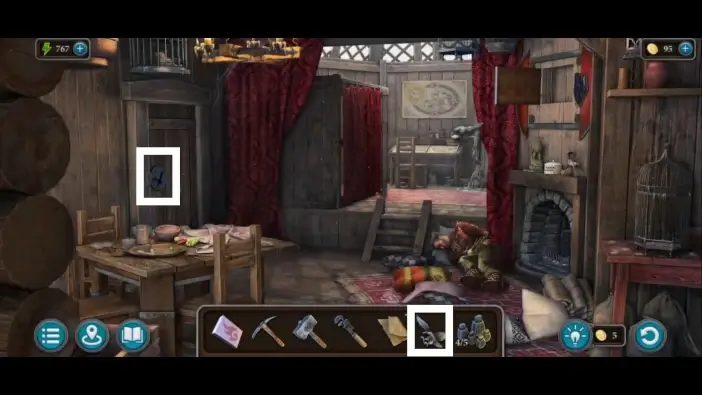
Return to the birder’s house and use the hawk item to unlock the storage room.
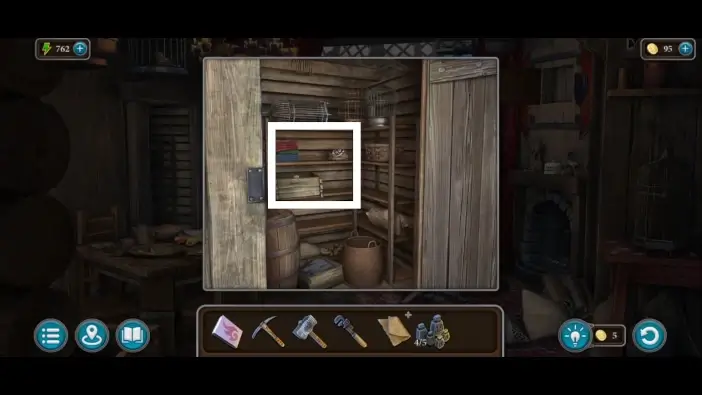
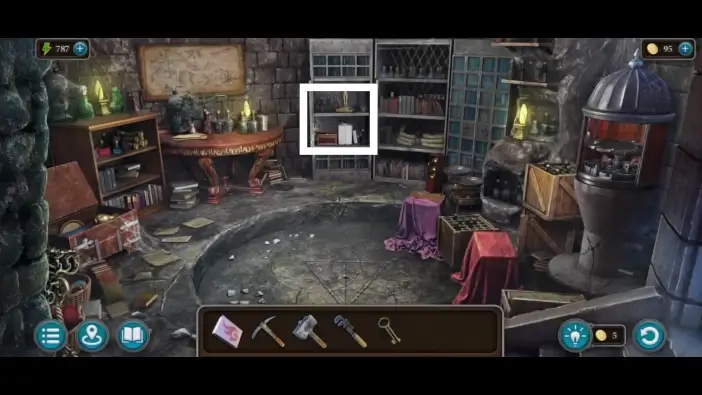
Approach the shelves.
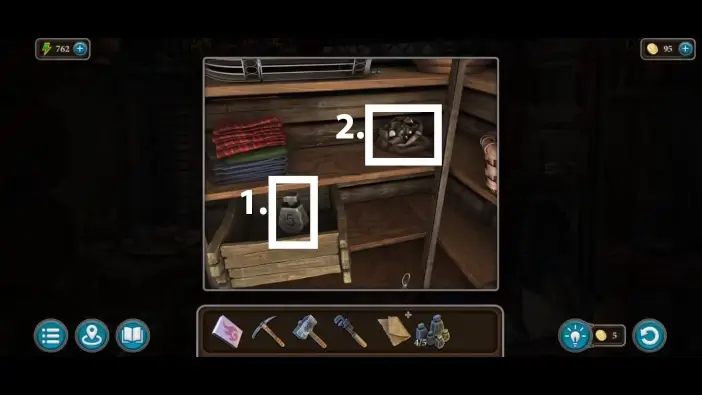
- Take the fifth weight.
- Take the silver. You’ll need it for the alloy formula.
Return to the spheres room and take the gold at the owl’s section of the wall. You will need it for the alloy formula.
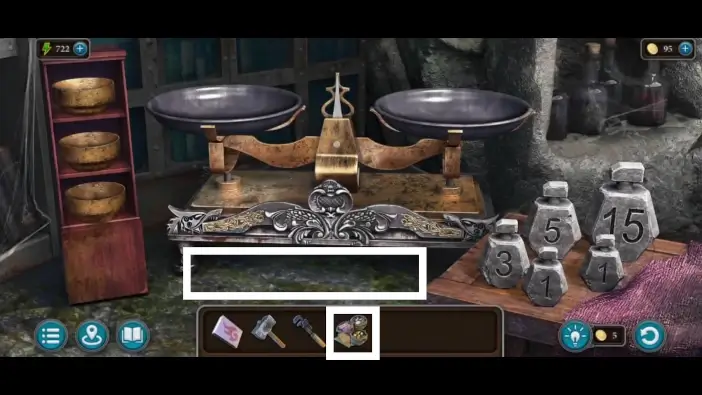
Go to the storage room of the Oracle’s Tower. Approach the scales.
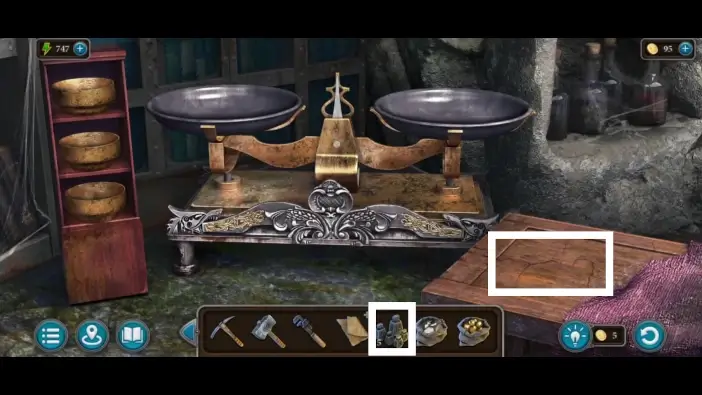
Place the weights on the box on the right.
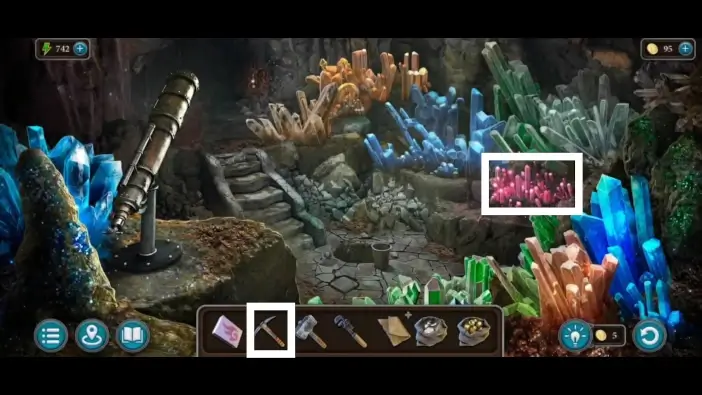
Go to the telescope area of the crystal cave. Use a pickaxe to mine crystals.
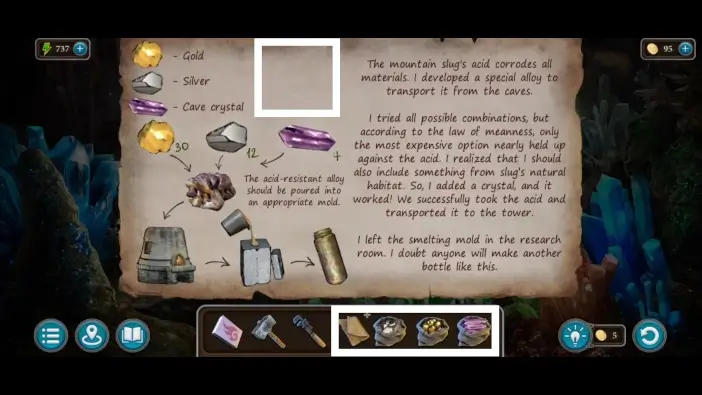
Tap on the alloy formula in your inventory to examine it. Tap on gold, then on the paper to add a checkmark on the list. Repeat the actions for other items such as silver and crystal. Once you do this, the alloy materials will be added to your inventory.
Go to the storage room and approach the scales. Place the alloy materials on the ground, in front of the scales. A puzzle challenge will begin.
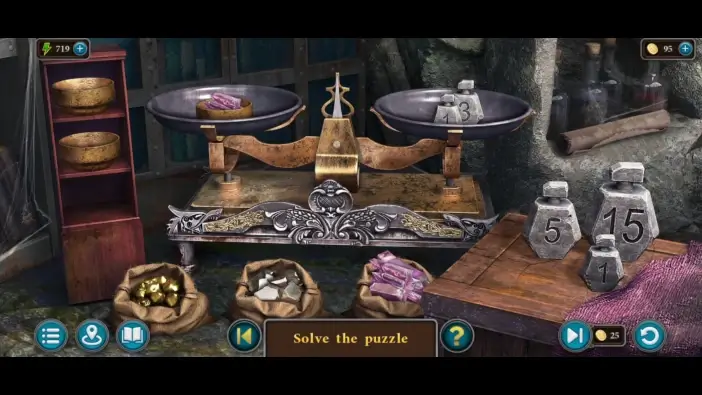
On the right side of the scales, place the three kg weight and the one kg weight because you need four kg of crystals. On the left side of the scales, place the empty bowl (use one of the bowls from the shelves on the left), then place four crystals into the bowl. After this, remove the items from the scales.
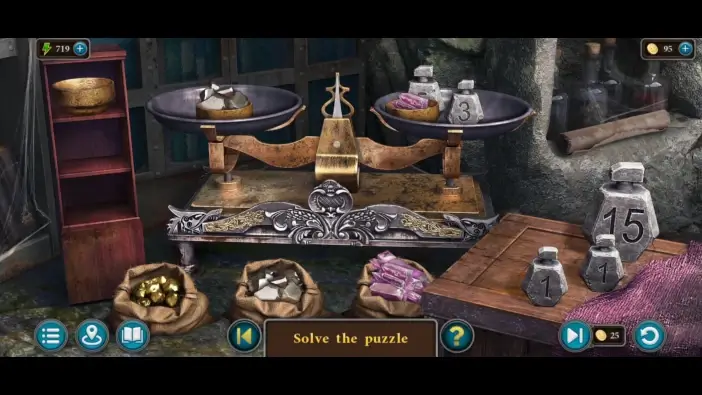
On the right side of the scales, place the three kg weight, the five kg weight, and the bowl of four crystals from earlier (the bowl is four kg). That’s a total of twelve kg because you need twelve kg of silver ore. On the left side of the scales, place the empty bowl, then place three silver ores into the bowl. After this, remove the items from the scales.
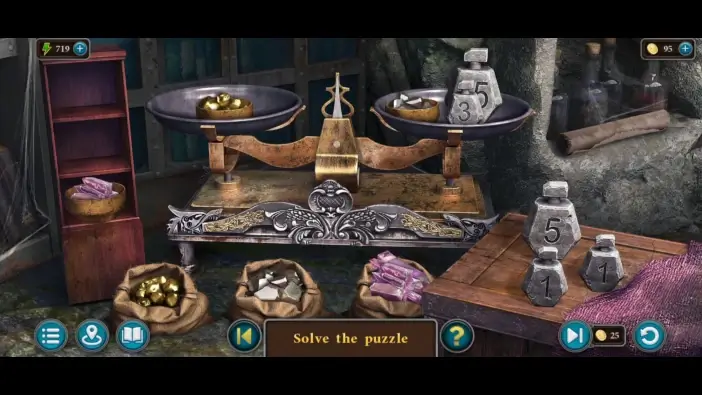
On the right side of the scales, place the three kg weight, the fifteen kg weight, and the bowl of three silver ores from earlier (the bowl is twelve kg). That’s a total of thirty kg because you need thirty kg of gold ore. On the left side of the scales, place the empty bowl, then place five gold ores into the bowl. After this, remove the items from the scales.
When you finish this challenge, the “materials” item will be added to your inventory.
In the same room, approach the cabinet and take the mold.
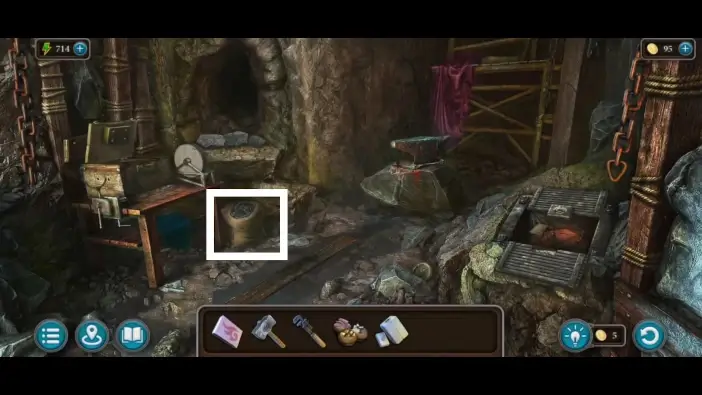
Go to the cave’s workshop and take the bag of coal.
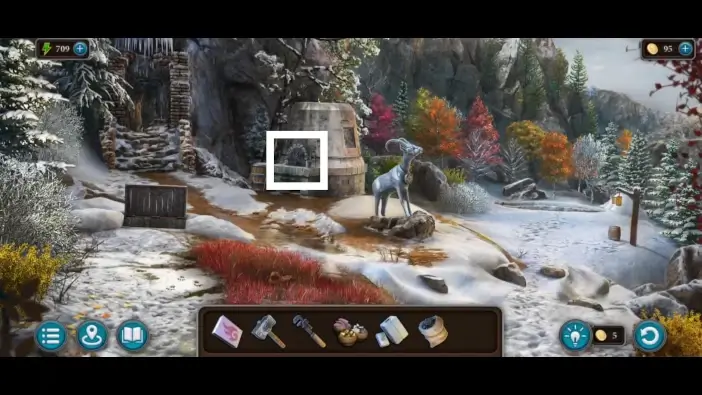
Go to the mountain and approach the furnace behind the goat monument.

- Use a hammer to open the furnace.
- Pour the coal from the bag.
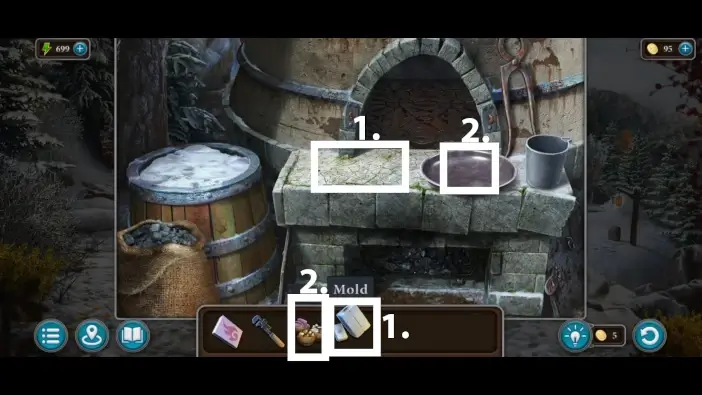
- Place the mold on the table.
- Place the materials on the plate.
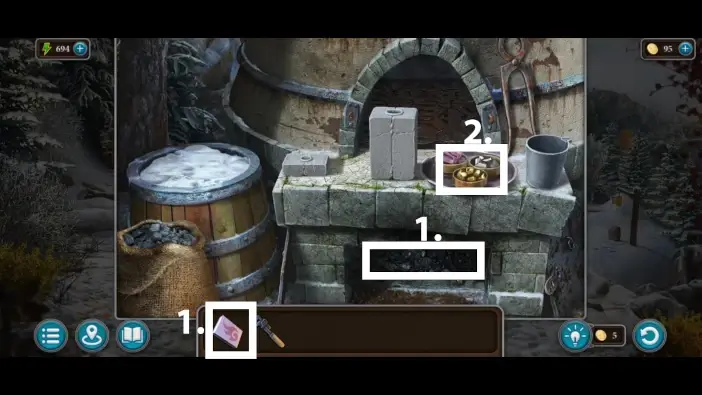
- Use matches to burn the coal.
- Place the materials into the cup on the right.

- Take the pliers. The protagonist will then melt the materials in the furnace, and then he will pour the melted materials into the mold.
- Break the mold.
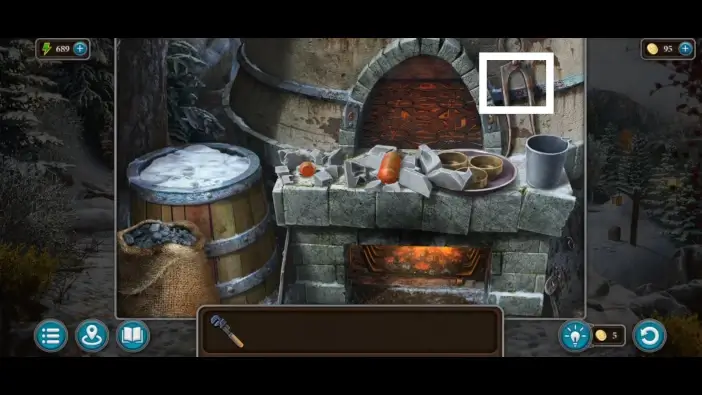
Use pliers to place the hot bottle into the snow in the barrel on the left.
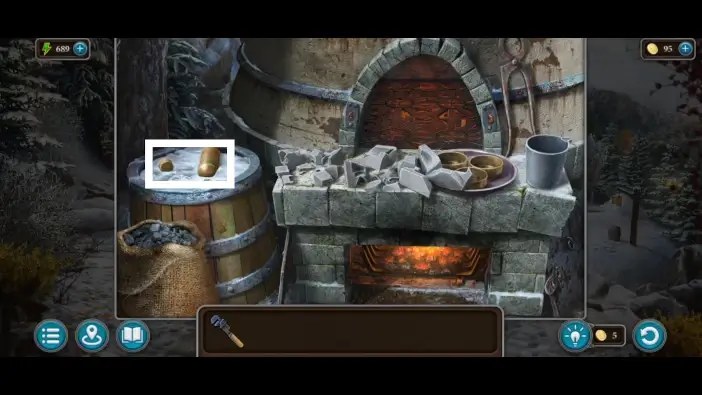
When the bottle is cooled off, take it.
Go to the crystal cave and approach the part of the roof where the giant slug was.
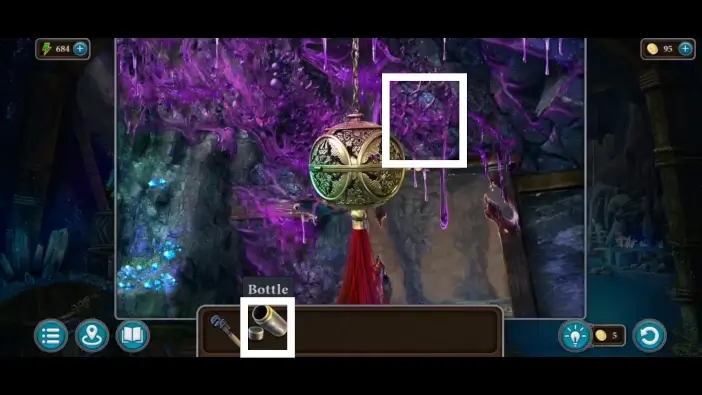
Fill the bottle with the slug’s acid.
Return to the laboratory and approach the machine on the left.
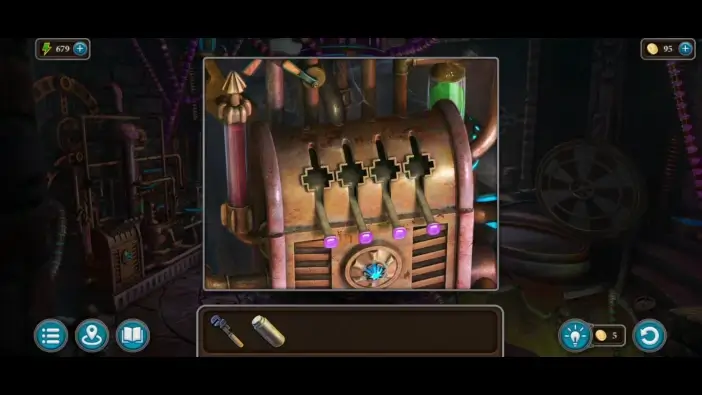
Pull down all the levers.
Approach the top part of the container. Use the wrench to unscrew the cap.
Pour the acid into the container.
Approach the bottom part of the container.
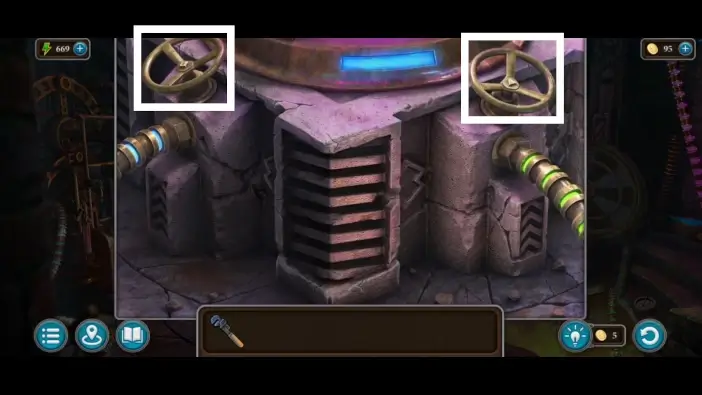
Turn both valves.
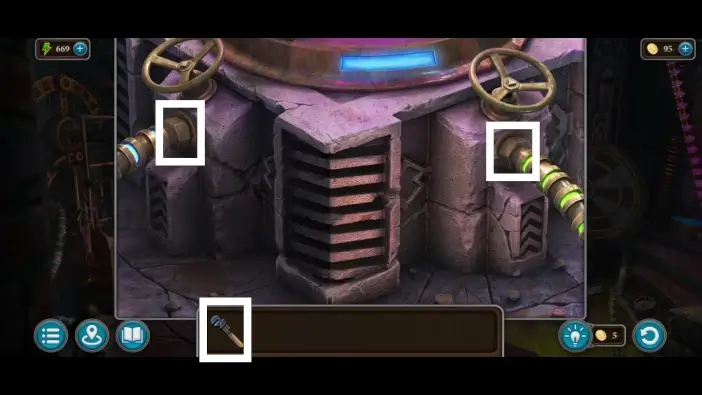
Swap the pipes using the wrench.
Go to the machine on the left and raise all four levers.
This will mark the end of our guide for Chapter 2 of Legendary Tales 4.
Thank you for reading!