Legendary Tales 4 – Chapter 2: Strange Coincidence | Part 1
Intro
Welcome to our walkthrough for Part 1 of Chapter 2 of “Legendary Tales 4” from “FIVE-BN GAMES”. Find out where the maps of magical creatures are coming from and destroy their source.
Walkthrough
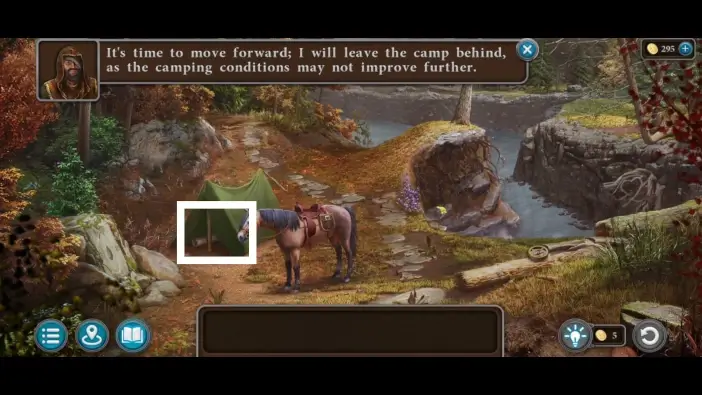
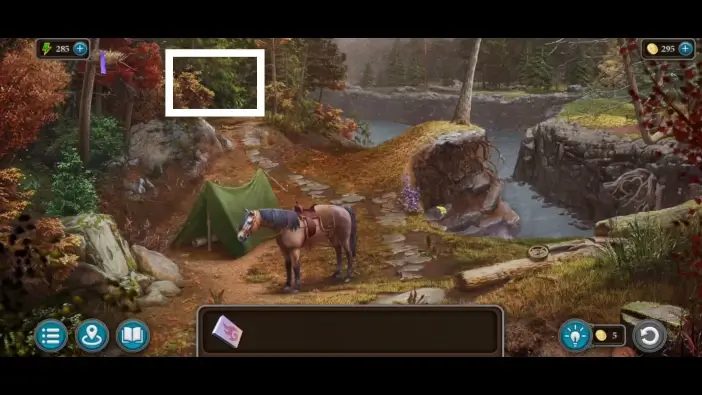
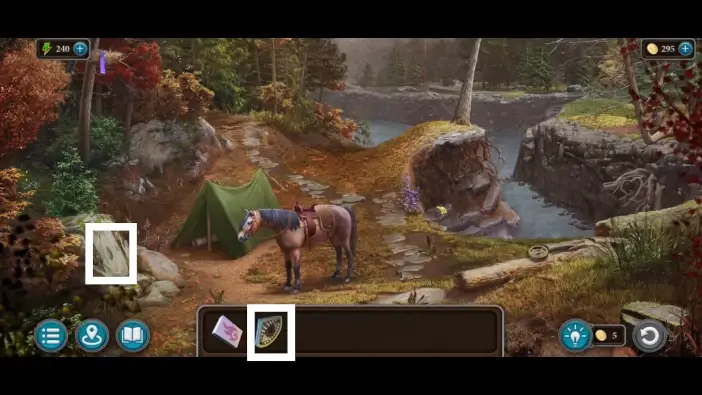
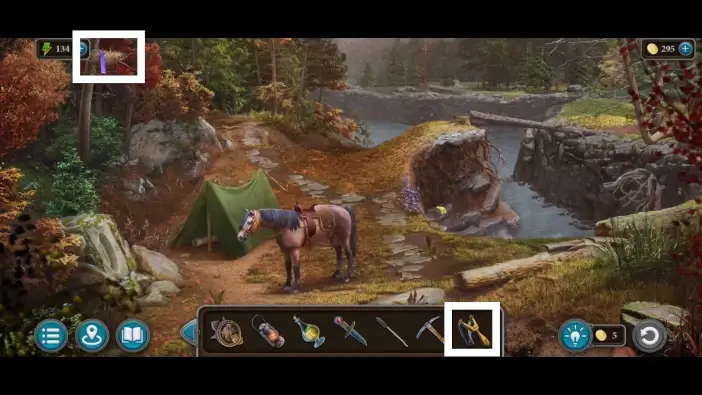
Approach the tent.
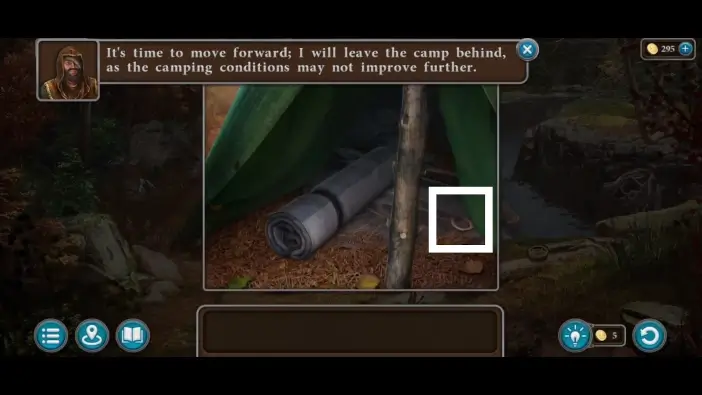
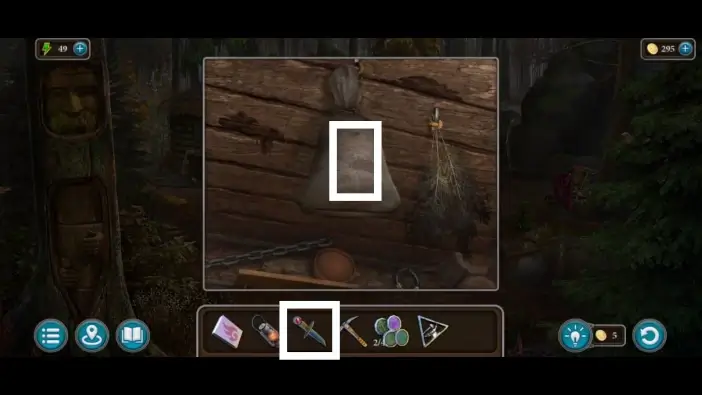
Pick up the horseshoe. You’ll need it to unlock the bag on the saddle.
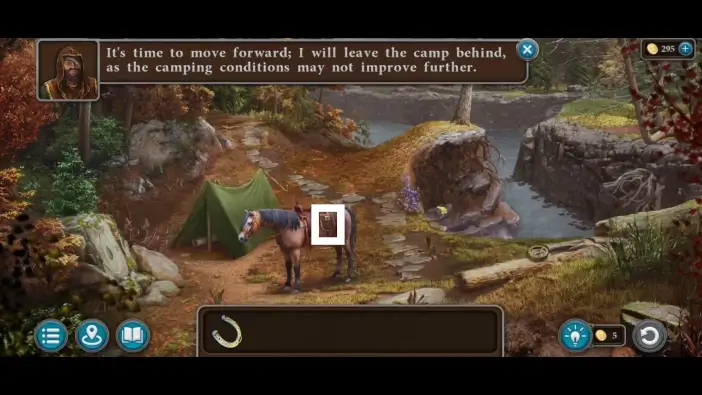
Approach the saddle on the horse.
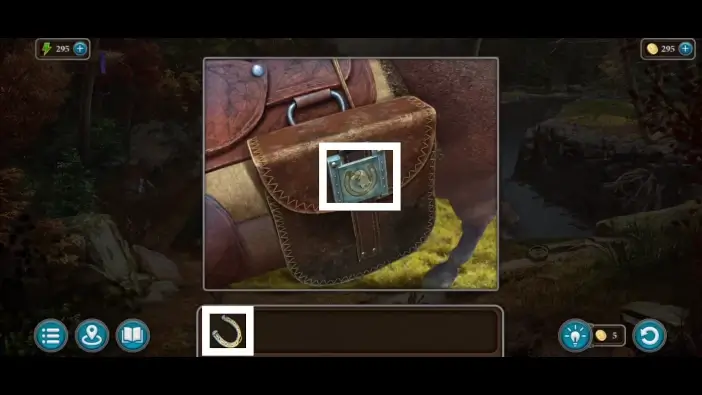
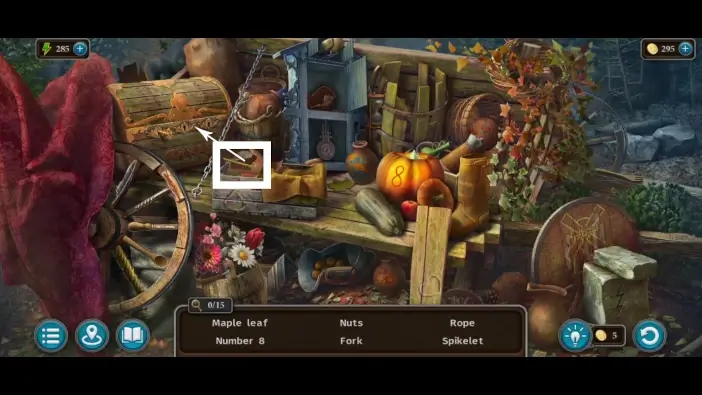
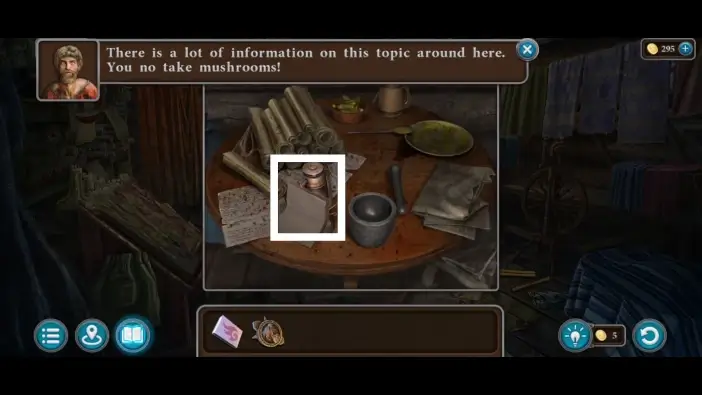
Unlock the bag using the horseshoe from the tent. Take the matches from the bag. You’ll use it multiple times.
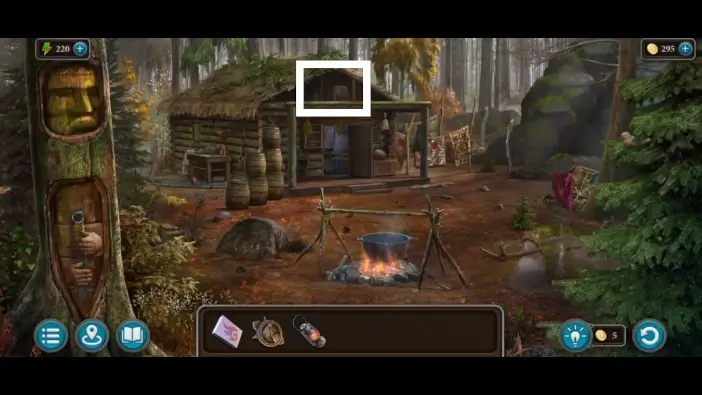
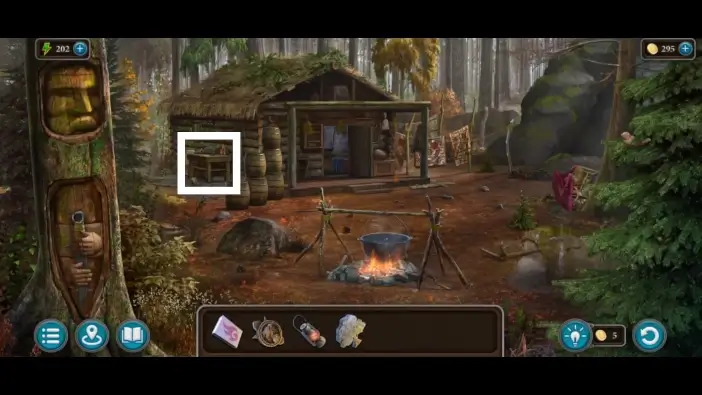
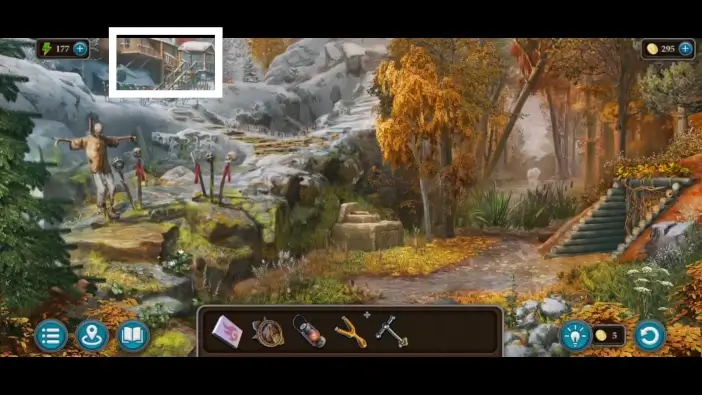
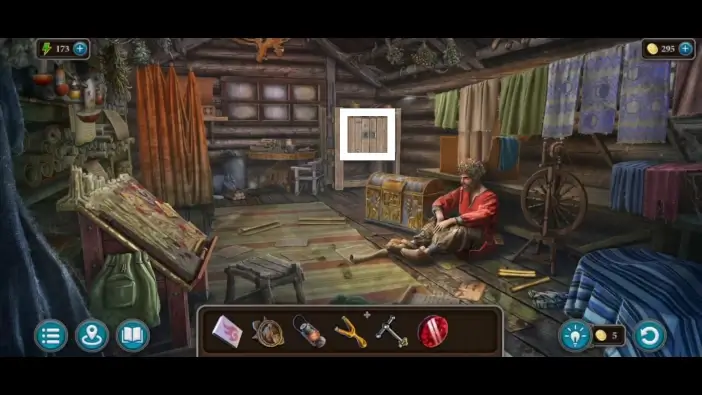
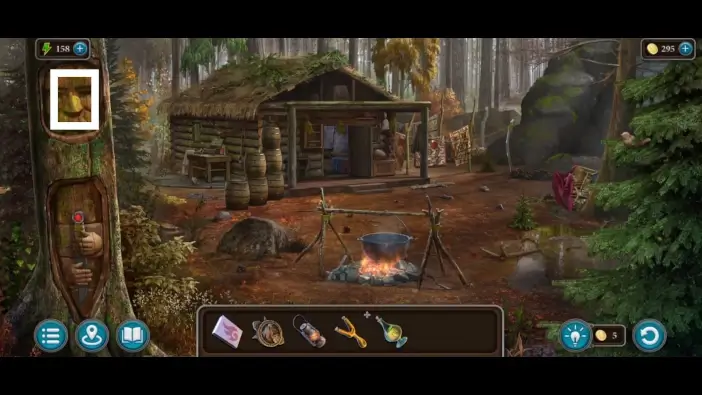
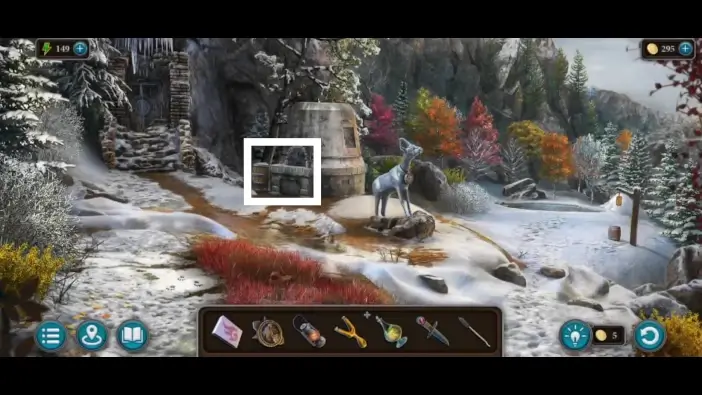
Go north towards the forest cabin.
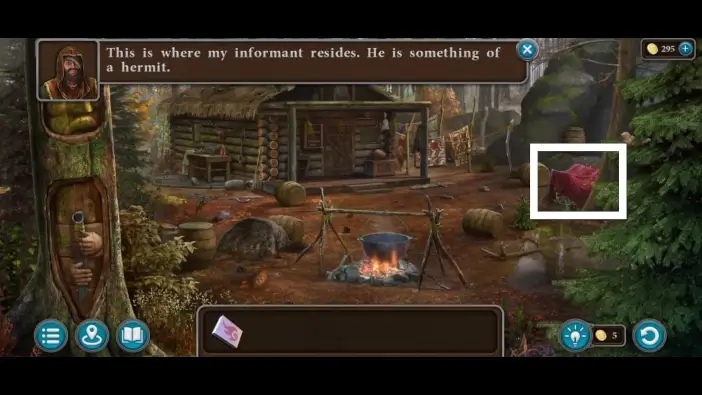
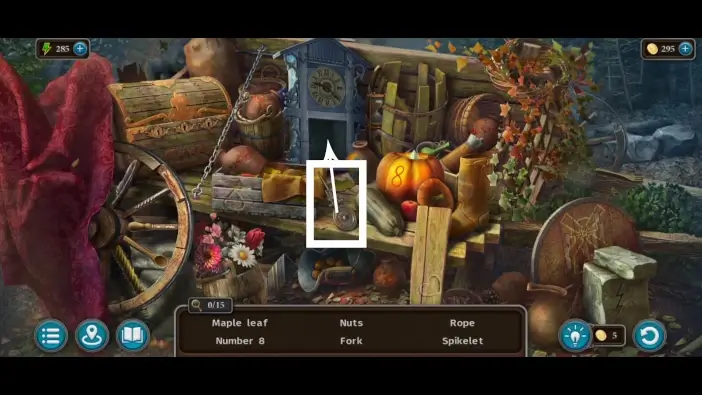
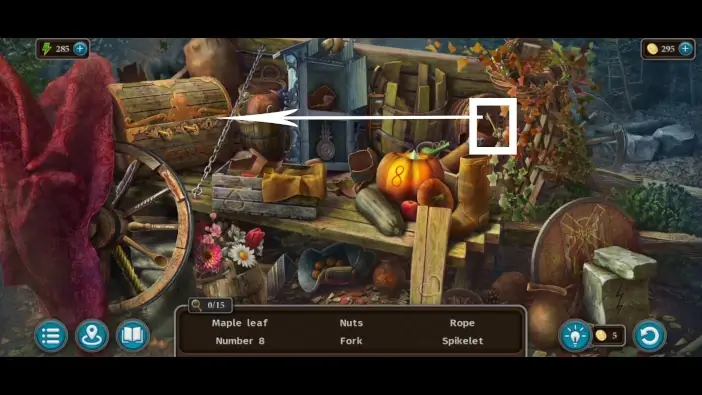
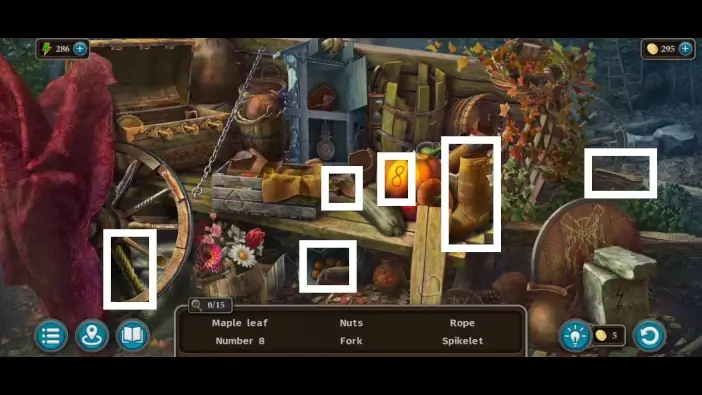
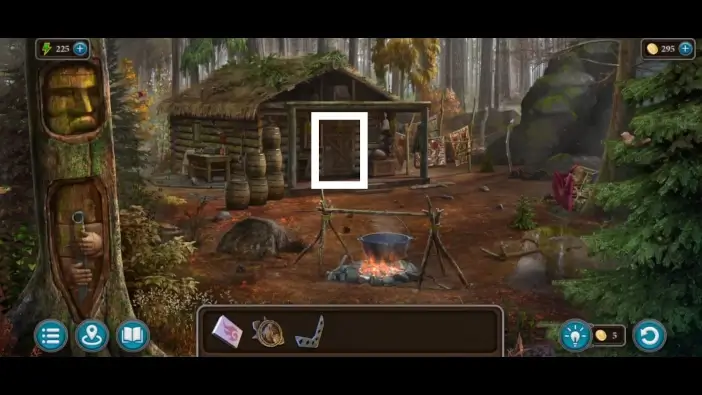
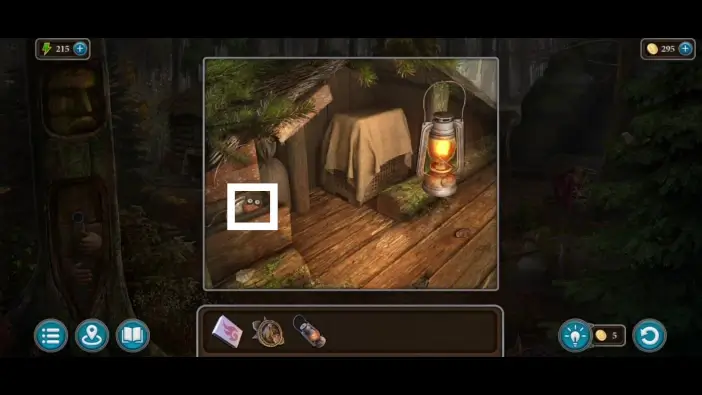
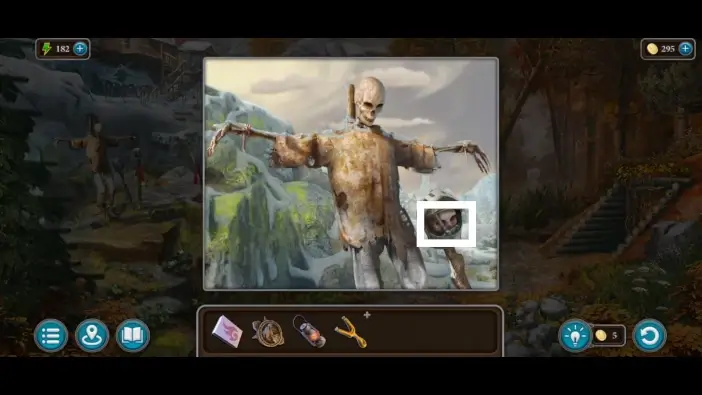
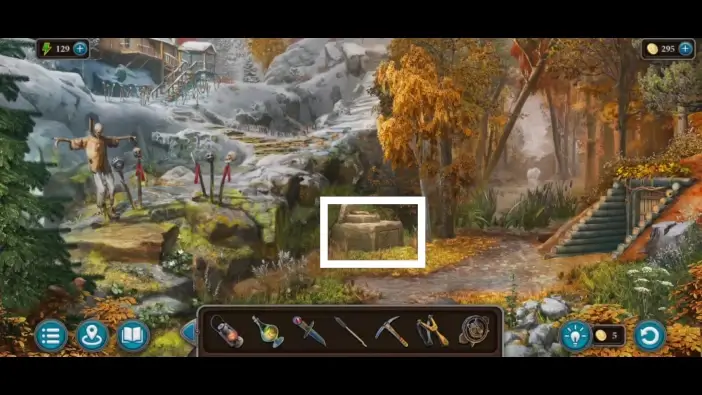
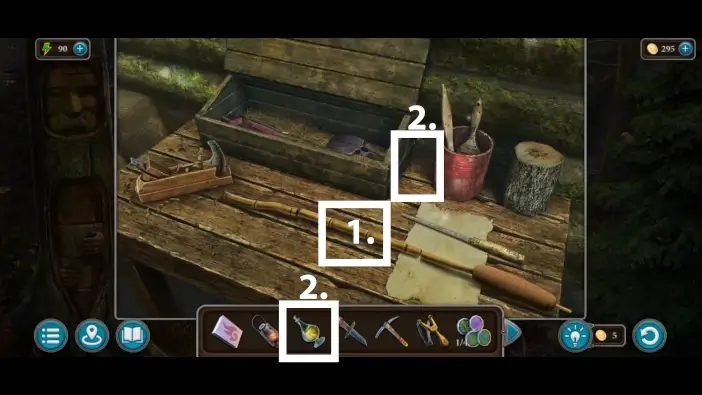
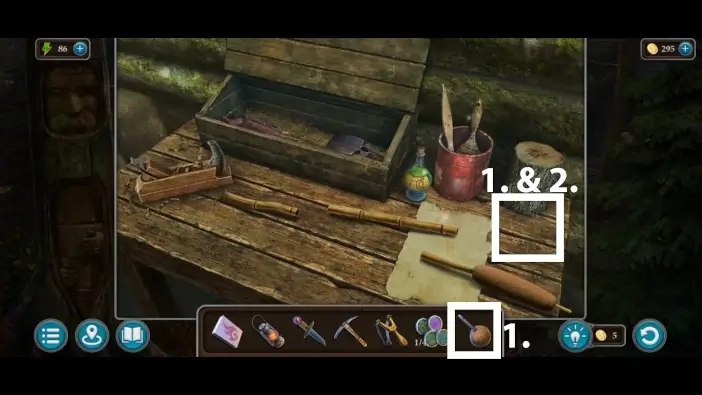
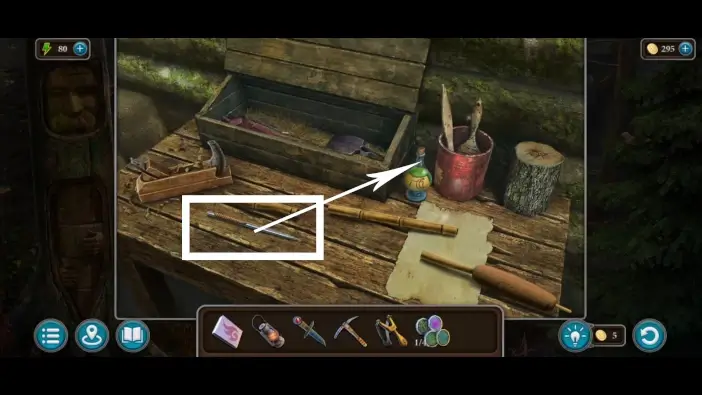
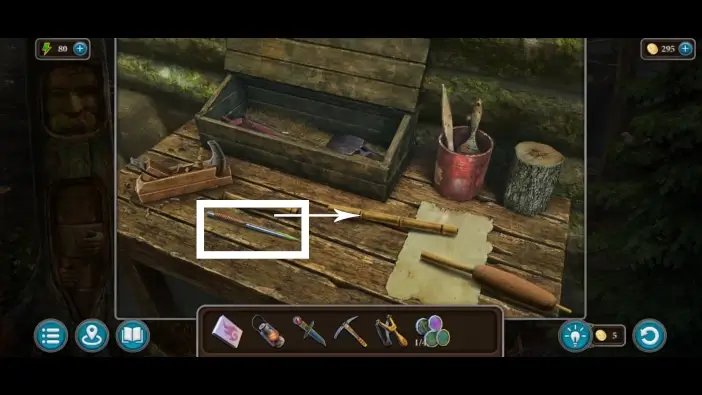
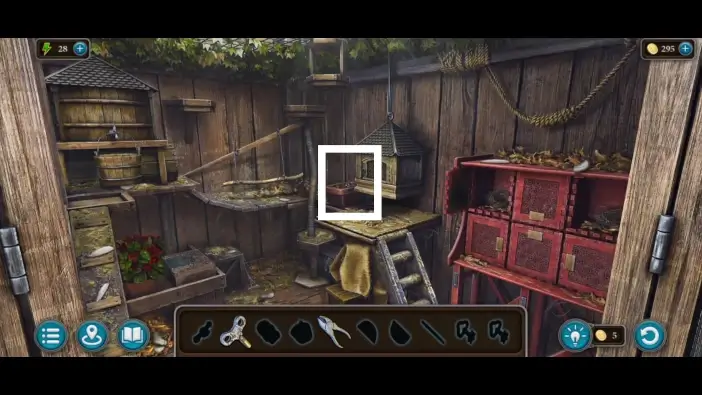
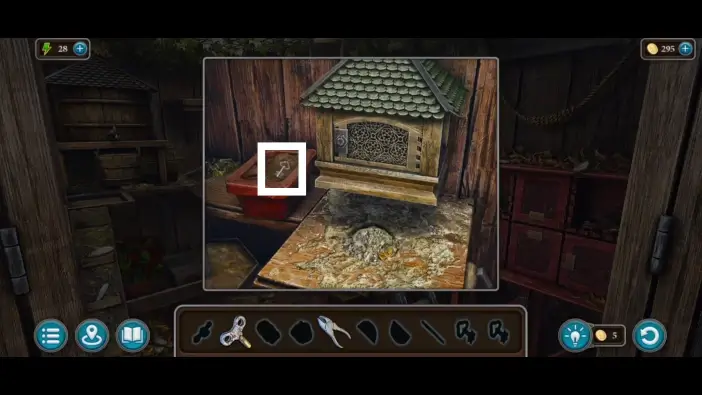
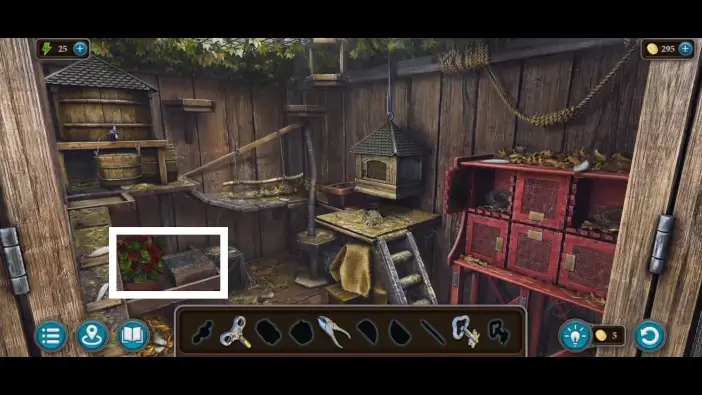
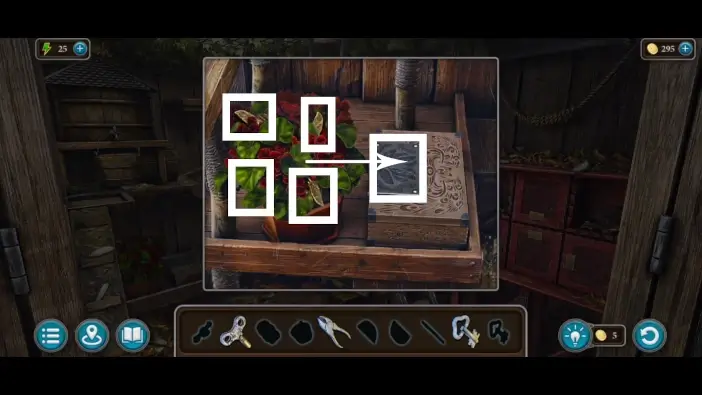
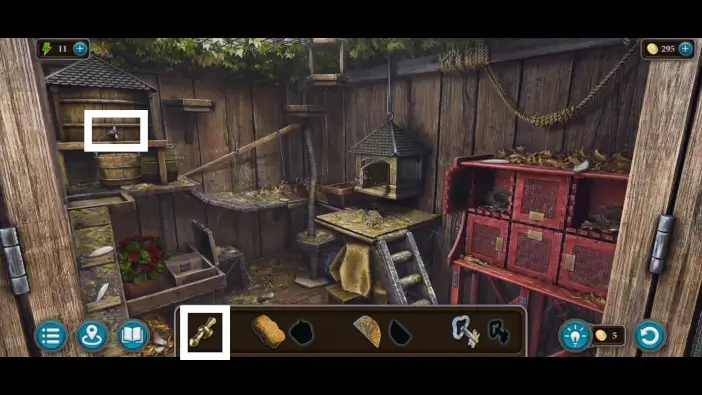
Approach the covered table on the right. This will start a new challenge.

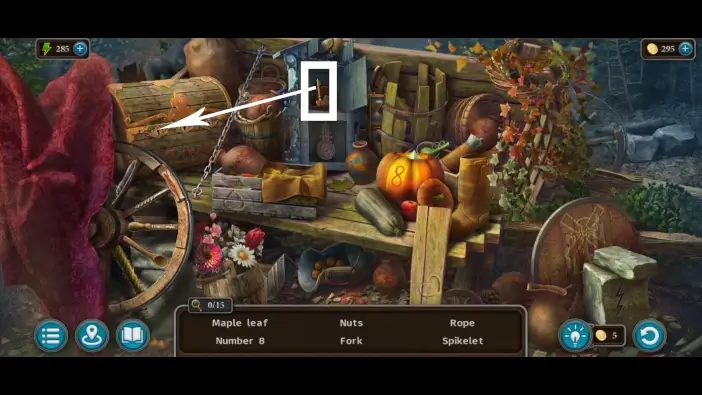
You’ll need to find fifteen objects to complete this challenge. Follow the markers in the pictures in this guide. Whenever you see arrows in the pictures, it means that one item needs to interact with another. You can only tap on an object if it is listed among the six current items. If you can’t tap on an item that is marked on the pictures, return to the object later when it appears on the active list.
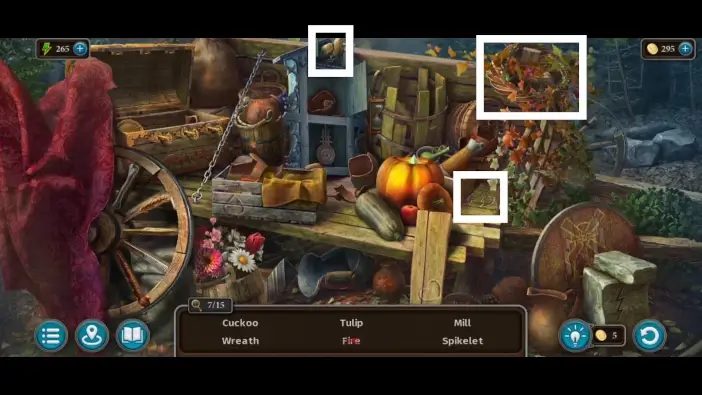
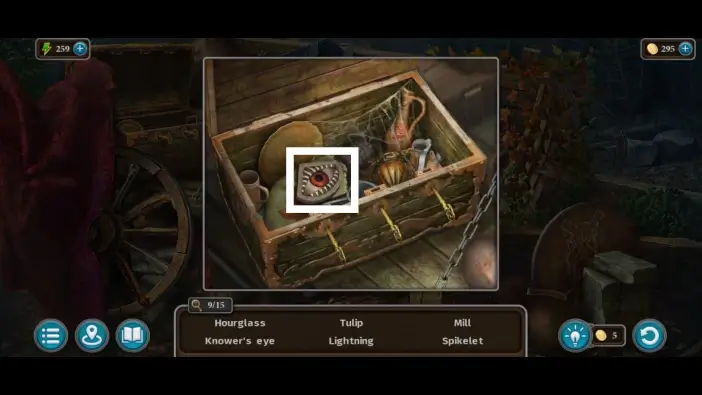
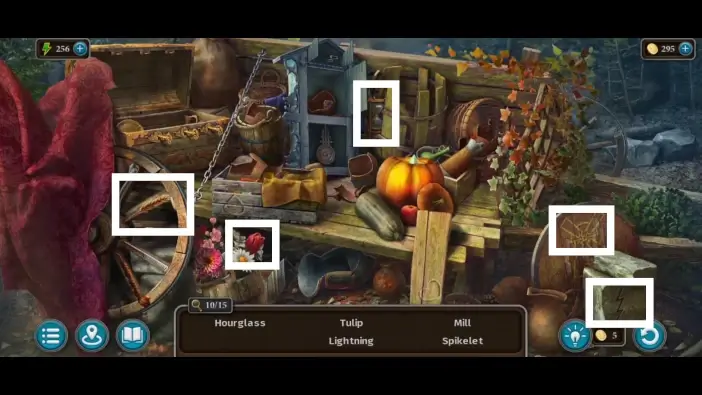
Once you find all fifteen items, you’ll receive the Knower’s Eye item. You’ll need it to unlock a stone door in the tent area.
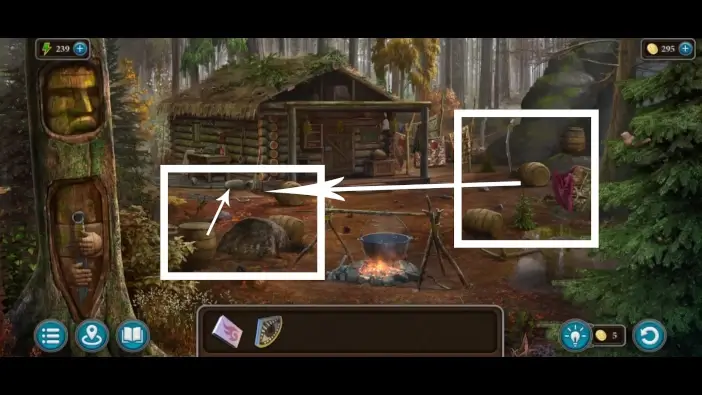
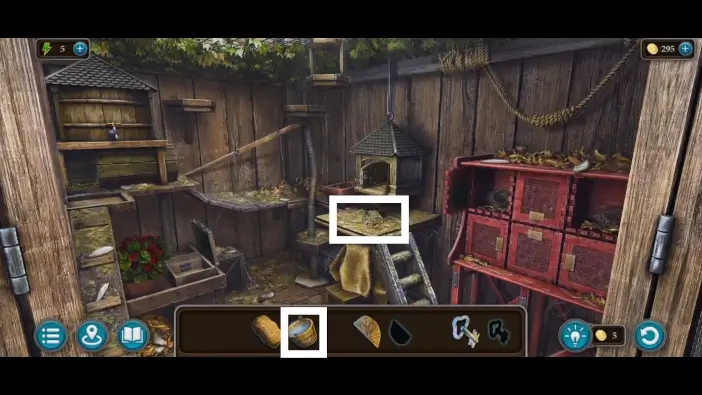
Move the barrels close to the forest cabin to create a pile of barrels. This way, you could access the attic of the forest cabin later.
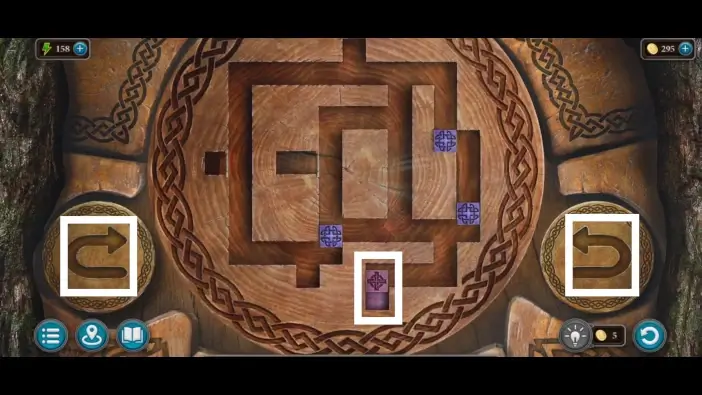
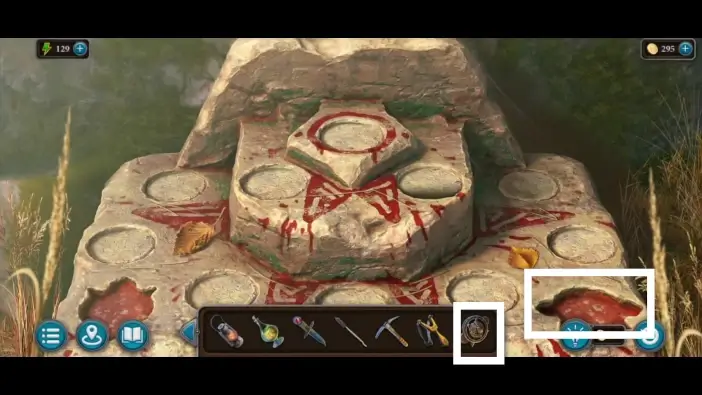
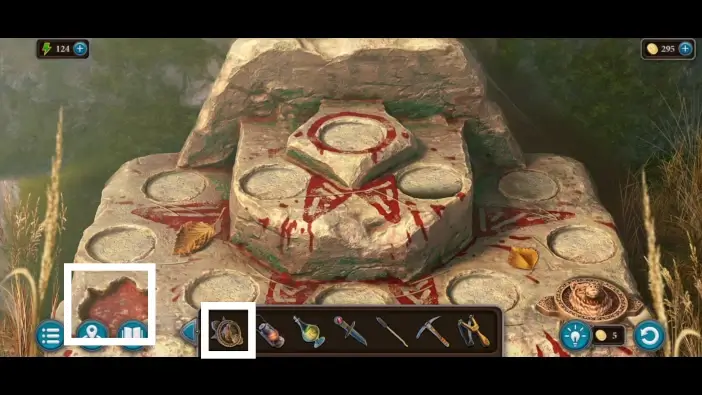
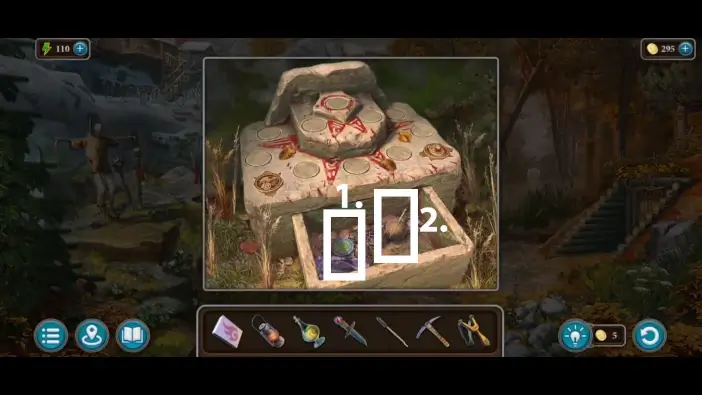
Return to the tent area and approach the stone door on the left. Use the Knower’s Eye to start a new puzzle challenge.
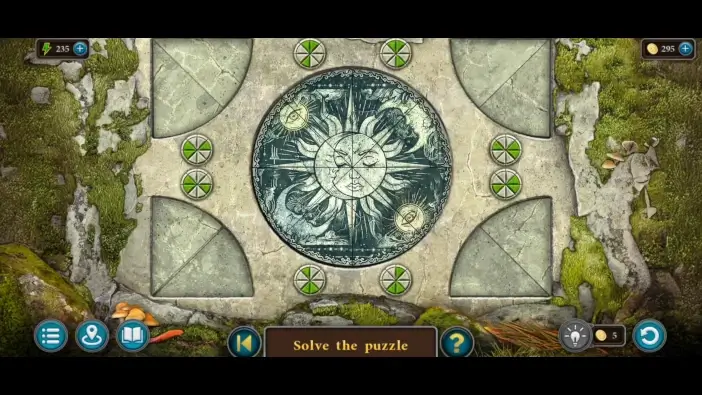
Use the colored buttons to move the parts of the image from the corners to the center. Assemble the image of a moon and the sun like in the picture above to solve this puzzle challenge. Afterwards, take the amulet and the stencil. You’ll need a stencil for the forest cabin door and an amulet for the ritual stone later.
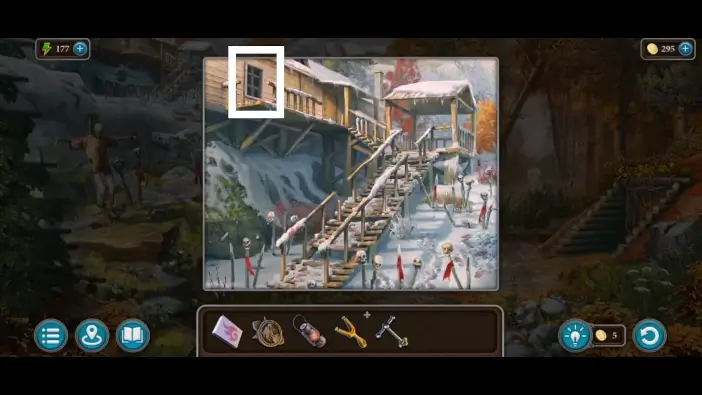
Go back to the forest cabin and approach the door.
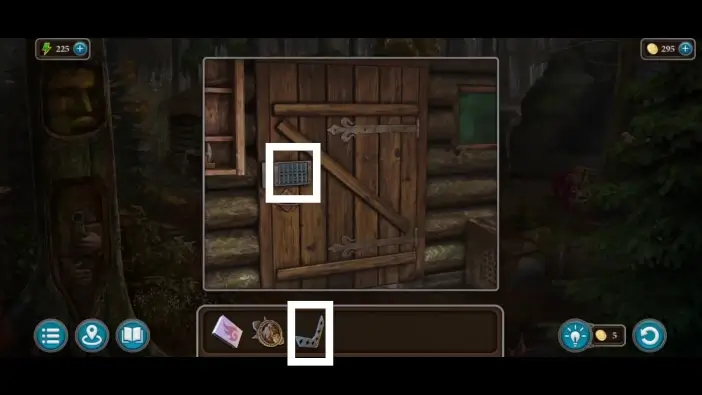
Approach the door’s lock and place the stencil on the lock. The new puzzle challenge will start, but you will miss a clue for it.
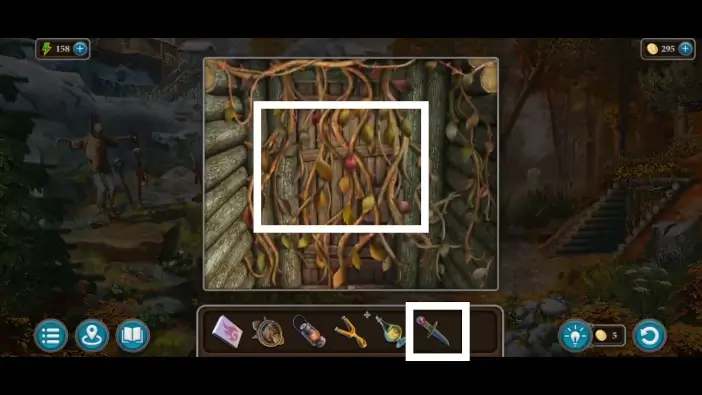
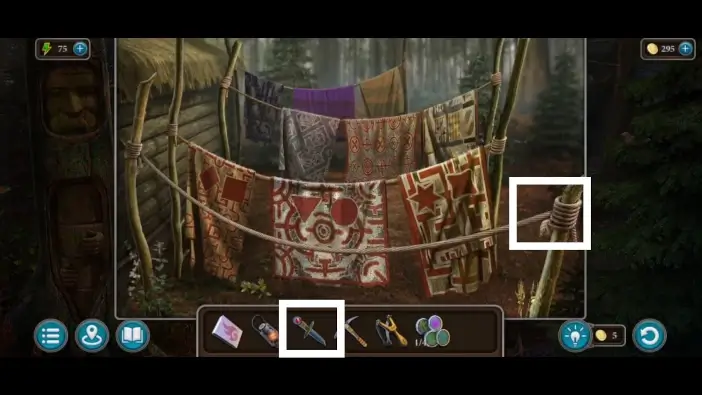
Approach the carpets on the right.
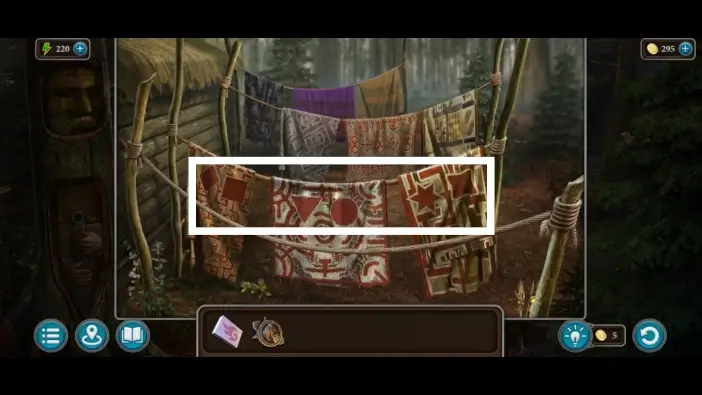
Remember the patterns on the carpets. This is a clue for the forest cabin’s lock.
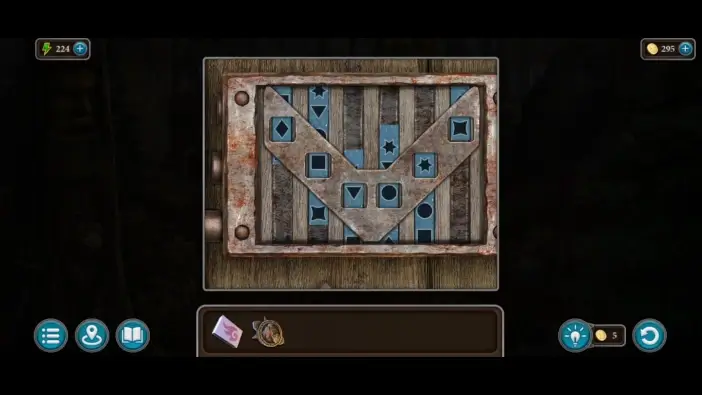
Return to the main entrance to the forest cabin and approach the lock. Rearrange the symbols to be in the same position as on the carpets. The problem is that when you move one column, the other columns move as well. Once you solve this puzzle, a door to the cabin will be unlocked. Enter the forest cabin.
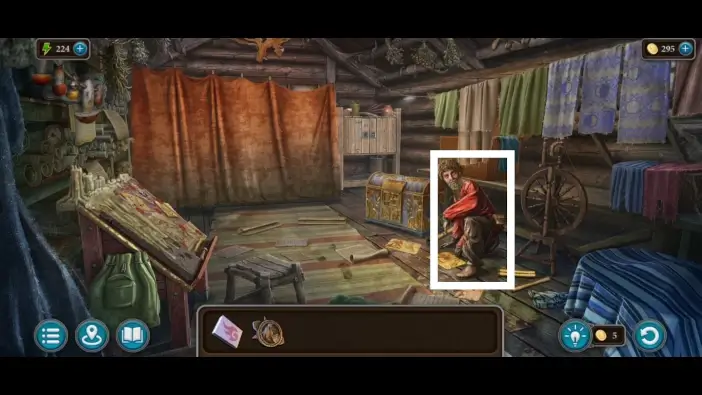
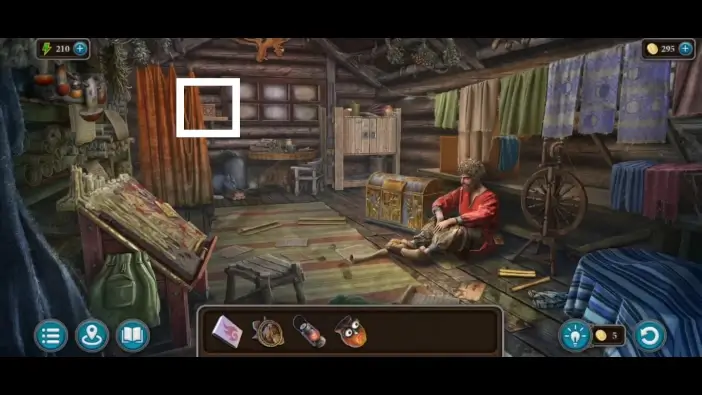
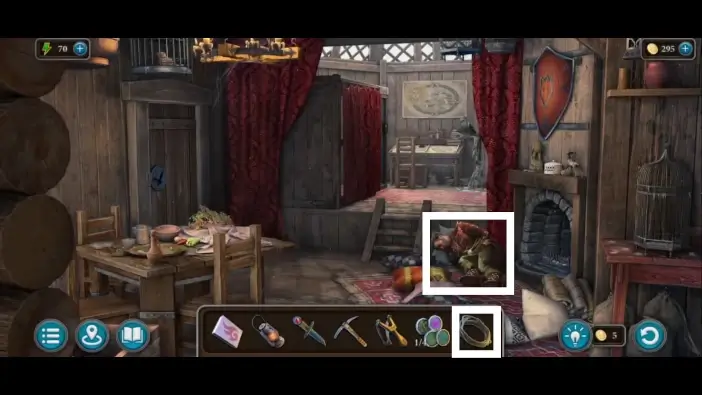
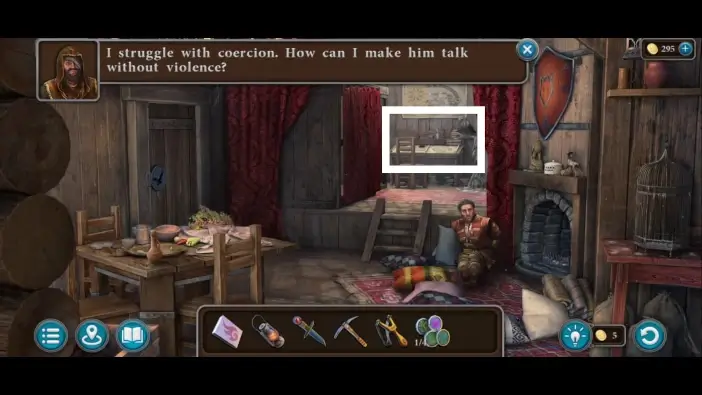
Speak with the hermit and wait for the conversation to end.
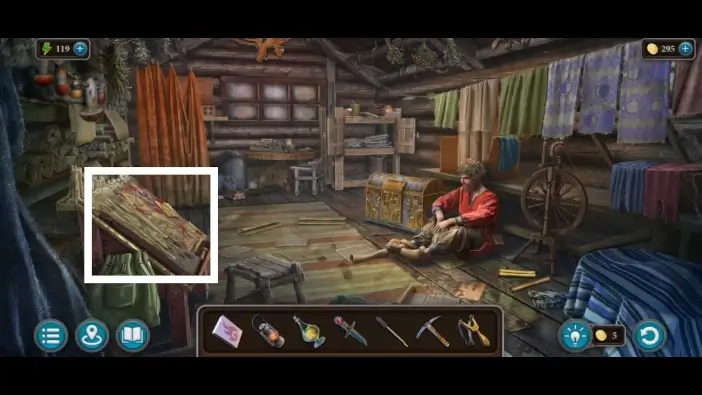
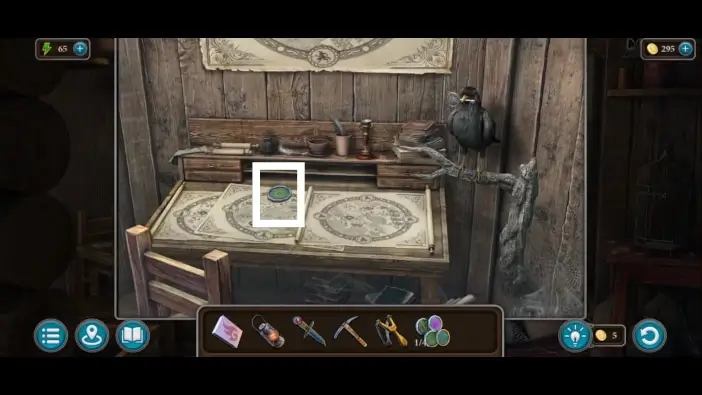
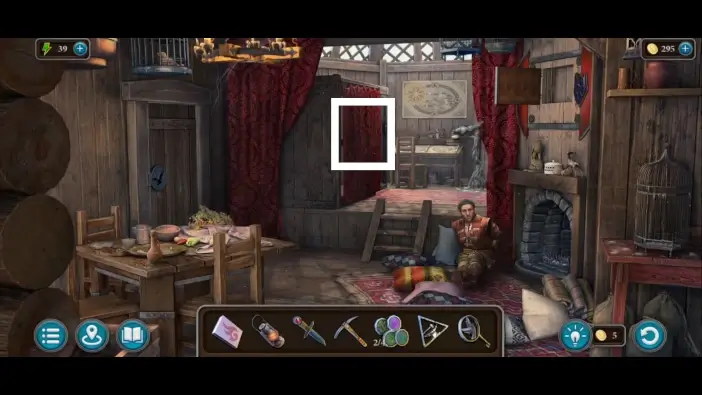
Move the curtain and approach the table.
Read the paper and take the lantern from the table. You’ll need it to illuminate the attic of the forest cabin.
Go to the attic of the forest cabin. You can only access it if you place the barrels.

Hang the lantern on the corner to illuminate the attic.
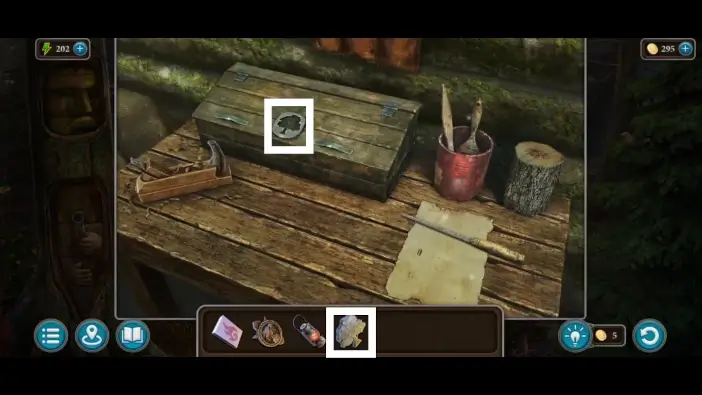
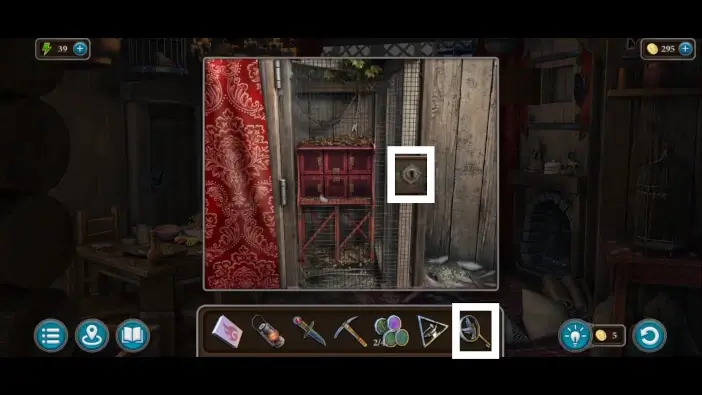
Open the wooden chest on the left and take the owl.
Enter the forest cabin and approach the shelf.
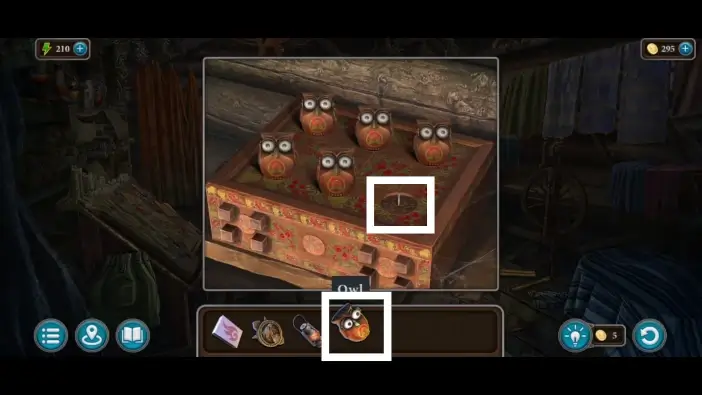
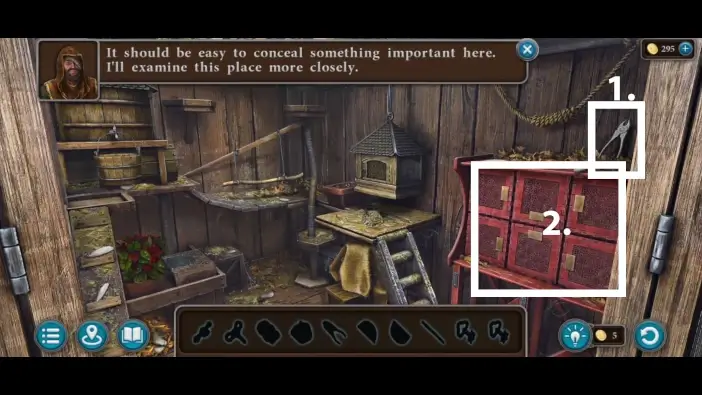
Place the owl in its place on a box. This will start a new puzzle challenge, but first, you need a clue on how to solve it.
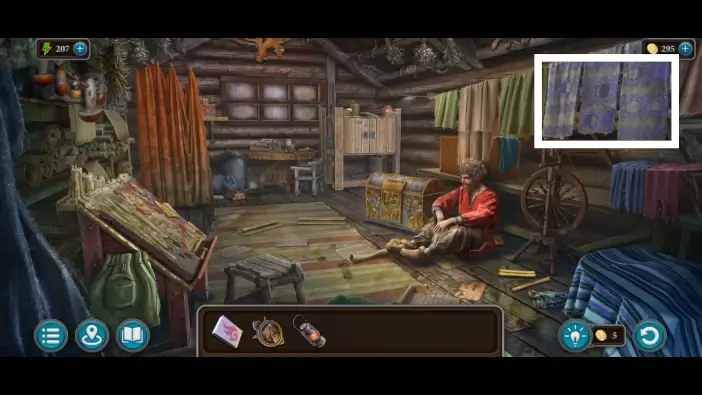
Approach the rags hanging on the right.
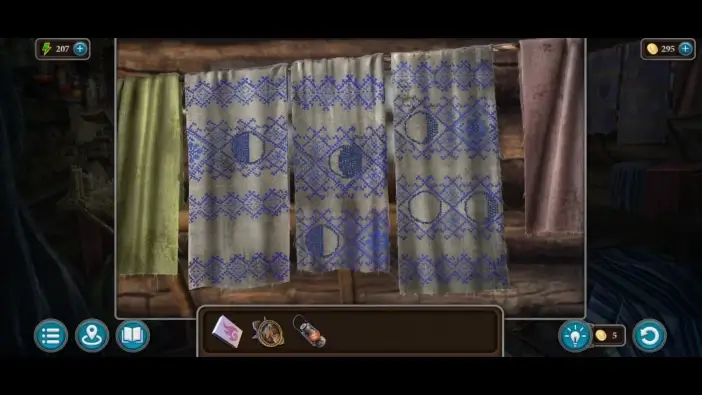
Remember the phases of the Moon and their positions.
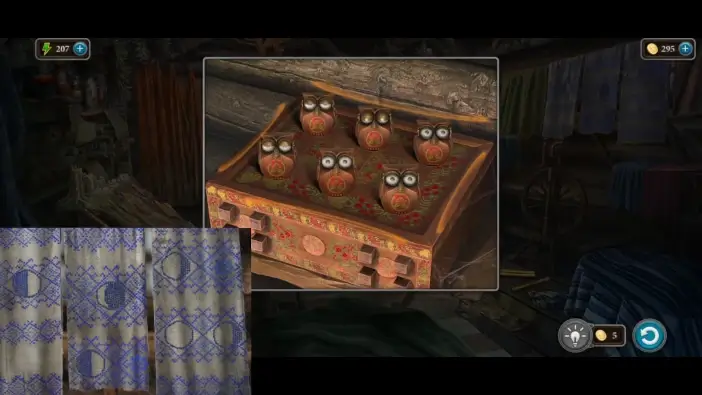
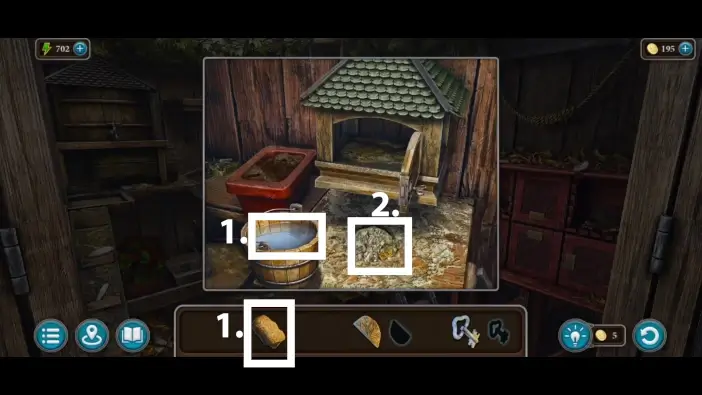
Return to the owls. You need to close or open their eyes, and how much to close/open them depends on the phases of the moon. The positions of the owls represent the positions of the moons. The solution is in the picture above. Once you solve the puzzle challenge and open the box, pick up the tree-shaped item.
Exit the forest cabin and approach the desk on the left.
Open the box using the tree-shaped item. Take the saw and the slingshot from the box. You’ll need a saw to cut down a tree that will serve as a bridge. You’ll use a slingshot multiple times.
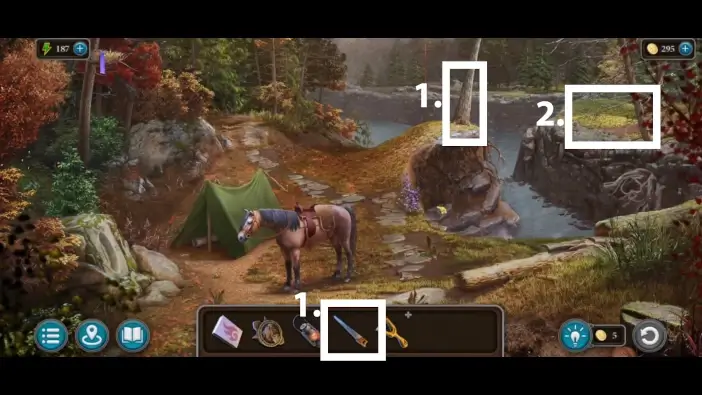
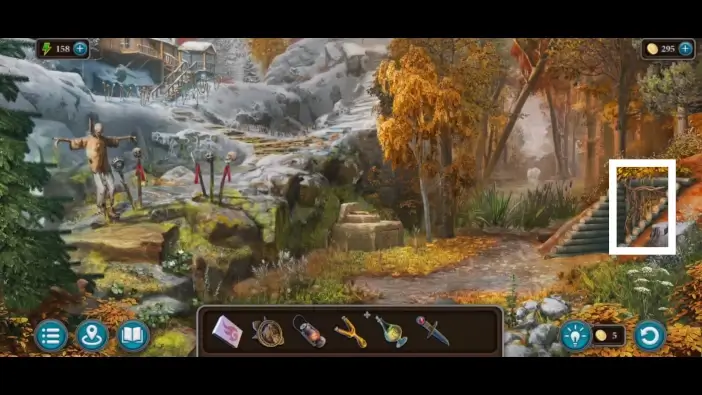
- Go to the tent area and use a saw to cut down the tree. The tree will fall, forming a bridge to the other side.
- Go to the new area on the right.
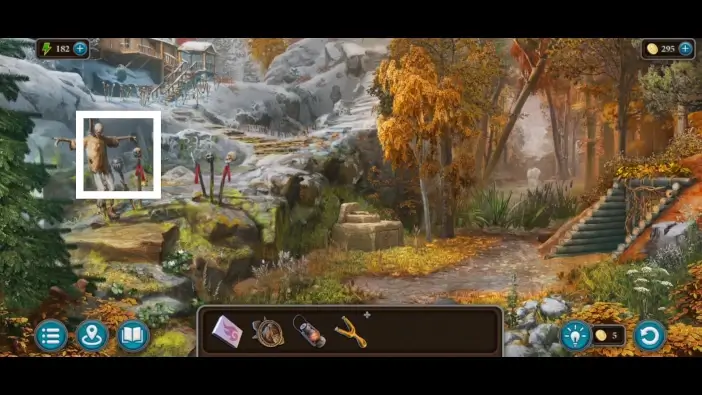
Approach the skeletons on the left.
Open the helmet on the skull on the right and take the handle from the helmet. You’ll use the handle to open a cabinet in the bird keeper’s house.
Approach the bird keeper’s house.
Approach the window.
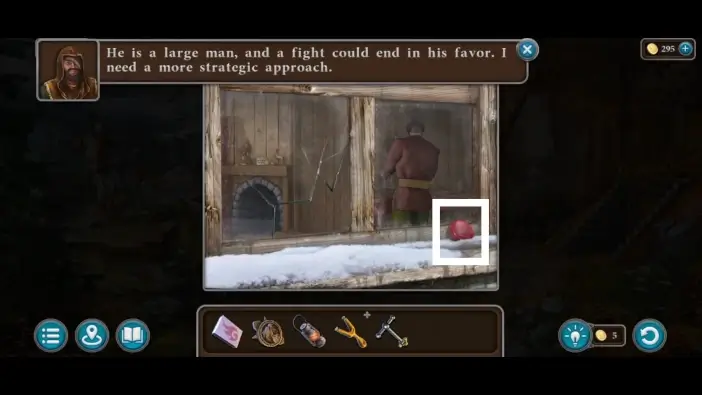
Take the gem near the window. You’ll need it to unlock a totem near the forest cabin.
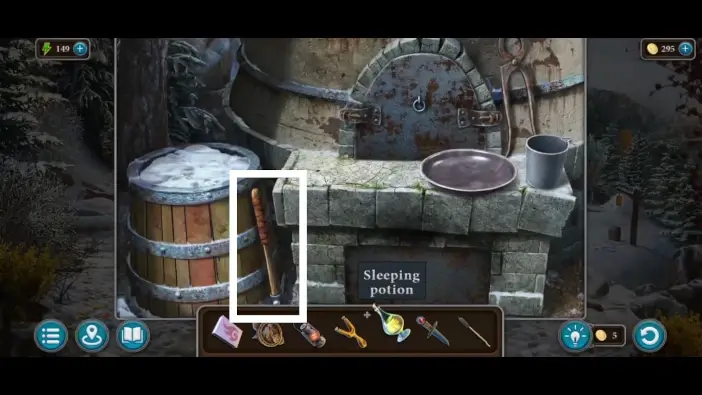
Go inside the forest cabin and approach the wooden cabinet.
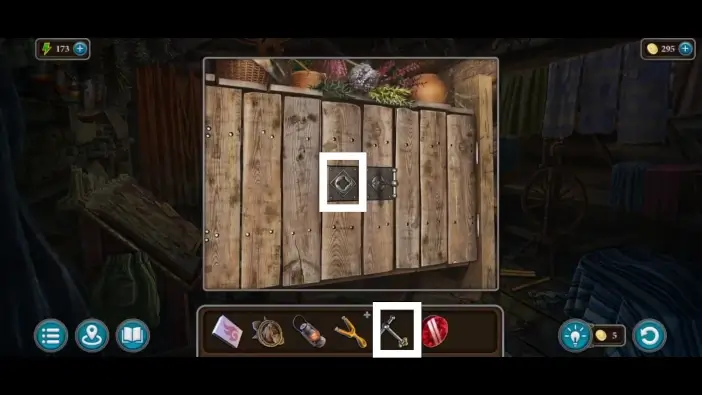
Place the handle you got from the skeleton’s helmet to open the cabinet.
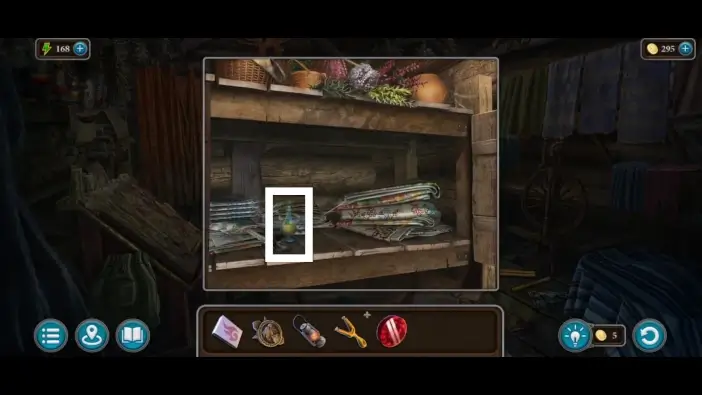
Take the sleeping potion from the cabinet. You’ll need it to put the birder to sleep.
Return to the forest cabin area and place the gem on the sword’s hilt on the totem.
Approach the totem’s face to start a new puzzle challenge.
To solve this puzzle challenge, you’ll need to place the pink rectangle in the grey slot. Use the arrows on the left and the right to rotate the entire field, which will cause the pink rectangle to go to the bottom. The pink rectangle can be blocked by the blue ones.
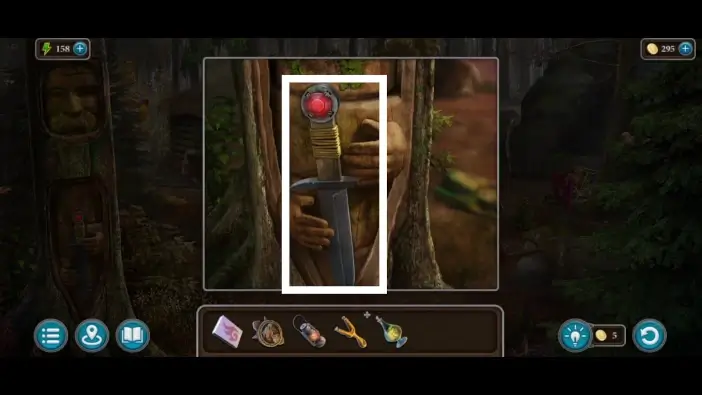
Once you solve this puzzle, take the knife from the totem.
Return to the birder’s house area and approach the door on the right.
Use the knife you got from the totem to cut the branches. For now, you won’t be able to open the door because you are missing items for the lock.
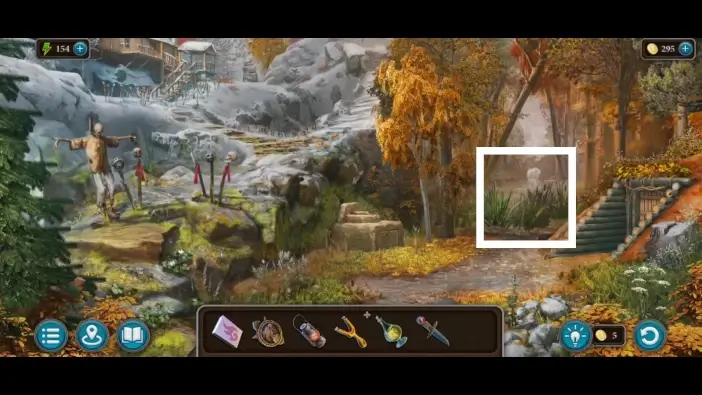
Approach the tall grass.
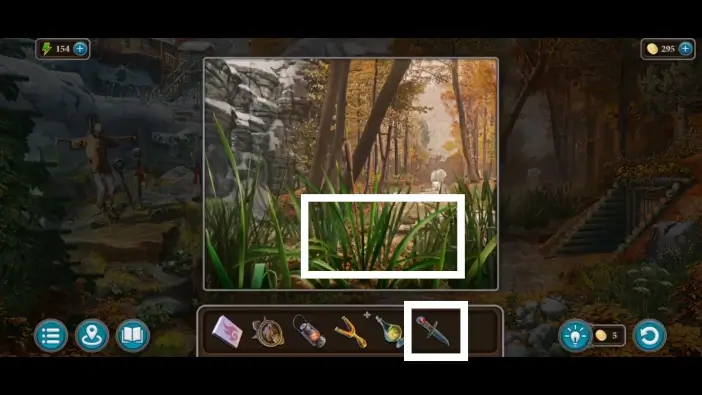
Use a knife to cut the reed. The cattail will be added to your inventory. It will help you to put the birder to sleep later.
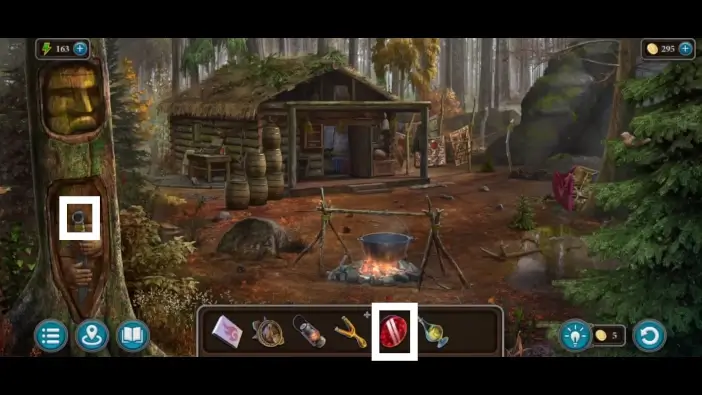
At the birder’s house, go uphill towards the mountains.
Approach the furnace.
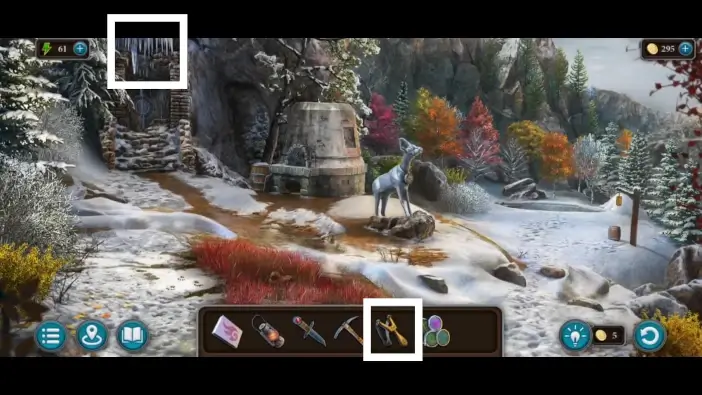
Take the pickaxe. You’ll use it multiple times later.
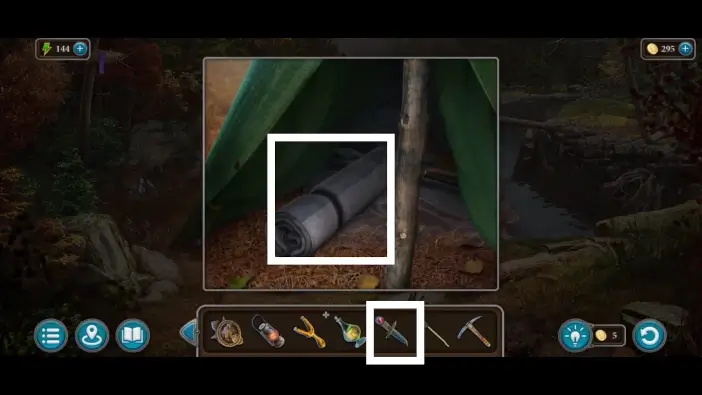
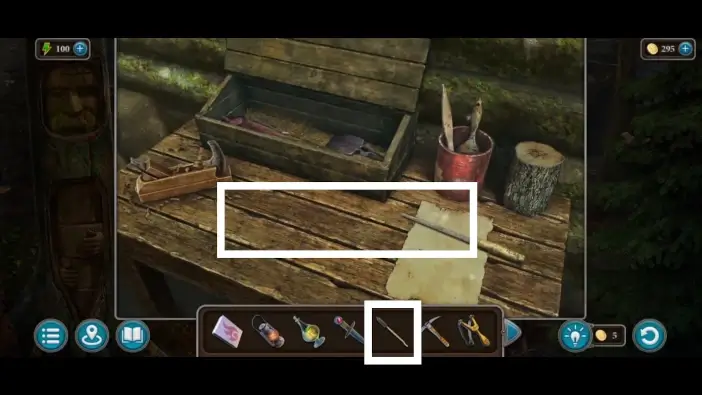
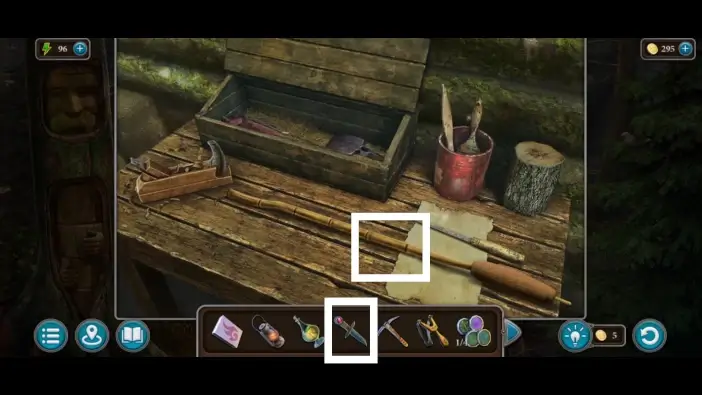
Return to your tent and cut the sleeping mat with a knife. Take the elastic.
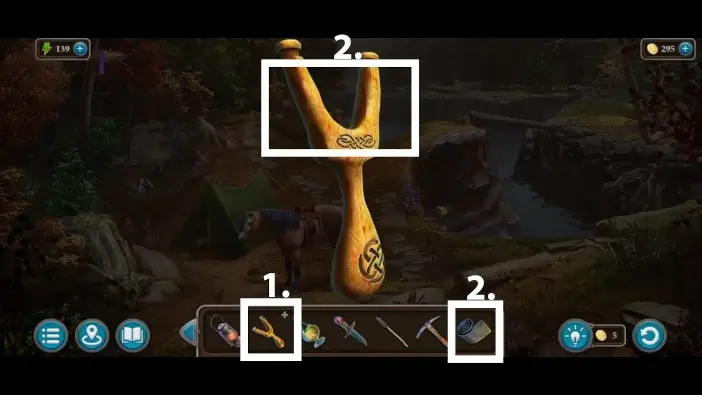
- Tap on the sling in your inventory to examine it.
- Place an elastic on it to create a slingshot item.
Use a slingshot to shoot at the nest. You will get the second amulet for the ritual stone.
Go near the birder’s house and approach the ritual stone.
Place the amulet you got from the nest on the right side.
The amulet you found behind the stone door should go to the left slot. The animal figurines will appear.
Go inside the forest cabin and approach the desk on the left.
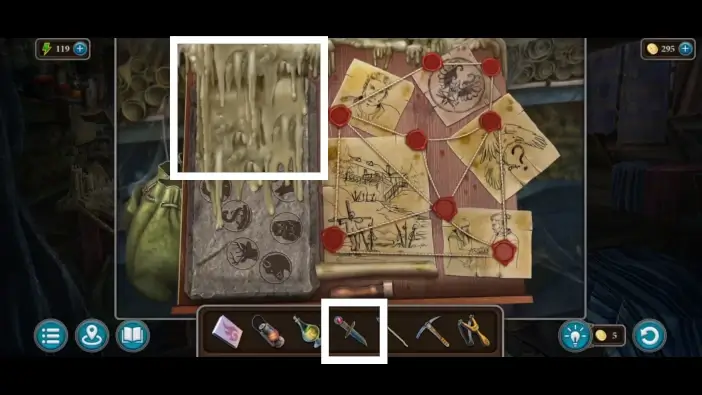
Use a knife to remove the wax, then take the “stone with pattern” item.
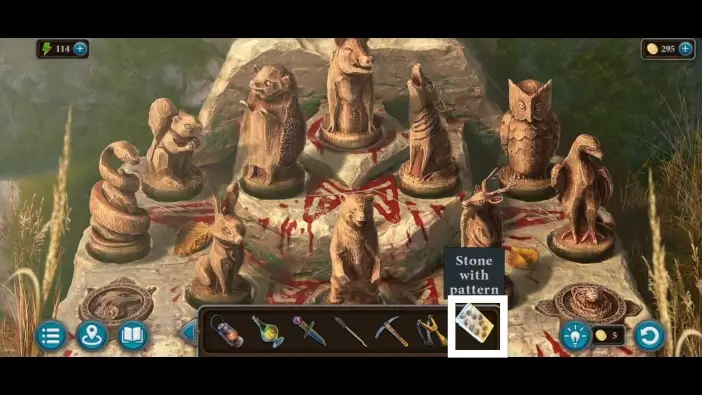
Return to the ritual stone and place the stone you just found.
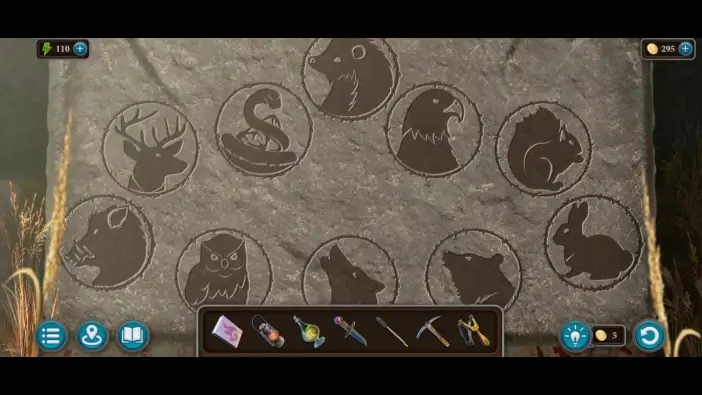
Check the clue on the stone. It will show you how you should rearrange the animal figurines.
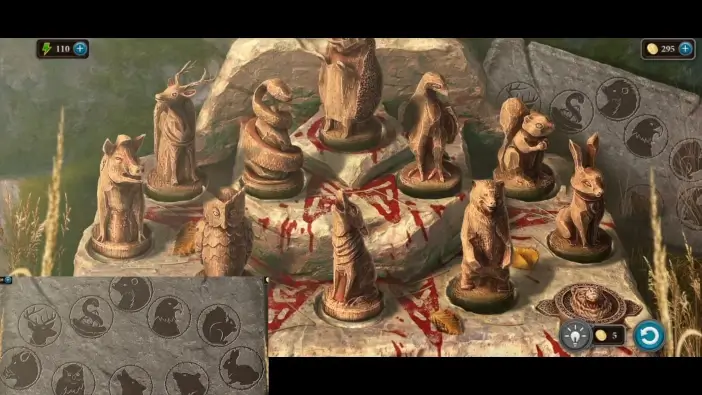
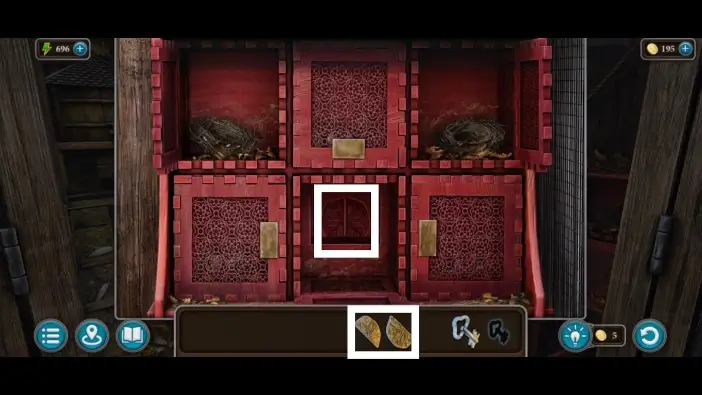
Arrange the figurines as shown in the picture above. You can only swap places between two figurines. Once you complete this puzzle challenge, the drawer will open.
- Take a first chip. You’ll need to collect four chips to unlock an abandoned cave in the mountains.
- Pick up the needle. It will help you make a weapon that will use the sleeping potion.
Go to the forest cabin and approach the working desk on the left side of the cabin. Place the cattail on the desk.
Cut the cattail with your knife.
- Tap on the fragment of cattail to clean it inside.
- Place the sleeping potion on the desk.
- Place the needle on the desk.
- Tap on the needle.
Dip the needle into the sleeping potion.
Put the needle into the cattail’s fragment. The “soporific dart” will be added to your inventory.

Return to the birder’s house and approach the window. Use a dart to put the birder to sleep.
Go to the right side of the forest cabin where the carpets are. Use a knife to cut and take the rope.
Go inside the birder’s house and tie the birder with the rope. The cutscene will begin.
Approach the working desk on the far side of the room.
Take the second chip.
Go to the mountain area and use the slingshot to shoot at the frozen bird-shaped item. This item will be added to your inventory.
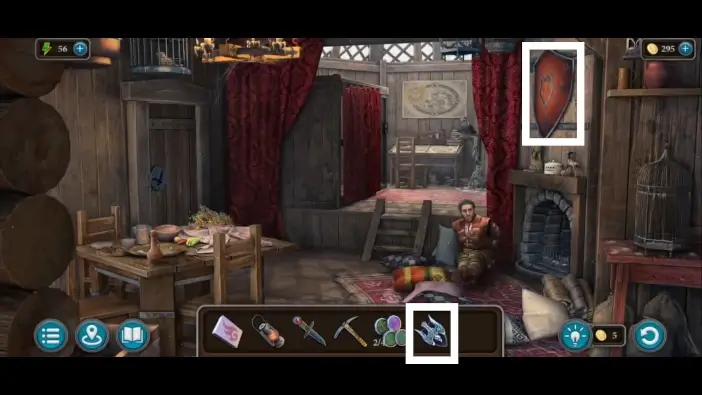
Return to the birder’s house and place the bird on the shield on the wall. This will start a new puzzle challenge.
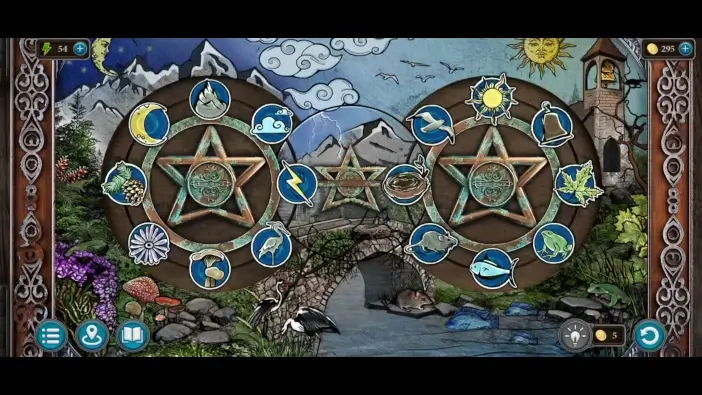
In the middle, you can swap two items between the circles. To place an item ready to be swapped, you can rotate the circle. The images in the circle should be the same as in the background image near the circle. You’ll also need to rotate the circle so that the small images are next to the same thing in the background image. For example, the picture of the nest on the right circle should be right next to the nest in the background image. The solution is in the picture above.
Once you complete this puzzle challenge, a hidden compartment will open. Take the figurine. You’ll need it to open a chest in the cave.
Go to the forest cabin and approach the hanging sack.
Cut the sack with your knife to get some grain.

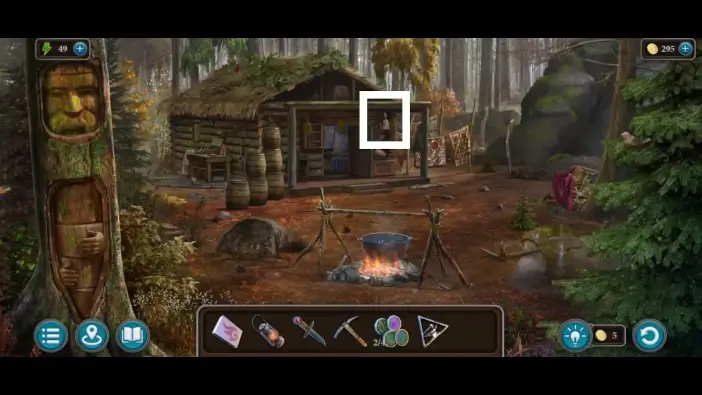
Go to the birder’s house and approach the work desk. Place the grain at the branch near the crow. The crow will get distracted, and it will drop the key. The key will be added to your inventory.
Remove the curtain and approach the door to the aviary.
Use the key you just got to unlock the aviary. Enter the aviary.
- Take pliers.
- Open the cabinets.

Open the bottom-right cabinet and take the key.
Approach the bird house.
Remove some of the potting soil to reveal a key. Take the key.
Approach the flowerpot on the bottom-left.
Find four golden leaves and place them on the chest to unlock the chest. Once you unlock the box, open it and take the sponge.
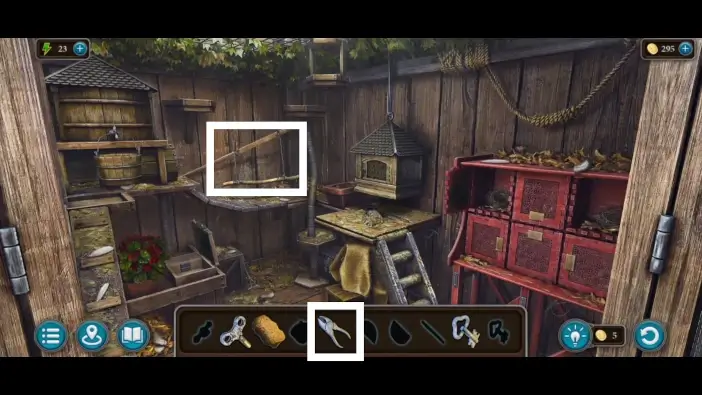
Approach the hanging wood perch. Use pliers to cut the rope and get the wood perch.
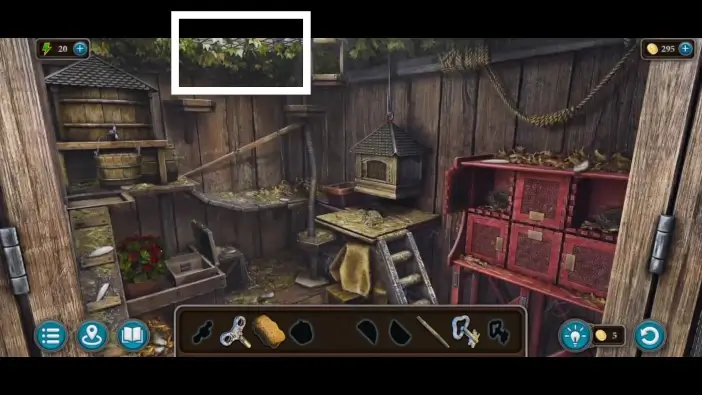
Approach the window on the floor.
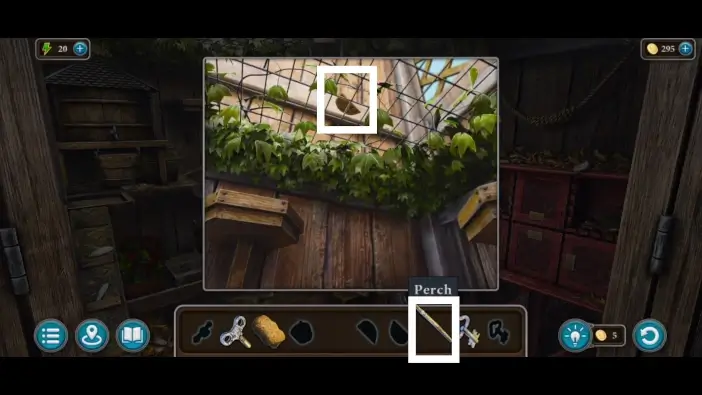
Use wood pearch to get the first half of the detail.
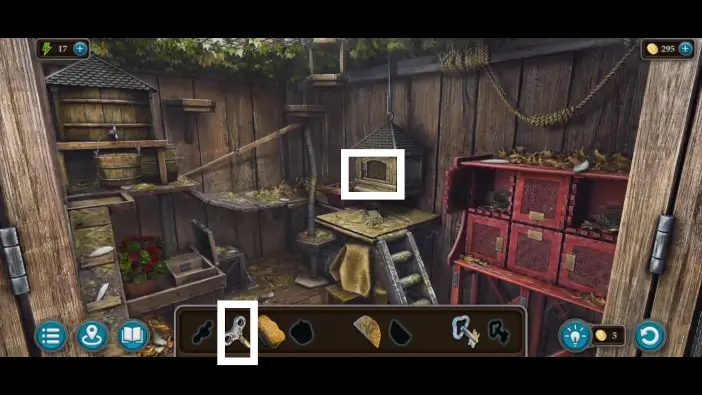
Approach the bird house. Use the key you got from the cabinet to unlock the birdhouse. Take the tap from the birdhouse.
Approach the faucet and attach the tap to it. Use the tap to fill the bucket with water. Take the bucket of water.
Approach the desk near the birdhouse and place the bucket of water on that desk.
- Dip the sponge into the water and clean the table.
- Take the second half of the detail.
Approach the cabinets and open the cabinets in the bottom-center. Place both halves of the detail to unlock a hidden compartment. Take the second key.

Return to the box where you picked up the sponge. Place two keys to unlock a hidden part of the chest. Take the medallion from the second section of the chest. You will use this medallion to unlock a large chest in the forest cabin.
This will mark the end of Part 1 of our guide for Chapter 2 of Legendary Tales 4.
Thank you for reading!