Legendary Tales 4 – Chapter 1: On the Road | Part 2
Intro
Welcome to our walkthrough for Part 2 of Chapter 1 of “Legendary Tales 4” from “FIVE-BN GAMES”. Help Lucia and her brother Ulf find the location of the werewolf village.
Walkthrough
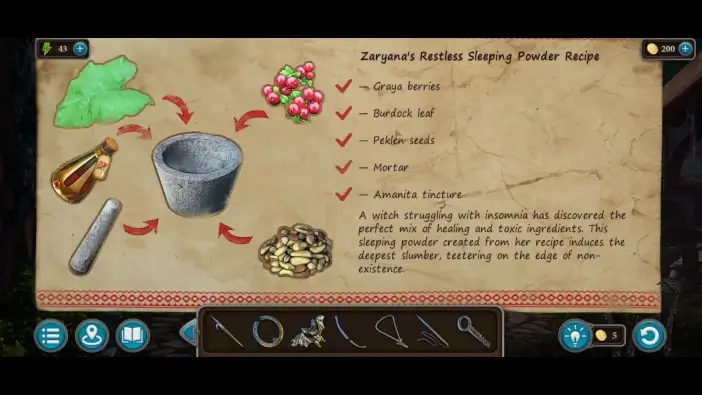
In your inventory, tap on the recipe for the sleeping powder. Tap on an ingredient in your inventory and then tap on the recipe to tick the list items. Repeat that for all items. The items you need in your inventory are: Graya Berries, Burdock Leaf, Peklen Seeds, Mortar, and Amanita Tincture. Once you do this, you will get the sleeping powder in your inventory.
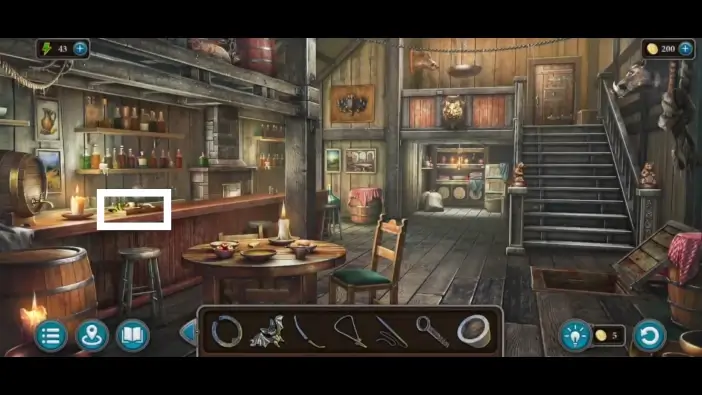
Return to the tavern and approach the witch’s breakfast.
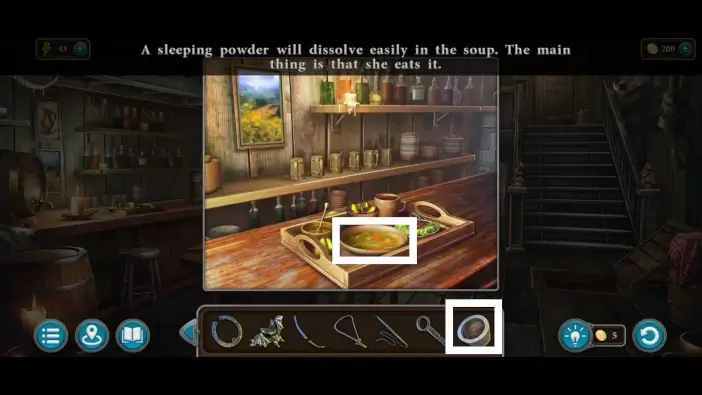
Pour the sleeping powder into the soup. After that, Lucia and Scarlett will have a conversation. After the conversation, you’ll get the lockpick in your inventory.
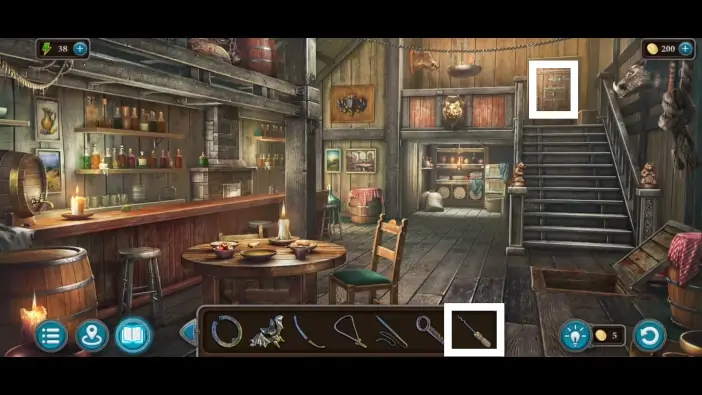
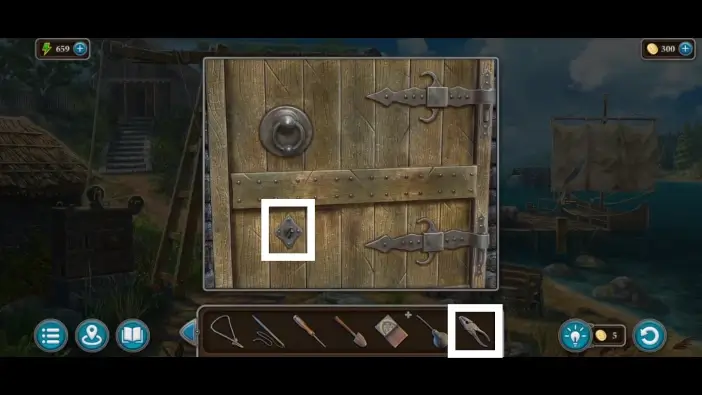
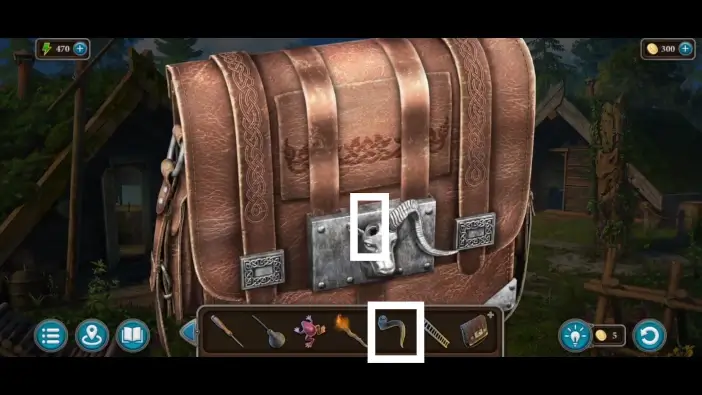
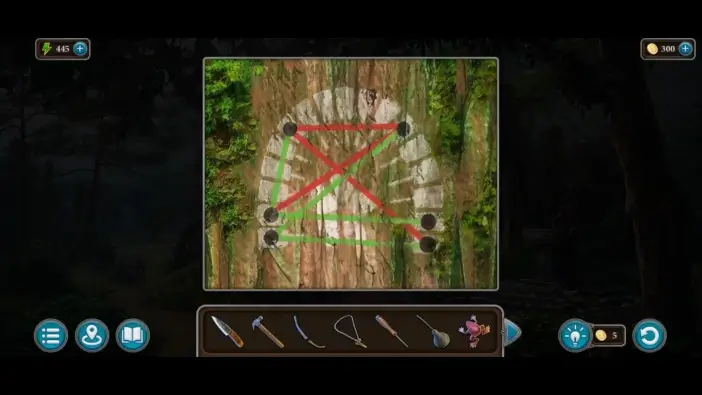
Use a lockpick on the door upstairs. It is a room where the witch is.
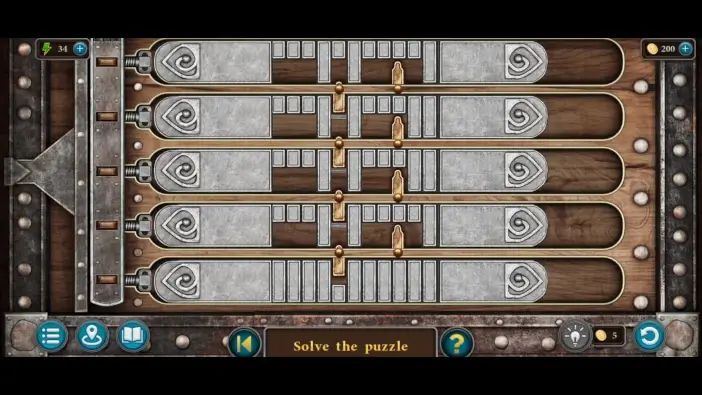
Once you place the lockpick into the door’s lock, a new puzzle challenge will start. Rearrange the locks like in the picture above to unlock the door. Enter the witch’s room.
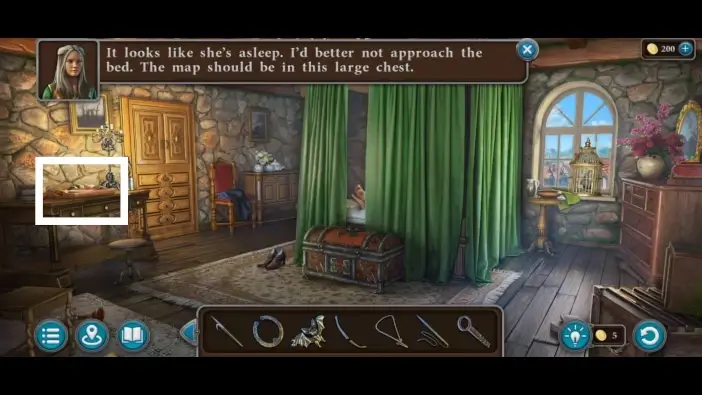
Approach the food on the left table.
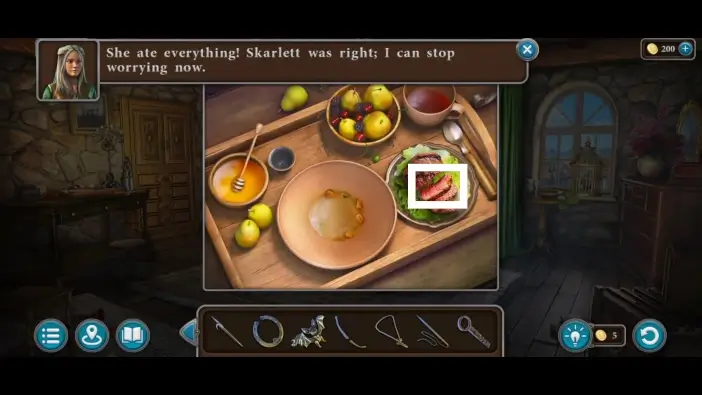
Take the piece of meat from the plate. You’ll use it to distract the crow.
Approach the crack on the floor.
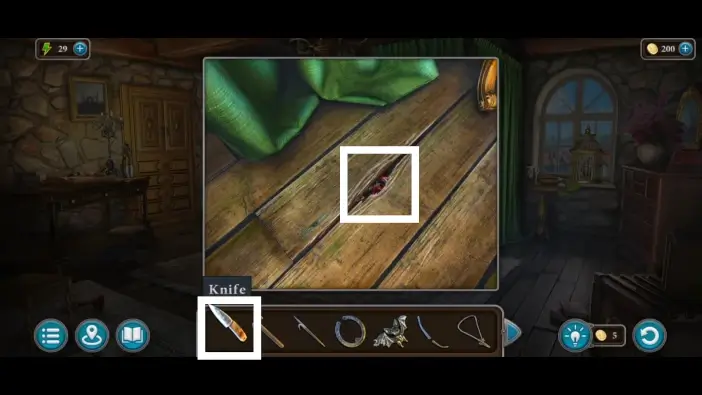
Use a knife to dig out the key from the crack.
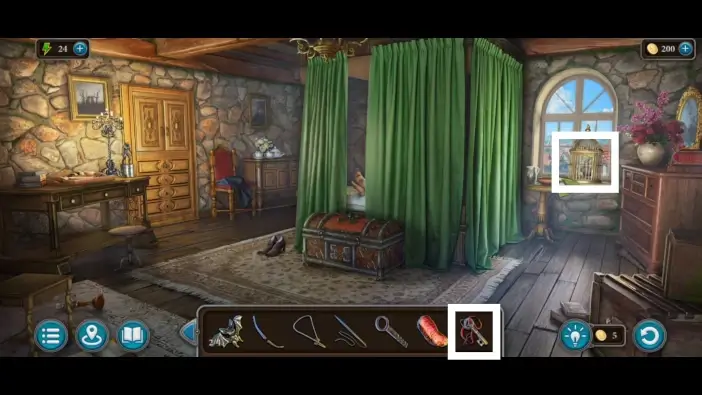
Use the key you just got to unlock the birdcage where the crow is.
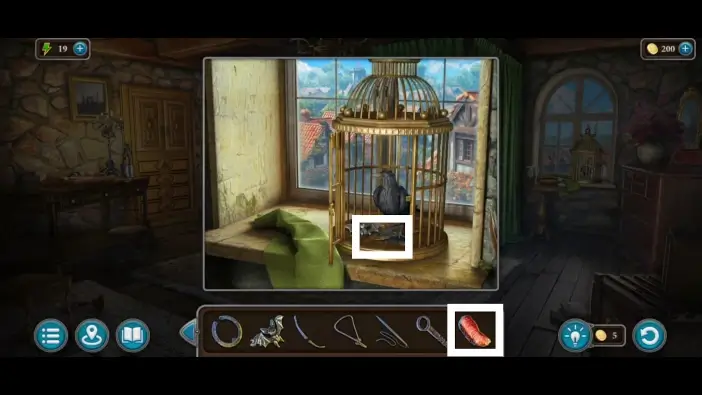
Place the meat inside the birdcage to distract the crow.

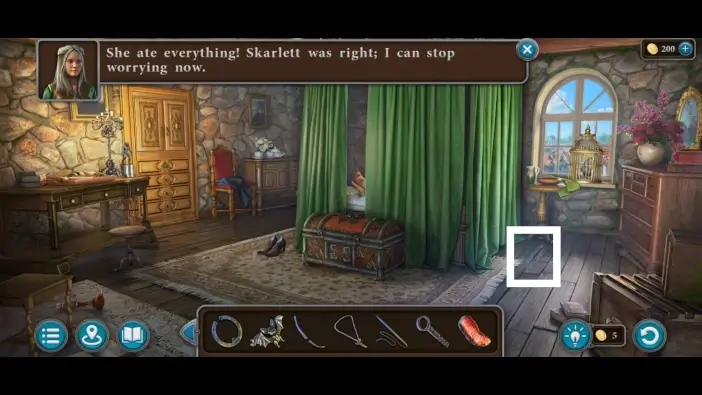
While the crow is distracted, take the third bat.
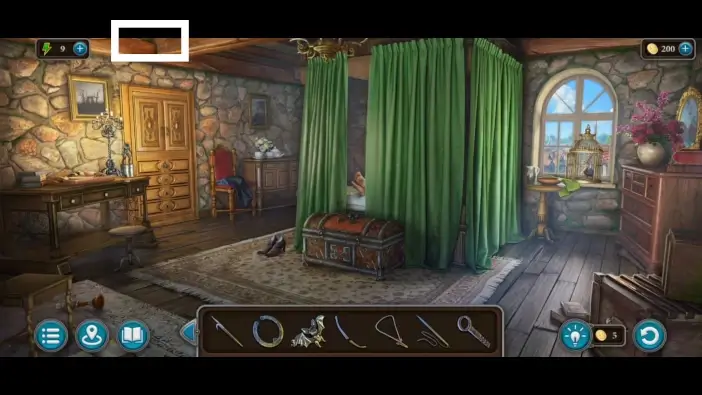
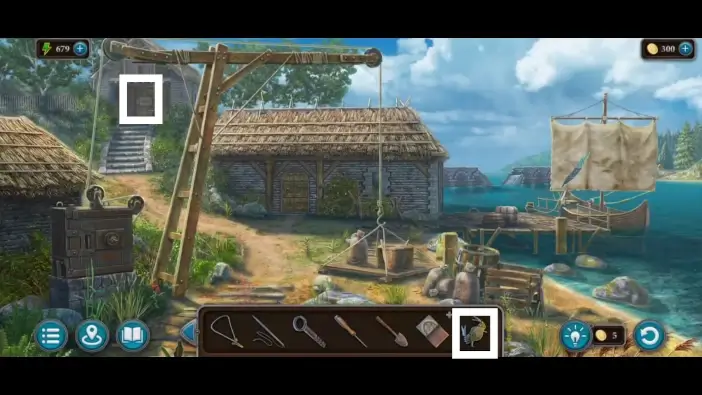
Approach the wooden beam on the top-left.
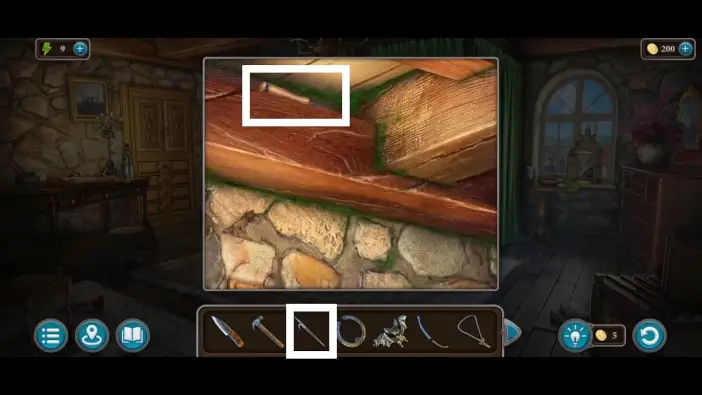
Use the pike pole to get the screwdriver from the wooden beam. You’ll use the screwdriver multiple times.
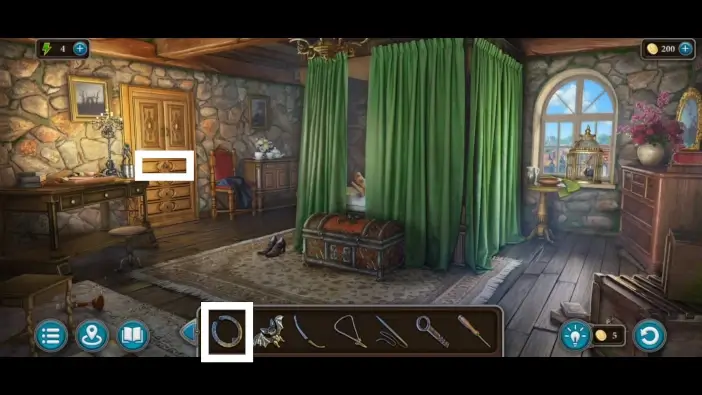
Approach the drawers on the left and attach the first handle you’ve found on the top-most drawer.
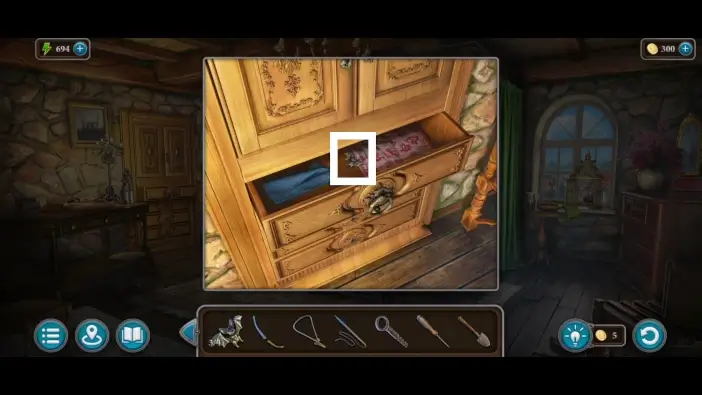
From the drawer, pick up the shovel and the fourth bat.
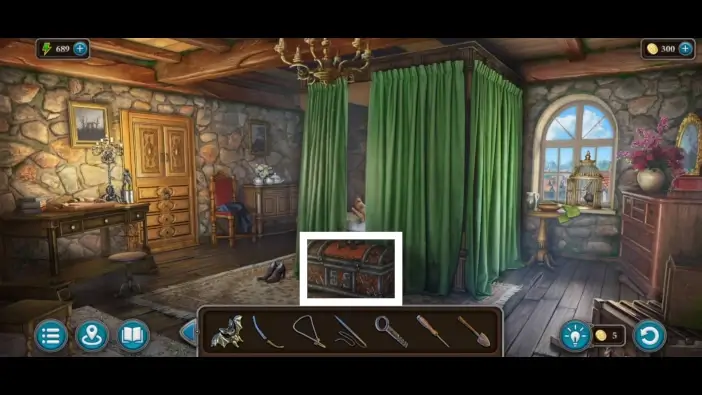
Once you find all four bats, approach the chest in the witch’s room.
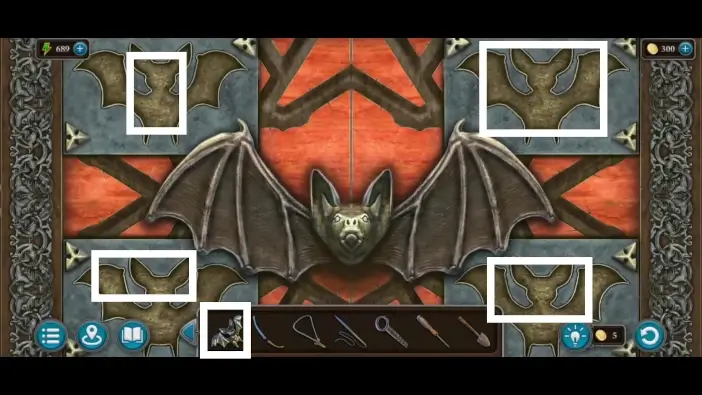
Place all four bats in their places to start a new puzzle challenge.
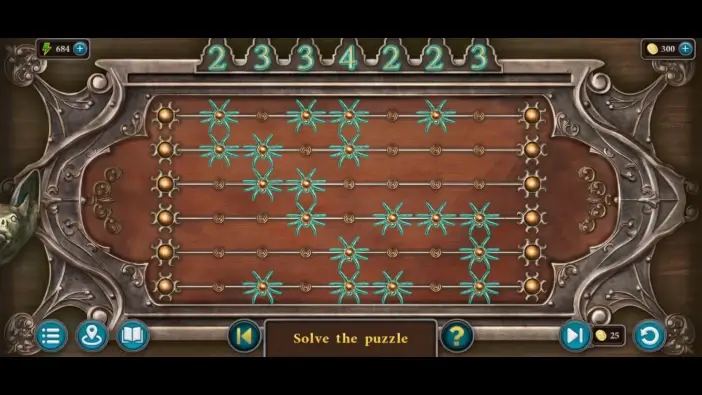
To unlock the chest, you need to rearrange the bugs so that you have the same number of bugs in a column as the number above the column. You can only move the entire row, not individual bugs.
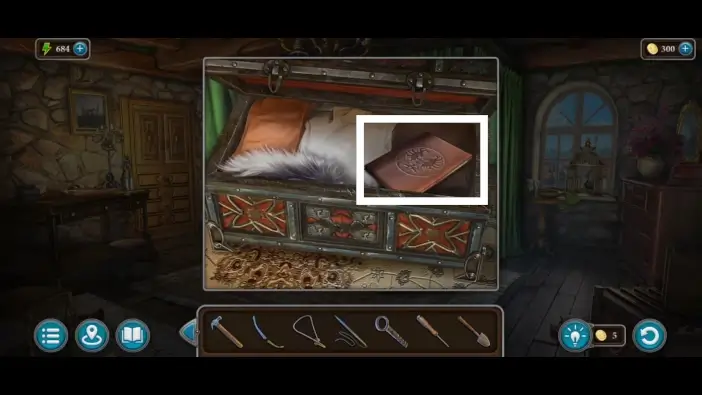
Once you unlock the chest, take the map.
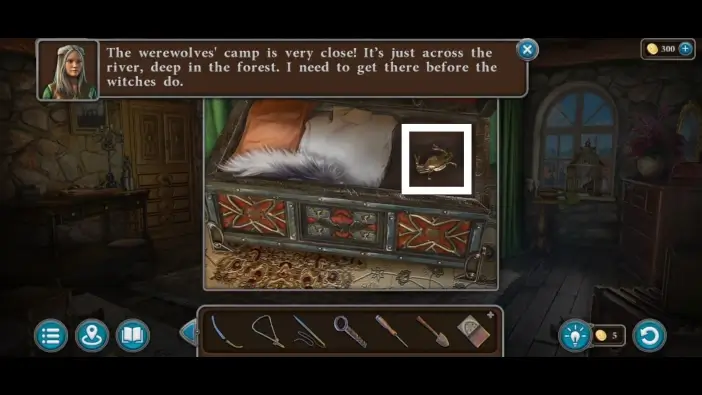
Take the crab from the chest as well. You’ll use this crab-shaped key to unlock a warehouse near the river.
Go to the river area and approach the warehouse door. Use the crab you just got from the chest to start a new puzzle challenge for unlocking the door.
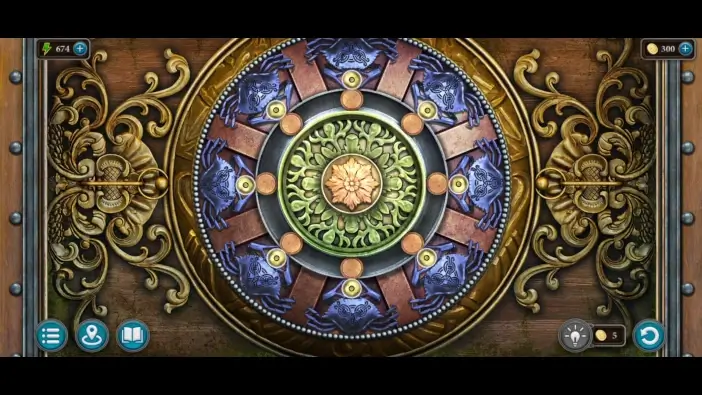
You need to attach all the balls to the frogs’ hands. Whenever you tap on a ball, the circle will rotate one step counterclockwise. Sometimes, you’ll be in a situation where you need to release a ball from the frog’s hands to keep the balls moving in a circle. Once you unlock the door, enter the warehouse.
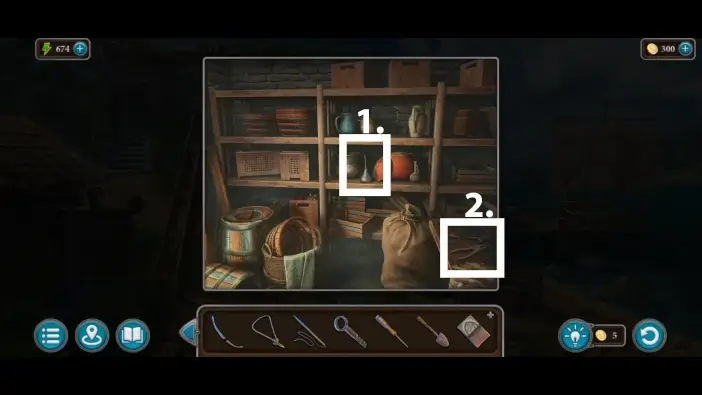
- Take the oil from the shelf. You’ll need it later to open one rusted cage.
- Pick up the pliers from the table on the right. You’ll use it, together with the key, to unlock the workshop.
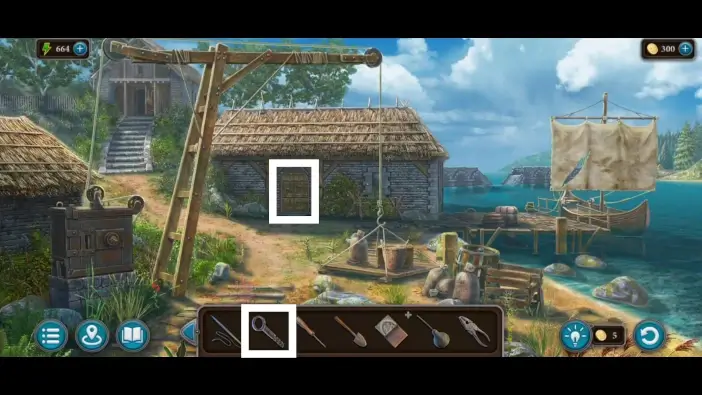
Approach the door to the workshop and use the key you found in the tavern to try to unlock it. Unfortunately, the key will break.
Use the pliers you just got from the warehouse to unlock the door and enter the workshop.
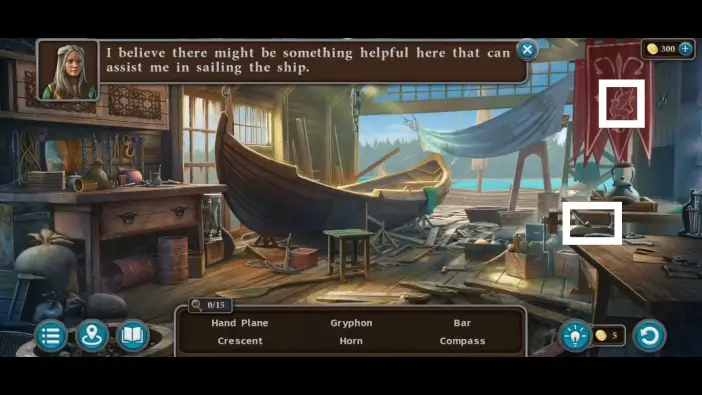
In this type of puzzle challenge, you need to find all fifteen items shown on the bottom list. Follow the marks on the picture above and the pictures below to find all fifteen items. The markers sometimes show the items and sometimes show where you need to approach to see more items.
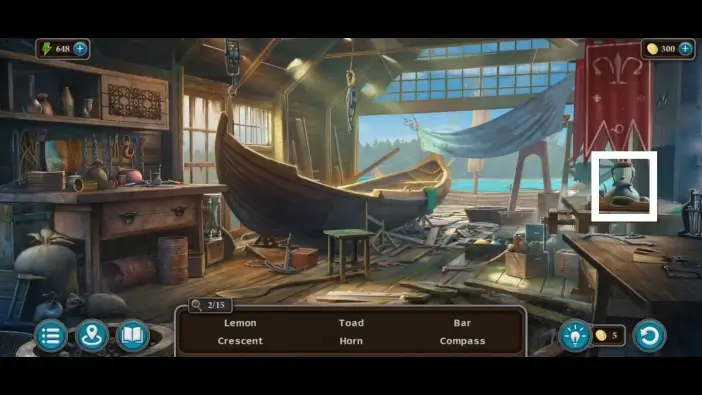
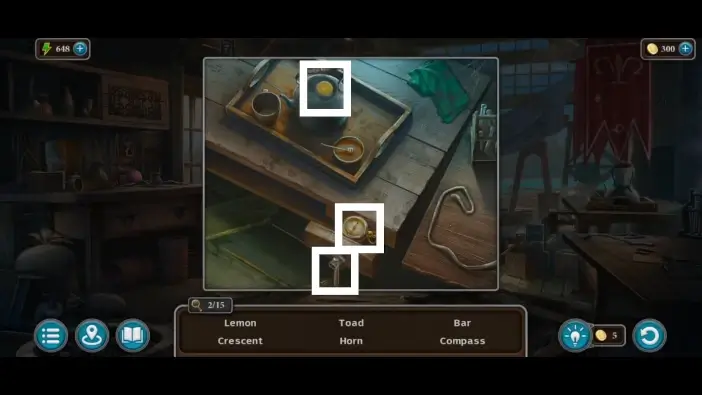
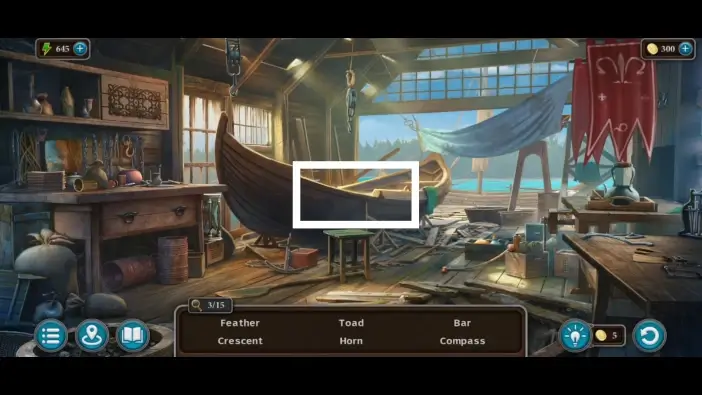
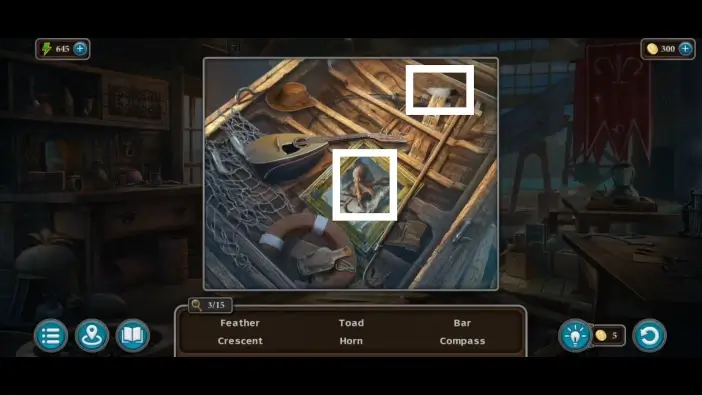
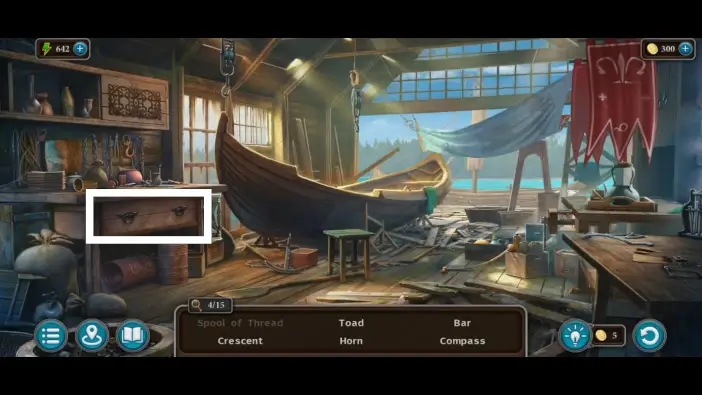
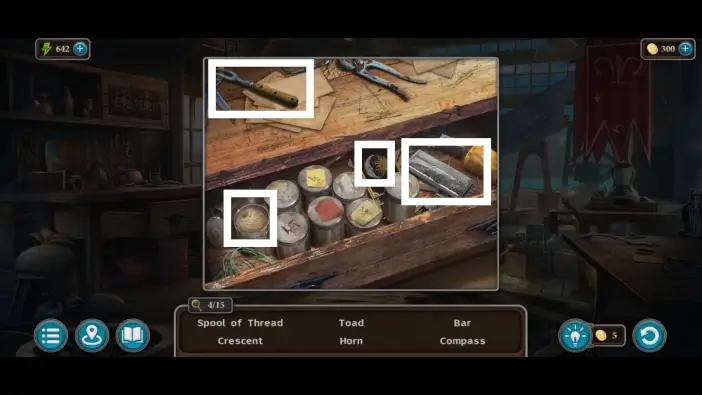
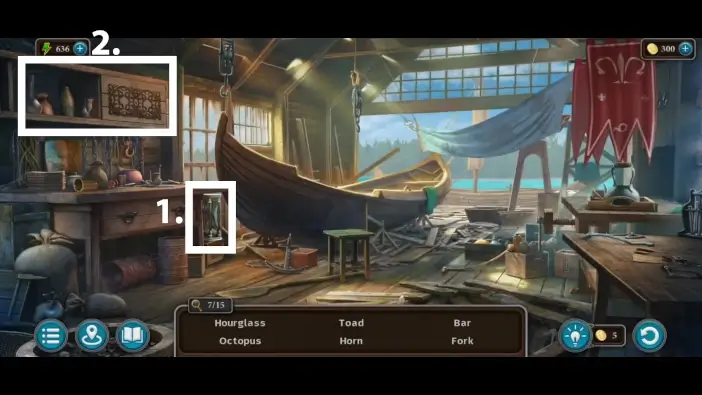
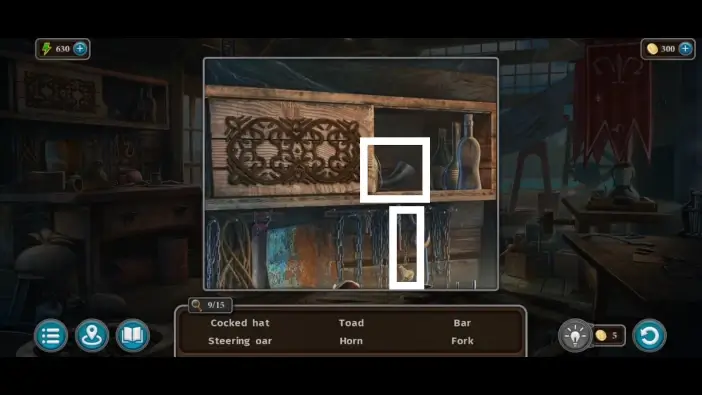
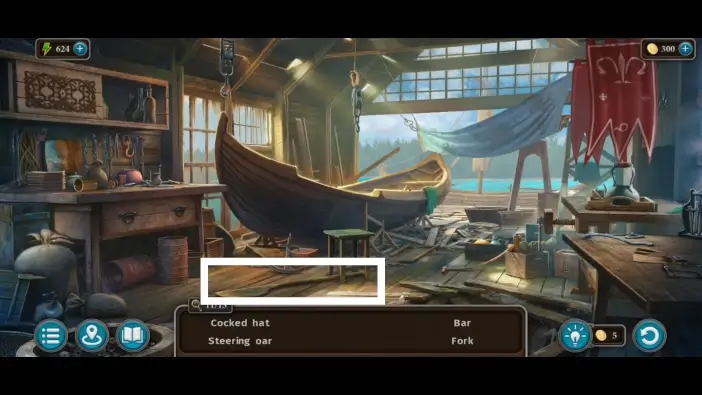
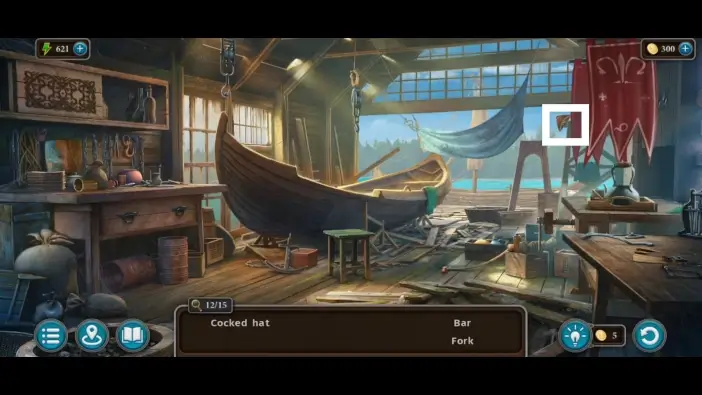
Once you find all the items, the steering oar will be added to your inventory. You’ll need it to control the boat and unlock new areas.
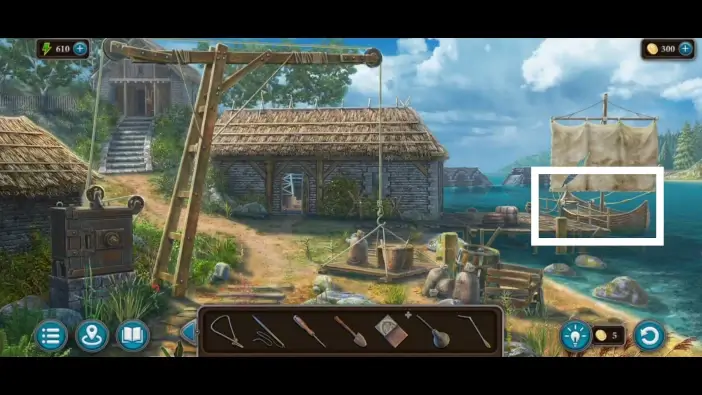
Approach the boat.
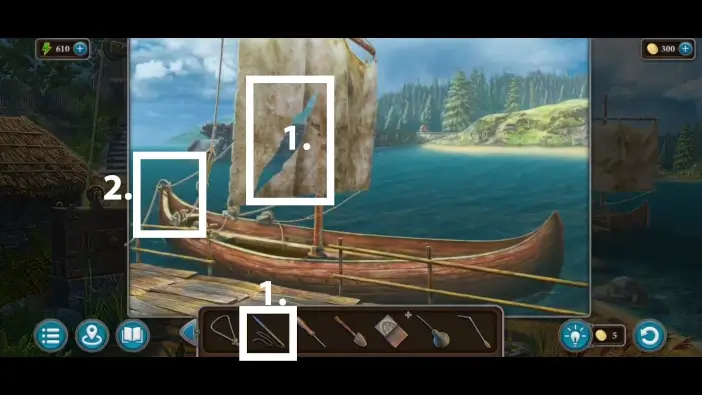
- Fix the sail by using the needle you find in the tavern.
- Approach the left side of the boat.
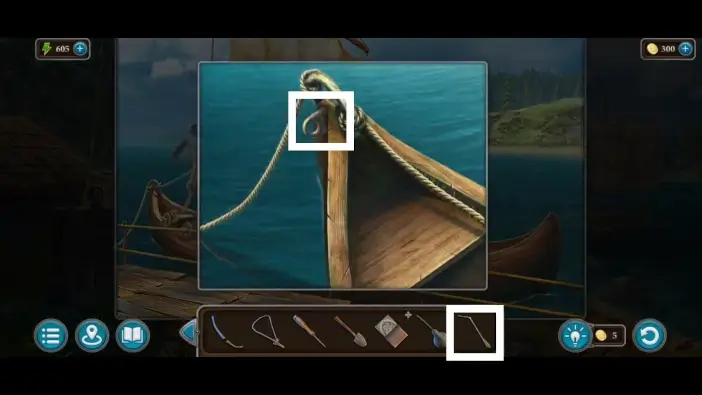
Place the steering oar.
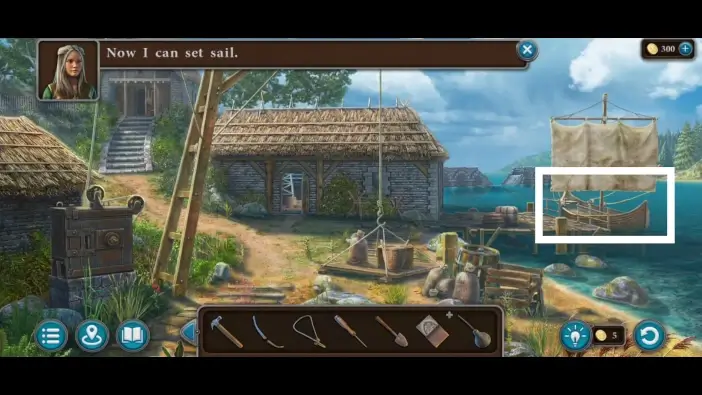
Tap on the boat one more time when you are ready to go to the new area across the river.
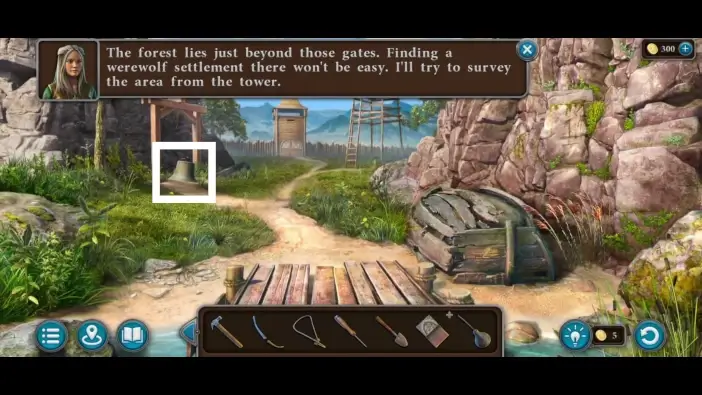
On the beach, on the other side of the river, approach the bell on the left.
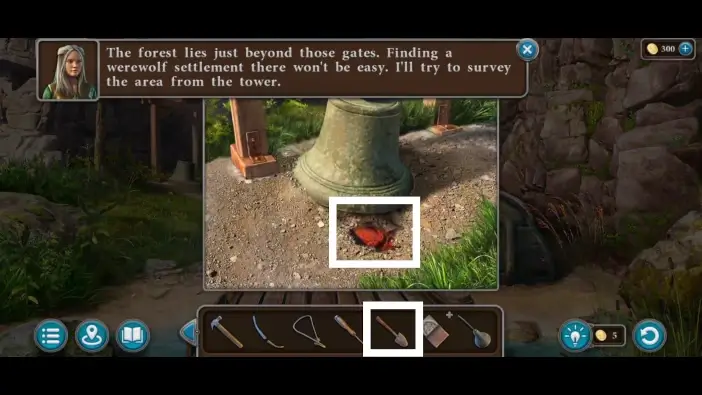
Use a shovel to dig the materials.
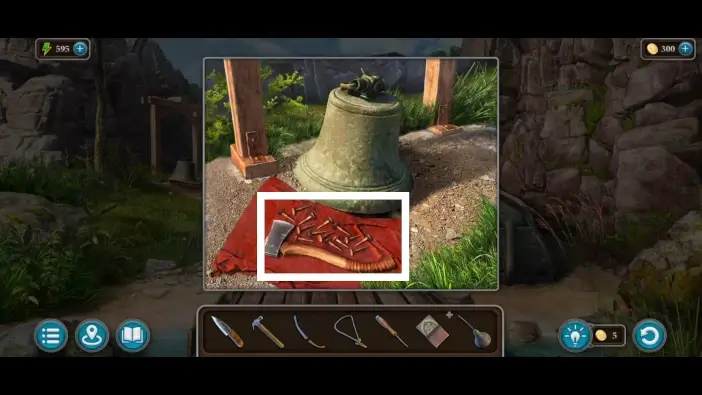
Take the axe and the nails. You will use the nails to fix the ladder for the watchtower, and you will use the axe multiple times.
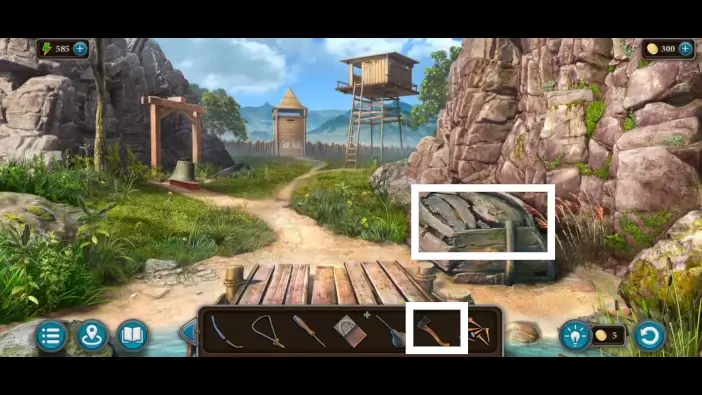
Approach the ruin of a boat on the right and use the axe to remove the side of the boat.
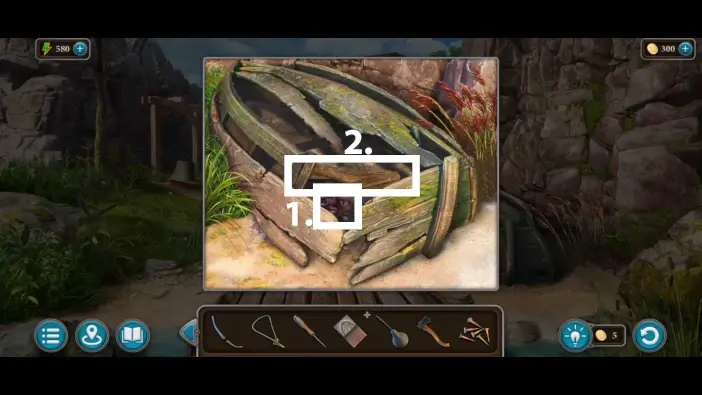
- Pick up the frog. You’ll need it much later for a frog totem in the swamp.
- Take the three boards. You’ll need seven boards to fix the ladder.
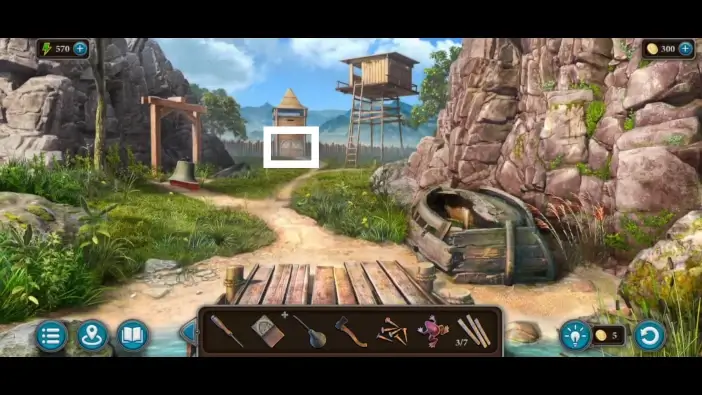
Go towards the gates.
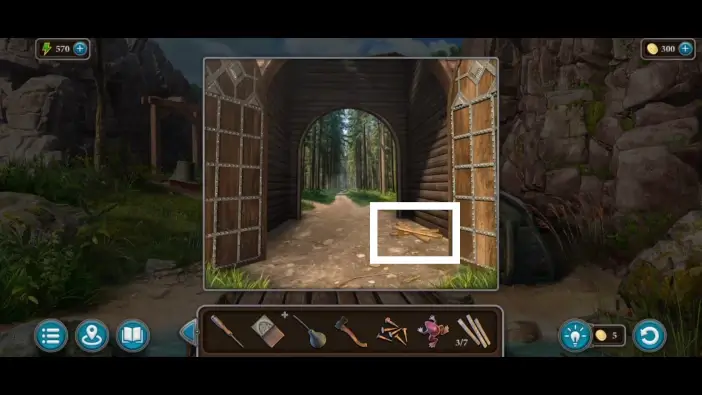
Open the gates and take the four remaining boards.
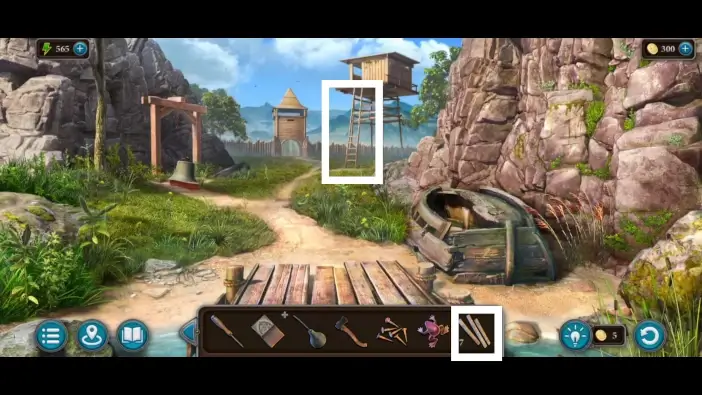
Approach the ladder at the watchtower. Place seven boards on the ladder.
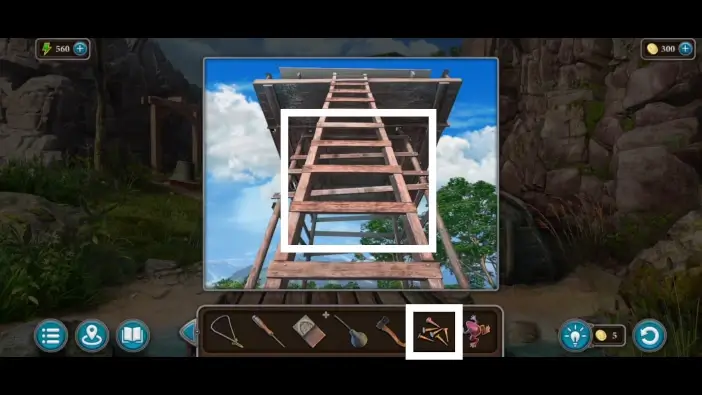
Place the nails on the boards. You found these nails earlier, beneath the bell.
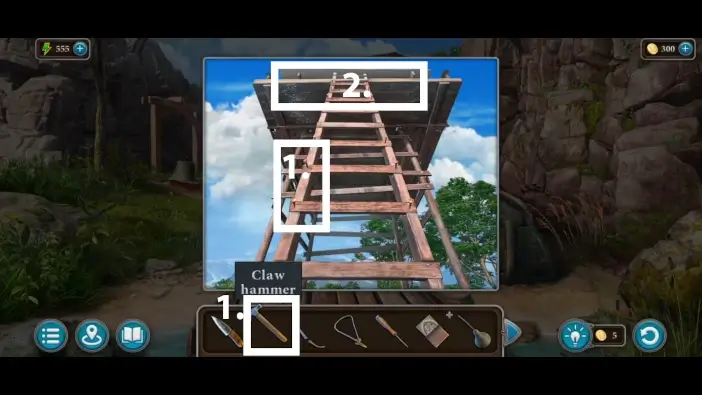
- Use a claw hammer to hammer the nails.
- Once you finish fixing the ladder, enter the watchtower.
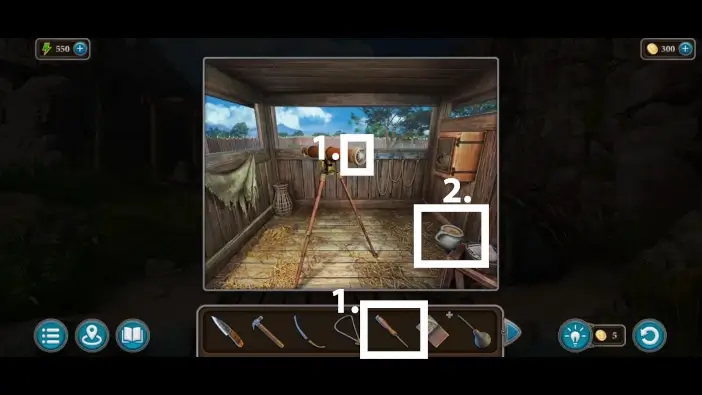
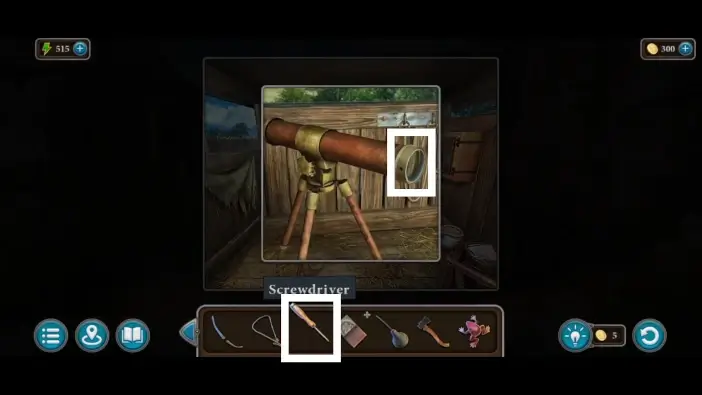
- Approach the telescope. Remove its broken lens using the screwdriver you found in the witch’s room. You’ll need to find a new lens later to replace it.
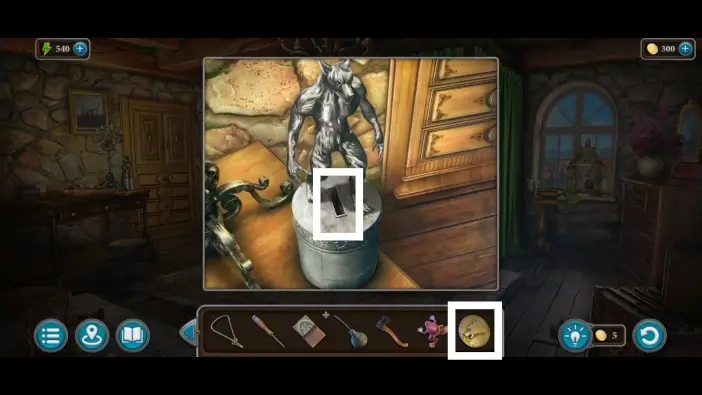
- Pick up the coin from the pot. You’ll use it in the witch’s room to unlock a hidden compartment of a trophy.
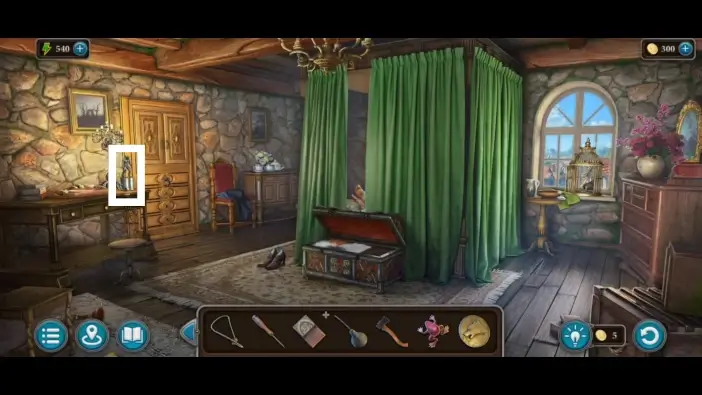
Return to the witch’s room inside the tavern and approach the wolf trophy on the left desk.
Place the wolf coin inside the trophy’s slot to unlock a hidden compartment inside the trophy. Take the keychain from the compartment.
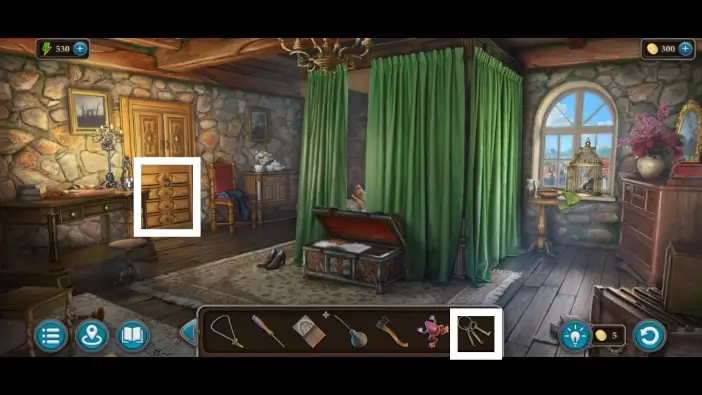
Approach the drawers. Unlock the drawers with the keychain you just picked.
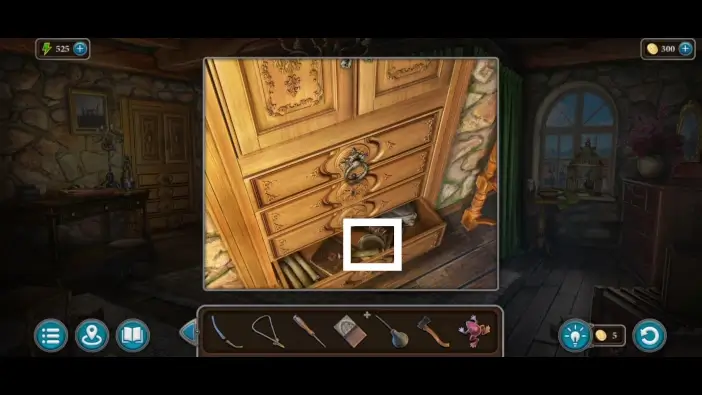
Open the bottom-most drawer and take the lens for the telescope.
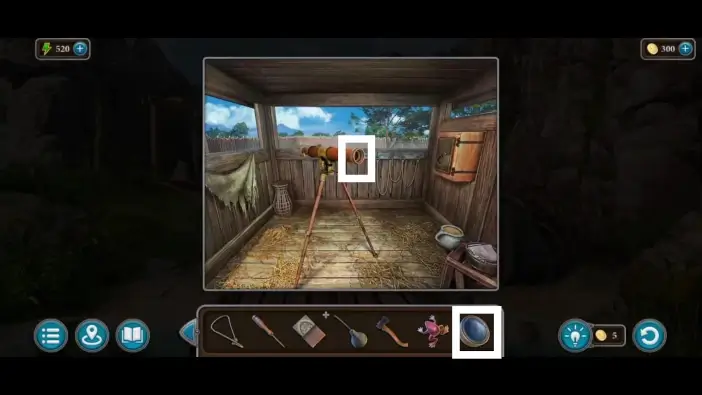
Return to the watchtower on the other side of the river, approach the telescope, and place the new lens.
Use a screwdriver to attach the lens.
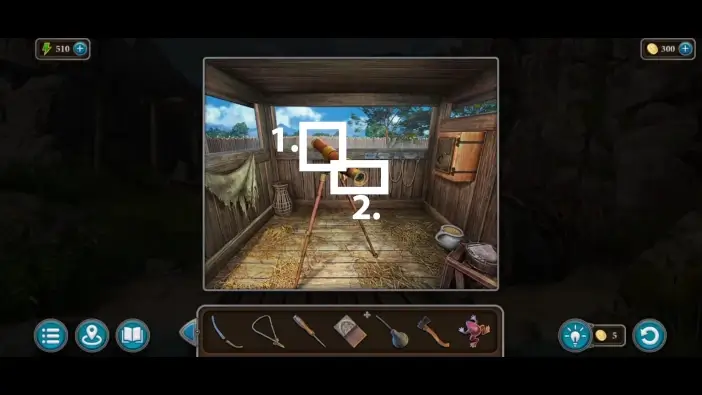
- Rotate the telescope so it is positioned towards the forest.
- Use the telescope.
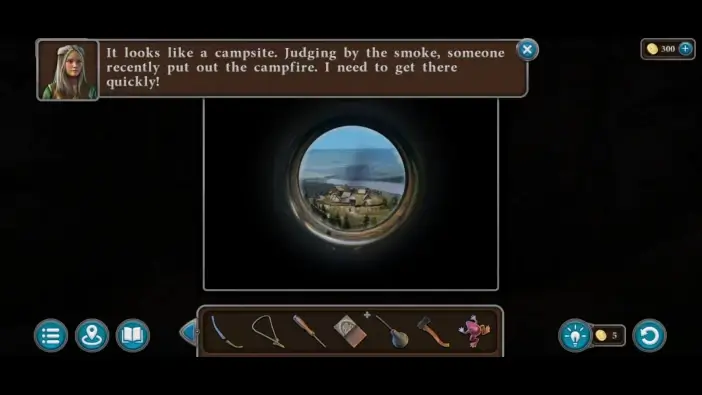
Lucia will eventually spot a campsite.

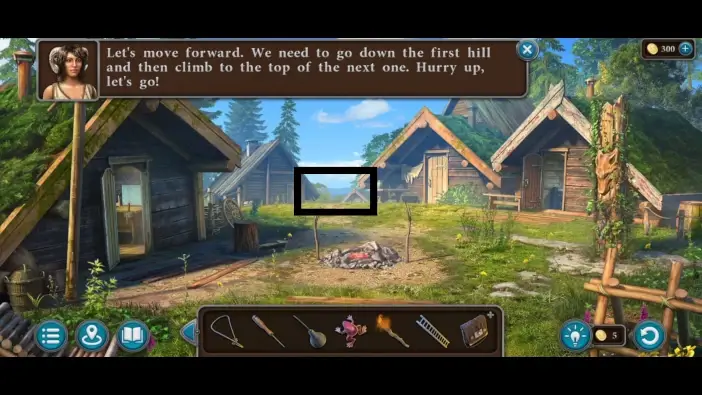
Go to the gates and enter the forest. A cutscene will begin.
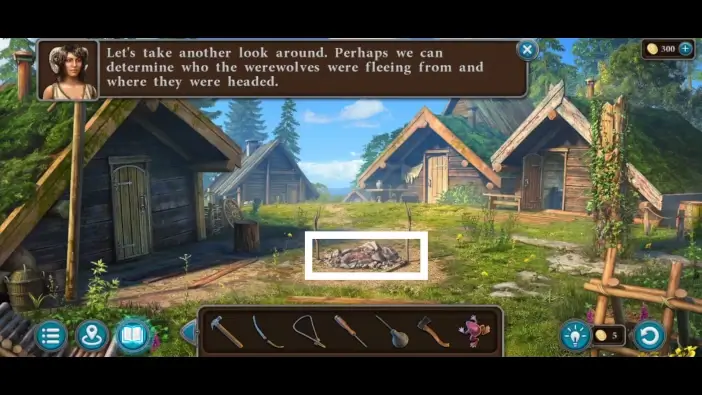
Approach the extinguished bonfire.
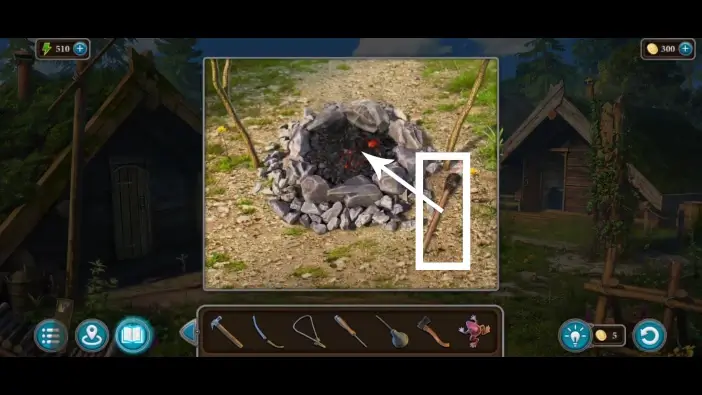
Pick up a torch from the ground and place it on the embers. The torch will start burning, and it will be added to your inventory. You’ll need a torch to scare a snake away later.
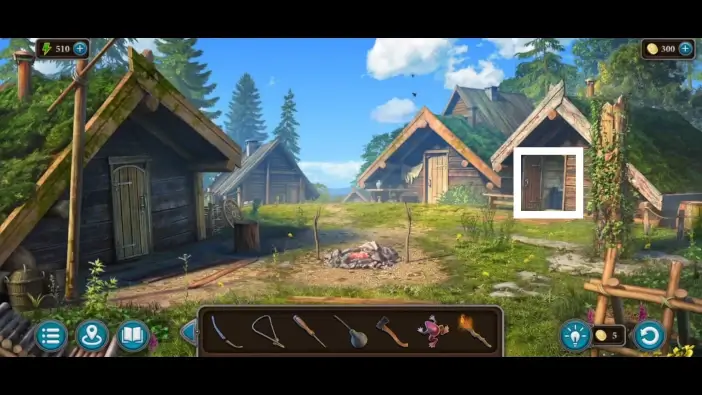
Check the house on the right.
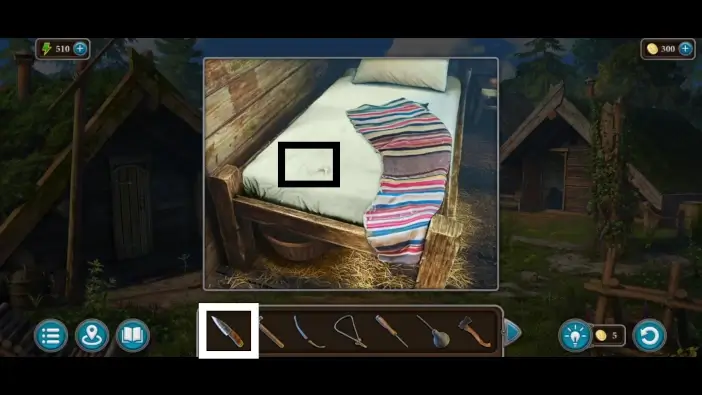
Use a knife to cut the mattress. Take the horn that was hidden inside the mattress. You’ll use a horn to unlock one bag.
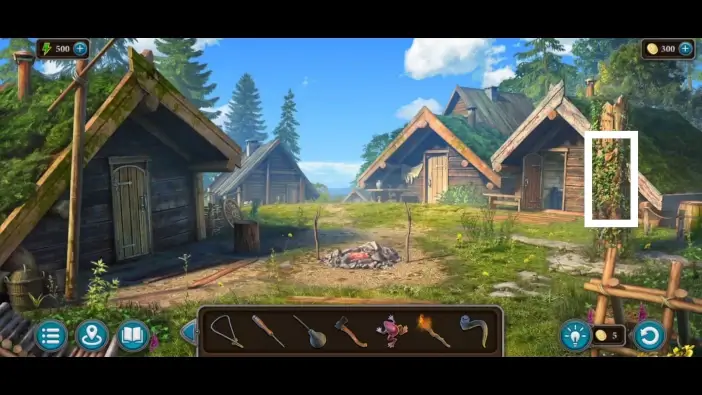
Approach the totem on the right.
Cut the plants with your knife. You will reveal a wooden wolf totem, but it misses one wooden eye.
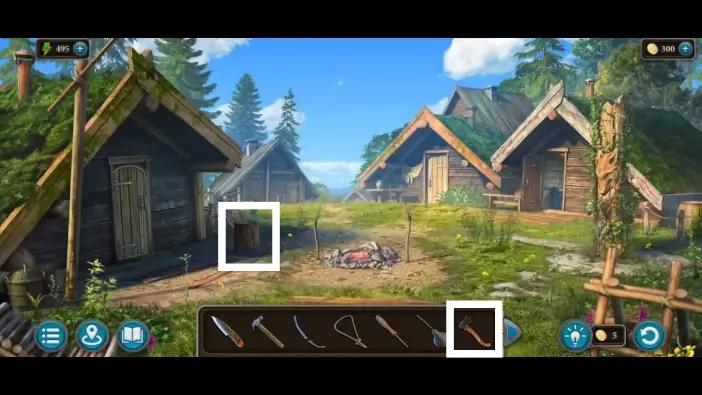
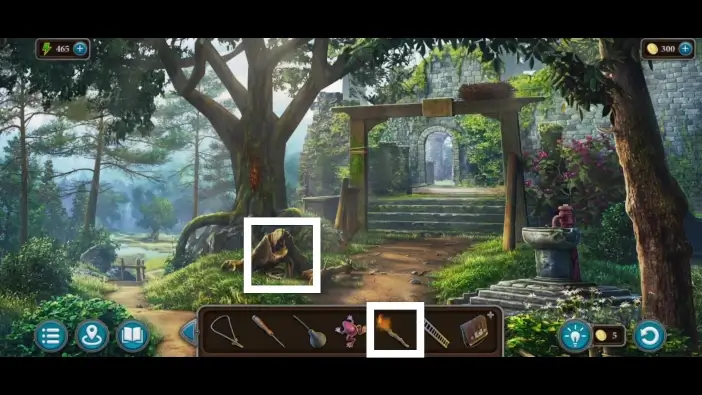
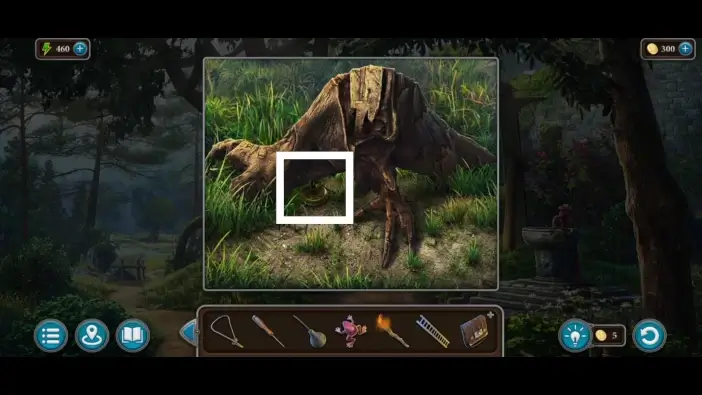
Approach the stump on the left and use an axe to chop it.
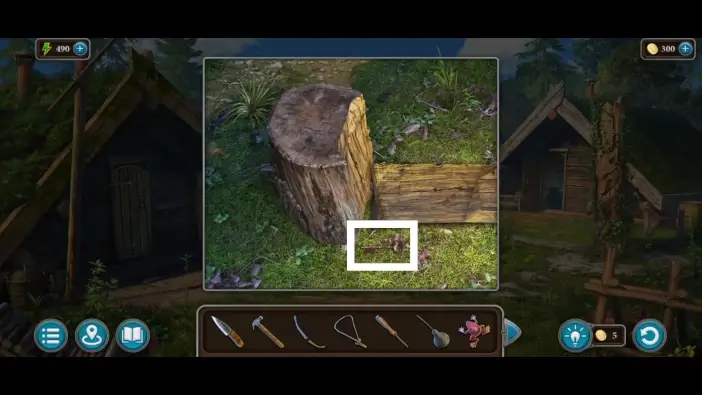
Pick up the key that was hidden inside the stump.
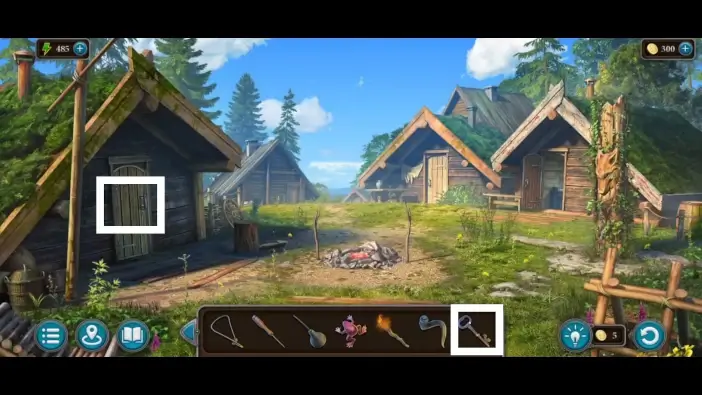
Unlock the house on the left with the key you just found. Enter the house.
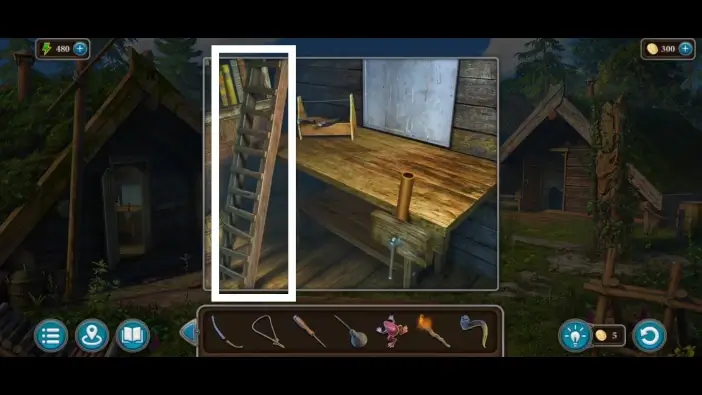
Take the ladder. You’ll use it to reach a nest later.
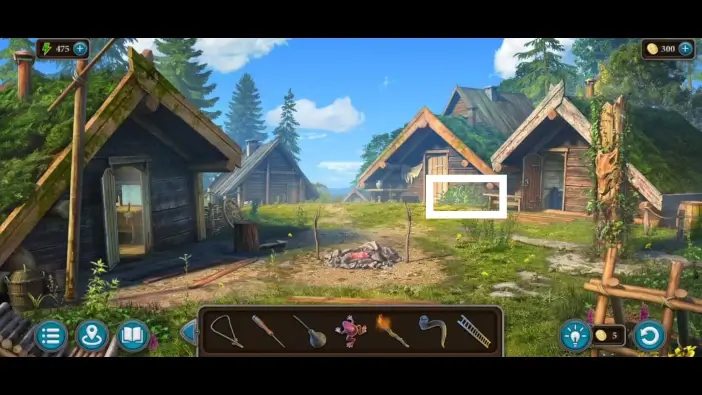
Approach the bush.
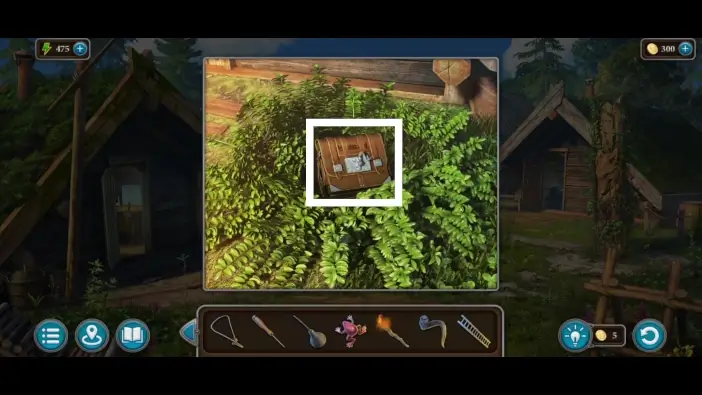
Move the leaves and take the bag.
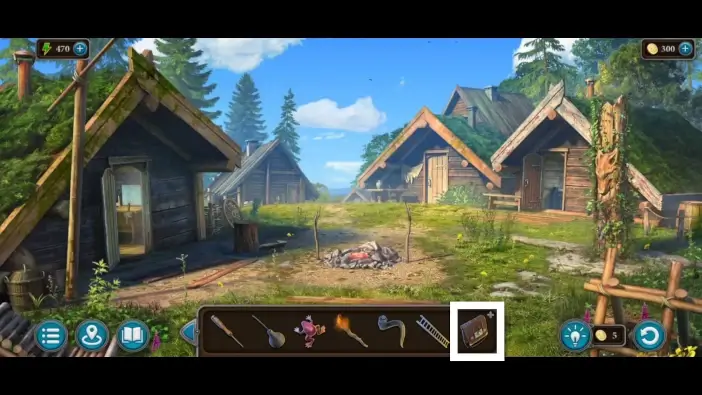
Tap on the bag in your inventory.
Remember the horn you picked up from the mattress in the house on the right. Use that horn to unlock the bag. Attach the horn. Read the diary from the bag to progress the story.
Go forward towards the ancient city of the forest dwellers.
Approach the hollow stump and scare the snake using the torch you found in the abandoned werewolf camp.
After the snake is gone, pick up the magnet. You’ll use it to retrieve a sword later.
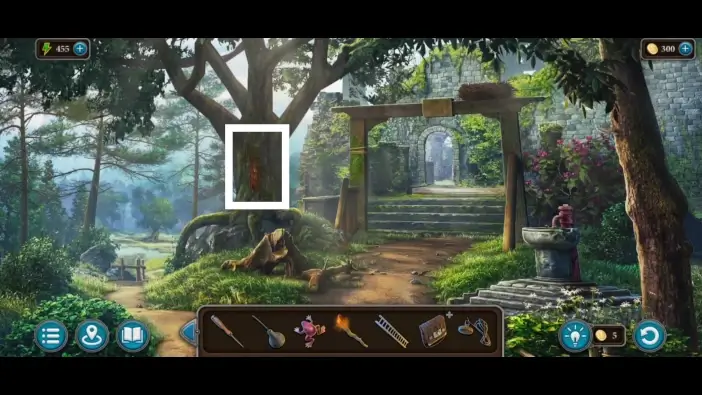
Approach the large tree in the center.
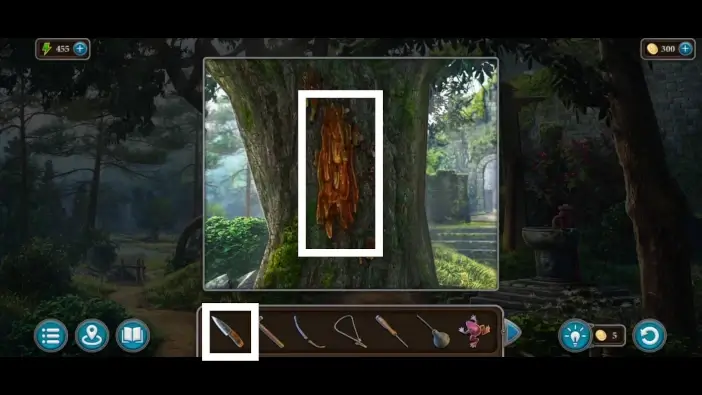
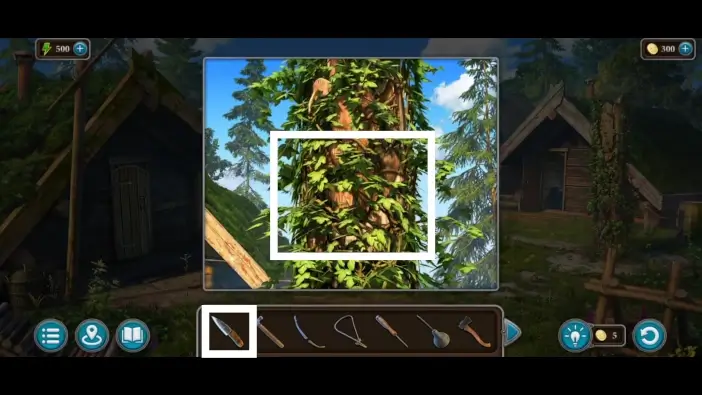
Gather resin using the knife from your inventory. You’ll need it later to create an explosive in the abandoned werewolf camp.
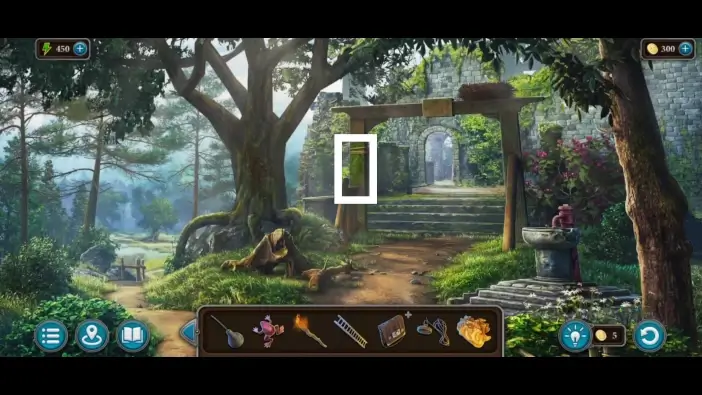
Approach the left column.
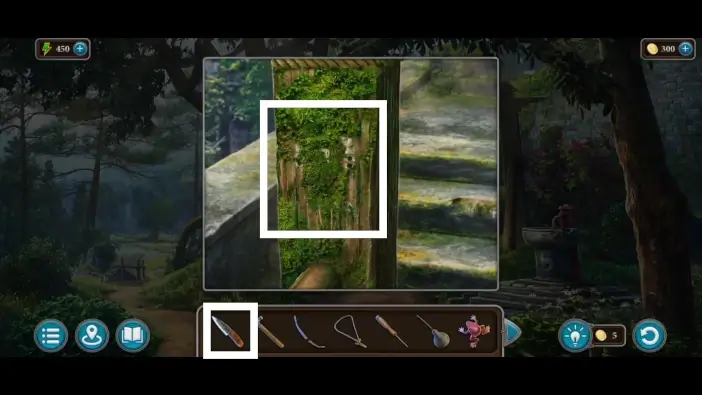
Remove the moss with the knife to reveal a hidden clue about one of the next puzzles.
Take a closer look at the clue and remember it. It will be useful for the puzzle after you unlock the wolf totem in the abandoned werewolf camp.
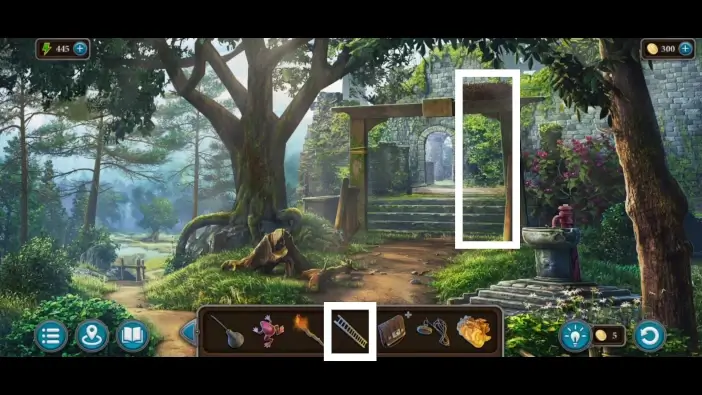
Place the ladder near the right column. You found this ladder in the abandoned werewolf camp earlier. Once you place it, approach the nest.
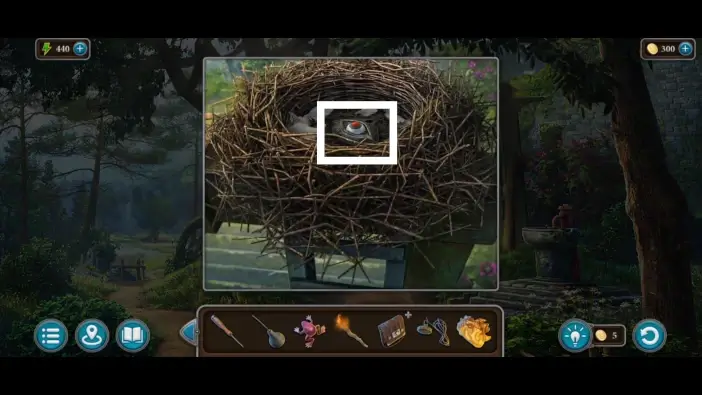
Take the eye from the nest. This eye is a key to unlock a cabinet in the watchtower where the telescope is.
Go to the abandoned fortress.
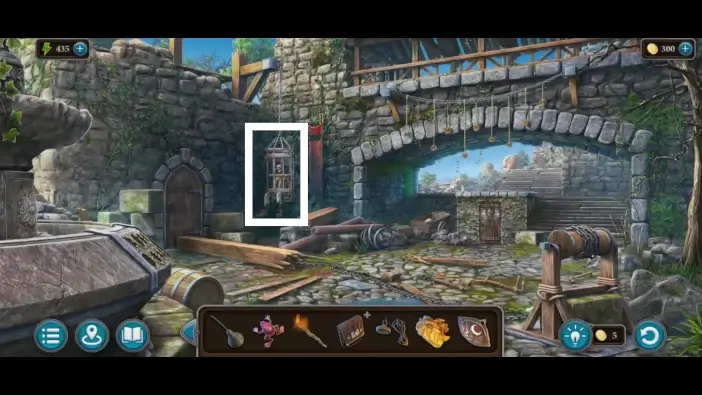
Approach the hanging cage.
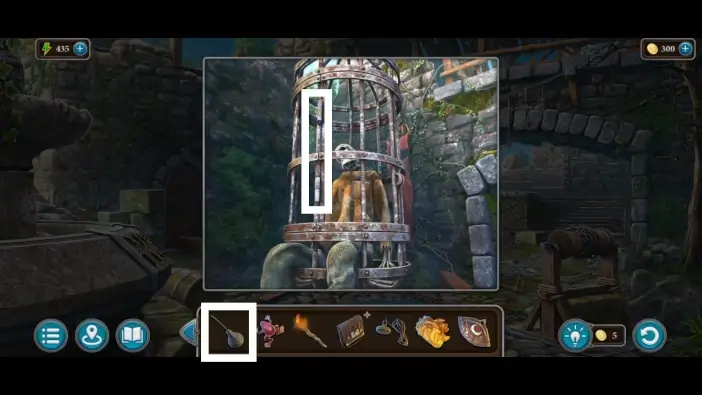
To unlock the rusted cage, use the oil you found in the warehouse near the boat.
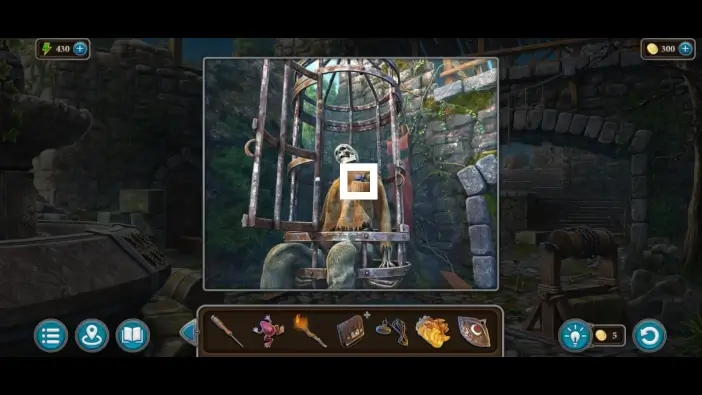
Take the trigger from the skeleton’s pocket. It is another component to fix the crossbow.
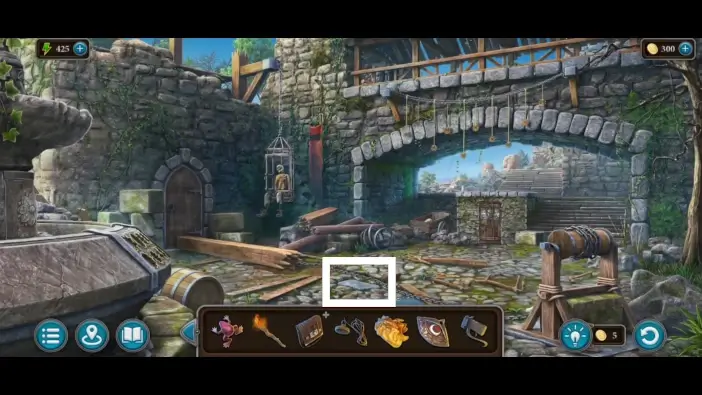
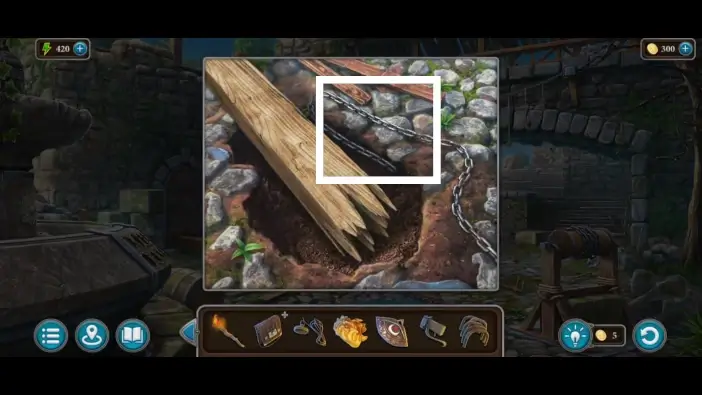
Approach the large cobblestone near the chain.
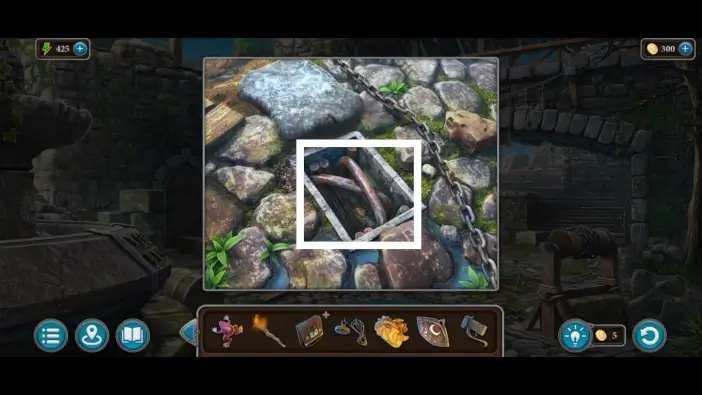
Remove the cobblestone to reveal a hidden item. Take the staples. It will be useful to fix a ladder later.
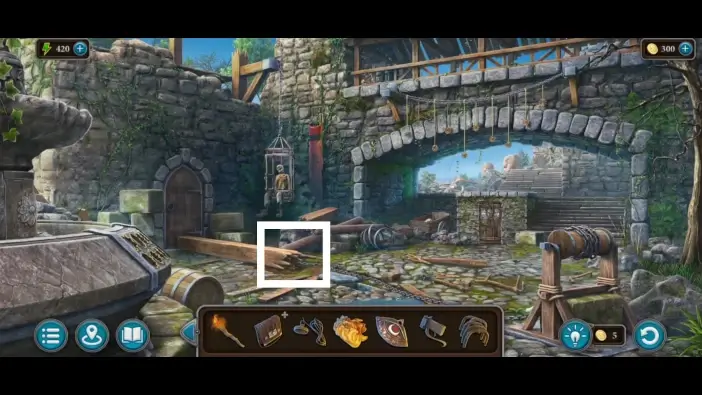
Approach the wooden block.
Tie a chain around the wooden block. You’ll need to remove this wooden block later with the help of this chain, but you’ll need to find a handle for the mechanism first.
This will mark the end of Part 2 of our guide for Chapter 1 of Legendary Tales 4.
Thank you for reading!